ACS Checkpoint Implementation Guideimages.acswebnetworks.com/1010/1487/CPImplementation... · ACS...
42
Transcript of ACS Checkpoint Implementation Guideimages.acswebnetworks.com/1010/1487/CPImplementation... · ACS...

ACS CheckpointImplementation Guide

Copyright
Copyright © 2008 ACS Technologies Group, Inc. All rights reserved. Reproduction of any part of this publication by mechanical or electronic means, including facsimile transmission and e-mail, without the express permission of ACS Technologies Group, Inc. is strictly prohibited.
v
Contents
Checkpoint Implementation Guide .................................................................................. 1
Checkpoint Overview ...................................................................................................... 2
Safety and Security ......................................................................................................... 2
Designing a Check-in System ......................................................................................... 4
Check-in Methods ........................................................................................................... 5
Check-in Stations ............................................................................................................ 7
Integrating with ACS Groups ........................................................................................ 14
Badges .......................................................................................................................... 15
Pagers ........................................................................................................................... 23
Check-out ...................................................................................................................... 25
Implementation Suggestions ......................................................................................... 25
Appendix A — Setting Up Check-In Stations ................................................................ 29
Appendix B — Dymo Printer Setup ............................................................................... 31
Appendix C — Zebra Printer Setup .............................................................................. 33

ACS Checkpoint Implementation Guide
vi
1
Checkpoint Implementation Guide
Safety and security are undoubtedly one of your highest priorities, and a safe and secure check-in system can be an integral part of your safety and security plan. This guide is designed to help you understand check-in systems, the features and capabilities of ACS Checkpoint, and how they fit in with your larger safety and security plan.
This guide covers the following information:
• Checkpoint Overview• Safety and Security• Designing a Check-in System• Check-in Methods• Check-in Stations• Integrating with ACS Groups• Badges• Pagers• Check-out• Implementation Suggestions
Checkpoint is a very flexible program. We recommend that you design a check-in system and then use Checkpoint to implement that system. With that in mind, the sections “Safety and Security” on page 2 and “Designing a Check-in System” on page 4 cover generic check-in information. If you have already created a check-in system, you can skip ahead to “Check-in Methods” on page 5.
Some of the suggestions and recommendations are for informational purposes only. This guide is not intended to provide specific legal or risk management advice, nor are any suggested checklists or action plans intended to include or address all possible risk management exposures or solutions.
ACS Checkpoint Implementation Guide
2
Checkpoint OverviewCheckpoint is check-in/check-out software that provides your organization with the assurance that you can identify and confirm the location of children at any time, and especially in the case of an emergency. Parents simply check in their kids at a workstation (either a manned computer or an unmanned kiosk). Checkpoint handles the rest.
With Checkpoint you can:
• Set up self check-in for members and regular attendees and assisted check-in for new members or visitors.
• Customize and print security badges (stickers, labels or cards) with unique identifiers like child name, date, session info, pager number, or parent’s name.
• Enter special notes at the time of check-in to include on the printed badge• Print security badges for visitors, and set defaults for adding their record into
your ACS database.• Produce real-time reports showing who has checked in/out by class or activity.• Post attendance markings immediately for individuals who are checked in to a
session.
Safety and SecurityTo most people, religious institutions provide sanctuary not only from the stresses of everyday life, but also from the physical threats prevalent in modern society. Unfortunately, today’s headlines reveal that many are not the safe havens they considered themselves to be.
For administrators and staff, the safety and security of your members and guests must be your first priority. If you’re wondering how a lack of attention to safety and security can affect your congregation, think about this:
• You want newcomers and members to know that you take very seriously the safety and security of all who attend. Parents may not want to worship with a congregation that they feel is not making every effort to protect them and their children.
• You want to protect the congregation from lawsuits and damage from child abuse allegations, injuries, or deaths related to neglect. Incidents like these can be detrimental to the growth and stability of your congregation.
• Your congregation wants to love and care for people. Without a proactive approach to safety and security, your congregation may instead serve as a venue where people experience the opposite.
Any check-in system you design should be part of a larger safety and security plan that includes the following:
• Classroom safety• Fire safety• Screening employees and volunteers• Supervising and training workers
Safety and Security
3
Classroom SafetyMany safety problems in your facilities arise because potential hazards are going unnoticed. To ensure you are well prepared in the event of an emergency, think about each of the following:
• Make sure first aid kits are available and easily accessible.• Make sure phones are easily accessible to volunteer workers and staff and
emergency numbers are clearly posted.• Inspect classrooms for potential dangers, such as exposed electrical outlets.• Avoid letting adults into the classrooms. Drop-off and pick-up should occur at
the doorway.• Observe room capacity limits and adult-to-child ratios. Check with your state and
local government agencies for recommendation and regulations concerning these areas.
If possible, provide a secure children’s wing with limited adult access. A separate wing provides better security and centralized check-in.
Fire SafetyA fire on your campus could cause injury or death, destroy your facility, lose your valuable data, and devastate your finances. Danger can be minimized by ensuring the following:
• Fire extinguishers are readily available and their inspections are up-to-date• Evacuation plans are posted throughout the campus, especially in children’s
classrooms• Your staff members, volunteers, and leaders have been trained on the evacuation
plan and their roles in case of a fire• Emergency exits are clearly marked and pass their battery backup test• Your staff knows where the main fire alarm panel is located and understand the
alarm codes it provides• You have your data backed up and a copy available at an off-site location
Screening Employees and VolunteersCongregations cannot afford to take anything for granted when it comes to protecting children and youth from child abuse. Screen your workers and keep organized, up-to-date information on all volunteer and paid workers that serve in your congregation. Many insurance companies will not provide sexual abuse coverage to a congregation without a criminal background check on workers that will care for minors. Check with your local insurance agent to find out about your existing insurance policy. A few suggestions to consider when screening workers are:
• Don’t give any volunteer worker the opportunity to be involved in nursery, children, or youth programs until he or she has been associated with your congregation for at least six months.
• Create a screening application that includes a list of references (at least two) and verify the references before approving the applicant for volunteer work.
• Investigate applicants’ prior volunteer involvement as an important part of the screening process.
• Choose a reliable criminal background check service and rescreen all volunteers and staff regularly.
ACS Checkpoint Implementation Guide
4
You can use ACS to conduct background checks and manage the background check process. To perform these tasks, use the Safeguard tab in View/Edit Individual.
Supervising and Training WorkersStandard procedures for overseeing workers are crucial for ensuring that each person who serves is supervised in an effective way. Procedures should be reviewed when workers are trained and refresher courses provided throughout the year to restate the guidelines of the congregation. A few suggestions to consider for supervising and training workers are:
• Consider assigning a roving adult who can drop in on classes where activities are taking place for children or youth and to keep an eye on unsupervised children in the hallways.
• The two-adult rule is best for all classes or events where children will be involved. The two-adult rule is that there must be present within the room at least two adults over the age of 18 years. Never leave one adult in a room with children alone.
• A restroom policy is important. This policy states how workers will supervise a child or children when someone has to use the restroom.
• Provide doorways with a glass window for outsiders to view into all classrooms.• Make sure your volunteers clearly understand the check-out process. If you print
security badges, make sure the workers compare the child’s and parent’s badges to maintain the integrity of the system.
• Staff should be familiar with state and federal regulations as well as your own policies regarding registered sex offenders and what to do in the event that a registered sex offender comes on the campus.
• Make sure all the staff, not just the children’s ministry staff, are familiar with your procedures so that everyone on staff can respond quickly and effectively should a crisis arise.
Without policies in place, there is a high risk of possible abuse or false accusations of abuse. Protect your workers and the children that attend your activities. Create policies and procedures for your congregation that cover these areas. If you already have policies in place, you should review them on a regular basis and update them as necessary.
Check-in/Check-outUsing a registration method that ensures the safety of every child helps keep your kids safe, your parents content, and your congregation protected. An ideal system provides an organized approach to signing children in and out and a way to positively identify parents who leave their children in your organization’s care during congregational activities. This way, an unauthorized person cannot take a child. ACS Checkpoint provides this solution for you.
Designing a Check-in SystemBefore you begin using Checkpoint, you should design your check-in system. Checkpoint is a very flexible program that can handle the check-in requirements of most organizations. We have found that organizations have the most success with Checkpoint when they take the time to design a check-in system and then configure Checkpoint to meet the needs of that particular system.
Check-in Methods
5
As you design your check-in system, keep the following in mind:
Parent identification — Will you require an ID from parents to pick up a child? How will you handle a lost security badge? How will you handle custody disputes?
Locating parents in an emergency — Will you have a central location for parents to report when paged, or will individual classrooms handle paging?
Emergency evacuation — Where will classes go in case of an emergency? How will parents know where to go? How will you handle parent pick-up in case of an emergency?
Check-in stations — Will you use self check-in as well as assisted check-in? Will the check-in stations be dispersed throughout the facility or in a central location?
Congregational growth — How well does your plan scale?
Check-in MethodsThere are two ways to configure your check-in stations: assisted check-in or self check-in. Most organizations will have a combination of assisted and self check-in stations. The specific combination of stations depends on the needs of your congregation and the layout of your facilities.
You will also need to determine the methods your members, volunteers, and staff will use to identify or locate members in Checkpoint. These methods include names, phone numbers, assigned pager numbers, bar codes, and biometrics.
Assisted Check-InAssisted check-in stations are manned stations designed for first-time attendees, guests, or anyone who needs help at your organization. A volunteer or staff member manning the station can quickly determine the attendee’s needs, enter the appropriate information into Checkpoint, print the appropriate badges, and point the attendee in the right direction.
To further help your visitors, you might want to consider providing volunteer hosts who can escort your guests through the check-in/drop-off process, particularly those visitors with small children or many children, or even members with newborns. These volunteers can answer questions for visitors and help ease any apprehension.
Tip
To speed up data entry, have first-time attendees fill out a paper form with the information you want to track in ACS. Enter their names and other information required to create a record in Checkpoint right away, and then go back when things have quieted down to enter the rest of the information on the form.
Self Check-inSelf check-in stations are unmanned stations designed for members and regular attendees. These are for people who are already in your database and are familiar with your check-in system. When your system is in place and your members are familiar with it, most of your regular attendees should be able to use a self check-in station.
ACS Checkpoint Implementation Guide
6
Keep in mind, that even though these stations are designed for self check-in, you will probably want to have a volunteer monitor several of these self check-in stations in case there are any questions or problems.
Checkpoint provides a kiosk mode that provides a simple user interface and limited access to ACS specifically designed for self check-in. We have also found that touchscreen monitors are ideal for self check-in stations.
Record Access MethodsThere are several methods by which members bring up their record in Checkpoint. The primary methods are:
• Entering all or part of a name• Entering the last four digits of a phone number• Scanning a bar code• Entering an assigned pager number• Scanning a finger print
As an administrator, you can choose which methods your congregation uses.
NameYou can locate a family or individual by entering all or part of a family’s last name or family member’s first name. Checkpoint displays a list of families you can choose from.
Phone NumberYou can locate a family or individual by entering the last four digits of a phone number. Checkpoint displays a list of families or individuals who have a matching phone number.
Assigned Pager NumberIf your congregation assigns pager numbers, you can locate a family or individual by entering the family’s assigned pager number. Checkpoint displays the family who matches the pager number that was entered. For more information, see “Assigning Pager Numbers” on page 24.
Bar CodesMany organizations assign a bar code to each individual. The bar codes are then printed and put on an ID card or key fob. These are similar to the discount cards offered at supermarkets and other retail stores.
Each check-in station has a bar code scanner where members can scan their cards. Checkpoint can be configured so that scanning the bar code automatically checks the attendee in with no further action required.
Bar codes are designed to print on Avery 6870 3/4” X 2 1/4” labels. Each label prints the bar code and name of the individual. The labels can then be attached to ID cards or key fobs and distributed to your members.
Every person in ACS automatically has a unique bar code assigned to him or her. You can change an individual’s bar code if necessary. If you need to change an individual’s bar code, keep the following in mind. Bar codes can be up to 12 characters long. We recommend restricting the characters you use to letters and numbers only. The percent sign (%) can also be used; however, this might not work with all bar code scanners.
Check-in Stations
7
BiometricsSome organizations have replaced bar code scanners with biometric scanners. Instead of scanning a key fob, members scan their fingerprints when they check in.
By connecting finger scanning devices to check-in stations instead of bar code scanners and entering the biometric ID in place of the individual’s bar code, you can use biometric scanners instead of bar code scanners.
Keep in mind, while this method is the most secure, it might take a while to create everyone’s fingerprint profile.
Check-in StationsThere are two types of check-in stations: manned and unmanned. There also two ways you interact with the software: Check In/Out and Express Check In/Out.
This section discusses the types of check-in stations you can set up, how you arrange and manage the check-in stations, and the software and hardware requirments for the check-in stations.
Types of StationsManned stations are for assisted check-in and are staffed by a trained volunteer who can assist with member and visitor check-in. Manned stations should be in a central area, and the stations should face the volunteer.
Unmanned stations are for self check-in. They speed up the check-in process for most members and regular attendees. When you first provide unmanned stations, make sure you have plenty of trained volunteers on hand to instruct members on how to use the system. Once members become more comfortable with the system, simply post a quick-reference card at each station outlining check-in instructions.
Most congregations will have a mix of both manned and unmanned check-in stations.
Physical SetupThe physical setup of your check-in stations can make or break your check-in system. Having stations too close in proximity could cause crowding and delays, and having no one on staff to help users could also present problems. To create the most inviting and productive atmosphere, consider the following in mapping out the locations of your check-in stations.
Number of stationsDetermining the number of check-in stations to begin with is always the greatest challenge. In general, you should aim for a single person to check in in eight seconds or less and a family to check in in 30 seconds or less.
A simple calculation will help you determine the number of check-in stations to use at an entrance. Divide the number of families that typically check in each week by your area’s heaviest traffic time in minutes, such as the 15-minute period before an activity begins.
ACS Checkpoint Implementation Guide
8
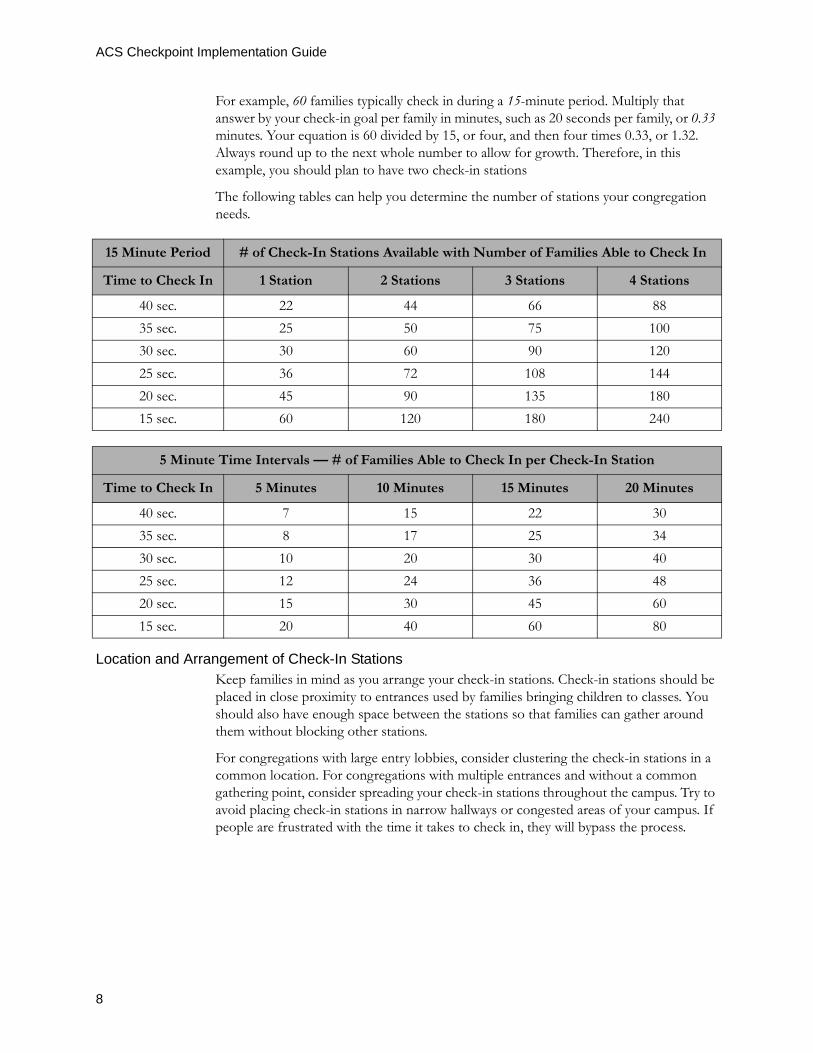
For example, 60 families typically check in during a 15-minute period. Multiply that answer by your check-in goal per family in minutes, such as 20 seconds per family, or 0.33 minutes. Your equation is 60 divided by 15, or four, and then four times 0.33, or 1.32. Always round up to the next whole number to allow for growth. Therefore, in this example, you should plan to have two check-in stations
The following tables can help you determine the number of stations your congregation needs.
Location and Arrangement of Check-In StationsKeep families in mind as you arrange your check-in stations. Check-in stations should be placed in close proximity to entrances used by families bringing children to classes. You should also have enough space between the stations so that families can gather around them without blocking other stations.
For congregations with large entry lobbies, consider clustering the check-in stations in a common location. For congregations with multiple entrances and without a common gathering point, consider spreading your check-in stations throughout the campus. Try to avoid placing check-in stations in narrow hallways or congested areas of your campus. If people are frustrated with the time it takes to check in, they will bypass the process.
15 Minute Period # of Check-In Stations Available with Number of Families Able to Check In
Time to Check In 1 Station 2 Stations 3 Stations 4 Stations
40 sec. 22 44 66 8835 sec. 25 50 75 10030 sec. 30 60 90 12025 sec. 36 72 108 14420 sec. 45 90 135 18015 sec. 60 120 180 240
5 Minute Time Intervals — # of Families Able to Check In per Check-In Station
Time to Check In 5 Minutes 10 Minutes 15 Minutes 20 Minutes
40 sec. 7 15 22 3035 sec. 8 17 25 3430 sec. 10 20 30 4025 sec. 12 24 36 4820 sec. 15 30 45 6015 sec. 20 40 60 80
Check-in Stations
9
Depending on the size of your campus, you will need at least one centrally located, visible, and well-staffed visitor check-in station. First-time guests will obviously not know how to use the system and will need assistance checking-in and obtaining security badges for their children. This is also the time to request the information your congregation likes to get from visitors. It can take several minutes to gather this information, so if you welcome a large number of guests each week, there might be a need for multiple visitor stations.
As a general rule, manned stations should face the volunteer, and unmanned stations should face the member. If you print labels or badges for your attendees, remember to place trash cans around the stations.
After the service, class, or activity is over, consider converting your stations into info centers where attendees can register for events, look up congregational information, or update their personal profiles using Access ACS. Converting stations to information centers assumes that check-out is not required for these events.
VolunteersKeep in mind the number of volunteers and staff members that are available to man the check-in stations. Obviously, you will need a volunteer for each manned station, but you should also plan to have volunteers available to help with the unmanned stations.
When you first roll out your check-in system, it’s best to have one volunteer per check-in station to walk members through the process. As your attendees use the check-in stations and become more familiar with them, you can reduce the number of volunteers, but you should still plan to have at least one person on hand to assist with any questions or problems that arise. If you have several unmanned check-in stations in a cluster, one volunteer to handle them all.
Physical plantThough it seems intuitive, be sure to think about the location of power outlets and network connections when deciding where you will place your check-in stations. If you are planning a new construction, be sure to incorporate these needs into your plan.
If your facilities span across multiple buildings or campuses, or they simply do not have network connections available in lobbies and hallways, you can run Checkpoint in disconnected mode. With disconnected mode, the data is first exported from the server and imported into the disconnected station. After check-in, just export the data and then sync it back up with the server.
For information about using Checkpoint on a wireless network, see knowledge base article 21717: ACS with Wireless Environment.
Kiosk Versus Full InstallationThere are two ways to install ACS Checkpoint: Kiosk mode or as part of the full ACS installation. There are advantages to using a kiosk environment versus a full installation and vice versa. The following outlines the key details of each.
ACS Checkpoint Implementation Guide
10
Kiosk — In Checkpoint kiosk mode, users only have access to Express Check In/Out. No other ACS functionality is installed. This provides tighter security and is easier for members to use since the station is limited to one process. Since the kiosk is so user-friendly, the best use is as a self check-in station or as part of a manned cluster of stations. Kiosks can be turned into information centers after activities are over.
Full installation — A full installation of ACS provides access to all of your ACS data, including both Check In/Out and Express Check In/Out. Stations with full installations are best used as manned check-in stations and for administrative uses of Checkpoint.
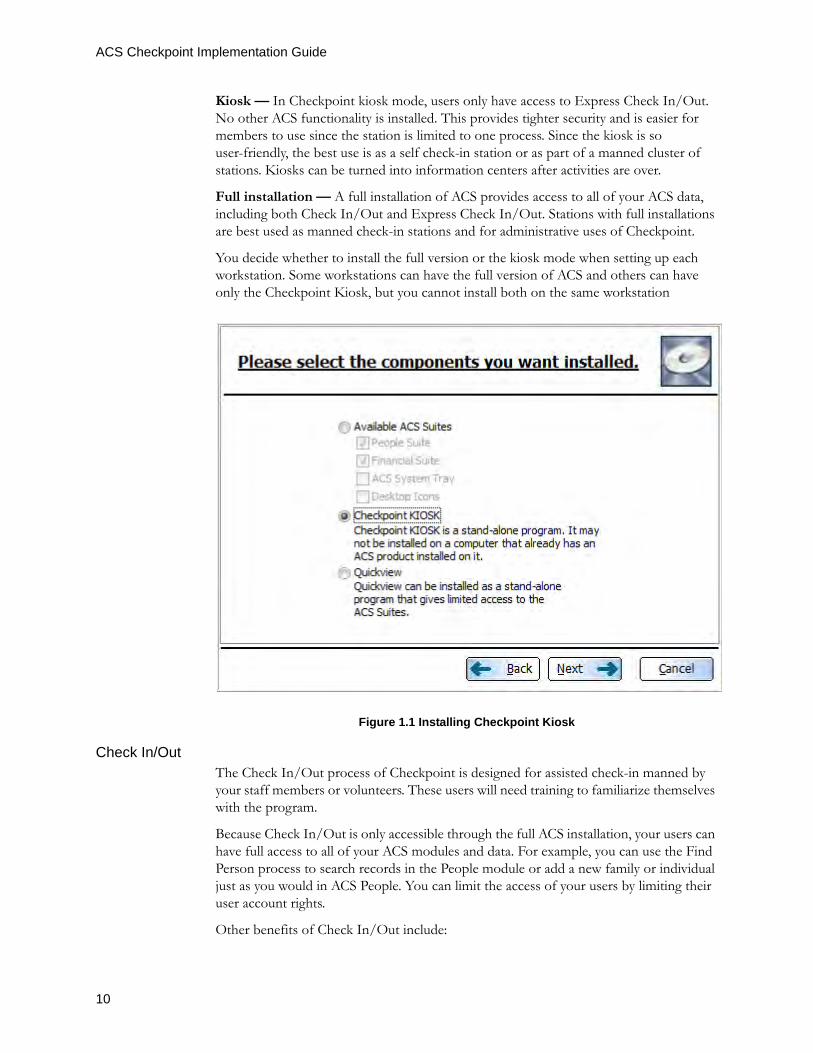
You decide whether to install the full version or the kiosk mode when setting up each workstation. Some workstations can have the full version of ACS and others can have only the Checkpoint Kiosk, but you cannot install both on the same workstation
Figure 1.1 Installing Checkpoint Kiosk
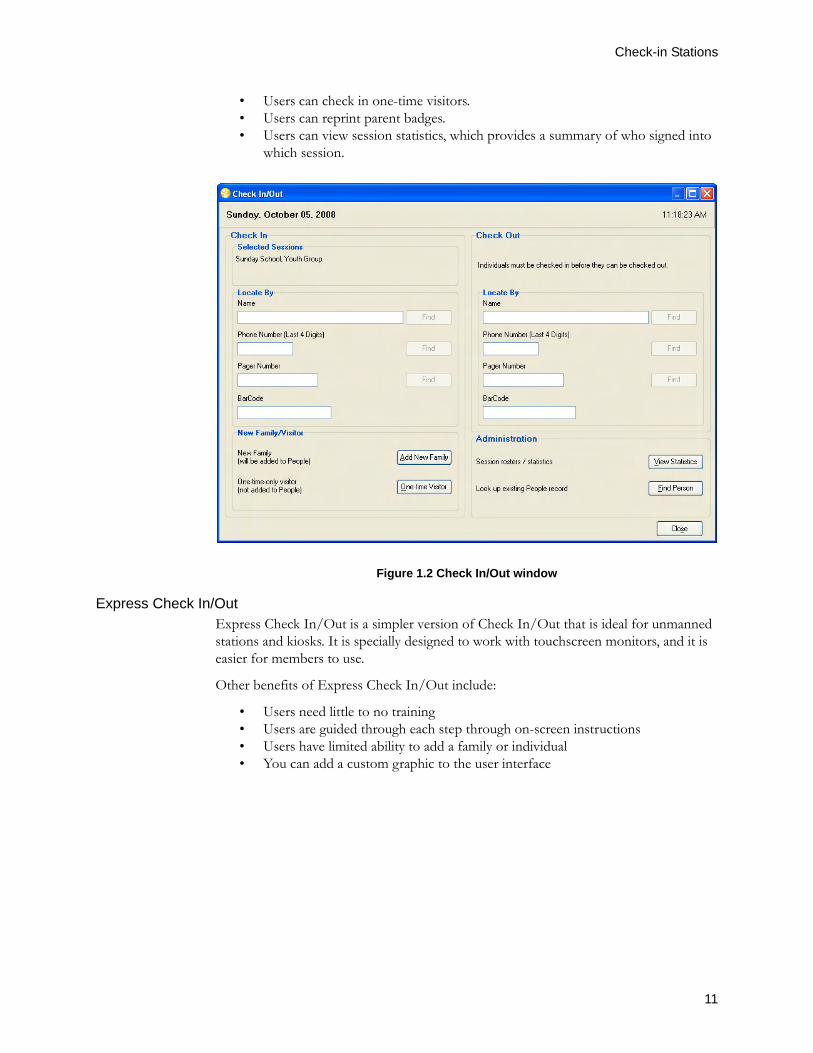
Check In/OutThe Check In/Out process of Checkpoint is designed for assisted check-in manned by your staff members or volunteers. These users will need training to familiarize themselves with the program.
Because Check In/Out is only accessible through the full ACS installation, your users can have full access to all of your ACS modules and data. For example, you can use the Find Person process to search records in the People module or add a new family or individual just as you would in ACS People. You can limit the access of your users by limiting their user account rights.
Other benefits of Check In/Out include:
Check-in Stations
11
• Users can check in one-time visitors.• Users can reprint parent badges.• Users can view session statistics, which provides a summary of who signed into
which session.
Figure 1.2 Check In/Out window
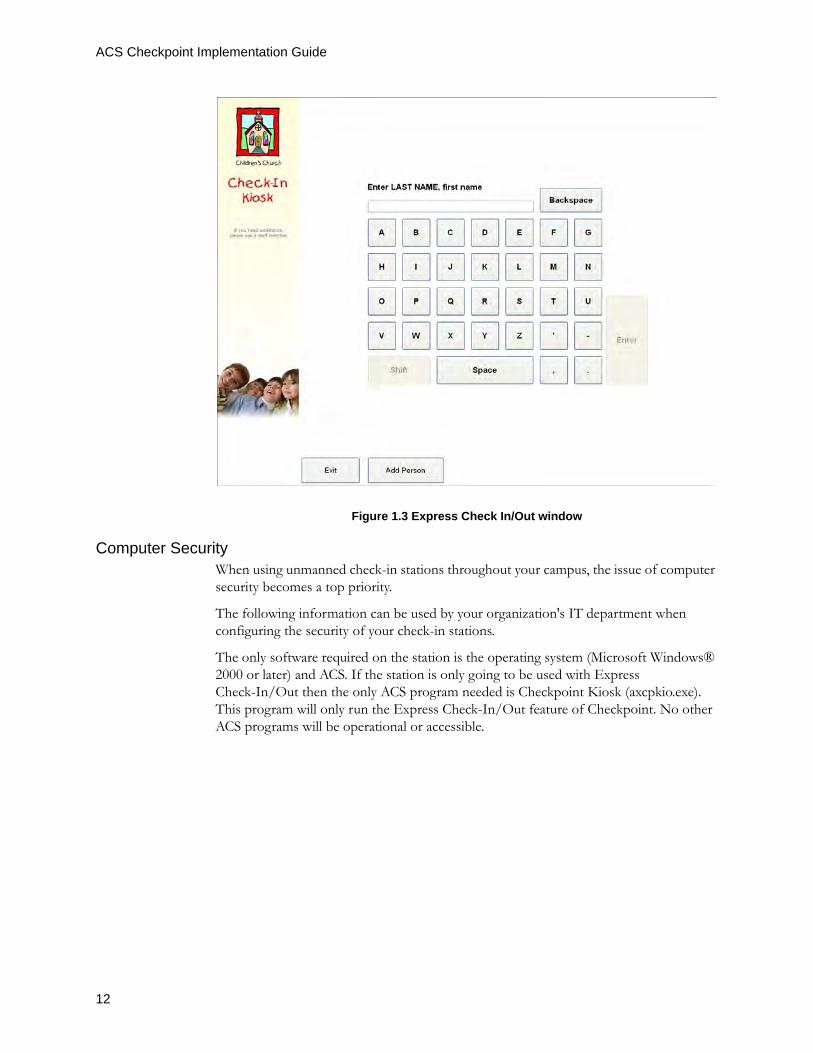
Express Check In/OutExpress Check In/Out is a simpler version of Check In/Out that is ideal for unmanned stations and kiosks. It is specially designed to work with touchscreen monitors, and it is easier for members to use.
Other benefits of Express Check In/Out include:
• Users need little to no training• Users are guided through each step through on-screen instructions• Users have limited ability to add a family or individual• You can add a custom graphic to the user interface
ACS Checkpoint Implementation Guide
12
Figure 1.3 Express Check In/Out window
Computer SecurityWhen using unmanned check-in stations throughout your campus, the issue of computer security becomes a top priority.
The following information can be used by your organization's IT department when configuring the security of your check-in stations.
The only software required on the station is the operating system (Microsoft Windows® 2000 or later) and ACS. If the station is only going to be used with Express Check-In/Out then the only ACS program needed is Checkpoint Kiosk (axcpkio.exe). This program will only run the Express Check-In/Out feature of Checkpoint. No other ACS programs will be operational or accessible.
Check-in Stations
13
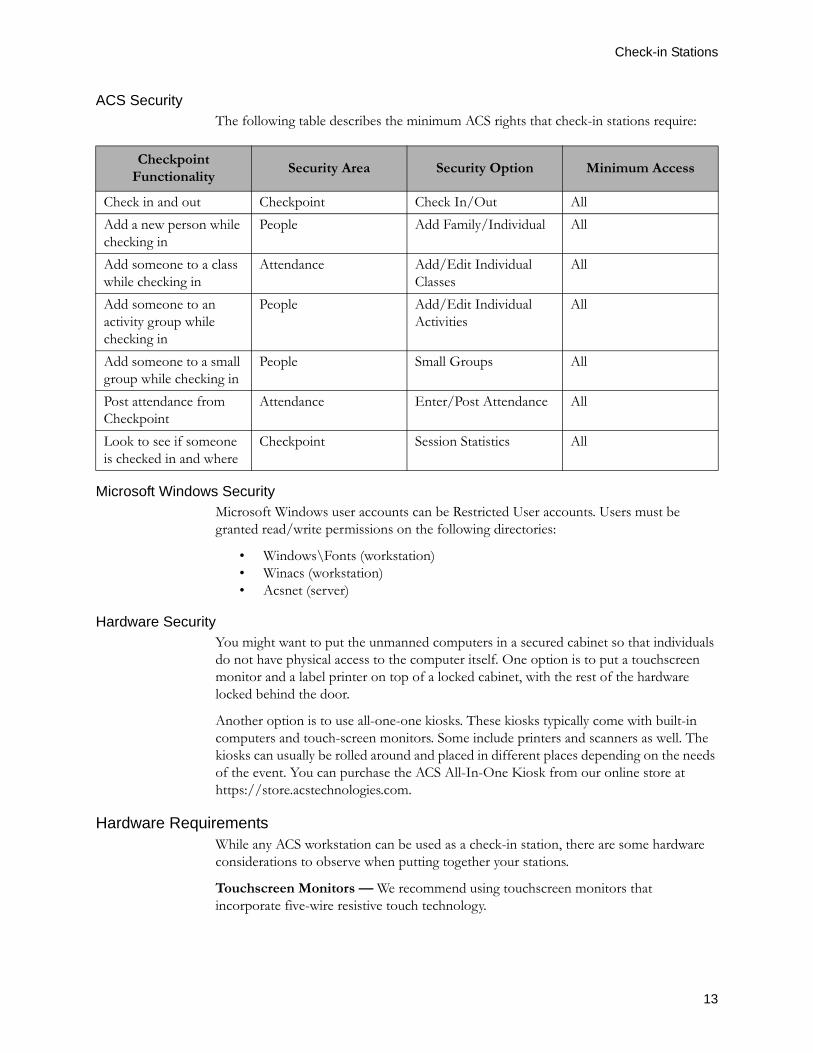
ACS SecurityThe following table describes the minimum ACS rights that check-in stations require:
Microsoft Windows SecurityMicrosoft Windows user accounts can be Restricted User accounts. Users must be granted read/write permissions on the following directories:
• Windows\Fonts (workstation)• Winacs (workstation)• Acsnet (server)
Hardware SecurityYou might want to put the unmanned computers in a secured cabinet so that individuals do not have physical access to the computer itself. One option is to put a touchscreen monitor and a label printer on top of a locked cabinet, with the rest of the hardware locked behind the door.
Another option is to use all-one-one kiosks. These kiosks typically come with built-in computers and touch-screen monitors. Some include printers and scanners as well. The kiosks can usually be rolled around and placed in different places depending on the needs of the event. You can purchase the ACS All-In-One Kiosk from our online store at https://store.acstechnologies.com.
Hardware RequirementsWhile any ACS workstation can be used as a check-in station, there are some hardware considerations to observe when putting together your stations.
Touchscreen Monitors — We recommend using touchscreen monitors that incorporate five-wire resistive touch technology.
Checkpoint Functionality
Security Area Security Option Minimum Access
Check in and out Checkpoint Check In/Out AllAdd a new person while checking in
People Add Family/Individual All
Add someone to a class while checking in
Attendance Add/Edit Individual Classes
All
Add someone to an activity group while checking in
People Add/Edit Individual Activities
All
Add someone to a small group while checking in
People Small Groups All
Post attendance from Checkpoint
Attendance Enter/Post Attendance All
Look to see if someone is checked in and where
Checkpoint Session Statistics All
ACS Checkpoint Implementation Guide
14
Printers — Checkpoint requires a label printer for badges to print properly. ACS Technologies tests and supports the Zebra® LP 2844-Z, Dymo® LabelWriter 300 series, and Dymo® LabelWriter 400 series printers. For more information, see “Printers” on page 22.
Wireless Networking — For information about using Checkpoint on a wireless network, see knowledge base article 21717: ACS with Wireless Environment.
Bar code Scanners — Must be able to read a Code 39-digit bar code (C39-digit UPC code).
Biometrics — We have had some clients integrate biometric interfaces with ACS Checkpoint. For more information, contact ACS Support.
You can purchase touchscreen monitors, label printers, bar code scanners, and full ACS All-In-One Kiosks that have been thoroughly tested with ACS Checkpoint from our online store at https://store.acstechnologies.com.
Integrating with ACS GroupsCheckpoint is designed to work with the attendance classes, activity groups, and small groups you have set up in ACS. Members check in to sessions, which are tied to attendance, activity, and small group events. Checkpoint tracks the number of people checked into a location and enforces maximum occupancy restrictions. Finally, you can post attendance markings from Checkpoint.
Because of the integration between Checkpoint and groups in ACS, people generally must be in the database and assigned to appropriate groups. You can add people and assign them to a roster during check in, and it is possible to check-in a visitor without permanently adding them to your database.
SessionsIn Checkpoint, you create sessions that are linked to events such as religious education classes or small group meetings. Your members and visitors then check in to one or more sessions. You must have at least one session.
Each session is tied to an event. The event can be associated with an attendance group, activity group, or small group. If you have more than one event for which you want to use Checkpoint, you need to create a session for each event.
When you set up your check-in stations, you can choose up to 10 sessions that can be checked in to. Different workstations can have different sessions, so you can target your check-in stations.
You can limit sessions to specific roster groups. If you have check-in stations dispersed across your campus instead of in one central location, you can create different sessions with classes based on where the classrooms are. For example, you can limit the sessions on the check-in stations in the junior high/senior high wing to sessions that contain youth classes.
You can create different badges for each session. For example, while you almost certainly want the parents’ name on security badges for the infants and toddlers nursery, that’s probably not needed on the name badges for an adult religious education class. For more information, see “Badges” on page 15.
Badges
15
LocationsAttendance classes can be assigned to more than one location. For example, you might have several rooms designated as nurseries for 12-18 month olds, with each room accommodating a maximum of 10 toddlers.
When members check in for the first time, they are asked to select a location. When the limit is reached for a specific location, members can no longer check in to that location. The location is remembered from week to week, so members only need to select a location if it is changing.
Maximum classroom size and multiple locations are configured in Attendance group setup. Both features are optional.
If you choose to implement this, the size limits are strictly enforced. If you have overages, you will need to add a new location or adjust the maximum number of people in Attendance setup.
Posting AttendanceYou can use Checkpoint to mark attendance. Since the people who are present in an attendance class are already checked-in to Checkpoint, this can be a huge time saver.
When you post attendance, you have the option of adding new people to the class rosters automatically. For example, John Gibson is a tenth grader attending for the first time. At a manned check-in station, you add him to your people database and check him into the tenth grade class. When you post attendance, you have the option of adding John to the tenth grade class roster. Next week when John goes to check in, he will already be assigned to the tenth grade class.
If you post attendance, make sure your attendance groups are up-to-date.
BadgesTypically, when you decide to implement a check-in system, security is one of your primary concerns. You want newcomers and members to know that you take this very seriously. After all, many parents might not want to attend if they feel that every effort is not being made to protect their children.
One security measure that many organizations implement with their check-in system is the use of badges. This is especially popular in keeping track of the children in the congregation. Nursery workers and other volunteers and staff print badges for each child and parent. Badges are checked before the child leaves, and, consequently, the risk of a child leaving with an unauthorized individual is greatly reduced. Different badges can also be printed for visitors and adults.
Badges are optional and may only be necessary for younger children. You can decide what is best for your organization.
If you decide to use security badges, make sure you have a system in place for handling situations where a child or parent loses a badge. Some guidelines include:
• Request a driver’s license to prove identity. You can compare it with the parents’ names if you have included it on security badges
• Check an authorized pick-up list. You can keep this list in the comments field in the child’s individual record.
ACS Checkpoint Implementation Guide
16
• Verify that there are no notes that reflect custody issues.• Ask the individual what children they need to pick up and what session they are
checked in to. This information is displayed on the check-out screen.
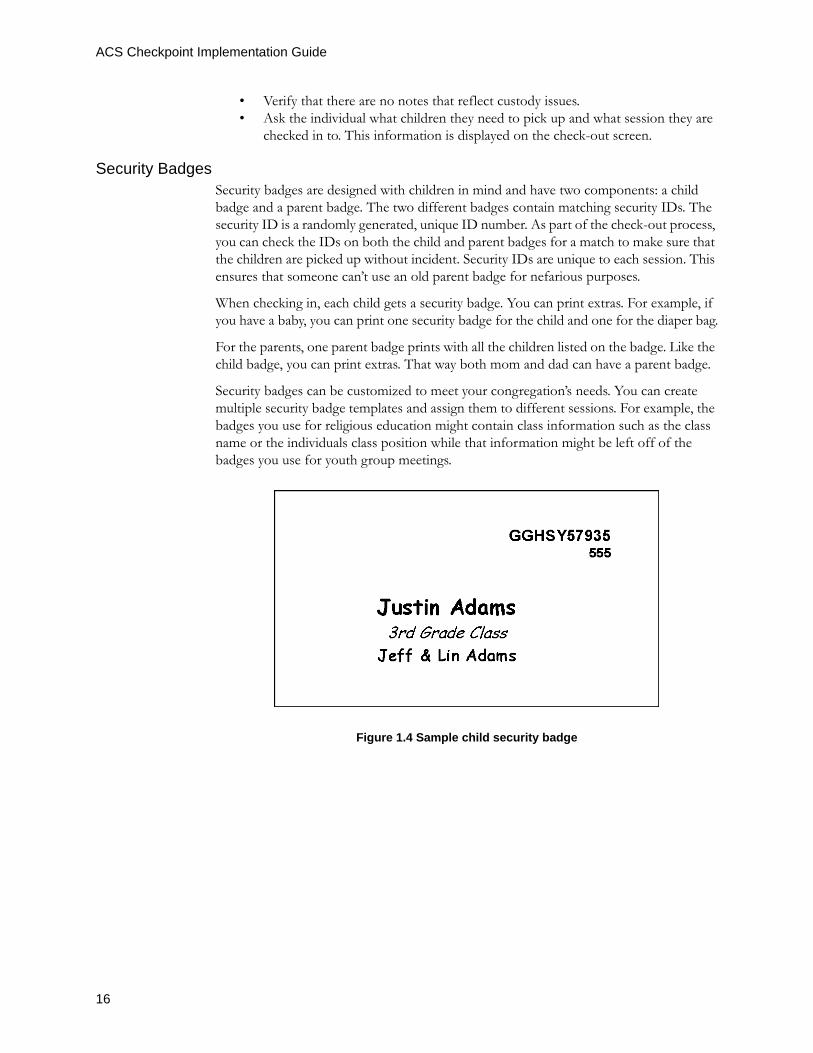
Security BadgesSecurity badges are designed with children in mind and have two components: a child badge and a parent badge. The two different badges contain matching security IDs. The security ID is a randomly generated, unique ID number. As part of the check-out process, you can check the IDs on both the child and parent badges for a match to make sure that the children are picked up without incident. Security IDs are unique to each session. This ensures that someone can’t use an old parent badge for nefarious purposes.
When checking in, each child gets a security badge. You can print extras. For example, if you have a baby, you can print one security badge for the child and one for the diaper bag.
For the parents, one parent badge prints with all the children listed on the badge. Like the child badge, you can print extras. That way both mom and dad can have a parent badge.
Security badges can be customized to meet your congregation’s needs. You can create multiple security badge templates and assign them to different sessions. For example, the badges you use for religious education might contain class information such as the class name or the individuals class position while that information might be left off of the badges you use for youth group meetings.
Figure 1.4 Sample child security badge
Badges
17
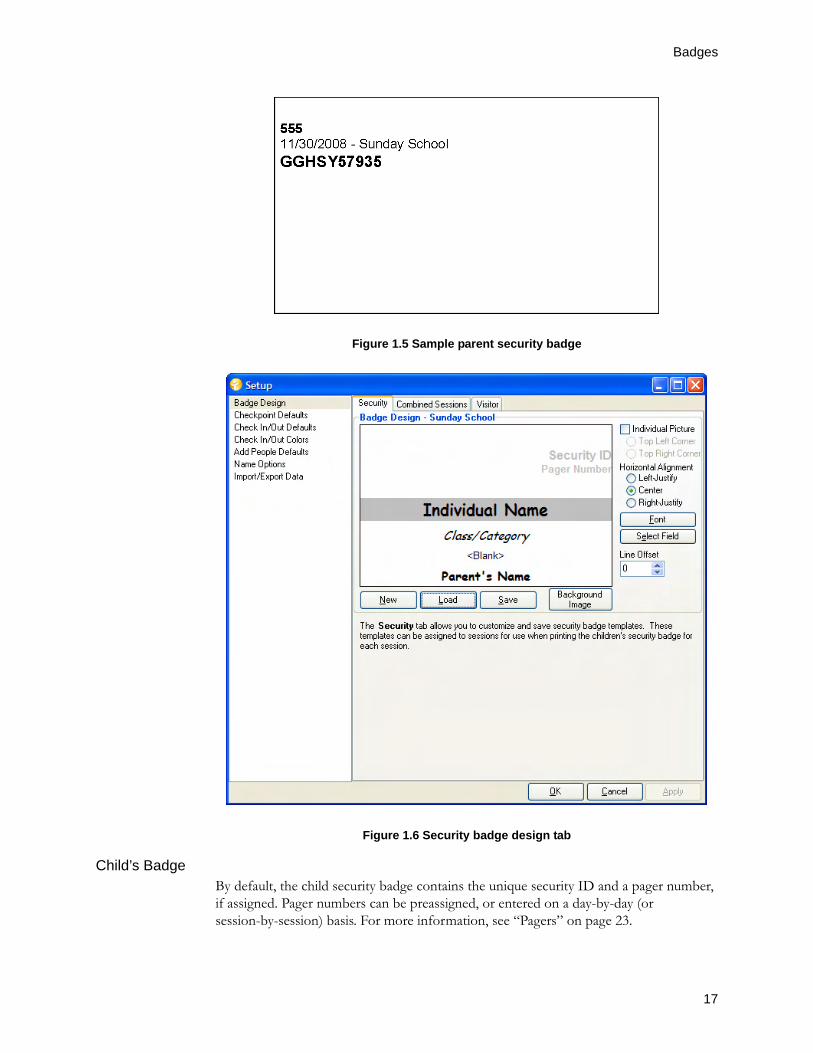
Figure 1.5 Sample parent security badge
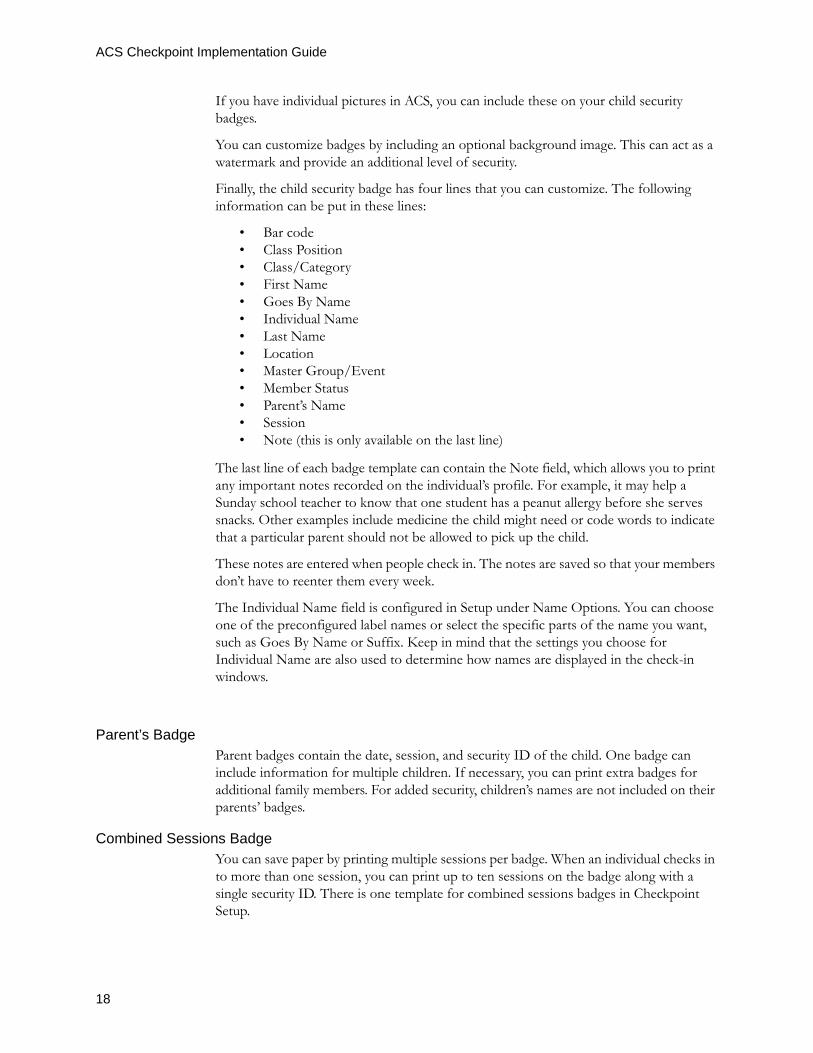
Figure 1.6 Security badge design tab
Child’s BadgeBy default, the child security badge contains the unique security ID and a pager number, if assigned. Pager numbers can be preassigned, or entered on a day-by-day (or session-by-session) basis. For more information, see “Pagers” on page 23.
ACS Checkpoint Implementation Guide
18
If you have individual pictures in ACS, you can include these on your child security badges.
You can customize badges by including an optional background image. This can act as a watermark and provide an additional level of security.
Finally, the child security badge has four lines that you can customize. The following information can be put in these lines:
• Bar code• Class Position• Class/Category• First Name• Goes By Name• Individual Name• Last Name• Location• Master Group/Event• Member Status• Parent’s Name• Session• Note (this is only available on the last line)
The last line of each badge template can contain the Note field, which allows you to print any important notes recorded on the individual’s profile. For example, it may help a Sunday school teacher to know that one student has a peanut allergy before she serves snacks. Other examples include medicine the child might need or code words to indicate that a particular parent should not be allowed to pick up the child.
These notes are entered when people check in. The notes are saved so that your members don’t have to reenter them every week.
The Individual Name field is configured in Setup under Name Options. You can choose one of the preconfigured label names or select the specific parts of the name you want, such as Goes By Name or Suffix. Keep in mind that the settings you choose for Individual Name are also used to determine how names are displayed in the check-in windows.
Parent’s BadgeParent badges contain the date, session, and security ID of the child. One badge can include information for multiple children. If necessary, you can print extra badges for additional family members. For added security, children’s names are not included on their parents’ badges.
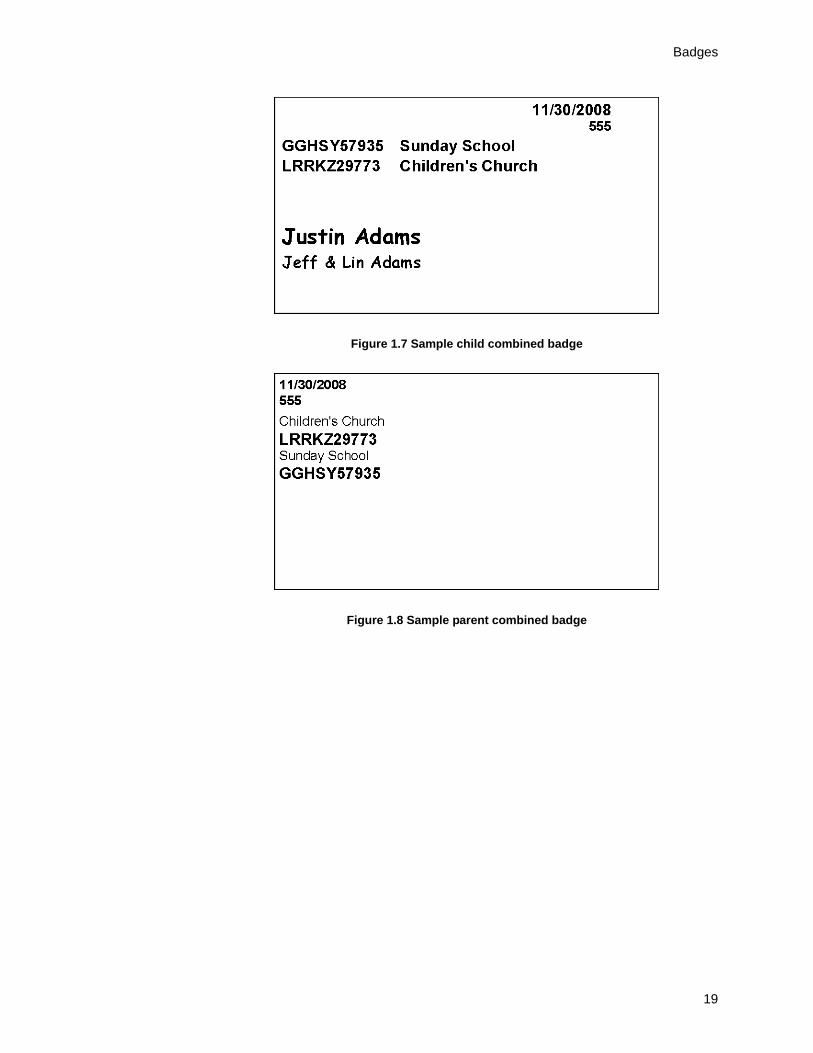
Combined Sessions BadgeYou can save paper by printing multiple sessions per badge. When an individual checks in to more than one session, you can print up to ten sessions on the badge along with a single security ID. There is one template for combined sessions badges in Checkpoint Setup.
Badges
19
Figure 1.7 Sample child combined badge
Figure 1.8 Sample parent combined badge
ACS Checkpoint Implementation Guide
20
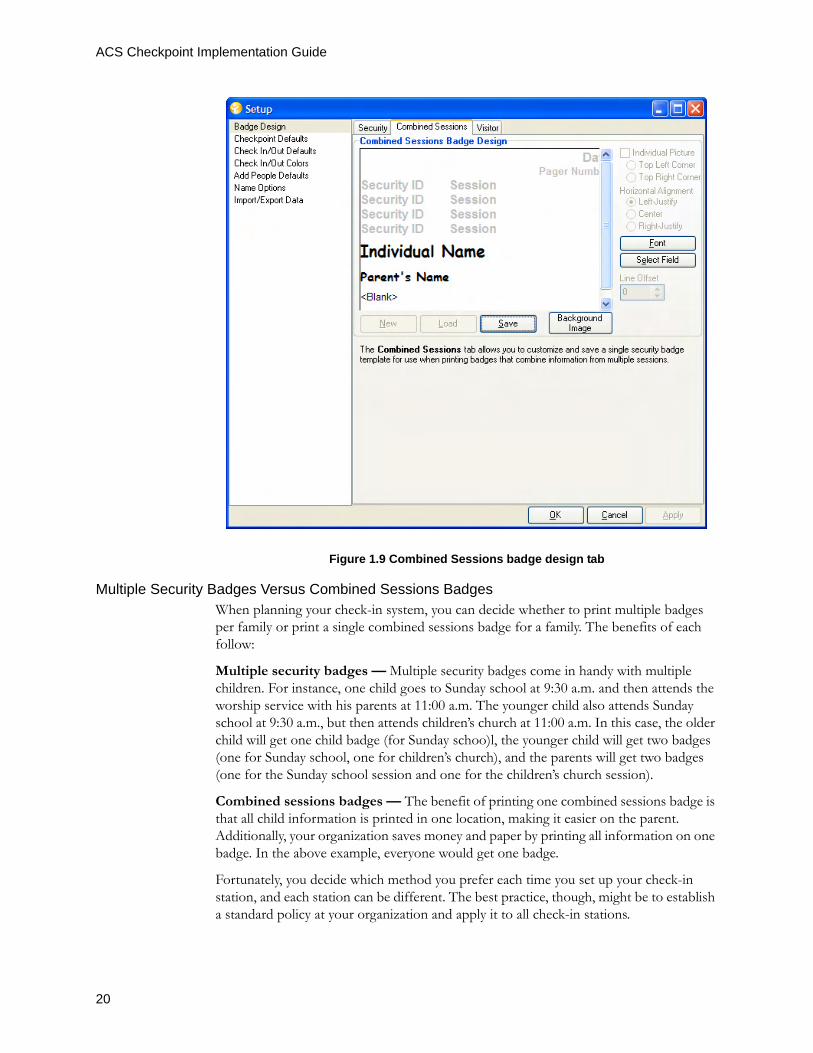
Figure 1.9 Combined Sessions badge design tab
Multiple Security Badges Versus Combined Sessions BadgesWhen planning your check-in system, you can decide whether to print multiple badges per family or print a single combined sessions badge for a family. The benefits of each follow:
Multiple security badges — Multiple security badges come in handy with multiple children. For instance, one child goes to Sunday school at 9:30 a.m. and then attends the worship service with his parents at 11:00 a.m. The younger child also attends Sunday school at 9:30 a.m., but then attends children’s church at 11:00 a.m. In this case, the older child will get one child badge (for Sunday schoo)l, the younger child will get two badges (one for Sunday school, one for children’s church), and the parents will get two badges (one for the Sunday school session and one for the children’s church session).
Combined sessions badges — The benefit of printing one combined sessions badge is that all child information is printed in one location, making it easier on the parent. Additionally, your organization saves money and paper by printing all information on one badge. In the above example, everyone would get one badge.
Fortunately, you decide which method you prefer each time you set up your check-in station, and each station can be different. The best practice, though, might be to establish a standard policy at your organization and apply it to all check-in stations.
Badges
21
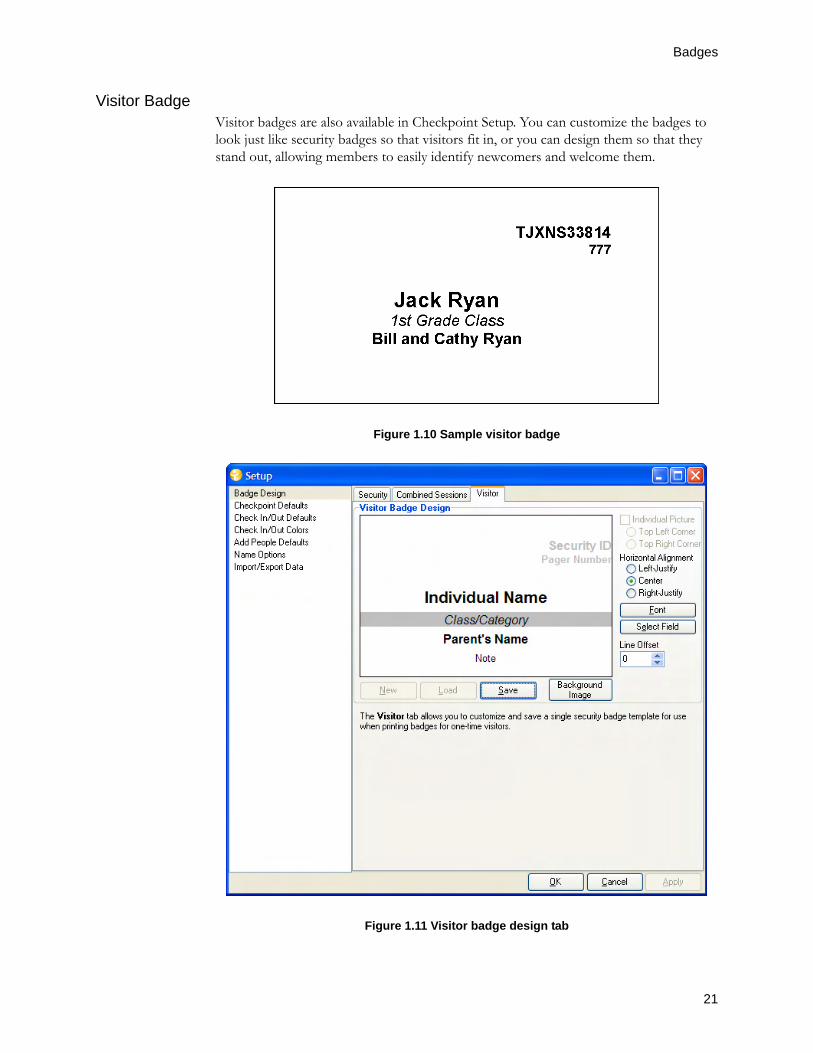
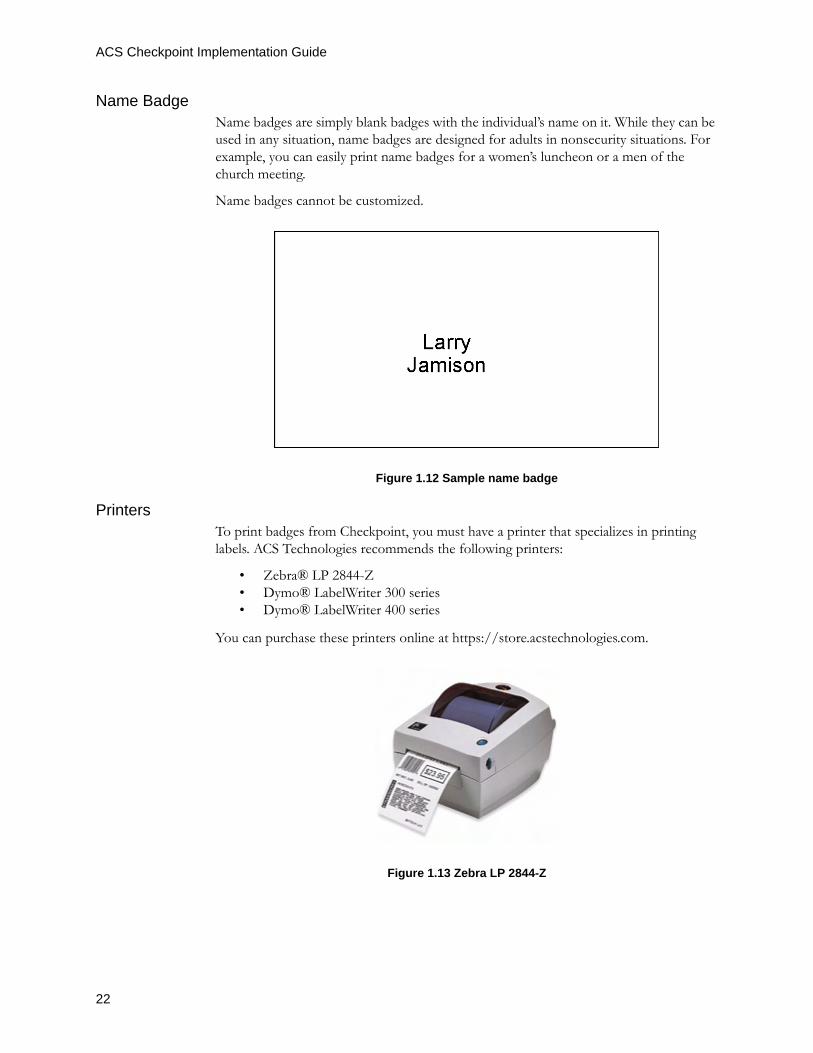
Visitor BadgeVisitor badges are also available in Checkpoint Setup. You can customize the badges to look just like security badges so that visitors fit in, or you can design them so that they stand out, allowing members to easily identify newcomers and welcome them.
Figure 1.10 Sample visitor badge
Figure 1.11 Visitor badge design tab
ACS Checkpoint Implementation Guide
22
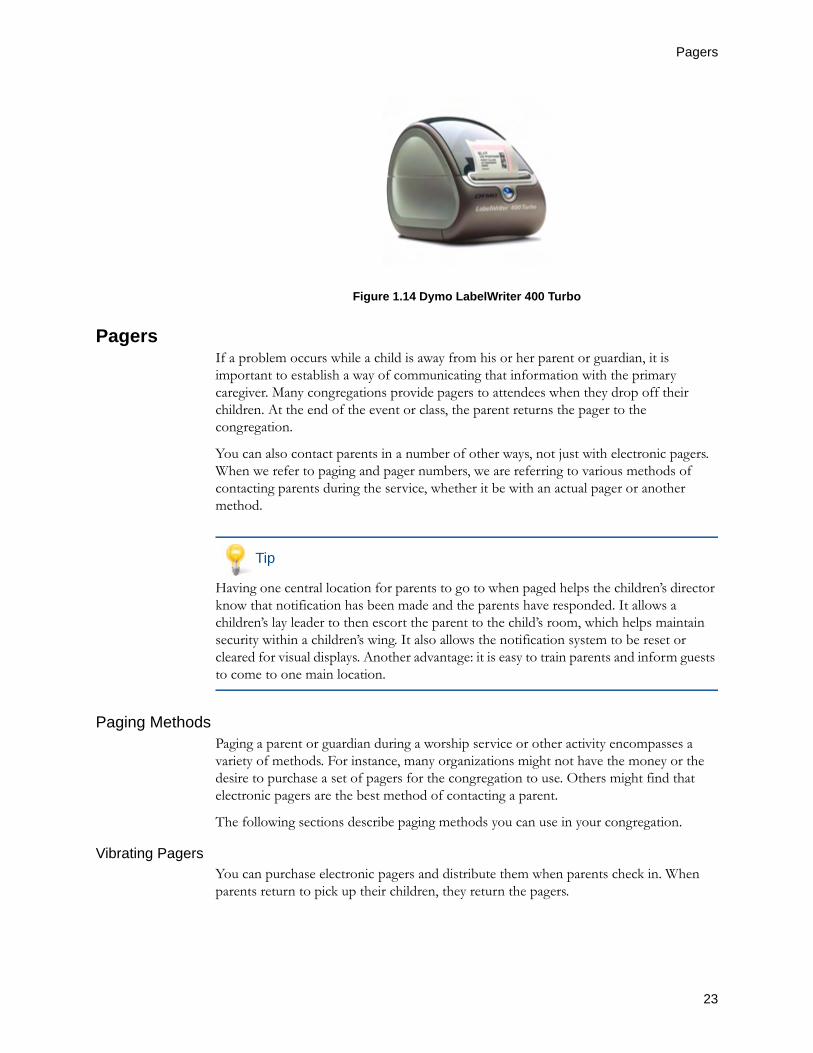
Name BadgeName badges are simply blank badges with the individual’s name on it. While they can be used in any situation, name badges are designed for adults in nonsecurity situations. For example, you can easily print name badges for a women’s luncheon or a men of the church meeting.
Name badges cannot be customized.
Figure 1.12 Sample name badge
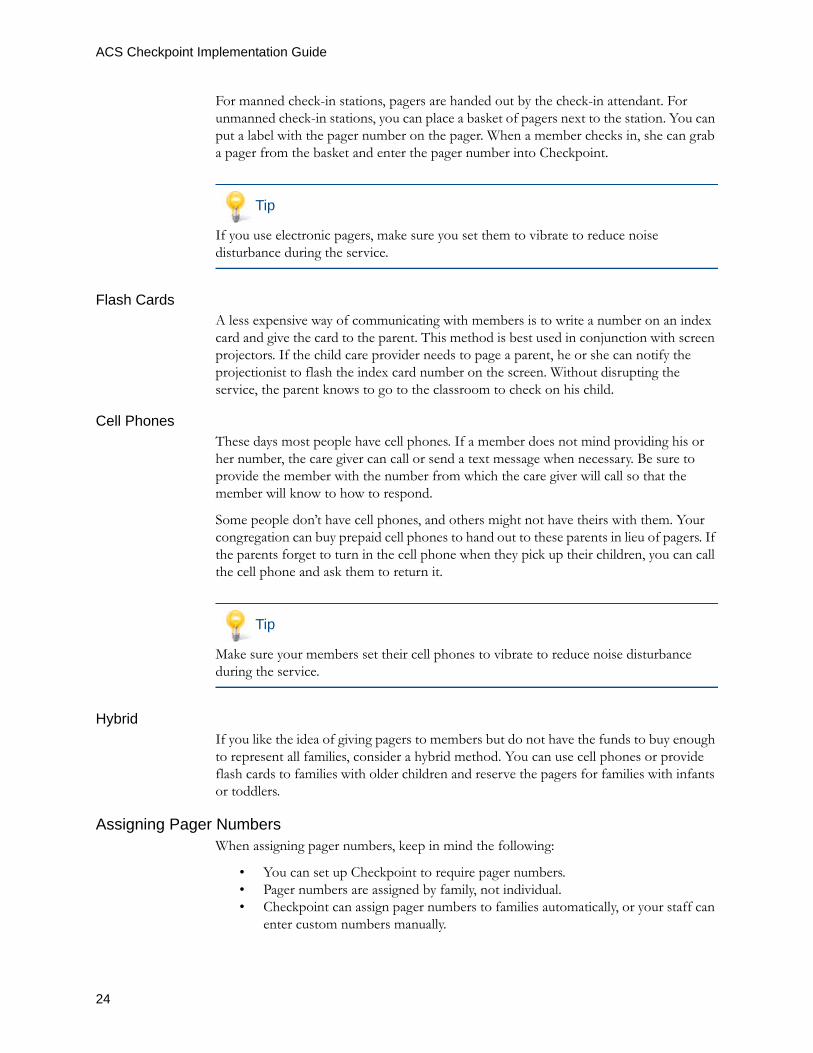
PrintersTo print badges from Checkpoint, you must have a printer that specializes in printing labels. ACS Technologies recommends the following printers:
• Zebra® LP 2844-Z• Dymo® LabelWriter 300 series• Dymo® LabelWriter 400 series
You can purchase these printers online at https://store.acstechnologies.com.
Figure 1.13 Zebra LP 2844-Z
Pagers
23
Figure 1.14 Dymo LabelWriter 400 Turbo
PagersIf a problem occurs while a child is away from his or her parent or guardian, it is important to establish a way of communicating that information with the primary caregiver. Many congregations provide pagers to attendees when they drop off their children. At the end of the event or class, the parent returns the pager to the congregation.
You can also contact parents in a number of other ways, not just with electronic pagers. When we refer to paging and pager numbers, we are referring to various methods of contacting parents during the service, whether it be with an actual pager or another method.
Tip
Having one central location for parents to go to when paged helps the children’s director know that notification has been made and the parents have responded. It allows a children’s lay leader to then escort the parent to the child’s room, which helps maintain security within a children’s wing. It also allows the notification system to be reset or cleared for visual displays. Another advantage: it is easy to train parents and inform guests to come to one main location.
Paging MethodsPaging a parent or guardian during a worship service or other activity encompasses a variety of methods. For instance, many organizations might not have the money or the desire to purchase a set of pagers for the congregation to use. Others might find that electronic pagers are the best method of contacting a parent.
The following sections describe paging methods you can use in your congregation.
Vibrating PagersYou can purchase electronic pagers and distribute them when parents check in. When parents return to pick up their children, they return the pagers.
ACS Checkpoint Implementation Guide
24
For manned check-in stations, pagers are handed out by the check-in attendant. For unmanned check-in stations, you can place a basket of pagers next to the station. You can put a label with the pager number on the pager. When a member checks in, she can grab a pager from the basket and enter the pager number into Checkpoint.
Tip
If you use electronic pagers, make sure you set them to vibrate to reduce noise disturbance during the service.
Flash CardsA less expensive way of communicating with members is to write a number on an index card and give the card to the parent. This method is best used in conjunction with screen projectors. If the child care provider needs to page a parent, he or she can notify the projectionist to flash the index card number on the screen. Without disrupting the service, the parent knows to go to the classroom to check on his child.
Cell PhonesThese days most people have cell phones. If a member does not mind providing his or her number, the care giver can call or send a text message when necessary. Be sure to provide the member with the number from which the care giver will call so that the member will know to how to respond.
Some people don’t have cell phones, and others might not have theirs with them. Your congregation can buy prepaid cell phones to hand out to these parents in lieu of pagers. If the parents forget to turn in the cell phone when they pick up their children, you can call the cell phone and ask them to return it.
Tip
Make sure your members set their cell phones to vibrate to reduce noise disturbance during the service.
HybridIf you like the idea of giving pagers to members but do not have the funds to buy enough to represent all families, consider a hybrid method. You can use cell phones or provide flash cards to families with older children and reserve the pagers for families with infants or toddlers.
Assigning Pager NumbersWhen assigning pager numbers, keep in mind the following:
• You can set up Checkpoint to require pager numbers.• Pager numbers are assigned by family, not individual.• Checkpoint can assign pager numbers to families automatically, or your staff can
enter custom numbers manually.
Check-out
25
• Pager numbers are stored in individual profiles. Thus, Checkpoint users can look up a family’s assigned number when necessary.
• Pager numbers are saved until an authorized Checkpoint user clears the numbers from the database.
It is also important to note that if you use pagers as part of your check-in system, this might require your check-in stations to be manned by staff or volunteers who can assign numbers and pagers. If you would rather provide self check-in stations, consider asking your attendees to enter their cell phone numbers as their pager numbers so that staff members and volunteers can still get in touch with parents if necessary.
Check-outIf you check in to a service, logic suggests that you will have to check out afterwards. However, many congregations do not incorporate a check-out process in their security system. Generally, all attendees leave at the same time, and many people would rather bypass check-out to avoid the bottleneck. Therefore, a more realistic plan may be to enlist volunteers to check everyone out after the service, or for staff members to do so the next work day.
Sometimes, though, you might want to require members to check out at special events, such as lock-ins. Check-out can be run on manned and unmanned stations, and individuals must be checked in, of course, in order to check out.
Note
If you post attendance from Checkpoint, you cannot incorporate manual check-out.
Implementation SuggestionsWhile working with organizations that have implemented check-in systems with Checkpoint, we’ve come up with a list of suggestions to help make your implementation a success.
PlanningFor any project that is as all encompassing as a check-in system, planning is paramount. In addition to the information and suggestions provided throughout this guide, keep the following in mind as you develop your plan:
• Review insurance and legal requirements that could affect your implementation.• Ask for input and get buy-in from the staff members and lay leaders in the
children’s ministry area.• Survey your existing facilities and determine if you need to make any
renovations.• Consider having a consultant from the ACS Implementation team visit your
congregation and assist in developing and implementing your plan.
As you develop your plan, make sure it fits your budget and can be implemented in the required time frame.

ACS Checkpoint Implementation Guide
26
TrainingThe key to implementing a successful security process is in the training of your ministry leaders, teachers, coordinators, and volunteers. A coordinated and comprehensive effort is essential to the protection of your children. As you implement the system, ministry leaders must ensure that:
• Greeters and host team members are well-trained on the overall workings of the children's ministry, including the registration and check-in equipment, classroom locations, centralized visitor location, volunteer and staff names, and the emergency policy for your organization.
• Ministry leaders are trained in how to use software tools to identify, qualify, and screen volunteers to match the right people with the right positions.
• Teachers and classroom volunteers know the drop-off and pick-up procedures, the use of security badges, and emergency procedures.
• Hall monitors, ushers, and parking lot attendants know what their specific roles are in case of emergency.
• Volunteers understand and follow the security protocols you have established. Remember that child security is more than data.
CommunicationOnce your children's and youth ministry security process is in place, don't be afraid to let your congregation and your visitors know about it. Publish information on the process and insert it into the weekly newsletter or bulletin. Post the information on your Web site. Announce it from the pulpit and encourage your small group leaders to pass along the information to their small groups. Continue to remind the congregation that the safety of your children is at stake and worth any perceived inconveniences.
Conduct Test RunsBefore you get ready for the first Sunday in action, conduct several test runs of the new system and procedures. Invite parents to come in during other times of the week to try out the system.
It's always best to discover any problems in the process before the crowd arrives on Sunday morning. For example, you might discover that some children have never been entered into your People database or they were not in the correct family. You might also discover duplicate records.
After your test runs, meet with your leaders and volunteers to get their feedback and suggestions for resolving any issues. It’s a good idea to meet with this same group after the first or second live runs.
The goal is to get everyone comfortable before the system is launched in full. This is also the time to create champions who will help promote the new system with other members of the congregation.
Implement in StagesAnother way to minimize problems and overcome objections to the system is to implement Checkpoint in stages.

Implementation Suggestions
27
In phase 1, you can implement the check-in system for your infants, toddlers, and preschoolers. You want to start with this age group because they are the most vulnerable and the parents are the most understanding of and receptive to the need for a check-in system. Indeed, these families are probably the most demanding of a comprehensive and secure check-in system.
Once a check-in system has been implemented for the youngest children in phase 1, you can implement the system for the grade school kids in phase 2 and the youth in phase 3.
Plan for Future GrowthSecurity is an ongoing process. Once the check-in system is in place, you’ll need maintain the system. This includes budgeting for labels (often overlooked), planning for printer and other hardware replacement, and budgeting for new check-in stations as your congregation grows.
In addition to budgeting for tangible items, you should also plan for changes to your people and processes as your congregation grows. This includes training new volunteers, evaluating and revising the systems and processes you have in place, and monitoring your staff members, leaders, and volunteers to make sure the policies and procedures are being followed.

ACS Checkpoint Implementation Guide
28
29
Appendix A
Setting Up Check-In Stations
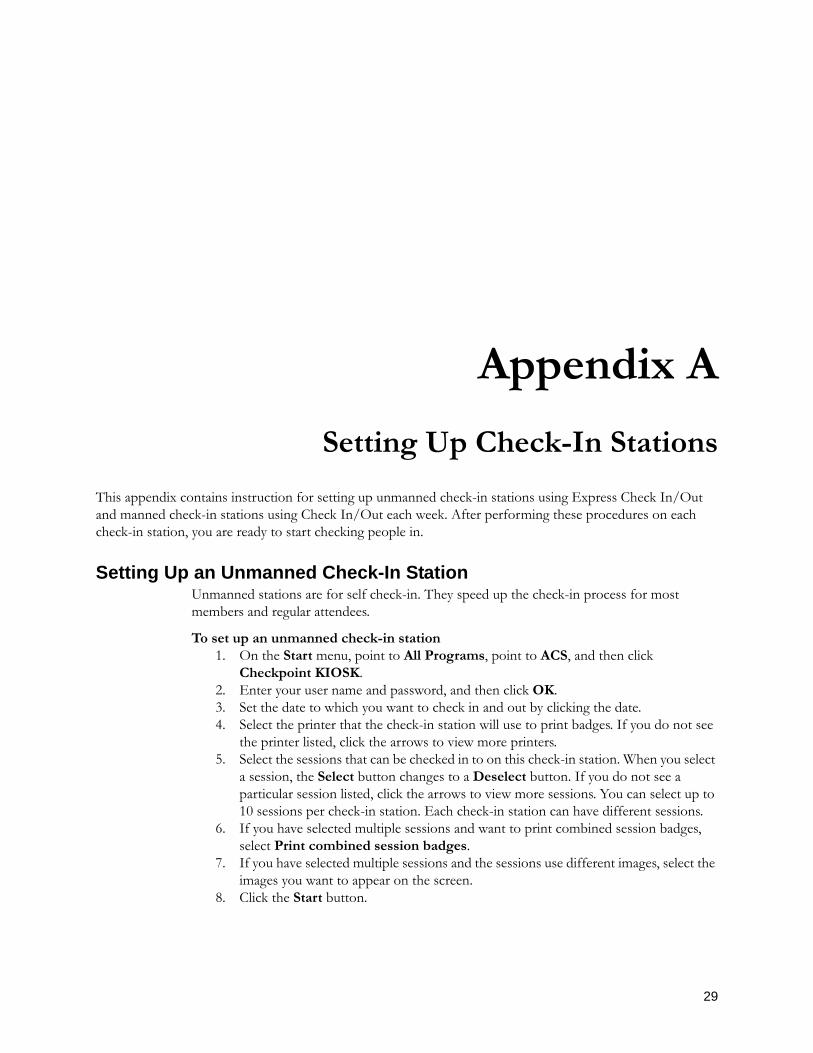
This appendix contains instruction for setting up unmanned check-in stations using Express Check In/Out and manned check-in stations using Check In/Out each week. After performing these procedures on each check-in station, you are ready to start checking people in.
Setting Up an Unmanned Check-In StationUnmanned stations are for self check-in. They speed up the check-in process for most members and regular attendees.
To set up an unmanned check-in station1. On the Start menu, point to All Programs, point to ACS, and then click
Checkpoint KIOSK.2. Enter your user name and password, and then click OK.3. Set the date to which you want to check in and out by clicking the date.4. Select the printer that the check-in station will use to print badges. If you do not see
the printer listed, click the arrows to view more printers.5. Select the sessions that can be checked in to on this check-in station. When you select
a session, the Select button changes to a Deselect button. If you do not see a particular session listed, click the arrows to view more sessions. You can select up to 10 sessions per check-in station. Each check-in station can have different sessions.
6. If you have selected multiple sessions and want to print combined session badges, select Print combined session badges.
7. If you have selected multiple sessions and the sessions use different images, select the images you want to appear on the screen.
8. Click the Start button.
ACS Checkpoint Implementation Guide
30
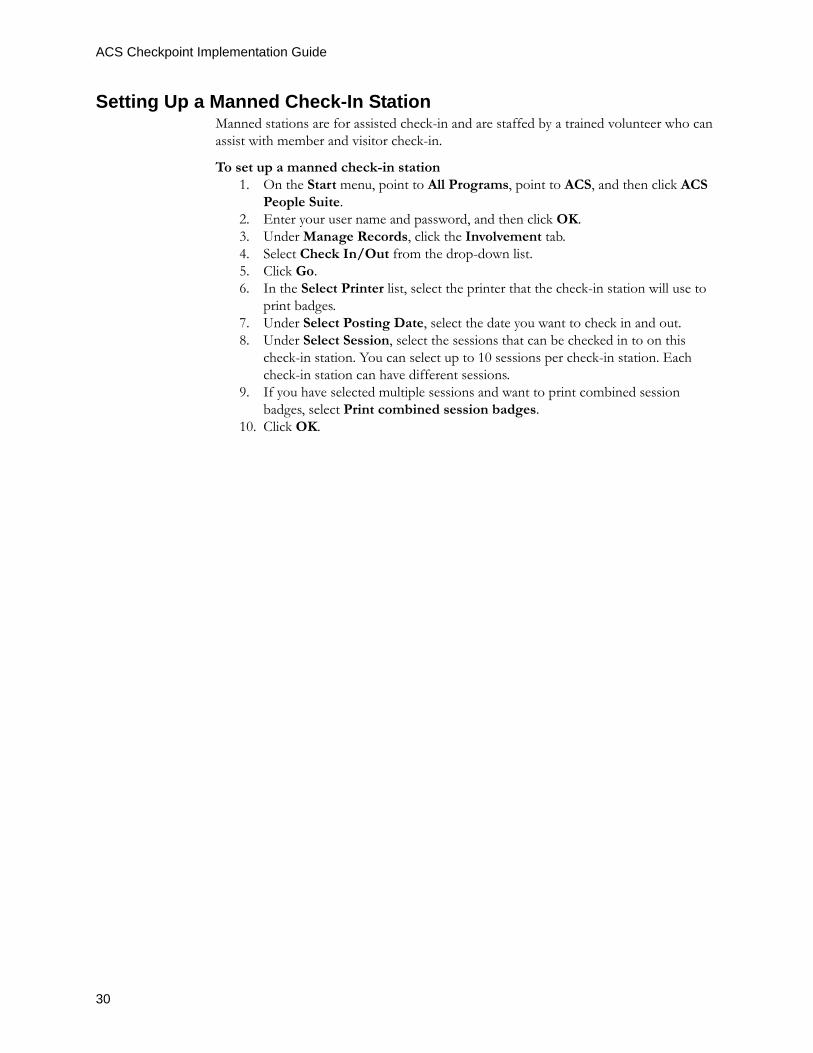
Setting Up a Manned Check-In StationManned stations are for assisted check-in and are staffed by a trained volunteer who can assist with member and visitor check-in.
To set up a manned check-in station1. On the Start menu, point to All Programs, point to ACS, and then click ACS
People Suite.2. Enter your user name and password, and then click OK.3. Under Manage Records, click the Involvement tab.4. Select Check In/Out from the drop-down list.5. Click Go.6. In the Select Printer list, select the printer that the check-in station will use to
print badges.7. Under Select Posting Date, select the date you want to check in and out.8. Under Select Session, select the sessions that can be checked in to on this
check-in station. You can select up to 10 sessions per check-in station. Each check-in station can have different sessions.
9. If you have selected multiple sessions and want to print combined session badges, select Print combined session badges.
10. Click OK.
31
Appendix B
Dymo Printer Setup
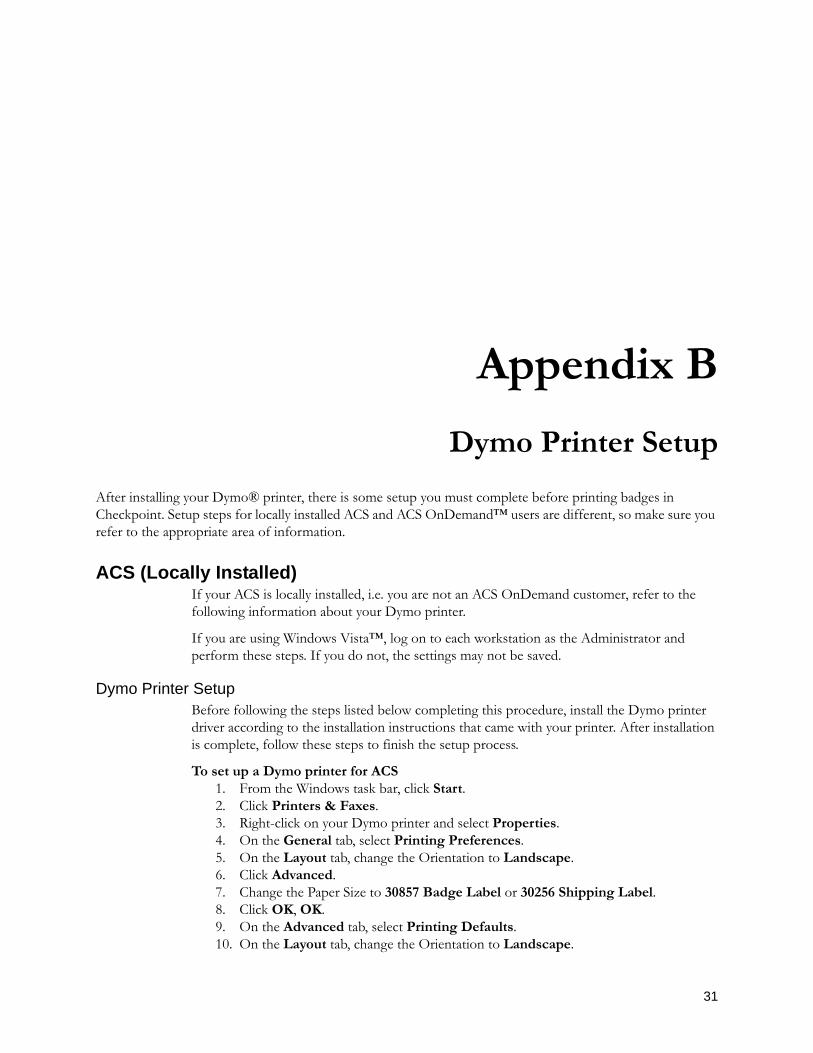
After installing your Dymo® printer, there is some setup you must complete before printing badges in Checkpoint. Setup steps for locally installed ACS and ACS OnDemand™ users are different, so make sure you refer to the appropriate area of information.
ACS (Locally Installed)If your ACS is locally installed, i.e. you are not an ACS OnDemand customer, refer to the following information about your Dymo printer.
If you are using Windows Vista™, log on to each workstation as the Administrator and perform these steps. If you do not, the settings may not be saved.
Dymo Printer SetupBefore following the steps listed below completing this procedure, install the Dymo printer driver according to the installation instructions that came with your printer. After installation is complete, follow these steps to finish the setup process.
To set up a Dymo printer for ACS1. From the Windows task bar, click Start.2. Click Printers & Faxes.3. Right-click on your Dymo printer and select Properties.4. On the General tab, select Printing Preferences.5. On the Layout tab, change the Orientation to Landscape.6. Click Advanced.7. Change the Paper Size to 30857 Badge Label or 30256 Shipping Label.8. Click OK, OK.9. On the Advanced tab, select Printing Defaults.10. On the Layout tab, change the Orientation to Landscape.

ACS Checkpoint Implementation Guide
32
11. Click Advanced.12. Change the Paper Size to 30857 Badge Label or 30256 Shipping Label.13. Click OK in the next three windows.
ACS OnDemandIf your ACS is hosted by OnDemand, refer to the following information about your Dymo printer.
If you are using Windows Vista™, log on to each worstations as the Administrator and perform these steps. If you do not, the settings may not be saved.
Dymo Printer SetupBefore following the steps listed below, install the Dymo printer driver according to the installation instructions that came with your printer. After installation is complete, configure the printer and then select the correct paper size and orientation using the steps below.
To configure a Dymo printer for ACS OnDemand1. On the OnDemand desktop, double-click the OnDemand Printing icon.2. From the File menu, select File.3. From Printer, select Configure Client Printer.4. Click Next.5. From the list, select your Dymo printer.6. Click Next.7. From Install Drivers, select Dymo LabelWriter 400.8. Click Next.9. Click Yes to the question “Do you want to print a test page?”10. Click Next.11. Click Finish.
To select Dymo paper size and orientation for ACS OnDemand1. On the OnDemand desktop, double-click the OnDemand Printing icon.2. From the File menu, select File.3. From Printers, select Configure Client Printer and then your Dymo printer.4. Click Preferences.5. From Paper Layout, select Landscape.6. From Paper Size, select 2.25 x 4.00-(5.71cm x 10.16cm).7. Click OK.8. Click Finish.

33
Appendix C
Zebra Printer Setup
After installing your Zebra® printer, there is some additional setup you must complete before printing badges in Checkpoint. Setup steps for locally installed ACS and ACS OnDemand™ users are different, so make sure you refer to the appropriate area of information.
ACS (Locally Installed)If your ACS is locally installed, refer to the following information about your Zebra printer.
If you are using Windows Vista™, log on to each workstation as the Administrator and perform these steps. If you do not, the settings may not be saved.
Zebra Printer SetupBefore following the steps listed below completing this procedure, install the Zebra printer driver according to the installation instructions that came with your printer. After installation is complete, follow these steps to finish the setup process.
To set up a Zebra printer for ACS1. From the Windows task bar, click Start.2. Click Printers & Faxes.3. Right-click on your Zebra printer and select Properties.4. On the General tab, click Printing Preferences.5. On the Document tab, change the Paper Layout to Landscape.6. Change the Paper Size to 2.25 x 4.00 (5.71cm x 10.16cm).7. Click Apply.8. Click OK.9. On the Advanced tab, click Printing Defaults.10. On the Document tab, change the Paper Layout to Landscape.11. Change the Paper Size to 2.25 x 4.00 (5.71cm x 10.16cm).
ACS Checkpoint Implementation Guide
34
12. Click Apply.13. Click OK on the next two windows.
ACS OnDemandIf your ACS is hosted by OnDemand, refer to the following information about your Zebra printer.
If you are using Windows Vista™, log on to each workstations as the Administrator and perform these steps. If you do not, the settings may not be saved.
Zebra Printer SetupBefore following the steps listed below, install the Zebra printer driver according to the installation instructions that came with your printer. After installation is complete, configure the printer and then select the correct paper size and orientation using the steps below.
To configure a Zebra printer for ACS OnDemand1. On the OnDemand desktop, double-click the OnDemand Printing icon.2. From the File menu, select File.3. From Printers, select Configure Client Printer.4. Click Next.5. From the list, select your Zebra printer.6. Click Next.7. From Install Drivers, select Zebra L42844-Z8. Click Next.9. Click Yes to the question “Do you want to print a test page?”10. Click Next.11. Click Finish.
To select Zebra paper size and Orientation for ACS OnDemand1. On the OnDemand desktop, double-click the OnDemand Printing icon.2. From the File menu, select File.3. From Printers, select Configure Client Printer and then your Zebra printer.4. Click Preferences.5. From Paper Layout, select Landscape.6. From Paper Size, select 2.25 x 4.00-(5.71cm x 10.16cm)7. Click OK.8. Click Finish.