AC TREADMILL INSTRUCTION MANUAL · [Do not use attachments not authorized by the manufacturer....
34
AC TREADMILL INSTRUCTION MANUAL
Transcript of AC TREADMILL INSTRUCTION MANUAL · [Do not use attachments not authorized by the manufacturer....

AC TREADMILL INSTRUCTION MANUAL

INDEX I. TREADMILL FEATURES ................................................... 1
II. IMPORTANT SAFETY PRECAUTIONS ........................... 3 Grounding instructions Electrical safety Mechanical safety Protective circuit III. ASSEMBLY INSTRUCTIONS............................................ 5 Tools and accessories Hardware kit content Assembly instruction IV. SETTING UP THE TREADMILL ....................................... 11 Placement of the treadmill Leveling the base Use dedicated circuit V. OPERATING THE TREADMILL ............................... ..... 12 Turn power on Safety tether key and clip Getting on and off the treadmill VI. OPERATING THE CONSOLE .......................................... 13 Display values Console functions Speed adjustments Elevation adjustments Pulse function Pause function End of workout stats Unit conversion - metric to English VII. WORKOUT PROGRAMS ................................................ 19 Quick start Speed programs Elevation programs Target training programs Heart rate control programs Fitness test program VIII. MAINTENANCE................................................................. 23 Cleaning Lubricating the deck Running belt centering adjustment Running belt tensioning adjustment IX. TROUBLE SHOOTING .................................................... 25 When to call for help Trouble shooting guide Error codes
Owner's Manual

Owner's Manual 1
Water bottle holder.
Built- in fan keeps user cool and refreshedduring training.
User-friendly console design with text messages makes customizing your workouts easy. Big LED and dot matrix display windows for real time feed back of all workout stats.
Horizontal handle bar ergonomically designed for the most comfortable hand position.
Contact heart rate sensor hand grips to check your heart beat. Treadmill also features wireless telemetry heart rate monitoring.
Side landing or side rail.
Running belt adjustment to adjust belt tension or to center the running belt.
Leveler to adjust in case of uneven floor.
Oversize running surface for the most comfortable workout.
Safety key-treadmill will not activate unless the safety key is secured in place.
I. TREADMILL FEATURES
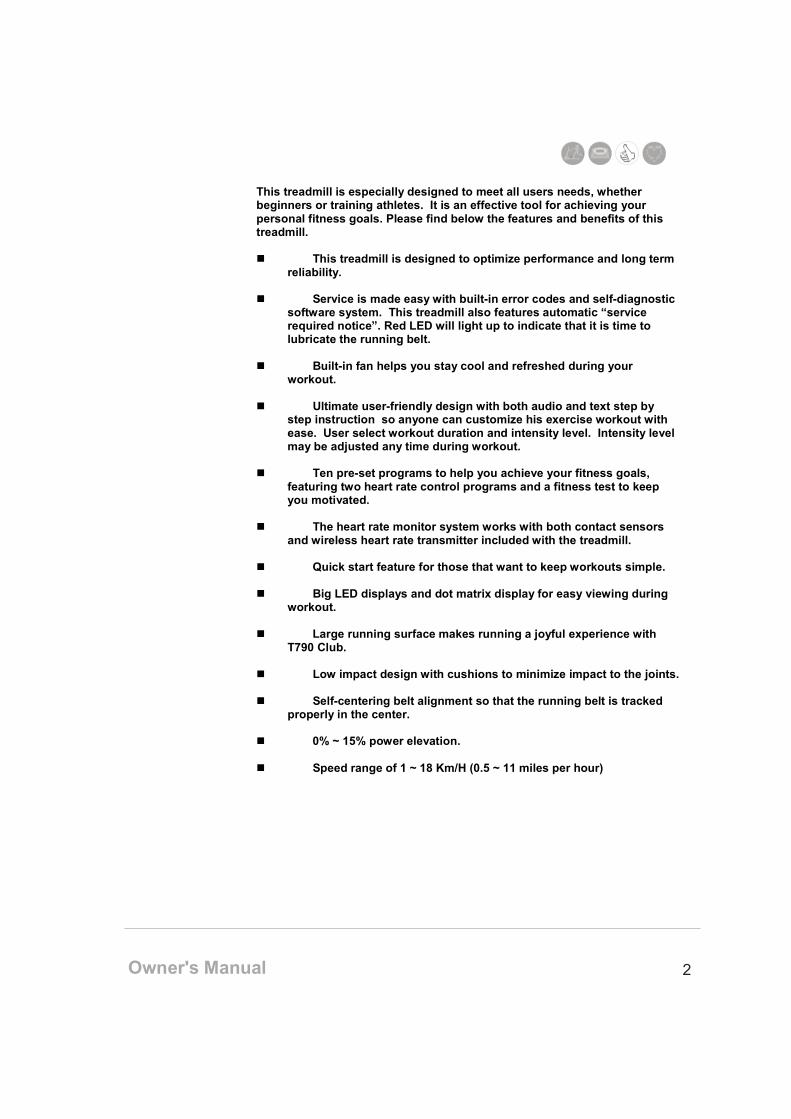
This treadmill is especially designed to meet all users needs, whether beginners or training athletes. It is an effective tool for achieving your personal fitness goals. Please find below the features and benefits of this treadmill. � This treadmill is designed to optimize performance and long term
reliability. � Service is made easy with built-in error codes and self-diagnostic
software system. This treadmill also features automatic “service required notice”. Red LED will light up to indicate that it is time to lubricate the running belt.
� Built-in fan helps you stay cool and refreshed during your
workout. � Ultimate user-friendly design with both audio and text step by
step instruction so anyone can customize his exercise workout with ease. User select workout duration and intensity level. Intensity level may be adjusted any time during workout.
� Ten pre-set programs to help you achieve your fitness goals,
featuring two heart rate control programs and a fitness test to keep you motivated.
� The heart rate monitor system works with both contact sensors
and wireless heart rate transmitter included with the treadmill. � Quick start feature for those that want to keep workouts simple. � Big LED displays and dot matrix display for easy viewing during
workout. � Large running surface makes running a joyful experience with
T790 Club. � Low impact design with cushions to minimize impact to the joints. � Self-centering belt alignment so that the running belt is tracked
properly in the center. � 0% ~ 15% power elevation. � Speed range of 1 ~ 18 Km/H (0.5 ~ 11 miles per hour)
2 Owner's Manual

II. IMPORTANT SAFETY PRECAUTIONS
When using an electrical product, basic precautions should always be followed. Read all instructions before using this treadmill.
GROUNDING INSTRUCTIONS This product must be grounded! Proper grounding provides a path of least resistance for electrical current if treadmill should malfunction or breakdown. This is to reduce the risk of electrical shock. This product is equipped with a cord having an equipment-grounding conductor and a grounding plug. This plug must be plugged into an appropriate outlet that is properly installed and grounded in accordance with local codes and ordinances.
DANGER! Improper connection of the equipment-grounding conductor can
result in a risk of electric shock. Check with a qualified
electrician or service person if you are in doubt as to whether the
product is properly grounded. Do not modify the plug provided
with the product – if it will not fit the power outlet, have a proper
outlet installed by a qualified electrician.
ELECTICAL SAFETY
WARNING! Connect this unit to a properly grounded outlet only.
DANGER! Improper connection of the equipment-grounding conductor can result in a risk of electric shock. Check with a qualified electrician or service person if you are in doubt as to whether the product is properly grounded. Do not modify the plug provided with the product if it will not fit the power outlet, have a proper outlet installed by a qualified electrician.
3 Owner's Manual

ELECTICAL SAFETY To reduce the risk of burns, fire, electrical shock, or injury to persons, take the following precautions.
� Do not use the treadmill if the unit is wet or the plug or cable is damaged or the treadmill is not working properly.
� Keep the power cable and plug away from heated surfaces. � Never place the power cord under carpeting or place any object on top of
the power cord. � Use only the power cord provided with this treadmill. � To disconnect, turn the switch to the off position, then remove the plug from
the outlet. This exercise equipment is designed and built for optimum safety. However, certain precautions always apply whenever you operate any exercise equipment. Be sure to read the entire manual before assembly and operation of this machine. Also, please note the following safety precautions.
MECHANICAL SAFETY � Before you start to exercise, make sure the unit functions correctly. To
maintain the safety level of the exercise equipment, do not use a faulty device.
� Replace defective components immediately and/or keep the equipment out of use until repair.
� Do not use attachments not authorized by the manufacturer.
� Never drop or insert any object into any opening. � Only one person may use the treadmill at a time. � Never activate the speed when someone else is standing on the treadmill.
PROTECTIVE CIRCUIT To protect your safety, this treadmill is designed and equipped with run away protection. If the admissible operating speed of the treadmill has exceeded or fallen below the console setting, the protective circuit will shut off the treadmill to protect user and equipment. Reset the treadmill by turning the power switch on/off will return the treadmill back to normal operating mode.
4 Owner's Manual

Owner's Manual 5
III. ASSEMBLY INSTURCTIONS
TOOLS AND ACCESSORIES
6mm Hex wrench
1 For assembling steps 1&2
Description Qty When to use
Silicon (100ml) 1 For deck lubrication
6mmT wrench
1 For adjusting running belt tension
Wireless heart rate transmitter and chest strap
1 For wireless pulse transmission
Safety key 1 For operating treadmill
Power cable 1 For operating treadmill
Phillips screwdriver
1 For assembling step 4
13mm box end wrench
1 For assembling step 3

6 Owner's Manual
4
4
B
A 4
G 3
F 2
7
D 4
# Description Qty When to use
H
HARDWARE KIT CONTENT
Bolt, dome head, M8x80mm
Step 1
Washer, flat, M8x1.6t
12 Step 1 x 4pcs Step 2 x 5pcs Step 3 x 3pcs
C Bolt, dome head,
M8x60mm Step 1
Washer, curve, M8x1.5t
Step 1
Screw, dome head,
M8x15mm Step 2 E
Washer, star, M8x0.8t
Step 2
Nut, hex, nylon, M8x7.8t
Step 3
Self tapping screw, dome head,
M6x15mm
Step 4
Screw, dome head,
M6x15mm 4I Step 4

7
J
C D
B A K
L Detail view
Detail view
L
Pin
Use hex wrench to perform this assembly procedure.
1. Connect the cables (K, L) before you assemble the upright post (J) to base frame (M). 2. Align the upright post to the two pins on base frame before gently set it down. 3. Lightly secure the upright post to base frame with four M8x80mm bolts (A) and four flat washers (B) in the center of the post. 4. Then secure the round tubes on both sides of the center post to base frame with two M8x60mm bolts (C) and two curve washers (D) on each side. 5. Tighten the eight bolts on the upright post after they are in position.
Take care that the cables do not get trapped or pinched.
NOTE
1. ASSEMBLE THE UPRIGHT POST
STEP BY STEP INSTRUCTION
Owner's Manual

2. ASSEMBLE THE CONSOLE BASE
8
E F
O
N
K
J
B
E
Use hex wrench to perform this assembly procedure. 1. Secure console base (N) to the upright post (J) with five M8x15mm bolts (E) and five flat washers (B) from the bottom and secure two M8x15mm bolts (E) and two star washers (F) from the top. Be careful not to pinch or damage the cables. 2. Tighten all bolts as tightly as possible. 3. Do not pull on the cable K. Carefully connect the cables (K) and (O). Push down the cables so that they lay inside the plastic.
Owner's Manual

P
Q
O
R
B
G
3. ASSEMBLE THE CONSOLE
Use 13mm box end wrench to perform this assembly procedure. 1. Do not pull on the cable O. Carefully connect the cables (O) and (Q). Push down the cables so that they lay inside the plastic. Then gently set the console (P) on the console base (R) by aligning the three pins. Be careful not to pinch or damage the cables. 2. Once you have the console in place, secure the console with three flat washers (B) and three nylon nuts (G). Tighten the three nuts on the console base after they are in position.
Owner's Manual 9

10 Owner's Manual
4. ASSEMBLE THE FRONT MOTOR COVER
M
H
S
I
Use Philips screwdriver to perform this assembly procedure. 1. Turn on the treadmill to ensure that all connections are connected properly by checking that the console display functions properly. 2. Then secure the front motor cover (S) to base frame (M) with four screws (H) along the top and four self-tapping screws (I) along the bottom. 3. Tighten the eight screws on the front motor cover after they are in position.

CAUTION
IV. SETTING UP THE TREADMILL
PLACEMENT OF THE TREADMILL
To optimize user safety, please take the following precautions when selecting location for the treadmill. � Do not place the treadmill outdoors. � Do not place the treadmill near water or in high moisture content
environment. � Make sure power cord is not in the path of heavy traffic. � Locate the treadmill at least 3 feet from walls or other equipment or
furniture. LEVELING THE BASE It is important that you place the treadmill on a firm level surface. If ground is uneven, you may level the treadmill with levelers located at the end of the deck. Make sure the rear of the deck is not higher than the front. USE DEDICATED CIRCUIT The outlet selected should be a dedicated circuit. It is particularly important that no sensitive electrical equipment, such as computer or TV, share the same circuit.
Make sure the running deck is level to the ground. If the deck is positioned so that you are running downhill, it would cause premature damage to
the electronic system.
Owner's Manual 11

V. OPERATING THE TREADMILL
TURN POWER ON The On/Off switch for the treadmill is located next to the power supply cord at the front of the motor cover. Flip this switch to the "ON" position. The switch will become lighted to indicate that the power is on.
SAFETY TETHER KEY AND CLIP The safety key is designed to cut the main power to the treadmill should you fall. Therefore, the safety key is designed to bring the treadmill to an immediate stop. At high speeds, it may be uncomfortable and somewhat dangerous to come to a complete stop immediately. So, use the safety key as emergency stop only. To bring the treadmill to a complete stop safely and comfortably, use the red STOP button. Your treadmill will not start unless the safety key is properly inserted into the safety key holder. The other end of the safety key should be securely clipped to your clothing so that should you fall, the safety key would become disconnected from the treadmill and stop the treadmill immediately to prevent injury to the person. Pull on the safety key clip to make sure it will not come off your clothing.
GETTING ON AND OFF THE TREADMILL Handle with care when getting on or off the treadmill. Try to use the handle bars while getting on or off. While you are preparing to use the treadmill, do not stand on the running belt. Straddle the running belt by placing your feet on both side rails of the treadmill deck. Place your feet on the belt only after the belt has begun to move at a consistent speed. During exercise, keep your body and head facing forward at all times. Never attempt to turn around on the treadmill while the running belt is still moving. When you have finished exercising, stop the treadmill by pressing the red STOP button. Wait until the treadmill comes to a complete stop before attempting to get off the treadmill.
CAUTION
WARNING
CAUTION! BEFORE BEGINNING ANY EXERCISE PROGRAM, ALWAYS CONSULT YOUR PHYSICIAN. IF YOU EXPERIENCE CHEST PAINS, NAUSEA, DIZZINESS OR SHORTNESS OF BREATH, STOP EXERCISING AND CONSULT YOUR PHYSICIAN BEFORE CONTINUING.
Never use this treadmill without first securing the safety tether clip to your clothing.
Never start the treadmill at a running speed and attempt to get on while it is
moving fast.
12 Owner's Manual

Owner's Manual 13
DISPLAY VALUES
Pulse Elevation (%) Distance (Miles) Distance (Km) Speed (Miles/H) Speed (km/H) Time Calories
Display
XXX XX
XX.X XX.X XX.X XX.X XX:XX XXX
Resolution
40-240
0-15 00.1-99.0 00.1-99.0 00.5-11.0 01.0-18.0 00:01-99:00 1-999
Range
1 1%
0.1
0.1
0.1
0.1
00.01 1
Increment
Left top LED window Left bottom LED window Right top LED window Right top LED window Right bottom LED window Right bottom LED window LCM LCM
Display windows
Service required signal Speaker on/off Pulse indicator
Elevation adjustment buttons Quick start or START
Dot matrix display window
ENTER 09 numebers or Preset programs ~ Speed adjustment buttons
Fan on/off
Pause or Stop
Message center
VI. OPERATING
THE CONSOLE

14 Owner's Manual
Increase elevation grade by 1% increment Functional even when the running belt is not in motion
Decrease elevation grade by 1% incrementFunctional even when the running belt is not in motion
Activates treadmill Running belt starts moving at 1 Km/H or 0.5 Mi/H
Setup mode - confirms program selected Setup mode - confirms value input
Stop running belt movement and pause workout End workout Skips current action to the next step
Basic function buttons
Elevation up
Elevation down
Quick start Start
Enter
Speed increase
Speed decrease
Pause Stop
Increase speed by 0.1Km/H, hold to ramp up Will not function when running belt is not in motion
Decrease speed by 0.1Km/H, hold to ramp down Will not function when running belt is not in motion

Advanced function buttons
Speed interval
Owner's Manual 15
Ten program options during workout selection.
Numerical input during program setup
Direct speed control during workout
Example: Press 1 and 2 for changing speed to 12Km/H
Aerobic
Weight loss
Hill climb
Target by time
Target by distance
Target by calories
HRC by speed
Fitness test
HRC by elevation
Speed program - automatically adjust by speed only
Speed program - automatically adjust by speed only
Elevation program - automatically adjust by elevation only
Elevation program - automatically adjust by elevation only
Target setting program
Target setting program
Target setting program
Target heart rate control program - automatically adjust by elevation only
Fitness test program
Target heart rate control program - automatically adjust by speed only

Additional feature buttons
Speaker ON/OFF
Service required indicator
Pulse indicator
Text message center
Turns speaker on or off Speaker light on indicates audio instruction is in operation
Pulse light on indicates pulse signal is picked up
Light will flash to the rate of heart beat
Speed and elevation workout mode - displays program profile Target training workout mode - displays target training value HRC workout mode - displays current heart rate value Pause mode - indicates time remaining
Setup mode - step by step instruction to set up workout routine Workout mode - displays time and calories valuesWorkout mode - displays messages, such as "speed will change" End of workout - displays total time, total distance, total calories, and average speed
Indicators and displays
Fan ON/OFF Turns fan on or offFan light on indicates fan is in operation
Tool light on indicates deck lubrication is required
Other maintenance and routine check should also be performed
Dot matrix display
16 Owner's Manual

CONSOLE FUNCTIONS
SPEED ADJUSTMENT There are two ways to adjust speed during workout. SPEED+and SPEED_ will adjust speed by increments of 0.1Km/H. Or you may hold these buttons to ramp up or down. If the speed adjustment increment is large, it is easier to use the number buttons which function as direct speed control buttons during workout. Example: to change from 3 Km/H to 10 Km/H, we could just press the number button 1 and 0. Or we could press and hold the SPEED+ button until the speed display shows 10 Km/H. ELEVATION ADJUSTMENT
For safety reasons, elevation is designed to be manually adjusted only. At no time will treadmill automatically adjust elevation except during one of the following four program workouts based on changing elevation: WEIGHT LOSS, HILL CLIMB, HRC BY ELEVATION, FITNESS TEST. Elevation may be adjusted even while the running belt is not moving. However, during the program setup mode, elevation will not be adjustable.
PULSE FUNCTION This treadmill features wireless heart rate monitoring, the most advanced technology to date for accurate read out of your heart beat. For convenience, this treadmill is also designed to pick up heart rate info via the contact sensors located on the side handlebars. Treadmill will look for wireless pulse signal first. If no wireless pulse signal is picked up, then treadmill will look for the signal from contact sensors. To use the wireless pulse monitoring system, you must wear the heart rate transmitter chest strap. Place the contact surface next to your skin directly under your heart to pick up the pulse signals from your heart. There is a heart rate transmitter strap included with this treadmill. To use the contact sensors, place your hands gently but firmly around the contact sensors on the handlebars. Movements in the hands may cause difficulty for the treadmill to pick up the signal properly. When signal is picked up, the LED light next to the pulse display window on the upper left hand corner of the console will light up and flash to the rate of your heart beat. Please note that some fibers used in clothes (e.g. polyester, polyamide) create static electricity which may prevent reliable heart rate measurement. Also note that mobile phone, television and other electrical appliances form an electro-magnetic field around them, which may also cause problems in heart rate measurement.
17 Owner's Manual
Owner's Manual 18
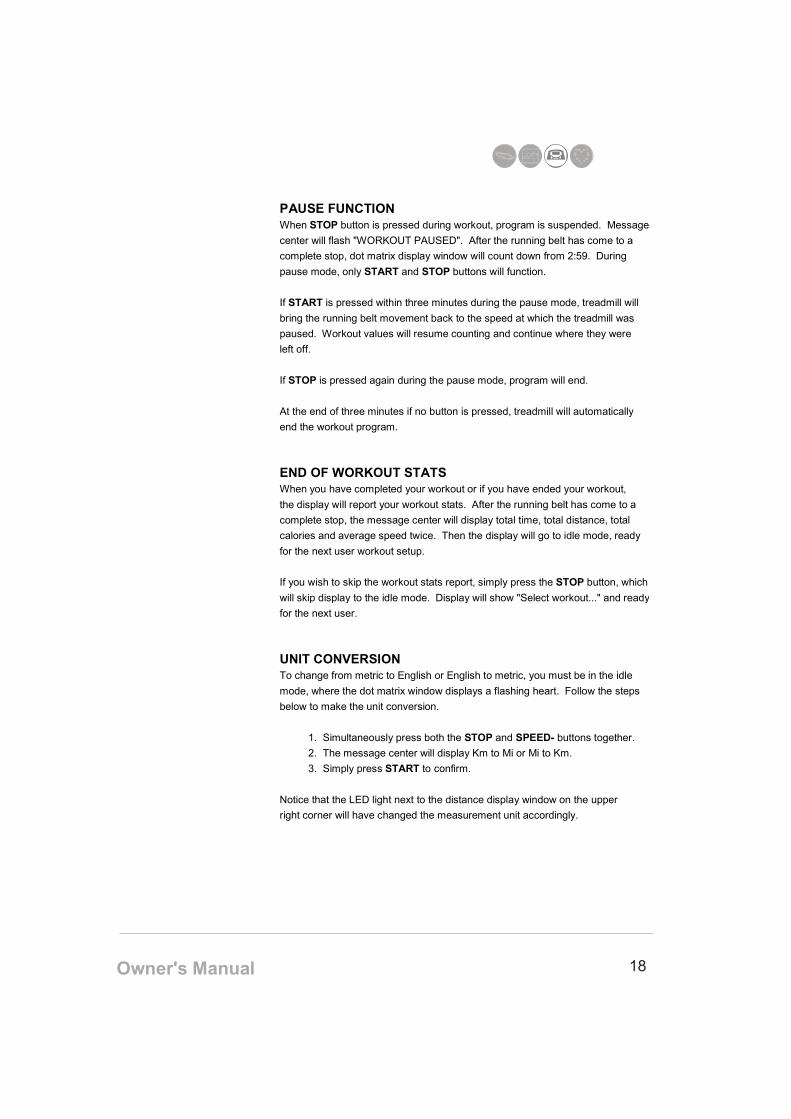
PAUSE FUNCTION
When STOP button is pressed during workout, program is suspended. Message
center will flash "WORKOUT PAUSED". After the running belt has come to a
complete stop, dot matrix display window will count down from 2:59. During
pause mode, only START and STOP buttons will function.
If START is pressed within three minutes during the pause mode, treadmill will
bring the running belt movement back to the speed at which the treadmill was
paused. Workout values will resume counting and continue where they were
left off.
If STOP is pressed again during the pause mode, program will end.
At the end of three minutes if no button is pressed, treadmill will automatically
end the workout program.
END OF WORKOUT STATS
When you have completed your workout or if you have ended your workout,
the display will report your workout stats. After the running belt has come to a
complete stop, the message center will display total time, total distance, total
calories and average speed twice. Then the display will go to idle mode, ready
for the next user workout setup.
If you wish to skip the workout stats report, simply press the STOP button, which
will skip display to the idle mode. Display will show "Select workout..." and ready
for the next user.
UNIT CONVERSION
To change from metric to English or English to metric, you must be in the idle
mode, where the dot matrix window displays a flashing heart. Follow the steps
below to make the unit conversion.
1. Simultaneously press both the STOP and SPEED- buttons together.
2. The message center will display Km to Mi or Mi to Km.
3. Simply press START to confirm.
Notice that the LED light next to the distance display window on the upper
right corner will have changed the measurement unit accordingly.

QUICK START Once the power is on
and the safety tether
key is secured in place,
simply press the start
button, and after three
second count down
treadmill will activate
and maintain the
running belt at 1Km/H.
VII. WORKOUT PROGRAMS
QUICK START
Once the power is turned on and the safety key is secured in place, simply
press the green quick START button. Treadmill will activate at 1.0 Km/H.
You may increase or decrease speed or elevation at any time during your
workout. To end workout, simply press the red STOP button to stop
the treadmill. During workout, time will count up.
1. Turn power on
2. Check safety key secured to treadmill and clip secured to user
clothing
3. Press START to begin workout
SPEED PROGRAMS
Once the power is turned on and the safety key is secured in place, you
may press the number button 0 or 1 to choose one of the two pre-set
speed programs, SPEED INTERVAL or AEROBIC. Message center will
prompt user to set up workout duration, and intensity level based on max
speed value. Once you have made your selection, press START key to
activate the treadmill.
During workout, treadmill will automatically adjust speed according to
pre-set program setting. User may still be able to adjust speed if the
preset is not appropriate. The entire remaining program will scale up or
down accordingly. During workout, user may adjust elevation level at will.
To end workout, simply press the red STOP button to stop the treadmill.
During workout, time counts down from target workout time.
1. Turn power on
2. Check safety key secured to treadmill and clip secured to user clothing
3. Press 0 for SPEED INTERVAL program or press 1 for AEROBIC program
4. Display will show program selected
5. Press ENTER to confirm
6. Use numeric buttons to input workout duration
7. Press ENTER to confirm
8. Use numeric buttons to input intensity level based on maximum speed
9. Press ENTER to confirm
10. Press START to begin workout
19 Owner's Manual

ELEVATION PROGRAMS Once the power is turned on and the safety key is secured in place, you may press the number button 2 or 3 to choose one of the two pre-set elevation programs, WEIGHT LOSS or HILL CLIMB. Message center will
prompt user to set up workout duration, and intensity level based on max elevation value. Once you have made your selection, press START key to
activate the treadmill. During workout, treadmill will automatically adjust elevation according to pre-set program setting. User may still be able to adjust elevation if the preset is not appropriate. The entire remaining program will scale up or down accordingly. During workout, user may adjust speed level at will. To end workout, simply press the red STOP button to stop the treadmill.
During workout, time counts down from target workout time. 1. Turn power on 2. Check safety key secured to treadmill and clip secured to user clothing 3. Press 2 for WEIGHT LOSS program or press 3 for HILL CLIMB program
4. Display will show program selected 5. Press ENTER to confirm
6. Use numeric buttons to input workout duration 7. Press ENTER to confirm 8. Use numeric buttons to input intensity level based on maximum elevation 9. Press ENTER to confirm 10. Press START to begin workout
TARGET TRAINING PROGRAMS Users have the option to customize workout based on setting training targets for time, distance, or calories. Once the power is turned on and the safety key is secured in place, you may press the number button 4 to set training target based on time or 5 to set training target based on distance or 6 to set training target based on calories. Message center will prompt user to set up workout target value. Once you have made your selection, press START key to activate the
treadmill. During workout, users may adjust speed and or elevation at will. To end workout, simply press the red STOP button to stop the treadmill. During workout, target training value will be displayed on the dot matrix display window. 1. Turn power on 2. Check safety key secured to treadmill and clip secured to user clothing 3. Press 4 to set training target based on time, press 5 to set training target based on distance, or press 6 to set training target based on calories
4. Display will show program selected 5. Press ENTER to confirm
6. Use numeric buttons to input training target value 7. Press ENTER to confirm
8. Press START to begin workout
20 Owner's Manual

HEART RATE CONTROL PROGRAMS Users have the option to customize their heart rate control programs based on their target heart rate value. Once the power is turned on and the safety key is secured in place, you may press the number button 7 to select HRC program adjust by speed or number button 8 to select HRC program adjust by elevation.
Message center will prompt user to set up workout step by step. Once you have made your selection, press START button to activate the treadmill.
Users also have the option to set up their warm up speed and warm up time. During warm up and cool down, target heart rate training function will not be in operation. Only during workout will heart rate be maintained at target value. After the warm up mode, treadmill will automatically adjust by elevation or speed (depending on which program is chosen) to reach and maintain the user's target heart rate. During workout mode, users may still be able to adjust speed or elevation. During workout, time counts down from total time: warm up + workout + cool down. At the end of the workout time, treadmill will automatically go into cool down mode. Cool down mode is set for 4 minutes. In the first two minutes, speed and elevation will be reduced by 50%. The last two minutes, speed and elevation will be reduced by another 50%. To end workout, simply press the red STOP button to stop the treadmill. To use the heart rate control programs, user must wear wireless transmitter chest strap. Signals from contact heart rate sensors will not be used as a basis to maintain your target heart rate during heart rate control programs. To determine your best target heart rate, please refer to the section on calculate your target heart rate on the next page. 1. Turn power on 2. Check safety key secured to treadmill and clip secured to user clothing 3. Press 7 to select HRC program adjust by speed changes or press 8 to select HRC program adjust by elevation changes
4. Display will show program selected 5. Press ENTER to confirm
6. Use numeric buttons to input your age 7. Press ENTER to confirm 8. Use numeric buttons to input workout time 9. Press ENTER to confirm
10. Use numeric buttons to input target heart rate 11. Press ENTER to confirm 12. Use numeric buttons to input warm up time 13. Press ENTER to confirm
14. Use numeric buttons to input warm up speed 15. Press ENTER to confirm
16. Press START to begin workout
21 Owner's Manual
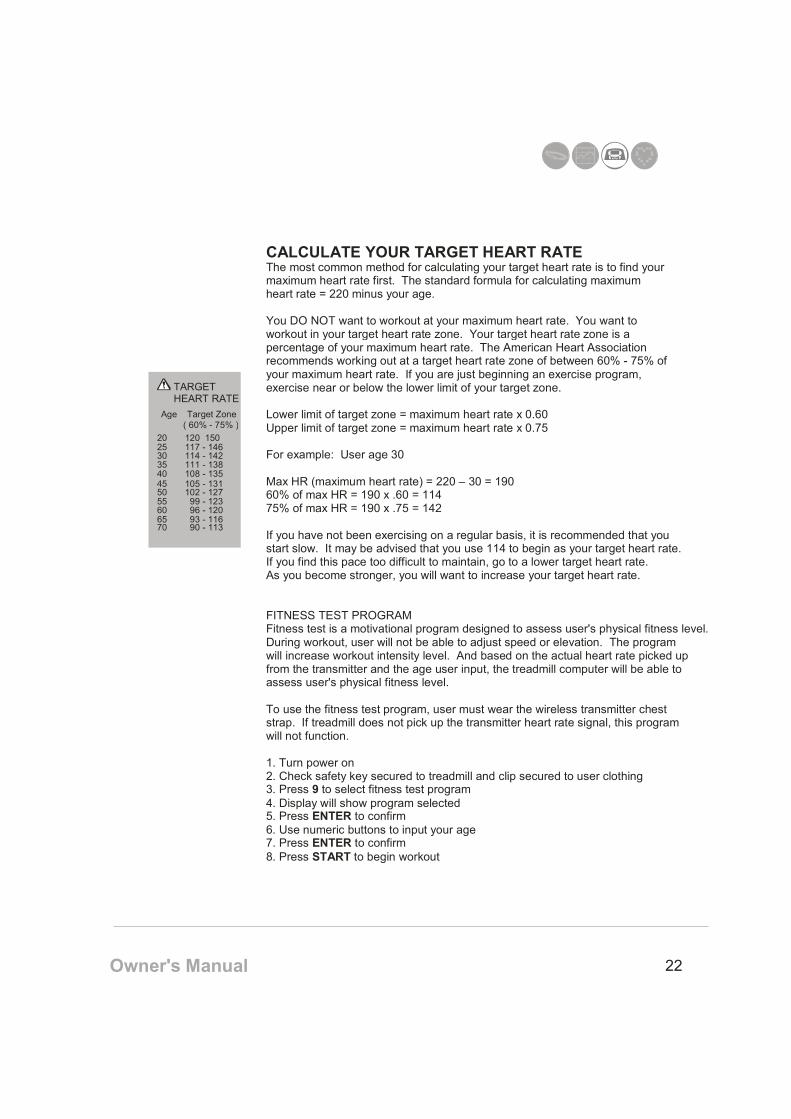
CALCULATE YOUR TARGET HEART RATEThe most common method for calculating your target heart rate is to find your maximum heart rate first. The standard formula for calculating maximum heart rate = 220 minus your age. You DO NOT want to workout at your maximum heart rate. You want to workout in your target heart rate zone. Your target heart rate zone is a percentage of your maximum heart rate. The American Heart Association recommends working out at a target heart rate zone of between 60% - 75% of your maximum heart rate. If you are just beginning an exercise program, exercise near or below the lower limit of your target zone. Lower limit of target zone = maximum heart rate x 0.60 Upper limit of target zone = maximum heart rate x 0.75 For example: User age 30 Max HR (maximum heart rate) = 220 – 30 = 190 60% of max HR = 190 x .60 = 114 75% of max HR = 190 x .75 = 142 If you have not been exercising on a regular basis, it is recommended that you start slow. It may be advised that you use 114 to begin as your target heart rate. If you find this pace too difficult to maintain, go to a lower target heart rate. As you become stronger, you will want to increase your target heart rate. FITNESS TEST PROGRAM Fitness test is a motivational program designed to assess user's physical fitness level. During workout, user will not be able to adjust speed or elevation. The program will increase workout intensity level. And based on the actual heart rate picked up from the transmitter and the age user input, the treadmill computer will be able to assess user's physical fitness level. To use the fitness test program, user must wear the wireless transmitter chest strap. If treadmill does not pick up the transmitter heart rate signal, this program will not function. 1. Turn power on 2. Check safety key secured to treadmill and clip secured to user clothing 3. Press 9 to select fitness test program
4. Display will show program selected 5. Press ENTER to confirm
6. Use numeric buttons to input your age 7. Press ENTER to confirm
8. Press START to begin workout
TARGET HEART RATE
Age Target Zone
( 60% - 75% )
20 120 150 25 117 - 146
35 111 - 138 40 108 - 135 45 105 - 131 50 102 - 127 55 99 - 123 60 96 - 120 65 93 - 116 70 90 - 113
30 114 - 142
22 Owner's Manual

NOTE A well lubricated
deck will optimize treadmill performance and user safety.
VIII. MAINTENANCE
Owner's Manual
23
The following maintenance procedures should be performed on a regular basis. Frequency of the routine check up should depend on usage level. When the service indicator lights up on the console, it is a reminder that you need to lubricate the deck and perform other maintenance procedures if you had not done them recently. Maintenance and check-up list: 1. Cleaning 2. Deck lubrication 3. Check all nuts and bolts are secure 4. Check all functions operate normally 5. Check for any damaged components
CLEANING Never use solvents on any part of the treadmill as it will damage surface finish. Remove dust on the treadmill with vacuum or slightly damp cloth. Clean the floor with vacuum periodically will help to prolong the treadmill product life.
LUBRICATING THE DECK A well lubricated deck will ensure high performance of your treadmill and reduce the level of normal wear and tear to important components. This treadmill has been pre-lubed at the factory. However, for optimal performance, the running deck may require periodic lubrication. You may adjust the frequency of the lubrication based on the treadmill usage level. To check the lubrication level, lift the running belt, and put your hand as far into the center of the belt as you can reach. If your hand shows signs of silicone, then it does not need additional lubrication. If the board feels dry and there is very little evidence of silicone, then additional lubrication should be added. To lubricate the deck: 1. Stop running belt so that the seam is located on top and of the deck. 2. Lift running belt. 3. Insert the nozzle between the belt and the deck. 4. Apply silicon from center of the running deck to five inches from the edge of the side rail. Apply the silicon from the front to the rear of the treadmill on each side of the treadmill. 5. To spread the silicon, run the treadmill at speed of 1 Km/H and step gently on the belt from left to right while the treadmill moves slowly. Do this for a few minutes and allow the silicon to soak into the running belt.

CAUTION Over tightening of the belt will severely shorten the life of the belt and may cause further damage to
other components.
TENSION-
TENSION+
24 Owner's Manual
RUNNING BELT CENTERING ADJUSTMENT When you run or walk, you may push off harder with one foot than the other. This will cause the running belt to run off centered. This treadmill is designed and built to ensure proper tracking of the belt so that it is always centered on the deck. Occasionally the belt may need further adjustment to keep it centered. To center the belt, use the enclosed T wrench to adjust the rear roller position. Running belt centering procedure 1. Never turn the bolts more than 1/4 turn at a time. 2. Always tighten one side and loosen the other to prevent over tightening of the belt. 3. Turn on the treadmill. Adjust belt while the treadmill is running at 4 Mi/H (6.4 Km/H) with no person on the running belt. After making the adjustment, walk on the belt for five minutes to test. If belt still slips, repeat the procedure but never turn the bolts more than 1/4 turn at a time. Over tightening the belt can significantly shorten the belt life. If belt is too far to the left side: 1. Turn the left roller bolt 1/4 turn clockwise (tighten) 2. Turn the right roller bolt 1/4 turn counterclockwise (loosen) If belt is too far to the right side: 1. Turn the right roller bolt 1/4 turn clockwise (tighten) 2. Turn the left roller bolt 1/4 turn counterclockwise (loosen)
RUNNING BELT TENSIONING ADJUSTMENT If when you plant your foot on the belt, you can feel a slipping sensation then the belt has stretched and is slipping across the rollers. All belts will stretch over time. This is a normal and common adjustment on any treadmill. To eliminate this slipping, tension both bolts on the rear roller 1/4 turn as shown. Try the treadmill again to check for slipping. Repeat if necessary, but never turn the roller bolts more than 1/4 turn at a time.

WHEN TO CALL FOR HELP This treadmill is designed with user safety as the number one priority. In the event of electrical failure, the treadmill will shut off automatically to prevent user injury and to prevent damage to expensive components such as the motor. When you encounter unusual behavior from the treadmill, simply turn the power switch off and on to reset the treadmill. This should clear incidental errors and ready the treadmill for normal operation again. If after you have reset the treadmill by turning the power switch off and on again, and the treadmill is still not operational and the console displays an error code, then it is time to call your dealer for service.
IX. TROUBLE SHOOTING
TROUBLE SHOOTING GUIDE
Problem Potential Cause Corrections
Treadmill will not start No signal on the console
Running belt slips
Running belt hesitates when stepped on
Running belt is off centered
1. Not plugged in
2. Safety tether key not inserted
3. On/Off switch on OFF
4. Connections loose or damaged
1. Running belt not tight enough
1. Insufficient lubrication
2. Running belt too tight
1. Running belt tension not even across the rear roller
1. Plug into grounded outlet.
2. Insert safety tether key into console.
3. Turn on/off switch to ON
4. Make sure connections aregood
1. Adjust running belt tension
1. Apply silicone lubricant
2. Adjust running belt tension
1. Center the running belt
25 Owner's Manual
26 Owner's Manual
ERROR 3 Safety Tether Key Error Error 3 occurs when safety tether key is not in positive contact with the console. Check for positive contact of the safety key to the console.
ERROR 5 Incline Motor Error This error occurs when the incline motor is not functioning properly. 1. Incline motor is over-loaded or over-heated. Simply wait until the incline motor has returned to normal temperature, then try again. 2. Calibrate the incline motor so that the controller confirms the position of the incline motor again. Sometimes, this will clear error 5. 3. Sensor connection cable or connector has problem. 4. Sensor (Potentiometer) is defective or damaged. 5. Incline motor is damaged. 6. Motor controller circuit is damaged.
ERROR 6 Internal Memory Error Error 6 occurs when console is not able to write and read the internal memory. Internal memory is kept for total mileage and others data. Turn off and on again to clear Error 6. This is not fatal error.
ERROR 10, 11 Communication Error Error 10 and Error 11 occurs when the motor controller and console lose connection. It will also happen if the signal cable is loose.
ERROR 20 Over Current Error Error 20 occurs when abnormally high current flows to the motor controller. Cool the motor and motor controller for around 30 minutes and check the deck and belt lubrication. If error 20 happens again, call service. If treadmill continues to be used when there is error 20, it will damage the controller and motor permanently.
ERROR 21 Over Heated Error Error 21 occurs when the motor controller is over heated. Cool the treadmill more than 1 hour and try again. Please check deck and belt condition if error 21 happens again. If treadmill continues to be used when there is error 21, it will damage the controller and motor permanently.
ERROR 22 High Input Voltage Error 22 occurs when the AC input voltage is too high to operate the treadmill normally. Check the AC input voltage.
ERROR 23 Low Input Voltage Error 23 occurs when the AC input voltage is too low to operate the treadmill normally. Check the AC input voltage.

Note :
27 Owner's Manual

28
Note :
Owner's Manual

29
Note :
Owner's Manual

Owner's Manual 30
Note :

31
Note :
Owner's Manual

2004 Healthstream Taiwan Inc.
Read and follow all instructions in this manual. Retain this instruction manual for future reference.