A TEACHER'S REFERENCE GUIDE TO POWER TOOL SAFETY
26
Presented by the manufacturer members of the A TEACHER’S REFERENCE GUIDE TO POWER TOOL SAFETY DANGER WARNING CAUTION ! ! !
Transcript of A TEACHER'S REFERENCE GUIDE TO POWER TOOL SAFETY

A TEACHER’SREFERENCE GUIDETO POWER TOOLSAFETY
DANGERWARNINGCAUTION
Presented by the manufacturer members of the
1300 SUMNER AVENUE • CLEVELAND, OHIO 44115-2851 • 216-241-7333 • FAX: 216-241-0105Revision 11/07 – 5m
THOMAS & ASSOCIATES, INC. EXECUTIVE MANAGER
A TeAcher’sreference GuideTo Power ToolsAfeTy
Danger
Warning
Caution
!!!

Safety, within the shop and beyond, is an ongoing concern for every vocational instructor. Teaching young people to respect power tools and take hazards and safety procedures to heart represents a continual challenge and a serious responsibility. Some students come to class having never before seen a power tool. Others have received poor instruction or downright bad advice and mistakenly think they “know what they are doing.” It’s essential that both groups gain from you a solid foundation in modern power tool safety practices that they can use in class and throughout their lives. The purpose of this guide is to aid teachers in this important work by providing them with a package of power tool safety information that can be easily transmitted to students through DVD’s, reading, discussions, and activities. Power tool safety information provided in this comprehensive kit includes:
A TEACHER’S REFERENCE GUIDE TO POWER TOOL SAFETY -lesson plans, student activities, quizzes, support materials, and references to additional information on each power tool category. SAFETY IS SPECIFIC – a straight forward compilation of rules and safe practices for each category of tools. POWER TOOL ACCIDENTS, THEY CAN BE PREVENTED – a 19 minute DVD with Teacher’s Guide that reviews the general rules for power tool safety. (Available in English or Spanish) CIRCULAR SAW SAFETY – a 25 minute DVD with Teacher’s Guide that recommends safe practices for the use of circular saws. (Available in English or Spanish) MITER SAW SAFETY - a 15-minute DVD which addresses safety procedures when using a miter saw. (Available in English or Spanish) TABLE SAW SAFETY - a 19-minute DVD which addresses proper workspace setup, the basics of making cuts, general safety procedures and proper maintenance. (Available in English or Spanish) THE MR. POWER TOOL SAFETY POSTER that reminds people to prepare for the job, dress for the job and perform the job with SAFETY in mind. POWER TOOL SAFETY – a four page cartoon brochure consisting of recommendations for safe use of portable and stationary power tools on the job or at home. ON THE JOB POWER TOOL MAINTENANCE CHECK LIST – a list of 11 items.
We hope that the Teacher’s Guide and the other materials provided in this kit prove to be a valuable addition to your library of teaching aids. If you need additional copies of any of these materials so each student can have his or her own copy they can be ordered free of charge from PTI using the enclosed form, or by visiting the website.
For more information about PTI and the educational materialsand services we offer, please contact us at:
1300 Sumner Avenue, Cleveland, Ohio 44115-2851Phone: 216-241-7333 • Fax: 216-241-0105
E-mail: [email protected] • URL: www.powertoolinstitute.com
A NOTE TO THE TEACHER

Teaching General Power Tool Safety ..................................................................... 3 Power Tool Safety Terms ....................................................................................... 5 Power Tool Safety Rules ........................................................................................ 8 Teaching Saws I ..................................................................................................... 9 Teaching Saws II .................................................................................................. 11 Teaching Drills, Impact Wrenches and Percussion Tools ................................... 12 Teaching Sanders .................................................................................................. 13 Teaching Grinders................................................................................................. 14 Teaching Routers ................................................................................................. 15 Teaching Jointers, Planers and Shapers ............................................................... 16 Teaching Wood Lathes ........................................................................................ 17 Power Tool Safety Symbols.................................................................................. 18 Student Activities and Quizzes ............................................................................ 19
For more information: The purpose of the Power Tool Institute is to educate the public as to the usefulness and importance of power tools; to encourage high standards of safety and quality control in the manufacture of power tools; and to prepare and distribute information about safe use of power tools. The following is a list of other agencies offering safety guidelines and regulations: Safety Organizations & Agencies National Safety Council www.nsc.org Occupational Safety & Health Agency www.osha.gov Underwriters Laboratories Inc. www.ul.com Electrical Safety Foundation International www.esfi.org CSA International www.csa-international.org National Institute of Occupational Safety and Health www.cdc.gov/niosh U.S.D.A. Extension Services www.csrees.usda.gov Consumer Product Safety Commission www.cpsc.gov Standards Organizations American National Standards Institute www.ansi.org International Electrotechnical Commission www.iec.ch Related Industry Groups Compressed Air and Gas Institute www.cagi.org International Staple, Nail and Tool Association www.isanta.org Unified Abrasives Manufacturers’ Association www.uama.org Outdoor Power Equipment Institute www.opei.org The American Hardware Manufacturers Association www.ahma.org Skills USA www.skillsusa.org National Electric Contractors Association www.necanet.org International Brotherhood of Electrical Workers www.ibew.org National FFA Organization www.ffa.org Battery Recycling Information Portable Rechargeable Battery Association (PRBA) www.prba.org Rechargeable Battery Recycling Corp. (RBRC) www.rbrc.org
CONTENTS

3
Power tools serve us well. They enable us to perform difficult tasks with greater ease and accuracy than most of us could ever hope for without them. However, they demand respect. To avoid accidents, power tool operators must be knowledgeable and thoroughly prepared. Inexperienced, untrained, and unprepared operators can be injured within minutes of attempting to use a power tool. Your teaching will play a critical role in helping your students avoid serious injury now and throughout their lives. Modern power tools are designed to operate safely when used prudently and according to all instructions in the tool’s operator’s manual. Virtually all power tool accidents are preventable. Yet, accidents happen to novices and experienced operators alike. Experienced tool operators get into trouble when they are careless or give in to the temptation to hurry or violate safety rules. Accidents involving novices are most often caused by a lack of necessary safety knowledge and/or respect for what a tool can do. The inexperienced tool operator may fail to identify a potentially dangerous situation. He or she may not recognize, for example, the sound of a saw that is beginning to labor because of a binding or pinching condition on the blade. The knowledgeable operator knows that sound is warning of an impending kickback condition. Your students need to learn such things too. Three of the major causes of power tool injuries are inattention through repetition, an unexpected event, and inexperience or over-confidence.
Inattention Through Repetition Inattention through repetition is most likely to occur at a busy jobsite or in a production shop. Hurrying to beat deadlines increases the risk of accidents and injuries. No matter how competent and confident the operator, he or she must not allow himself or herself to become complacent. Teach your students to pause deliberately after every few repeat operations to refocus
on the task at hand and then proceed with renewed awareness.
Unexpected Events Because most power tools operate at high speeds, when things happen, they tend to happen very quickly. A kickback situation can suddenly hurl a workpiece — or a portable tool itself — at the operator. Fingers might be drawn into the blade in some instances, or the tool may move toward fingers or other body parts that are in the wrong place at the wrong time. Working with fingers too near the blade can result in a wide variety of unpleasant surprises. Giving into distractions such as trying to catch a waste strip moving backward on a table saw after the cut can cause an operator to thoughtlessly move his or her hands into dangerous areas. Unexpected events are more likely to end badly when operators are inexperienced, plan poorly or don’t understand how a particular tool works. For example, attempting to cut, joint, or shape small workpieces without a guard and the use of work helpers (or jigs) can end in disaster. Blades and cutters can mangle fingers when an operator attempts to machine small pieces. Teaching your students how to build and use jigs and fixtures that keep the workpiece under control and hands well away from blades and cutters is essential.
Inexperience and Overconfidence Some people with many years of experience grow accustomed to working with their hands dangerously close to blades and cutters - sometimes without protective guards in place. A sudden grab of the workpiece or a kickback condition can cause fingers or hands to be pulled into the cutter almost instantaneously. Experience, although a good teacher, can lull us into overconfidence. The foolish risks we then become willing to take can inflict very painful lessons on us and our families. Teach your students that risks like these are absolutely not worth it.
TEACHING GENERAL POWER TOOL SAFETY

4
Refer To ... Power Tool Accidents -They Can Be Prevented, 19 minute DVD. Safety Is Specific A Teachers Reference Guide to Power Tool Safety, page 8. On the Job Power Tool Maintenance Check List.
Lesson Suggestion ... Play Safety Cop Objective: To teach students how to prepare themselves, their tools, and their job sites for the safe use of power tools. Materials/Requirements: Teacher’s Video Guide, Power Tool Accidents - They Can Be Prevented DVD, and a well appointed shop environment. What To Do: 1. Review the Teacher’s Guide which accompanies the DVD. 2. Introduce the DVD by instructing the class that it covers four areas for safe use of power tools.
• Safe Work Area • Electrical Safety • Good Personal Work Habits • Proper Use and Care of Tools
3. Encourage the students to look for examples of each while reviewing the DVD. 4. Show the DVD. 5. Review the points made in the DVD. 6. Photocopy the safety rules in Safety Is Specific and the Teacher’s Guide and distribute these to your students. 7. Answer students’ questions and discuss general safety procedures with them. Following this orientation, choose a student to serve as “Safety Cop” at your next working session. He/she will inspect each student’s job site and determine whether or not it is in acceptable condition according to the safety precautions and procedures read and discussed. Allow no one to begin working until the “Safety Cop” and you have inspected and approved the job site. Allow students to knowingly display errors to test the Safety Cop’s expertise. Assign a different student to play “Safety Cop” at each of your working meetings until every student has had a chance.
Power tool safety begins with several basic, universal tenets. Students who learn to apply these can approach any power tool with confidence. Many basic safety rules and terms are summarized on the next three pages. Photocopy these for your students to keep and learn, and/or enlarge them for use as posters in your classroom. To have your students read and understand the words in context, refer them to Safety Is Specific. Train your students to understand that there are many other safety considerations beyond those on the photocopied pages. Remind them to always use good common sense. Information on general power tool use and safety is in your PTI package materials. TheDVD Power Tool Accidents, They Can Be Prevented provides an excellent overview, and therefore, an appropriate starting point.
TEACHING GENERAL POWER TOOL SAFETY
Refer To ... Power Tool Accidents -They Can Be Prevented, 19 minute DVD. Safety Is Specific A Teachers Reference Guide to Power Tool Safety, page 8. On the Job Power Tool Maintenance Check List.

5
Abrasive Wheel (including diamond wheels) – A rotating accessory designed to grind, cut, or remove stock from various materials such as metal or concrete. There are three types of wheels that are most frequently encountered:
Type 1A Wheel (ISO 41) – A disc shaped wheel intended for cutting by the periphery of the wheel.
Type 11 Wheel – A cup shaped wheel intended for grinding by the face of the wheel.
Type 27 Wheel – A saucer/center depressed shaped wheel intended for grinding by its periphery or the face of the wheel.
Amperage (Amps/Rated Amperage) – A measure of the flow of electric current. If you think in terms of water through a hose, amperage would be a measure of water volume flowing through the hose. As it applies to electric power tools, “Rated Amperage” is how many amps the tool uses when tested under a specified condition. Rated amperage is useful in choosing the correct extension cord gauge and length (refer to the tool’s instruction manual.)
Anti-Kickback Device – A device incorporated into some power tools intended to minimize the effects of kickback. (see Kickback)
Anti-Kickback Pawl – A device with teeth intended to permit motion in only one direction and help minimize the effect of kickback. (See “Anti-Kickback Device”)
Blade Guard – See Guard
Chip Shield – An attachment to tools designed to contain wood or metal chips, and sawdust, and help keep them away from the operator.
Clamp – A restraining device used to hold a workpiece in place while you work on it.
Cutter Guard – See Guard.
Double-Insulated (DI) – A form of electrical protection featuring two separate insulation systems to help protect against electrical shock from internal malfunctions. DI tools have no provision for grounding (no third grounding prong), and are equipped with a polarized two-prong plug (See “Polarized Plug”). Double-insulated tools will be marked with a “double square”, or the words “Double-Insulated” on the tool’s rating plate.
Ear Protection – Devices such as ear muffs or ear plugs that reduce the intensity of the noise entering your ear. Ear protection will carry a NIOSH Noise Reduction Rating, or “NRR”, which indicates how much the noise level you experience is reduced (in decibels), when the device is properly used.
Extension Cord – An electric cord used between power tools and outlets to extend the range of the tools. The more amperage your tool uses and the longer the distance, the larger the size of the wire needed in your extension cord (larger wire = smaller gauge).
Eye Protection – Goggles or spectacles intended to protect your eyes. Eye protection should meet the requirements of ANSI Z87.1 (USA) or CSA Z94.3-M88 (Canada) – these products will be marked with “Z87.1” or “Z94.3”. Note: a face shield is not “eye protection” unless used with goggles or spectacles. Face Shield – An impact-resistant shield that helps to protect your face from chips, sparks, small debris, or wire wheel bristles. Face shields should be used only in conjunction with spectacles or goggles. Featherboard – A multiple fingers-like aid, used to firmly hold your workpiece against the fence or table while you're feeding the workpiece through the tool. A device used whenever your hands would otherwise need to pass near the blade or cutter. (See Push Block/Push Stick)
POWER TOOL SAFETY TERMS

6
Fence – A device that helps locate and/or guide your workpiece during the cutting process.
Goggles (Safety Goggles) – See “Eye Protection”.
Ground Fault Circuit Interrupter (GFCI) – A safety device designed to sense electrical leakage to ground and quickly shut off the circuit to prevent electric shock.
Grounded Outlets (Receptacles) – An electrical outlet in a typical 120V application is equipped with two vertical slots and a third rounded hole (the “ground”). Use of an adapter with a grounded outlet eliminates the grounding protection.
Guard – Protective device that forms a barrier between a hazardous object such as a blade, wheel or a cutter and the operator.
Hearing Protection – See "Ear Protection."
Hold-down – Device used to help hold the workpiece down to the support surface during the work. (See “Clamp” or “Featherboard”.)
Horsepower (HP) – A measure of power – that is the amount of work done in a given time. In terms of electric power, one HP = 746 Watts. Horsepower of power tools is typically stated in the following ways:
Motor-only Horsepower – a horsepower measurement performed at the output of the motor only without reduction through gears or belts.
Tool Horsepower – A horsepower measurement performed at the “work end” of the tool, in other words, the point where the accessory performing the work is attached, i.e. the blade on the spindle or the drill bit in the chuck.
Continuous Horsepower – The maximum output that can be produced continuously without exceeding the rated current. A motor’s Continuous Horsepower is usually lower than its Peak Horsepower. It is sometimes referred to as “Continuous Duty Horsepower”.
Peak Horsepower – The maximum output that can be developed in actual use.
Impact Energy – Represents the amount of work that can be performed by a single blow of the hammering mechanism. It is usually measured in foot-pounds (or inch-pounds) of energy.
Instruction Manual (Manual, Owner's/Operator's Manual, Use & Care Guide) – The booklet accompanying your power tool that describes the hazards and safe operating procedures, outlines basic tool operation, care, and maintenance.
Kickback – Sudden and unintended movement of the tool or workpiece. It is typically caused by binding or pinching of the workpiece.
Listed – As in "UL Listed" means the product has been tested for conformance to the applicable national standards. Listed products can be identified by a “mark” on the tool’s rating plate (e.g., a “UL”, “ETL”, or “CSA” mark or symbol).
Motor – There are several types of electric motors typically used in power tools:
AC Motor – An electric motor that operates on “alternating currents” – the kind of power source found in a household outlet.
DC Motor – An electric motor that operates on “direct current”.
Induction Motor – An AC motor that has no brushes, and is typically larger, heavier, slower, and used in benchtop and stationary equipment, such as table saws, planers, band saws and jointers.
Permanent Magnet Motor – a DC motor that is commonly used in battery tools.
POWER TOOL SAFETY TERMS

7
NRTL – Nationally Recognized Testing Laboratory – The OSHA Program recognizes private sector organizations as NRTL’s, and recognition signifies that an organization has met the necessary qualifications specified in the regulations for the program. Examples of laboratories which are listed with OSHA as NRTL’s include CSA, ETL and UL.
Overreaching – Extending your body with a tool or a workpiece in hand such that a loss of balance is likely. For example: reaching over the blade or cutter area; or reaching from scaffolding to drive a screw.
Polarized Plug – Type of plug which has one prong larger than the other so it can only be inserted into an outlet in one way.
Power Source – A household workplace electrical outlet, battery or generator providing the electricity for your tool. The power source must be compatible with the requirements found on the tool’s rating plate; voltage, amperage, AC or DC, frequency.
Power Switch – A control device that energizes your tool in the “on” position and de-energizes the tool in the “off” position.
Push-block/Push Stick – A suitably shaped and designed hand-held device used to push the workpiece into and past cutting edges on stationary power tools.
Respiratory Protection – A device placed on your face used to filter the air you breathe. Available in a variety of styles (such as disposable dust masks, half-face respirators, and full-face respirators), respiratory protection devices are typically provided with a NIOSH approval rating (e.g., “N95”).
Revolutions Per Minute (RPM) – For a tool that rotates an accessory (e.g., a drill, saw, router…), RPM is the number of complete turns the accessory makes in one minute.
Safety Glasses (Spectacles) - See “Eye Protection”.
Speed
Maximum Speed – The highest speed at which a product (i.e. tools, accessories, attachments) can be safely operated.
No-Load Speed – Speed measured when the tool is operating at the rated voltage but not engaged in work. It is usually listed on the tool rating plate.
Rated Speed – Speed measured when the tool is operating at the rated voltage and loaded to work at the rated load current.
Torque – A twisting action tending to cause rotation typically measured in foot-pounds or inch-pounds.
Vise – See "Clamp".
Voltage – The electric potential difference measured between two conductors such as the “hot” and “neutral” for AC power supply or the potential difference between the + and the – poles of the DC supply. If you think in terms of water through a hose, voltage would be the water pressure. So the higher the voltage, the more “pressure” is pushing the electricity.
Wattage (W) – A measure of power, that is the amount of work done in a given time. If you think in terms of water through a hose, wattage is a measure of how much pressure is required to push the volume of water delivered in a period of time. Note: For A.C. electric tools, the wattage is more complicated than simply amps times volts.
POWER TOOL SAFETY TERMS
8
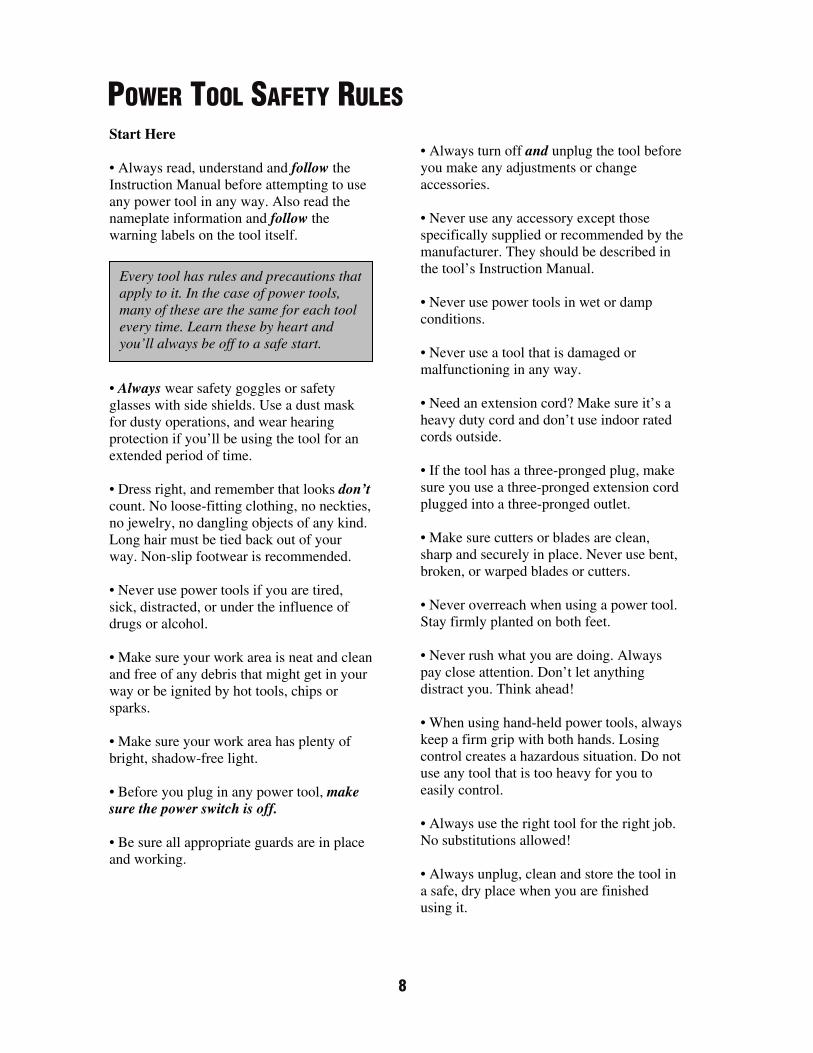
Start Here • Always read, understand and follow the Instruction Manual before attempting to use any power tool in any way. Also read the nameplate information and follow the warning labels on the tool itself.
• Always wear safety goggles or safety glasses with side shields. Use a dust mask for dusty operations, and wear hearing protection if you’ll be using the tool for an extended period of time. • Dress right, and remember that looks don’t count. No loose-fitting clothing, no neckties, no jewelry, no dangling objects of any kind. Long hair must be tied back out of your way. Non-slip footwear is recommended. • Never use power tools if you are tired, sick, distracted, or under the influence of drugs or alcohol. • Make sure your work area is neat and clean and free of any debris that might get in your way or be ignited by hot tools, chips or sparks. • Make sure your work area has plenty of bright, shadow-free light. • Before you plug in any power tool, make sure the power switch is off. • Be sure all appropriate guards are in place and working.
• Always turn off and unplug the tool before you make any adjustments or change accessories. • Never use any accessory except those specifically supplied or recommended by the manufacturer. They should be described in the tool’s Instruction Manual. • Never use power tools in wet or damp conditions. • Never use a tool that is damaged or malfunctioning in any way. • Need an extension cord? Make sure it’s a heavy duty cord and don’t use indoor rated cords outside. • If the tool has a three-pronged plug, make sure you use a three-pronged extension cord plugged into a three-pronged outlet. • Make sure cutters or blades are clean, sharp and securely in place. Never use bent, broken, or warped blades or cutters. • Never overreach when using a power tool. Stay firmly planted on both feet. • Never rush what you are doing. Always pay close attention. Don’t let anything distract you. Think ahead! • When using hand-held power tools, always keep a firm grip with both hands. Losing control creates a hazardous situation. Do not use any tool that is too heavy for you to easily control. • Always use the right tool for the right job. No substitutions allowed! • Always unplug, clean and store the tool in a safe, dry place when you are finished using it.
Every tool has rules and precautions that apply to it. In the case of power tools, many of these are the same for each tool every time. Learn these by heart and you’ll always be off to a safe start.
POWER TOOL SAFETY RULES

9
Saws account for a large share of power tool accidents. The very nature of high-speed, super sharp blades can produce severe injuries. Base your safety training on two central points: the potential hazards and how to avoid injury. A well-proven fact in the use of saws and other cutting tools is that guards are critical to safety. Modern guards provide essential protection without hindering the tool’s capacity to do its job in any way. If your students have been told otherwise, they’ve been dangerously misinformed. It’s vital that you correct them. Properly functioning guards respond to emergencies by providing an immediate barrier between the operator and high-speed cutting edges. They also serve to contain sawdust, chips and other debris that can be thrown toward the operator. They simply must be used for each and every operation. Yet, the use of guards alone is not enough. Guards must still be combined with proper setup and tool operation to assure the operator’s safety. One of the most serious issues in learning to use power saws is averting kickback. That’s the subject of this first saw lesson.
Refer To... Safety is Specific, Sections on:
• Circular Saws • Miter Saws • Table Saws • Kickback in Table Saws • Portable Circular Saws • Kickback in Portable Circular
Saws • Radial Arm Saws • Kickback in Radial Arm Saws • Reciprocating Saws • Jig/Saber Saws • Stationary Band Saws
Refer to… Safety DVD’s on:
• Circular Saws • Miter Saws • Table Saws
TEACHING SAWS I

10
Refer to… Safety is Specific, Section on Circular Saws.
Lesson Suggestion . . . Attack Kickback Objective: To teach students the causes of kickback and the measures to take to avoid it. Materials/Requirements: Safety Is Specific, the Circular Saw Safety DVD, the Miter Saw Safety DVD, the Table Saw Safety DVD and access to a shop equipped with a variety of power saws and stock. What To Do: Have your students read the paragraphs on kickback that appear in Safety Is Specific. (Copy these pages for your students if they do not have their own booklets). Also review the Circular Saw Safety DVD, the Miter Saw Safety DVD, and the Table Saw Safety DVD. As a class, compile lists of the various causes of kickback. Organize your lists into three categories: problems with stock, problems with the saw, problems with the set-up and the operator’s procedure. Ask your students to suggest what precautions they can take to prevent kickback. What factors, if any, are beyond their control?
warped, cracked, dull or dirty? Are all properly aligned? Is any of the stock pitchy, knotty or warped? Discuss guards around the shop. Point out what effect each part or portion of the guards has on the causes of kickback. Are any conditions or materials present that might invite kickback? Ask your students if they would be comfortable using any of the stock or equipment on hand. If not, ask the students to note what conditions should be addressed.
Finally, take a tour of your shop to inspect the equipment and stock on hand. Examine all saw blades - are any
TEACHING SAWS I

11
Refer To...
Safety Is Specific, Section on Miter Saws.
Safety Is Specific, Section on Table Saws.
The table saw and miter saw are two of the most widely used power tools in any woodworking shop and two of the most demanding. Operators must have a thorough understanding of these tools and all their procedures in addition to knowing how to set up for safety.
The area around the blades of the table and radial arm saws can generally be considered a “danger zone.” Any time any part of the operator’s body is in direct line with the blade, or is less than three inches to either side of the blade, that operator is in imminent danger. Remember that no power tool knows the difference between a workpiece and flesh and bone.
Show your students how to avoid awkward operations and hand positions that might allow the operator’s hands to move into the cutting tool. Help them develop the habit of always avoiding the area in front of the blade and three inches to either side. Tell them to never reach behind or over the blade area for any reason. Teach them that when the operator’s hands need to pass beyond the front edge of the saw table or past the leading edge of the blade, he or she must use work helpers to keep the workpiece flat on the table and against the fence. Show your students how work helpers will stabilize, control, and guide the workpiece while allowing the operator better cutting precision without placing hands and arms in harm’s way. Make sure your students understand that time invested in careful and proper setup using work helpers is all important to safety - and actually saves time too.
Lesson Suggestion . . . Set Up for Safety Objective: To teach students to prepare for and execute a variety of table saw and miter saw jobs.
Materials/Requirements: The Miter Saw Safety DVD and the Table Saw Safety DVD. A table saw, a miter saw, workpieces in a variety of shapes and dimensions appropriate to the miter saw or table saw, featherboards, pushsticks and pushblocks.
What To Do: Have your students read the sections in Safety Is Specific that deal with the use of table saws and miter saws. (Copy these pages for your students if they do not have their own booklet.) Give them a first demonstration on using each of these tools. Identify all the parts of each tool and explain their function. Also view the Safety DVDs on tables saws and miter saws.
Carefully demonstrate proper saw alignment procedures and how to adjust fences according to the tool’s instruction manual. Stress the importance of keeping saws aligned at all times and how to use the saws’ instruction manuals to do so.
Next, offer the students workpieces that present some problems —short pieces, narrow pieces, twisted pieces, pieces without straight edges, pieces of unusual thickness. Have the students demonstrate how they would set up the job to accommodate these pieces. Offer the featherboards, pushblocks and pushsticks. Are the students able to use these appropriately to make the job safe?
Offer the students some workpieces that are not safe — a workpiece that is shorter than the diameter of the saw blade, for example. Do they recognize these pieces as unsafe? Explain that stock of certain dimensions should not be attempted with these saws. Offer them alternative tools or procedures. Finish by demonstrating exactly how to set up and cut unusually sized workpieces.
TEACHING SAWS II

12
Refer To... Safety Is Specific, Section on Drill Presses. Safety Is Specific, Section on Portable Drills. Safety Is Specific, Section on Impact Wrenches. Safety Is Specific, Section on Percussion Tools. ...for references to the safe use of drills, impact wrenches and percussion tools.
Lesson Suggestion ... Create an Expert Objective: To have students become thoroughly acquainted with at least one hand-held power tool owner’s manual, to note the issues that are typically covered and the information that is provided, to recognize the manual’s value as a reference tool and resource, to recognize when to refer back to it.
Materials/Requirements: Several hand-held power tools and their owner’s manuals. What To Do: Discuss the importance of owner’s manuals as a starting point for becoming acquainted with any power tool. Point out the kind of information that is typically provided in an owner’s manual and how that information might be useful. Assign each student or team of students to read and digest one instruction manual that accompanies one of the hand-held power tools in your shop. Ask each student to create a written outline on the manual’s highlights and prepare a presentation for his or her classmates. Distribute copies of the outline to the other students and ask the student who created it to instruct his/her peers on the proper use of the tool based on what he/she has read and learned. Have him or her also relate dangerous situations that could develop if the proper procedures are not followed. Encourage the other students to question their “instructor,” and to evaluate how thorough the instruction session was. Ask them to suggest instances when it would be appropriate to re-read certain sections of the manual. Finally, photocopy the guidelines for each tool as presented in Safety Is Specific and provide each student with a copy. Have your students compare each presentation to the rules outlined in Safety Is Specific. Have all the vital points been covered? Has any important information been overlooked? If so, what might the consequences be of overlooking that information?
This subset of tools includes the most widely used power tools in the world — drills — along with powered wrenches, hammers, rotary hammers and hammer drills. Bracing, maintaining a firm grip on these powerful handheld tools is critical, so is protective eyewear - and ear plugs in the case of extended use.
TEACHING DRILLS, IMPACT WRENCHESAND PERCUSSION TOOLS

13
Refer To... Safety Is Specific, Section on Sanders. ...for references to the safe use of sanders.
Lesson Suggestion... Talk with the Experts Objective: Have students become familiar with and benefit from the experience and perspective of seasoned professionals. Materials/Requirements: Safety Is Specific. What to Do: Assign each student, or a small team of students, to create a report on a particular power tool — a sander if you wish. Each student or team should begin by reading the pertinent section of Safety Is Specific.
In preparing the report, the student or team should interview professional users of the tool — carpenters, contractors and cabinetmakers — about their experiences with the tool. Issues should include safe tips for maximum effectiveness, mistakes the professional has made, use and care pointers, lessons he/she has learned and anecdotes. Have each student present his/her report to the class. When all reports have been presented and discussed, they can be photocopied and combined to create the students’ own guide to using these tools.
Sanders require more skill and finesse in their use than many other power tools. The operator’s inexperience is too often clearly evident in the finished product. Students must learn to pay particular attention to the manufacturers’ instructions for mounting abrasive belts, discs and sheets, and benefit from talking with experienced users about technique.
TEACHING SANDERS

14
Refer To...
Grinders perform a wide variety of operations — all at high speeds. As with every power tool, operators must give grinders their undivided attention. Remind students to always check the wheel for tightness before each use, and never use cracked or damaged grinding wheels. (At the high speeds that grinders turn, rotational forces can cause faulty wheels to fly apart, throwing sharp fragments in many directions at high velocity.) Here again, guards are critical in preparation for the unexpected event. They will help to protect the operator from potentially lethal fragments should a grinder wheel break up in use.
Safety Is Specific, Section on Bench and Portable Disc Grinders. Safety Is Specific, Section on Rotary Die Grinder. ...for references to the safe use of grinders.
Lesson Suggestion... Help Someone Else Learn Objective: Get students to thoroughly absorb use and care procedures for a tool that they must teach to someone else. Materials/Requirements: A cooperative volunteer “student” — or two. What to Do: After students have gained a level of familiarity with the grinder or other tool, invite another teacher or adult who has no experience with the tool to visit your classroom. Have your students take turns instructing the newcomer in various aspects of using and caring for the tool — set up, use, maintenance, clean up. Make sure your students stress the importance of using the guards. Are the students able to convey what they know? Do they themselves thoroughly understand what they are trying to teach the visitor? Encourage them to press each other for more information and better explanations. Students should prepare for this class with a group discussion in which they arrive at a basic outline for teaching the tool.
TEACHING GRINDERS

15
Refer To... Safety Is Specific, Section on Routers. ...for references to the safe use of routers.
Lesson Suggestion... Shopping for Info Objective: To help students thoroughly understand routers and their features. Materials/Requirements: Access to routers, router bits, accessories, and their use & care guides. Consumer Reports and trade and handyman magazines would be helpful too.
Like grinders, routers operate at very high speeds – in the 20,000 RPM range. A firm grip with both hands while the router is in use is essential, and no matter what precautions you’ve taken, never face the cutter bit toward your body. Install router bits securely, and always use the wrenches included with the tool.
What to Do: Assign a router or other tool to a student or small team of students. Tell them that they are to research their tool as though they are planning to buy one. They should visit stores to view and examine the models that are on the market. What features do they all share? What features differ? Do all the choices seem equally safe? What is the price differential? What do salespeople have to say about the various models? What do magazine articles say about them? How do the models students examine compare to the models that are in use in the classroom? Which model seems best overall and why? Students should present their findings to the class.
TEACHING ROUTERS

16
Refer To... Safety Is Specific, Section on Jointers and Planers. Safety Is Specific, Section on Shapers. ...for references to the safe use of jointers, planers and shapers.
Operators must be fully alert at all times when using these tools. Careful operation must begin even before a power tool appears on the scene. Stock is a critical concern with this equipment; choose it carefully. Chipboard, panel board, or stock containing nails, paint or varnish can create a hazard. Knots in wood can be a threat, too. It’s also essential to learn to use pushblocks and featherboards with these tools.
Lesson Suggestion... Collect and Critique Objective: To sharpen students’ critical eye and interest in detail. Materials/Requirements: Old issues of carpentry, craft and woodworking magazines. What to Do: Have your students read the Safety Is Specific entry on Jointers, Planers and Shapers. Next, instruct them to clip from old magazines you’ve collected all photos and illustrations of these or other power tools in use. Your students should also clip all references to use and care of the tools. Do they see or read anything that differs from what they learned in class and read in their class booklets? Can they find any errors or unsafe practices?
TEACHING JOINTERS, PLANERS AND SHAPERS

17
Before securing wood on a lathe, have students check the wood for defects that could result in breaking or splintering. They should securely tighten all adjusting levers and locks, too, before turning on the machine. Instruct students to always stand to one side as they switch on the power, and to be sure the motor suits the lathe in both horsepower and RPMs.
Refer To... Safety Is Specific, Section on Wood Lathes. ...for references to the safe use of wood lathes.
Lesson Suggestion... Don’t Wing It Objective: To teach students that trusting yourself to figure out how to use a power tool without having received proper instruction is a very bad idea. Materials/Requirements: Students and a lathe — unplugged.
What to Do: Present your class with an assignment that involves using the lathe. Suggest to them that the owner’s manual is lost and time is short, and you’re wondering if anyone can figure out how to use the lathe without the benefit of the manual or any instruction in the tool. Have a student volunteer or volunteers show the class how they would proceed to do the assignment. (Make sure the lathe is unplugged while students handle it.) Keep a list of all the student suggestions that are dangerous or ill-advised. When all the students have offered their suggestions, address each of them, explaining why it is dangerous or unacceptable. Discuss with the students the possible consequences of trying to figure out a machine like the lathe on their own. Finally, retrieve the manual and explain the proper way to use the tool. Based on your discussion, have the students create a list of warnings or “Do Nots” for the lathe, as well as a list of “Things to Do.”
TEACHING WOOD LATHES

18
Your power tool and its Owner’s Manual may contain "WARNING ICONS" (a picture symbol intended to alert you to, and/or instruct you how to avoid, a potentially hazardous condition). Understanding and heeding these symbols will help you operate your tool better and safer. Shown below are some of the symbols you may see.
SAFETY ALERT: potential personal injury hazards.
PROHIBITION
DANGER: indicates an imminently hazardous situation which, if not avoided, will result in death or serious injury.
WARNING: indicates a potentially hazardous situation which, if not avoided, could result in death or serious injury.
CAUTION: indicates a potentially hazardous situation which, if not avoided, may result in minor or moderate injury.
CAUTION: used without the safety alert symbol indicates a potentially hazardous situation which, if not avoided, may result in property damage.
WEAR EYE PROTECTION
READ AND UNDERSTAND INSTRUCTION MANUAL
SUPPORT AND CLAMP WORK
HOLD SAW WITH BOTH HANDS
KEEP HANDS AWAY FROM BLADE
POWER TOOL SAFETY SYMBOLS

19
See if you can find these 10 saw words in the puzzle below. To double the fun, each one appears twice.
Student Activities
I SAW THAT!
T G M N R E G I P N G P E WO B I W A S A W A R O L B UR A T J D E J C E H B J A L
M R E C I P R O C A T I N G
R O R H A X I T T M E G D UA S B O L E J A G B S X C PL E O P A U L B Q A G O R EA N S C R N U L B R E B A SI A T G M I T E R S O X R OD N A B E Q R A L U C R I CA P X C I R C U L A R O X AR G N I T A C O R P I C E R
Band Circular Jig Radial Arm SawChop Reciprocating Miter Saber Table

20
1. When using power tools ALWAYS wear___________________________________ 2. Before you plug in any power tool, ALWAYS make sure ______________________ 3. When you finish using any power tool ALWAYS ____________________________ 4. NEVER attempt to use any power tool without reading_______________________ 5. Before you use a tool, ALWAYS make sure all guards are _____________________ 6. NEVER use power tools when you are ____________________________________ 7. If you need an extension cord outdoors, ALWAYS ___________________________ 8. NEVER us any power tool accessory except _______________________________ 9. Before starting a job, ALWAYS make sure the work area is ____________________ 10. When using hand-held power tools, ALWAYS ______________________________
Some things never change — like the basic rules for using power tools any place, any time. Complete each one of the 10 phrases below with important “Always” and “Never” rules that you recall.
ALWAYS, ALWAYS/NEVER, NEVER!

A
HOLD SAW WITH BOTH HANDS
B
CAUTION: indicates a potentially hazardous situation which, if not avoided, may result in minor or moderate injury.
C
SAFETY ALERT
D
DANGER: indicates an imminently hazardous situation which, if not avoided, will result in death or serious injury.
E
WEAR EYE PROTECTION
F
PROHIBITION
G
WARNING: indicates a potentially hazardous situation which, if not avoided, could result in death or serious injury.
H
KEEP HANDS AWAY FROM BLADE
I
READ AND UNDERSTAND INSTRUCTION MANUAL
J
SUPPORT AND CLAMP WORK
K
CAUTION: indicates a potentially hazardous situation which, if not avoided, may result in minor or moderate injury.
We’ve talked safety up and down, but do you recognize safety symbols when you see them? Match the drawing to the warning.
21
PICTURE THIS!

22
Power Switch Required Reading Goggles Underwriters Laboratories Guard Occurs when you use damaged sanding discs Pushblock Safety device that senses electric leaks Skipping Offers you “On” and “Off” control GFCI Holds workpiece firmly in place Kickback Workhelper to keep hands safely away UL Necessary protective device that partially covers blades, cutters or bits Owner’s Manual Sudden, unexpected, dangerous tool or workpiece movement Clamp Required attire
Do you know your Power Switch from your Push Stick? Prove it by matching the safety term on the left to the correct definition on the right.
YOU CALL IT!

Answer Key:
I Saw That!
Picture This! F- No Hands Near Blades H -No Jewelry B -Use the Handle and a Firm Grip A -Plan Your Project G -Don’t Overreach D -Use Pushsticks E -Dry Conditions Only C -No Alcohol (or drugs) You Call It! Power Switch-Offers you “On” and “Off’ control. Goggles-Required attire. Guard-Necessary protective device that partially covers blades, cutters or bits. Pushblock-Workhelper to keep hands safely away. Skipping-Occurs when you use damaged sanding discs. GFCI-Safety device that senses electric leaks. Kickback-Sudden, unexpected, dangerous tool or workpiece movement. UL-Underwriters Laboratories. Owner’s Manual-Required reading. Clamp-Holds workpiece firmly in place.
The following pages offer quizzes and activities that can test and exercise your students’ knowledge of power tool safety principles. Also use these activities to keep students occupied productively when you are involved in setting up equipment or procedures. Quiz and activity answer keys appear on this page. The quizzes and activities themselves follow.
Always, Always/Never, Never! 1- Goggles 2- The power switch is off 3- Unplug it and put it away 4- The manual 5- Attached & working 6- Tired or under the influence of alcohol or drugs 7- Choose one rated for outdoor use 8- Those the tool manufacturer approves 9- Clean, dry, well-lit 10- Keep a firm grip on them
23
ANSWER KEY:
T G M N R E G I P N G P E WO B I W A S A W A R O L B UR A T J D E J C E H B J A L
M R E C I P R O C A T I N G
R O R H A X I T T M E G D UA S B O L E J A G B S X C PL E O P A U L B Q A G O R EA N S C R N U L B R E B A SI A T G M I T E R S O X R OD N A B E Q R A L U C R I CA P X C I R C U L A R O X AR G N I T A C O R P I C E R

24
NOTES

A TEACHER’SREFERENCE GUIDETO POWER TOOLSAFETY
DANGERWARNINGCAUTION
Presented by the manufacturer members of the
1300 SUMNER AVENUE • CLEVELAND, OHIO 44115-2851 • 216-241-7333 • FAX: 216-241-0105Revision 11/07 – 5m
THOMAS & ASSOCIATES, INC. EXECUTIVE MANAGER