A Raiding escalation campaign in the Sahara, 94 -...
44
A Raiding escalation campaign in the Sahara, 94-943
Transcript of A Raiding escalation campaign in the Sahara, 94 -...
�
A Raiding escalation campaign in the Sahara, �94�-�943
�
egyptiA
N SA
ND
SeA
CHADNigeRSuDAN
egypt
LibyA
tuNiSiA
Fezzan
TripoliTania CyrenaiCa
Jebel Uweinat
ZaghenTaiserbo
Tahla
Zouar
Tummo
Um El AranebMurzuk
Sebha
Zella
Hon Marada Jalo Siwa
Jarabub
Msus
JedabiaMersa Brega
El Aghelia
BenghaziBarce Derna
GazalaTobruk
BardiaSidi Barrani
Matruh Alexandria
Cairo
Asyut
Dakhla
Sirte
Tripoli
Ribiana sand
sea
kala
nsh
o s
an
d s
ea
mu
rzu
k s
an
d s
ea
tibes
ti m
ou
nt
ain
s
eghei MounTains
Qattara Depression
El Alamein
0
KM
Miles
1000
200100
Mediterranean Sea
Bir Hakiem
Jebel Sherif
Kufra
bRitiSH
itALiAN
FRee FReNCH
ALg
eRiA
geRmAN
Gatrun
Bardai
eARLy WAR OpeRAtiONS: �94�
eARLy AND miD WAR OpeRAtiONS: �94�-�943
miD WAR OpeRAtiONS: �94�-�943
mAp Key
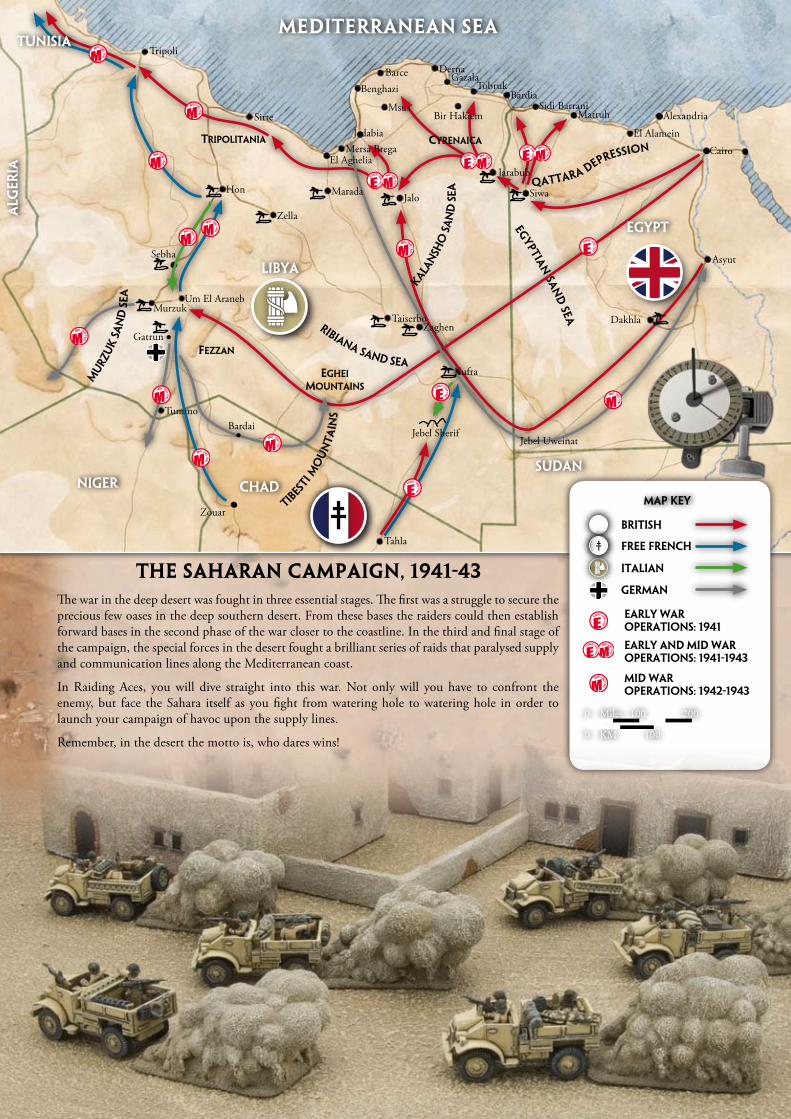
the Saharan CaMpaign, 1941-43The war in the deep desert was fought in three essential stages. The first was a struggle to secure the precious few oases in the deep southern desert. From these bases the raiders could then establish forward bases in the second phase of the war closer to the coastline. In the third and final stage of the campaign, the special forces in the desert fought a brilliant series of raids that paralysed supply and communication lines along the Mediterranean coast.
In Raiding Aces, you will dive straight into this war. Not only will you have to confront the enemy, but face the Sahara itself as you fight from watering hole to watering hole in order to launch your campaign of havoc upon the supply lines.
Remember, in the desert the motto is, who dares wins!
�
Written by: Andrew HaughtAssistant Writer: Michael Haught
Editors: Peter Simunovich, John-Paul BrisigottiGraphic Design: Sean Goodison Photography: Battlefront Studio
Miniatures Design: Evan Allen Artwork: Vincent Wai, Ben Wooten
Miniatures Painting: James Brown, Jeremy Painter, Mark Hazell Terrain Modelling: Battlefront Studio
Web Support: Blake Coster
This is a supplement for Flames Of War, the World War II miniatures game.A copy of the rulebook for Flames Of War is necessary to fully use the contents of this book.
All rights reserved. No part of this publication may be reproduced, stored in a retrieval system, or transmitted, in any form or by any means without the prior written permission of the publisher, nor be otherwise circulated in any form of binding or cover other than that
in which it is published and without a similar condition being imposed on the subsequent purchaser.
© Copyright Battlefront Miniatures Ltd., 2011.
Raiding Aces .............................................................. 2
Part I: The Campaign ................................................. 2
Playing the Campaign .......................................... 4
Campaign Result Table ........................................ 5
Part II: Your Raiding Ace ........................................... 6
Selecting Abilities ................................................ 7
Turn 1 Abilities ..................................................... 8
Turn 2 Abilities ................................................... 11
Turn 3 Abilities ................................................... 14
Ace of Aces .......................................................... 18
Part III: Your Force .................................................. 21
Your Force in Turn 1 ........................................... 22
Your Force in Turn 2 ........................................... 22
Your Force in Turn 3 ........................................... 23
What Mission Should We Play? ............................... 24
Tracks in the Sand .............................................. 25
The Will of the Sahara ........................................ 26
Smash & Grab ......................................................... 27
Setting Up and Running the Mission .................. 29
Mission Special Rules ......................................... 28
Key Buildings ..................................................... 29
Demolition & Time Of Day Special Rules .......... 32
Smash & Grab Mission ....................................... 33
Organising the Campaign ........................................ 34
Abilities Quick Reference Sheet................................ 36
Raiding Aces Results Sheets ..................................... 38
Raiding Aces Company Chart .................................. 39
Key Buildings Markers ............................................. 40
ContentS
�
Raiding Aces is an escalation campaign that focuses on the special forces that fought in the Sahara from 1941-1943. It is all about the bold raids, sabotage missions, and convoy ‘bash ups’ fought in North Africa.
This is not your typical campaign. In the beginning you are a commander with a crazy notion of establishing a deep recon-naissance unit. Your superiors reluctantly agree to let you form your elite unit, but it will be up to you and your men to prove the value of your idea.
During the campaign you will write the story of your squadron as you fight through the sand dunes of the Sahara Desert and wadis of the Mediterranean coastline. Your small force will grow and develop into an elite force ready for the final decisive battles in North Africa.
WhaT is an esCalaTion CaMpaign?An escalation campaign is different from a normal campaign where players use the same points throughout the campaign. Instead, an escalation campaign starts at a small point level and works its way up to higher levels at the beginning of each campaign turn.
In the first turn you will command a 500-point force, then in the second campaign turn you will grow to 700 points and in the final turn you will get up to 900 points.
The escalation format is ideal for new players to learn raiding basics without the intimidating presence of tanks. It is also a great opportunity for veteran players to start a new raiding force with plenty of time between turns to get their men painted up and ready for combat. Raiding Aces gives all players the chance to launch a campaign of havoc on the enemy supply lines!
geTTing sTarTed
Raiding Aces includes the campaign rules, a map, and key documents such as company and results sheets. The campaign documents can be found at the back of the document, but they can be downloaded individually from our website: www.FlamesOfWar.com.
Once you have read through these materials it’s time to select your favourite raiding force and head into the deep wastes of the Sahara to begin your campaign of destruction!
raiding aces
part i: the CampaignThe BaTTleFields oF The sahara
The raiding war erupted in North Africa in 1941 with the birth of British special forces. The elite troops joined forces with the Free French in Chad and together sowed havoc across the entire Libyan Sahara. The raiders of the Sahara battled for control of vital oases and forward bases from which to launch raids against the supply lines along the coastline of the Mediterranean Sea.
The desert is an unforgiving place. It is not all sand; large ridges, rocks, lower plains and vegetation made the battlefield more diverse than one would expect. Perhaps the most important terrain to raiding operations in the deep Sahara were the few vital oases. They were a key source of water and the base of operations for most of the raiding forces. The Axis knew these vital locations were important to the Allied raiders and made efforts to fortify and protect them.
WhaT is raiding aCes?In Raiding Aces the battlefield is generally divided into two main fighting grounds: the deep desert and the coastline. In the deep desert, Axis and Allied special forces fought over key oases. Controlling them meant that your raiders didn’t have to return to their own lines for resupply as often. In the first turn of the campaign you fight for control of these oases. From there you will try and secure forward bases to launch raids against the coastline. With these secure you are off to cause as much havoc as possible!
3
The CaMpaign Map
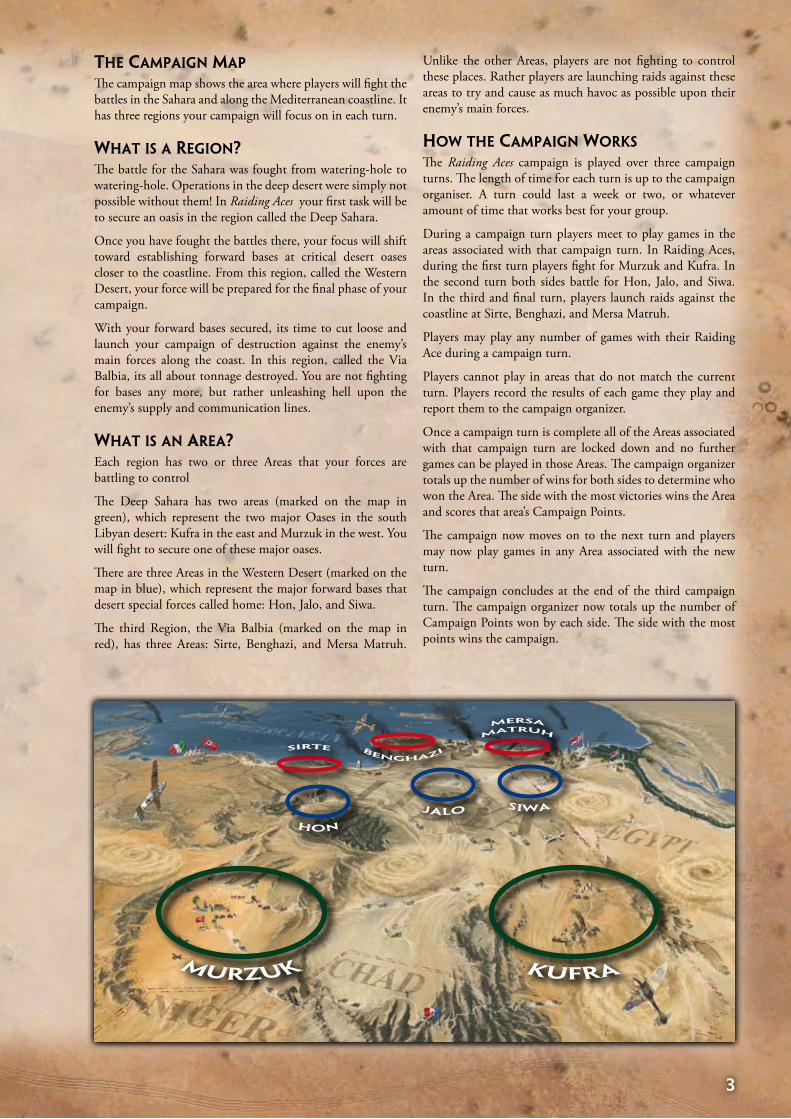
The campaign map shows the area where players will fight the battles in the Sahara and along the Mediterranean coastline. It has three regions your campaign will focus on in each turn.
WhaT is a region?The battle for the Sahara was fought from watering-hole to watering-hole. Operations in the deep desert were simply not possible without them! In Raiding Aces your first task will be to secure an oasis in the region called the Deep Sahara.
Once you have fought the battles there, your focus will shift toward establishing forward bases at critical desert oases closer to the coastline. From this region, called the Western Desert, your force will be prepared for the final phase of your campaign.
With your forward bases secured, its time to cut loose and launch your campaign of destruction against the enemy’s main forces along the coast. In this region, called the Via Balbia, its all about tonnage destroyed. You are not fighting for bases any more, but rather unleashing hell upon the enemy’s supply and communication lines.
WhaT is an area?Each region has two or three Areas that your forces are battling to control
The Deep Sahara has two areas (marked on the map in green), which represent the two major Oases in the south Libyan desert: Kufra in the east and Murzuk in the west. You will fight to secure one of these major oases.
There are three Areas in the Western Desert (marked on the map in blue), which represent the major forward bases that desert special forces called home: Hon, Jalo, and Siwa.
The third Region, the Via Balbia (marked on the map in red), has three Areas: Sirte, Benghazi, and Mersa Matruh.
Unlike the other Areas, players are not fighting to control these places. Rather players are launching raids against these areas to try and cause as much havoc as possible upon their enemy’s main forces.
hoW The CaMpaign Works
The Raiding Aces campaign is played over three campaign turns. The length of time for each turn is up to the campaign organiser. A turn could last a week or two, or whatever amount of time that works best for your group.
During a campaign turn players meet to play games in the areas associated with that campaign turn. In Raiding Aces, during the first turn players fight for Murzuk and Kufra. In the second turn both sides battle for Hon, Jalo, and Siwa. In the third and final turn, players launch raids against the coastline at Sirte, Benghazi, and Mersa Matruh.
Players may play any number of games with their Raiding Ace during a campaign turn.
Players cannot play in areas that do not match the current turn. Players record the results of each game they play and report them to the campaign organizer.
Once a campaign turn is complete all of the Areas associated with that campaign turn are locked down and no further games can be played in those Areas. The campaign organizer totals up the number of wins for both sides to determine who won the Area. The side with the most victories wins the Area and scores that area’s Campaign Points.
The campaign now moves on to the next turn and players may now play games in any Area associated with the new turn.
The campaign concludes at the end of the third campaign turn. The campaign organizer now totals up the number of Campaign Points won by each side. The side with the most points wins the campaign.
4
Blue versus Blue
If there are not enough Axis or Allied players to match up together it is perfectly normal to match up two players from the same side. The player who won the die roll to choose the Area plays for their side, and the other player represents the opposition.
Games for each campaign turn can be played at any time during that campaign turn. Players can meet whenever they like to battle it out in the deserts and sand seas of Libya and Egypt.
sTep one: Choose an area When two players are ready to play a Raiding Aces campaign game they first have to determine who gets to choose which Area they will be using for that game. Both players roll a die. The player with the highest score decides which Area the game will be fought over. In the event of a tie, simply roll again until there is a winner.
There are two or three Areas to choose from during each campaign turn. In the first turn you can choose either the Murzuk or Kufra Areas to do battle. In the second turn you can choose one of three Areas: Hon, Jalo, or Siwa. Finally, during the third turn you can launch your raids in the Sirte, Benghazi, or Mersa Matruh Areas.
sTep TWo: play a FlaMes oF War gaMe
Once the Area has been selected and both players know which mission they are going to play, it’s time to start rolling dice and moving miniatures!
Players may play any of the normal Flames Of War missions or Raiding missions they like. For example, if the players are fighting to capture Kufra, they may want to use the Secure Outpost mission. If you are having trouble choosing a mission, be sure to check out the Mission Generator chart on page 24.
Alternatively, if both players agree, they may choose to play modified missions that reflect the conditions of the raiding war. These modifications (called Tracks in the Sand) can be found on pages 25-26.
Tracks in the Sand are designed to help match up your mission with the historical situation by adding some new advantages, challenges, and victory conditions.
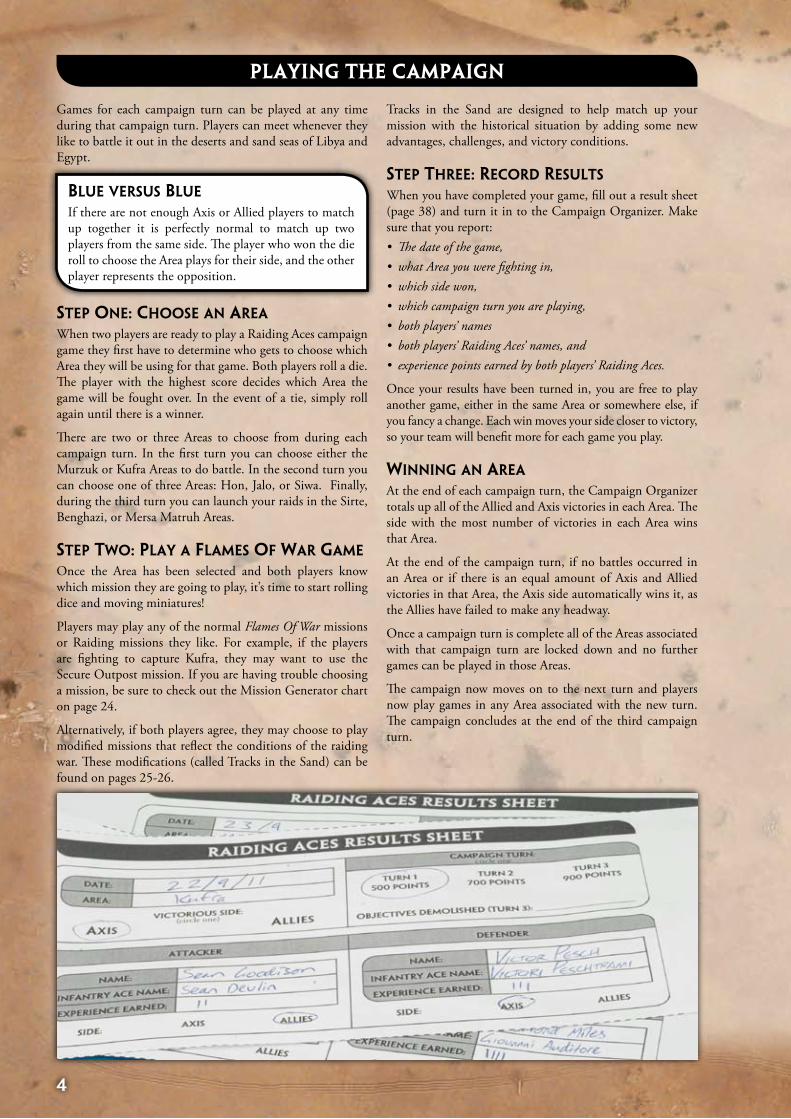
sTep Three: reCord resulTs
When you have completed your game, fill out a result sheet (page 38) and turn it in to the Campaign Organizer. Make sure that you report:
The date of the game, what Area you were fighting in, which side won,which campaign turn you are playing,both players’ namesboth players’ Raiding Aces’ names, and experience points earned by both players’ Raiding Aces.
Once your results have been turned in, you are free to play another game, either in the same Area or somewhere else, if you fancy a change. Each win moves your side closer to victory, so your team will benefit more for each game you play.
Winning an area
At the end of each campaign turn, the Campaign Organizer totals up all of the Allied and Axis victories in each Area. The side with the most number of victories in each Area wins that Area.
At the end of the campaign turn, if no battles occurred in an Area or if there is an equal amount of Axis and Allied victories in that Area, the Axis side automatically wins it, as the Allies have failed to make any headway.
Once a campaign turn is complete all of the Areas associated with that campaign turn are locked down and no further games can be played in those Areas.
The campaign now moves on to the next turn and players now play games in any Area associated with the new turn. The campaign concludes at the end of the third campaign turn.
•••••••
playing the CaMpaign
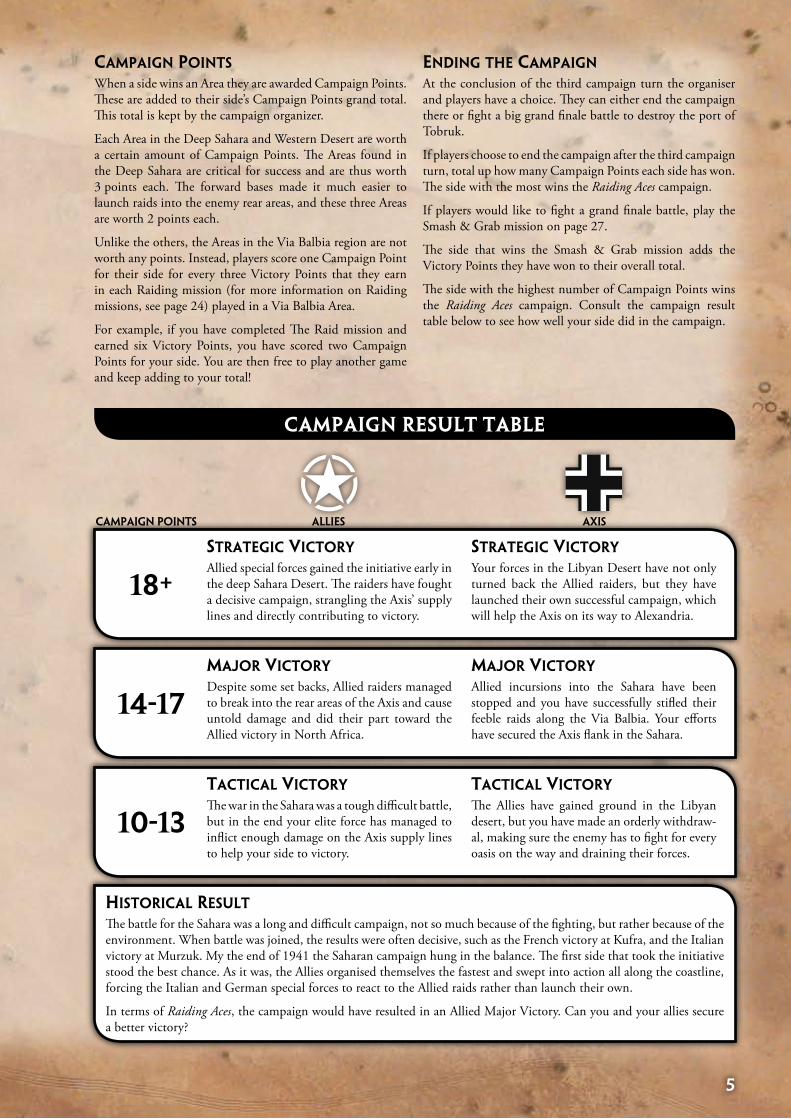
18+
14-17
10-13
�
sTraTegiC viCTory
Your forces in the Libyan Desert have not only turned back the Allied raiders, but they have launched their own successful campaign, which will help the Axis on its way to Alexandria.
sTraTegiC viCTory
Allied special forces gained the initiative early in the deep Sahara Desert. The raiders have fought a decisive campaign, strangling the Axis’ supply lines and directly contributing to victory.
Major viCTory
Allied incursions into the Sahara have been stopped and you have successfully stifled their feeble raids along the Via Balbia. Your efforts have secured the Axis flank in the Sahara.
Major viCTory
Despite some set backs, Allied raiders managed to break into the rear areas of the Axis and cause untold damage and did their part toward the Allied victory in North Africa.
TaCTiCal viCTory
The Allies have gained ground in the Libyan desert, but you have made an orderly withdraw-al, making sure the enemy has to fight for every oasis on the way and draining their forces.
TaCTiCal viCTory
The war in the Sahara was a tough difficult battle, but in the end your elite force has managed to inflict enough damage on the Axis supply lines to help your side to victory.
CAmpAigN pOiNtS ALLieS AxiS
hisToriCal resulT
The battle for the Sahara was a long and difficult campaign, not so much because of the fighting, but rather because of the environment. When battle was joined, the results were often decisive, such as the French victory at Kufra, and the Italian victory at Murzuk. My the end of 1941 the Saharan campaign hung in the balance. The first side that took the initiative stood the best chance. As it was, the Allies organised themselves the fastest and swept into action all along the coastline, forcing the Italian and German special forces to react to the Allied raids rather than launch their own.
In terms of Raiding Aces, the campaign would have resulted in an Allied Major Victory. Can you and your allies secure a better victory?
CaMpaign poinTs
When a side wins an Area they are awarded Campaign Points. These are added to their side’s Campaign Points grand total. This total is kept by the campaign organizer.
Each Area in the Deep Sahara and Western Desert are worth a certain amount of Campaign Points. The Areas found in the Deep Sahara are critical for success and are thus worth 3 points each. The forward bases made it much easier to launch raids into the enemy rear areas, and these three Areas are worth 2 points each.
Unlike the others, the Areas in the Via Balbia region are not worth any points. Instead, players score one Campaign Point for their side for every three Victory Points that they earn in each Raiding mission (for more information on Raiding missions, see page 24) played in a Via Balbia Area.
For example, if you have completed The Raid mission and earned six Victory Points, you have scored two Campaign Points for your side. You are then free to play another game and keep adding to your total!
ending The CaMpaign
At the conclusion of the third campaign turn the organiser and players have a choice. They can either end the campaign there or fight a big grand finale battle to destroy the port of Tobruk.
If players choose to end the campaign after the third campaign turn, total up how many Campaign Points each side has won. The side with the most wins the Raiding Aces campaign.
If players would like to fight a grand finale battle, play the Smash & Grab mission on page 27.
The side that wins the Smash & Grab mission adds the Victory Points they have won to their overall total.
The side with the highest number of Campaign Points wins the Raiding Aces campaign. Consult the campaign result table below to see how well your side did in the campaign.
CaMpaign reSult table
�
part ii: your raiding aceThe most exciting aspect of Raiding Aces is creating your own Flames Of War warrior, called a Raiding Ace. During the campaign, you follow your warrior’s story as he fights his way through the sand seas of the Sahara to strike at the heart of the enemy’s supply lines along the Via Balbia.
Shortly before this campaign begins, your Raiding Ace proposed the concept of an elite desert reconnaissance force to headquarters. The commanding general reluctantly agrees to let you form your force. You will now have to prove your value in the coming battles.
As the campaign progresses, your Raiding Ace continues to grow his elite force with more and more men and equipment.
At the beginning of the second turn, his efforts in the Libyan desert have not gone unnoticed. Headquarters has given you more support to help you secure forward bases closer to the main battlefields of North Africa.
During the third turn your Ace has expanded his force into a private army. You will lead your troops on a campaign of destruction and mayhem against the enemy supply line, called the Via Balbia.
CharaCTerisTiCs Your Raiding Ace is a Company Command team, replacing your normal Company Command team. He retains the ratings and weapons of the Company Command team he replaced. He is a Warrior and follows all of the normal rules about warriors found in the Flames Of War rulebook.
playing gaMes
Your ace may play any number of games during a campaign turn. The more games he plays the more experience he will earn, making him a better Raiding Ace.
no Warriors
In Raiding Aces you cannot take normal Flames Of War warrior teams. Instead you will create your own warrior called a Raiding Ace.
earning Medals Your Raiding Ace fights alongside your company earning medals, getting promotions, and gaining abilities.
In turn one, your Raiding Ace must fight with what he can muster. It’s not much, but it’s enough to get the job done. As he continues through the campaign he will earn experience points, which you can use to award him medals. Medals will give him special abilities.
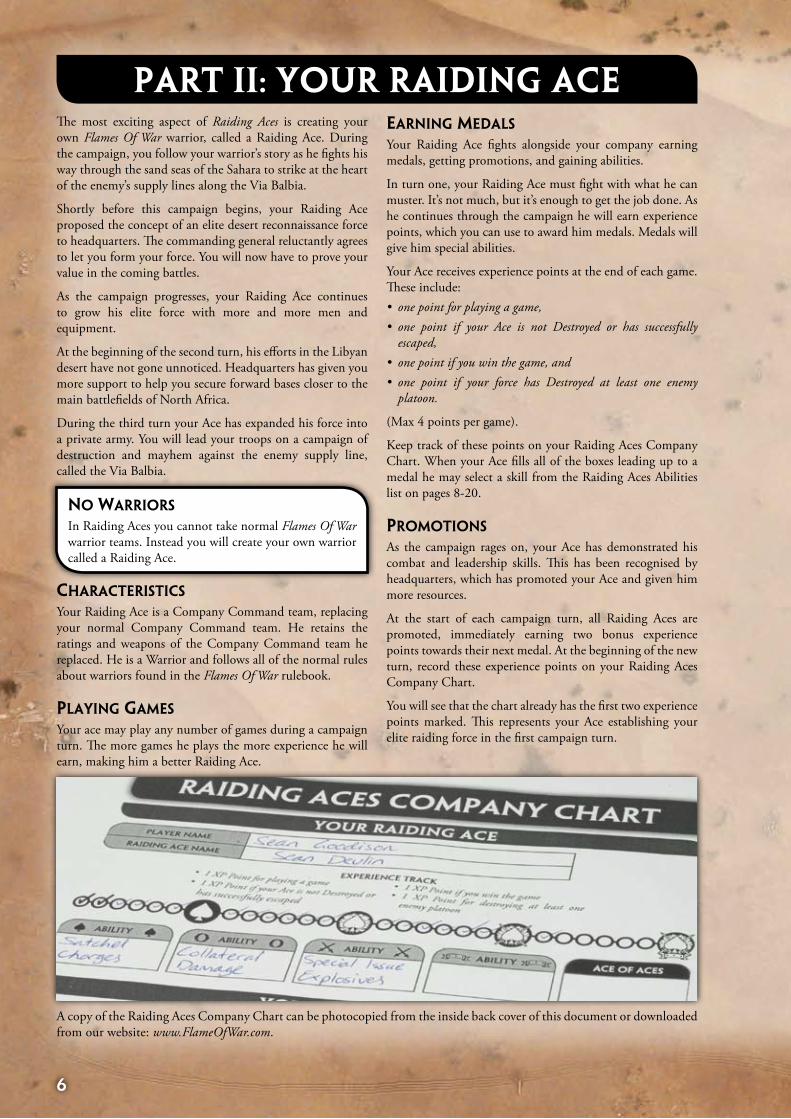
Your Ace receives experience points at the end of each game. These include:
one point for playing a game,one point if your Ace is not Destroyed or has successfully escaped, one point if you win the game, and one point if your force has Destroyed at least one enemy platoon.
(Max 4 points per game).
Keep track of these points on your Raiding Aces Company Chart. When your Ace fills all of the boxes leading up to a medal he may select a skill from the Raiding Aces Abilities list on pages 8-20.
proMoTions
As the campaign rages on, your Ace has demonstrated his combat and leadership skills. This has been recognised by headquarters, which has promoted your Ace and given him more resources.
At the start of each campaign turn, all Raiding Aces are promoted, immediately earning two bonus experience points towards their next medal. At the beginning of the new turn, record these experience points on your Raiding Aces Company Chart.
You will see that the chart already has the first two experience points marked. This represents your Ace establishing your elite raiding force in the first campaign turn.
••
••
A copy of the Raiding Aces Company Chart can be photocopied from the inside back cover of this document or downloaded from our website: www.FlameOfWar.com.
�
noTe
You do not have to select an Ability straight away when your Ace earns a medal. You can choose to wait until another campaign turn to select one or spend them all at once.
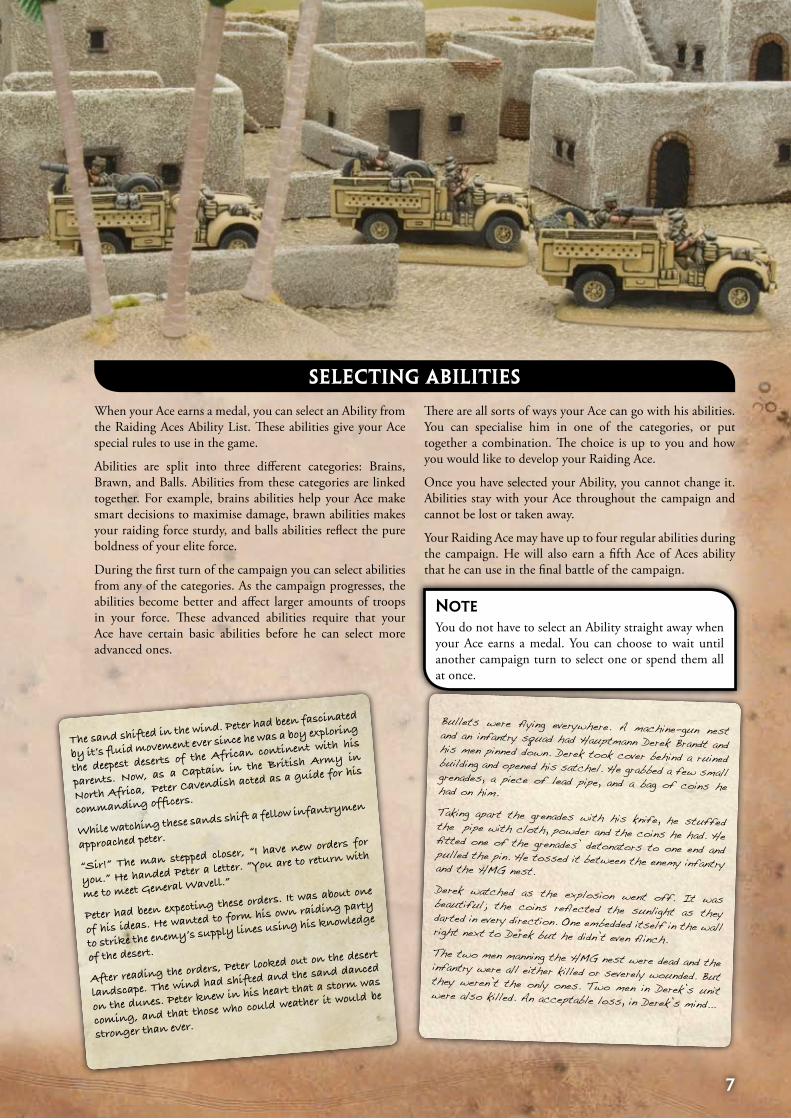
When your Ace earns a medal, you can select an Ability from the Raiding Aces Ability List. These abilities give your Ace special rules to use in the game.
Abilities are split into three different categories: Brains, Brawn, and Balls. Abilities from these categories are linked together. For example, brains abilities help your Ace make smart decisions to maximise damage, brawn abilities makes your raiding force sturdy, and balls abilities reflect the pure boldness of your elite force.
During the first turn of the campaign you can select abilities from any of the categories. As the campaign progresses, the abilities become better and affect larger amounts of troops in your force. These advanced abilities require that your Ace have certain basic abilities before he can select more advanced ones.
There are all sorts of ways your Ace can go with his abilities. You can specialise him in one of the categories, or put together a combination. The choice is up to you and how you would like to develop your Raiding Ace.
Once you have selected your Ability, you cannot change it. Abilities stay with your Ace throughout the campaign and cannot be lost or taken away.
Your Raiding Ace may have up to four regular abilities during the campaign. He will also earn a fifth Ace of Aces ability that he can use in the final battle of the campaign.
SeleCting abilitieS
The sand shifted in the wind. Peter had been fascinated
by it’s fluid movement ever since he was a boy exploring
the deepest deserts of the African continent with his
parents. Now, as a Captain in the British Army in
North Africa, Peter Cavendish acted as a guide for his
commanding officers.
While watching these sands shift a fellow infantrymen
approached peter.
“Sir!” The man stepped closer, “I have new orders for
you.” He handed Peter a letter. “You are to return with
me to meet General Wavell.”
Peter had been expecting these orders. It was about one
of his ideas. He wanted to form his own raiding party
to strike the enemy’s supply lines using his knowledge
of the desert.
After reading the orders, Peter looked out on the desert
landscape. The wind had shifted and the sand danced
on the dunes. Peter knew in his heart that a storm was
coming, and that those who could weather it would be
stronger than ever.
Bullets were flying everywhere. A machine-gun nest and an infantry squad had Hauptmann Derek Brandt and his men pinned down. Derek took cover behind a ruined building and opened his satchel. He grabbed a few small grenades, a piece of lead pipe, and a bag of coins he had on him. Taking apart the grenades with his knife, he stuffed the pipe with cloth, powder and the coins he had. He fitted one of the grenades’ detonators to one end and pulled the pin. He tossed it between the enemy infantry and the HMG nest. Derek watched as the explosion went off. It was beautiful; the coins reflected the sunlight as they darted in every direction. One embedded itself in the wall right next to Derek but he didn’t even flinch. The two men manning the HMG nest were dead and the infantry were all either killed or severely wounded. But they weren’t the only ones. Two men in Derek’s unit were also killed. An acceptable loss, in Derek’s mind...
�
turn 1 abilities
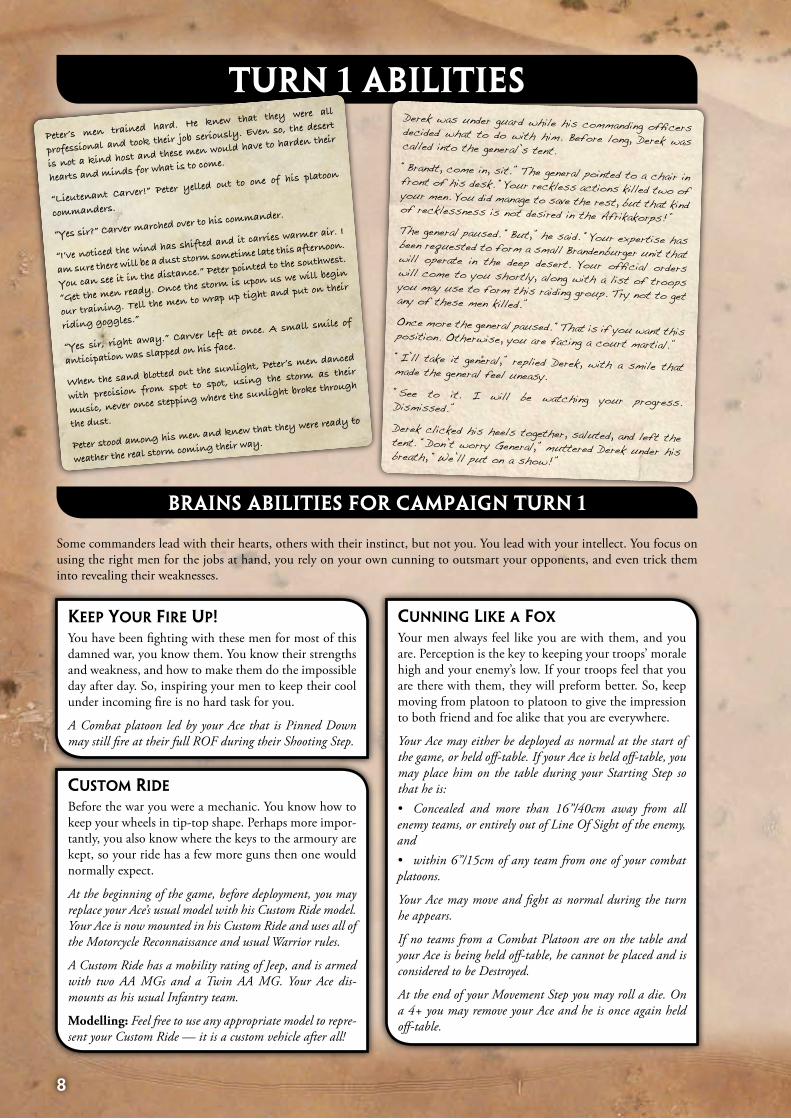
Some commanders lead with their hearts, others with their instinct, but not you. You lead with your intellect. You focus on using the right men for the jobs at hand, you rely on your own cunning to outsmart your opponents, and even trick them into revealing their weaknesses.
keep your Fire up!You have been fighting with these men for most of this damned war, you know them. You know their strengths and weakness, and how to make them do the impossible day after day. So, inspiring your men to keep their cool under incoming fire is no hard task for you.
A Combat platoon led by your Ace that is Pinned Down may still fire at their full ROF during their Shooting Step.
Cunning like a Fox
Your men always feel like you are with them, and you are. Perception is the key to keeping your troops’ morale high and your enemy’s low. If your troops feel that you are there with them, they will preform better. So, keep moving from platoon to platoon to give the impression to both friend and foe alike that you are everywhere.
Your Ace may either be deployed as normal at the start of the game, or held off-table. If your Ace is held off-table, you may place him on the table during your Starting Step so that he is:
Concealed and more than 16”/40cm away from all enemy teams, or entirely out of Line Of Sight of the enemy, and
within 6”/15cm of any team from one of your combat platoons.
Your Ace may move and fight as normal during the turn he appears.
If no teams from a Combat Platoon are on the table and your Ace is being held off-table, he cannot be placed and is considered to be Destroyed.
At the end of your Movement Step you may roll a die. On a 4+ you may remove your Ace and he is once again held off-table.
•
•
CusToM ride
Before the war you were a mechanic. You know how to keep your wheels in tip-top shape. Perhaps more impor-tantly, you also know where the keys to the armoury are kept, so your ride has a few more guns then one would normally expect.
At the beginning of the game, before deployment, you may replace your Ace’s usual model with his Custom Ride model. Your Ace is now mounted in his Custom Ride and uses all of the Motorcycle Reconnaissance and usual Warrior rules.
A Custom Ride has a mobility rating of Jeep, and is armed with two AA MGs and a Twin AA MG. Your Ace dis-mounts as his usual Infantry team.
Modelling: Feel free to use any appropriate model to repre-sent your Custom Ride — it is a custom vehicle after all!
brainS abilitieS for CaMpaign turn 1
Peter’s men trained hard. He knew that they were all
professional and took their job seriously. Even so, the desert
is not a kind host and these men would have to harden their
hearts and minds for what is to come.
“Lieutenant Carver!” Peter yelled out to one of his platoon
commanders.
“Yes sir?” Carver marched over to his commander.
“I’ve noticed the wind has shifted and it carries warmer air. I
am sure there will be a dust storm sometime late this afternoon.
You can see it in the distance.” Peter pointed to the southwest.
“Get the men ready. Once the storm is upon us we will begin
our training. Tell the men to wrap up tight and put on their
riding goggles.”
“Yes sir, right away.” Carver left at once. A small smile of
anticipation was slapped on his face.
When the sand blotted out the sunlight, Peter’s men danced
with precision from spot to spot, using the storm as their
music, never once stepping where the sunlight broke through
the dust.
Peter stood among his men and knew that they were ready to
weather the real storm coming their way.
Derek was under guard while his commanding officers decided what to do with him. Before long, Derek was called into the general’s tent. “Brandt, come in, sit.” The general pointed to a chair in front of his desk. “Your reckless actions killed two of your men. You did manage to save the rest, but that kind of recklessness is not desired in the Afrikakorps!”The general paused. “But,” he said. “Your expertise has been requested to form a small Brandenburger unit that will operate in the deep desert. Your official orders will come to you shortly, along with a list of troops you may use to form this raiding group. Try not to get any of these men killed.” Once more the general paused. “That is if you want this position. Otherwise, you are facing a court martial.” “I’ll take it general,” replied Derek, with a smile that made the general feel uneasy. “See to it. I will be watching your progress. Dismissed.”Derek clicked his heels together, saluted, and left the tent. “Don’t worry General,” muttered Derek under his breath, “We’ll put on a show!”
9
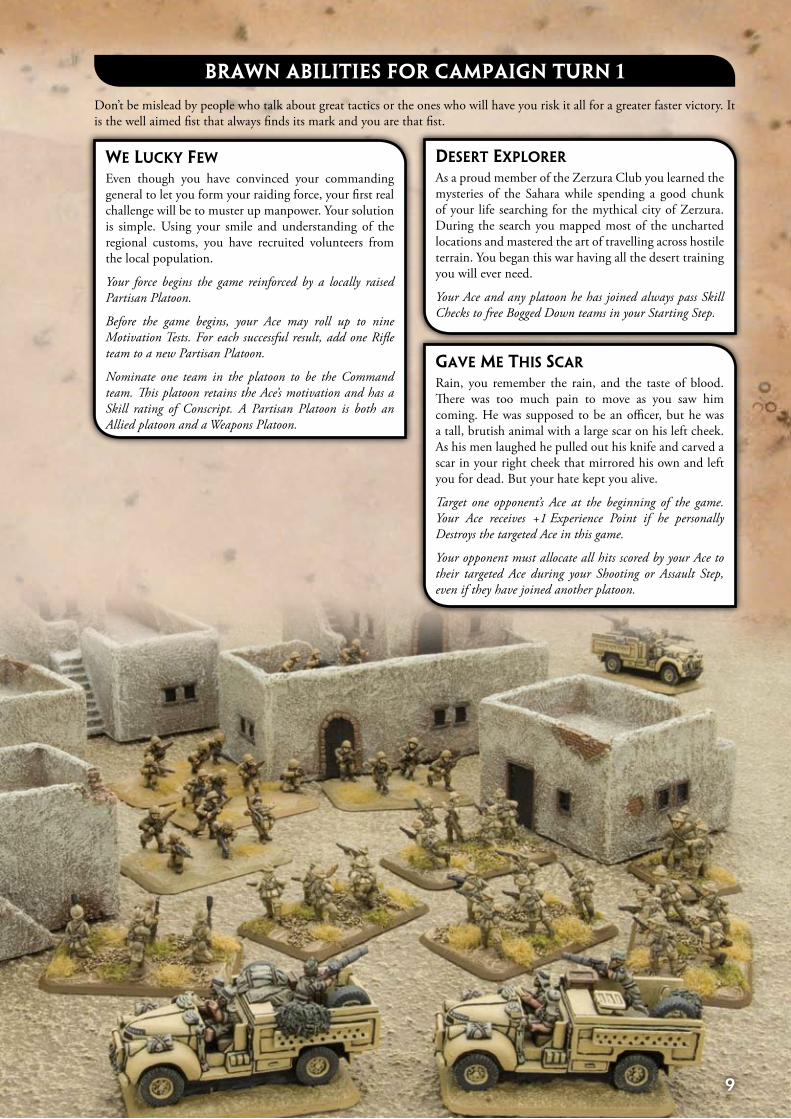
deserT explorer
As a proud member of the Zerzura Club you learned the mysteries of the Sahara while spending a good chunk of your life searching for the mythical city of Zerzura. During the search you mapped most of the uncharted locations and mastered the art of travelling across hostile terrain. You began this war having all the desert training you will ever need.
Your Ace and any platoon he has joined always pass Skill Checks to free Bogged Down teams in your Starting Step.
We luCky FeW
Even though you have convinced your commanding general to let you form your raiding force, your first real challenge will be to muster up manpower. Your solution is simple. Using your smile and understanding of the regional customs, you have recruited volunteers from the local population.
Your force begins the game reinforced by a locally raised Partisan Platoon.
Before the game begins, your Ace may roll up to nine Motivation Tests. For each successful result, add one Rifle team to a new Partisan Platoon.
Nominate one team in the platoon to be the Command team. This platoon retains the Ace’s motivation and has a Skill rating of Conscript. A Partisan Platoon is both an Allied platoon and a Weapons Platoon.
brawn abilitieS for CaMpaign turn 1
gave Me This sCar
Rain, you remember the rain, and the taste of blood. There was too much pain to move as you saw him coming. He was supposed to be an officer, but he was a tall, brutish animal with a large scar on his left cheek. As his men laughed he pulled out his knife and carved a scar in your right cheek that mirrored his own and left you for dead. But your hate kept you alive.
Target one opponent’s Ace at the beginning of the game. Your Ace receives +1 Experience Point if he personally Destroys the targeted Ace in this game.
Your opponent must allocate all hits scored by your Ace to their targeted Ace during your Shooting or Assault Step, even if they have joined another platoon.
Don’t be mislead by people who talk about great tactics or the ones who will have you risk it all for a greater faster victory. It is the well aimed fist that always finds its mark and you are that fist.
�0
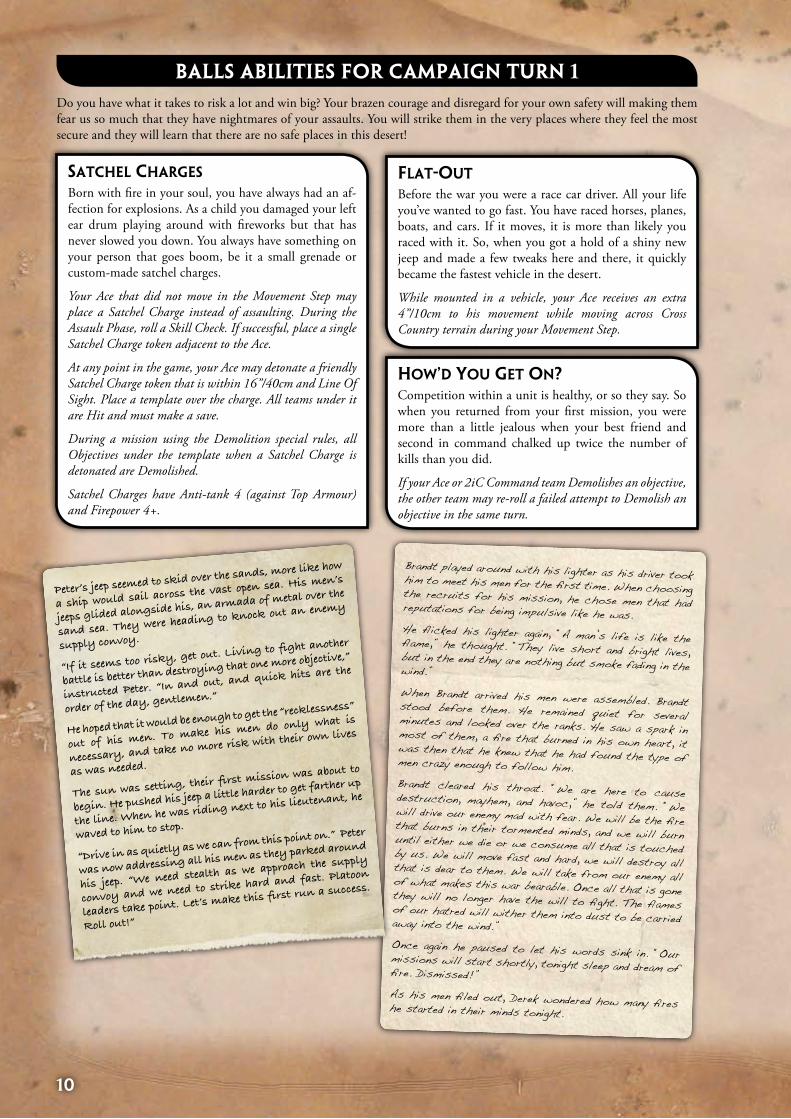
Do you have what it takes to risk a lot and win big? Your brazen courage and disregard for your own safety will making them fear us so much that they have nightmares of your assaults. You will strike them in the very places where they feel the most secure and they will learn that there are no safe places in this desert!
FlaT-ouT
Before the war you were a race car driver. All your life you’ve wanted to go fast. You have raced horses, planes, boats, and cars. If it moves, it is more than likely you raced with it. So, when you got a hold of a shiny new jeep and made a few tweaks here and there, it quickly became the fastest vehicle in the desert.
While mounted in a vehicle, your Ace receives an extra 4”/10cm to his movement while moving across Cross Country terrain during your Movement Step.
saTChel Charges
Born with fire in your soul, you have always had an af-fection for explosions. As a child you damaged your left ear drum playing around with fireworks but that has never slowed you down. You always have something on your person that goes boom, be it a small grenade or custom-made satchel charges.
Your Ace that did not move in the Movement Step may place a Satchel Charge instead of assaulting. During the Assault Phase, roll a Skill Check. If successful, place a single Satchel Charge token adjacent to the Ace.
At any point in the game, your Ace may detonate a friendly Satchel Charge token that is within 16”/40cm and Line Of Sight. Place a template over the charge. All teams under it are Hit and must make a save.
During a mission using the Demolition special rules, all Objectives under the template when a Satchel Charge is detonated are Demolished.
Satchel Charges have Anti-tank 4 (against Top Armour) and Firepower 4+.
ballS abilitieS for CaMpaign turn 1
hoW’d you geT on? Competition within a unit is healthy, or so they say. So when you returned from your first mission, you were more than a little jealous when your best friend and second in command chalked up twice the number of kills than you did.
If your Ace or 2iC Command team Demolishes an objective, the other team may re-roll a failed attempt to Demolish an objective in the same turn.
Peter’s jeep seemed to skid over the sands, more like how
a ship would sail across the vast open sea. His men’s
jeeps glided alongside his, an armada of metal over the
sand sea. They were heading to knock out an enemy
supply convoy.
“If it seems too risky, get out. Living to fight another
battle is better than destroying that one more objective,”
instructed Peter. “In and out, and quick hits are the
order of the day, gentlemen.”
He hoped that it would be enough to get the “recklessness”
out of his men. To make his men do only what is
necessary, and take no more risk with their own lives
as was needed.
The sun was setting, their first mission was about to
begin. He pushed his jeep a little harder to get farther up
the line. When he was riding next to his lieutenant, he
waved to him to stop.
“Drive in as quietly as we can from this point on.” Peter
was now addressing all his men as they parked around
his jeep. “We need stealth as we approach the supply
convoy and we need to strike hard and fast. Platoon
leaders take point. Let’s make this first run a success.
Roll out!”
Brandt played around with his lighter as his driver took him to meet his men for the first time. When choosing the recruits for his mission, he chose men that had reputations for being impulsive like he was. He flicked his lighter again, “A man’s life is like the flame,” he thought. “They live short and bright lives, but in the end they are nothing but smoke fading in the wind.”
When Brandt arrived his men were assembled. Brandt stood before them. He remained quiet for several minutes and looked over the ranks. He saw a spark in most of them, a fire that burned in his own heart, it was then that he knew that he had found the type of men crazy enough to follow him. Brandt cleared his throat. “We are here to cause destruction, mayhem, and havoc,” he told them. “We will drive our enemy mad with fear. We will be the fire that burns in their tormented minds, and we will burn until either we die or we consume all that is touched by us. We will move fast and hard, we will destroy all that is dear to them. We will take from our enemy all of what makes this war bearable. Once all that is gone they will no longer have the will to fight. The flames of our hatred will wither them into dust to be carried away into the wind.”
Once again he paused to let his words sink in. “Our missions will start shortly, tonight sleep and dream of fire. Dismissed!” As his men filed out, Derek wondered how many fires he started in their minds tonight.

��
spliT up
Watching how your men fight, you have begun to think more about speed and flexibility when planning your raiding missions. You are now convinced that these are the keys to victory in raiding missions. Splitting up a platoon can be risky, but being in two places at once can shift the advantage in your favour.
Before the game begins, you may split up to one of your Combat Platoons into two separate platoons (each with as equal of strength as possible).
Nominate one team from the new platoon to be the platoon’s command team.
To take this Ability your Ace must have the ability: Keep Your Fire Up!
Don’t think that your enemy is stupid, even if he is. Always plan as if they are smarter so that you are prepared when they get lucky. When your opponents position themselves in a way to counter your brilliant strategies, don’t be caught off guard. Instead be prepared and show them that nothing can defeat your superior mind.
turn 2 abilities
brainS abilitieS for CaMpaign turn 2
diversion
In your previous job as a stage magician, you learned the value of sleight of hand and misdirection. In your per-formances you were able to do something in one hand to catch the eyes of the entire audience while the other secretly completed your goals.
Once per game, at the beginning of your opponent’s turn, select one of your Combat platoons to create a Diversion.
All enemy platoons must make an immediate Skill Check. If a platoon fails this Skill Check, it may only move
toward and shoot at your platoon creating the Diversion. Otherwise the platoon is not fooled by the Diversion and
may move and shoot as normal.
To take this Ability your Ace must have the ability: Cunning Like a Fox.
•
•
heavy FirepoWer
After seeing your men in action you decided get some more firepower. You have managed to secure much the needed firepower by going though the proper channels or just out-right stealing.
You may upgrade up to one vehicle MG in each Combat Platoon with a HMG. An HMG has a ROF of 6, Anti-tank 2, Firepower 6, and a range of 24”/60cm as long as the vehicle does not move. However, when moving the weapon is reduced to the normal ROF 3 and 16”/40cm range of a vehicle MG.
When this vehicle dismounts, it may do so as its normal team or as a HMG man-packed gun team with the same HMG characteristics as above.
To take this Ability your Ace must have the ability: Custom Ride.
As night approached, Peter spotted the large enemy
supply convoy through his binoculars. It was making
its way through a lonely part of the desert and heading
to a small village where Peter was convinced they would
set up camp for the night.
Peter and his men drove into the night and up to the
small abandoned village. Silently Peter and his force
disembarked from their transports and moved closer to
the enemy camp on foot. They found that most of the
supply trucks were concentrated in two areas.
Peter split his force in two to cover both objectives.
Leading the first group himself, Peter crept closer. He
singled out two sharpshooters to take out two sentries.
The shots will awaken the enemy, but hopefully they
will be taken by surprise.,
Peter heard shots ring out from the other platoon, taking
out the enemy sentries. The fight was on!
Derek’s scouts finally located the base of the British raiders that had been carving up a fair amount of carnage along the coast. They had made camp at a nearby oasis. Derek and his men boldly drove straight into the British camp and without even leaving their transports they cut down all the of the enemy that guarded the oasis. But Derek felt empty. This was too easy and not even close to being fun.“Sir, we cleared out the enemy,” one of Derek’s lieutenants reported. “Also, while clearing out the enemy we found a great deal of explosives in one of the tents. Should we destroy them before we head out?”“No, I have an idea,” Derek smiled. “Gather the explosives grab the platoon commanders. We must work fast!”“Yes sir!”
��
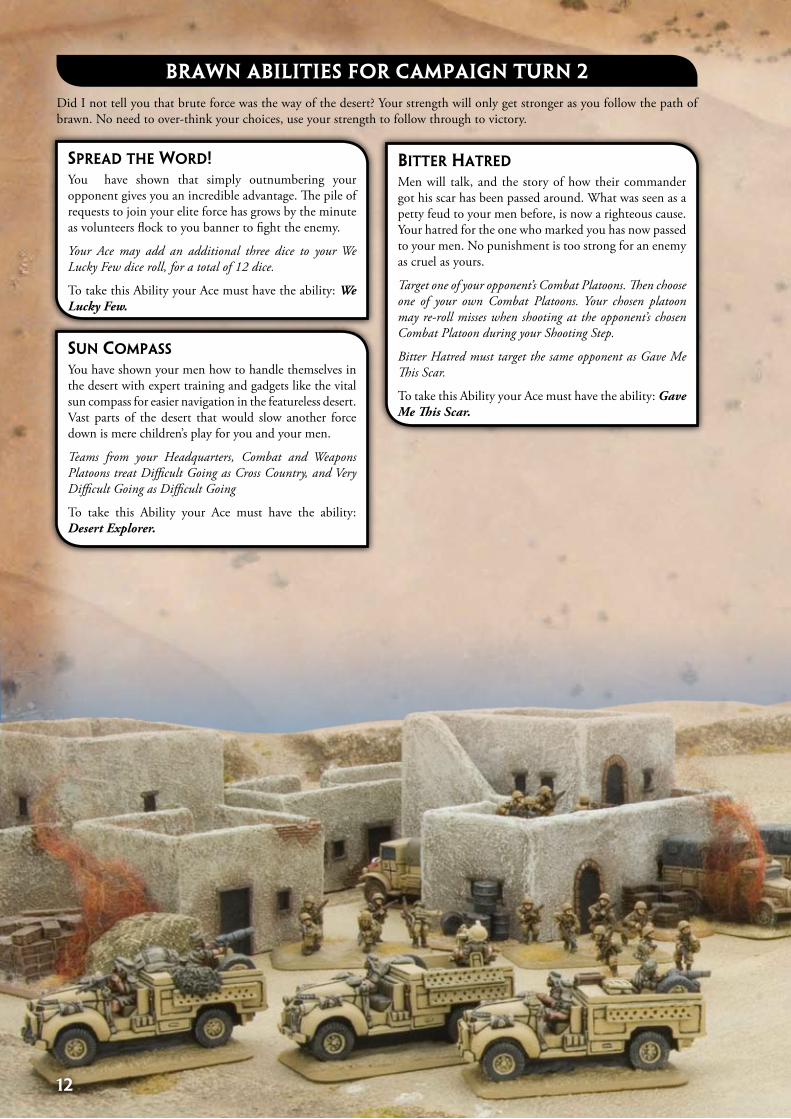
Did I not tell you that brute force was the way of the desert? Your strength will only get stronger as you follow the path of brawn. No need to over-think your choices, use your strength to follow through to victory.
spread The Word!You have shown that simply outnumbering your opponent gives you an incredible advantage. The pile of requests to join your elite force has grows by the minute as volunteers flock to you banner to fight the enemy.
Your Ace may add an additional three dice to your We Lucky Few dice roll, for a total of 12 dice.
To take this Ability your Ace must have the ability: We Lucky Few.
brawn abilitieS for CaMpaign turn 2
sun CoMpass
You have shown your men how to handle themselves in the desert with expert training and gadgets like the vital sun compass for easier navigation in the featureless desert. Vast parts of the desert that would slow another force down is mere children’s play for you and your men.
Teams from your Headquarters, Combat and Weapons Platoons treat Difficult Going as Cross Country, and Very Difficult Going as Difficult Going
To take this Ability your Ace must have the ability: Desert Explorer.
BiTTer haTred
Men will talk, and the story of how their commander got his scar has been passed around. What was seen as a petty feud to your men before, is now a righteous cause. Your hatred for the one who marked you has now passed to your men. No punishment is too strong for an enemy as cruel as yours.
Target one of your opponent’s Combat Platoons. Then choose one of your own Combat Platoons. Your chosen platoon may re-roll misses when shooting at the opponent’s chosen Combat Platoon during your Shooting Step.
Bitter Hatred must target the same opponent as Gave Me This Scar.
To take this Ability your Ace must have the ability: Gave Me This Scar.
�3
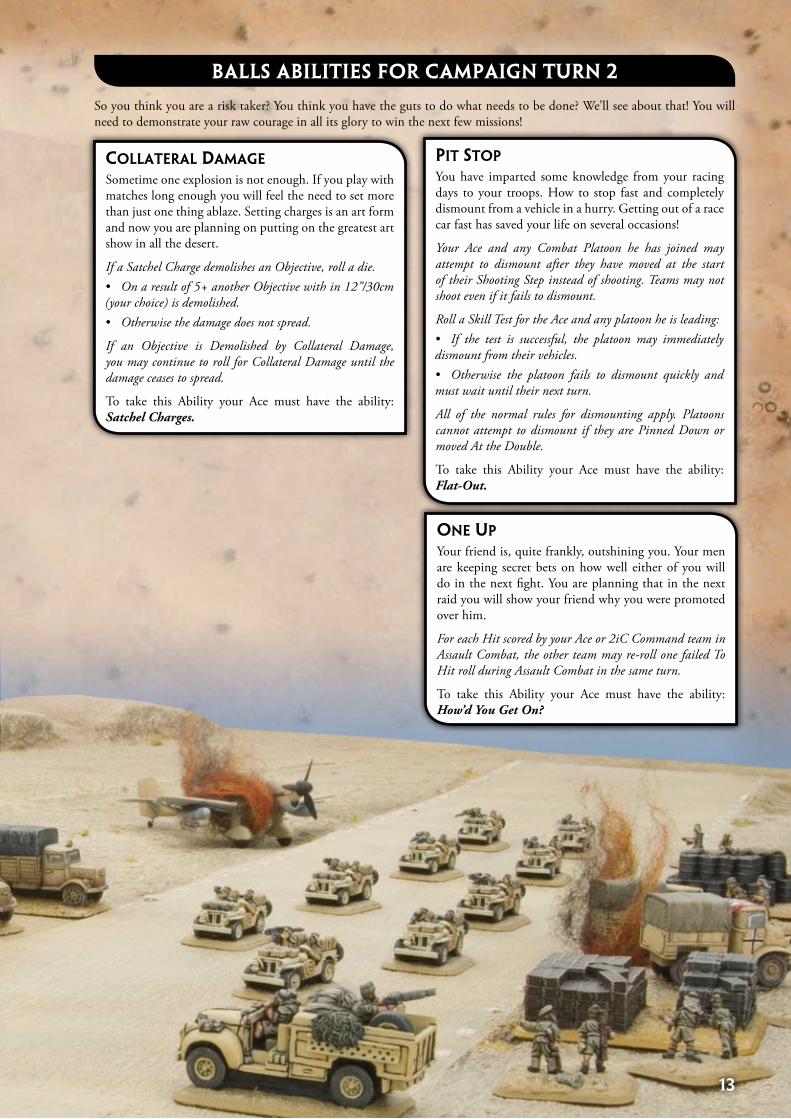
CollaTeral daMage
Sometime one explosion is not enough. If you play with matches long enough you will feel the need to set more than just one thing ablaze. Setting charges is an art form and now you are planning on putting on the greatest art show in all the desert.
If a Satchel Charge demolishes an Objective, roll a die. On a result of 5+ another Objective with in 12”/30cm
(your choice) is demolished.Otherwise the damage does not spread.
If an Objective is Demolished by Collateral Damage, you may continue to roll for Collateral Damage until the damage ceases to spread.
To take this Ability your Ace must have the ability: Satchel Charges.
•
•
ballS abilitieS for CaMpaign turn 2
piT sTop You have imparted some knowledge from your racing days to your troops. How to stop fast and completely dismount from a vehicle in a hurry. Getting out of a race car fast has saved your life on several occasions!
Your Ace and any Combat Platoon he has joined may attempt to dismount after they have moved at the start of their Shooting Step instead of shooting. Teams may not shoot even if it fails to dismount.
Roll a Skill Test for the Ace and any platoon he is leading:If the test is successful, the platoon may immediately
dismount from their vehicles. Otherwise the platoon fails to dismount quickly and
must wait until their next turn.
All of the normal rules for dismounting apply. Platoons cannot attempt to dismount if they are Pinned Down or moved At the Double.
To take this Ability your Ace must have the ability: Flat-Out.
•
•
one up Your friend is, quite frankly, outshining you. Your men are keeping secret bets on how well either of you will do in the next fight. You are planning that in the next raid you will show your friend why you were promoted over him.
For each Hit scored by your Ace or 2iC Command team in Assault Combat, the other team may re-roll one failed To Hit roll during Assault Combat in the same turn.
To take this Ability your Ace must have the ability: How’d You Get On?
So you think you are a risk taker? You think you have the guts to do what needs to be done? We’ll see about that! You will need to demonstrate your raw courage in all its glory to win the next few missions!
�4
The camp erupted into chaos, enemy troops poured out of
the buildings, half awake and not knowing where the
attack was coming from. Like the sands shifting in
the wind, Peters men moved among the enemy killing
them without pause. Peter was among them.
Peter’s submachine gun seemed to find its targets on
its own. The bullets from his men’s guns created a
storm in the night. Muzzle flashes in the dark served
to confuse the enemy troops even more.
Peter and a few of his men fought their way to the
transport trucks. A quick look inside one told Peter
that it was an ammunition supply truck, just what he
needed!
“Everyone fall back!” Peter shouted to his men as he
tossed three grenades into the supply truck.
The explosion was perfect, it took out the other trucks
around it. A second explosion in the camp signalled to
Peter that the other platoon had found and destroyed the
rest of the supply trucks.
As planned, the jeep drivers had brought their vehicles
to the edge of the abandoned village. Peter and his men
jumped aboard and as quickly as they had come, they
left.
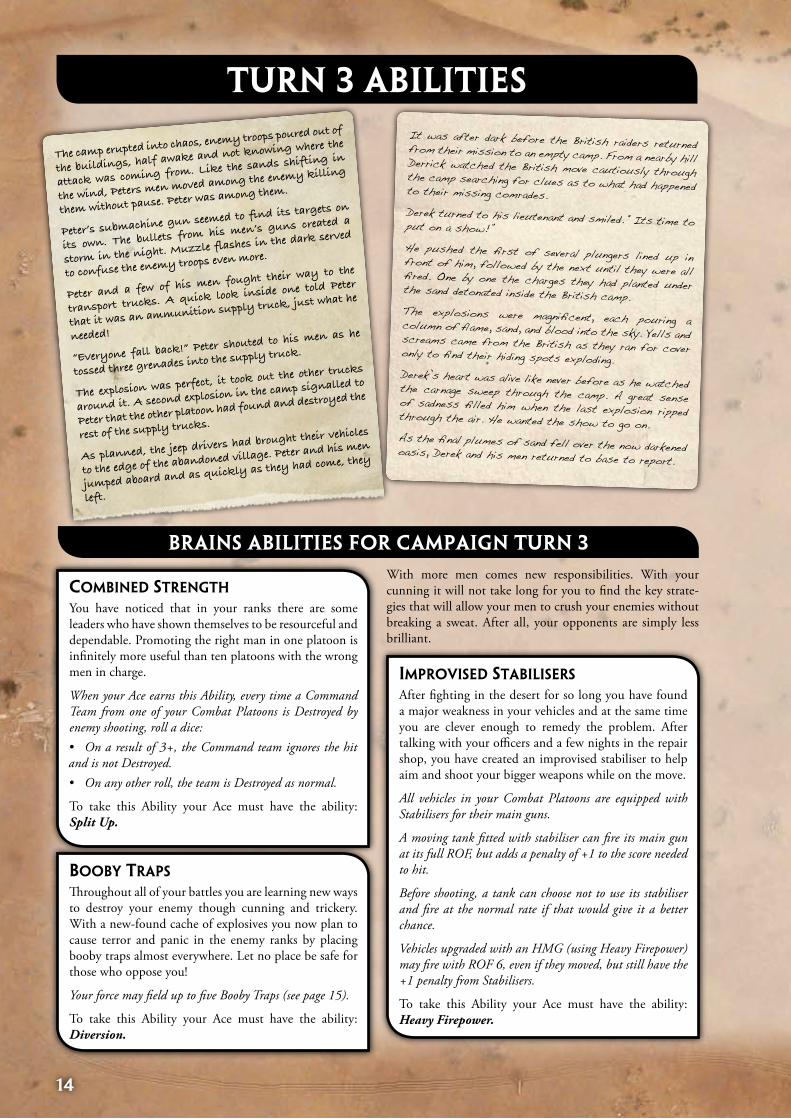
CoMBined sTrengTh
You have noticed that in your ranks there are some leaders who have shown themselves to be resourceful and dependable. Promoting the right man in one platoon is infinitely more useful than ten platoons with the wrong men in charge.
When your Ace earns this Ability, every time a Command Team from one of your Combat Platoons is Destroyed by enemy shooting, roll a dice:
On a result of 3+, the Command team ignores the hit and is not Destroyed.
On any other roll, the team is Destroyed as normal.
To take this Ability your Ace must have the ability: Split Up.
•
•
With more men comes new responsibilities. With your cunning it will not take long for you to find the key strate-gies that will allow your men to crush your enemies without breaking a sweat. After all, your opponents are simply less brilliant.
turn 3 abilities
brainS abilitieS for CaMpaign turn 3
BooBy Traps
Throughout all of your battles you are learning new ways to destroy your enemy though cunning and trickery. With a new-found cache of explosives you now plan to cause terror and panic in the enemy ranks by placing booby traps almost everywhere. Let no place be safe for those who oppose you!
Your force may field up to five Booby Traps (see page 15).
To take this Ability your Ace must have the ability: Diversion.
iMprovised sTaBilisers
After fighting in the desert for so long you have found a major weakness in your vehicles and at the same time you are clever enough to remedy the problem. After talking with your officers and a few nights in the repair shop, you have created an improvised stabiliser to help aim and shoot your bigger weapons while on the move.
All vehicles in your Combat Platoons are equipped with Stabilisers for their main guns.
A moving tank fitted with stabiliser can fire its main gun at its full ROF, but adds a penalty of +1 to the score needed to hit.
Before shooting, a tank can choose not to use its stabiliser and fire at the normal rate if that would give it a better chance.
Vehicles upgraded with an HMG (using Heavy Firepower) may fire with ROF 6, even if they moved, but still have the +1 penalty from Stabilisers.
To take this Ability your Ace must have the ability: Heavy Firepower.
It was after dark before the British raiders returned from their mission to an empty camp. From a nearby hill Derrick watched the British move cautiously through the camp searching for clues as to what had happened to their missing comrades.Derek turned to his lieutenant and smiled. “Its time to put on a show!”He pushed the first of several plungers lined up in front of him, followed by the next until they were all fired. One by one the charges they had planted under the sand detonated inside the British camp. The explosions were magnificent, each pouring a column of flame, sand, and blood into the sky. Yells and screams came from the British as they ran for cover only to find their hiding spots exploding. Derek’s heart was alive like never before as he watched the carnage sweep through the camp. A great sense of sadness filled him when the last explosion ripped through the air. He wanted the show to go on. As the final plumes of sand fell over the now darkened oasis, Derek and his men returned to base to report.

��
Retreating troops often booby trapped areas before with-drawing. The pursuing troops usually had little warning of booby traps and relied on their skill to detect and neutralise any they encountered. Those unwary enough not to notice them suffered accordingly.
Booby Traps are dangerous Obstacles. As such platoons need to pass a Motivation Test before they can cross or move off them.
Unlike other Obstacles, a Booby Trap occupies the area of a small base (1¼”/32mm x 1”/25mm).
A Booby Trap only affects the first team to move across or off the Booby Trap base. After that the Booby Trap is expended and removed.
Placing BooBy traPs
Booby traps are always carefully hidden and come as a surprise to the enemy.
Booby Traps do not need to be deployed before the game begins. Instead, they may be placed at the same time as Ambushing platoons during the Starting Step.
Booby Traps may be placed anywhere in your own Deployment Area or No man’s Land, including under enemy troops. However, you may not place Booby Traps under teams already on Booby Traps, nor under Dug In teams or those that deployed in Prepared Positions and have not yet moved.
triPPing a BooBy traP
Because booby traps are carefully hidden, soldiers can find themselves in a dangerous situation without having realised it..
If a Booby Trap is placed under a team, the team’s platoon will test as if crossing the Booby Trap when it first moves off it. Otherwise the Booby Trap goes off when a team first crosses it.
Roll a Skill Test for a team that crosses a Booby Trap.
If the team passes the Skill Test, they are unharmed.
If they fail, they take a hit from the Booby Trap and must stop moving immediately.
In either case, the Booby Trap is removed.
If any team in a platoon is hit by a Booby Trap, whether the hit causes a casualty or not, the entire platoon is Pinned Down at the end of their movement.
•
•
arMoured vehiCles hiT By BooBy Traps
Booby traps are normally small and intended for infantry on foot rather than tanks, but some of them are much larger and can knock out a tank with a bit of luck.
Treat hits from Booby Traps on Armoured vehicles as a hit on the Top armour by a weapon with an Anti-tank rating of 3 and a Firepower rating of 5+.
unarMoured vehiCles hiT By BooBy Traps
Booby traps are usually powerful enough to wreck a truck, but a lucky driver might find themselves shocked but unharmed.
Unarmoured vehicles that are hit by a Booby Trap save on a roll of 5+.
inFanTry and guns hiT By BooBy Traps
Infantry are generally cautious in booby trapped areas, but occasionally they make a serious miscalculation and pay the price.
Roll a save for each Infantry or Gun team hit by a Booby Trap. An Infantry team survives on a roll of 3+, but is Destroyed otherwise. Gun teams survive on a roll of 5+.
passengers hiT By BooBy Traps
With a little luck, the passengers in a vehicle or tank riders on a tank that hits a booby trap survive unharmed.
Passengers carried in or on a vehicle Destroyed by a Booby Trap must roll a 5+ save. If they pass the save, they Dismount.
gaPPing a BooBy traP
Booby traps are designed to be tricky to locate and hard to disarm. One mistake and the clearing team is in serious trouble.
A team may attempt to gap a Booby Trap in the same way they would gap a minefield. If a team fails its Skill Test to gap a Booby Trap it is hit by mines (see the Flames Of War rulebook) as if it failed its Skill Test to cross the Booby Trap.
booby trap SpeCial ruleS
��
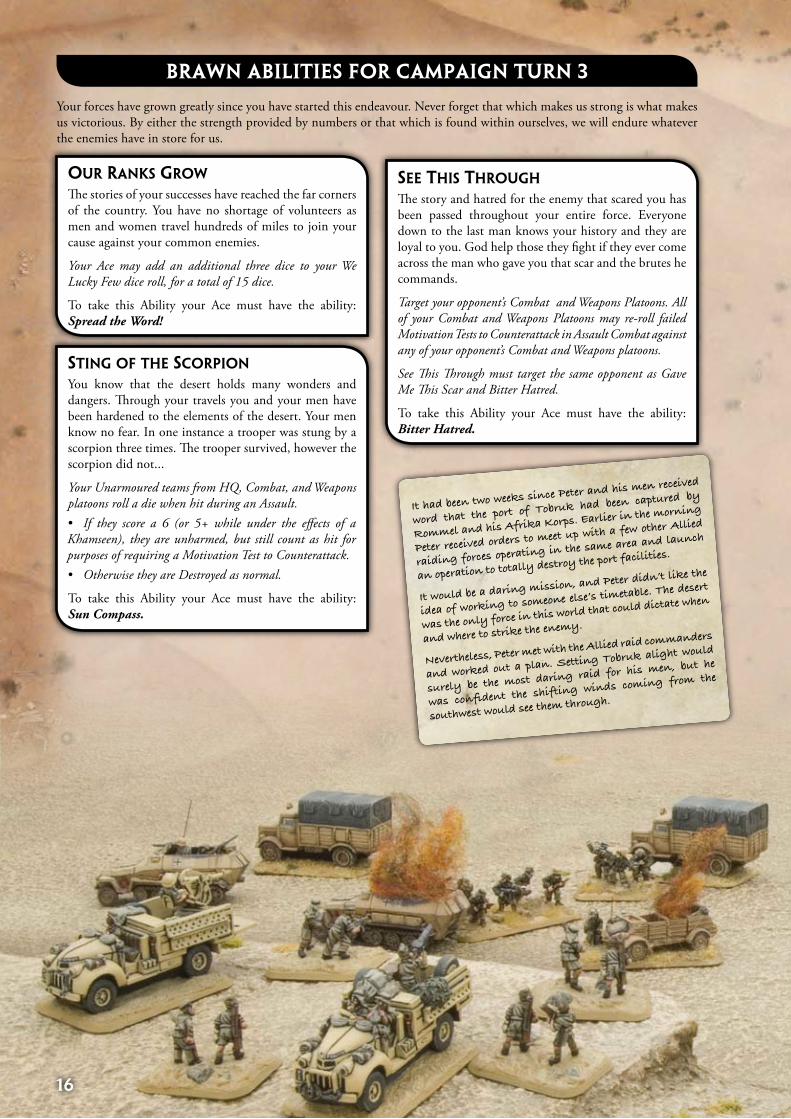
Your forces have grown greatly since you have started this endeavour. Never forget that which makes us strong is what makes us victorious. By either the strength provided by numbers or that which is found within ourselves, we will endure whatever the enemies have in store for us.
our ranks groW
The stories of your successes have reached the far corners of the country. You have no shortage of volunteers as men and women travel hundreds of miles to join your cause against your common enemies.
Your Ace may add an additional three dice to your We Lucky Few dice roll, for a total of 15 dice.
To take this Ability your Ace must have the ability: Spread the Word!
brawn abilitieS for CaMpaign turn 3
sTing oF The sCorpion
You know that the desert holds many wonders and dangers. Through your travels you and your men have been hardened to the elements of the desert. Your men know no fear. In one instance a trooper was stung by a scorpion three times. The trooper survived, however the scorpion did not...
Your Unarmoured teams from HQ, Combat, and Weapons platoons roll a die when hit during an Assault.
If they score a 6 (or 5+ while under the effects of a Khamseen), they are unharmed, but still count as hit for purposes of requiring a Motivation Test to Counterattack.
Otherwise they are Destroyed as normal.
To take this Ability your Ace must have the ability: Sun Compass.
•
•
see This Through
The story and hatred for the enemy that scared you has been passed throughout your entire force. Everyone down to the last man knows your history and they are loyal to you. God help those they fight if they ever come across the man who gave you that scar and the brutes he commands.
Target your opponent’s Combat and Weapons Platoons. All of your Combat and Weapons Platoons may re-roll failed Motivation Tests to Counterattack in Assault Combat against any of your opponent’s Combat and Weapons platoons.
See This Through must target the same opponent as Gave Me This Scar and Bitter Hatred.
To take this Ability your Ace must have the ability: Bitter Hatred.
It had been two weeks since Peter and his men received
word that the port of Tobruk had been captured by
Rommel and his Afrika Korps. Earlier in the morning
Peter received orders to meet up with a few other Allied
raiding forces operating in the same area and launch
an operation to totally destroy the port facilities.
It would be a daring mission, and Peter didn’t like the
idea of working to someone else’s timetable. The desert
was the only force in this world that could dictate when
and where to strike the enemy.
Nevertheless, Peter met with the Allied raid commanders
and worked out a plan. Setting Tobruk alight would
surely be the most daring raid for his men, but he
was confident the shifting winds coming from the
southwest would see them through.

��
speCial issue explosives
You have secured permission to use Special Issue Explosives, drawn from headquarters. To you they are a theatre of light and fire—a song of chaos that rips through the air destroying and unmaking the world. As you watch your ‘un-creation’ you can not help but feel elated by the power that is in your SIE charges!
Your Ace’s Satchel Charges are now Anti-tank 5 (against Top Armour) and Firepower 2+.
In addition, unarmoured teams within 2”/5cm of one of your Ace’s Satchel Charge automatically fail their save when it detonates.
To take this Ability your Ace must have the ability: Collateral Damage.
ballS abilitieS for CaMpaign turn 3
Finish line In racing and in life, goals are important. The impor-tance of this lesson is not lost on your men, they feel the rush of adrenaline when rushing home from a mission. The idea of crossing the finish line and completing a mission is fixed in their minds.
Vehicles from your Combat and Headquarters platoons may attempt to escape in the same turn that they have moved At the Double.
Roll a dice when each vehicle attempts to escape while moving At the Double:
On a result of 5+, the team escapes.On any other roll the team fails to escape and is Destroyed.
If vehicles were Destroyed and takes this the platoon below half-strength, the platoon must make an immediate Morale Check. If the platoon fails this Check the platoon is Destroyed no matter how many teams escaped.
To take this Ability your Ace must have the ability: Pit Stop.
••
anyThing you Can do… The stakes are higher and you heard that some of your lieutenants have lost money on you from the last battle. Are you going to take this? I don’t think so. They will win twice what they lost in the next battle... that is if they chose to bet on you again.
For every Hit scored by your Ace or 2iC Command team during the Shooting Step, the other team may re-roll a failed To Hit roll during the Shooting Step in the same turn.
To take this Ability your Ace must have the ability: One Up.
Well look who’s still standing like he’s got a pair! Good on you. Looks like you are getting a few more toys to play with. Will you hold them back not wanting the big mean enemy to destroy them or will you man-up and go all-in to win?
Brandt’s campaign of fire and light could be seen all across the allied lines, striking British and French raiding bases across Libya. He then spearheaded Rommel’s drive to capture Tobruk, lending his unique demolition skills to disrupt and demoralise the retreating British army.
However, while the Afrika Korps swept east toward certain victory, Derek worried that his elite force would no longer be needed and disbanded. He couldn’t bear the thought that he would be taken away from completing his masterpiece of fire. He needed a reason to prove that his work was essential to final victory. To do that, he would need supplies, and lots of them! With the British in full retreat Derek knew he had an opportunity to loot British explosives from the abandoned port city. He pushed his men hard and when they reached the city he let them off the leash with orders to plunder any supplies they could for their small force. After a few hours Brandt’s headquarters was stocked with enough explosives to finish his masterpiece. It was time to put the final strokes into motion...
��
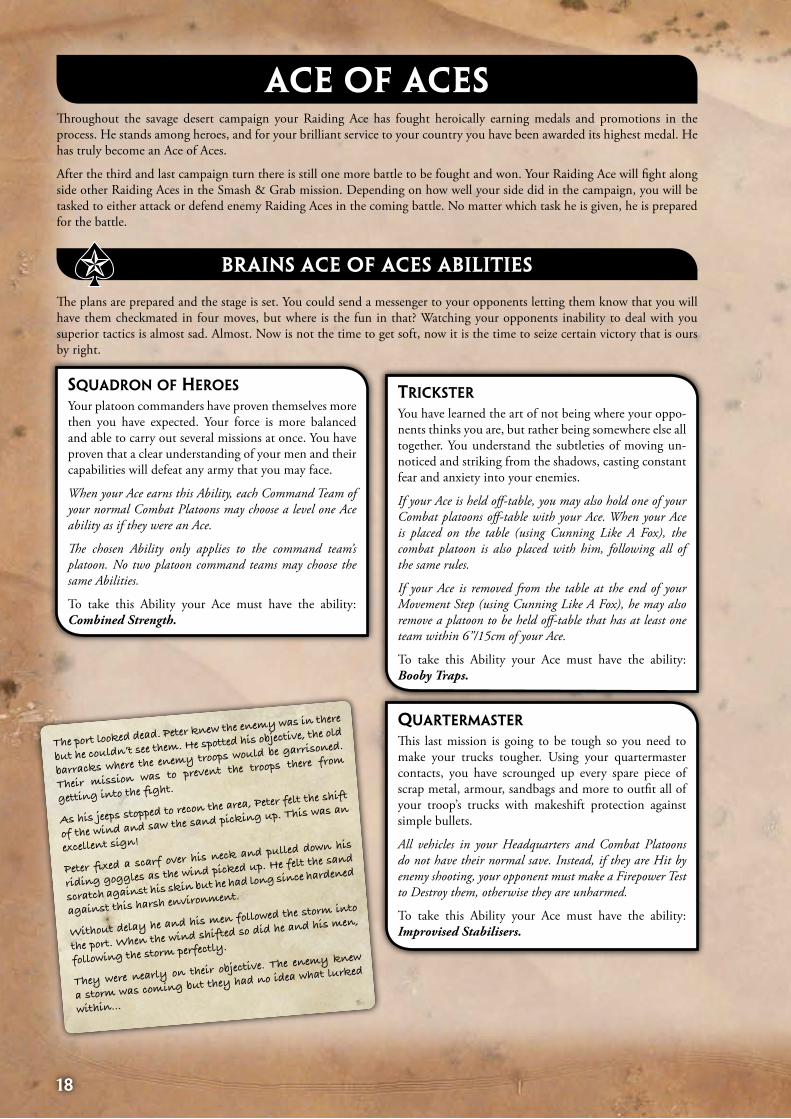
Throughout the savage desert campaign your Raiding Ace has fought heroically earning medals and promotions in the process. He stands among heroes, and for your brilliant service to your country you have been awarded its highest medal. He has truly become an Ace of Aces.
After the third and last campaign turn there is still one more battle to be fought and won. Your Raiding Ace will fight along side other Raiding Aces in the Smash & Grab mission. Depending on how well your side did in the campaign, you will be tasked to either attack or defend enemy Raiding Aces in the coming battle. No matter which task he is given, he is prepared for the battle.
ace of aces
brainS aCe of aCeS abilitieS
squadron oF heroes
Your platoon commanders have proven themselves more then you have expected. Your force is more balanced and able to carry out several missions at once. You have proven that a clear understanding of your men and their capabilities will defeat any army that you may face.
When your Ace earns this Ability, each Command Team of your normal Combat Platoons may choose a level one Ace ability as if they were an Ace.
The chosen Ability only applies to the command team’s platoon. No two platoon command teams may choose the same Abilities.
To take this Ability your Ace must have the ability: Combined Strength.
TriCksTer
You have learned the art of not being where your oppo-nents thinks you are, but rather being somewhere else all together. You understand the subtleties of moving un-noticed and striking from the shadows, casting constant fear and anxiety into your enemies.
If your Ace is held off-table, you may also hold one of your Combat platoons off-table with your Ace. When your Ace is placed on the table (using Cunning Like A Fox), the combat platoon is also placed with him, following all of the same rules.
If your Ace is removed from the table at the end of your Movement Step (using Cunning Like A Fox), he may also remove a platoon to be held off-table that has at least one team within 6”/15cm of your Ace.
To take this Ability your Ace must have the ability: Booby Traps.
quarTerMasTer
This last mission is going to be tough so you need to make your trucks tougher. Using your quartermaster contacts, you have scrounged up every spare piece of scrap metal, armour, sandbags and more to outfit all of your troop’s trucks with makeshift protection against simple bullets.
All vehicles in your Headquarters and Combat Platoons do not have their normal save. Instead, if they are Hit by enemy shooting, your opponent must make a Firepower Test to Destroy them, otherwise they are unharmed.
To take this Ability your Ace must have the ability: Improvised Stabilisers.
The plans are prepared and the stage is set. You could send a messenger to your opponents letting them know that you will have them checkmated in four moves, but where is the fun in that? Watching your opponents inability to deal with you superior tactics is almost sad. Almost. Now is not the time to get soft, now it is the time to seize certain victory that is ours by right.
The port looked dead. Peter knew the enemy was in there
but he couldn’t see them. He spotted his objective, the old
barracks where the enemy troops would be garrisoned.
Their mission was to prevent the troops there from
getting into the fight.
As his jeeps stopped to recon the area, Peter felt the shift
of the wind and saw the sand picking up. This was an
excellent sign!
Peter fixed a scarf over his neck and pulled down his
riding goggles as the wind picked up. He felt the sand
scratch against his skin but he had long since hardened
against this harsh environment.
Without delay he and his men followed the storm into
the port. When the wind shifted so did he and his men,
following the storm perfectly.
They were nearly on their objective. The enemy knew
a storm was coming but they had no idea what lurked
within...
�9
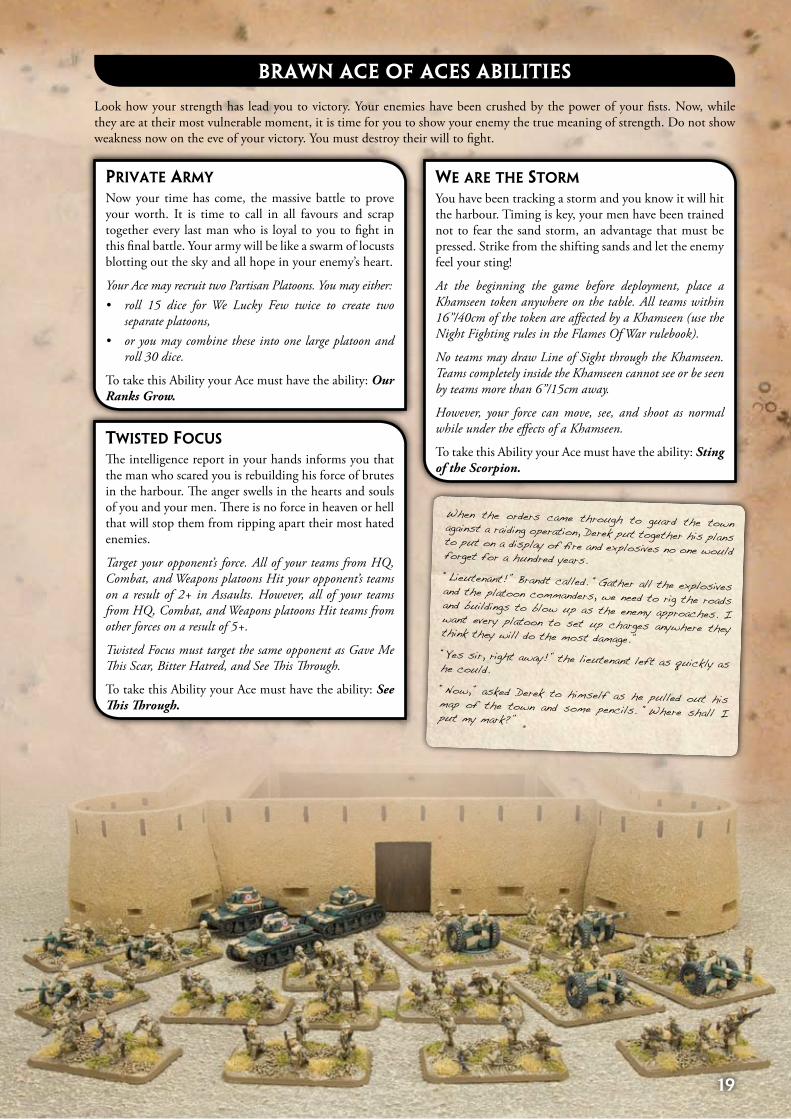
Look how your strength has lead you to victory. Your enemies have been crushed by the power of your fists. Now, while they are at their most vulnerable moment, it is time for you to show your enemy the true meaning of strength. Do not show weakness now on the eve of your victory. You must destroy their will to fight.
privaTe arMy
Now your time has come, the massive battle to prove your worth. It is time to call in all favours and scrap together every last man who is loyal to you to fight in this final battle. Your army will be like a swarm of locusts blotting out the sky and all hope in your enemy’s heart.
Your Ace may recruit two Partisan Platoons. You may either:roll 15 dice for We Lucky Few twice to create two separate platoons, or you may combine these into one large platoon and roll 30 dice.
To take this Ability your Ace must have the ability: Our Ranks Grow.
•
•
brawn aCe of aCeS abilitieS
We are The sTorM
You have been tracking a storm and you know it will hit the harbour. Timing is key, your men have been trained not to fear the sand storm, an advantage that must be pressed. Strike from the shifting sands and let the enemy feel your sting!
At the beginning the game before deployment, place a Khamseen token anywhere on the table. All teams within 16”/40cm of the token are affected by a Khamseen (use the Night Fighting rules in the Flames Of War rulebook).
No teams may draw Line of Sight through the Khamseen. Teams completely inside the Khamseen cannot see or be seen by teams more than 6”/15cm away.
However, your force can move, see, and shoot as normal while under the effects of a Khamseen.
To take this Ability your Ace must have the ability: Sting of the Scorpion.
TWisTed FoCus
The intelligence report in your hands informs you that the man who scared you is rebuilding his force of brutes in the harbour. The anger swells in the hearts and souls of you and your men. There is no force in heaven or hell that will stop them from ripping apart their most hated enemies.
Target your opponent’s force. All of your teams from HQ, Combat, and Weapons platoons Hit your opponent’s teams on a result of 2+ in Assaults. However, all of your teams from HQ, Combat, and Weapons platoons Hit teams from other forces on a result of 5+.
Twisted Focus must target the same opponent as Gave Me This Scar, Bitter Hatred, and See This Through.
To take this Ability your Ace must have the ability: See This Through.
When the orders came through to guard the town against a raiding operation, Derek put together his plans to put on a display of fire and explosives no one would forget for a hundred years.“Lieutenant!” Brandt called. “Gather all the explosives and the platoon commanders, we need to rig the roads and buildings to blow up as the enemy approaches. I want every platoon to set up charges anywhere they think they will do the most damage.”“Yes sir, right away!” the lieutenant left as quickly as he could.“Now,” asked Derek to himself as he pulled out his map of the town and some pencils. “Where shall I put my mark?”
�0
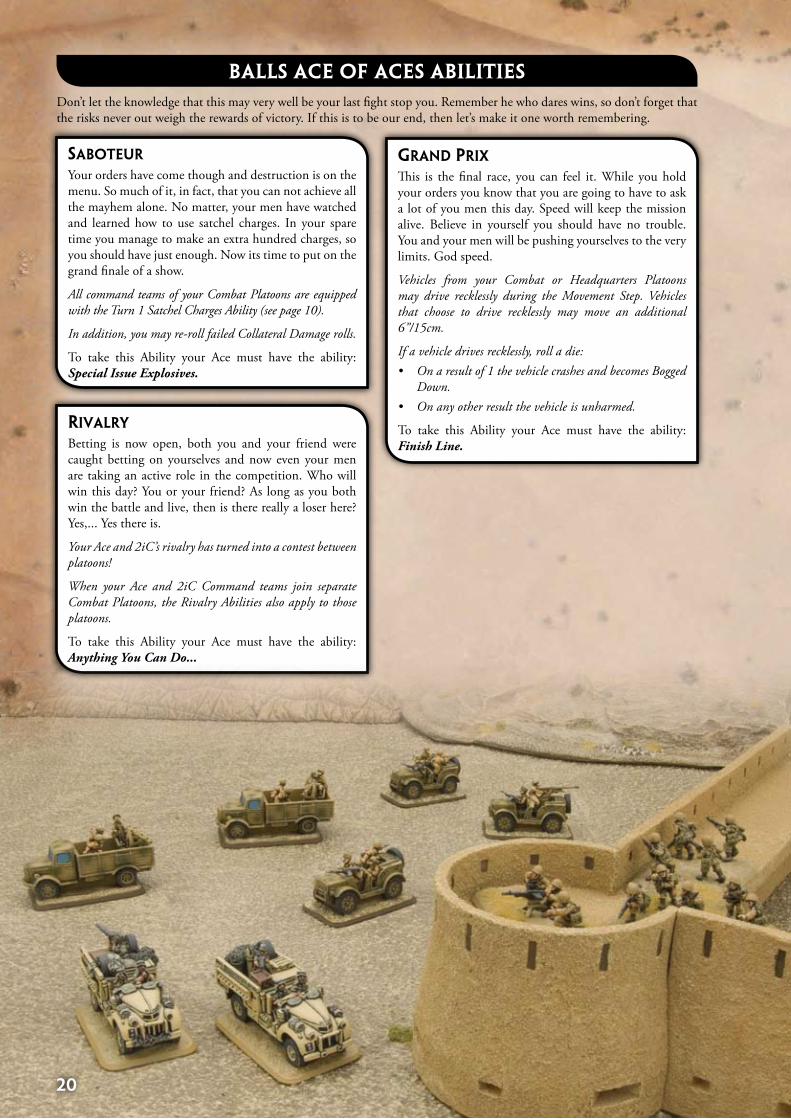
Don’t let the knowledge that this may very well be your last fight stop you. Remember he who dares wins, so don’t forget that the risks never out weigh the rewards of victory. If this is to be our end, then let’s make it one worth remembering.
saBoTeur
Your orders have come though and destruction is on the menu. So much of it, in fact, that you can not achieve all the mayhem alone. No matter, your men have watched and learned how to use satchel charges. In your spare time you manage to make an extra hundred charges, so you should have just enough. Now its time to put on the grand finale of a show.
All command teams of your Combat Platoons are equipped with the Turn 1 Satchel Charges Ability (see page 10).
In addition, you may re-roll failed Collateral Damage rolls.
To take this Ability your Ace must have the ability: Special Issue Explosives.
ballS aCe of aCeS abilitieS
grand prix
This is the final race, you can feel it. While you hold your orders you know that you are going to have to ask a lot of you men this day. Speed will keep the mission alive. Believe in yourself you should have no trouble. You and your men will be pushing yourselves to the very limits. God speed.
Vehicles from your Combat or Headquarters Platoons may drive recklessly during the Movement Step. Vehicles that choose to drive recklessly may move an additional 6”/15cm.
If a vehicle drives recklessly, roll a die: On a result of 1 the vehicle crashes and becomes Bogged Down.On any other result the vehicle is unharmed.
To take this Ability your Ace must have the ability: Finish Line.
•
•rivalry
Betting is now open, both you and your friend were caught betting on yourselves and now even your men are taking an active role in the competition. Who will win this day? You or your friend? As long as you both win the battle and live, then is there really a loser here? Yes,... Yes there is.
Your Ace and 2iC’s rivalry has turned into a contest between platoons!
When your Ace and 2iC Command teams join separate Combat Platoons, the Rivalry Abilities also apply to those platoons.
To take this Ability your Ace must have the ability: Anything You Can Do...

raiding ForCes
garrison ForCes
play any era
��
part iii: your forceNot surprisingly, Raiding Aces is all about raiding forces. The Sahara Desert was a difficult, if not impossible, battlefield to wage war upon. Its vast distances and fine sand made it exceptionally difficult to operate heavy equipment. Similarly the sparse sources of water made it impossible to operate a major infantry force, which required large amounts of supplies to maintain.
The fate of the battle relied heavily on fast and mobile columns of troops, whether in trucks, mounted on camel-back or garrisoned around a precious oasis.
Building your ForCe
At the beginning of the campaign, each player must choose a deep desert raiding company or a garrison company to play during the whole course of the campaign.
Players may only choose from the following options when selecting their Raiding Aces company:
BriTish ForCesLRDG PatrolSAS Squadron
iTalian ForCesCompagnia Autosahariana103a Compagnia Arditi Camionettisti
Free FrenCh ForCesCompagnie de Tiralleurs SenegalaisCompagnie Decouverte de Combat
gerMan ForCesBrandenburger HalbkompanieKampfgruppe von Koenen (website PDF)Unternehmen Dora (website PDF)
us ForCesOSS Operational Group
••
••
••
•••
•
BriTish ForCesSudan Rifle Company
iTalian ForCesCompagnia Mitraglieri
Free FrenCh ForCesCompagnie de Tiralleurs Senegalais
•
•
•
Build your company just like you would any normal Flames Of War force. For example you must take a Company HQ and all mandatory platoons listed on your force’s company diagram.
Once the campaign has begun, you are free to change the composition of your force, however you cannot change your company.
For example, you cannot change your force from an LRDG Patrol to an SAS Squadron. However, you may change what platoons you take in your LRDG Patrol. Your force must also contain your Raiding Ace and you must follow the campaign turn rules for building your force (see pages 22-23).
Each campaign turn has its own set of rules telling you what platoons have been made available to your Raiding Ace. At the beginning of the campaign it’s just you and your men. You cannot count on outside help straight away and you’ll have to accomplish the mission with what you have. As the campaign progresses, you’ll get to add support platoons as your missions become larger.
opTional rules For garrison ForCes
Garrison forces were a vital portion of the raiding war. They guarded the vial places in the desert and fought the raiders whenever and wherever they could. In Raiding Aces, feel free to use the Raiding Aces Abilities for your Garrison troops.
Alternatively, one modification you can make to your Raiding Aces campaign is to allow players fielding garrison forces to use the Infantry Aces Abilities rather than the Raiding Aces set. These tried and true skills offer more for the static garrison forces than the high-octane ones of the raiders! Its up to you and the campaign organiser to make the call!
You can find the Infantry Aces Ability Chart on our website www.FlamesOfWar.com.
In many ways the raiding war is an era unto itself. The raiders and garrisons of the Sahara faced each other with similar technologies, made their own field modifica-tions, and fought the war at their own pace.
In your Raiding Aces campaign, feel free to allow Early and Mid War forces to mingle and fight each other throughout the campaign. This opens up the variety of forces available and prevents confusion on how to field forces that undergo complete a reorganisation between the eras, such as the Italian Compagnia Mitraglieri.
noTe
You may also choose any other force not listed here that has been officially recognised as a raiding or garrison force. You can find a list of these on our website:
www.FlamesOfWar.com
��
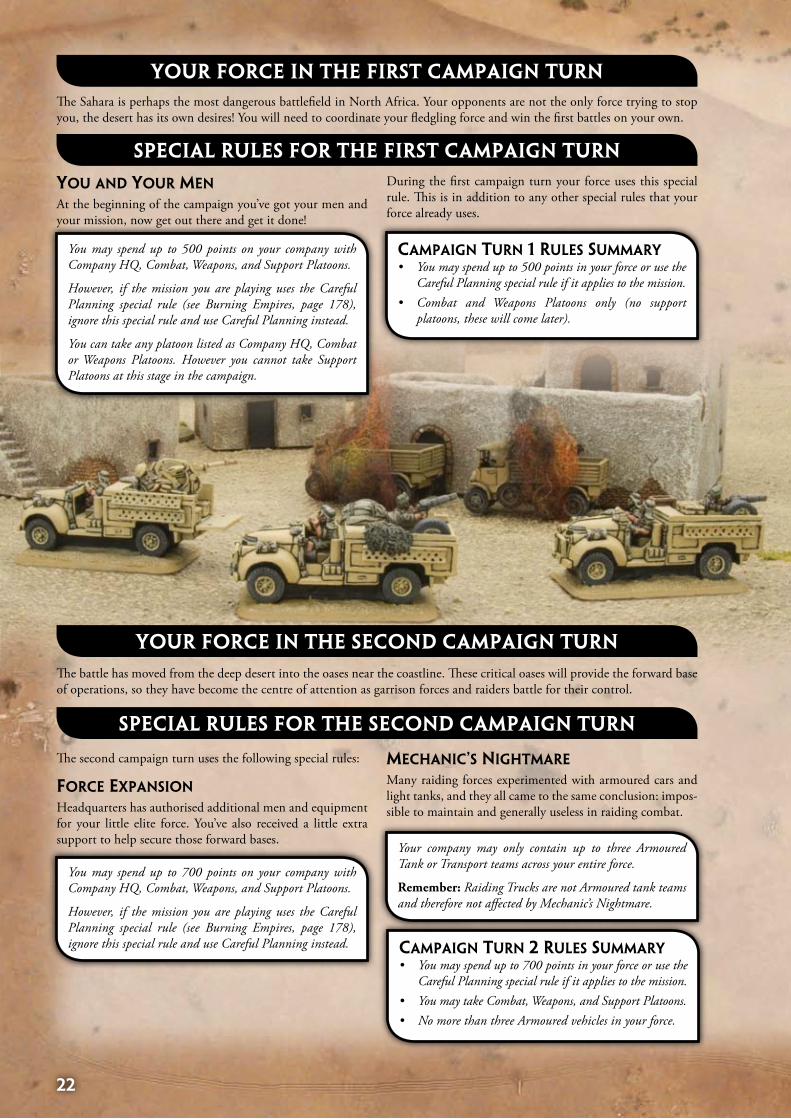
The Sahara is perhaps the most dangerous battlefield in North Africa. Your opponents are not the only force trying to stop you, the desert has its own desires! You will need to coordinate your fledgling force and win the first battles on your own.
you and your Men
At the beginning of the campaign you’ve got your men and your mission, now get out there and get it done!
You may spend up to 500 points on your company with Company HQ, Combat, Weapons, and Support Platoons.
However, if the mission you are playing uses the Careful Planning special rule (see Burning Empires, page 178), ignore this special rule and use Careful Planning instead.
You can take any platoon listed as Company HQ, Combat or Weapons Platoons. However you cannot take Support Platoons at this stage in the campaign.
During the first campaign turn your force uses this special rule. This is in addition to any other special rules that your force already uses.
your forCe in the firSt CaMpaign turn
SpeCial ruleS for the firSt CaMpaign turn
The battle has moved from the deep desert into the oases near the coastline. These critical oases will provide the forward base of operations, so they have become the centre of attention as garrison forces and raiders battle for their control.
ForCe expansion
Headquarters has authorised additional men and equipment for your little elite force. You’ve also received a little extra support to help secure those forward bases.
You may spend up to 700 points on your company with Company HQ, Combat, Weapons, and Support Platoons.
However, if the mission you are playing uses the Careful Planning special rule (see Burning Empires, page 178), ignore this special rule and use Careful Planning instead. CaMpaign Turn 2 rules suMMary
You may spend up to 700 points in your force or use the Careful Planning special rule if it applies to the mission. You may take Combat, Weapons, and Support Platoons.No more than three Armoured vehicles in your force.
•
••
The second campaign turn uses the following special rules:
your forCe in the SeCond CaMpaign turn
SpeCial ruleS for the SeCond CaMpaign turn
CaMpaign Turn 1 rules suMMaryYou may spend up to 500 points in your force or use the Careful Planning special rule if it applies to the mission. Combat and Weapons Platoons only (no support platoons, these will come later).
•
•
MeChaniC’s nighTMare Many raiding forces experimented with armoured cars and light tanks, and they all came to the same conclusion: impos-sible to maintain and generally useless in raiding combat.
Your company may only contain up to three Armoured Tank or Transport teams across your entire force.
Remember: Raiding Trucks are not Armoured tank teams and therefore not affected by Mechanic’s Nightmare.
�3
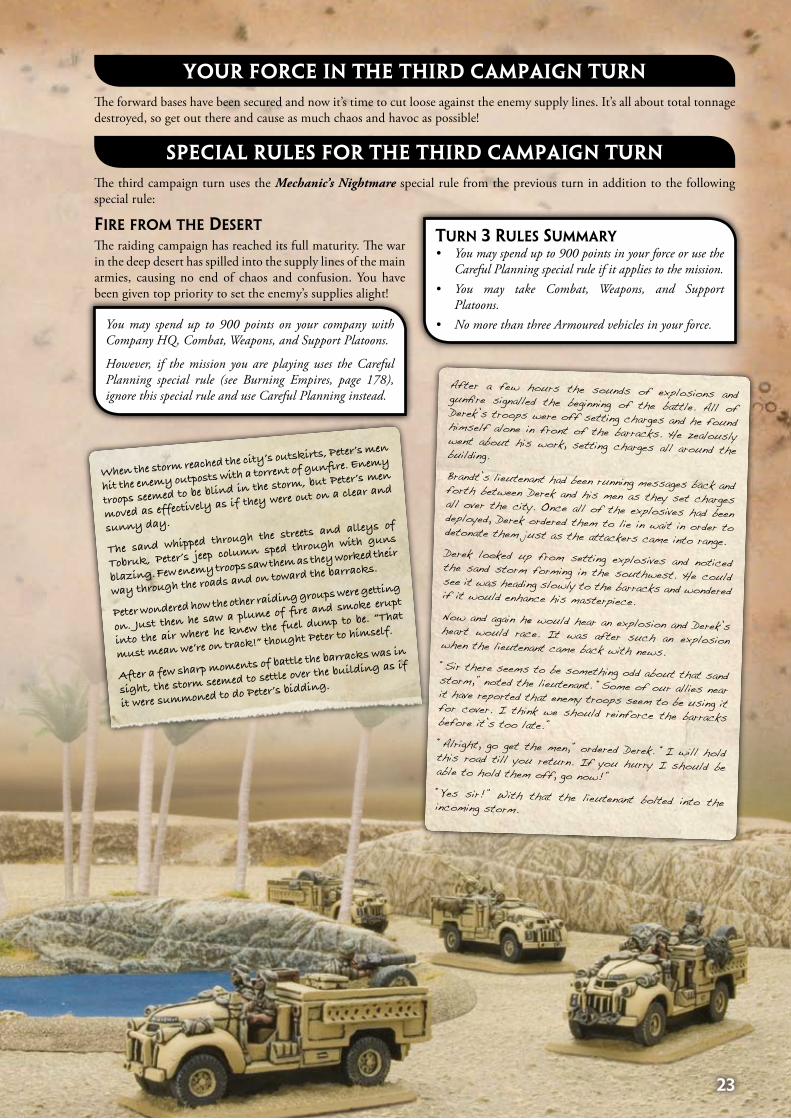
Fire FroM The deserT
The raiding campaign has reached its full maturity. The war in the deep desert has spilled into the supply lines of the main armies, causing no end of chaos and confusion. You have been given top priority to set the enemy’s supplies alight!
You may spend up to 900 points on your company with Company HQ, Combat, Weapons, and Support Platoons.
However, if the mission you are playing uses the Careful Planning special rule (see Burning Empires, page 178), ignore this special rule and use Careful Planning instead.
Turn 3 rules suMMaryYou may spend up to 900 points in your force or use the Careful Planning special rule if it applies to the mission. You may take Combat, Weapons, and Support Platoons.No more than three Armoured vehicles in your force.
•
•
•
The forward bases have been secured and now it’s time to cut loose against the enemy supply lines. It’s all about total tonnage destroyed, so get out there and cause as much chaos and havoc as possible!
The third campaign turn uses the Mechanic’s Nightmare special rule from the previous turn in addition to the following special rule:
your forCe in the third CaMpaign turn
SpeCial ruleS for the third CaMpaign turn
When the storm reached the city’s outskirts, Peter’s men
hit the enemy outposts with a torrent of gunfire. Enemy
troops seemed to be blind in the storm, but Peter’s men
moved as effectively as if they were out on a clear and
sunny day.
The sand whipped through the streets and alleys of
Tobruk, Peter’s jeep column sped through with guns
blazing. Few enemy troops saw them as they worked their
way through the roads and on toward the barracks.
Peter wondered how the other raiding groups were getting
on. Just then he saw a plume of fire and smoke erupt
into the air where he knew the fuel dump to be. “That
must mean we’re on track!” thought Peter to himself.
After a few sharp moments of battle the barracks was in
sight, the storm seemed to settle over the building as if
it were summoned to do Peter’s bidding.
After a few hours the sounds of explosions and gunfire signalled the beginning of the battle. All of Derek’s troops were off setting charges and he found himself alone in front of the barracks. He zealously went about his work, setting charges all around the building. Brandt’s lieutenant had been running messages back and forth between Derek and his men as they set charges all over the city. Once all of the explosives had been deployed, Derek ordered them to lie in wait in order to detonate them just as the attackers came into range. Derek looked up from setting explosives and noticed the sand storm forming in the southwest. He could see it was heading slowly to the barracks and wondered if it would enhance his masterpiece. Now and again he would hear an explosion and Derek’s heart would race. It was after such an explosion when the lieutenant came back with news.“Sir there seems to be something odd about that sand storm,” noted the lieutenant. “Some of our allies near it have reported that enemy troops seem to be using it for cover. I think we should reinforce the barracks before it’s too late.”“Alright, go get the men,” ordered Derek. “I will hold this road till you return. If you hurry I should be able to hold them off, go now!”“Yes sir!” With that the lieutenant bolted into the incoming storm.
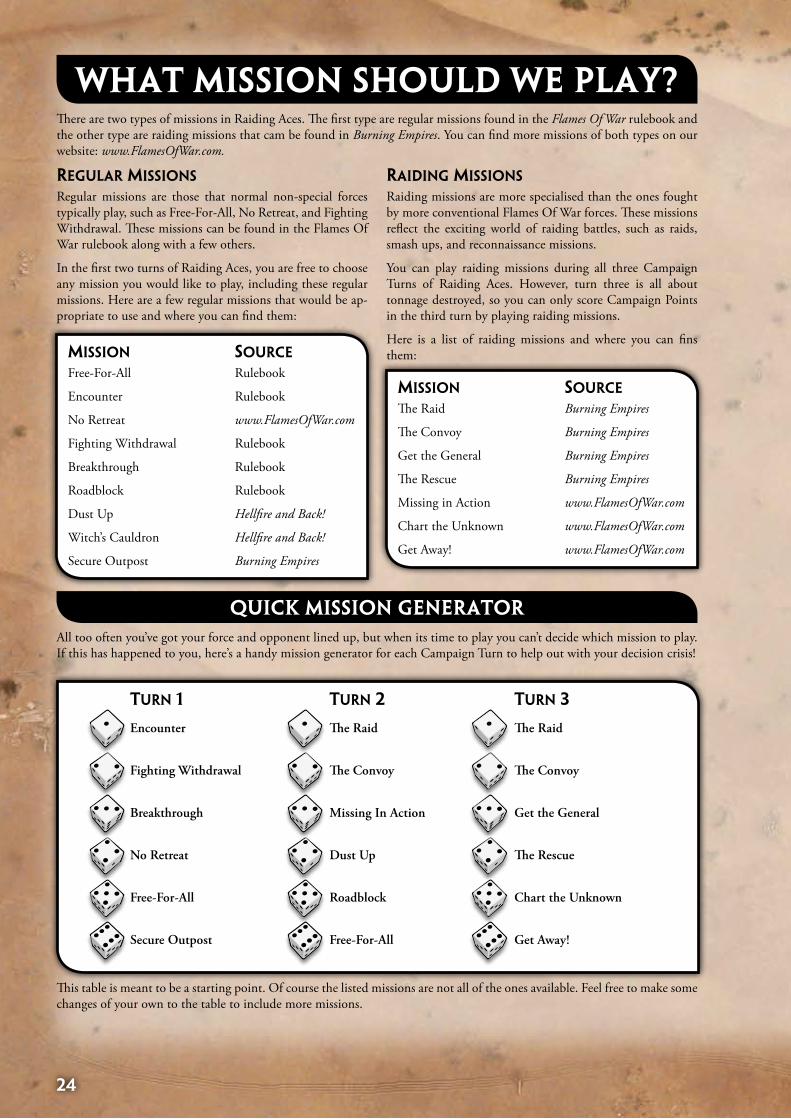
�4
what Mission Should we play?
regular Missions
Regular missions are those that normal non-special forces typically play, such as Free-For-All, No Retreat, and Fighting Withdrawal. These missions can be found in the Flames Of War rulebook along with a few others.
In the first two turns of Raiding Aces, you are free to choose any mission you would like to play, including these regular missions. Here are a few regular missions that would be ap-propriate to use and where you can find them:
Mission sourCe
Free-For-All Rulebook
Encounter Rulebook
No Retreat www.FlamesOfWar.com
Fighting Withdrawal Rulebook
Breakthrough Rulebook
Roadblock Rulebook
Dust Up Hellfire and Back!
Witch’s Cauldron Hellfire and Back!
Secure Outpost Burning Empires
There are two types of missions in Raiding Aces. The first type are regular missions found in the Flames Of War rulebook and the other type are raiding missions that cam be found in Burning Empires. You can find more missions of both types on our website: www.FlamesOfWar.com.
raiding Missions
Raiding missions are more specialised than the ones fought by more conventional Flames Of War forces. These missions reflect the exciting world of raiding battles, such as raids, smash ups, and reconnaissance missions.
You can play raiding missions during all three Campaign Turns of Raiding Aces. However, turn three is all about tonnage destroyed, so you can only score Campaign Points in the third turn by playing raiding missions.
Here is a list of raiding missions and where you can fins them:
Mission sourCe
The Raid Burning Empires
The Convoy Burning Empires
Get the General Burning Empires
The Rescue Burning Empires
Missing in Action www.FlamesOfWar.com
Chart the Unknown www.FlamesOfWar.com
Get Away! www.FlamesOfWar.com
All too often you’ve got your force and opponent lined up, but when its time to play you can’t decide which mission to play. If this has happened to you, here’s a handy mission generator for each Campaign Turn to help out with your decision crisis!
QuiCk MiSSion generator
Turn 2
The Raid
The Convoy
Missing In Action
Dust Up
Roadblock
Free-For-All
Turn 1
Encounter
Fighting Withdrawal
Breakthrough
No Retreat
Free-For-All
Secure Outpost
Turn 3
The Raid
The Convoy
Get the General
The Rescue
Chart the Unknown
Get Away!
This table is meant to be a starting point. Of course the listed missions are not all of the ones available. Feel free to make some changes of your own to the table to include more missions.
��
traCkS in the Sand
Tracks in the Sand and the Will of the Sahara special rules are optional modifications to missions that give players specific flavour representing the battlefield conditions for the Areas they are fighting in. Each of the following will help players recreate the environment that faced the desert raiders and garrisons in each Region of the campaign map.
Each Region has three rules that apply to all games played there. Each player has one special rule to use in each turn. Furthermore, both players will learn to respect the Sahara Desert itself, which will impose its will upon your game with its own special rule!
The Western Desert was a formidable obstacle for armies fighting there. Only small and unconventional forces could operate in the region with relative ease. However, all forces still had to respect the might of the desert and come prepared.
Attacker Mission Rule: Your attack is fast and furious and the enemy are shocked when your force thunders into view. You may choose an enemy platoon deployed on the table to begin the game Pinned Down.
Defender Mission Rule: Maintaining and rotating oasis garrisons was critical to the supply routes. Before the game begins, but after deployment, you may swap one platoon held in Reserve with one deployed on the table.
The Via Balbia was the main road that ran along the coastline of the Mediterranean Sea and linking Libya and Egypt. Any army fighting in North Africa had to rely on this single road to supply its forces, making it an ideal target for raiding forces.
Attacker Mission Rule: You have spent time setting up your raiding missions by securing your own supply route trough the wastes of the Sahara Desert. You receive +1 Victory Point at the end of each Raiding mission if your side controls an Area in the Deep Desert or in the Western Desert (or +2 Victory Points if your side controls an Area in both Regions).
Defender Mission Rule: Due to the proximity of the Via Balbia to the main battlefields, you may re-roll one failed result each turn to receive platoons held off of the table in Reserve.
Typically the defender had the advantage by fortifying the major water sources and destroying smaller ones. This forces the enemy to come to them. The attacker’s advantage lay in the element of surprise. The garrison troops could only speculate where the attack would come from.
Attacker Mission Rule: In missions without any type of Reserve rules, an attacker can send some of their troops on a wide flanking attack. Before deployment the attacker may nominate up to half of their platoons to place in Delayed Reserve. When the first platoon arrives from Delayed Reserve, choose any table edge (including your opponent’s table edge) to deploy from. All of your reserves now arrive along that same table edge for the rest of the game.
Defender Mission Rule: After deployment, but before the game begins, the defender may move one objective on their side of the table. It may be placed up to 12”/30cm from its original position, but may only be placed inside the objective’s original deployment area as defined by the mission, obeying any other mission rules.
CaMpaign turn 3 - the Via balbia (900 pointS)
CaMpaign turn 2 - the weStern deSert (700 pointS)
CaMpaign turn 1 - the deep Sahara (500 pointS)
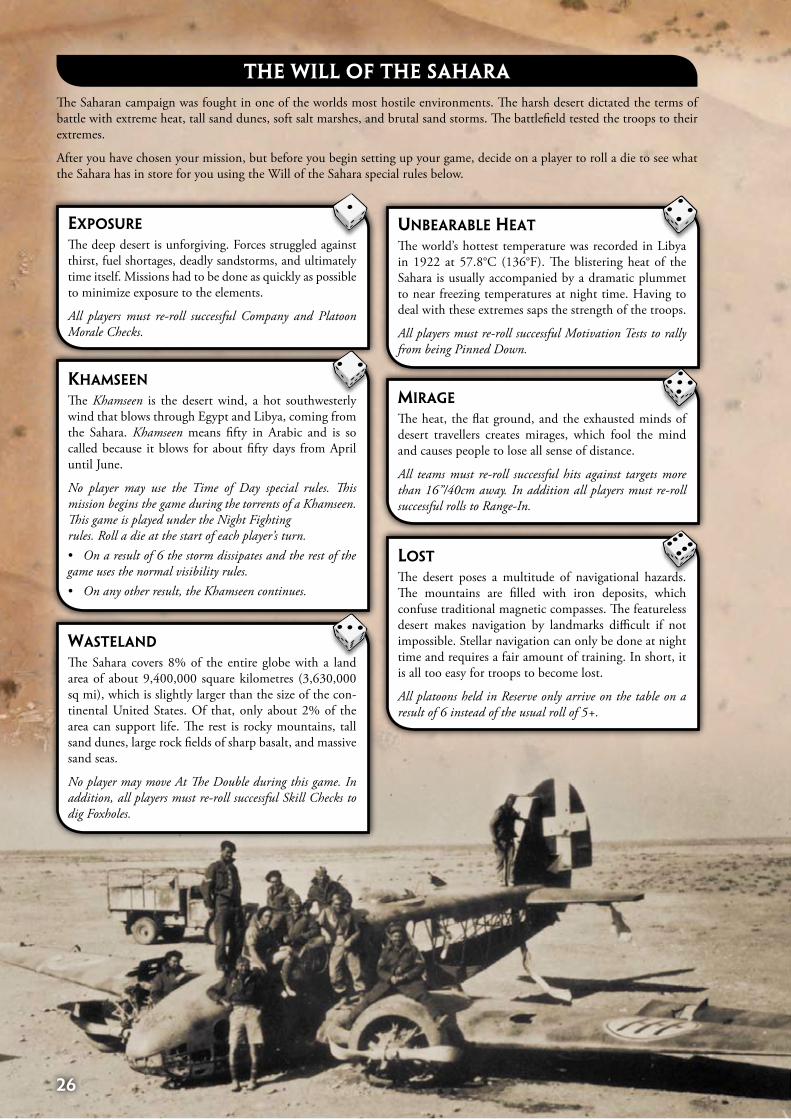
��
the will of the Sahara
WasTeland
The Sahara covers 8% of the entire globe with a land area of about 9,400,000 square kilometres (3,630,000 sq mi), which is slightly larger than the size of the con-tinental United States. Of that, only about 2% of the area can support life. The rest is rocky mountains, tall sand dunes, large rock fields of sharp basalt, and massive sand seas.
No player may move At The Double during this game. In addition, all players must re-roll successful Skill Checks to dig Foxholes.
unBearaBle heaT
The world’s hottest temperature was recorded in Libya in 1922 at 57.8°C (136°F). The blistering heat of the Sahara is usually accompanied by a dramatic plummet to near freezing temperatures at night time. Having to deal with these extremes saps the strength of the troops.
All players must re-roll successful Motivation Tests to rally from being Pinned Down.
Mirage
The heat, the flat ground, and the exhausted minds of desert travellers creates mirages, which fool the mind and causes people to lose all sense of distance.
All teams must re-roll successful hits against targets more than 16”/40cm away. In addition all players must re-roll successful rolls to Range-In.
losT
The desert poses a multitude of navigational hazards. The mountains are filled with iron deposits, which confuse traditional magnetic compasses. The featureless desert makes navigation by landmarks difficult if not impossible. Stellar navigation can only be done at night time and requires a fair amount of training. In short, it is all too easy for troops to become lost.
All platoons held in Reserve only arrive on the table on a result of 6 instead of the usual roll of 5+.
The Saharan campaign was fought in one of the worlds most hostile environments. The harsh desert dictated the terms of battle with extreme heat, tall sand dunes, soft salt marshes, and brutal sand storms. The battlefield tested the troops to their extremes.
After you have chosen your mission, but before you begin setting up your game, decide on a player to roll a die to see what the Sahara has in store for you using the Will of the Sahara special rules below.
exposure
The deep desert is unforgiving. Forces struggled against thirst, fuel shortages, deadly sandstorms, and ultimately time itself. Missions had to be done as quickly as possible to minimize exposure to the elements.
All players must re-roll successful Company and Platoon Morale Checks.
khaMseen
The Khamseen is the desert wind, a hot southwesterly wind that blows through Egypt and Libya, coming from the Sahara. Khamseen means fifty in Arabic and is so called because it blows for about fifty days from April until June.
No player may use the Time of Day special rules. This mission begins the game during the torrents of a Khamseen. This game is played under the Night Fighting rules. Roll a die at the start of each player’s turn.
On a result of 6 the storm dissipates and the rest of the game uses the normal visibility rules.
On any other result, the Khamseen continues.
•
•
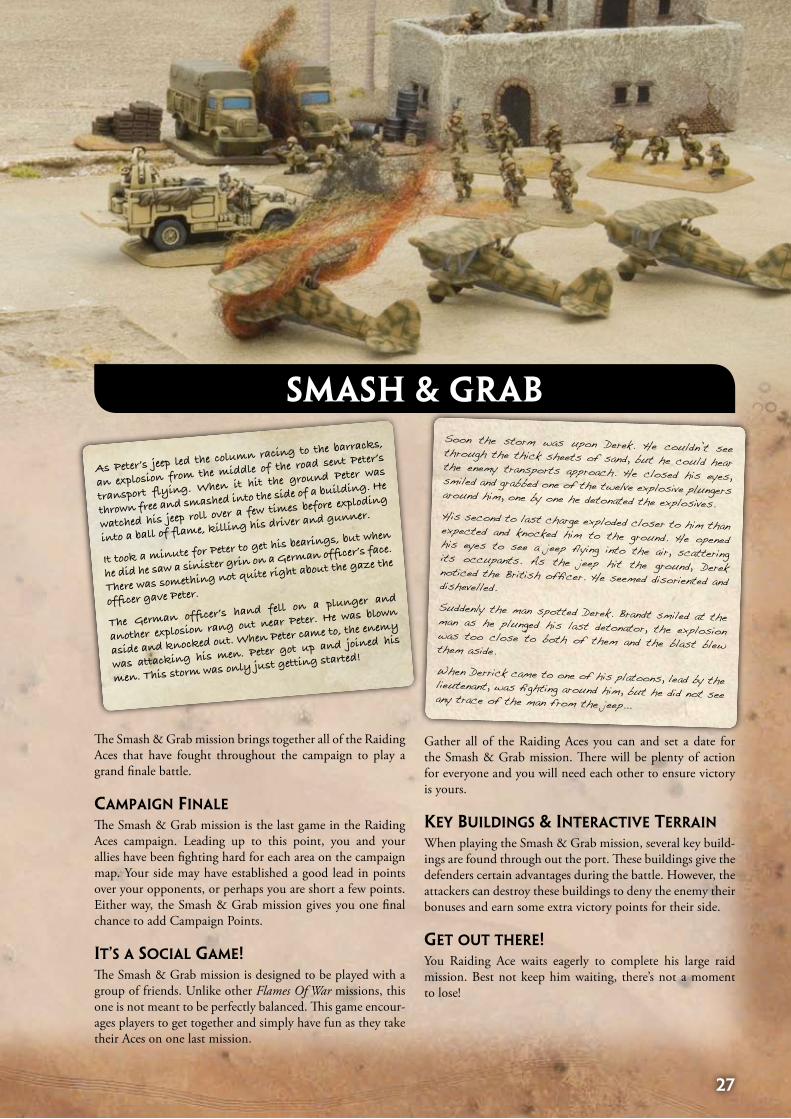
��
As Peter’s jeep led the column racing to the barracks,
an explosion from the middle of the road sent Peter’s
transport flying. When it hit the ground Peter was
thrown free and smashed into the side of a building. He
watched his jeep roll over a few times before exploding
into a ball of flame, killing his driver and gunner.
It took a minute for Peter to get his bearings, but when
he did he saw a sinister grin on a German officer’s face.
There was something not quite right about the gaze the
officer gave Peter.
The German officer’s hand fell on a plunger and
another explosion rang out near Peter. He was blown
aside and knocked out. When Peter came to, the enemy
was attacking his men. Peter got up and joined his
men. This storm was only just getting started!
Smash & grab
The Smash & Grab mission brings together all of the Raiding Aces that have fought throughout the campaign to play a grand finale battle.
CaMpaign Finale
The Smash & Grab mission is the last game in the Raiding Aces campaign. Leading up to this point, you and your allies have been fighting hard for each area on the campaign map. Your side may have established a good lead in points over your opponents, or perhaps you are short a few points. Either way, the Smash & Grab mission gives you one final chance to add Campaign Points.
iT’s a soCial gaMe!The Smash & Grab mission is designed to be played with a group of friends. Unlike other Flames Of War missions, this one is not meant to be perfectly balanced. This game encour-ages players to get together and simply have fun as they take their Aces on one last mission.
Gather all of the Raiding Aces you can and set a date for the Smash & Grab mission. There will be plenty of action for everyone and you will need each other to ensure victory is yours.
key Buildings & inTeraCTive Terrain
When playing the Smash & Grab mission, several key build-ings are found through out the port. These buildings give the defenders certain advantages during the battle. However, the attackers can destroy these buildings to deny the enemy their bonuses and earn some extra victory points for their side.
geT ouT There!You Raiding Ace waits eagerly to complete his large raid mission. Best not keep him waiting, there’s not a moment to lose!
Soon the storm was upon Derek. He couldn’t see through the thick sheets of sand, but he could hear the enemy transports approach. He closed his eyes, smiled and grabbed one of the twelve explosive plungers around him, one by one he detonated the explosives.His second to last charge exploded closer to him than expected and knocked him to the ground. He opened his eyes to see a jeep flying into the air, scattering its occupants. As the jeep hit the ground, Derek noticed the British officer. He seemed disoriented and dishevelled. Suddenly the man spotted Derek. Brandt smiled at the man as he plunged his last detonator, the explosion was too close to both of them and the blast blew them aside. When Derrick came to one of his platoons, lead by the lieutenant, was fighting around him, but he did not see any trace of the man from the jeep...
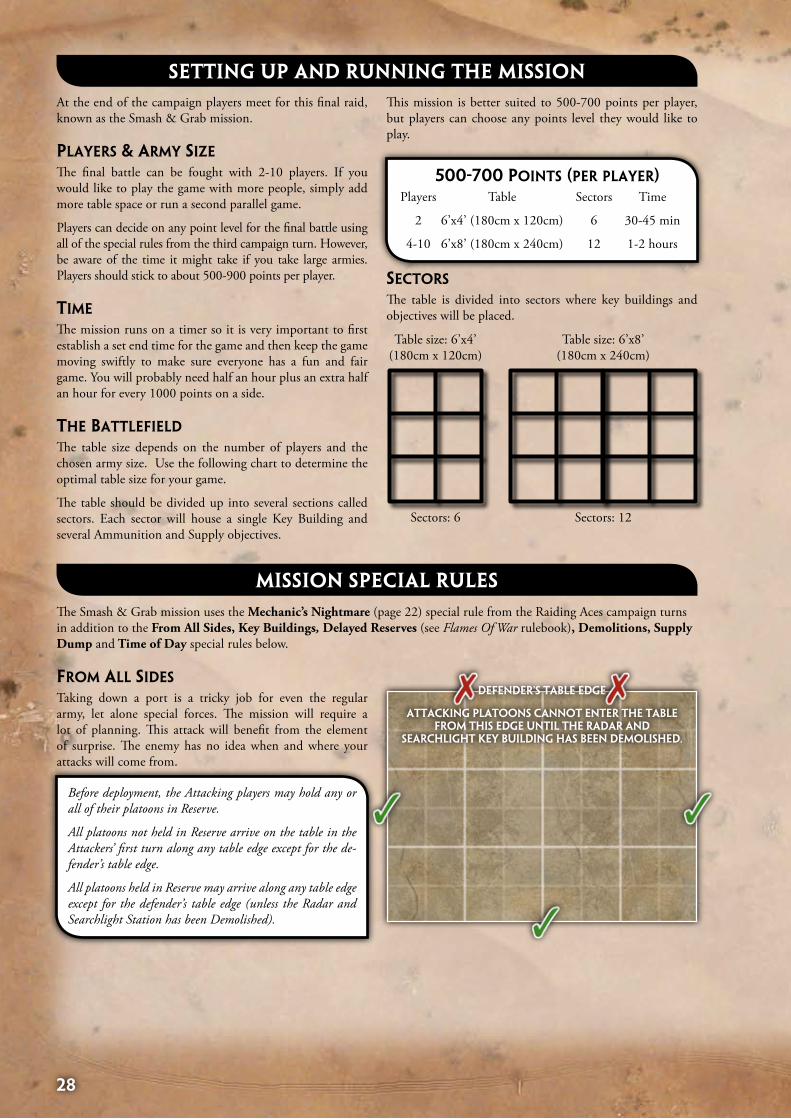
��
500-700 poinTs (per player) Players Table Sectors Time
2 6’x4’ (180cm x 120cm) 6 30-45 min
4-10 6’x8’ (180cm x 240cm) 12 1-2 hours
At the end of the campaign players meet for this final raid, known as the Smash & Grab mission.
players & arMy size
The final battle can be fought with 2-10 players. If you would like to play the game with more people, simply add more table space or run a second parallel game.
Players can decide on any point level for the final battle using all of the special rules from the third campaign turn. However, be aware of the time it might take if you take large armies. Players should stick to about 500-900 points per player.
TiMe
The mission runs on a timer so it is very important to first establish a set end time for the game and then keep the game moving swiftly to make sure everyone has a fun and fair game. You will probably need half an hour plus an extra half an hour for every 1000 points on a side.
The BaTTleField
The table size depends on the number of players and the chosen army size. Use the following chart to determine the optimal table size for your game.
The table should be divided up into several sections called sectors. Each sector will house a single Key Building and several Ammunition and Supply objectives.
This mission is better suited to 500-700 points per player, but players can choose any points level they would like to play.
Setting up and running the MiSSion
Table size: 6’x4’ (180cm x 120cm)
Table size: 6’x8’ (180cm x 240cm)
Sectors: 6 Sectors: 12
seCTors The table is divided into sectors where key buildings and objectives will be placed.
MiSSion SpeCial ruleS
The Smash & Grab mission uses the Mechanic’s Nightmare (page 22) special rule from the Raiding Aces campaign turns in addition to the From All Sides, Key Buildings, Delayed Reserves (see Flames Of War rulebook), Demolitions, Supply Dump and Time of Day special rules below.
FroM all sides
Taking down a port is a tricky job for even the regular army, let alone special forces. The mission will require a lot of planning. This attack will benefit from the element of surprise. The enemy has no idea when and where your attacks will come from.
Before deployment, the Attacking players may hold any or all of their platoons in Reserve.
All platoons not held in Reserve arrive on the table in the Attackers’ first turn along any table edge except for the de-fender’s table edge.
All platoons held in Reserve may arrive along any table edge except for the defender’s table edge (unless the Radar and Searchlight Station has been Demolished).
DeFeNDeR’S tAbLe eDge
AttACKiNg pLAtOONS CANNOt eNteR tHe tAbLe FROm tHiS eDge uNtiL tHe RADAR AND
SeARCHLigHt Key buiLDiNg HAS beeN DemOLiSHeD.
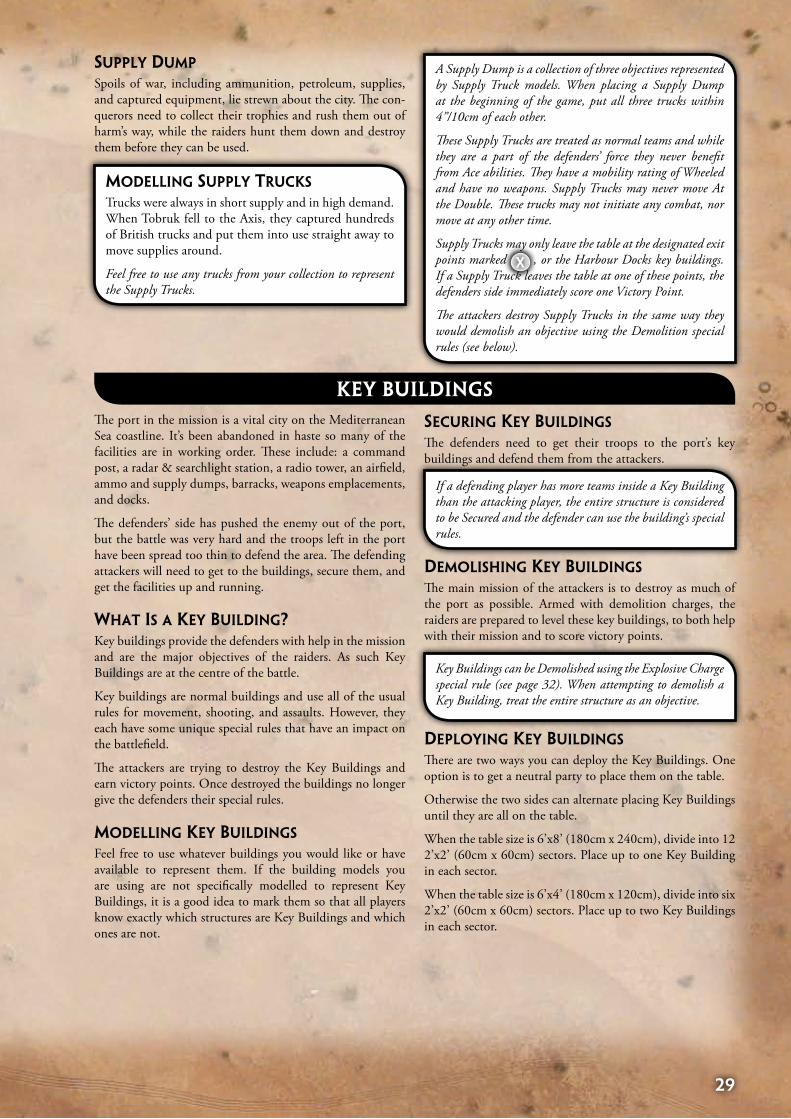
�9
supply duMp
Spoils of war, including ammunition, petroleum, supplies, and captured equipment, lie strewn about the city. The con-querors need to collect their trophies and rush them out of harm’s way, while the raiders hunt them down and destroy them before they can be used.
A Supply Dump is a collection of three objectives represented by Supply Truck models. When placing a Supply Dump at the beginning of the game, put all three trucks within 4”/10cm of each other.
These Supply Trucks are treated as normal teams and while they are a part of the defenders’ force they never benefit from Ace abilities. They have a mobility rating of Wheeled and have no weapons. Supply Trucks may never move At the Double. These trucks may not initiate any combat, nor move at any other time.
Supply Trucks may only leave the table at the designated exit points marked , or the Harbour Docks key buildings. If a Supply Truck leaves the table at one of these points, the defenders side immediately score one Victory Point.
The attackers destroy Supply Trucks in the same way they would demolish an objective using the Demolition special rules (see below).
x
deploying key Buildings
There are two ways you can deploy the Key Buildings. One option is to get a neutral party to place them on the table.
Otherwise the two sides can alternate placing Key Buildings until they are all on the table.
When the table size is 6’x8’ (180cm x 240cm), divide into 12 2’x2’ (60cm x 60cm) sectors. Place up to one Key Building in each sector.
When the table size is 6’x4’ (180cm x 120cm), divide into six 2’x2’ (60cm x 60cm) sectors. Place up to two Key Buildings in each sector.
The port in the mission is a vital city on the Mediterranean Sea coastline. It’s been abandoned in haste so many of the facilities are in working order. These include: a command post, a radar & searchlight station, a radio tower, an airfield, ammo and supply dumps, barracks, weapons emplacements, and docks.
The defenders’ side has pushed the enemy out of the port, but the battle was very hard and the troops left in the port have been spread too thin to defend the area. The defending attackers will need to get to the buildings, secure them, and get the facilities up and running.
WhaT is a key Building?Key buildings provide the defenders with help in the mission and are the major objectives of the raiders. As such Key Buildings are at the centre of the battle.
Key buildings are normal buildings and use all of the usual rules for movement, shooting, and assaults. However, they each have some unique special rules that have an impact on the battlefield.
The attackers are trying to destroy the Key Buildings and earn victory points. Once destroyed the buildings no longer give the defenders their special rules.
Modelling key Buildings Feel free to use whatever buildings you would like or have available to represent them. If the building models you are using are not specifically modelled to represent Key Buildings, it is a good idea to mark them so that all players know exactly which structures are Key Buildings and which ones are not.
seCuring key Buildings
The defenders need to get their troops to the port’s key buildings and defend them from the attackers.
key buildingS
If a defending player has more teams inside a Key Building than the attacking player, the entire structure is considered to be Secured and the defender can use the building’s special rules.
deMolishing key Buildings
The main mission of the attackers is to destroy as much of the port as possible. Armed with demolition charges, the raiders are prepared to level these key buildings, to both help with their mission and to score victory points.
Key Buildings can be Demolished using the Explosive Charge special rule (see page 32). When attempting to demolish a Key Building, treat the entire structure as an objective.
Modelling supply TruCks
Trucks were always in short supply and in high demand. When Tobruk fell to the Axis, they captured hundreds of British trucks and put them into use straight away to move supplies around.
Feel free to use any trucks from your collection to represent the Supply Trucks.
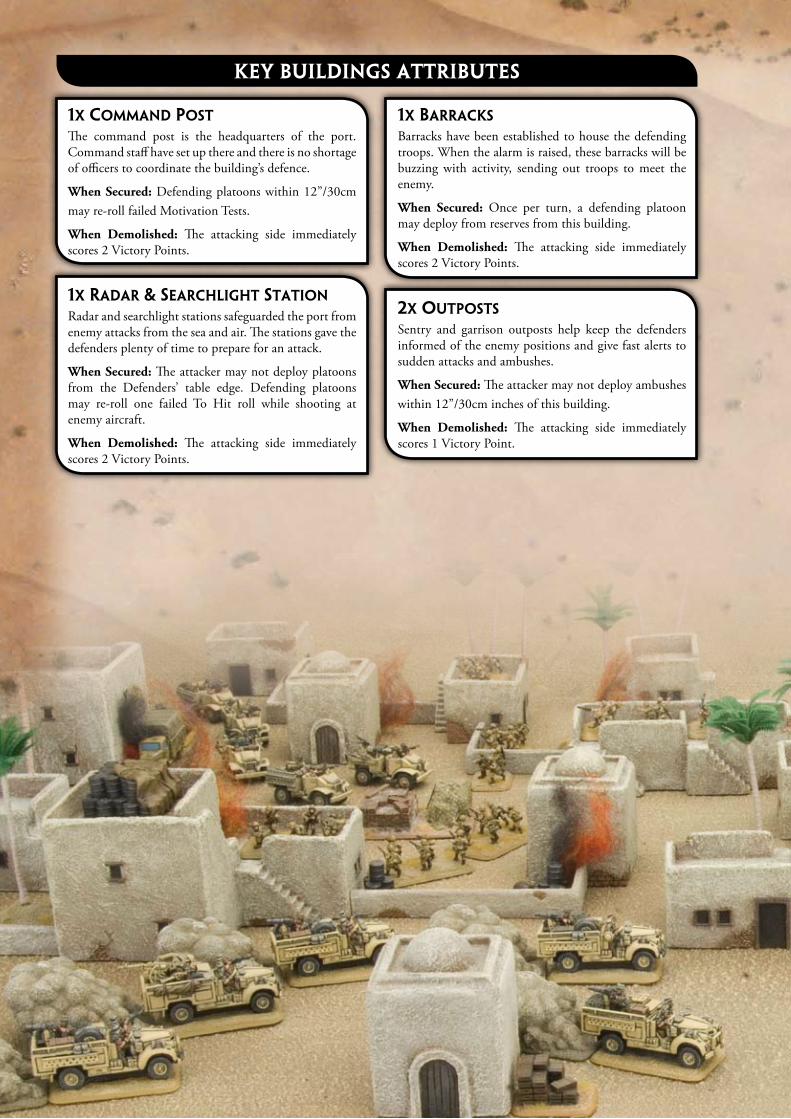
30
1x CoMMand posT
The command post is the headquarters of the port. Command staff have set up there and there is no shortage of officers to coordinate the building’s defence.
When Secured: Defending platoons within 12”/30cm may re-roll failed Motivation Tests.
When Demolished: The attacking side immediately scores 2 Victory Points.
1x radar & searChlighT sTaTion
Radar and searchlight stations safeguarded the port from enemy attacks from the sea and air. The stations gave the defenders plenty of time to prepare for an attack.
When Secured: The attacker may not deploy platoons from the Defenders’ table edge. Defending platoons may re-roll one failed To Hit roll while shooting at enemy aircraft.
When Demolished: The attacking side immediately scores 2 Victory Points.
1x BarraCks
Barracks have been established to house the defending troops. When the alarm is raised, these barracks will be buzzing with activity, sending out troops to meet the enemy.
When Secured: Once per turn, a defending platoon may deploy from reserves from this building.
When Demolished: The attacking side immediately scores 2 Victory Points.
2x ouTposTs
Sentry and garrison outposts help keep the defenders informed of the enemy positions and give fast alerts to sudden attacks and ambushes.
When Secured: The attacker may not deploy ambushes within 12”/30cm inches of this building.
When Demolished: The attacking side immediately scores 1 Victory Point.
key buildingS attributeS
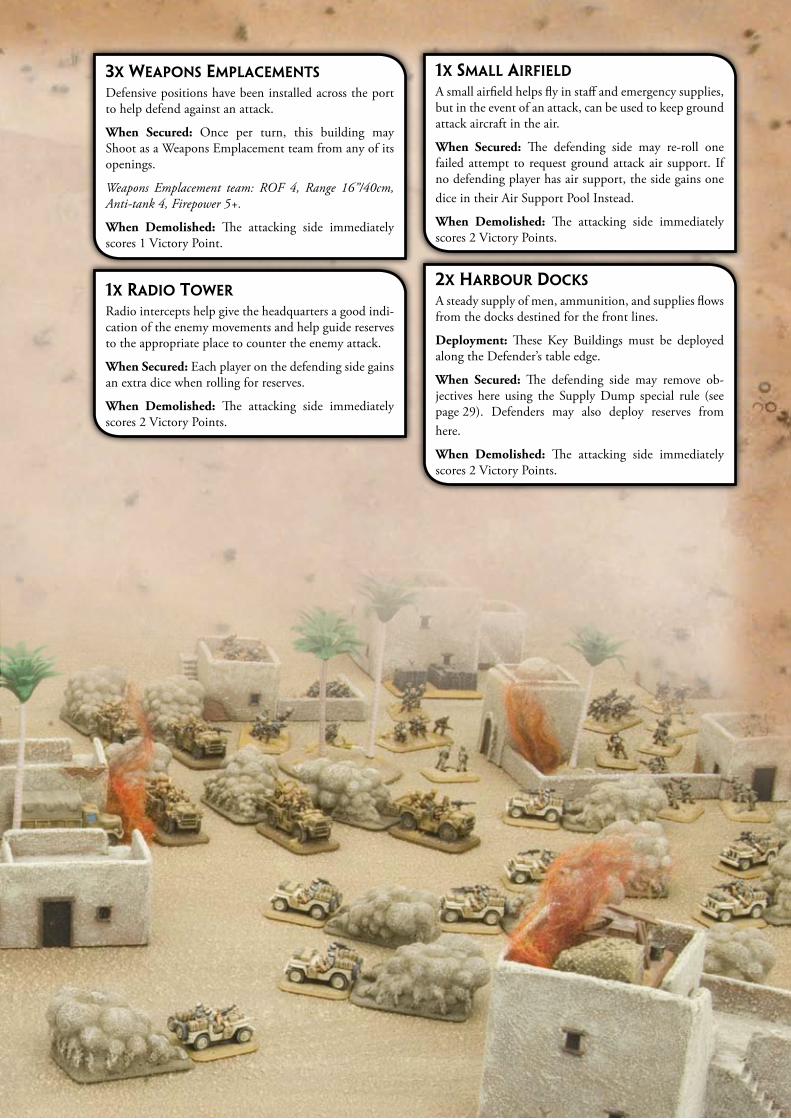
3�
1x radio ToWer
Radio intercepts help give the headquarters a good indi-cation of the enemy movements and help guide reserves to the appropriate place to counter the enemy attack.
When Secured: Each player on the defending side gains an extra dice when rolling for reserves.
When Demolished: The attacking side immediately scores 2 Victory Points.
1x sMall airField
A small airfield helps fly in staff and emergency supplies, but in the event of an attack, can be used to keep ground attack aircraft in the air.
When Secured: The defending side may re-roll one failed attempt to request ground attack air support. If no defending player has air support, the side gains one dice in their Air Support Pool Instead.
When Demolished: The attacking side immediately scores 2 Victory Points.
3x Weapons eMplaCeMenTs
Defensive positions have been installed across the port to help defend against an attack.
When Secured: Once per turn, this building may Shoot as a Weapons Emplacement team from any of its openings.
Weapons Emplacement team: ROF 4, Range 16”/40cm, Anti-tank 4, Firepower 5+.
When Demolished: The attacking side immediately scores 1 Victory Point.
2x harBour doCks
A steady supply of men, ammunition, and supplies flows from the docks destined for the front lines.
Deployment: These Key Buildings must be deployed along the Defender’s table edge.
When Secured: The defending side may remove ob-jectives here using the Supply Dump special rule (see page 29). Defenders may also deploy reserves from here.
When Demolished: The attacking side immediately scores 2 Victory Points.
key Building Markers
It is a good idea to mark all of your Key Buildings in order to keep them separate from other regular build-ings. If you have not specifically modelled your Key buildings feel free to print or copy the Key Building markers found at the end of this document.
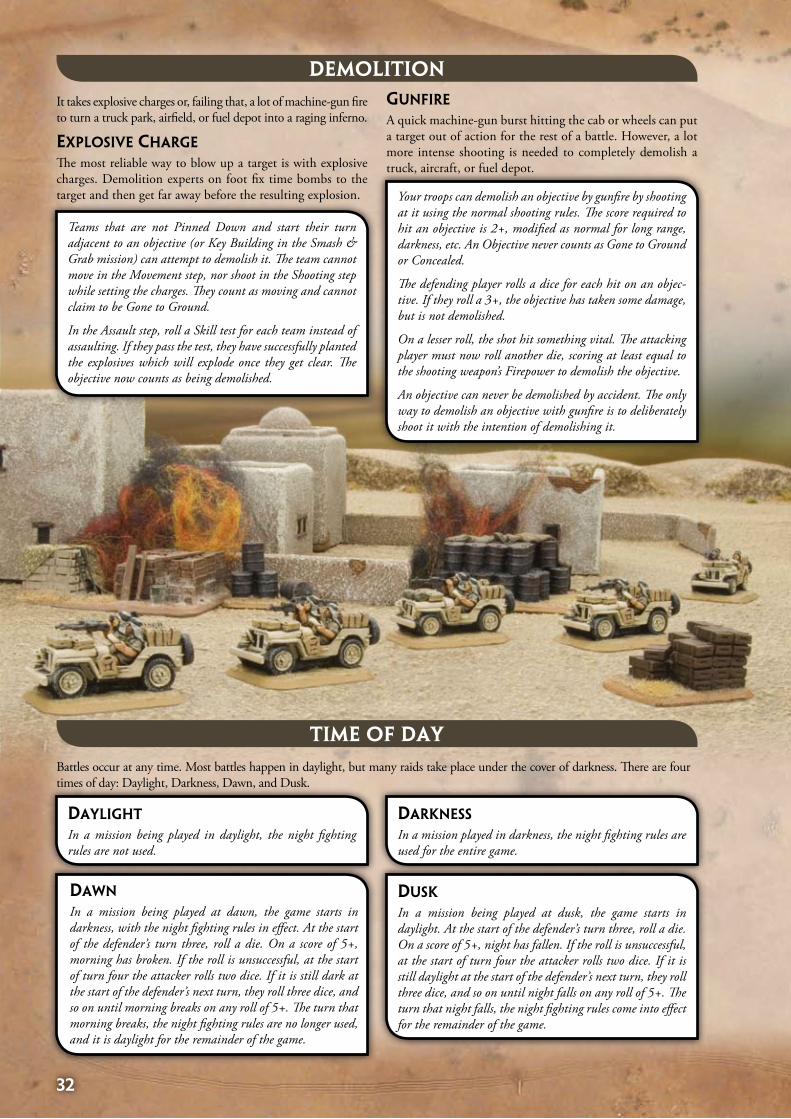
explosive Charge
The most reliable way to blow up a target is with explosive charges. Demolition experts on foot fix time bombs to the target and then get far away before the resulting explosion.
Teams that are not Pinned Down and start their turn adjacent to an objective (or Key Building in the Smash & Grab mission) can attempt to demolish it. The team cannot move in the Movement step, nor shoot in the Shooting step while setting the charges. They count as moving and cannot claim to be Gone to Ground.
In the Assault step, roll a Skill test for each team instead of assaulting. If they pass the test, they have successfully planted the explosives which will explode once they get clear. The objective now counts as being demolished.
It takes explosive charges or, failing that, a lot of machine-gun fire to turn a truck park, airfield, or fuel depot into a raging inferno.
gunFire
A quick machine-gun burst hitting the cab or wheels can put a target out of action for the rest of a battle. However, a lot more intense shooting is needed to completely demolish a truck, aircraft, or fuel depot.
Your troops can demolish an objective by gunfire by shooting at it using the normal shooting rules. The score required to hit an objective is 2+, modified as normal for long range, darkness, etc. An Objective never counts as Gone to Ground or Concealed.
The defending player rolls a dice for each hit on an objec-tive. If they roll a 3+, the objective has taken some damage, but is not demolished.
On a lesser roll, the shot hit something vital. The attacking player must now roll another die, scoring at least equal to the shooting weapon’s Firepower to demolish the objective.
An objective can never be demolished by accident. The only way to demolish an objective with gunfire is to deliberately shoot it with the intention of demolishing it.
Battles occur at any time. Most battles happen in daylight, but many raids take place under the cover of darkness. There are four times of day: Daylight, Darkness, Dawn, and Dusk.
daylighT
In a mission being played in daylight, the night fighting rules are not used.
darkness
In a mission played in darkness, the night fighting rules are used for the entire game.
daWn
In a mission being played at dawn, the game starts in darkness, with the night fighting rules in effect. At the start of the defender’s turn three, roll a die. On a score of 5+, morning has broken. If the roll is unsuccessful, at the start of turn four the attacker rolls two dice. If it is still dark at the start of the defender’s next turn, they roll three dice, and so on until morning breaks on any roll of 5+. The turn that morning breaks, the night fighting rules are no longer used, and it is daylight for the remainder of the game.
dusk
In a mission being played at dusk, the game starts in daylight. At the start of the defender’s turn three, roll a die. On a score of 5+, night has fallen. If the roll is unsuccessful, at the start of turn four the attacker rolls two dice. If it is still daylight at the start of the defender’s next turn, they roll three dice, and so on until night falls on any roll of 5+. The turn that night falls, the night fighting rules come into effect for the remainder of the game.
3�
deMolition
tiMe of day
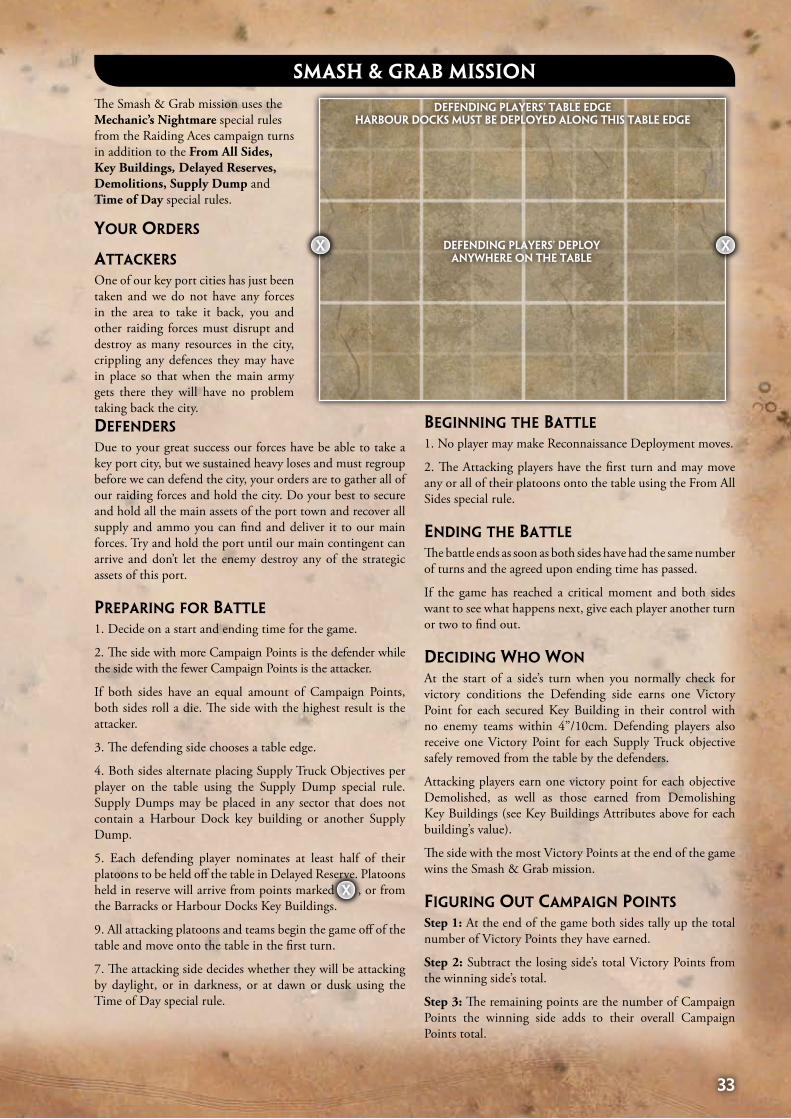
33
deFenders
Due to your great success our forces have be able to take a key port city, but we sustained heavy loses and must regroup before we can defend the city, your orders are to gather all of our raiding forces and hold the city. Do your best to secure and hold all the main assets of the port town and recover all supply and ammo you can find and deliver it to our main forces. Try and hold the port until our main contingent can arrive and don’t let the enemy destroy any of the strategic assets of this port.
preparing For BaTTle
1. Decide on a start and ending time for the game.
2. The side with more Campaign Points is the defender while the side with the fewer Campaign Points is the attacker.
If both sides have an equal amount of Campaign Points, both sides roll a die. The side with the highest result is the attacker.
3. The defending side chooses a table edge.
4. Both sides alternate placing Supply Truck Objectives per player on the table using the Supply Dump special rule. Supply Dumps may be placed in any sector that does not contain a Harbour Dock key building or another Supply Dump.
5. Each defending player nominates at least half of their platoons to be held off the table in Delayed Reserve. Platoons held in reserve will arrive from points marked , or from the Barracks or Harbour Docks Key Buildings.
9. All attacking platoons and teams begin the game off of the table and move onto the table in the first turn.
7. The attacking side decides whether they will be attacking by daylight, or in darkness, or at dawn or dusk using the Time of Day special rule.
The Smash & Grab mission uses the Mechanic’s Nightmare special rules from the Raiding Aces campaign turns in addition to the From All Sides, Key Buildings, Delayed Reserves, Demolitions, Supply Dump and Time of Day special rules.
your orders
aTTaCkers
One of our key port cities has just been taken and we do not have any forces in the area to take it back, you and other raiding forces must disrupt and destroy as many resources in the city, crippling any defences they may have in place so that when the main army gets there they will have no problem taking back the city.
SMaSh & grab MiSSion
Beginning The BaTTle
1. No player may make Reconnaissance Deployment moves.
2. The Attacking players have the first turn and may move any or all of their platoons onto the table using the From All Sides special rule.
ending The BaTTle
The battle ends as soon as both sides have had the same number of turns and the agreed upon ending time has passed.
If the game has reached a critical moment and both sides want to see what happens next, give each player another turn or two to find out.
deCiding Who Won
At the start of a side’s turn when you normally check for victory conditions the Defending side earns one Victory Point for each secured Key Building in their control with no enemy teams within 4”/10cm. Defending players also receive one Victory Point for each Supply Truck objective safely removed from the table by the defenders.
Attacking players earn one victory point for each objective Demolished, as well as those earned from Demolishing Key Buildings (see Key Buildings Attributes above for each building’s value).
The side with the most Victory Points at the end of the game wins the Smash & Grab mission.
Figuring ouT CaMpaign poinTs
Step 1: At the end of the game both sides tally up the total number of Victory Points they have earned.
Step 2: Subtract the losing side’s total Victory Points from the winning side’s total.
Step 3: The remaining points are the number of Campaign Points the winning side adds to their overall Campaign Points total.
DeFeNDiNg pLAyeRS’ DepLOy ANyWHeRe ON tHe tAbLe
DeFeNDiNg pLAyeRS’ tAbLe eDge
x
x x
HARbOuR DOCKS muSt be DepLOyeD ALONg tHiS tAbLe eDge
34
The Raiding Aces campaign is a flexible system that encour-ages players to play raiding battles and develop their own special warriors called Raiding Aces. The campaign system is built to pretty much run itself with a little help from you as the organizer. Here is a short guide to assist you in hosting an exciting Raiding Aces campaign.
organise The venue
You can play Raiding Aces with your friends at the local store or gaming club. Choose a place that best suits your group and the number of players you expect will play.
organise TeaMs
There are two teams, or sides, in Raiding Aces: the Axis and the Allies. Organise your players into these two sides and have them nominate a leader to coordinate their side and their strategy. With that done they can begin fighting for the battlefields of the Sahara.
CaMpaign Turns
As the organiser one of your biggest responsibilities is to determine the length of the campaign turns. Raiding Aces is quite flexible in how long you would like your turns to be.
Turns do not have to be the same length as each other. For example, if your players are having fun playing at 500 points, feel free to extend the turn.
Short campaign turns mean the campaign will be fast and sharp, maintaining players’ interest, but requires your players to be very active in playing games. Longer turns gives your players more time to play games and build up their Raiding Ace warriors, but requires more work to keep their interest up over a longer time period.
seTTing aside gaMe days
It is a good idea to set aside dedicated days to play Raiding Aces. This helps players schedule their game and ensures that they can get a table when they need one.
proMoTe your evenT
Having a good campaign promotion plan is essential as you organise your event. No one will be excited to play Raiding Aces if they don’t know what it is and where to play! For ideas on how to promote your campaign check out our website: www.FlamesOfWar.com.
preparing For The CaMpaign
Make copies of the Raiding Aces Company Chart and the Abilities Quick Reference Chart for each of your players so that they can track the progress of their Raiding Ace and his company.
Display the campaign map prominently so that all of your players can see it and know where they will be fighting.
TraCking The CaMpaign
Once the campaign has begun all that you need to worry about is keeping track of its progress on the Raiding Aces Campaign Chart. This chart is the master record of the campaign, so place it in a safe place where players can see it and keep up to date on the progress of the campaign.
You will need to record the results of each battle. Players will report their games to you. They will need to give you the following information:
What Area they were fighting in, andwhich side won.
Record each victory with a mark in the winning side’s column.
Winning an area
At the end of the campaign turn, total up all of the Allied and Axis victories in each Area. The side with the most number of victories in each Area wins that Area. Circle the side that won the area. No further games can be played in that Area.
At the end of the campaign turn, if no battles occurred in an Area, the Axis side automatically wins it, as the Allies have ignored it.
At the end of the campaign turn, if there is an equal amount of Axis and Allied victories in the same Area, the Axis side wins the Area as the Allies have failed to make any headway.
CaMpaign poinTs
When a side wins an Area they are awarded Campaign Points. These are added to their side’s Campaign Points grand total found at the bottom of the Raiding Aces Campaign Chart.
Each Area in the Deep Sahara and Western Desert are worth a certain amount of Campaign Points. The Areas found in the Deep Sahara are critical for success and are thus worth 3 points each. The forward bases made it much easier to launch raids into the enemy rear areas, and these three Areas are worth 2 points each.
••
organizing the campaign

3�
raiding aCes doCuMenTs
All of the Raiding Aces charts and documents are avail-able on our website, www.FlamesOfWar.com. These documents include:
Raiding Aces Company ChartAbilities Quick Reference ChartRaiding Aces Campaign MapRaiding Aces Results Sheet
••••
The Campaign Kit includes: one 20”x 30” (51cm x 76cm) Raiding Aces wall chartone wet-erase pen ten Ace of Aces Badges
The kit comes in a nice map tube which will keep your map and gear safe and ready for the next Saharan campaign.
aCe oF aCes Badge
Following the successful conclusion of your Raiding Aces campaign you may award your players with an Ace of Aces Badge, found with the Raiding Aces campaign kit or sold separately on our website: www.FlamesOfWar.com.
The Ace of Aces Badge celebrates a player’s participation in the campaign. Players from both sides that have filled their Raiding Ace’s experience boxes are eligible for this award.
These can be worn proudly by players or fastened to army transport bags to show off their achievement in the sand seas, dunes, and wadis of the Sahara Desert!
•••
Unlike the others, the Areas in the Via Balbia region are not worth any points. Instead, players score one Campaign Point for their side for every three Victory Points that they earn in each game played in a Via Balbia Area. For example, if you have completed The Raid mission and earned six Victory Points, you have scored two Campaign Points for your side. You are then free to play another game and keep adding to your total!
ending The CaMpaign
At the conclusion of the third campaign turn you have a choice about how to end your Raiding Aces campaign. You can either end the campaign at the conclusion of turn three or fight a big grand finale raid on Tobruk.
If players chose to end the campaign after the third campaign turn, total up how many Campaign Points each side has won. The side with the most wins the Raiding Aces campaign.
If players would like to fight the grand finale battle, play the Smash & Grab mission on page 27.
The side that won the Smash & Grab mission earns some bonus Campaign Points. Be sure to add these to the winning side’s total. The side with the highest number of Campaign Points wins the Raiding Aces campaign.
CaMpaign kiT
Raiding Aces can be run completely from this book, but you can also get an Raiding Aces Campaign Kit with includes everything you need on one large erasable wall chart.
The wall chart includes:Raiding Aces map, experience trackers for up to 10 players, Abilities Quick Reference chart, and a Victory Chart.
••••

3�
Abilities Quick Reference
brainS
tuRN
�tuRN
�tuRN
3Smash & grab
keep your Fire up!A Combat platoon led by your Ace that is Pinned Down may still fire at
their full ROF during their Shooting Step.
spliT up
Before the game begins, you may split up to one of your Combat Platoons into two
separate platoons.
CoMBined sTrengTh
Combat platoon Command Teams that are Destroyed
survive on a roll of 3+.
squadron oF heroes
When your Ace earns this Ability, each Command Team of your Combat Platoons earn a Turn
1 Ability.
Cunning like a Fox
Your Ace may be held off-table and placed near one of your platoons. On a 4+ your Ace can return to being held
off-table.
diversion Once per game, at the
beginning of your opponent’s turn, select one of your
Combat platoons to create a Diversion.
BooBy Traps Your force may use up to
five Booby Traps during the game.
TriCksTer You may place one of your Combat Platoons off-table
with your Ace. Your Ace may take a platoon with him
when he is removed from the table.
CusToM ride
Your Ace is mounted in a custom vehicle armed with
two AA MGs and a Twin AA MG . Your Ace uses all of the Motorcycle Reconniassance
special rules.
heavy FirepoWer You may upgrade up to one
vehicle in each Combat Platoon with a heavy
machine-gun.
iMprovised sTaBilisers
All vehicles in your Combat Platoons are equipped with
Stabilisers for their main guns.
quarTerMasTer
Vehicles from your HQ and Combat platoons do not have their normal save. Instead, if they are Hit
your opponent must make a Firepower Test to Destroy
them.
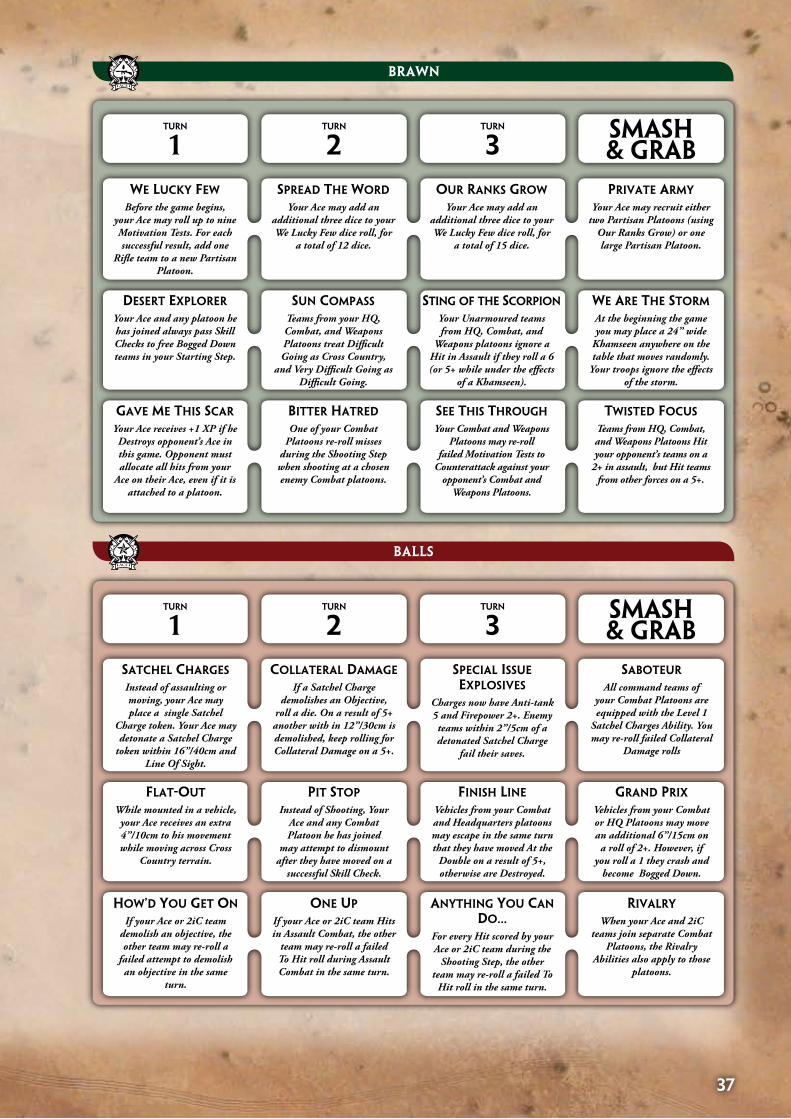
3�
brawn
ballS
saTChel Charges
Instead of assaulting or moving, your Ace may place a single Satchel
Charge token. Your Ace may detonate a Satchel Charge
token within 16”/40cm and Line Of Sight.
CollaTeral daMage
If a Satchel Charge demolishes an Objective,
roll a die. On a result of 5+ another with in 12”/30cm is demolished, keep rolling for Collateral Damage on a 5+.
speCial issue explosives
Charges now have Anti-tank 5 and Firepower 2+. Enemy teams within 2”/5cm of a detonated Satchel Charge
fail their saves.
saBoTeur
All command teams of your Combat Platoons are equipped with the Level 1
Satchel Charges Ability. You may re-roll failed Collateral
Damage rolls
tuRN
�tuRN
�tuRN
3Smash & grab
FlaT-ouT
While mounted in a vehicle, your Ace receives an extra 4”/10cm to his movement while moving across Cross
Country terrain.
piT sTop Instead of Shooting, Your
Ace and any Combat Platoon he has joined
may attempt to dismount after they have moved on a
successful Skill Check.
Finish line Vehicles from your Combat and Headquarters platoons may escape in the same turn that they have moved At the
Double on a result of 5+, otherwise are Destroyed.
grand prix Vehicles from your Combat or HQ Platoons may move an additional 6”/15cm on
a roll of 2+. However, if you roll a 1 they crash and
become Bogged Down.
hoW’d you geT on
If your Ace or 2iC team demolish an objective, the other team may re-roll a
failed attempt to demolish an objective in the same
turn.
one up If your Ace or 2iC team Hits in Assault Combat, the other
team may re-roll a failed To Hit roll during Assault Combat in the same turn.
anyThing you Can do...
For every Hit scored by your Ace or 2iC team during the
Shooting Step, the other team may re-roll a failed To
Hit roll in the same turn.
rivalry
When your Ace and 2iC teams join separate Combat
Platoons, the Rivalry Abilities also apply to those
platoons.
We luCky FeW
Before the game begins, your Ace may roll up to nine Motivation Tests. For each successful result, add one
Rifle team to a new Partisan Platoon.
spread The Word
Your Ace may add an additional three dice to your We Lucky Few dice roll, for
a total of 12 dice.
our ranks groW
Your Ace may add an additional three dice to your We Lucky Few dice roll, for
a total of 15 dice.
privaTe arMy
Your Ace may recruit either two Partisan Platoons (using
Our Ranks Grow) or one large Partisan Platoon.
deserT explorer
Your Ace and any platoon he has joined always pass Skill Checks to free Bogged Down teams in your Starting Step.
sun CoMpass
Teams from your HQ, Combat, and Weapons Platoons treat Difficult Going as Cross Country,
and Very Difficult Going as Difficult Going.
sTing oF The sCorpion Your Unarmoured teams from HQ, Combat, and
Weapons platoons ignore a Hit in Assault if they roll a 6 (or 5+ while under the effects
of a Khamseen).
We are The sTorM At the beginning the game you may place a 24” wide
Khamseen anywhere on the table that moves randomly.
Your troops ignore the effects of the storm.
gave Me This sCar
Your Ace receives +1 XP if he Destroys opponent’s Ace in this game. Opponent must allocate all hits from your
Ace on their Ace, even if it is attached to a platoon.
BiTTer haTred
One of your Combat Platoons re-roll misses
during the Shooting Step when shooting at a chosen enemy Combat platoons.
see This Through
Your Combat and Weapons Platoons may re-roll
failed Motivation Tests to Counterattack against your
opponent’s Combat and Weapons Platoons.
TWisTed FoCus Teams from HQ, Combat, and Weapons Platoons Hit your opponent’s teams on a
2+ in assault, but Hit teams from other forces on a 5+.
tuRN
�tuRN
�tuRN
3Smash & grab
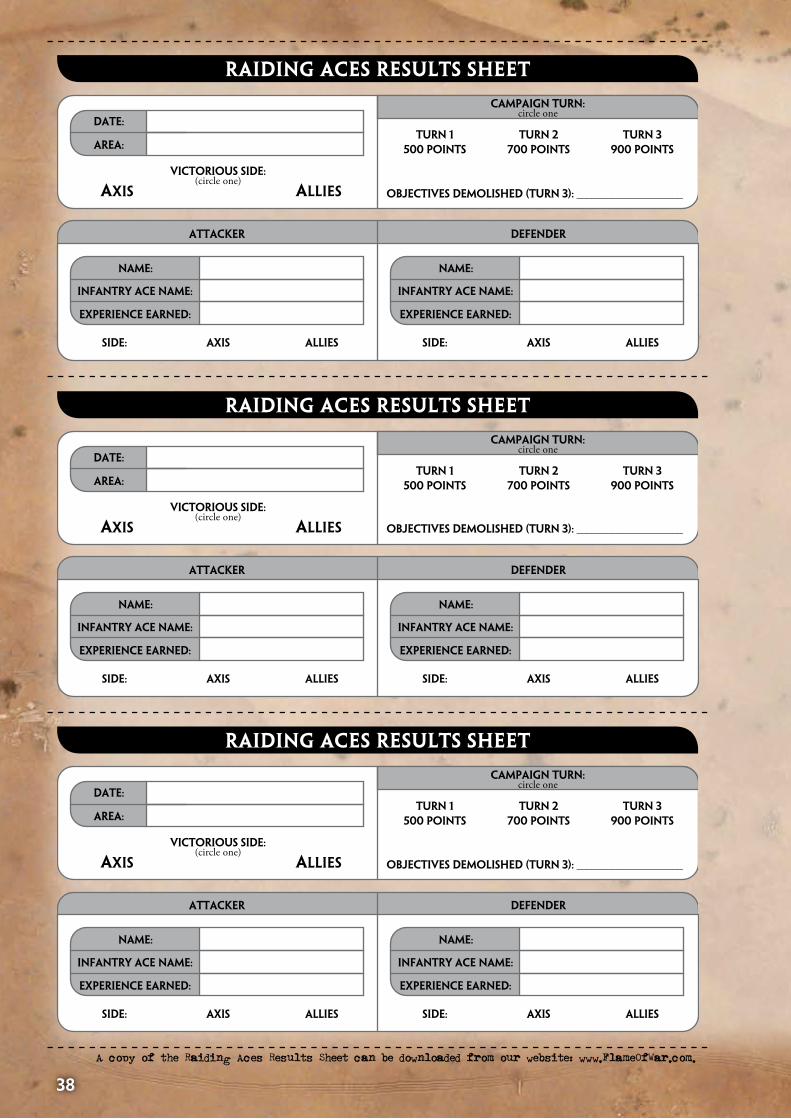
3�
A copy of the Raiding Aces Results Sheet can be downloaded from our website: www.FlameOfWar.com.
raiding aCeS reSultS Sheet
raiding aCeS reSultS Sheet
raiding aCeS reSultS Sheet
DAte:
AReA:
ViCtORiOuS SiDe:(circle one)
CAmpAigN tuRN:circle one
�00 pOiNtS �00 pOiNtS 900 pOiNtS tuRN � tuRN � tuRN 3
AttACKeR DeFeNDeR
NAme:
iNFANtRy ACe NAme:
expeRieNCe eARNeD:
SiDe: AxiS ALLieS
NAme:
iNFANtRy ACe NAme:
expeRieNCe eARNeD:
SiDe: AxiS ALLieS
axis allies
DAte:
AReA:
ViCtORiOuS SiDe:(circle one)
CAmpAigN tuRN:circle one
�00 pOiNtS �00 pOiNtS 900 pOiNtS tuRN � tuRN � tuRN 3
AttACKeR DeFeNDeR
NAme:
iNFANtRy ACe NAme:
expeRieNCe eARNeD:
SiDe: AxiS ALLieS
NAme:
iNFANtRy ACe NAme:
expeRieNCe eARNeD:
SiDe: AxiS ALLieS
axis allies
DAte:
AReA:
ViCtORiOuS SiDe:(circle one)
CAmpAigN tuRN:circle one
�00 pOiNtS �00 pOiNtS 900 pOiNtS tuRN � tuRN � tuRN 3
AttACKeR DeFeNDeR
NAme:
iNFANtRy ACe NAme:
expeRieNCe eARNeD:
SiDe: AxiS ALLieS
NAme:
iNFANtRy ACe NAme:
expeRieNCe eARNeD:
SiDe: AxiS ALLieS
axis allies
ObjeCtiVeS DemOLiSHeD (tuRN 3): _____________________
ObjeCtiVeS DemOLiSHeD (tuRN 3): _____________________
ObjeCtiVeS DemOLiSHeD (tuRN 3): _____________________
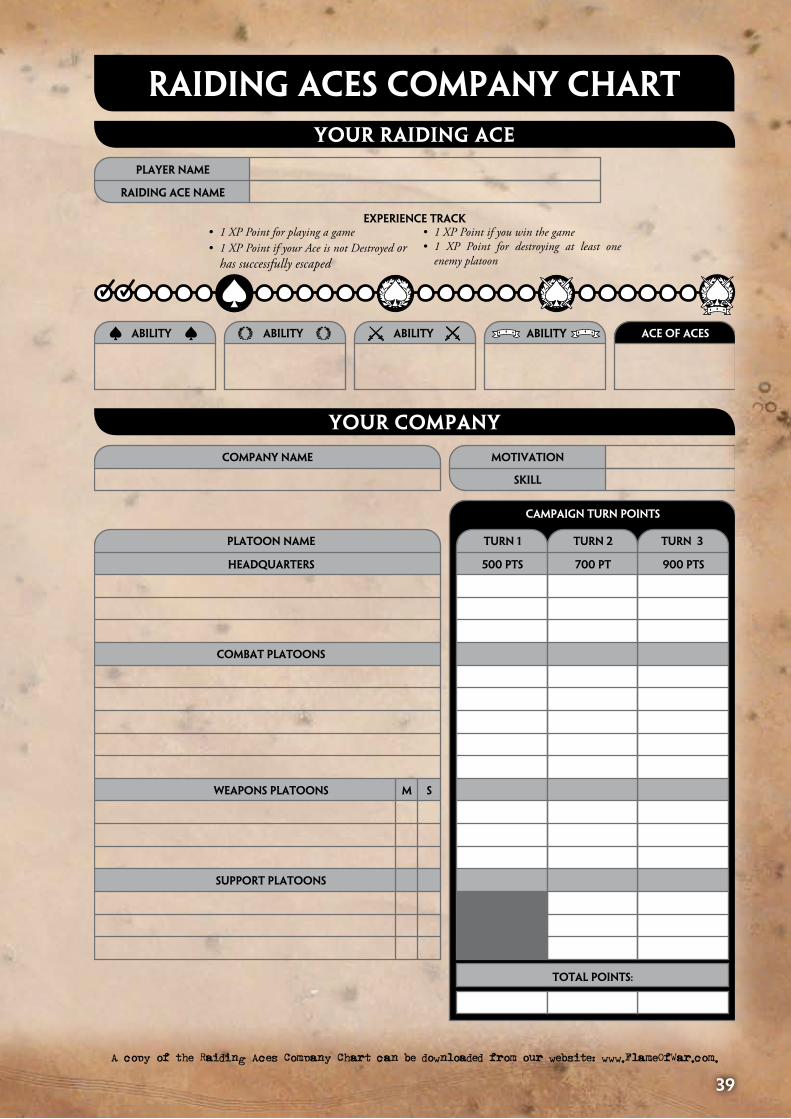
39
A copy of the Raiding Aces Company Chart can be downloaded from our website: www.FlameOfWar.com.
AbiLity AbiLity AbiLity AbiLity ACe OF ACeS
Raiding Aces Company Chart
your raiding aCe
your CoMpany
RAiDiNg ACe NAme
pLAyeR NAme
pLAtOON NAme tuRN � tuRN � tuRN 3
HeADQuARteRS �00 ptS �00 pt 900 ptS
CAmpAigN tuRN pOiNtS
COmpANy NAme
COmbAt pLAtOONS
WeApONS pLAtOONS m S
SuppORt pLAtOONS
tOtAL pOiNtS:
mOtiVAtiON
SKiLL
expeRieNCe tRACK1 XP Point for playing a game1 XP Point if your Ace is not Destroyed or has successfully escaped
••
1 XP Point if you win the game1 XP Point for destroying at least one enemy platoon
••
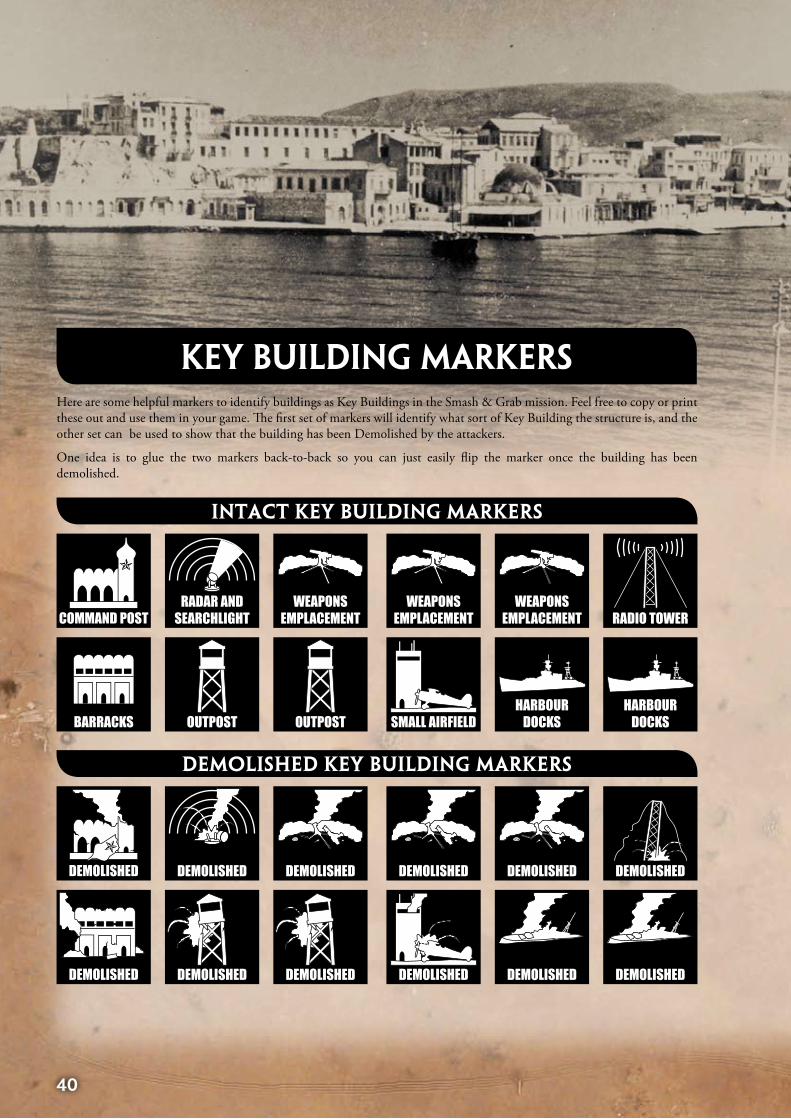
40
Key building markersHere are some helpful markers to identify buildings as Key Buildings in the Smash & Grab mission. Feel free to copy or print these out and use them in your game. The first set of markers will identify what sort of Key Building the structure is, and the other set can be used to show that the building has been Demolished by the attackers.
One idea is to glue the two markers back-to-back so you can just easily flip the marker once the building has been demolished.
intaCt key building MarkerS
deMoliShed key building MarkerS

4�
Raiding Aces uses Raiding and Garrison forces. The majority of these forces can be found in Burning Empires, while a few can be found on our website: www.FlamesOfWar.com.
Here is a quick introduction to the raiding and garrison forces found in Burning Empires.
oss operaTional groupThe American secret service, the Office of Strategic Services (OSS) deployed Operational Groups in Corsica and Italy in 1943. These groups consisted of a core of American volunteers from the US Army’s airborne divisions and the US Marines. To support the core, partisan guerillas were raised and trained to help put together a formidable resistance army, supplied by the American war machine.
BrandenBurger halBkoMpapnieThe Brandenburgers were Germany’s own special forces. Specialising in subterfuge, these troops wore enemy uniforms to infiltrate the enemy’s lines and secure critical points behind enemy lines. They achieved success in Germany’s early campaigns and were expanded to operate as company-sized units in 1942. The 13. ‘Tropen’ Kompanie, or 13th Tropical Company, was deployed to North Africa and saw action in southern Libya as well as along the coastline. They also fought an exceptional campaign of sabotage in Tunisia toward the end of the North African campaign.
CoMpagnie déCouverTe de CoMBaTLeclerc consolidated his motorised forces into the Compagnie portée du RTST and based them on the LRDG pattern of mechanised reconnaissance. These patrols, called Découverte de Combat (Combat Reconnaissance), ran interference for Leclerc’s main force, keeping the Autosahariana busy. After the Battle of Kufra, Leclerc expanded the Découverte de Combat patrols to conduct an aggressive raiding campaign to buy time and build his forces up for his final drive north.
CoMpagnie de Tirailleurs sénégalaisThe Régiment de tirailleurs sénégalais du Tchad (RTST, or Senegalese Light Infantry Regiment of Chad), formed the core of the Free French forces in Chad, commanded by Colonel Philippe Leclerc. Leclerc fought a more traditional war against the Italians in the Sahara, laying siege against the garrison of Kufra and launching an ambitious offensive against Murzuk. Although poorly equipped, the French fought hard and bravely and eventually marched from their base in Chad all the way to Tunisia.
103a CoMpagnia ardiTi CaMioneTTisTiThe Arditi, literally translated as The Daring Ones, were among Italy’s most elite troops. The arrived in Libya towards the end of the campaign and only saw action in Tunisia during the Axis retreat from North Africa. However, their contribution was felt by the LRDG and the Allies as they fought hard and even launched some of Italy’s only offensive raids in the war.
CoMpagnia MiTraglieriThe Mitraglieri (machine-gun) were the second half of the Italian defence force in the Sahara, along with the Autosahariana. Their role was to provide a bse of operations for the mechanised troops, garrisoning the critical oases, such as Murzuk and Kufra.
CoMpagnia auTosaharianaThe Sahariana were Italy’s special forces in the Sahara. They were veterans of desert warfare, having fought the Senussi in the decades before the war. They were mechanised and renamed the Autosahariana. Like the LRDG the Autosahariana armed their vehicles to the teeth and met their adversaries as equals in every battle they fought.
sudan riFle CoMpanyThe Sudan Defence Force, or SDF, was responsible for garrisoning the Kufra Oasis. This force made sure that the critical oasis did not fall back into enemy hands. In 1942 the SDF sent a raiding party to capture the Jalo Oasis as a part of Operation Agreement. Although this mission did not succeed, the SDF acquitted itself well.
speCial air serviCeThe Special Air Service, or SAS, was established by David Sterling to operate behind enemy lines in full raiding mode, freeing up the LRDG to concentrate on reconnaissance. To do this Sterling build his force around the famous SAS jeep, each one bristling with machine-guns. You can field an SAS Squadron and recreate the brilliant jeep raids conducted by Sterling’s men in 1943-43.
long range deserT groupThe Long Range Desert Group, or LRDG, was founded by the legendary desert explorer, Ralph Bagnold. Its mission provided the British with critical long-range reconnaissance and raiding support. You can field an LRDG Patrol, fully equipped with specially modified Chev trucks. The LRDG worked closely with the Free French and also experimented with heavy equipment in their Heavy Section, including a 25pdr gun and light tanks.
raiding forces

4�