A Patient’s Guide To Spinal Surgery - Shore Medical...
24
A Patient’s Guide To Spinal Surgery PRE-OPERATIVE CARE, HOSPITAL CARE, AND POST OPERATIVE DISCHARGE HOME CARE Our Passion Makes Us The Best
Transcript of A Patient’s Guide To Spinal Surgery - Shore Medical...

A Patient’s Guide To
Spinal Surgery
P R E - O P E R AT I V E C A R E , H O S P I TA L C A R E , A N D P O S T O P E R AT I V E D I S C H A R G E H O M E C A R E
Our Passion Makes Us The Best
TA B L E O F C O N T E N T S
General Information• Welcome to the Advanced Spine & Orthopedic Institute
• Joint Commission Certified for Spine Surgery
• Using the Patient Guide
• Patient Partner Program
• Spine Education Class and Pre-Admission Testing
Frequently Asked Questions• Lumbar Surgery with Posterior Fusion
• Cervical Fusion
• General Questions
Advanced Spine & Orthopedic Multidisciplinary Team
Pre-Operative Checklist• What to do 6 Weeks before surgery?
• What to Do 4 Weeks before Surgery?
• What to Do 10 Days before Surgery?
• What to Do the Day before Surgery?
• What to Do the Night before Surgery?
• Special Instructions
• Smoking Policy
Anesthesia & You
Blood Donation Options
Hospital Care• What to Do the Day of Surgery?
• What to Expect the Day of Surgery?
Post-Operative Discharge Home Care Instructions • Instructions for Types of Spinal Procedures
- Decompressive Lumbar Laminectomy (PLIF/LIA)
- Microlumbar and Microendoscopic Discectomy
- Anterior Cervical Discectomy and Fusion
• Caring for Yourself at Home
• Dressing Change
• Recognizing and Preventing Potential Complications
• Care and Instruction for Your Brace
• LSO Body Jacket
• TLSO Body Jacket
• Neck Brace with Chest Extension
• Post-Operative Exercises – Activity Instruction and Body Mechanics
Resource Numbers
Your Medication List
Questions for your Surgeon
Notes
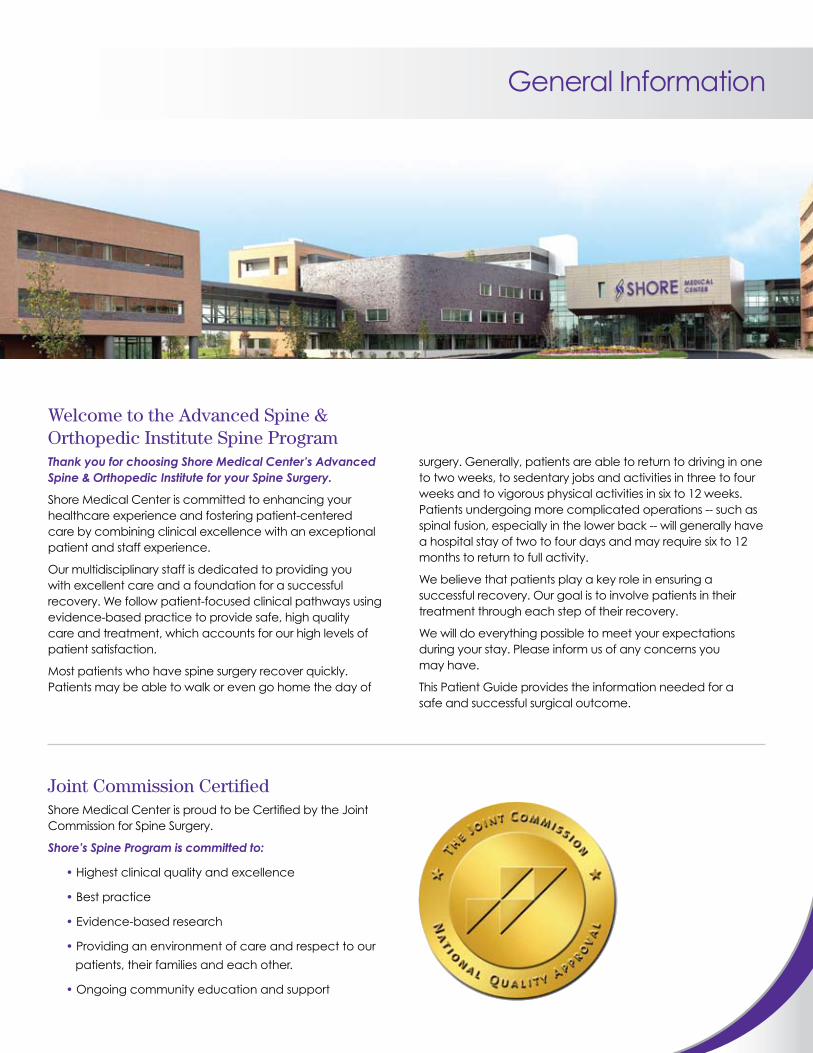
Joint Commission CertifiedShore Medical Center is proud to be Certified by the Joint Commission for Spine Surgery.
Shore’s Spine Program is committed to:
• Highest clinical quality and excellence
• Best practice
• Evidence-based research
• Providing an environment of care and respect to our
patients, their families and each other.
• Ongoing community education and support
Welcome to the Advanced Spine & Orthopedic Institute Spine Program Thank you for choosing Shore Medical Center’s Advanced Spine & Orthopedic Institute for your Spine Surgery.
Shore Medical Center is committed to enhancing your healthcare experience and fostering patient-centered care by combining clinical excellence with an exceptional patient and staff experience.
Our multidisciplinary staff is dedicated to providing you with excellent care and a foundation for a successful recovery. We follow patient-focused clinical pathways using evidence-based practice to provide safe, high quality care and treatment, which accounts for our high levels of patient satisfaction.
Most patients who have spine surgery recover quickly. Patients may be able to walk or even go home the day of
surgery. Generally, patients are able to return to driving in one to two weeks, to sedentary jobs and activities in three to four weeks and to vigorous physical activities in six to 12 weeks. Patients undergoing more complicated operations -- such as spinal fusion, especially in the lower back -- will generally have a hospital stay of two to four days and may require six to 12 months to return to full activity.
We believe that patients play a key role in ensuring a successful recovery. Our goal is to involve patients in their treatment through each step of their recovery.
We will do everything possible to meet your expectations during your stay. Please inform us of any concerns you may have.
This Patient Guide provides the information needed for a safe and successful surgical outcome.
General Information
Patient PartnerShore Medical Center’s Patient Partner Program was developed to formally involve family and friends in the care of their loved one during their stay and when they return home.
A Patient Partner is whomever you choose. It can be a family member or a friend who is interested and available to participate in your care and would like to become a member of your healthcare team.
Your Patient Partner can assist you by providing physical, psychological and spiritual support. You and your partner can choose their level of involvement in your care. Your Patient Partner will receive a pin that will identify them as a Patient Partner to hospital staff.
For more information, please feel free to speak with your nurse.
Using the Patient GuidePreparation, education, continuity of care and a pre-planned discharge are essential for achieving exceptional clinical outcomes in spinal surgery. Communication is an important part of this process. This Patient Guide is a communication and educational tool for patients, family members, physicians, surgeons, physical therapists and nurses.
It is designed to help you understand:
• What to expect during every step of your diagnosis, surgery and recovery.
• What you need to do pre- and post-operatively.
• How to care for yourself before and after spine surgery.
Remember, this is just a guide. Your surgeon, nurse or therapist may add to or change some of the recommendations. Always use their recommendations first and ask questions if you are unsure of any information. Keep this guide as a handy reference for at least the first year after surgery.
Bring this guide with you to the hospital, sub-acute rehabilitation, outpatient therapy, and all physician and surgeon visits. Read all the sections. Make notes in the guide as needed.
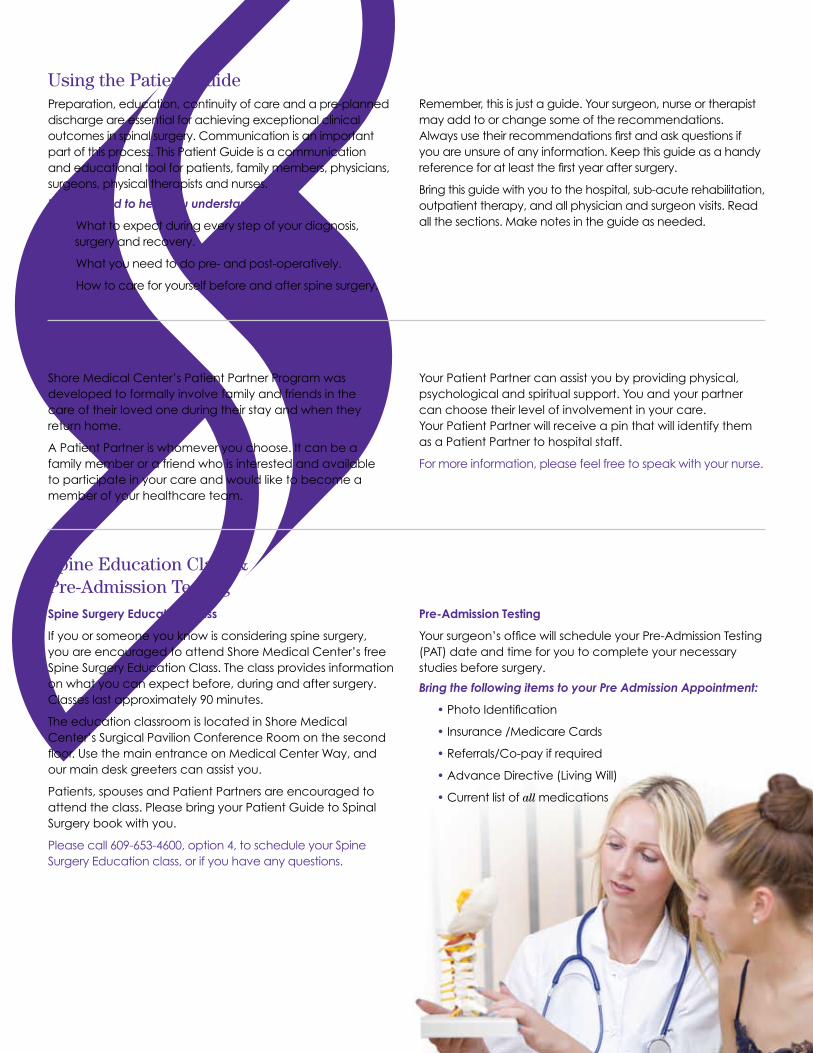
Spine Education Class & Pre-Admission TestingSpine Surgery Education Class
If you or someone you know is considering spine surgery, you are encouraged to attend Shore Medical Center’s free Spine Surgery Education Class. The class provides information on what you can expect before, during and after surgery. Classes last approximately 90 minutes.
The education classroom is located in Shore Medical Center’s Surgical Pavilion Conference Room on the second floor. Use the main entrance on Medical Center Way, and our main desk greeters can assist you.
Patients, spouses and Patient Partners are encouraged to attend the class. Please bring your Patient Guide to Spinal Surgery book with you.
Please call 609-653-4600, option 4, to schedule your Spine Surgery Education class, or if you have any questions.
Pre-Admission Testing
Your surgeon’s office will schedule your Pre-Admission Testing (PAT) date and time for you to complete your necessary studies before surgery.
Bring the following items to your Pre Admission Appointment:
• Photo Identification
• Insurance /Medicare Cards
• Referrals/Co-pay if required
• Advance Directive (Living Will)
• Current list of all medications
Lumbar Surgery with a Posterior Fusion What is wrong with my back?
You have one or more damaged discs and/or area of arthritis in your back. This produces pain, and may produce abnormal motion, or malalignment of your spine. Discs are rubbery shock absorbers between the vertebrae (bone), and are close to nerves that travel down to the legs. If the disc is damaged, part of it may bulge or even burst free into the spinal canal, putting pressure on the nerve and causing leg pain, numbness or weakness.
What is required to fix it?Your condition requires both a nerve decompression (freeing the nerves from pressure) and a spinal fusion. In your case, both the nerve decompression and the fusion will be done posteriorly (from behind).
What is spinal fusion?A fusion is a bony bridge between at least two bones, in this case two vertebrae in your spine. The vertebrae are the blocks of bone that make up the bony part of the spine, like a child’s building blocks stacked one on top of the other to make a tower. Normally, each vertebra moves with certain limits in relationship to its neighbors. In spinal disease, the movement may become excessive and painful, or the vertebrae may become unstable and move out of alignment, putting pressure on the spinal nerves. In cases like this, surgeons try to build bony bridges between the vertebrae using pieces of bone, which we call a bone graft. The bone graft may be obtained either from the patient himself, usually from the pelvis, or from a bone bank. There are advantages and disadvantages to each source. The bone graft is either laid next to the vertebrae or placed between the vertebral bodies, first removing the rubbery disc that lies between the vertebrae. In both cases, the bone graft has to heal and unite to the adjacent bones before the fusion becomes solid. Spine surgeons often use plates or rods to protect the bone graft and stabilize the spine while the fusion heals, attaching them to the spine using either screws or hooks.
How is the operation performed?A four- to five-inch incision is made in the middle of the lower back. Muscles supporting the spine are temporarily pushed aside. The spinal nerve is exposed, moved aside and protected, and the ruptured disc or bone spur is removed to “free-up” the nerve. The fusion is then performed as previously described. The wound is then closed and dressings are applied. The operation typically takes a minimum of three hours and may last longer, depending on the complexity of the problem.
Who is a candidate for posterior lumbar fusion and when is it necessary?
When back and nerve problems cannot be corrected in a simpler procedure, and pain persists at an unacceptable level, it is necessary to perform a fusion.
Cervical Fusion What is wrong with my neck?
You have one or more damaged discs and/or areas of arthritis in your neck. This arthritis/disc problem may be causing pressure on your spinal cord resulting in neck/arm pain, numbness, tingling and weakness.
What is required to fix it?Your condition requires removal of the disc and/or bones causing pressure on your spinal cord and fusion with either allograft or autograft with possible instrumentation. The bone/disc may be removed anteriorly, posteriorly or both.
What is cervical fusion?A fusion is a bony bridge between at least two other bones, in this case two vertebrae in your spine. The vertebrae are the blocks of bone that make up the bony part of the spine, like a child’s building blocks stacked one on top of the other to make a tower. Normally, each vertebra moves with certain limits in relationship to its neighbors. In spinal disease, the movement may become excessive and painful, or the vertebrae may become unstable and move out of alignment, putting pressure on the spinal nerves. In cases like this, surgeons try to build bony bridges between the vertebrae using pieces of bone, which we call a bone graft. The bone graft may be obtained either from the patient himself, usually from the pelvis, or from a bone bank. There are advantages and disadvantages to each source. The bone graft is either laid next to the vertebrae or placed between the vertebral bodies, first removing the rubbery disc that lies between the vertebrae. In both cases, the bone graft has to heal and unite to the adjacent bones before the fusion becomes solid. Spine surgeons often use either plates or rods to protect the bone graft and stabilize the spine while the fusion heals, attaching them to the spine using screws.
Frequently Asked Questions

How is the operation performed?ANTERIOR: An incision is made in the front of the neck. The trachea, esophagus and blood vessels are immobilized. The front of the spine is exposed and the disc or bone is removed and replaced with either allograft from the bone bank, autograft from the iliac crest (hip area) or a titanium cage packed with autograft. A plate and screws are placed over the front of the spine to hold the construction together. The wound is then closed and dressings are applied. The operation typically takes a minimum of three hours and may last longer, depending on the complexity of the surgery.
POSTERIOR: An incision is made in the back of the neck. Bones are removed to decompress the spinal cord. Bone graft may be packed between joints. Plates and screws or wires may be used to augment fusion.
Who is a candidate for cervical fusion, and when is it necessary?
People with cord or nerve compression are candidates for cervical fusion. It is necessary when pain persists and/or neurological deficit is present.
General QuestionsWho will perform my spine surgery?
Both orthopedists and neurosurgeons are trained in spinal surgery and both specialists may perform this surgery, either individually or as a team. It is important that your surgeon specialize in this type of procedure.
Can I be paralyzed?With any type of spinal surgery, there is a small chance of paralysis, loss of bowel or bladder function, impotence and permanent weakness.
Are there other risks involved?There are general risks with any type of surgery. These include, but are not limited to, the possibility of wound infection, uncontrollable bleeding, spinal fluid leakage, persistent pain, pulmonary embolism, pneumonia, DVT (deep vein thrombosis, or blood clot), etc. The chances of any of these happening, particularly to a healthy patient, are low. Rarely, death may occur during or after any surgical procedure.
Will my neck or back be normal after surgery?No. Even if you have excellent relief of pain, the spine is not completely normal after a fusion. Stiffening one segment of the spine with the fusion may put additional strain on other areas. Other discs may have started to wear out, and even if they aren’t causing you pain now they may do so in the future. For these reasons, you may have more neck pain than a normal person would have. However, most people can resume almost all of their normal activities after their fusion has healed.
How long will I be in the hospital?Depending on your surgery, you may go home the day of surgery or stay up to three days.
What shouldn’t I do after surgery?Your surgeon will give you specific instructions. Generally, you should avoid lifting heavy objects, especially if the lifts are awkward. Twisting and repetitive bending are also stressful to the back. Even if screws and plates are used, six to 12 months are required for the fusion to heal completely and your spine must be protected during this time. Your surgeon will usually prescribe a brace for you to wear for part of this time. If you are a smoker, you should not smoke until your fusion is completely solid, since smoking interferes with bone healing.
What can I do after surgery?Walking is the best exercise. You may get up and move around as soon as you feel like it, and may ride in a car. Your surgeon will advise when you are able to drive.
When can I return to work?This should be discussed individually with your surgeon. Generally, patients may return to sedentary jobs whenever they are comfortable, which is usually within two to four weeks. If you drive more than 30 minutes to get to work, your surgeon may want you to wait longer. It takes much longer to get back to work requiring strenuous physical activity after this operation because of the risk of disrupting healing of the bone fusion.
Could this happen to me again?Unfortunately, yes. A fusion may add stress to the levels above and below the fusion. If the fusion doesn’t heal solidly, even with plates and screws, your symptoms may recur and additional surgery may be needed.
Should I avoid physical activity?No. Exercise is good for you. Walking outside or using an exercise bike are examples of the types of exercise appropriate for spine patients.

Through consultation and collaboration, Shore’s multidisciplinary spine team will work to help you achieve the best medical outcome.
Your Team Includes Yourself and a Patient Partner - Prior to surgery, we suggest you select a family member or caregiver who will be available to provide assistance and encouragement before and after your surgery.
Surgeons and staff – Your neurosurgeon will manage your care, with assistance from his staff nurse and consulting physicians if indicated, such as a medical management physician and a physiatrist, who is a physician specializing in physical medicine and rehabilitation.
The Nursing Department at Shore Medical Center consists of:
• Pre-Admission Testing (PAT) – In Pre Admission Testing you will have required studies done approximately seven to 21 days before your surgery. You will also receive education regarding your surgery and have the opportunity to ask questions. Shore Medical Center offers a free Spine Education Class you are encouraged to attend. For information on the Spine Education Class call (609) 653- 4600, option 4.
• Surgical Registration / Pre-Op Unit – You will be admitted to this area on the day of surgery. Registration will be completed and you will be taken to Surgical Pre-Op. Your vital signs will be taken, an IV access will be started, and you will speak with an anesthesiologist. You will remain in this area until the time of your surgery. We understand that wait times may vary; therefore, we encourage your family to wait with you. We also have televisions and guided imagery meditation tapes available to help keep you comfortable.
• Post Anesthesia Care Unit (PACU / Recovery) – You will be taken to the Post Anesthesia Care Unit (PACU) where you will recover. You will remain in this area until you are fully awake and ready to go to the Advanced Spine & Orthopedic Unit located on the fourth floor. The average length of stay in PACU is approximately 90 – 120 minutes.
• Advanced Spine & Orthopedic Nursing Team – Once you are admitted to the Advanced Spine & Orthopedic Unit you will have a primary care nurse assigned to you. A charge nurse or team leader will help direct your care. The nurse manager oversees the Spine Unit.
• Nursing Assistants - Under the direction and supervision of a Registered Nurse, a nursing assistant will assist with your care.
• Transport Team – Members of this team provide transportation to tests.
• Health Unit Coordinator – The coordinator works at the nurses’ station and assists with communication between in-house departments and the nursing staff.
The Rehabilitation Department at Shore Medical Center consists of:
• Physical Therapists and Physical Therapist Assistants – Shore’s skilled physical therapists and physical therapist assistants provide training and exercises to regain your functional mobility.
• Occupational Therapist – If necessary, you will be evaluated by an occupational therapist to assist you with performing activities of daily living.
Care Management/Social Services Team – Members of the Care Management/Social Services Team continuously review your progress and communicate with your surgeon and insurance company as necessary.
Advanced Spine & Orthopedic Multidisciplinary Team
Obtain Medical Clearance and Pre-Anesthesia Instructions
When you are scheduled for surgery you should receive a medical clearance letter from your surgeon. This will tell you whether you need to see your primary care physician and/or a specialist. Please follow the instructions in the letter. Check with your surgeon regarding medications you should take the morning of your surgery.
Start Pre-Operative Exercises
Many patients with spinal problems become sedentary and deconditioned, and thus become weaker. This interferes with their recovery. It is important that you begin an exercise program before surgery, unless instructed otherwise by your surgeon. Practice putting on your brace while sitting on the edge of the bed without twisting.
Review “Advance Directive for Healthcare”
The law requires that everyone over 18 years of age who is being admitted to a medical facility have the opportunity to complete an Advance Directive form concerning future decisions regarding your medical care. If you have an advance directive, please bring a copy to the hospital on the day of surgery.
If you do not have an Advance Directive and would like to complete one, you may contact the Patient Care Representative at Shore Medical Center by calling (609) 653-3882 for assistance Monday through Friday from 9 a.m. - 4 p.m.
What to Do 4 Weeks before Surgery?Take Your Vitamins
Prior to your surgery, you may be instructed by your surgeon to take multivitamins as well as iron.
Obtain Laboratory Tests
When you are scheduled for surgery you will receive instructions for laboratory-testing from your surgeon. These studies are completed within 30 days prior to your scheduled surgery. Follow the instructions from your surgeon. Your medical physician may order additional testing.
Read Anesthesia Information
Spinal surgery does require the use of general anesthesia. Please review “Anesthesia and You” later in this booklet.
What to Do Six Weeks before Surgery?Contact your insurance company
Before surgery, you will need to contact your insurance company. Its telephone number can be found on the back of your insurance card.
You will need to find out if:
• Pre-certification, second opinion or a referral form is required.
• Your insurance company has a benefit for Durable Medical Equipment (DME - walker, cane, brace, or commode).
It is crucial to make this call to your insurance company. Failure to clarify these questions may result in a reduction of benefits or delay of surgery. This is especially important if your spine problem is due to an injury at work. Check with your surgeon’s office; they may do this for you.
If you are a member of a Health Maintenance Organization (HMO), you will go through the same registration process. However, you will need to call your HMO once your procedure has been scheduled to arrange for pre-admission lab studies that must be completed.
Pre-Admission Screening
After your surgery has been scheduled, a representative from Pre-Admission Testing will call you to gather your pre-registration information by telephone. A nurse will also ask you questions about your medical history.
You will need to have the following information ready when you are contacted:
• Patient’s full legal name and address, including county
• Home telephone number
• Religion
• Marital status
• Social Security number
• Name of insurance holder, his or her address, telephone number, and his or her work address and work telephone number
• Name of insurance company, mailing address, policy and group number
• Patient’s occupation, employer, address and telephone number
• Name, address and telephone number of nearest relative
• Name, address and telephone number of someone to notify in case of emergency. This can be the same as the nearest relative.
Pre-Operative Checklist
What to Do the Night before Surgery?NPO – Do Not Eat or Drink
Do not eat or drink anything, EVEN WATER, after midnight, unless otherwise instructed to do so by your surgeon.
Suggestions on What to Bring to the Hospital
• Personal hygiene items (toothbrush, powder, deodorant, battery operated razor, etc.)
• Insurance card
• Well-fitted, closed-heel slippers or tennis shoes
• Loose fitting warm-up suit
• Battery-operated items
• This Patient Guide to Spinal Surgery book
• Copy of Advance Directive
• Brace
• X-rays
• Your medication list
Special Instructions• Check with your surgeon regarding what medications you
need to take the morning of surgery.
• Please DO NOT bring valuables such as money, credit cards, wallets, purses and jewelry.
• For safety reasons, DO NOT bring electrical items.
• Eyeglasses and contact lenses should be kept in protective containers, labeled with your name and kept on your bedside table when not in use. Please do not leave them unprotected or on your bed sheets
• Dentures or partials, when not in place, should be kept in a denture cup labeled with your name and kept on your bedside table. Please do not wrap dentures in tissues, napkins or washcloths. Please do not place them under your pillow or on your sheets.
The hospital cannot assume responsibility for the loss of money, jewelry or other personal property kept in your room.
Smoking Policy• Smoking by anyone is prohibited throughout all buildings,
grounds, parking lots, and walkways owned or operated by Shore Health Systems.
• If you are a smoker, inform your surgeon. Evidence has shown that smoking can decrease the rate of healing.
If you smoke and need help to quit, contact Shore’s Tobacco Prevention and Treatment Program at (609) 653-3440.
What to Do 10 Days before Surgery?Pre-Operative Visit to Surgeon
You may have an appointment in your surgeon’s office seven to 10 days prior to your surgery. This will serve as a final check-up and a time to ask any questions that you might have. Some patients with acute disc herniations may have a shorter time between the visit and surgery.
Stop Medications That May Increase Bleeding
• Ten days before surgery, stop taking all medications containing aspirin and anti-inflammatory medications such as Aspirin, Motrin, Naproxen, etc. These medications may cause increased bleeding.
• If you are taking Coumadin, you will need special instructions from your surgeon about stopping this medication.
• Consult with your surgeon regarding medications you are taking.
• Consult with your surgeon before stopping medications.
What to Do the Day before Surgery?Find Out Your Arrival Time at the Hospital
You will be asked to come to the hospital two hours before your scheduled surgery to give the nursing staff sufficient time to start an intravenous line, prepare the surgical site and answer questions. It is important that you arrive on time to the hospital because sometimes the surgical time is moved up at the last minute and your surgery could start earlier. If you are late, it may create a significant problem with starting your surgery on time. In some cases, lateness could result in moving your surgery to a much later time.
Types of AnesthesiaThe two types of anesthesia available for this surgery are:
• General Anesthesia – You will be unconscious and have no awareness or other sensations. This requires mechanical ventilation.
• Regional Anesthesia – You will receive an injection near a cluster of nerves to numb the area of your body that requires surgery. A sedative is used so that you will not be awake.
ProcedurePrior to surgery an anesthesiologist will evaluate your medical history, lab values and test results to formulate an anesthesia plan.
During surgery, advanced technology is used to monitor the body’s functions. Your anesthesiologist will interpret these monitors and appropriately diagnose, regulate and treat the body’s organ systems while a personalized balance of anesthetic medication is administered. A nurse anesthetist may assist the anesthesiologist with your monitoring. At the conclusion of the surgery, the anesthesiologist reverses the effects of the anesthetic medication and returns you to consciousness.
After surgery, you will be taken to the Post Anesthesia Care Unit (PACU / Recovery). Here, specially trained registered nurses will care for you and monitor your vital signs. Your anesthesiologist will be available to direct your care.
Side EffectsYour anesthesiologist will discuss the risks and benefits associated with the different anesthetic options, as well as any complications or side effects that may occur. The most common side effect is nausea or vomiting, which may be related to anesthesia or the type of surgical procedure. Medications to treat nausea and vomiting will be given, if needed. More serious adverse results can occur following anesthesia and surgery; however, they are extremely rare. Please consult your surgeon for further information.
Our StaffThe anesthesiologists at Shore Medical Center are board eligible and/or board-certified physicians. These professionals staff the operating room and recovery room.
You may choose your anesthesiologist. However, you must make that choice known in advance so that arrangements may be made to honor your request. If you have questions about your insurance coverage, please contact your insurance company for guidance.
In most situations where no request exists, the surgeon who has scheduled the operation will arrange the services of an anesthesiologist with whom he is familiar.
Anesthesia & You
What are the sources of blood? When a transfusion is needed, patients receive blood they have donated for themselves, blood donated by a directed donor (a donor personally selected by you) or blood donated by the community. Being transfused with your own blood is generally the safest option, but some people are unable to provide their own blood and must rely on other blood sources.
Being Your Own Donor The blood that offers you the most safety and the best match is the blood you donate for yourself. This is called autologous donation.
If you are able to serve as your own blood donor, the blood collection process will likely begin about three weeks before your surgery. However, the last donation must be made at least three days before surgery. Many patients anticipating surgery donate blood for themselves without problems. Your doctor will make the final decision depending on your condition.
• Benefits: Your own blood provides the best match. Transfusion of your own blood eliminates the risk of getting a viral infection, such as hepatitis or AIDS, from the transfusion. By giving blood to meet your own needs, you also help conserve the community blood supply for people who need blood in an emergency or who can’t be their own donors.
• Possible Risks: Your blood iron level will decrease after donation. For this reason, your doctor may prescribe iron supplements.
• Procedure: The American Red Cross Blood Bank is ready to help you be your own donor. Your blood will be collected on a schedule that will be convenient and safe while meeting your blood needs. Your blood will be uniquely tagged especially for you and be ready if you need it during or after your surgery.
Eat a light meal two to three hours before donation. Be prepared to give blood bank personnel a general health history and a list of medications. An infection may prevent you from being your own blood donor.
The process will take approximately one hour from registration to refreshment. The actual drawing procedure takes about 5-10 minutes.
Remember, donors must call the American Red Cross Blood Bank at 1-800-35-BLOOD for an appointment NO LATER than three weeks prior to the scheduled surgery.
At the time of donation, he/she must present the following information:
• Patient name and Social Security number
• Date of surgery
• Blood type, if known
Maintain any iron therapy prescribed until your surgery. Your blood is reserved for you until its expiration date. Please call the blood bank if your surgery is rescheduled.
Choosing Family or Friends to Donate BloodWhen family or friends donate blood for you, the process is called a directed, or designated, donation. Although it is appealing to have people close to you give blood, directed donations are not statistically safer than the community blood supply.
Blood types will not be performed prior to the donation unless the donor registers as an outpatient and pays a fee for the blood typing.
Upon testing of donor units, donors who are found to be incompatible with the patient will be released into the general community supply.
Because of the possibility of testing problems or mechanical failures, directed donor blood will automatically be released to other patients one week after the scheduled surgery date if it has not been used.
Benefits: Directed donations may provide peace of mind for some patients because they personally know the person who donated the blood.
Possible Risks: The safety of any donation depends on the donor providing complete and factual answers to health screening questions. Sometimes friends or family may feel pressured into making directed donations, even though they know that their health history may make their blood unsafe. Even if a patient knows the donor personally, a directed donation may still transmit disease.
You can be assured that the American Red Cross will use the same thorough procedures for screening the donors and testing the blood that is normally used for the community blood supply.
The American Red Cross collects and processes most of the blood used by Shore Medical Center patients. Donors are screened very carefully using a detailed health questionnaire. After blood is collected, it is screened very carefully for any reason that would make it unacceptable for use. Any
unacceptable units are discarded.
If your surgery date is postponed, you must notify the American Red Cross Blood Bank.
Blood Donation Options
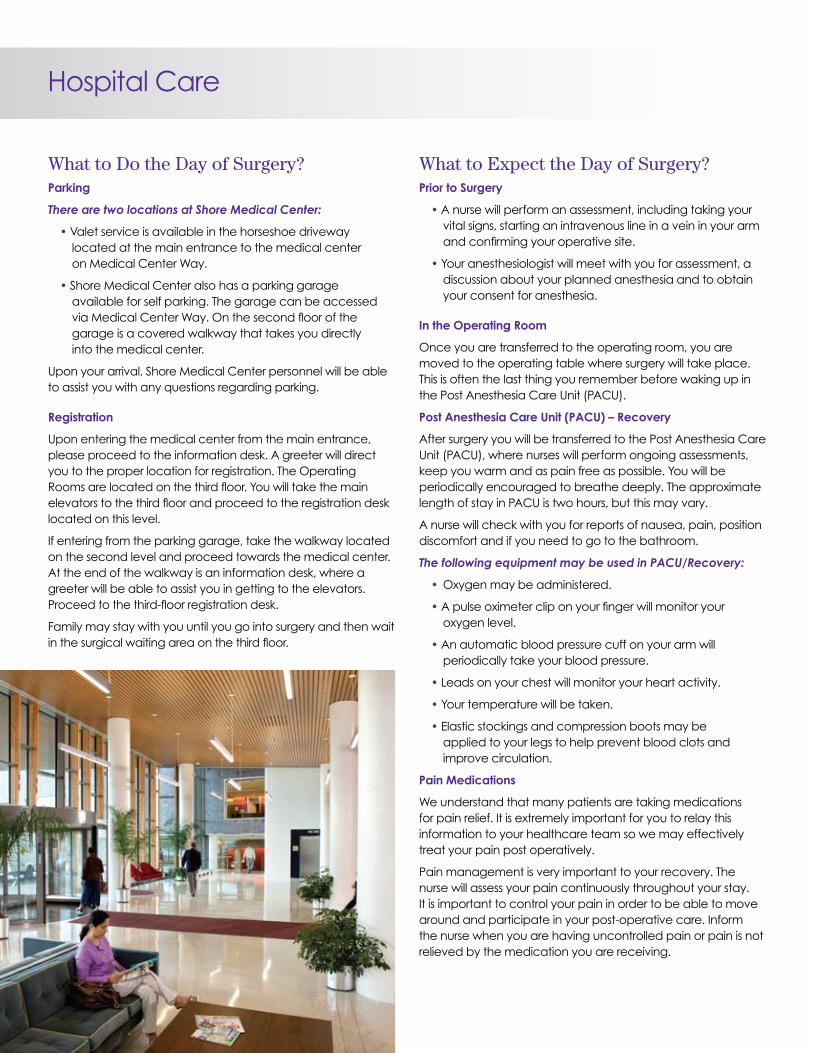
What to Do the Day of Surgery?Parking
There are two locations at Shore Medical Center:
• Valet service is available in the horseshoe driveway located at the main entrance to the medical center on Medical Center Way.
• Shore Medical Center also has a parking garage available for self parking. The garage can be accessed via Medical Center Way. On the second floor of the garage is a covered walkway that takes you directly into the medical center.
Upon your arrival, Shore Medical Center personnel will be able to assist you with any questions regarding parking.
Registration
Upon entering the medical center from the main entrance, please proceed to the information desk. A greeter will direct you to the proper location for registration. The Operating Rooms are located on the third floor. You will take the main elevators to the third floor and proceed to the registration desk located on this level.
If entering from the parking garage, take the walkway located on the second level and proceed towards the medical center. At the end of the walkway is an information desk, where a greeter will be able to assist you in getting to the elevators. Proceed to the third-floor registration desk.
Family may stay with you until you go into surgery and then wait in the surgical waiting area on the third floor.
What to Expect the Day of Surgery?Prior to Surgery
• A nurse will perform an assessment, including taking your vital signs, starting an intravenous line in a vein in your arm and confirming your operative site.
• Your anesthesiologist will meet with you for assessment, a discussion about your planned anesthesia and to obtain your consent for anesthesia.
In the Operating Room
Once you are transferred to the operating room, you are moved to the operating table where surgery will take place. This is often the last thing you remember before waking up in the Post Anesthesia Care Unit (PACU).
Post Anesthesia Care Unit (PACU) – Recovery
After surgery you will be transferred to the Post Anesthesia Care Unit (PACU), where nurses will perform ongoing assessments, keep you warm and as pain free as possible. You will be periodically encouraged to breathe deeply. The approximate length of stay in PACU is two hours, but this may vary.
A nurse will check with you for reports of nausea, pain, position discomfort and if you need to go to the bathroom.
The following equipment may be used in PACU/Recovery:
• Oxygen may be administered.
• A pulse oximeter clip on your finger will monitor your oxygen level.
• An automatic blood pressure cuff on your arm will periodically take your blood pressure.
• Leads on your chest will monitor your heart activity.
• Your temperature will be taken.
• Elastic stockings and compression boots may be applied to your legs to help prevent blood clots and improve circulation.
Pain Medications
We understand that many patients are taking medications for pain relief. It is extremely important for you to relay this information to your healthcare team so we may effectively treat your pain post operatively.
Pain management is very important to your recovery. The nurse will assess your pain continuously throughout your stay. It is important to control your pain in order to be able to move around and participate in your post-operative care. Inform the nurse when you are having uncontrolled pain or pain is not relieved by the medication you are receiving.
Hospital Care
Transfer to the Advanced Spine and Orthopedic UnitOnce you are completely awake, you will be taken to the Advanced Spine and Orthopedic Unit on the fourth floor. Your family members may visit you in your room. The Advanced Spine and Orthopedic nurses will continually reassess your status. Your nurse will assist you in getting up and walking as soon as you feel able. Pain is usually not severe and will be controlled with pain injections or pills. Most patients are able to go home on the day of surgery or the next day. Some patients will need to stay in the hospital for two to four days.
Post-Operative Hospital Plan of CareYour nurse will review the following plan of care as ordered by your surgeon:
• Pain assessment
• Assess vital signs
• Neurological assessment
• Assessment of the surgical area
• Wound drainage
• Monitor drainage tubes from your surgical site if present
• Monitor oral fluid intake and elimination
• Ice therapy to operative site to prevent swelling and assist with pain control
• Use of antiembolic stockings to help prevent blood clots and improve circulation
• Ankle pump exercises to assist circulation
• Pneumatic pumps while in bed or chair to assist with your circulation
• Use of your incentive spirometer to ensure deep breathing
• Coughing and deep breathing every hour while awake to help expand the lungs
• Inspect and assess heels/feet
• Inspect and assess integrity of skin
• Occupational therapy evaluation if ordered by your surgeon
• Physical Therapy evaluation if ordered by your surgeon
• Out of bed as ordered by your surgeon
• Instructions on medications and their side effects
• Discharge planning
• Brace application and education
To manage pain after surgery, you will be given medications. Pain will be controlled with pain injections or pills. Some patients are treated with a PCA (patient-controlled analgesia) pump, a device that you use to administer your own pain medication through an intravenous line.
• The Pain Pump (PCA) is ordered by your surgeon.
• The amount of medication you can receive is pre set by the surgeon. You cannot receive more than the amount programmed into the pump.
• Nurses will instruct you on the use of the pump.
• Nurses will evaluate your pain level.
• The amount of pain medication may be adjusted by the surgeon based on your pain relief.
Numeric Pain Scale
Before and after your surgery, you will be asked to describe your pain using a numeric pain scale. You will assign the pain a number between 0 and 10, with 0 representing no pain and 10 the worst pain. The numeric pain scale helps your surgeon and nurse determine the proper pain medication and dosage you will receive. The pain scale also helps to determine if the pain medication provides relief from your pain. Inform your nurse if you are in pain.
Safety Concerns:Our goal is to keep you safe and prevent a fall from occurring during your stay.
Some medications – including pain medication, sleeping medications and medications used during surgery – can increase your risk for a fall. Your safety will be monitored throughout your stay.
Our healthcare team is dedicated to keeping you safe. It is extremely important to call for assistance every time you would like to get out of bed. Well-fitted, closed-heel slippers or tennis shoes are necessary for all physical therapy sessions and walking.

Decompressive Lumbar Laminectomy with Instrumented Fusion and Posterior Interbody Fusion with Harvesting of Bone Graft (PLIF/LIA)
• You will be discharged from the hospital two to three days post-operatively.
• When you go home, you may shower. You may not take a bath, swim or soak in a pool or hot tub.
• If there is any drainage or opening in any of your wounds, you must call your surgeon’s office immediately.
• You will be given narcotic pain medication to take at home. Narcotics can be very constipating. Remember to drink plenty of fluids. It is helpful to utilize a stool softener such as Colace (available over the counter) while on narcotic medications.
• Do not take Motrin, Advil or other anti-inflammatory medications.
• The surgeon will see you approximately 10 to 14 days after your surgery. You may not drive until you are cleared to do so by your surgeon. It is okay to be a passenger in a car.
• Walking is the best exercise. It is okay to climb stairs.
• It is not uncommon to experience the same type of back and/or leg pain/numbness and tingling you experienced before the operation. It sometimes takes several weeks for these symptoms to resolve. If you have any questions or problems before then, please call your surgeon’s office.
Microlumbar Discectomy and Microendoscopic Discectomy
• You may sleep in any position you find comfortable. Many patients find using a few extra pillows to support their back while lying on their side aids in finding a comfortable position.
• Showering is okay. You should not take a bath in the tub or swim in a pool until you are advised that it is okay by your surgeon.
• Leave the bandage on your back intact. It is not necessary for you to change it. You will be seen by your surgeon approximately 10 to 14 days after your surgery. It will be changed then. If the bandage begins to fall off or accumulate a large collection of fluid, call your surgeon for further instructions.
• If you notice any drainage or excessive redness on or near the incision, notify your surgeon immediately.
• You will be given narcotic pain medication to take at home. Narcotics can be very constipating. Remember to drink plenty of fluids. It is helpful to utilize a stool softener such as Colace (available over the counter) while on narcotic medications.
• Do not take Motrin, Advil or other anti-inflammatory medications.
• Walking is the best exercise for you in the post-operative period. Just remember not to overdo it. If you have increased pain after walking, you are probably doing too much. You should avoid lifting or bending from the waist until your surgeon tells you otherwise.
• If you have any questions about your care, surgery or post-operative instructions, call your surgeon’s office.
• It is best to check with your surgeon at your first post-operative visit regarding driving restrictions. You should not drive until you are cleared to do so by your surgeon. It is OK to be a passenger in the car prior to being cleared to drive.
Anterior Cervical Discectomy and Fusion with Plating
• It is not necessary for you to change the dressings on your neck and hip. You will be seen by your surgeon approximately 10 to 14 days after your surgery. It will be changed then. If the bandage begins to fall off or accumulate a large collection of fluid, call your surgeon for further instructions.
• You may sleep in any position you find comfortable. Many patients find using a few extra pillows to support their back while lying on their side aids in finding a comfortable position.
• If you notice any drainage or excessive redness on or near the incision, notify your surgeon immediately.
• Walking is the best exercise for you in the post-operative period. Just remember not to overdo it. If you have increased pain after walking, you are probably doing too much. You should avoid lifting or pushing anything that weighs more than five pounds until your surgeon tells you otherwise.
• If you have any questions about your care, surgery or post-operative instructions, call your surgeon’s office.
• Narcotic pain medications such as Darvocet, Tylenol #3 or Percocet can cause constipation. If you are unable to move your bowels, call your surgeon’s office. Most patients find that an over-the-counter stool softener (Colace) is also helpful while taking pain medication.
• Please try and estimate when you will be due for a refill on your medications. Medications can be refilled by calling your surgeon’s office Monday to Friday from 9 a.m. to 5 p.m. Refills will not be processed on evenings or weekends.
• It is best to check with your surgeon at your first post-operative visit regarding driving restrictions. You should not drive until you are cleared by your surgeon. It is OK to be a passenger in the car prior to being cleared to drive.
Post-Operative Discharge Home Care Instructions

• Do not take medications such as Advil, Motrin, Naproxyn, etc. unless instructed otherwise by your surgeon. These types of medications can prevent your fusion from healing.
• If you had a bone graft harvested from your iliac crest (hip area), it is OK to utilize heat and ice for local pain relief.
Caring for Yourself At Home When you go home, there are several things you need to know for your comfort, safety and speedy recovery.
Spinal Precautions The following is a list of precautions that must be followed in order to protect your spine. These precautions will help avoid injury to your spine, and will promote healing.
Things to consider and practice while in bed:
• Log rolling: This means keeping your body in a single unit as you roll right or left. Your right hip must stay aligned with your right shoulder just as your left hip needs to stay aligned with your left shoulder.
• To sit up: Log roll to your side. Push yourself up with your arms, and as your legs go down your shoulders go up.
• DO NOT come to a seated position without first rolling to your side.
• DO NOT twist or rotate your spine.
Things to consider while sitting:
• DO NOT bend forward or to the side.
• DO use your long handled or adaptive equipment to put on socks and shoes.
• DO use your reacher/grabber to get objects that are on low and high surfaces.
• DO sit in a firm straight-back chair with arm rests; seat height should be knee height.
• DO NOT twist/rotate your spine to reach for something.
Things to consider while standing:
• DO NOT twist/rotate your spine.
• DO NOT bend at your waist. You MUST bend from your knees.
Control Your Discomfort
• Take pain medicine at least 30 minutes before beginning activity.
• Pain medication may cause constipation. For this reason you should drink plenty of fluids, eat a balanced diet and stay as active as possible. Check with your surgeon for instructions on the use of stool softeners or laxatives.
• Gradually wean yourself from prescription medication.
• Change your position every 45 minutes throughout the day.
• Use ice for pain control. Applying ice to your wound will decrease discomfort, but do not use ice for more than 20 minutes at a time each hour. Use a covered ice pack. Do not apply ice directly to the skin.
• Pain medications can be refilled by calling your surgeon. Please anticipate your need for refills in advance.
Body Changes
• Your appetite may be poor. Drink plenty of fluids to keep from getting dehydrated. Your desire for solid food will return.
• You may have difficulty sleeping. This is normal. Don’t sleep or nap too much during the day.
• Your energy level may be decreased for the first month after surgery.
• Constipation may result from pain medication. Use a stool softener or laxative if needed.
Caring For Your Incision
• You may shower (not bathe) after 48 hours.
• Notify your surgeon if there is increased drainage, redness, pain, odor or heat around the incision.
• Take your temperature if you feel warm or sick. Call your surgeon if your temperature exceeds 101.5°F.
Dressing Change (Procedure may vary with surgeon)
1. Wash hands
2. Open all dressing change materials (ABD pads, 4x4)
3. Remove old dressing
4. Inspect incision for the following:
• Increased redness
• Increase in clear drainage
• Odor
• Surrounding skin is hot to touch
If you notice any of the above, notify your surgeon.
5. Pick up 4x4 by one corner and lay over incision. Be careful not to touch the inside of the dressing that will lay over the incision.
6. Place the dressing over the incision and tape it in place. If possible, use paper bandage tape. It is less irritating to the skin.
7. If you have a clear plastic bandage (tegaderm) over your wound, it is not necessary to change it. If it gets water under it or starts to fall off, call your surgeon’s office for further instructions.
8. If you have staples, they will be removed by your surgeon, usually in seven to 14 days.
Recognizing and Preventing Potential ComplicationsNotify your surgeon if you experience any of the following:
• Increased swelling and redness at the incision site
• Change in drainage color, amount, odor
• Increased pain around the incision
• Fever greater than 101.5° F
• Pain not relieved by medication
Blood Clots in Your Legs
Surgery may cause the blood to slow and coagulate in the veins of your legs, creating a blood clot. If a clot occurs, you may need to be admitted to the hospital to receive intravenous blood thinners. Prompt attention usually prevents the more serious complications of pulmonary embolus (blood clot in the lung). Moving around, especially walking, will reduce the chance of a blood clot.
Signs of Blood Clots in Your Legs
• Swelling in thigh, calf or ankle that does not go down with elevation.
• Pain and/or tenderness in calf
• Chest pain
• Difficulty breathing
These signs are not 100 percent certain, but are warnings. Do not be alarmed if they are present, but notify your surgeon, immediately.
Prevention of Blood Clots
• Foot and ankle pumps
• Walking
• Compression stockings
• Blood thinners, such as Coumadin, Aspirin, Heparin
Pulmonary Embolus
An unrecognized blood clot could break off the vein and go to the lungs. This is an emergency and you should call 911 if you suspect it has occurred.
Signs of Pulmonary Embolus
• Sudden chest pain
• Difficult and/or rapid breathing
• Shortness of breath
• Sweating
• Confusion
Prevention of Pulmonary Embolus
• Prevent blood clots in legs by walking, doing ankle pumps and wearing compression stockings
• Recognize a blood clot in legs and call your surgeon immediately
Care and Instructions for Your Brace
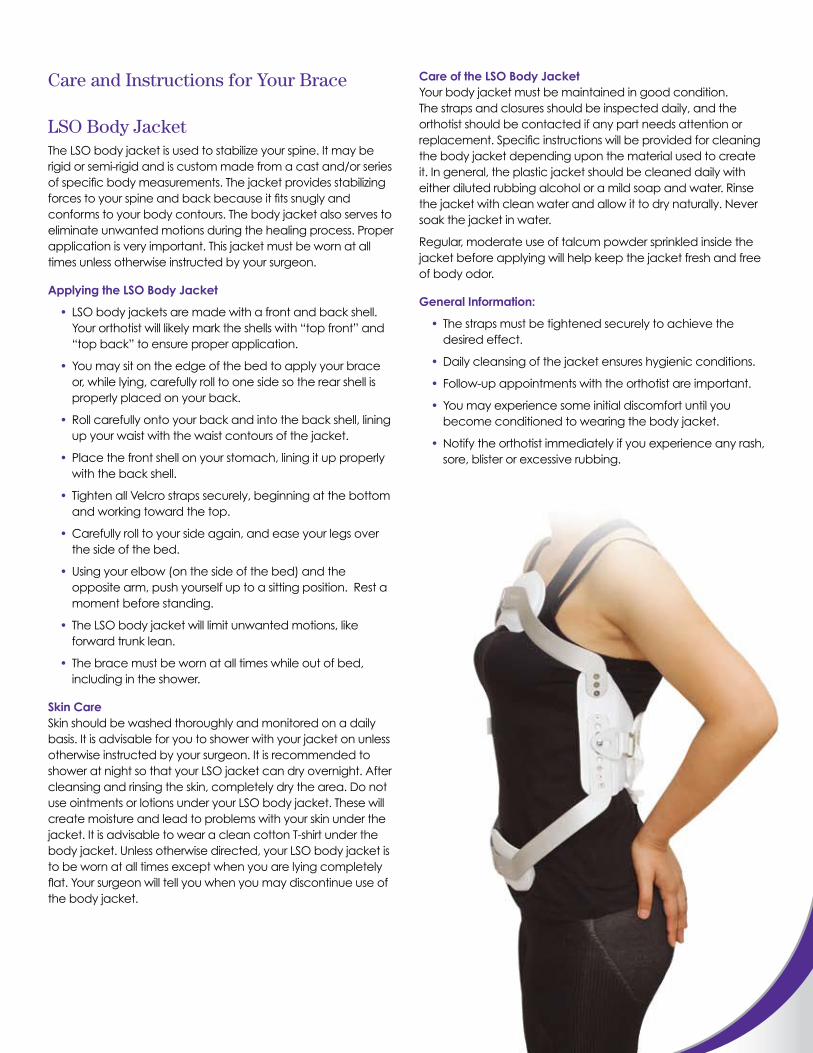
LSO Body JacketThe LSO body jacket is used to stabilize your spine. It may be rigid or semi-rigid and is custom made from a cast and/or series of specific body measurements. The jacket provides stabilizing forces to your spine and back because it fits snugly and conforms to your body contours. The body jacket also serves to eliminate unwanted motions during the healing process. Proper application is very important. This jacket must be worn at all times unless otherwise instructed by your surgeon.
Applying the LSO Body Jacket
• LSO body jackets are made with a front and back shell. Your orthotist will likely mark the shells with “top front” and “top back” to ensure proper application.
• You may sit on the edge of the bed to apply your brace or, while lying, carefully roll to one side so the rear shell is properly placed on your back.
• Roll carefully onto your back and into the back shell, lining up your waist with the waist contours of the jacket.
• Place the front shell on your stomach, lining it up properly with the back shell.
• Tighten all Velcro straps securely, beginning at the bottom and working toward the top.
• Carefully roll to your side again, and ease your legs over the side of the bed.
• Using your elbow (on the side of the bed) and the opposite arm, push yourself up to a sitting position. Rest a moment before standing.
• The LSO body jacket will limit unwanted motions, like forward trunk lean.
• The brace must be worn at all times while out of bed, including in the shower.
Skin Care Skin should be washed thoroughly and monitored on a daily basis. It is advisable for you to shower with your jacket on unless otherwise instructed by your surgeon. It is recommended to shower at night so that your LSO jacket can dry overnight. After cleansing and rinsing the skin, completely dry the area. Do not use ointments or lotions under your LSO body jacket. These will create moisture and lead to problems with your skin under the jacket. It is advisable to wear a clean cotton T-shirt under the body jacket. Unless otherwise directed, your LSO body jacket is to be worn at all times except when you are lying completely flat. Your surgeon will tell you when you may discontinue use of the body jacket.
Care of the LSO Body Jacket Your body jacket must be maintained in good condition. The straps and closures should be inspected daily, and the orthotist should be contacted if any part needs attention or replacement. Specific instructions will be provided for cleaning the body jacket depending upon the material used to create it. In general, the plastic jacket should be cleaned daily with either diluted rubbing alcohol or a mild soap and water. Rinse the jacket with clean water and allow it to dry naturally. Never soak the jacket in water.
Regular, moderate use of talcum powder sprinkled inside the jacket before applying will help keep the jacket fresh and free of body odor.
General Information:
• The straps must be tightened securely to achieve the desired effect.
• Daily cleansing of the jacket ensures hygienic conditions.
• Follow-up appointments with the orthotist are important.
• You may experience some initial discomfort until you become conditioned to wearing the body jacket.
• Notify the orthotist immediately if you experience any rash, sore, blister or excessive rubbing.
TLSO Body JacketThis device is a body jacket that is used to stabilize your spine. It may be rigid or semi-rigid and is custom made from a cast and/or series of specific body measurements. The jacket provides stabilizing forces to your spine and back because it fits snugly and conforms to your body contours. The body jacket also serves to eliminate unwanted motions during the healing process. Proper application is very important. This jacket must be worn at all times unless otherwise instructed by your surgeon.
Applying the TLSO Body Jacket
• TLSO body jackets are made with a front and back shell. Your orthotist will likely mark the shells with “top front” and “top back” to ensure proper application.
• You may sit on the edge of the bed to apply your brace or, while lying, carefully roll to one side so the rear shell is properly placed on your back.
• Place the front shell on your stomach, lining it up properly with the back shell.
• Tighten all Velcro straps securely, beginning at the bottom and working toward the top.
• Carefully roll to your side again, and ease your legs over the side of the bed.
• Using your elbow (on the side of the bed) and the opposite arm, push yourself up to a sitting position. Rest a moment before standing.
• The TLSO body jacket will limit unwanted motions, like forward trunk lean.
• The brace must be worn at all times while out of bed, including while in the shower.
Skin Care Skin should be washed thoroughly and monitored on a daily basis. It is advisable for you to shower with your jacket on unless otherwise instructed by your surgeon. It is recommended to shower at night so that your TLSO jacket can dry overnight. After cleansing and rinsing the skin, completely dry the area. Do not use ointments or lotions under your TLSO body jacket. These will create moisture and lead to problems with your skin under the jacket. It is advisable to wear a clean cotton T-shirt under the body jacket. Unless otherwise directed, your TLSO body jacket is to be worn at all times except when you are lying completely flat. Your surgeon will tell you when you may discontinue use of the body jacket.
Care of the TLSO Body Jacket Your body jacket must be maintained in good condition. The straps and closures should be inspected daily, and the orthotist should be contacted if any part needs attention or replacement. Specific instructions will be provided for cleaning the body jacket depending upon the material used to create it. In general, the plastic jacket should be cleaned daily with either diluted rubbing alcohol or a mild soap and water. Rinse the jacket with clean water and allow it to dry naturally. Never soak the jacket in water.
Regular, moderate use of talcum powder sprinkled inside the jacket before applying will help keep the jacket fresh and free of body odor.
General Information:
• The straps must be tightened securely to achieve the desired effect.
• Daily cleansing of the jacket ensures hygienic conditions.
• Follow-up appointments with the orthotist are important.
• You may experience some initial discomfort until you become conditioned to wearing the body jacket.
• Notify the orthotist immediately if you experience any rash, sore, blister or excessive rubbing.
Neck Brace with Chest ExtensionThe neck brace with chest extension is utilized in the post-operative period to facilitate healing of your fusion. It is designed to keep you from bending (flexing) and twisting your neck. The collar cannot completely stop your neck from moving. When you want to move your head, you should move your entire body in the direction you would like to turn.
• The neck brace should be worn as snugly as can be tolerated. This way the brace will keep your head straight, thus providing better support.
• You must wear your neck brace at all times. There are no exceptions to this rule. You should wear your brace in the shower. When you are fitted for the brace in the pre-operative period, two braces will be given to you. When you get out of the shower, you may remove only one half of the brace at a time. For example, remove the front of the brace while holding the back in place with your other hand. While the front is off, maintain your head and neck in alignment, cleanse your skin with soap and water and dry completely. Apply the second brace in the front and repeat the same procedure for the back. If you have any questions, you should contact your surgeon’s office.
• We recommend cutting a cotton T-shirt into squares and placing them between the brace and your skin. This provides a barrier between your skin and the brace. It will help prevent irritation to the skin by absorbing perspiration. If the cotton becomes wet, it should be changed immediately.
• If the skin under your brace becomes red, irritated, or chafed, or if you develop breaks in the skin under the collar, please call your surgeon’s office. Do not use ointments or lotions under your collar. These will create moisture and lead to problems with your skin under the collar. If you develop a rash under your collar, you should notify your surgeon’s office.
• You may not drive while immobilized in your neck brace. Once use of the brace is discontinued by your doctor, please check with your surgeon’s office to see if you are permitted to drive. It is safe to be a passenger in a car as long as the brace is worn correctly.
• If your incision was closed with staples, you can shower four days after surgery. A dry, clean dressing should be applied over the staple line and changed daily and as needed. You may cleanse your neck as described above.
• If you have any questions or problems with your brace, you should contact your surgeon’s office.
Post-Operative Exercises - Activity Instruction and Body Mechanics
Safety considerations following spine surgery:
• Remove throw rugs. Cover slippery surfaces with carpets that are firmly anchored to the floor with no edges to trip over.
• Be aware of all floor hazards such as pets, small objects, toys or uneven surfaces.
• Provide good lighting throughout the house. Leave a light on at night in the bathroom.
• Keep extension cords and telephone cords out of walkways.
• Avoid slippers or shoes with open toes or without heel enclosures. They can cause slips and falls.
• Sit in straight-back chairs with firm surfaces and arm rests. It makes it easier to get up.
• Rise slowly from either a sitting or lying position so as not to get light-headed.
• Avoid heavy lifting for the first three months after your surgery, and then only with your surgeon’s permission.
• Stop and think prior to every activity to ensure good safety and body mechanics.
• You may need to consider alternative arrangements if you have stairs in your home.
Basic Body Mechanics
• ALWAYS bend your knees when picking up an object from the floor or lower surface.
• Keep objects close to your body when moving them to another location.
• Avoid twisting or pulling so as to avoid undue stress on your back.
• ALWAYS ask for assistance prior to lifting a heavy object. Attempt to keep loads light, and make several trips if necessary.
• DO NOT get down on your knees to scrub the floor or bathtub. Use a mop or long-handled brush.
Bathroom and Kitchen Safety
• Plan ahead! Gather all your cooking supplies at one time. Then sit to prepare your meal. This cuts down on excessive trips to the refrigerator, cupboards, etc.
• Place cooking supplies and utensils in a convenient location so they can be obtained without too much bending or stretching.
• Raise the seat height of your chair by putting cushions on the seat. Always maintain good sitting posture.
• Always use non-slip adhesive or rubber mats in the tub.
• Attach a soap-on-a-rope so it is within easy reach.
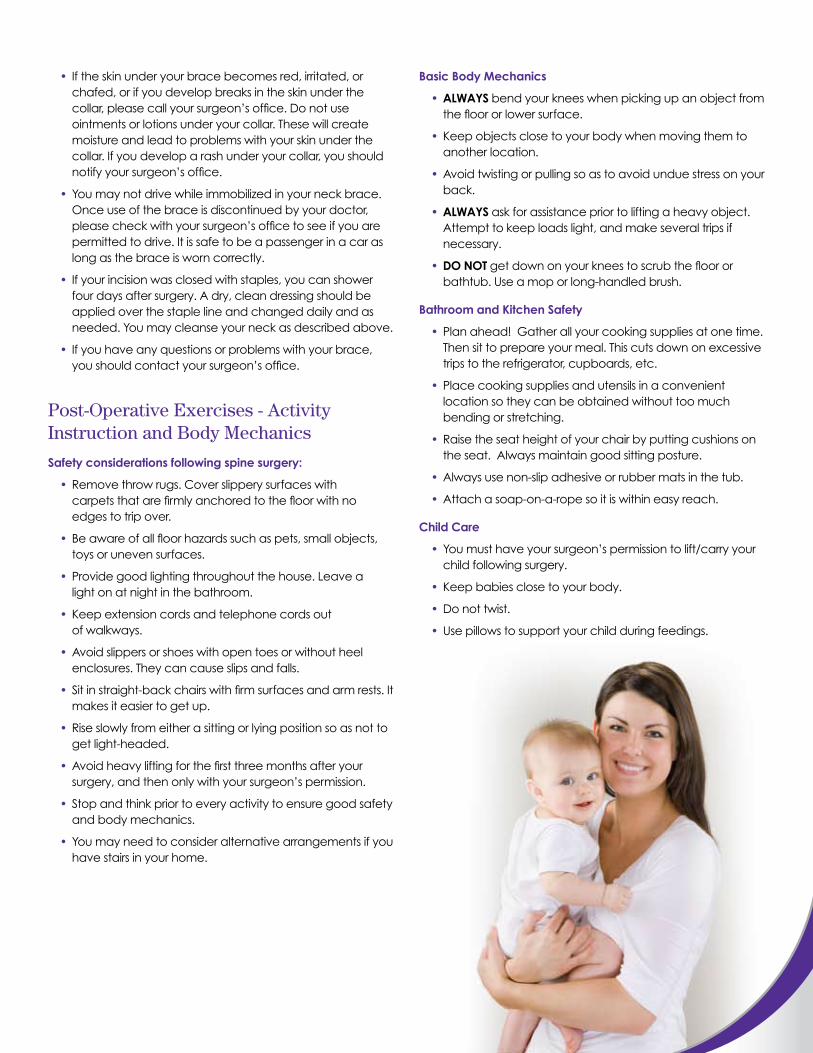
Child Care
• You must have your surgeon’s permission to lift/carry your child following surgery.
• Keep babies close to your body.
• Do not twist.
• Use pillows to support your child during feedings.
Post-Operative Exercise Goals and Activity GuidelinesExercising is important to obtain the best results from spine surgery. You may receive exercises from a physical therapist at an outpatient facility or at home. In either case, you need to participate in an ongoing home exercise program as well.
Exercise after Surgery
General Activities: Discharge to Six Weeks
• Walking is the most important exercise. You should start the night of surgery and walk as far as you can each day, building up to three miles a day by six weeks after surgery.
• Take a deep breath, cough deeply and use your incentive spirometer several times each hour.
• Take sponge baths for the first four days. After that, you may shower, but not bathe, as long as your wound is clean, dry and not red.
• You may drive short distances if you are not in a brace, if permitted by your surgeon.
Do’s and Don’ts for the Rest of Your Life Whether or not they have reached all the recommended goals in three months, all spinal surgery patients need to have a regular exercise program to maintain their fitness and the health of the muscles around their spine. With their primary care physicians’ permission, they should be on a regular exercise program three to four times per week, lasting 20-30 minutes per session. In general, the aim of spinal surgery is to return the patient to a full activity level, but the conditions leading to spine surgery cannot be completely corrected by even the most successful operation. Certain precautions must be taken.
In General:
• Avoid bending, lifting and twisting as much as possible. It may be possible to return to strenuous physical activity, including heavy lifting, but discuss this with your surgeon.
• Try to maintain your ideal body weight.
• DO NOT SMOKE.
• Maintain proper posture.
• When traveling, change positions every one to two hours to keep your back from tightening up.
Exercise: Choose a Low-Impact Activity
• Enroll in recommended exercise classes.
• Follow the home program as outlined in this Patient Guide.
• Take regular one- to three-mile walks.
• Use a home treadmill and/or stationary bike.
• Exercise regularly at a fitness center.
• Engage in low-impact sports, such as walking, gardening, dancing, etc. Lumbar spine patients who aren’t already golfers should avoid taking up this sport because of the twisting required.
Six to 12 Weeks
• At six weeks, you may start more aggressive walking and exercising if permitted by your surgeon.
• You may drive 30-60 minutes at a time, using a car-seat support, if permitted by your surgeon.
• You may do light gardening, but avoid vigorous digging, transplanting or prolonged weeding.
• You should continue to avoid repetitive bending, twisting or lifting at this time.
12 Weeks to Six Months
• Patients who have had simple discectomy without fusion may generally return to full activities, using proper body mechanics. Very heavy lifting (over 75 pounds) should be avoided indefinitely.
• For patients with complex cervical or lumbar fusion, your brace is usually removed at eight to 12 weeks post-operatively and physical therapy begins. You will be given a set of home stretches and strengthening exercises. It is important to complete these exercises daily.
Six to 12 Months
• You should be completely healed by this time and need only to avoid activities that put extreme strain on your back or neck.
• Try to follow a regular exercise program to maintain aerobic fitness. This helps to relieve stress and promote a sense of well being, is good for your heart and helps you keep your weight down.
• DO NOT SMOKE. Smoking is bad for your discs and for your health in general. Smoking can also interfere with the healing of a fusion.
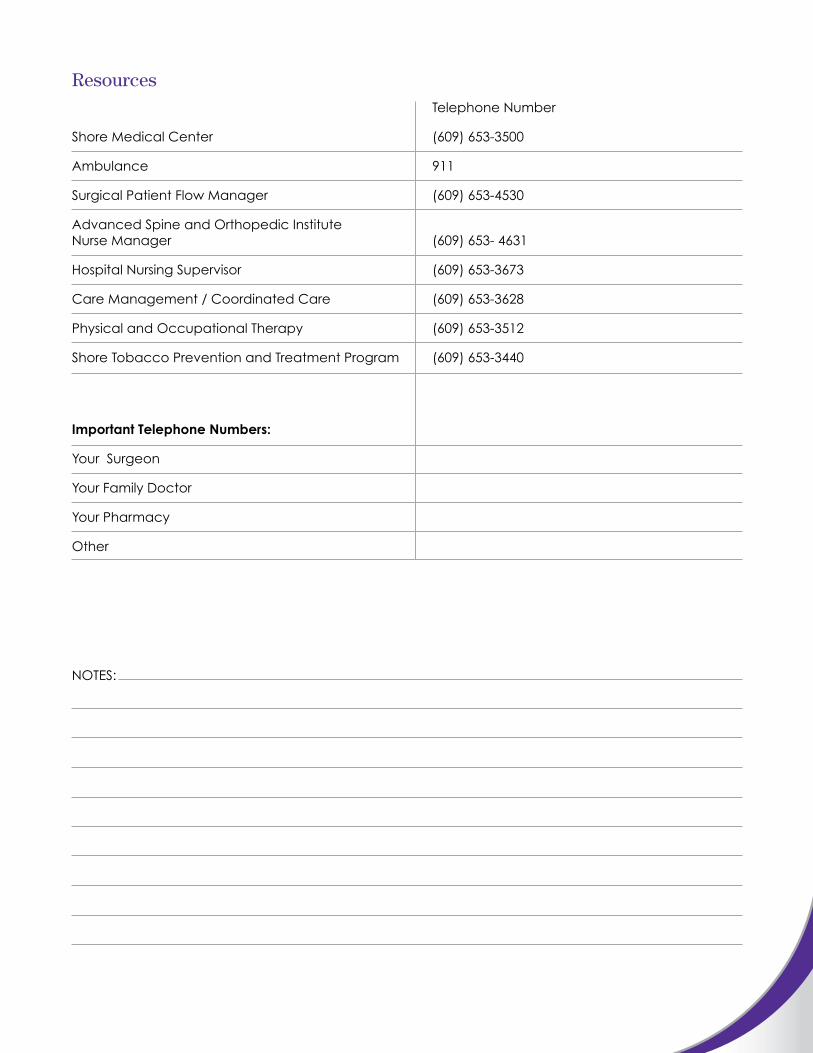
Resources Telephone Number
Shore Medical Center (609) 653-3500
Ambulance 911
Surgical Patient Flow Manager (609) 653-4530
Advanced Spine and Orthopedic Institute Nurse Manager (609) 653- 4631
Hospital Nursing Supervisor (609) 653-3673
Care Management / Coordinated Care (609) 653-3628
Physical and Occupational Therapy (609) 653-3512
Shore Tobacco Prevention and Treatment Program (609) 653-3440
Important Telephone Numbers:
Your Surgeon
Your Family Doctor
Your Pharmacy
Other
NOTES:

Your Medication List
Please list your current medications and bring this with you to the hospital.
How many times a day Date and Time of LastMedication Name Dosage you take this medication Dose taken

QUESTIONS FOR THE SURGEON:
NOTES:

ShoreMedicalCenter.org