99 Washington Street Melrose, MA 02176 Visit us at www ...
40
Arbitrary/DDS Function Generator AFG-1000 series 5MHz~20MHz Operation Manual V1.0 BENCHTOP INSTRUMENT 99 Washington Street Melrose, MA 02176 Phone 781-665-1400 Toll Free 1-800-517-8431 Visit us at www.TestEquipmentDepot.com
Transcript of 99 Washington Street Melrose, MA 02176 Visit us at www ...

Arbitrary/DDS Function Generator
AFG-1000 series
5MHz~20MHz
Operation Manual V1.0
BE
NC
HT
OP
INS
TR
UM
EN
T
99 Washington Street Melrose, MA 02176 Phone 781-665-1400Toll Free 1-800-517-8431
Visit us at www.TestEquipmentDepot.com

I
Use of Operation Manual
Please read through and understand this Operation Manual before operating the product. After
reading, always keep the manual nearby so that you may refer to it as needed. When moving the
product to another location, be sure to bring the manual as well.
Calibration notification
We notify that the instruments included in this manual are in compliance with the features and
specifications as stated in this manual. Before shipment, the instrument has been calibrated in
factory. The calibration procedures and standards are compliant to the national regulations and
standards for electronic calibration.
Warranty
We guarantee that the instrument has been passed strict quality check. We warrant our instrument’s
mainframe and accessories in materials within the warranty period of one year. We guarantee the
free replacement or repair of products which are approved defective. To get repair service, please
contact with your nearest sales and service office. We do not provide any other warranty items
except the one being provided by this summary and the warranty statement. The warranty items
include but not being subjected to the hinted guarantee items related to tradable characteristics and
any particular purpose. We will not take any responsibility in cases regarding to indirect, particular
and ensuing damage, such as modifications to the circuit and functions by the users, repairing or
component replacement by the users, or damage during transportation.
For product improvement, the specifications are subject to change without prior notice. This
manual is meant to be an operation guide to users and has been prepared with the utmost care.
However, if you have any questions or note any errors or omissions, please contact your local
distributor.
Test Equipment Depot - 800.517.8431 - 99 Washington Street Melrose, MA 02176TestEquipmentDepot.com

II
Safety Instruction
This chapter contains important safety instructions that you must follow when operating the instrument and when
keeping it in storage. Read the following before any operation to insure your safety and to keep the best condition
for the instrument.
1. Safety Terms and Symbols
The following safety symbols may appear in this manual or on the instrument:
WARNING Identifies conditions or practices that could result in injury or loss of life.
CAUTION
Identifies conditions or practices that could result in damage to the instrument or to
other properties.
DANGER High voltage
ATTENTION Refer to the manual
Earth (ground) terminal
2. Safety Guidelines
CAUTION
Before plugging into local AC mains, check and make sure that the output voltage
is compatible to the load. (It is suggested to disconnect a load before plugging into
local AC mains.
Do not use this instrument near water.
Do not operate or touch this instrument with wet hands.
Do not open the casing of the instrument when it is connected to AC mains.
Do not use the instrument in an atmosphere which contains sulfuric acid mist or
other substances which cause corrosion to metal.
Do not use the instrument in a dusty place or a highly humid place as such will
cause instrument reliability degradation and instrument failures.
Install the instrument in a place where is free from vibration.
Install the instrument in a place where the ambient temperature is in range of
-10~70. Note that the instrument operation may become unstable if it is
operated in an ambient temperature exceeding the range of 0~40
3. Power Supply
WARNING
AC Input voltage: 110V~120V/220~240V ±10%, 50/60Hz
Connect the protective grounding conductor of the AC power cord to an earth ground
to avoid electrical shock.
4. Fuse
WARNING
Fuse type: 110~120V: T2A /250V, or 220~240V: T1A/250V.
Make sure the correct type of fuse is installed before power up.
Replace the AC fuse with the same type and rating as the original fuse.
Disconnect the power cord before fuse replacement.
Make sure the cause of fuse blowout is fixed before fuse replacement.

III
5. Maintenance Inspection
Inspect the instrument at regular intervals so that it maintains its initial
performance for a long time.
Check the input power cord for damage of the vinyl cover and overheating of the
plug and cord stopper. Check the terminal screws and binding posts for loosening.
Remove dust from the inside of the casing and ventilation holes of the cover by
using a compressed air of the exhaust air of a vacuum cleaner.
6. Cleaning
Before cleaning, disconnect the AC mains.
To clean the power supply, use a soft cloth dampened in a solution of mild
detergent and water. Do not spray cleaner directly onto the instrument,
since it may leak into the cabinet and cause damage.
Do not use chemicals containing benzene, benzene, toluene, xylene,
acetone, or similar solvents.
Do not use abrasive cleaners on any portion of the instrument.

IV
Introduction
This user's guide is used for all models of this series of DDS function generator. The last two digits in the model
number represent the maximum frequency of the channel A. There are four models to choose from this series,
with max.frequency range of 5MHz, 10MHz, 15MHz and 20MHz.
This series of arbitrary waveform DDS function generator uses Direct Digital Synthesis (DDS) technology. Its
outstanding performance and system features make this function generator a perfect solution for your testing
requirement. The simplified and optimized design of the front panel and dual-language (English/Chinese) TFT
LCD display interface make your testing much easier for operation and observation. Additionally, the extendable
optional functions can also improve your system characteristics.
Technical characteristics and system features:
High-accurate Frequency: up to the 10-5
order of magnitude
High Frequency Resolution: full-range resolution is 40 mHz
No Range Limitation: no frequency level switch, frequency set directly by digit keypad
No Frequency Transition: momentarily switch to the stable value on phase and amplitude without
transition and distortion
Precise Output Waveform: output waveform is synthesized by the preset function calculation values,
very accurate and less distortion
Multiple Waveform: output 32 kinds of the pre-stored waveforms
Pulse Characteristics: set accurate pulse duty cycle
Harmonic Wave Characteristics: output the fundamental and harmonic waves with adjustable phase
Sweep Characteristics: frequency sweep and amplitude sweep, free to set the start and stop frequency
Modulation Characteristics: output FM signals
Shift Keying Characteristics: output FSK, ASK, and PSK signals
Burst Characteristics: output pulse waveform with burst count
Store Characteristics: store 40 sets of the user parameters and recall
Counter Characteristics: count the frequency, period, amplitude RMS value or peak-to-peak value
Operation mode: Key operation for all functions, English/Chinese menu selectable, parameters settings
by numeric keypad or rotary dial
High reliability: use VLSI components and surface mount technology
Protection: over voltage protection, over current protection, output short circuit protection (for a few
minutes), reverse voltage protection
Frequency testing: built-in frequency counter, capable of internal and external frequency signal testing
Remote control: RS232 interface
Check list
DDS function generator 1 Operation manual 1
Power cord 1 RS232 software CD 1
Q9 test lead 1 RS232 cable 1
Q9 BNC-clip test lead 1
Test Equipment Depot - 800.517.8431 - 99 Washington Street Melrose, MA 02176TestEquipmentDepot.com

V
Safety Instruction………………………………………………………………………………………………… II
Introduction……………………………………………………………………………………………………… IV
Chapter 1 Quick Starting…………………………………………………………………………………………- 1 -
1.1 Preparation ............................................................................................................................................... - 1 -
1.1.1 Check the Function Generator and Accessories ............................................................................ - 1 -
1.1.2 Connect the Function Generator to Power .................................................................................... - 1 -
1.2 Front Panel and Rear Panel...................................................................................................................... - 1 -
1.3 Description of LCD Display .................................................................................................................... - 2 -
1.4 Key Description ....................................................................................................................................... - 3 -
1.4.1 Function Key ................................................................................................................................ - 3 -
1.4.2 Soft Key ........................................................................................................................................ - 3 -
1.4.3 Numeric Keypad ........................................................................................................................... - 3 -
1.4.4 Unit Soft Key ................................................................................................................................ - 3 -
1.5 Fundamental Operation ........................................................................................................................... - 3 -
1.5.1 Function of Channel A .................................................................................................................. - 3 -
1.5.2 Function of Channel B .................................................................................................................. - 4 -
1.5.3 Frequency Sweep of Channel A .................................................................................................... - 5 -
1.5.4 Amplitude Sweep .......................................................................................................................... - 5 -
1.5.5 Frequency Modulation (FM) ........................................................................................................ - 5 -
1.5.6 Burst Output of Channel A ........................................................................................................... - 5 -
1.5.7 Burst Count of Channel B ............................................................................................................. - 6 -
1.5.8 FSK Modulation (FSK) ................................................................................................................ - 6 -
1.5.9 Amplitude Shift Keying (ASK) .................................................................................................... - 6 -
1.5.10 Phase Shift Keying (PSK) ........................................................................................................... - 6 -
1.5.11 System Initialization ................................................................................................................... - 7 -
Chapter 2 Principle of the Function Generator………………………………………………………………… - 8 -
2.1 Principle Diagram .................................................................................................................................... - 8 -
2.2 Principle of Direct Digital Synthesis ....................................................................................................... - 8 -
2.3 Principle of Operation and Control .......................................................................................................... - 9 -
Chapter 3 Operation Instructions……………………………………………………………………………… - 10 -
3.1 Operation Common Rules ..................................................................................................................... - 10 -
3.1.1 Menu Selection ........................................................................................................................... - 10 -
3.1.2 Parameter Display ....................................................................................................................... - 10 -
3.1.3 Numeric Keypad Input................................................................................................................ - 10 -
3.1.4 Knob Adjustment ........................................................................................................................ - 11 -
3.1.5 Frequency and Amplitude Step Input.......................................................................................... - 11 -
3.1.6 Input Mode Selection .................................................................................................................. - 11 -
3.2 Setup of Channel A ................................................................................................................................ - 11 -
3.2.1 Set the Frequency of Channel A ................................................................................................. - 11 -
3.2.2 Set the Period of Channel A ........................................................................................................ - 12 -
3.2.3 Set the Amplitude of Channel A ................................................................................................. - 12 -
3.2.4 Amplitude Attenuation ................................................................................................................ - 12 -
3.2.5 Output Load ................................................................................................................................ - 12 -
3.2.6 Amplitude Flatness ..................................................................................................................... - 13 -
3.2.7 Set the Offset of Channel A ........................................................................................................ - 13 -
VI
3.2.8 DC Voltage Output ...................................................................................................................... - 13 -
3.2.9 Select the Waveform of Channel A ............................................................................................. - 13 -
3.2.10 Set the Duty Cycle of Channel A .............................................................................................. - 14 -
3.2.11 Set the Phase of Channel A ....................................................................................................... - 14 -
3.3 Setup of Channel B ................................................................................................................................ - 14 -
3.3.1 Set the Frequency of Channel B ................................................................................................. - 14 -
3.3.2 Set the Amplitude of Channel B ................................................................................................. - 14 -
3.3.3 Select the Waveform of Channel B ............................................................................................. - 15 -
3.3.4 Set the Harmonics of Channel B ................................................................................................. - 15 -
3.4 Frequency Sweep ................................................................................................................................... - 15 -
3.4.1 Set the Start and Stop Frequency ................................................................................................ - 15 -
3.4.2 Set the Step Frequency ............................................................................................................... - 15 -
3.4.3 Select Sweep Mode ..................................................................................................................... - 15 -
3.4.4 Set Step Time .............................................................................................................................. - 16 -
3.4.5 Manual and Auto Sweep ............................................................................................................. - 16 -
3.5 Amplitude Sweep ................................................................................................................................... - 16 -
3.6 Frequency Modulation (FM) ................................................................................................................. - 16 -
3.6.1 Set the Carrier Frequency ........................................................................................................... - 16 -
3.6.2 Set the Modulation Frequency .................................................................................................... - 17 -
3.6.3 Set the Frequency Deviation ....................................................................................................... - 17 -
3.6.4 Set the Modulation Waveform .................................................................................................... - 17 -
3.6.5 External Modulation Source ....................................................................................................... - 17 -
3.7 Frequency Shift Keying (FSK) .............................................................................................................. - 17 -
3.7.1 Set the Carrier Frequency ........................................................................................................... - 18 -
3.7.2 Set the Hop Frequency ................................................................................................................ - 18 -
3.7.4 Set the Interval Time ................................................................................................................... - 18 -
3.8 Amplitude Shift Keying (ASK) ............................................................................................................. - 18 -
3.8.1 Set the Carrier Amplitude ........................................................................................................... - 18 -
3.8.2 Set the Hop Amplitude ................................................................................................................ - 18 -
3.8.3 Set the Interval Time ................................................................................................................... - 18 -
3.9 Phase Shift Keying (PSK) ..................................................................................................................... - 18 -
3.9.1 Set the Hop Phase ....................................................................................................................... - 18 -
3.9.2 Set the Interval Time ................................................................................................................... - 19 -
3.9.3 PSK Observation ........................................................................................................................ - 19 -
3.10 Burst Output of Channel A .................................................................................................................. - 19 -
3.10.1 Set the Carrier Frequency ......................................................................................................... - 19 -
3.10.2 Set the Carrier Amplitude ......................................................................................................... - 19 -
3.10.3 Set the Burst Count ................................................................................................................... - 19 -
3.10.4 Set the Burst Frequency ............................................................................................................ - 20 -
3.10.5 Set the Single Burst Mode ........................................................................................................ - 20 -
3.10.6 Set TTL_A Burst ....................................................................................................................... - 20 -
3.10.7 Set External Burst ..................................................................................................................... - 20 -
3.11 Burst Output of Channel B .................................................................................................................. - 20 -
3.12 TTL Output .......................................................................................................................................... - 21 -
3.12.1 Set the TTL_A Frequency ......................................................................................................... - 21 -
3.12.2 Set the TTL_A Duty Cycle ....................................................................................................... - 21 -

VII
3.12.3 Set the TTL_B Frequency ......................................................................................................... - 21 -
3.12.4 Set the TTL_B Duty Cycle ....................................................................................................... - 21 -
3.13 Measure External Frequency ............................................................................................................... - 21 -
3.13.1 Self Check and Demonstration ................................................................................................. - 21 -
3.13.2 Measure External Frequency .................................................................................................... - 21 -
3.13.3 Set the Gate Time ...................................................................................................................... - 21 -
3.14 System Setup ....................................................................................................................................... - 22 -
3.14.1 Store Parameters ....................................................................................................................... - 22 -
3.14.2 Recall Parameters ..................................................................................................................... - 22 -
3.14.3 Remote Address ........................................................................................................................ - 22 -
3.14.4 Beeper ....................................................................................................................................... - 22 -
3.14.5 Choose A Language .................................................................................................................. - 23 -
Chapter 4 Programmable Interface…………………………………………………………………………… - 24 -
4.1 Interface Application ............................................................................................................................. - 24 -
4.2 RS232 Interface ..................................................................................................................................... - 24 -
4.2.1 Interface Voltage Level ............................................................................................................... - 24 -
4.2.2 Transmission Format................................................................................................................... - 24 -
4.2.3 Transmission Rate ....................................................................................................................... - 24 -
4.2.4 Interface Connection ................................................................................................................... - 24 -
4.2.5 System Construction ................................................................................................................... - 25 -
4.2.6 Environment ............................................................................................................................... - 25 -
4.2.7 Address Information ................................................................................................................... - 25 -
4.2.8 Data Information ......................................................................................................................... - 25 -
4.3 Remote Command ................................................................................................................................. - 25 -
4.3.1 Command String ......................................................................................................................... - 25 -
4.3.2 Character Return ......................................................................................................................... - 27 -
4.3.3 Separate Character ...................................................................................................................... - 27 -
4.3.4 Question Mark ............................................................................................................................ - 27 -
4.3.5 Data String .................................................................................................................................. - 27 -
4.3.6 Control Capability ...................................................................................................................... - 27 -
4.3.7 Serial Port Control ...................................................................................................................... - 27 -
4.3.8 Online Operation ........................................................................................................................ - 27 -
4.4 Application Software ............................................................................................................................. - 27 -
4.4.1 Enter the Programmable Mode ................................................................................................... - 28 -
4.4.2 Tips for Writing a Program ......................................................................................................... - 28 -
4.4.3 Application Example................................................................................................................... - 28 -
Chapter 5 Frequency Counter & RS232……………………………………………………………………… - 29 -
5.1 Frequency Counter ................................................................................................................................ - 29 -
5.2 RS232 .................................................................................................................................................... - 29 -
Chapter 6 Technical Specifications…………………………………………………………………………… - 30 -

- 1 -
Chapter 1 Quick Starting
This chapter describes the front and rear panels of the arbitrary waveform DDS function generator. The brief
introduction of the function generator helps you get familiar with the fundamental operations and functions. The
main contents in this chapter are as following.
1.1 Preparation
1.1.1 Check the Function Generator and Accessories
Check the function generator and accessory parts and verify all items in the good shape. If the box is broken,
please keep the box until the function generator passes function test.
1.1.2 Connect the Function Generator to Power
Only under the conditions below, users can connect power cable and turn on the power switch.
Voltage: AC220V (1±10%)
AC110V (1±10%) (Pay attention to the position of voltage selection switch)
Frequency: 50Hz (1±5%)
Watts: <45VA Temperature: 0~40 Humidity: <80%
Plug the power cord into an 110V or 220 V power outlet with ground connection and turn on the function
generator. The function generator starts to initialize - display the instrument name, load the default parameters,
display menu of Channel A frequency, start channel A and B output signal. After initialization, the function
generator is in the normal working mode.
WARNING: For protection from electrical shock, the three-hole power cord with protective earth ground has to
be used.
1.2 Front Panel and Rear Panel
Front Panel

- 2 -
1. Power switch 2. LCD display 3. Unit soft key 4. Software option
5. Function key and Numeric keypad 6. Direction key 7. Rotary knob
8. Channel A trigger/output 9. Channel B trigger/output
Rear Panel
1. A-TTL/B-TTL output (BNC) 2. Modulation/External signal input (BNC)
3. Power connector with fuse 4. AC110V/220V power selection switch
5. RS232 connector
1.3 Description of LCD Display
Channel A waveform display: the waveform of channel A and preset parameter is displayed at the upper-left
portion.
Channel B waveform display: the waveform of channel B and preset parameters are displayed at the
upper-middle portion.
Test Equipment Depot - 800.517.8431 - 99 Washington Street Melrose, MA 02176TestEquipmentDepot.com

- 3 -
Function menu: The first line on the right of the LCD displays the function menu
Option menu: The second to the sixth lines display the option menu.
Parameter menu: Three of the waveform parameters of channel A are displayed at the middle of the lower-left
portion.
Unit menu: The bottom line displays the unit menu.
1.4 Key Description
On the front panel, there are 38 keys which are divided into five categories.
1.4.1 Function Key
Key [Freq] [Sweep] [MOD] [BURST] [SK] [TTL]: selects the ten functions of the instrument.
Key [COUNT]: selects the function of frequency counter.
Key [Utility]: sets the system parameters and exits remote control.
Key [Sine ] [Square ] [Ramp ] [Pulse ] [Noise ] [Arb]: selects waveforms.
Key [CHA Output Trigger] [CHB Output Trigger]: Turns on or off the signal output of channel A & channel B
and the trigger output of channel A & channel B.
1.4.2 Soft Key
There are five soft keys at the right side of LCD display. They are used to select the various options under each
function.
1.4.3 Numeric Keypad
Key [0] [1] [2] [3] [4] [5] [6] [7] [8] [9]: for numeric input.
Key [.]: decimal point.
Key [-]: negative sign.
1.4.4 Unit Soft Key
There are five blank keys at the bottom side of LCD display. The definitions of these soft keys change according
to the characteristics of data. The input value has to be validated by pressing the unit soft key at the end of data
input.
1.4.5 Directional Key
Key [⊳] and []: cursor keys, used to add or subtract the digit on the cursor when tuning the rotary knob.
Key [] and []: used to increase or decrease the frequency or amplitude of channel A at the specified step.
1.5 Fundamental Operation
This section introduces the fundamental operations on the general requirements through some examples. See
Chapter 3 for more information if you have complex problems or need the complicated operations.
1.5.1 Function of Channel A
Press key [Channel] to select “CHA Alone” function.
- 4 -
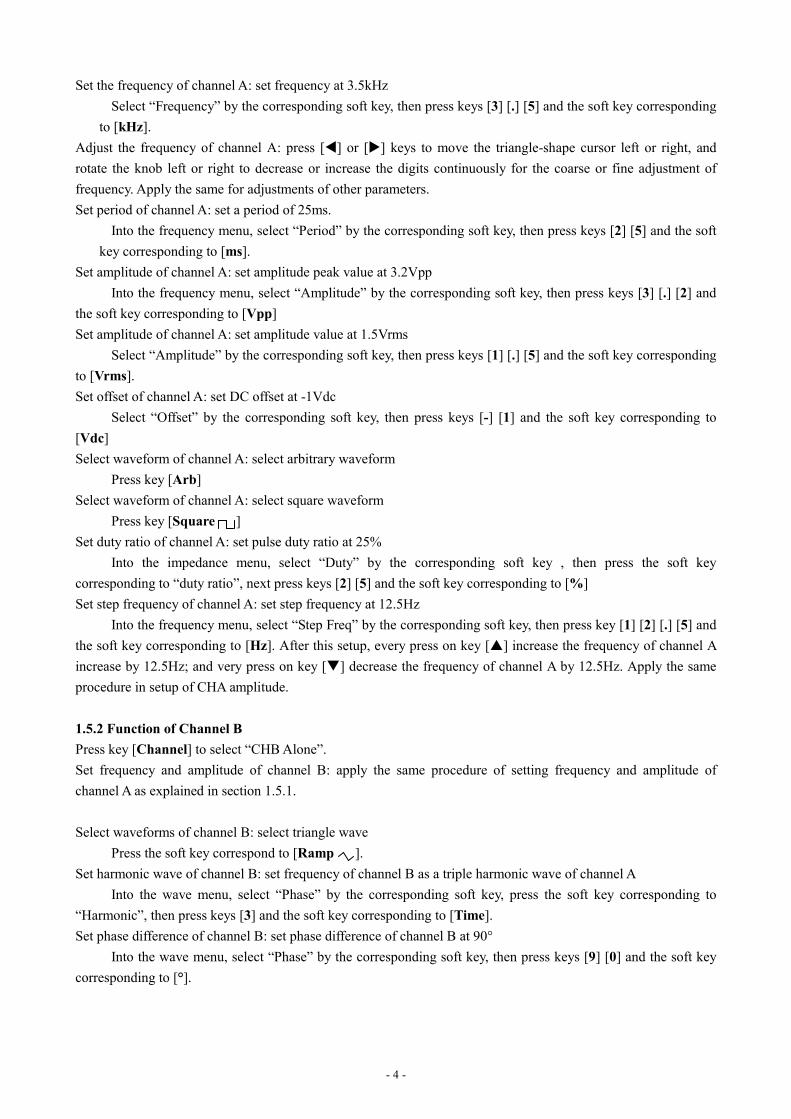
Set the frequency of channel A: set frequency at 3.5kHz
Select “Frequency” by the corresponding soft key, then press keys [3] [.] [5] and the soft key corresponding
to [kHz].
Adjust the frequency of channel A: press [⊳] or [] keys to move the triangle-shape cursor left or right, and
rotate the knob left or right to decrease or increase the digits continuously for the coarse or fine adjustment of
frequency. Apply the same for adjustments of other parameters.
Set period of channel A: set a period of 25ms.
Into the frequency menu, select “Period” by the corresponding soft key, then press keys [2] [5] and the soft
key corresponding to [ms].
Set amplitude of channel A: set amplitude peak value at 3.2Vpp
Into the frequency menu, select “Amplitude” by the corresponding soft key, then press keys [3] [.] [2] and
the soft key corresponding to [Vpp]
Set amplitude of channel A: set amplitude value at 1.5Vrms
Select “Amplitude” by the corresponding soft key, then press keys [1] [.] [5] and the soft key corresponding
to [Vrms].
Set offset of channel A: set DC offset at -1Vdc
Select “Offset” by the corresponding soft key, then press keys [-] [1] and the soft key corresponding to
[Vdc]
Select waveform of channel A: select arbitrary waveform
Press key [Arb]
Select waveform of channel A: select square waveform
Press key [Square ]
Set duty ratio of channel A: set pulse duty ratio at 25%
Into the impedance menu, select “Duty” by the corresponding soft key , then press the soft key
corresponding to “duty ratio”, next press keys [2] [5] and the soft key corresponding to [%]
Set step frequency of channel A: set step frequency at 12.5Hz
Into the frequency menu, select “Step Freq” by the corresponding soft key, then press key [1] [2] [.] [5] and
the soft key corresponding to [Hz]. After this setup, every press on key [] increase the frequency of channel A
increase by 12.5Hz; and very press on key [] decrease the frequency of channel A by 12.5Hz. Apply the same
procedure in setup of CHA amplitude.
1.5.2 Function of Channel B
Press key [Channel] to select “CHB Alone”.
Set frequency and amplitude of channel B: apply the same procedure of setting frequency and amplitude of
channel A as explained in section 1.5.1.
Select waveforms of channel B: select triangle wave
Press the soft key correspond to [Ramp ].
Set harmonic wave of channel B: set frequency of channel B as a triple harmonic wave of channel A
Into the wave menu, select “Phase” by the corresponding soft key, press the soft key corresponding to
“Harmonic”, then press keys [3] and the soft key corresponding to [Time].
Set phase difference of channel B: set phase difference of channel B at 90°
Into the wave menu, select “Phase” by the corresponding soft key, then press keys [9] [0] and the soft key
corresponding to [°].

- 5 -
1.5.3 Frequency Sweep of Channel A
Select “A SweepF” by the corresponding soft key.
Set stop frequency: set stop frequency at 50kHz
Select “Stop Freq” by the corresponding soft key, then press keys [5] [0] [kHz].
Set start frequency: set start frequency at 10kHz
Select “Start Freq” by the corresponding soft key, then press key [1] [0] [kHz].
Set step frequency: set step frequency at 200Hz
Select “Step Freq” by the corresponding soft key, then press key [2] [0] [0] [Hz].
Set sweep mode: set sweep mode at down sweep
Select “Down Swe” by the corresponding soft key.
Set interval time: set interval time at 25ms
Select “Interval” by the corresponding soft key, then press key [2] [5] [ms].
Set manual sweep: set the sweep at manual mode
Select “Manual Sweep” by the corresponding soft key. This operation ceases the continuous sweep mode.
Press key [CHA Output/Trigger] for one time, the frequency of channel A will step up or down by one step.
1.5.4 Amplitude Sweep
Press key [Sweep] to select “S SweepA”. Apply the same setting procedure as described in section 1.5.3.
1.5.5 Frequency Modulation (FM)
Press key [MOD] to select “CHA FM”.
Set carrier frequency: set carrier frequency at 100kHz
Select “Carrier Freq” by the corresponding soft key, then press keys [1] [0] [0] and the key corresponding to
[kHz].
Set carrier waveform amplitude: set carrier amplitude at 2Vpp
Select “Carrier AMP” by the corresponding soft key, then press keys [2] and the key corresponding to
[Vpp].
Set frequency modulation: set frequency modulation at 10kHz
Select “MOD Freq” by the corresponding soft key, then press key [1] [0] and the key corresponding to
[kHz].
Set modulation deviation: set modulation deviation at 5.2%
Select “FM Deviation” by the corresponding soft key, then press key [5] [.] [2] and the key corresponding
to [%].
Set modulation waveform: set modulation waveform (actually it is waveforms of channel B) as Triangle wave
Select “Mod Wav” by the corresponding soft key, then press key [2] and the key corresponding to [No.].
Set external modulation:
Select“Mod Wav” by the corresponding soft key, press the same key again to select “External”.
1.5.6 Burst Output of Channel A
Press key [Channel] to select “CHA Alone”. Next press key [Burst] to go to “CHA Burst”. Apply the same
setting procedures as described in section 1.5.1. for frequency and amplitude setup.
Set burst count set burst count as 5 cycles
Select “N Cycles” by the corresponding soft key, then press keys [5] and the key corresponding to [Cycl].

- 6 -
Set burst frequency: set burst frequency at 50Hz
Select “Carrier Freq” by the corresponding soft key, then press keys [5] [0] and the key corresponding to
[Hz].
Set single burst mode:
Press the soft key corresponding to “TTL_A Trig”. Press this soft key twice to step down to “Single” to
select the signal bust mode. Press key [CHA Output/Trigger] for one time will output burst for one time. If the
signal bust mode is not selected, pressing on key [CHA Output/Trigger] starts a continuous burst..
Set internal burst:
Select “TTL_A Trig” by the corresponding soft key. The signal of TTL_A will be used as burst source for
continuous burst.
Set external TTL burst:
Press the soft key corresponding to “TTL_A Trig”. Press this soft key once more to step down to “EXT
Trigge” to select the external TTL burst. Input external signal from “Count In” terminal on the rear panel. The
input external signal will be used as a burst source.
1.5.7 Burst Count of Channel B
Press key [Channel] to select “CHB Alone”. Next press key [Burst] to go to “CHB Burst”. Apply the same
setting procedure as explained in section 1.5.6 for setting burst of channel A.
1.5.8 FSK Modulation (FSK)
Press key [SK] to select “CHA FSK”.
Set carrier frequency: set carrier frequency at 15kHz
Select “Carrier Freq” by the corresponding soft key, then press the key corresponding to [1] [5] [kHz].
Set carrier amplitude: set carrier amplitude at 2Vpp
Select “Carrier AMP” by the corresponding soft key, then press the key corresponding to [2] [Vpp].
Set hop frequency: set hop frequency at 2kHz
Select “Hop Freq” by the corresponding soft key, then press the key corresponding to [2] [kHz].
Set interval time: set interval time at 20ms
Select “Interval” by the corresponding soft key, then press the key corresponding to [2] [0] [ms].
1.5.9 Amplitude Shift Keying (ASK)
Press key [SK] to step down to “CHA ASK”. The setups of carrier frequency, carrier amplitude and interval time
here apply the same setting procedure of explained in the above section 1.5.8.
Set hop frequency: set hop amplitude at 0.5Vpp
Select “Hop Amp” by the corresponding soft key, then press the key corresponding to [0] [.] [5] [Vpp].
1.5.10 Phase Shift Keying (PSK) Press key [SK] to twice to step down to “CHA PSK” function. The setup of carrier frequency, carrier amplitude
and interval time here apply the same setting procedure of explained in the above section 1.5.8.
Set hop phase: set hop phase at 180°.
Select “Hop Phase” by the corresponding soft key, then press the key corresponding to [1] [8] [0] [°].

- 7 -
1.5.11 System Initialization
After power on, the system initialization of the instrument displays the following parameters:
CHA and CHB waveform: Sine CHA and CHB frequency: 1kHz CHA and CHB amplitude: 2Vpp
CHA and CHB duty cycle: 50% CHA attenuation: AUTO CHA offset: 0V
CHB harmonics: 1.0 Time CHB phase offset: 0° Step frequency: 10Hz
Gate time: 100ms Start frequency: 500Hz Stop frequency: 5kHz
Interval time: 10ms Sweep mode: UP Carrier frequency: 50kHz
Carrier amplitude: 2Vpp Modulation frequency: 1kHz Modulation waveform: Sine
Modulation deviation: 5%
Test Equipment Depot - 800.517.8431 - 99 Washington Street Melrose, MA 02176TestEquipmentDepot.com

- 8 -
Chapter 2 Principle of the Function Generator
In order to help you to better understand the internal operation of the instrument, this chapter describes the basic
signal-generation concepts and provides the specific details on the internal operations of the function generator.
2.1 Principle Diagram
2.2 Principle of Direct Digital Synthesis
In order to generate a voltage signal, the traditional analog signal source generally uses the discrete electronic
components to build oscillation circuitries in variety ways. The accuracy of frequency is not only low but also
very unstable. The production and testing procedures are very complicated and time-consuming. Moreover, it is
not convenient for the frequency setting and computer programming. The Direct Digital Synthesis (DDS)
technology is a new signal-generation technique. DDS does not consist of any oscillating components. It applies a
stream of digital data which represents the desired waveform pre-stored in memory to the input of
digital-to-analog (DAC) converter. The DAC converts the data and outputs a series of voltage steps approximating
the desired waveform.
For example, to synthesize a sine waveform, first, the function y = sin(x) is digitized, then the digitized value y is

- 9 -
sequentially stored in the waveform memory by the address of x. DDS uses the phase accumulating technique to
control the address of the waveform memory. In every single sampling period, a phase increment is added to the
current content of the phase accumulator. The output frequency of DDS can be modified by changing this phase
increment. The digitized waveform data is read from the waveform memory addressed by the phase accumulator
and converted into an analog voltage through D/A converter and amplifier circuitry. Because the waveform data
are the interval samples, the output of DDS is a stepwise sine wave. Thus, the output waveform from DDS has to
be filtered out the high harmonic components by a low-pass filter. The high accurate reference regulator in D/A
converter assures the amplitude precision and stability of the output waveform.
The amplitude controller is a D/A converter. According to the preset amplitude value, this converter generates a
corresponding analog voltage which multiplies with the output signal and produces a final output signal whose
amplitude is equal to the preset value. The offset controller is also a D/A converter. According to the preset offset
value, this converter generates a corresponding analog voltage which adds with the output signal and produces a
final output signal whose offset is equal to the preset value. The output signal is output at the channel A.
2.3 Principle of Operation and Control
The MCU controls keypad and LCD display through the interface circuitry. When the key is pressed, the MCU
detects the action, finds the code of key, and executes the corresponding program. The LCD display circuit adopts
menu characters to display the working status and parameters of the instrument.
The knob on the front panel can be used to adjust the numeric digit on the cursor position. Every 15-degree
rotation will generate a trigger pulse. Based on the pulse, the MCU can determine the knob left-rotation or
right-rotation. If the rotation is left, the digit on the cursor is subtracted by one. If the rotation is right, the digit is
added by one.

- 10 -
Chapter 3 Operation Instructions
3.1 Operation Common Rules
3.1.1 Menu Selection
If there is a triangle displayed on the right side of the menu, it means this menu has several options. Otherwise,
this menu has only one option. Press one option key to select the corresponding option in this menu. This
instrument has ten functions and the five function keys: [Channel],[Sweep], [MOD], [BURST], and [SK] are
used to select these functions. The five lines on the right side of LCD are the option menus which can be selected
by pressing one of the five option keys located on the right side of LCD. The selected option menu will change to
green.
3.1.2 Parameter Display
he area under the waveform display is for parameter display. The contents in this parameter area are divided into
two parts. One is the name of parameter displayed in the 8x16 size text. The other is the parameter value displayed
in a variety of colors. These setups make the LCD display more beautiful and easier to recognize. The parameter
display is divided into the five areas below:
“Frequency” area: display the frequency value or period value.
“Amplitude” area: display the output amplitude. Because of the frequently used of frequency and amplitude
parameters, they are displayed in a larger font size to make them eye-catching.
“Offset and Other Parameters” area: display all parameters except the two important parameters.
The data units are shown on the bottom line of the LCD display. The units change according to the data
characteristic. The input data have to be validated by pressing the corresponding one of the five blank soft keys.
“parameter of Channel A” area: display the current waveform , function and the other parameters of the
channel A.
“parameter of Channel B” area: display the current waveform , function and the other parameters of the
channel B.
3.1.3 Numeric Keypad Input
If a parameter is selected, the color of this parameter changes to yellow, which means this parameter can be
modified. There are ten numeric keys for data input. The input method is the shift input from left to right. The data
can have one decimal point. If one data input has more than one decimal point, only the first one is valid.
In the offset mode, the negative sign can be input. After input a value, press a unit key to validate the input data.
If the input data has error, there are two ways to correct it. If the destination side of output signal can receive the
wrong signal, press any unit key to terminate the pervious operation. Input the correct data and press the unit key
to validate the input. If the destination side of output signal can not receive the wrong signal, the wrong input is
not validated because of no any wrong signal at the output. In this case, reselect the operation, input correct data,
and press the unit key to validate the input.
Although there are a variety of combinations of the decimal point and the unit key for data input, the instrument
always displays the input data in a fixed format. . For example, input either 1.5kHz or 1500Hz, after validation,

- 11 -
the instrument will display as 1500.00Hz.
3.1.4 Knob Adjustment
In some applications, it is required to adjust the output signal continuously. The rotary knob is in use here. When a
parameter is selected, the color of this parameter changes to yellow, and the color of one digit in this parameter
changes to yellow too. Actually, this digit is located on the cursor position. Press key [⊳] or [] to move the
cursor left or right. Rotate the knob to the right to continuously increase the digit on the cursor by one and make
the carry to a higher unit position. Rotate the knob to the left to continuously decrease the digit on the cursor by
one and make the carry to a lower unit position. When using the knob to modify a specified data, the modified
data is valid instantaneously without pressing the unit key. Move the cursor left to make a coarse adjustment and
move to the right to make a fine adjustment.
3.1.5 Frequency and Amplitude Step Input
In applications, it is very common to input a set of data or several sets of data with the same frequency or
amplitude interval. It is complicated and time consuming to input this kind of data by repeatedly pressing the
numeric keypad and unit key. However, it is very convenient to use the step input method. Set the frequency
interval as the “step frequency” value, every press on key [] makes the frequency increase by one step value,
every press on key [] makes the frequency decrease by one step value. The modified data is validated
automatically without pressing the unit key.
For example, generate a series of frequency with an interval of 12.5 kHz, press the keys sequentially as following:
Press the corresponding soft key to “Step Frequency”;
Press keys [1], [2], [.], and [5] and the soft key corresponding to [kHz];
Into CHA menu, press the soft key corresponding to “Frequency”;
Press keys [] to increase the frequency by 12.5k Hz or press key [] to decrease the frequency by
12.5kHz. Repeat this operation, a series of waveform with equal interval frequency difference can be generated.
The same procedure can be used for the amplitude operation. This method can only be used on the frequency and
amplitude of channel A.
3.1.6 Input Mode Selection
It is convenient to input the known data through the numeric keypad. It makes the input to be set at only one step
without the intermediate transition data. For the partial modification of the input data or at the situation of
monitoring the variation process of the input data, the knob is usually more useful. For a series of equal interval
data input, the step input method is the most efficient. You can use the different ways to meet your requirement.
3.2 Setup of Channel A
Press key [Channel] and select “CHA Alone” function.
3.2.1 Set the Frequency of Channel A
Select “Frequency” option by the corresponding soft key. The current frequency value changes to yellow. Using
the numeric keypad or rotary knob to input a new frequency value. The function generator outputs the specified
frequency at CHA Output.

- 12 -
3.2.2 Set the Period of Channel A
The frequency of channel A can also be set and displayed in the way of period. Select” Period” by the
corresponding soft key. The current period value changes to yellow. Input a new period value here by numeric
keypad or rotary knob. The instrument still uses the frequency synthesis and the input data is just converted to the
right value when it is input and displayed. Due to the limitation of the low resolution at low frequency, when the
period is too big, the function generator can only generate the frequency points with the bigger period interval.
Although the preset and displayed period is precise, the real period of the output signal has relatively big variation.
Please pay attention to this point.
3.2.3 Set the Amplitude of Channel A
Select “Amplitude” by the corresponding soft key. The current amplitude value changes to yellow. Input a new
amplitude data here by numeric keypad or rotary dial. The function generator outputs the desired signal on the
CHA Output.
The input and display of the Channel A amplitude value have two formats: Vpp and Vrms. Press key [Vpp] or
[mVpp] after numeric input to input and display amplitude peak-to-peak value. Press key [Vrms] or [mVrms]
after numeric input to input and display amplitude true RMS value. If press key [Vrms] and [mVrms] without
amplitude data input, the current amplitude value unit can be switched between the two formats.
Although the amplitude value has two formats, the instrument still uses the peak-to-peak format internally and
makes the format conversion on the data input and the data display. Due to the limitation of the amplitude
resolution, there is difference between the format conversions. For example, if the Vpp of sine wave is 1 V, the
Vrms conversion value is 0.353 Vrms. If the Vrms of sine wave is 0.353 Vrms, the Vpp conversion value is 0.998
V. In most cases, this difference is within the error range. The RMS format can only be used at the channel A or
channel B frequency mode and the waveform selected as sine. For other operations and waveforms, only
peak-to-peak format can be used.
3.2.4 Amplitude Attenuation
Press the corresponding “Offset” soft key twice to step down to “Attenuator”.
After instrument power on or reset, the attenuation is default in “AUTO” mode. In “AUTO” mode, the instrument
automatically selects suitable attenuation ratio according to preset amplitude values. When the output amplitude is
at 2V, 0.2V, or 0.02V, the instrument switches between attenuation ratios. In this situation, the instrument
generates a waveform of high amplitude resolution, high signal & noise ratio, and low distortion, regardless of
signal amplitude values. However, during attenuation ratio switch, there is instant hopping in the output signal,
which is not allowed in some practices. That is why the instrument has preset with fixed attenuation mode.
Select “Attenuator” by the corresponding soft key. An attenuation data can be input here by numeric keypad or
rotary dial. There are five ranges of attenuation: 0dB, 20dB, 40dB, 60dB and AUTO, which can be input by
numeric key 1, 2, 3, 4 and 0 respectively. The attenuation mode can also be selected by rotary dial. One step in
rotary dial tuning goes to one range. If a fixed attenuation mode is selected, the attenuation is fixed and does not
change according to amplitude value changes, which make continuous variation of the output signal in full
amplitude range. But in range of 0dB, if the signal amplitude value is too small, there will be higher waveform
distortion and the signal & noise ratio can not be so good.
3.2.5 Output Load
The default amplitude value is calibrated when the output is open circuit. The real voltage on the output load is the
Test Equipment Depot - 800.517.8431 - 99 Washington Street Melrose, MA 02176TestEquipmentDepot.com

- 13 -
default amplitude multiplying the dividing ratio of the load and the output load. The output resistance of the
instrument is about 50Ω. When the load resistance is big enough and the voltage dividing ratio is close to 1, the
loss on the output load resistance can be ignored. The voltage on the load is close to default amplitude value.
When the load resistance is too small, the loss on the output load is significant and can not be ignored. The voltage
on the load is not same as the default amplitude value. Please pay attention to this point.
The output of channel A has the over-voltage and over-current protections. The instrument can not be damaged if
the output is short only few minutes or the transient inverse voltage less than 30V. However, this kind of operation
should avoid in case of potential damage to the instrument.
3.2.6 Amplitude Flatness
If the output frequency is lower than 1MHz, the amplitude and frequency characteristics of the output signal are
very flat. If the output frequency is over 10MHz, due to the characteristics of the output amplitude and load
matching, the amplitude and phase characteristics of the output signal will not be so good. The maximum output
amplitude is also affected. The higher frequency, the higher amplitude, and the more distortion in output
waveform.
Output frequency 10MHz~15MHz: max. output amplitude 15Vpp
Output frequency 15MHz~20MHz: max. output amplitude 8Vpp
3.2.7 Set the Offset of Channel A
Select “Offset” by the corresponding soft key. The current offset value is shown on the LCD display. Enter a new
offset data here by numeric keypad or rotary dial. The function generator outputs the desired signal at the CHA
output.
Please note that the sum of half of the signal output amplitude value and the offset value should be less than 10V,
so as to make sure the offset signal peak value is less than ±10V. Otherwise, there will be amplitude distortion.
Besides, when Channel A is at AUTO mode in attenuation, the output offset attenuates as per amplitude
attenuation. When amplitude Vpp value is above about 2V, the actual output offset is the preset offset value. When
amplitude Vpp value is approximately between 0.2V~2V, the actual output offset is 10% of the preset offset value.
When the amplitude Vpp value is approximately less than 0.2V, the actual output offset is 1% of the preset offset
value.
When adjusting DC offset value of the signal, the rotary knob is more frequently used than numeric keypad. As a
common rule, tune the rotary knob to the right to increase DC offset level, while to the left decease the DC offset
value, regardless of the DC offset value as positive or negative. When the rotary knob tune across zero, the offset
value changes automatically between positive and negative signs.
3.2.8 DC Voltage Output
If the amplitude attenuation is set at fixed 0dB, the output DC offset value is the preset offset value. Set the
amplitude at 0V, the offset value can be set at any value within the range of ±10V. In this case, the function
generator becomes a DC voltage source to output preset DC voltage signal.
3.2.9 Select the Waveform of Channel A
The channel A can output 32 waveforms, including: Sine, Square, Triangle, Pulse, Noise, Arbitrary waveforms.
These waveforms can be directly selected by waveform keys. After selecting a waveform, the CHA output will
output the selected waveform and display the waveform in display area of parameters of channel A. When the

- 14 -
square waveform is selected in channel A, the Square duty ratio is default at 50%. As to the other 27 waveforms
which are not frequently used, they are displayed as “Arb” in the upper portion of the LCD and can be selected
with corresponding button. Regarding the user defined arbitrary waveform, it is edited by the control program on
the computer, and can be downloaded to the designated storage unit. To output user defined arbitrary waveforms,
recall the waveforms by the correct index number to the storage unit. The function generator will output the
selected waveform and display it on the LCD. The following table lists the code and waveform names of the 32
waveforms:
Code and name for 32 waveforms
Code Waveform name Code Waveform name Code Waveform name Code Waveform name
00 Sine 08 Up stair 16 Exponent 24 Down stair
01 Square 09 Pos-DC 17 Logarithm 25 Po-bipulse
02 Triangle 10 Neg-DC 18 Half round 26 Ne-bipulse
03 Up ramp 11 All sine 19 Tangent 27 Trapezia
04 Down ramp 12 Half sine 20 Sin (x)/x 28 Cosine
05 Pos-pulse 13 Limit sine 21 Noise 29 Bidir-SCR
06 Neg-pulse 14 Gate sine 22 Duty 10% 30 Cardiogram
07 Tri-pulse 15 Squar-root 23 Duty 90% 31 Earthquake
3.2.10 Set the Duty Cycle of Channel A
For the convenience of application, the duty cycle value can be input via numeric keypad or rotary dial. When the
current duty cycle value is changed to yellow, the output duty cycle is the square wave of the preset duty cycle.
The pulse duty cycle can be set at any value between 1%~99%. The duty cycle can be displayed only when the
pulse wave is selected.
3.2.11 Set the Phase of Channel A
Press the corresponding soft key to step down to “Phase”. The phase value can be set at any value between
0~360°via numeric keypad or rotary dial. When the frequency is at low value, the phase has a high resolution. For
example, the frequency is below 1MHz, the phase resolutions 3.6°.
3.3 Setup of Channel B
Press key [Channel] to select “CHB Alone”. Setup for frequency, period, amplitude, waveform selection, duty
ratio, phase apply the same procedures as explained in the setup of channel A. The difference is that there is no
amplitude attenuation and DC offset in channel B.
3.3.1 Set the Frequency of Channel B
Select “Frequency” by the corresponding soft key. The current frequency value changes to yellow, which means
the frequency value can be modified and input via numeric keypad or rotary dial. The function generator outputs
the desired frequency signal on CHB output. In channel B, frequency period can also be set and displayed.
3.3.2 Set the Amplitude of Channel B
Select “Amplitude” by the corresponding soft key. The current amplitude value changes to yellow, which means
the amplitude value can be modified and input via numeric keypad or rotary dial. The function generator outputs
the desired signal at CHB Output. The amplitude unit of Channel B can only use Vpp but not Vrms. The channel

- 15 -
B does not have the amplitude attenuation or DC offset functions.
3.3.3 Select the Waveform of Channel B
The waveform of channel B is represented by the index number. Select “Waveform” by the corresponding soft key,
apply the same operation as explained in section 3.2.9.
3.3.4 Set the Harmonics of Channel B
The frequency of channel B can be set and displayed as multiple times of channel A frequency. That is, channel B
signal becomes the multiple N times harmonic signal of channel A signal. Select “B harmonics” by the
corresponding soft key. Input harmonic times via numeric keypad or rotary dial. Channel B frequency becomes
the set multiple times of channel A frequency. That means, channel B signal becomes the multiple N times
harmonic signal of channel A signal. At this time, phase of channel A and B signals has stable synchronization. If
channel B is not selected, channel A and B will not have synchronization. Although channel B frequency is set at a
multiple time of channel A frequency, channel A and channel B may not able to reach synchronization. Therefore,
to make sure of stable phase synchronization of channel A and B, user must first set up channel A frequency, next
select “B harmonics” and set harmonic multiple time so that channel B frequency can change automatically.
3.4 Frequency Sweep
Press key [Sweep] and select “A SweepF” option. The function generator outputs the frequency sweep signal at
the CHA Output. The sweep mode of output frequency is step sweep. The output frequency automatically
increases or decreases by a step value in a certain interval time. Start frequency, stop frequency, step frequency
and interval time are free to be set by the users.
3.4.1 Set the Start and Stop Frequency
The start point of frequency sweep is start frequency, and the stop point is stop frequency. To set the start
frequency, press key “Start F” by the corresponding soft key and display the start frequency. Input a new start
frequency value via numeric keypad or rotary dial. To set the stop frequency, select “Stop F” by the corresponding
soft key and display stop frequency. Input a new stop frequency value via numeric keypad or rotary dial.
Note: the stop frequency must be greater than the start frequency. Otherwise the sweep can not operate.
3.4.2 Set the Step Frequency
After the start frequency and the stop frequency are set, the sweep rate can be determined according to the
required accuracy. In a sweep process, the bigger the step frequency, the less numbers of frequency points and
lower accuracy, the shorter time taken in a sweep process. The smaller step frequency, the more numbers of
frequency points and higher accuracy, the longer time taken in a sweep process.
Select “Step F” by the corresponding soft key, the current step frequency changes to yellow. Input a new step
frequency data here by numeric keypad or rotary dial.
3.4.3 Select Sweep Mode
Select one of the three sweep modes by the corresponding soft key: Up Sweep Mode, Down Sweep Mode,
Up-Down Sweep Mode.
Up Sweep Mode: the output signal sweeps repetitively from the start frequency to the stop frequency at the
sweep rate.
- 16 -
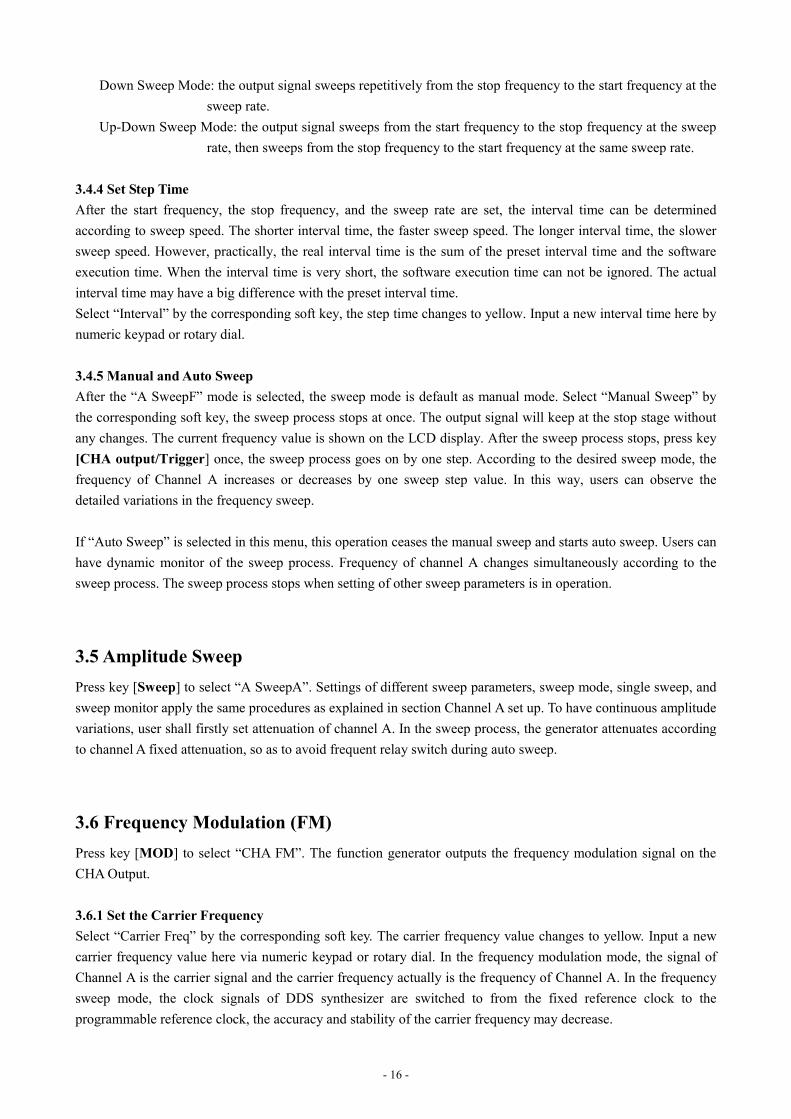
Down Sweep Mode: the output signal sweeps repetitively from the stop frequency to the start frequency at the
sweep rate.
Up-Down Sweep Mode: the output signal sweeps from the start frequency to the stop frequency at the sweep
rate, then sweeps from the stop frequency to the start frequency at the same sweep rate.
3.4.4 Set Step Time
After the start frequency, the stop frequency, and the sweep rate are set, the interval time can be determined
according to sweep speed. The shorter interval time, the faster sweep speed. The longer interval time, the slower
sweep speed. However, practically, the real interval time is the sum of the preset interval time and the software
execution time. When the interval time is very short, the software execution time can not be ignored. The actual
interval time may have a big difference with the preset interval time.
Select “Interval” by the corresponding soft key, the step time changes to yellow. Input a new interval time here by
numeric keypad or rotary dial.
3.4.5 Manual and Auto Sweep
After the “A SweepF” mode is selected, the sweep mode is default as manual mode. Select “Manual Sweep” by
the corresponding soft key, the sweep process stops at once. The output signal will keep at the stop stage without
any changes. The current frequency value is shown on the LCD display. After the sweep process stops, press key
[CHA output/Trigger] once, the sweep process goes on by one step. According to the desired sweep mode, the
frequency of Channel A increases or decreases by one sweep step value. In this way, users can observe the
detailed variations in the frequency sweep.
If “Auto Sweep” is selected in this menu, this operation ceases the manual sweep and starts auto sweep. Users can
have dynamic monitor of the sweep process. Frequency of channel A changes simultaneously according to the
sweep process. The sweep process stops when setting of other sweep parameters is in operation.
3.5 Amplitude Sweep
Press key [Sweep] to select “A SweepA”. Settings of different sweep parameters, sweep mode, single sweep, and
sweep monitor apply the same procedures as explained in section Channel A set up. To have continuous amplitude
variations, user shall firstly set attenuation of channel A. In the sweep process, the generator attenuates according
to channel A fixed attenuation, so as to avoid frequent relay switch during auto sweep.
3.6 Frequency Modulation (FM)
Press key [MOD] to select “CHA FM”. The function generator outputs the frequency modulation signal on the
CHA Output.
3.6.1 Set the Carrier Frequency
Select “Carrier Freq” by the corresponding soft key. The carrier frequency value changes to yellow. Input a new
carrier frequency value here via numeric keypad or rotary dial. In the frequency modulation mode, the signal of
Channel A is the carrier signal and the carrier frequency actually is the frequency of Channel A. In the frequency
sweep mode, the clock signals of DDS synthesizer are switched to from the fixed reference clock to the
programmable reference clock, the accuracy and stability of the carrier frequency may decrease.

- 17 -
3.6.2 Set the Modulation Frequency
Select “MOD Freq” by the corresponding soft key. The modulation frequency value changes to yellow. Input a
new modulation frequency value via numeric keypad or rotary dial. In the frequency modulation mode, the signal
of Channel B is the modulation signal. So the modulation frequency actually is the frequency of Channel B.
Generally speaking, the carrier frequency should be at least 10 times higher than the modulation frequency.
3.6.3 Set the Frequency Deviation
Select “FM Deviation” by the corresponding soft key. The frequency deviation value changes to yellow. Input a
new deviation value here via numerical keypad or rotary dial. Deviation depth shows the variations of the carrier
signal frequency during the frequency modulation. It is more intuitional to show the variation in the way of carrier
waveform period variation. Variation in the frequency of modulated waveform is shown as the equation below:
DEVI% = 100*SHFT/PERD
DEVI is the modulation frequency deviation;
SHIFT is the peak variation;
PERD is the period of the carrier signal at the zero frequency deviation.
In the modulation demonstration, to have clear observation of the frequency variation, a bigger frequency
deviation should be set. In practices, to reduce the bandwidth of the carrier signal, the frequency deviation is
usually less than 5%.
3.6.4 Set the Modulation Waveform
Since the signal of channel B as the modulation signal, the Channel B waveform is actually the modulated
waveform. Select “MOD Wav” by the corresponding soft key. The index number changes to yellow. Input the
correct index number by numeric keypad or rotary dial so as to select corresponding waveform. The function
generator outputs the desired modulated signal.
3.6.5 External Modulation Source
The frequency modulation can use the external modulation signal. There is a “Modulation In” connector on the
rear panel to import external modulation signal. The external modulation signal frequency should be compatible to
the frequency of carrier signal. The amplitude of external modulation signal should be adjusted according to the
frequency deviation. The bigger the external signal, the bigger the frequency deviation. In the external modulation
mode, the frequency depth deviation should be set to 0 and turn off the internal modulation signal. Otherwise, it
will affect the external modulation process. Similarly, in the internal mode, the frequency depth deviation should
be set, and the external signal connection should be disconnected. Otherwise, the internal modulation will be
affected.
3.7 Frequency Shift Keying (FSK)
In the digital communication and remote measurement systems, the transmission of the digital signal uses the
Frequency Shift Keying (FSK) or Phase Shift Keying (PSK) method to encode the frequency or phase of the
carrier signal. At the receiving station, the received signal is decoded and recovered to the original digital signal.
Press key [SK] and select “CHA FSK” option. The function generator outputs the FSK signal on the CHA Output.
Test Equipment Depot - 800.517.8431 - 99 Washington Street Melrose, MA 02176TestEquipmentDepot.com

- 18 -
The upper-left portion of the LCD displays the FSK waveform. The frequency of the output signal is the
alternative variation of the carrier frequency and the hop frequency. The interval time of alternation is adjustable.
3.7.1 Set the Carrier Frequency
Select “Carrier Freq” by the corresponding soft key. The carrier frequency value changes to yellow. Input a new
carrier frequency value here via numeric keypad or rotary dial. In the FSK mode, the signal of the channel A is the
carrier signal. The first frequency value is the carrier frequency.
3.7.2 Set the Hop Frequency
Select “Hop Freq” by the corresponding soft key. The hop frequency value changes to yellow. Input a new hop
frequency value via numeric keypad or rotary dial. The hop frequency is the second frequency of the channel A.
3.7.4 Set the Interval Time
Select “Interval” by the corresponding soft key. The interval time value changes to yellow. Input a new interval
time via numeric keypad or rotary dial.
3.8 Amplitude Shift Keying (ASK)
Press key [SK] again to step down to “CHA ASK” option. The function generator outputs the ASK signal on the
CHA Output. The upper-left portion of the LCD displays the ASK waveform. The amplitude of output signal is
the alternative variation of the carrier amplitude and the hop amplitude. The interval time of alternation is
adjustable.
3.8.1 Set the Carrier Amplitude
Select “Carrier AMP” by the corresponding soft key. The carrier amplitude value changes to yellow. Input a new
amplitude value via numeric keypad or rotary dial. In the ASK mode, the channel A signal is the carrier signal.
The first amplitude of channel A signal is the carrier amplitude.
3.8.2 Set the Hop Amplitude
Select “Hop Amp” by the corresponding soft key. The hop amplitude value changes to yellow. Input a new hop
amplitude here via numeric keypad or rotary dial. The hop amplitude is the second amplitude of the channel A.
3.8.3 Set the Interval Time
Select “Interval” by the corresponding soft key. The interval time value changes to yellow. Input a new interval
time value here via numeric keypad or rotary dial.
3.9 Phase Shift Keying (PSK)
Press key [SK] to step down to “CHA PSK”. The function generator outputs the PSK signal on the CHA Output.
The phase of output signal is the alternative variation of the reference phase and the hop phase. The alternative
time of these two phases can be set at the desired value.
3.9.1 Set the Hop Phase
Select “Hop Phase” by the corresponding soft key. The hop phase value changes to yellow. Input a new hop phase

- 19 -
value here via numeric keypad or rotary dial. The hop phase here is the second hop phase value of channel A
signal. The basic phase value is the phase value set in channel A setup.
3.9.2 Set the Interval Time
Select “Interval” by the corresponding soft key. The interval time value changes to yellow. Input a new interval
time value here via numeric keypad or rotary dial.
3.9.3 PSK Observation
Due to the phase variation caused by PSK signal, it is hard to have synchronization on the oscilloscope, and
therefore cannot observe a stable waveform. If the frequency of the channel B is set at the same value of carrier
frequency, and use channel B signal as synchronization burst signal, a stable PSK signal waveform can be
observed.
However, the PSK waveform displayed on the LCD is just an extreme special case for the purpose of direct and
easy explanation of PSK process. There are conditions for operating the special case: the carrier signal period
should be exactly same as the interval time of two alternative phase signals, hop phase at 180° and hop at the
phase value of 0°. In practices, it is very difficult to meet the conditions required. If we set the carrier frequency at
1Hz, interval time as 1s, hop phase at 180°, we can observe a similar waveform on the oscilloscope. But the
waveform can only stay for a very short time, because the actual interval time is not exactly same as carrier
frequency period. Adjust the interval time to make it as close as possible to the carrier frequency period, so as to
have a longer display of the waveform.
3.10 Burst Output of Channel A
Press key [Channel] to select “CHA alone”, and then press key “Burst” to go to channel A burst mode. The LCD
will display “CHA Burst” in the upper portion. The function generator outputs a waveform with a specified
number of cycles at the burst frequency continuously at CHA output. Every set has a preset burst count, and there
is an interval time between very set of burst.
3.10.1 Set the Carrier Frequency
Signal of channel A is used as the output burst signal. Therefore, channel A signal frequency and amplitude should
be firstly set up. Select “Carrier Freq” by the corresponding soft key. The carrier frequency value becomes yellow.
Input a new carrier frequency value here via numeric keypad or rotary dial.
3.10.2 Set the Carrier Amplitude
Select “Carrier AMP” by the corresponding soft key. The carrier amplitude value becomes yellow. Input a new
carrier amplitude value here via numeric keypad or rotary dial.
3.10.3 Set the Burst Count
Select “N Cycles” by the corresponding soft key. The burst count value becomes yellow. Input a new burst count
number here via numeric keypad or rotary dial. If the burst frequency is fixed, the maximum value of the burst
count is limited. The lower burst frequency, the longer burst period and the bigger the burst count number to be
set. Vise visa, the smaller burst count number is. If the burst frequency is not set, the burst count can be set firstly
and then the burst frequency value is adjusted in order to keep an appropriate time interval between each burst.

- 20 -
3.10.4 Set the Burst Frequency
Select “Burst Freq” by the corresponding soft key. The burst frequency changes to yellow. Input a new burst
frequency here via numeric keypad or rotary dial. When burst is in operation in channel A, TTL_A signal is used
as the trigger signal. The burst frequency actually is the TTL_A frequency. The burst frequency is determined by
the values of the Channel A frequency and the burst count. The multiple of channel A signal period value and burst
count number is the time needed for a set of burst. Burst period value should be bigger than the interval time so as
to make sure of a suitable interval time between each set of burst. Otherwise, all sets of burst will be output
continuously and cannot be a burst signal.
3.10.5 Set the Single Burst Mode
Press the soft key corresponding to “TTL_A Trig” twice to step down to “Single” to enter single burst mode. The
function generator turns off the continuous burst mode and signal output. In the single burst mode, press key
[CHA Output/Trigger] once, the burst process executes once and the function generator outputs one burst
waveform according to the preset value of the burst count. If the burst count is set to 1, users can output the single
burst manually.
3.10.6 Set TTL_A Burst
Select “TTL_A Burst” by the corresponding soft key. At the rise edge of every TTL_A signal, the burst process
executes once according to the preset burst count number, and outputs a set of preset numbers of burst waveform.
The burst process is operating continuously.
3.10.7 Set External Burst
Press the soft key corresponding to “TTL_A Burst” to step down to “EXT Burst” to enter external burst mode..
Input external burst signal from the “Count In” terminal on the rear panel. To validate “Count In” function, the
generator must have frequency counter input.
Burst count function can be used to test the dynamic features of audio equipments as well as to calibrate a counter.
3.11 Burst Output of Channel B
Press key [Channel] to select “CHB Alone”. Next press key [Burst] to enter “CHB Burst” mode. The function
generator outputs a waveform with a specified number of cycles at the burst frequency continuously at the CHB
Output. There is a time interval between each burst. Parameter settings of channel B burst is the same as setting
procedure of channel A burst parameter setting.
Set the Burst Frequency
Select “Burst Freq” by the corresponding soft key. The burst frequency changes to yellow. Input a new burst
frequency here via numeric keypad or rotary dial. In channel B burst operation, TTL_B signal is used as the burst
signal. The burst frequency actually is the TTL_B frequency. The burst frequency is determined by the values of
the Channel B frequency and the burst count. The multiple of channel B signal period value and burst count
number is the time needed for a set of burst. Burst period value should be bigger than the interval time so as to
make sure of a suitable interval time between each set of burst. Otherwise, all sets of burst will be output
continuously and cannot be a burst signal.

- 21 -
3.12 TTL Output
Press key [TTL] to enable the TTL function. The upper-left portion of the LCD displays TTL, and there is TTL
signal output at the TTL_A and TTL_B terminals on the rear panel.
3.12.1 Set the TTL_A Frequency
Select “TTL_A Freq” by the corresponding soft key. The LCD displays TTL_A frequency value. A new TTL_A
frequency value van he set here via numeric keypad or rotary dial.
3.12.2 Set the TTL_A Duty Cycle
Press soft key corresponding to “TTL_A Duty”. The LCD displays TTL_A duty ratio value. A new duty ratio
value can he set here via numeric keypad or rotary dial.
3.12.3 Set the TTL_B Frequency
Select “TTL_B Freq” by the corresponding soft key. The LCD displays TTL_B frequency value. A new TTL_B
frequency value can he set here via numeric keypad or rotary dial.
3.12.4 Set the TTL_B Duty Cycle
Select “TTL_B Duty” by the corresponding soft key. The LCD displays TTL_B duty ratio. A new TTL_B duty
ratio value can he set here via numeric keypad or rotary dial.
3.13 Measure External Frequency
Press key [COUNT] to select “EXT Freq” option by the corresponding soft key. The LCD display shows the
external measurement interface. In this mode, the instrument is a frequency meter and measures the frequency
value of the external signal.
3.13.1 Self Check and Demonstration
The instrument is capable of using internal waveform to carry out self check and present demonstration. Use a test
cable to connect the CHA terminal with the “Count In” terminal on the rear panel. Select “External Freq” by the
corresponding soft key. The test result displayed is the current channel A frequency value. Since channel A
frequency synthesizer uses the same clock with frequency tester, the test result does not have the affect of crystal
error. Therefore the test result is highly accurate.
3.13.2 Measure External Frequency
Select “EXT Freq” by the corresponding soft key. Input the external frequency from the “Count In” terminal on
the rear panel. The LCD displays the testing external frequency value. The testing external signal can be period
signal of the arbitrary waveform. The signal amplitude peak-to-peak value should be 100mVpp~20Vpp. Due to
the affect of crystal error and trigger error, the accuracy and stability may not be as good as those in self check.
3.13.3 Set the Gate Time
Select “Strobe Time” by the corresponding soft key. The gate time changes to yellow. Input a new gate time data
here by numeric keypad or rotary dial. During frequency measurement, the tested signal must be continuous.
However, the measurement is intermittent. With the preset gate time as a cycle, the instrument makes sampling of
the tested signal, analyzes the testing data and refresh display. The instrument usually adopts average periodical

- 22 -
measurement. The longer gate time, the more cycle numbers to be collected from the testing signal, the more
stable the average value, the more valid digits to have in testing results, but the slower tracking to the frequency
variation. This is applicable to test the long-term frequency stability. The shorter gate time, the less valid digits to
have in testing results, the faster tracking to the frequency variation, which is suitable to frequency testing
requiring a short time of stability.
3.14 System Setup
Press key [Utility] to enter system setup mode. The system interface is displayed. Users can store or recall system
setup parameters and carry out the programmable interface operation.
3.14.1 Store Parameters
Press the soft key corresponding to “Recall” to step down to “Store” to enter the parameter storage mode. All
preset parameters can be stored into the memory of the instrument. The instrument provides 39 index numbers for
the parameter memories, starting from index NO.1 to index NO.39. Memories of index No.1~39 are available for
user defined setting storage, except memory of index NO.0. Memory index NO.0 is for the storage of default
parameters setup.
3.14.2 Recall Parameters
Select “Recall” by the corresponding soft key. Input recall index number 0 to 39 to recall the stored settings in
each memory. Input number 0 recalls the default parameter setting of the instrument. After the parameters are
recalled, the instrument outputs the signal based on the recalled parameters. In some applications, it is required to
frequently use a set of certain parameters, such as frequency, amplitude, offset, waveform, etc. It is very easy and
convenient to store and recall these frequently used parameter settings.
After input a set of parameters, press soft key [SYS], input the memory index number by numeric keypad, press
the corresponding soft key of [No.] to store this set of parameter setting into the corresponding memory. Apply the
same storage procedure to store up to 39 sets of parameter settings. The parameter memory uses a non-volatile
memory, which can store the settings even the instrument is power off.
If you need to use the stored parameter later, select “Recall” by the corresponding soft key, input the recall index
number and press the soft key corresponding to [No.]. The stored parameter setting is recalled. If select “Recall”,
then press key [0] and the soft key corresponding to [No.] to recall the default parameter setting.
3.14.3 Remote Address
Select “Address” by the corresponding soft key. The remote address changes to yellow. The remote address can
be entered by numeric keypad or rotary dial. After power on, the instrument remote address is default as 88. If the
instrument is connected to other equipments with RS232 interface to make an auto testing system, each equipment
in the system should have a different remote address for PC recognition.
3.14.4 Beeper
Select “Beep On” by the corresponding soft key. The beeper can be turned on or off here. After power on the
instrument, the beeper is default as ON, the key sound is on. Every press on a key, there is a sound going with. To
turn off the beeper, press by the corresponding soft key to “Beep Off”.
Test Equipment Depot - 800.517.8431 - 99 Washington Street Melrose, MA 02176TestEquipmentDepot.com

- 23 -
3.14.5 Choose A Language
Select a language by the corresponding soft key. There are only two languages available in the system: English,
Chinese (simplified), Chinese (Traditional).

- 24 -
Chapter 4 Programmable Interface
This chapter introduces the usage of the program interface. Through the study of this chapter, you will learn how
to setup the testing system and use the testing software to program the instrument.
4.1 Interface Application
Nowadays, the application of computer is prevalent. The traditional test equipment is gradually replaced by the
digital test devices. Most of the manual testing tasks have been replaced by the automatic testing systems based on
the computer control technology, which is an inevitable trend in testing & measuring field. Today almost all
high-end and middle-end test equipment has the communication interfaces. With the interfaces, the test
equipments can be connected to the computer with the communication cables to make a testing system. During the
test, all the devices or equipments in the system can communicate with each other through the interfaces and
cables. Based on the preprogrammed test software, the remote computer can control various devices and make
them work coordinately. For example, first, the remote computer sends a command to the function generator to
request it to output an appropriate signal. Secondly, the computer sends commands to the frequency meter and
voltage meter to measure the frequency and voltage. After collecting all measurement data, the computer
processes and analysis the data, and finally prints out the test report. In this example, all complicated tasks are
completed by the automatic testing system. What the testing engineer needs to do is to write a testing program. A
good testing system can not only save a lot of labor and improve the efficiency, but also provide the reliable
results and reduce the risk of the mistakes and faults caused by the testing engineer. In some situations, the
automatic testing system can even complete the test tasks which cannot be done by the manual test ways.
4.2 RS232 Interface
The instrument has the option to install the RS232 interface, which is compliant to EIA-RS232 standards. The
RS232 interface is the serial asynchronous communication interface. It has the characteristics of the long
transmission distance and les number of transmission wire. Most of the current computer has the RS232 interface.
4.2.1 Interface Voltage Level
Logic “0”: +5 V to +15 V;
Logic “1”: -5 V to -15 V.
4.2.2 Transmission Format
Each transmission frame consists of 11 bits: 1 start bit (logic “0”), 8 data bits (ASCII code), 1 index bit (address
logic = “1” data logic = “0”), 1 stop bit (logic “1”).
4.2.3 Transmission Rate
In this instrument, the transmission rate is default 19200bits/s and can be reset by software.
4.2.4 Interface Connection
Use a RS232 cable to connect the RS232 connector on the rear panel to the COM1 or COM2 connector on the
computer.

- 25 -
4.2.5 System Construction
In one system, the maximum number of connected instruments is 99 units and the total length of connection cable
cannot exceed 100 meters.
4.2.6 Environment
The RS232 adapts the data transmission in the common lab and production environment without heavy electrical
interference.
4.2.7 Address Information
In the programmable mode, the instrument starts to receive the message from computer, checks the index bit, and
determines the received message is either address message or data message. If it is an address message, check if
the received address matches its own address or not, if not, ignore all following messages and wait for the next
address message. If the address matches, the instrument starts to receive the following data message until the
whole message received.
4.2.8 Data Information
After receiving the data message, the instrument verifies and stores the data in the memory. If the received
character is the line feed Chr(10), it means it is the end of the data message. The instrument starts to execute each
operation in this remote command.
4.3 Remote Command
The remote command is the ASCII code delivered from the computer to the controlled equipment. The controlled
equipment works according to given command. Each equipment has its own command in a specified format and
definition. In writing a new remote command, user must strictly follow the format and definition of the
equipment’s command, so as to give correct command for the controlled equipment to complete the work.
Remote command 1 Remote command 2 (without digit and unit) Inquiry command
CHA:AFREQ:1.31:MHz CHA:SQUAR CHA:?AFREQ
↑ ↑ ↑ ↑ ↑ ↑ ↑ ↑ ↑ ↑ ↑ ↑ ↑
1 5 2 5 3 5 4 1 5 2 1 6 2
1: Function string 2: Option string 3: Data string
4: Unit string 5 Separate character 6: Question mark
The remote command consists of the function string, the option string, the data string, the unit string, the separate
character, and the question mark. Some commands do not include the data string and the unit string.
4.3.1 Command String
The instrument remote commands consist of the function string, the option string, the data string, and the unit
string shown in the tables below. Both function and option strings use the uppercase characters, whose definition
is corresponding to the instrument functionality and option. The data string consists of 10 digits of numbers from
0 to 9, decimal point, and negative sign. The unit string consists of the defined uppercase and lowercase characters
depending on the data characteristics. Except the characters in the table, the other characters can not be used.
Otherwise, the error occurs.

- 26 -
The Table of Function Command
Option String Option String
Frequency of Channel A CHA Burst of Channel A ABURST
Frequency of Channel B CHB Burst of Channel B BBURST
Frequency Sweep of Channel A FSWP FSK of Channel A FSK
Amplitude Sweep of Channel A ASWP ASK of Channel A ASK
Frequency Modulation of Channel A FM PSK of Channel A PSK
External Frequency Measurement COUNT TTL TTL
Return to Local LOCAL RS232 control RS232
System SYS
The Table of the Option Command
Option String Option String Option String
CHA waveform AWAVE Recall Parameter RECAL Hop Amplitude HOPA
CHA offset AOFFS Measuring Frequency MEASF Hop Frequency HOPF
CHA frequency AFREQ Software Version VER Hop Phase HOPP
CHA attenuation AATTE Burst Count NCYCL External Trigger EXTTR
CHA period APERD Burst Frequency BURSF External Modulation EXT
CHA duty cycle ADUTY Single Trigger TRIGG System Reset RESET
CHB frequency BFREQ Single Burst ONCES Phase PHASE
CHB harmonic Wave BHARM FM Deviation Depth DEVIA True RMS VRMS
CHB period BPERD Modulation Waveform MWAVE Language Setup LANG
CHB duty cycle BDUTY Modulation Frequency MODUF Carrier Amplitude CARRA
TTL_A Frequency TTLAF Peak-to-peak value VPP Carrier Frequency CARRF
TTL_A Duty Cycle TTLAD Beep Sound BEEP Gate time STROBE
TTL_B Frequency TTLBF Interval Time INTVL Stop Amplitude STOPA
TTL_B Duty Cycle TTLBD Interface Address ADDR Stop Frequency STOPF
TTL_A Trigger TTLTR Sweep Mode MODEL Auto Sweep AUTO
Step Amplitude STEPA Start Amplitude STARA Store Parameter STORE
Step Frequency STEPF Start Frequency STARF Output Switch SWITCH
CHB waveform BWAVE Arbitrary waveform ARB
The Table of the Data Command
Data String Data String
Digit 0 1 2 3 4 5 6 7 8 9 Decimal Point ·
Negative Sign -

- 27 -
The Table of the Unit Command
Unit String Unit String
Frequency MHz, kHz, Hz, mHz Phase DEG
Peak-to-peak Value Vpp, mVpp Attenuation dB
Time s, ms Index No.
Harmonic wave TIME Percentage %
Burst count CYCL DC offset Vdc, mVdc
RMS Vrms, mVrms
4.3.2 Character Return
The length of a remote command cannot exceed 60 characters. Every string is ended with a Chr (10).
4.3.3 Separate Character
The separate character has to be placed between the function and option strings, the option and data strings, the
data and unit strings, and the function string and question mark..
4.3.4 Question Mark
To add the question mark (?) before the option string will be back the corresponding value and unit. If no unit,
only back to the value.
4.3.5 Data String
The maximum length of the data string is 10 characters.
4.3.6 Control Capability
The remote commands can control all instrument functionalities.
4.3.7 Serial Port Control
In the serial port control mode, first user must send the instrument's address and then select the corresponding
instrument, next send the remote commands.
4.3.8 Online Operation
First, send the interface select command. For example, send “address + RS232” command to select the RS232
interface. The instrument will switch to the RS232 remote mode. If the address of the instrument is 88, send
“88RS232”. To exit this remote control mode, send “88LOCAL” to make the instrument back to the normal key
operation mode. Otherwise, neither the key operation nor the other remote controls can be used.
4.4 Application Software
In the automatic testing system, the application software is a control program which is written by the testing
engineers for the accurate control on the variety of instruments and devices. Users have to read the details of this
guide before starting to write the application program. It is quite easy to program as long as you are familiar with
the manual operations and transfer each manual operation to the program of each remote command gradually. The
application program can be written by a variety of computer languages.
Test Equipment Depot - 800.517.8431 - 99 Washington Street Melrose, MA 02176TestEquipmentDepot.com

- 28 -
4.4.1 Enter the Programmable Mode
After power on, the instrument is in the manual operation mode. When the remote command is received, the
instrument enters the remote operation mode. At this time, all the key functions are not available. The instrument
can only be operated by the remote command. To return to the manual operation mode, send the “Address +
LOCAL” (for example “88LOCAL”) command from the computer to tell the instrument back to the manual
operation mode. Or, press key [SYS] to return to manual operation.
4.4.2 Tips for Writing a Program
Users have to pay attention to the program main points below when use the remote command to program.
1. Strictly follow the remote command format, including the uppercase and lowercase characters in the command
code. Otherwise, the instrument will consider the command as a wrong message and ignore the
operation.
2. Users should be familiar with the manual operation firstly and make sure the remote command sequence
exactly same as the manual operation. The right sequence of the command should be the function string, the
option string, the data string, and finally the unit string. If the program sequence is not correct or the
string does not match the corresponding functionality, although the instrument executes the code and
does not give any error notice, the result may be wrong. For example, set the frequency of the channel A at
100 kHz, remote command: 100:AFREQ:kHz:100. This is a string in wrong sequence. Another example,
select the No.3 waveform of channel B, remote command: CHA:BWAVE:3No, the command and function
are not matching.
4.4.3 Application Example
The application examples of the various types of the remote command are shown as below:
Example1: Channel A, Single output, Sine wave, Frequency 1MHz
RS232 mode: 88CHA:AWAVE:0:No.
88CHA:AFREQ:1:MHz
Example 2: Channel B, Single output, Triangle wave, Frequency 1kHz
RS232 mode: 88CHB:BWAVE:2:No.
88CHB:BTRIG:1:kHz
Example 3: Channel A, Single Output, Pulse wave, Duty cycles 25%
RS232 mode:88CHA:ADUTY:25:%
Example 4: Frequency Sweep output, Start frequency 1kHz
RS232 mode: 88FSWP:STARF:1:kHz
Example 5: FSK output, Carrier frequency 25kHz
RS232 mode: 88FSK:CARRF:25:kHz
Example 6: Query channel A frequency operation mode
RS232 mode: 88CHA:?AFREQ
Example 7: Return to the control mode and recover keypad operation
RS232 mode: 88LOCAL

- 29 -
Chapter 5 Frequency Counter & RS232
This chapter introduces the function generator accessories which are not included in the standard.
5.1 Frequency Counter
If users choose to purchase the frequency counter, the frequency count board will be installed in the instrument.
The input connector is the “Count in” connector on the rear panel. The detail instruction is in the section 3.13.
5.2 RS232
If users choose to purchase RS232 interface, user can remote control the instrument from a computer.

- 30 -
Chapter 6 Technical Specifications
6.1 Output Characteristics of Channel A
6.1.1 Waveform Characteristics
Waveform type: 32 waveforms including: Sine, Square, Triangle, Pulse etc. , and 8 user defined arbitrary
waveforms
Waveform length: 1024 points Sampling rate: 100MSa/S
Waveform amplitude resolution: 8bits
Sinusoidal harmonic rejection: ≥40dBc (<1MHz=, ≥35dBc (1MHz~20MHz)
Sine wave total distortion: ≤1% (20Hz~200kHz)
Square rise/fall edge time: ≤35 ns Overshoot: ≤10%
Square wave duty cycle: 1%~99%
6.1.2 Frequency Characteristics
Frequency range: Sine: 40mHz~Max. frequency (MHz) Other waveforms: 40mHz~1MHz
Frequency resolution: 40mHz
Frequency accuracy: ±(5×10⁻⁵
+40mHz)
Frequency stability: ±5×10⁻⁶
/3 hours
6.1.3 Amplitude Characteristics
Amplitude range: 2mVpp~20Vpp 40mHz~10MHz (high impedance)
2mVpp~15Vpp 10MHz~15MHz (high impedance)
2mVpp~8Vpp 15MHz~20MHz (high impedance)
Resolution: 20mVpp (amplitude>2Vpp), 2mVpp (amplitude<2Vpp)
Accuracy: ±(1%+2mVrms) (high resolution, true RMS, frequency at 1kHz)
Stability: ±0.5%/3 hours
Flatness: ±5% (frequency<10MHz), ±10% (frequency >10MHz)
Output impedance: 50Ω
6.1.4 DC Offset Characteristics
Offset range: ±10V (high impedance, attenuation 0dB) Resolution: 20mVdc
Accuracy: ±(1%+20mVdc)
6.1.5 Sweep Characteristics
Linear sweep on frequency or amplitude.
Sweep range: free to set start point and stop point.
Sweep step: higher than any value of resolution.
Sweep rate: 10ms~60s/step
Sweep mode: UP, DOWN, UP AND DOWN
6.1.6 Modulation Characteristics
Carrier signal: channel A signal
Modulation signal: channel B signal or external signal
Modulation depth: 0%~20%

- 31 -
6.1.7 Shift Keying Characteristics
FSK: free to set carrier frequency and hop frequency
ASK: free to set carrier amplitude and hop amplitude
PSK: hop phase 0~360°, Max. resolution 1°
Alternative rate: 10ms~60s
6.1.8 Burst Characteristics
Carrier signal: channel A signal
Trigger signal: TTL_A signal
Burst count: 1~65000 cycles
Burst mode: Internal TTL, External, Single
6.2 Output Characteristics of Channel B
6.2.1 Waveform Characteristics
Waveform type: 32 waveforms including: Sine, Square, Triangle, Pulse etc. and 8 user defined arbitrary
waveforms
Waveform length: 1024 points Sampling rage: 12.5MSa/S
Waveform amplitude resolution: 8bits
Square duty cycle: 1%~99%
6.2.2 Frequency Characteristics
Frequency range: Sine: 10mHz~1MHz Other waveforms: 10mHz~100kHz
Resolution: 10mHz
Accuracy: ±(1×10⁻⁵
+10mHz)
6.2.3 Amplitude Characteristics
Amplitude range: 50mVpp~20Vpp (high impedance) Resolution: 20mVpp
Output impedance: 50Ω
6.2.4 Burst Characteristics
Trigger signal: TTL_B signal
Burst count: 1~65000 cycles
Burst mode: Internal TTL, External, Single
6.3 TTL Output Characteristics
6.3.1 Waveform Characteristics: Square, rise/fall time≤20ns
6.3.2 Frequency Characteristics: 40mHz~1MHz
6.3.3 Amplitude Characteristics: TTL, CMOS compatible, low<0.3V, high>4V
- 32 -
6.4 Common Characteristics
6.4.1 Power Source
Voltage: AC220V (1±10%)
AC110V (1±10%) (Pay attention to the voltage selection on rear panel)
Frequency: 50Hz (1±5%)
Power: <45VA
6.4.2 Environment
Temperature: 0~40 Humidity: 80%
6.4.3 Operation Characteristics
Keypad operation and rotary knob operation
6.4.4 Display
TFT LCD display, 320*240, English, Chinese (simplified), Chinese (traditional)
6.4.5 Dimension and Weight
415mmx295mmx195mm Weight: 3.5kg
6.4.6 Manufacturing Technology
Surface Mount Technology, Integrated Circuit. High reliability and stability.
6.5 Frequency Counter Characteristics
6.5.1 Frequency Counter
Testing frequency range: 1Hz~100MHz, or 1Hz~150MHz
Input signal amplitude: 100mVpp~20Vpp
Test Equipment Depot - 800.517.8431 - 99 Washington Street Melrose, MA 02176TestEquipmentDepot.com