76 © 1998, 1999, 2000 David T. Gray, Howard Duncan, Jane Kernan Frames When displaying information...
26
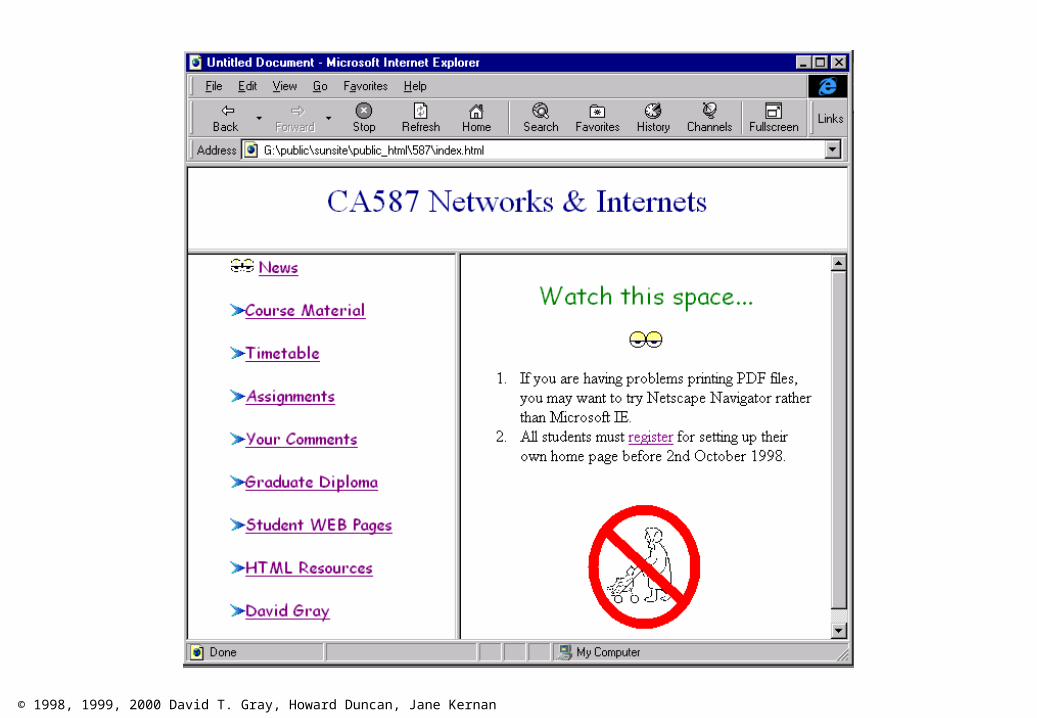
© 1998, 1999, 2000 David T. Gray, Howard Duncan, Jane Kernan Frames • When displaying information in a browser, it is sometimes useful to divide the display into a number of distinct areas called frames and display different HTML pages in each frame.
-
Upload
shannon-farmer -
Category
Documents
-
view
213 -
download
0
Transcript of 76 © 1998, 1999, 2000 David T. Gray, Howard Duncan, Jane Kernan Frames When displaying information...

© 1998, 1999, 2000 David T. Gray, Howard Duncan, Jane Kernan 1
Frames
• When displaying information in a browser, it is sometimes useful to divide the display into a number of distinct areas called frames and display different HTML pages in each frame.
© 1998, 1999, 2000 David T. Gray, Howard Duncan, Jane Kernan 2

© 1998, 1999, 2000 David T. Gray, Howard Duncan, Jane Kernan 3
• To use frames, we need a frame page that specifies the layout of the frames.+ This page uses the <FRAMESET> tag to specify a set of related frames.+ Each frame in this set is introduced by a <FRAME> tag.
• For a set of frames, we need to specify:+ Whether the frames form rows or columns.+ What percentage of the available space is to be occupied by each frame.
• For an individual frame, we need to specify:+ The HTML page that will be displayed in that page.+ This is known as the source for the frame.+ The name of the frame.
<FRAMESET ROWS="30%,40%,30%">•••</FRAMESET>
<FRAMESET COLS="40%,60%">•••</FRAMESET>
<FRAME SRC="one.html" NAME=TOP>

© 1998, 1999, 2000 David T. Gray, Howard Duncan, Jane Kernan 4
twenty.html
<HTML><HEAD> <TITLE>Frames in a row</TITLE></HEAD>
<FRAMESET ROWS="30%,40%,30%">
<FRAME SRC="one.html" NAME=TOP><FRAME SRC="two.html" NAME=MIDDLE><FRAME SRC="three.html" NAME=BOTTOM>
</FRAMESET>
</HTML>

© 1998, 1999, 2000 David T. Gray, Howard Duncan, Jane Kernan 5
twentyone.html
<HTML><HEAD> <TITLE>Frames in a column</TITLE></HEAD>
<FRAMESET cols="40%,50%">
<FRAME SRC="eight.html" NAME=LEFT><FRAME SRC="two.html" NAME=RIGHT>
</FRAMESET>
</HTML>

© 1998, 1999, 2000 David T. Gray, Howard Duncan, Jane Kernan 6
Other <FRAME> Attributes
• There are a number of other useful attributes that can be used with <FRAME>.
+ Normally, a user can resize frames once they have been created.• For example, the frames on the previous two examples can be resized
by "dragging" the bar separating the frames.
+ The NORESIZE attribute can be used to prevent the user resizing a frame.+ If the content of the page displayed in a frame is too large for the frame,
a browser will add scroll bars.+ To prevent the browser adding scroll bars we can use the SCROLLING
attribute.• We can specify scrolling as YES, NO or AUTO.
<FRAME SRC="one.html" NAME=TOP NORESIZE SCROLLING=NO>

© 1998, 1999, 2000 David T. Gray, Howard Duncan, Jane Kernan 7
Nested Frame Sets
• It is possible to nest one frame set within another.+ This allows us to divide the display into arbitrarily complex sets of
frames.
<HTML><HEAD><TITLE>Untitled Document</TITLE></HEAD> <FRAMESET ROWS="81,86%" BORDER=0> <FRAME SRC="name.html" NAME="Top" SCROLLING=NO NORESIZE> <FRAMESET COLS="263,74%"BORDER="0"> <FRAME SRC="frame.html" NAME="Left" SCROLLING=NO NORESIZE> <FRAME SRC="tan.html" NAME="Right" SCROLLING=YES> </FRAMESET> <NOFRAMES> <BODY> Viewing this page requires a browser capable of displaying frames. </BODY> </NOFRAMES> </FRAMESET></HTML>

© 1998, 1999, 2000 David T. Gray, Howard Duncan, Jane Kernan 8
Navigating Between Frames• Normally when we follow a hypertext link, the new page
overwrites the page containing the link.+ If the original page is displayed in a frame, then the contents of the
frame are overwritten.+ However, within an <A> tag we can specify the frame into which a page
should be loaded.
twentytwo.html
<HTML><HEAD> <TITLE>Frames in a column</TITLE></HEAD>
<FRAMESET cols="40%,50%">
<FRAME SRC="eight_a.html" NAME=LEFT><FRAME SRC="two.html" NAME=RIGHT>
</FRAMESET>
</HTML>
eight_a.html
<HTML> <HEAD> <TITLE> Contents</TITLE> </HEAD> <BODY> <H1>Networks & Internets</H1> Example pages: <UL> <LI> <A HREF="one.html" TARGET=RIGHT>One</A> <LI> <A HREF="two.html" TARGET=RIGHT>Two</A> <LI> <A HREF="three.html" TARGET=RIGHT>Three</A> <LI> <A HREF="four.html" TARGET=RIGHT> Four </A> <LI> <A HREF="five.html" TARGET=RIGHT> Five </A> <LI> <A HREF="six.html" TARGET=RIGHT> Six </A> <LI> <A HREF="seven.html" TARGET=RIGHT> Seven</A> </UL> </BODY></HTML>

© 1998, 1999, 2000 David T. Gray, Howard Duncan, Jane Kernan 9
twentyone.html
<HTML><HEAD> <TITLE>Frames in a column</TITLE></HEAD>
<FRAMESET cols="40%,50%">
<FRAME SRC="eight.html" NAME=LEFT><FRAME SRC="two.html" NAME=RIGHT>
</FRAMESET>
</HTML>

© 1998, 1999, 2000 David T. Gray, Howard Duncan, Jane Kernan 10
Exercise IV
• Update your home page to use frames.

© 1998, 1999, 2000 David T. Gray, Howard Duncan, Jane Kernan 11
Forms• It is sometimes useful to have HTML pages that allow a user to
enter data.+ For example, a page used to register a student for the practical work allows
a user to enter data.
• This is achieved by using a form.+ A form consists of a collection of controls.
• Text windows.• Drop down selection lists.• Radio buttons.• Check boxes.• Buttons.
+ The exact nature of these controls depends on the platform.• i.e., whether the computer is a Java Workstation, MS Windows, Unix,
Macintosh, ...

© 1998, 1999, 2000 David T. Gray, Howard Duncan, Jane Kernan 12

© 1998, 1999, 2000 David T. Gray, Howard Duncan, Jane Kernan 13
• A form is specified by using the tags <FORM> and </FORM>.+ Between these tags we use other tags to insert the specific controls and
other information (e.g., static text) making up the form.+ Note that we can have more than one form on a page.
twentythree.html
<HTML><HEAD> <TITLE>A simple form</TITLE></HEAD> <BODY BGCOLOR=#888888 TEXT=#FFFFFF> This page contains an example form. <FORM>
••• </FORM> The form is finished. </BODY></HTML>

© 1998, 1999, 2000 David T. Gray, Howard Duncan, Jane Kernan 14
Text Areas• A text area is a control that allows multiple lines of text to be
entered.+ If the text is too large to display, then scroll bars are used.+ We use the tags <TEXTAREA> and </TEXTAREA> to introduce a text area.+ The text between these two tags is used as the default text for the text
area.+ Note that most control must be given a name.
• We will see the purpose of the name later.
twentythree.html
••• <FORM> Type some text: <TEXTAREA NAME="area" ROWS=5 COLS=30> Default text. OK. </TEXTAREA>
••• </FORM>
•••

© 1998, 1999, 2000 David T. Gray, Howard Duncan, Jane Kernan 15
Single Line Text• A control that can be used to input a single line of text can be specified
using the <INPUT> tag.+ As we will see, this tag can be used to specify other controls.+ Therefore, the <INPUT> tag has an attribute TYPE which indicates the type of control
required.+ In addition, we can use attributes to give the control a name, a default value and a size.+ The type text is used for ordinary text and the type password for a text which is always
echoed as '*'.
twentythree.html
••• <FORM>
••• <BR><BR> Text: <INPUT TYPE="text" NAME="details" SIZE=30 VALUE="DEFAULT"> <BR><BR> Password: <INPUT TYPE="password" NAME="password" SIZE=30 VALUE="DEFAULT">
••• </FORM>
•••

© 1998, 1999, 2000 David T. Gray, Howard Duncan, Jane Kernan 16
Selections• A selection control allows a user to select one or more options
from a drop down menu.+ We use the tags <SELECT> and </SELECT> to specify a selection.
• Like all controls, we must give a selection a name.• In addition, we can use the attribute MULTIPLE to allow the user to
select more than one option.
+ Between these tags, we use the <OPTION> tag to introduce each option.• For each option we use the attribute VALUE to give the value of the
option. Later we will see how this value is used.• We give the text to be displayed after the tag.• We can use the SELECTED attribute to indicate that by default, an option
is selected.
twentythree.html
••• <BR><BR> Select an item: <SELECT NAME="item"> <OPTION VALUE="1"> One <OPTION VALUE="2"> Two <OPTION SELECTED VALUE="3"> Three <OPTION VALUE="4"> Four <OPTION VALUE="5"> Five <OPTION VALUE="5"> Six </SELECT>
•••

© 1998, 1999, 2000 David T. Gray, Howard Duncan, Jane Kernan 17
Checkboxes
• A checkbox is a small box that can either be ticked or not ticked.+ A checkbox is specified using the <INPUT> tag.+ We use attributes to give a checkbox a name and to indicate if it is ticked
by default.
twentythree.html
••• <FORM>
••• <BR><BR> Checkboxes: <INPUT TYPE="checkbox" NAME="checked1" CHECKED> <INPUT TYPE="checkbox" NAME="checked2">
••• </FORM>
•••

© 1998, 1999, 2000 David T. Gray, Howard Duncan, Jane Kernan 18
Radio Buttons• A group of radio buttons is specified by using a separate
<INPUT> tag for each button.+ To indicate that the buttons belong to the same group, they are all given
the same name.+ For each button we use the attribute VALUE to give the value of the
button. Later we will see how this value is used.+ We give the text to be displayed beside the button after the tag.+ We can also use the attribute CHECKED to specify which of the buttons is
checked.
twentythree.html
••• <FORM>
••• <BR><BR> Radio buttons: <INPUT TYPE="radio" NAME="choice" VALUE="1"> A <INPUT TYPE="radio" NAME="choice" VALUE="2" CHECKED> B <INPUT TYPE="radio" NAME="choice" VALUE="3"> C <INPUT TYPE="radio" NAME="choice" VALUE="4"> D
••• </FORM>
•••

© 1998, 1999, 2000 David T. Gray, Howard Duncan, Jane Kernan 19
Buttons
• We have two types of regular buttons - submit and reset buttons.+ These buttons can be specified by using the <INPUT> tag.+ By default, these buttons are displayed with the text "Submit Query" and
"Reset". + We can use the attribute VALUE to change the value displayed.+ We do not need to give buttons names.
twentythree.html
••• <FORM>
••• <BR><BR> Buttons: <INPUT TYPE="submit"> <INPUT TYPE="submit" VALUE="2nd submit"> <INPUT TYPE="reset"> <INPUT TYPE="reset" VALUE="2nd reset">
••• </FORM>
•••

© 1998, 1999, 2000 David T. Gray, Howard Duncan, Jane Kernan 20
Hidden Input
• It is sometime useful to have controls that are hidden.+ i.e., controls that have a name and a fixed value that cannot be changed by the
user.+ In fact, such controls are hidden and do not appear on the display.+ These controls can be specified by using the <INPUT> tag.+ E.g. a posting ID
••• <FORM>
••• <INPUT TYPE="hidden" NAME="secret" VALUE="Hidden value"> </FORM>
•••

© 1998, 1999, 2000 David T. Gray, Howard Duncan, Jane Kernan 21
Actions• Q: A form allows us to fill out text fields, check buttons etc., but
what can we do with the data that a user enters?
• A: We can submit it to a server.+ i.e., we send the data entered into the form to a server, this interprets the data
and sends back results.+ This is achieved by pressing any submit button.+ If we press any reset button, then the controls on the form are reset to their
default values.
• For this process to work, we must specify:+ The address of a server.
• For this we use a Uniform Resource Locator (URL).• We will discuss the structure of URLs later in the course.
+ How the data should be sent to the server.• There are two methods - POST and GET.
– With GET, the data is appended to the end of the URL and sent to the server.– With POST, the data is sent separately from the URL.
• In both cases, the browser sends pairs consisting of the name of the control and its current value.

© 1998, 1999, 2000 David T. Gray, Howard Duncan, Jane Kernan 22
• The <FORM> tag has two attributes:+ METHOD which allows us to specify GET or POST.+ ACTION which allows us to specify the URL.
twentyfour.html
<HTML><HEAD> <TITLE>A simple form</TITLE></HEAD> <BODY BGCOLOR=#888888 TEXT=#FFFFFF> This page conatins an example form. <FORM METHOD="POST" ACTION="http://www.computing.dcu.ie/cgi-bin/away/form2mail"> <INPUT Type="hidden" NAME="mailto" VALUE="[email protected]"> <INPUT Type="hidden" NAME="subject" VALUE="GDF1 Networks & Internets">
••• </FORM> The form is finished. </BODY></HTML>
This server will send an e-mail to this address with this subject heading
containing a list of the information on the form.

© 1998, 1999, 2000 David T. Gray, Howard Duncan, Jane Kernan 23

© 1998, 1999, 2000 David T. Gray, Howard Duncan, Jane Kernan 24
The POST Method
• If the POST method is used, then the user data is entered in the body of the form and sent with the URL to the server.
• POST EXAMPLE – GOOD SITE ABOUT FORMS
http://computing.dcu.ie/cgi-bin/away/form2mail... [More headers here]
area=+Default+text.++OK.+&item=3&details=%26%26%26%26%26%26%26%26%26&password=Dog&checked2=on&choice=2&secret=Hidden+value
Note that line breaks have been introduced to fit this single line
of text onto the slide.

© 1998, 1999, 2000 David T. Gray, Howard Duncan, Jane Kernan 25
The GET Method• If the GET method is used, then the user data are appended
to the URL and sent to the server.+ The resulting URL must be unambiguous. Therefore, the following
conventions are used:• The user data is separated from the original URL by a '?'.
• The data for each control is added as a pair name=value.
• Each pair is separated by a '&'.
• Spaces are represented by '+'.
• Special characters ('?', '&', '+', '=', etc.) are represented as numbers such as %26.
• •••
http://compapp.dcu.ie/cgi-bin/away/form2mail?area=+Default+text.++OK.+&item=3&details=%26%26%26%26%26%26%26%26%26&password=Dog&checked2=on&choice=2&secret=Hidden+value

© 1998, 1999, 2000 David T. Gray, Howard Duncan, Jane Kernan 26
Exercise V
• Construct some simple forms
• ALSO LOOK AT EXAMPLES OF FORMS