60468849 Solaris Volume Manager
421
Solaris Volume Manager Administration Guide Sun Microsystems, Inc. 4150 Network Circle Santa Clara, CA95054 U.S.A. Part No: 819–2789–01 June 2006 Copyright 2006 Sun Microsystems, Inc. 4150 Network Circle, Santa Clara, CA95054 U.S.A. All rights reserved. This product or document is protected by copyright and distributed under licenses restricting its use, copying, distribution, and decompilation.No part of this product or document may be reproduced in any form by any means without prior written authorization of Sun and its licensors, if any. Third-party software, including font technology, is copyrighted and licensed from Sun suppliers. Parts of the product may be derived from Berkeley BSD systems, licensed from the University of California. UNIX is a registered trademark in the U.S. and other countries, exclusively licensed through X/Open Company, Ltd. Sun, Sun Microsystems, the Sun logo, docs.sun.com, AnswerBook, AnswerBook2, and Solaris are trademarks or registered trademarks of Sun Microsystems, Inc. in the U.S. and other countries. All SPARC trademarks are used under license and are trademarks or registered trademarks of SPARC International, Inc. in the U.S. and other countries. Products bearing SPARC trademarks are based upon an architecture developed by Sun Microsystems, Inc. The OPEN LOOK and SunTM Graphical User Interface was developed by Sun Microsystems, Inc. for its users and licensees. Sun acknowledges the pioneering efforts
-
Upload
deepthi-garikipati -
Category
Documents
-
view
36 -
download
2
Transcript of 60468849 Solaris Volume Manager

Solaris Volume Manager
Administration Guide
Sun Microsystems, Inc.
4150 Network Circle
Santa Clara, CA95054
U.S.A.
Part No: 819–2789–01
June 2006
Copyright 2006 Sun Microsystems, Inc. 4150 Network Circle, Santa Clara,
CA95054 U.S.A. All rights reserved.
This product or document is protected by copyright and distributed under
licenses restricting its use, copying, distribution, and decompilation.No part of
this
product or document may be reproduced in any form by any means without
prior written authorization of Sun and its licensors, if any. Third-party software,
including font technology, is copyrighted and licensed from Sun suppliers.
Parts of the product may be derived from Berkeley BSD systems, licensed
from the University of California. UNIX is a registered trademark in the U.S.
and other
countries, exclusively licensed through X/Open Company, Ltd.
Sun, Sun Microsystems, the Sun logo, docs.sun.com, AnswerBook,
AnswerBook2, and Solaris are trademarks or registered trademarks of Sun
Microsystems, Inc. in
the U.S. and other countries. All SPARC trademarks are used under license
and are trademarks or registered trademarks of SPARC International, Inc. in
the U.S. and
other countries. Products bearing SPARC trademarks are based upon an
architecture developed by Sun Microsystems, Inc.
The OPEN LOOK and SunTM Graphical User Interface was developed by
Sun Microsystems, Inc. for its users and licensees. Sun acknowledges the
pioneering efforts
of Xerox in researching and developing the concept of visual or graphical user
interfaces for the computer industry. Sun holds a non-exclusive license
fromXerox to
the Xerox Graphical User Interface, which license also covers Sun’s licensees
who implement OPEN LOOK GUIs and otherwise comply with Sun’s written
license
agreements.
U.S. Government Rights – Commercial software. Government users are
subject to the Sun Microsystems, Inc. standard license agreement and
applicable provisions
of the FAR and its supplements.
DOCUMENTATION IS PROVIDED “AS IS”ANDALLEXPRESS OR IMPLIED
CONDITIONS, REPRESENTATIONSANDWARRANTIES, INCLUDINGANY
IMPLIEDWARRANTYOF MERCHANTABILITY, FITNESS
FORAPARTICULAR PURPOSE OR NON-INFRINGEMENT,ARE
DISCLAIMED, EXCEPT TO
THE EXTENT THAT SUCH DISCLAIMERSARE HELD TOBE LEGALLY
INVALID.
Copyright 2006 Sun Microsystems, Inc. 4150 Network Circle, Santa Clara,
CA95054 U.S.A. Tous droits réservés.
Ce produit ou document est protégé par un copyright et distribué avec des
licences qui en restreignent l’utilisation, la copie, la distribution, et la
décompilation.
Aucune partie de ce produit ou document ne peut être reproduite sous
aucune forme, par quelque moyen que ce soit, sans l’autorisation préalable et
écrite de Sun et
de ses bailleurs de licence, s’il y en a. Le logiciel détenu par des tiers, et qui
comprend la technologie relative aux polices de caractères, est protégé par
un copyright et
licencié par des fournisseurs de Sun.
Des parties de ce produit pourront être dérivées du système Berkeley BSD
licenciés par l’Université de Californie. UNIX est une marque déposée aux
Etats-Unis et
dans d’autres pays et licenciée exclusivement par X/Open Company, Ltd.

Sun, Sun Microsystems, le logo Sun, docs.sun.com, AnswerBook,
AnswerBook2, et Solaris sont des marques de fabrique ou des marques
déposées, de Sun
Microsystems, Inc. aux Etats-Unis et dans d’autres pays. Toutes les marques
SPARC sont utilisées sous licence et sont des marques de fabrique ou des
marques
déposées de SPARC International, Inc. aux Etats-Unis et dans d’autres pays.
Les produits portant les marques SPARC sont basés sur une architecture
développée par
Sun Microsystems, Inc.
L’interface d’utilisation graphique OPEN LOOK et Sun a été développée par
Sun Microsystems, Inc. pour ses utilisateurs et licenciés. Sun reconnaît les
efforts de
pionniers de Xerox pour la recherche et le développement du concept des
interfaces d’utilisation visuelle ou graphique pour l’industrie de l’informatique.
Sun détient
une licence non exclusive de Xerox sur l’interface d’utilisation graphique
Xerox, cette licence couvrant également les licenciés de Sun qui mettent en
place l’interface
d’utilisation graphique OPEN LOOK et qui en outre se conforment aux
licences écrites de Sun.
CETTE PUBLICATION EST FOURNIE “EN L’ETAT” ETAUCUNE
GARANTIE, EXPRESSEOUIMPLICITE, N’ESTACCORDEE, Y COMPRIS
DES
GARANTIES CONCERNANT LAVALEUR MARCHANDE, L’APTITUDE DE
LAPUBLICATIONAREPONDREAUNE UTILISATION PARTICULIERE,OU
LE FAIT QU’ELLE NE SOIT PAS CONTREFAISANTE DE PRODUIT DE
TIERS. CE DENI DE GARANTIE NE S’APPLIQUERAIT PAS, DANS
LAMESUREOU
IL SERAIT TENU JURIDIQUEMENT NULETNONAVENU.
060807@15490
Contents
Preface.............................17
1 Getting StartedWith Solaris Volume Manager.......21

Solaris Volume Manager Roadmap—What’s New…....22
Solaris Volume Manager Roadmap—Storage Capacity.......22
Solaris Volume Manager Roadmap—Availability.......23
Solaris Volume Manager Roadmap—I/O Performance...........24
Solaris Volume Manager Roadmap—Administration.........24
Solaris Volume Manager Roadmap—Troubleshooting.........25
2 Storage Management Concepts.........27
Introduction to Storage Management...............27
Storage Hardware....27
RAID Levels..............28
Configuration Planning Guidelines...........29
Choosing
Storage ..............................................................................................................
...................29
General Performance
Guidelines ..........................................................................................................
.....30
Random I/O and Sequential I/O
Optimization ........................................................................................31
Random
I/O ......................................................................................................................
....................31
Sequential Access
I/O ......................................................................................................................
.....32
3 Solaris Volume Manager Overview
...........................................................................................................33
What’s New in Solaris Volume
Manager ...................................................................................................33
Support for Descriptive
Names ...........................................................................................................33
Introduction to Solaris Volume
Manager ..................................................................................................34

How Solaris Volume Manager Manages
Storage ..............................................................................34
How to Administer Solaris Volume
Manager ...........................................................................................35
_How to Access the Solaris Volume Manager Graphical User Interface
(GUI) ..............................36
3
Solaris Volume Manager
Requirements .....................................................................................................
36
Overview of Solaris Volume Manager
Components ................................................................................37
Overview of
Volumes .............................................................................................................
..............37
State Database and State Database
Replicas ......................................................................................42
Hot Spare
Pools ..................................................................................................................
..................42
Disk
Sets ....................................................................................................................
............................43
Solaris Volume Manager Configuration
Guidelines ................................................................................43
General
Guidelines ..........................................................................................................
.....................43
File System
Guidelines ..........................................................................................................
...............43
Overview of Creating Solaris Volume Manager
Components ................................................................44

Prerequisites for Creating Solaris Volume Manager
Components .................................................44
Overview of Multi-Terabyte Support in Solaris Volume
Manager .........................................................44
Large Volume Support
Limitations ....................................................................................................45
Using Large
Volumes .............................................................................................................
...............45
Upgrading to Solaris Volume
Manager ......................................................................................................46
4Solaris Volume Manager for Sun Cluster (Overview)
............................................................................49
Introduction to Solaris Volume Manager for Sun
Cluster .......................................................................49
Prerequisite: Required Software Components for Multi-Owner Disk Set
Functionality ............50
Multi-Owner Disk Set
Concepts ............................................................................................................
.....51
Tasks AssociatedWith Multi-Owner Disk
Sets .................................................................................52
Solaris Volume Manager for Sun Cluster
Configuration .........................................................................53
RAID–1 (Mirror) Volumes in Multi-Owner Disk
Sets ............................................................................54
Mirror OwnershipWith Multi-Owner Disk
Sets ..............................................................................54
Data Management and Recovery
Processes ......................................................................................55
5 Configuring and Using Solaris Volume Manager (Scenario)
................................................................57

Scenario Background
Information .........................................................................................................
....57
Hardware
Configuration ......................................................................................................
................57
Initial Physical Storage
Configuration ...............................................................................................58
Final Solaris Volume Manager
Configuration ..........................................................................................58
6 State Database (Overview)
........................................................................................................................61
About the Solaris Volume Manager State Database and
Replicas ...........................................................61
Understanding the Majority Consensus
Algorithm .................................................................................62
Administering State Database
Replicas .....................................................................................................63
Contents
4 Solaris VolumeManagerAdministration Guide • June 2006
Handling State Database Replica
Errors ....................................................................................................64
Scenario—State Database
Replicas .............................................................................................................
65
7 State Database (Tasks)
............................................................................................................................
...67
State Database Replicas (Task
Map) ...........................................................................................................67
Creating State Database
Replicas .............................................................................................................
...68

_How to Create State Database
Replicas ..............................................................................................68
Maintaining State Database
Replicas .........................................................................................................70
_How to Check the Status of State Database
Replicas ........................................................................70
_How to Delete State Database
Replicas ..............................................................................................71
8 RAID-0 (Stripe and Concatenation) Volumes (Overview)
.....................................................................73
Overview of RAID-0
Volumes .............................................................................................................
.......73
RAID-0 (Stripe)
Volume ...............................................................................................................
.......74
RAID-0 (Concatenation)
Volume ......................................................................................................76
RAID-0 (Concatenated Stripe)
Volume .............................................................................................77
Background Information for Creating RAID-0
Volumes ........................................................................80
RAID-0 Volume
Requirements .....................................................................................................
......80
RAID-0 Volume
Guidelines ..........................................................................................................
......80
Scenario—RAID-0
Volumes .............................................................................................................
..........81
9 RAID-0 (Stripe and Concatenation) Volumes (Tasks)
.............................................................................83

RAID-0 Volumes (Task
Map) ...................................................................................................................
...83
Creating RAID-0 (Stripe)
Volumes ............................................................................................................
84
_How to Create a RAID-0 (Stripe)
Volume .........................................................................................84
Creating RAID-0 (Concatenation)
Volumes .............................................................................................85
_How to Create a RAID-0 (Concatenation)
Volume ..........................................................................85
Expanding Storage
Capacity .............................................................................................................
..........87
_How to Expand Storage Capacity for Existing
Data .........................................................................87
_How to Expand an Existing RAID-0
Volume ....................................................................................88
Removing a RAID-0
Volume ...............................................................................................................
.......90
_How to Remove a RAID-0
Volume .....................................................................................................90
10 RAID-1 (Mirror) Volumes (Overview)
........................................................................................................93
Overview of RAID-1 (Mirror)
Volumes ....................................................................................................93
Contents
5
Overview of
Submirrors .........................................................................................................
..............93

Scenario—RAID-1 (Mirror)
Volume .................................................................................................94
Providing RAID-1+0 and RAID-
0+1 .................................................................................................95
RAID-1 Volume (Mirror)
Resynchronization ..........................................................................................9
6
Full
Resynchronization .............................................................................................
...........................96
Optimized
Resynchronization .............................................................................................
...............96
Partial
Resynchronization .............................................................................................
......................97
Canceling and Resuming ResynchronizationWith the metasync
Command ..............................97
Creating and Maintaining RAID-1
Volumes ............................................................................................97
Configuration Guidelines for RAID-1
Volumes ...............................................................................97
Performance Guidelines for RAID-1
Volumes .................................................................................99
About RAID-1 Volume
Options .........................................................................................................99
Understanding Submirror Status to Determine Maintenance
Actions .......................................101
The Affect of Booting Into Single-User Mode on RAID-1
Volumes ....................................................102
Scenario—RAID-1 Volumes
(Mirrors) ....................................................................................................103
11 RAID-1 (Mirror) Volumes (Tasks)
..............................................................................................................105
RAID-1 Volumes (Task
Map) ...................................................................................................................
.105
Creating a RAID-1
Volume ...............................................................................................................
........107
_How to Create a RAID-1 Volume From Unused
Slices ..................................................................107
_How to Create a RAID-1 Volume From a File
System ....................................................................109
_SPARC: How to Create a RAID-1 Volume From the root (/) File
System ................................... 113
_x86: How to Create a RAID-1 Volume From the root (/) File
System .......................................... 117
Understanding Boot TimeWarnings When Mirroring the root (/) File
System ........................122
WorkingWith
Submirrors .........................................................................................................
................122
_How to Attach a
Submirror ...........................................................................................................
....122
_How to Detach a
Submirror ...........................................................................................................
....124
_How to Place a Submirror Offline and
Online ................................................................................124
_How to Enable a Slice in a
Submirror ...............................................................................................125
Maintaining RAID-1
Volumes .............................................................................................................
.....126
_How to View the Status of Mirrors and
Submirrors .......................................................................126

_How to Change RAID-1 Volume
Options .......................................................................................128
_How to Expand a RAID-1
Volume ...................................................................................................129
_How to Cancel a Volume Resynchronization
Process ....................................................................130
_How to Resume a Volume Resynchronization
Process ..................................................................133
Responding to RAID-1 Volume Component
Failures ...........................................................................135
Contents
6 Solaris VolumeManagerAdministration Guide • June 2006
_How to Replace a Slice in a
Submirror .............................................................................................135
_How to Replace a
Submirror ...........................................................................................................
..136
Removing RAID-1 Volumes
(Unmirroring) ...........................................................................................138
_How to Unmirror a File
System ........................................................................................................138
_How to Unmirror a File System That Cannot Be
Unmounted .....................................................140
Backing Up Data on a RAID-1
Volume ...................................................................................................143
_How to Perform an Online Backup of a RAID-1
Volume ..............................................................143
12 Soft Partitions (Overview)
........................................................................................................................14
7
Overview of Soft
Partitions ............................................................................................................
............147

Configuration Guidelines for Soft
Partitions ..........................................................................................148
Scenario—Soft
Partitions ............................................................................................................
..............148
13 Soft Partitions (Tasks)
............................................................................................................................
...149
Soft Partitions (Task
Map) ...................................................................................................................
......149
Creating Soft
Partitions ............................................................................................................
..................150
_How to Create a Soft
Partition ...........................................................................................................1
50
Maintaining Soft
Partitions ............................................................................................................
...........151
_How to Check the Status of a Soft
Partition .....................................................................................151
_How to Expand a Soft
Partition .........................................................................................................15
2
_How to Remove a Soft
Partition ........................................................................................................153
14RAID-5 Volumes (Overview)
.....................................................................................................................155
Overview of RAID-5
Volumes .............................................................................................................
.....155

Example—RAID-5
Volume ...............................................................................................................
156
Example—Concatenated (Expanded) RAID-5
Volume ................................................................157
Background Information for Creating RAID-5
Volumes ......................................................................158
Requirements for RAID-5
Volumes .................................................................................................158
Guidelines for RAID-5
Volumes .......................................................................................................158
Overview of Checking Status of RAID-5
Volumes .................................................................................159
Overview of Replacing and Enabling Slices in RAID-5
Volumes .........................................................161
Scenario—RAID-5
Volumes .............................................................................................................
........161
15 RAID-5 Volumes (Tasks)
............................................................................................................................
163
RAID-5 Volumes (Task
Map) ...................................................................................................................
.163
Contents
7
Creating RAID-5
Volumes .............................................................................................................
...........164
_How to Create a RAID-5
Volume .....................................................................................................164
Maintaining RAID-5
Volumes .............................................................................................................
.....165
_How to Check the Status of a RAID-5
Volume ................................................................................165
_How to Expand a RAID-5
Volume ...................................................................................................166
_How to Enable a Component in a RAID-5
Volume ........................................................................167
_How to Replace a Component in a RAID-5
Volume ......................................................................168
16 Hot Spare Pools (Overview)
.....................................................................................................................171
Overview of Hot Spares and Hot Spare
Pools .........................................................................................171
Hot
Spares ................................................................................................................
...........................172
Hot Spare
Pools ..................................................................................................................
................172
How Hot
SparesWork .......................................................................................................
.................172
Hot Spare Pool
States .................................................................................................................
.........173
Example—Hot Spare
Pool .................................................................................................................1
73
Scenario—Hot
Spares ................................................................................................................
...............174
17 Hot Spare Pools (Tasks)
............................................................................................................................
.175

Hot Spare Pools (Task
Map) ...................................................................................................................
...175
Creating a Hot Spare
Pool ....................................................................................................................
......176
_How to Create a Hot Spare
Pool ........................................................................................................176
_How toAddAdditional Slices to a Hot Spare
Pool .........................................................................177
Associating a Hot Spare PoolWith
Volumes ...........................................................................................178
_How to Associate a Hot Spare PoolWith a
Volume ........................................................................178
_How to Change the Associated Hot Spare
Pool ...............................................................................179
Maintaining Hot Spare
Pools ..................................................................................................................
..181
_How to Check the Status of Hot Spares and Hot Spare
Pools ........................................................181
_How to Replace a Hot Spare in a Hot Spare
Pool ............................................................................182
_How to Delete a Hot Spare Froma Hot Spare
Pool ........................................................................183
_How to Enable a Hot
Spare ................................................................................................................
184
18 Disk Sets (Overview)
............................................................................................................................
.....185
What’s New in Disk
Sets ....................................................................................................................
........185

Enhanced OutputWith the metaimport
Command ......................................................................185
Introduction to Disk
Sets ....................................................................................................................
.......186
Types of Disk
Sets ....................................................................................................................
...................186
Contents
8 Solaris VolumeManagerAdministration Guide • June 2006
Local Disk
Sets ....................................................................................................................
................186
Named Disk
Sets ....................................................................................................................
............187
Solaris Volume Manager Disk Set
Administration .................................................................................188
Reserving a Disk
Set ......................................................................................................................
......189
Releasing a Disk
Set ......................................................................................................................
......190
Importing a Disk
Set ......................................................................................................................
.....190
Automatic Disk
Partitioning .........................................................................................................
....191
Disk Set Name
Requirements .....................................................................................................
.......193

Example—Two Shared Disk
Sets ......................................................................................................193
Guidelines forWorkingWith Disk
Sets ...................................................................................................194
Asynchronous Shared Storage in Disk
Sets .............................................................................................195
Scenario—Disk
Sets ....................................................................................................................
...............195
19 Disk Sets (Tasks)
............................................................................................................................
............197
Disk Sets (Task
Map) ...................................................................................................................
..............197
Creating Disk
Sets ....................................................................................................................
..................198
_How to Create a Disk
Set ....................................................................................................................1
98
Expanding Disk
Sets ....................................................................................................................
..............200
_How toAdd Disks to a Disk
Set .........................................................................................................200
_How toAddAnother Host to a Disk
Set ...........................................................................................201
_How to Create Solaris Volume Manager Components in a Disk
Set ............................................202
Maintaining Disk
Sets ....................................................................................................................
...........204

_How to Check the Status of a Disk
Set ..............................................................................................204
_How to Delete Disks From a Disk
Set ...............................................................................................204
_How to Take a Disk
Set ......................................................................................................................
.205
_How to Release a Disk
Set ..................................................................................................................20
7
_How to Delete a Host or Disk
Set ......................................................................................................208
Importing Disk
Sets ....................................................................................................................
...............210
_How to Print a Report on Disk SetsAvailable for
Import ..............................................................210
_How to Import a Disk Set From One System to Another
System .................................................213
20 Maintaining Solaris Volume Manager (Tasks)
......................................................................................215
Solaris Volume Manager Maintenance (Task
Map) ...............................................................................215
Viewing the Solaris Volume Manager
Configuration ............................................................................216
_How to View the Solaris Volume Manager Volume
Configuration ..............................................216
Where To Go
FromHere ...........................................................................................................
........220
Contents
9

Renaming
Volumes .............................................................................................................
......................220
Background Information for Renaming
Volumes ..........................................................................220
Exchanging Volume
Names ..............................................................................................................2
21
_How to Rename a
Volume ...............................................................................................................
..221
WorkingWith Configuration
Files ...........................................................................................................223
_How to Create Configuration
Files ...................................................................................................223
_How to Initialize Solaris Volume Manager From a Configuration
File ........................................223
Changing Solaris Volume Manager Default
Values ................................................................................225
Expanding a File System Using the growfs
Command .........................................................................225
Background Information for Expanding Slices and
Volumes .......................................................226
_How to Expand a File
System ............................................................................................................2
27
Overview of Replacing and Enabling Components in RAID-1 and RAID-5
Volumes ......................228
Enabling a
Component ........................................................................................................
..............228
Replacing a ComponentWith AnotherAvailable
Component .....................................................229

Maintenance and Last Erred
States ...................................................................................................229
Background Information for Replacing and Enabling Components in RAID-1
and RAID-5
Volumes .............................................................................................................
.................................230
21 Best Practices for Solaris Volume Manager
...........................................................................................233
Deploying Small
Servers ...............................................................................................................
.............233
Using Solaris Volume ManagerWith Networked Storage
Devices ......................................................235
22 Top-Down Volume Creation (Overview)
................................................................................................237
Overview of Top-Down Volume
Creation ...............................................................................................237
Top-Down Volume Creation ImplementationWith Disk
Sets .............................................................238
Top-Down Volume Creation
Processes ...................................................................................................238
Determining Which Disks AreAvailable for Top-Down Volume
Creation ........................................240
23 Top-Down Volume Creation (Tasks)
........................................................................................................241
Top-Down Volume Creation (Task
Map) ................................................................................................241
Prerequisites for Top-Down Volume
Creation .......................................................................................242
Creating Volumes
Automatically ......................................................................................................
........243
Analyzing Volume Creation by Specifying Output
Verbosity .......................................................243

_How to Create RAID-1 (mirror) Volumes Using the metassist
Command ..............................243
WorkingWith File-Based Data Using the metassist
Command ........................................................246
Creating a Command File (Shell Script) Using the metassist
Command .................................246
Contents
10 Solaris VolumeManagerAdministration Guide • June 2006
_How to Create a Command File (Shell Script) Using the metassist Command
.......................247
Creating a VolumeWith a Saved Shell Script Created by the metassist
Command .................251
_How to Execute a Saved metassist Command Shell
Script ..................................................251
Creating a Volume Configuration FileWith the metassist
Command ......................................252
_How to Create a Volume Configuration File Using the metassist
Command ..........................252
Changing the Default Behavior of the metassist
Command ..............................................................254
Changing the Volume Defaults
File ..................................................................................................254
24Monitoring and Error Reporting (Tasks)
................................................................................................257
Solaris Volume Manager Monitoring and Reporting (Task
Map) ........................................................257
Configuring the mdmonitord Command for Periodic Error
Checking ................................................258
_How to Configure the mdmonitord Command for Periodic Error
Checking ..............................258
Solaris Volume Manager SNMPAgents
Overview .................................................................................259
Configuring the Solaris Volume Manager
SNMPAgents ......................................................................259

_How to Configure the Solaris Volume Manager
SNMPAgents ....................................................260
Limitations of the Solaris Volume Manager
SNMPAgent ....................................................................262
Monitoring Solaris Volume ManagerWith a cron
Job ..........................................................................262
_How to Automate Checking for Errors in
Volumes ........................................................................262
25 Troubleshooting Solaris Volume Manager (Tasks)
..............................................................................273
Troubleshooting Solaris Volume Manager (Task
Map) .........................................................................273
Overview of Troubleshooting the
System ................................................................................................274
Prerequisites for Troubleshooting the
System .................................................................................274
General Guidelines for Troubleshooting Solaris Volume
Manager ..............................................275
General Troubleshooting
Approach .................................................................................................275
Replacing
Disks ..................................................................................................................
........................276
_How to Replace a Failed
Disk ............................................................................................................276
Recovering From Disk Movement
Problems ..........................................................................................278
Disk Movement and Device ID
Overview .......................................................................................278
Resolving Unnamed Devices Error
Message ...................................................................................278
Device ID Discrepancies After Upgrading to the Solaris 10
Release ....................................................279

Recovering From Boot
Problems ............................................................................................................
..281
Background Information for Boot
Problems ..................................................................................281
How to Recover From Improper /etc/vfstab
Entries .................................................................282
_Recovering the root (/) RAID-1 (Mirror)
Volume .........................................................................282
_How to Recover From a Boot Device
Failure ...................................................................................284
Contents
11
Recovering From State Database Replica
Failures ..................................................................................288
_How to Recover From Insufficient State Database
Replicas ..........................................................288
Recovering From Soft Partition
Problems ...............................................................................................291
_How to Recover Configuration Data for a Soft
Partition ...............................................................291
Recovering Storage From a Different
System ..........................................................................................293
_How to Recover Storage From a Local Disk
Set ..............................................................................293
Recovering Storage From a Known Disk
Set ...................................................................................298
_How to Print a Report on Disk SetsAvailable for
Import ......................................................298
_How to Import a Disk Set From One System to Another
System ..........................................299
Recovering From Disk Set
Problems ........................................................................................................30
0

What to Do When You Cannot Take Ownership ofADisk
Set .....................................................300
_How to Purge a Disk
Set .............................................................................................................300
Performing Mounted Filesystem Backups Using the ufsdump
Command .........................................301
_How to Perform a Backup of a Mounted Filesystem Located on a RAID-1
Volume ..................302
Performing System
Recovery ............................................................................................................
........303
_How to Recover a System Using a Solaris Volume Manager
Configuration ...............................303
A Important Solaris Volume Manager Files
..............................................................................................305
System Files and Startup
Files ...................................................................................................................
305
Manually Configured
Files ...................................................................................................................
.....306
Overview of the md.tab
File ...............................................................................................................306
B Solaris Volume Manager Quick Reference
............................................................................................309
Command-Line
Reference ..........................................................................................................
..............309
C Solaris Volume Manager CIM/WBEM API
............................................................................................... 311
Managing Solaris Volume
Manager .........................................................................................................
311

Index ..................................................................................................................
.........................................313
Contents
12 Solaris VolumeManagerAdministration Guide • June 2006
Tables
TABLE 2–1 Comparison of Types of
Storage .....................................................................................29
TABLE 2–2 Optimizing Redundant
Storage ......................................................................................30
TABLE 3–1 Summary of Solaris Volume Manager
Features ............................................................37
TABLE 3–2 Classes of
Volumes ...........................................................................................................3
8
TABLE 10–1 RAID-1 Volume Read
Policies ......................................................................................100
TABLE 10–2 RAID-1 VolumeWrite
Policies .....................................................................................100
TABLE 10–3 Submirror
States .............................................................................................................10
1
TABLE 10–4 Submirror Slice
States ....................................................................................................102
TABLE 14–1 RAID-5 Volume
States ...................................................................................................160
TABLE 14–2 RAID-5 Slice
States ........................................................................................................160
TABLE 16–1 Hot Spare Pool States (Command
Line) ......................................................................173
TABLE 18–1 Example Volume Names for Disk
Sets .........................................................................193
TABLE 25–1 Common Boot ProblemsWith Solaris Volume
Manager .........................................281

TABLE B–1 Solaris Volume Manager
Commands ..........................................................................309
13
14
Figures
FIGURE 3–1 View of the Enhanced Storage Tool (SolarisVolume Manager) in
the Solaris
Management
Console .......................................................................................................35
FIGURE 3–2 RelationshipAmong a Volume, Physical Disks, and
Slices .........................................39
FIGURE 4–1 Sample Cluster
Configuration ........................................................................................50
FIGURE 5–1 Basic Hardware Diagram Storage
Scenario ...................................................................58
FIGURE 8–1 RAID-0 (Stripe) Volume
Example .................................................................................76
FIGURE 8–2 RAID-0 (Concatenation) Volume
Example ..................................................................77
FIGURE 8–3 RAID-0 (Concatenated Stripe) Volume
Example ........................................................79
FIGURE 10–1 RAID-1 (Mirror)
Example ..............................................................................................94
FIGURE 10–2 RAID-1+0
Example .........................................................................................................95
FIGURE 14–1 RAID-5 Volume
Example ..............................................................................................156
FIGURE 14–2 Expanded RAID-5 Volume
Example ...........................................................................157
FIGURE 16–1 Hot Spare Pool
Example ................................................................................................174
FIGURE 18–1 Disk Sets
Example ..........................................................................................................1
94

FIGURE 21–1 Small System
Configuration .........................................................................................234
FIGURE 22–1 Processing Options for Top-Down Volume
Creation ................................................239
15
16
Preface
The Solaris Volume Manager Administration Guide explains how to use
SolarisTM Volume Manager
to manage your system’s storage needs. Solaris Volume Manager enables
you to create, modify, and
use RAID-0 (concatenation and stripe) volumes, RAID-1 (mirror) volumes,
Note – This Solaris release supports systems that use the SPARC® and x86
families of processor
architectures: UltraSPARC®, SPARC64,AMD64, Pentium, and Xeon EM64T.
The supported systems
appear in the Solaris 10 Hardware Compatibility List at
http://www.sun.com/bigadmin/hcl. This
document cites any implementation differences between the platform types.
In this document these x86 related terms mean the following:
_ x86 refers to the larger family of 64-bit and 32-bit x86 compatible products.
_ x64 points out specific 64-bit information aboutAMD64 or EM64T systems.
_ 32-bit x86 points out specific 32-bit information about x86 based systems.
For supported systems, see the Solaris 10 Hardware Compatibility List.
WhoShould Use This Book
System and storage administrators can use this book to identify:
_ Tasks supported by Solaris Volume Manager
_ Ways to use Solaris Volume Manager to provide more reliable and
accessible data
HowThis Book Is Organized
The Solaris Volume Manager Administration Guide includes the following
information:
Chapter 1 provides a detailed “roadmap” to the concepts and tasks described
in this book. Use this

chapter as a navigational aid to the book’s content.
Chapter 2 provides an introduction to general storage management concepts
for those readers who
are new to this technology.
Chapter 3 describes Solaris Volume Manager. This chapter introduces
essential product-related
concepts and explains how to access Solaris Volume Manager tools.
17
Chapter 4 provides an introduction to multi-owner disk sets. Multi-owner disk
sets enhance the use
of Solaris Volume Manager in a SunTM Cluster environment.
Chapter 5 provides the storage configuration scenario used throughout this
book. This scenario is
intended to help you understand the Solaris Volume Manager product.
Chapter 6 describes concepts related to state databases and state database
replicas.
Chapter 7 explains how to perform tasks related to state databases and state
database replicas.
Chapter 8 describes concepts related to RAID-0 (stripe and concatenation)
volumes.
Chapter 9 explains how to perform tasks related to RAID-0 (stripe and
concatenation) volumes.
Chapter 10 describes concepts related to RAID-1 (mirror) volumes.
Chapter 11 explains how to perform tasks related to RAID-1 (mirror) volumes.
Chapter 12 describes concepts related to Solaris Volume Manager’s soft
partitioning feature.
Chapter 13 explains how to perform tasks related to soft partitioning.
Chapter 14 describes concepts related to RAID-5 volumes.
Chapter 15 explains how to perform tasks related to RAID-5 volumes.
Chapter 16 describes concepts related to hot spares and hot spare pools.
Chapter 17 explains how to perform tasks related to hot spares and hot spare
pools.
Chapter 18 describes concepts related to disk sets.
Chapter 19 explains how to perform tasks related to disk sets.

Chapter 20 explains some general maintenance tasks that are not related to a
specific Solaris Volume
Manager component.
Chapter 21 provides some “best practices” information about configuring and
using Solaris Volume
Manager.
Chapter 23 describes concepts of and tasks related to the Solaris Volume
Manager top-down volume
creation feature.
Chapter 24 provides concepts and instructions for using the Solaris Volume
Manager SNMPagent
and for other error-checking approaches.
Chapter 25 provides information about troubleshooting and solving common
problems in the
Solaris Volume Manager environment.
AppendixAlists important Solaris Volume Manager files.
Appendix B provides tables that summarize commands and other helpful
information.
Preface
18 Solaris VolumeManagerAdministration Guide • June 2006
Appendix C provides a brief introduction to the CIM/WBEMAPI that allows
open Solaris Volume
Manager management from WBEM-compliant management tools.
Related Books
Solaris Volume Manager is one of several system administration tools
available for the Solaris
operating system. Information about overall system administration features
and functions, as well as
related tools are provided in the following:
_ System Administration Guide: Basic Administration
_ System Administration Guide: Advanced Administration
_ System Administration Guide: Devices and File Systems
Documentation, Support, and Training
Sun Function URL Description

Documentation http://www.sun.com/documentation/ Download PDF and
HTML
documents, and order printed
documents
Support and
Training
http://www.sun.com/supportraining/ Obtain technical support,
download patches, and learn
about Sun courses
Typographic Conventions
The following table describes the typographic changes that are used in this
book.
TABLE P–1Typographic Conventions
Typeface or Symbol Meaning Example
AaBbCc123 The names of commands, files, and directories,
and onscreen computer output
Edit your .login file.
Use ls -a to list all files.
machine_name% you have mail.
AaBbCc123 What you type, contrasted with onscreen
computer output
machine_name% su
Password:
Preface
19
TABLE P–1Typographic Conventions (Continued)
Typeface or Symbol Meaning Example
AaBbCc123 Command-line placeholder: replace with a real
name or value
The command to remove a file is rm
filename.
AaBbCc123 Book titles, new terms, and terms to be
emphasized
Read Chapter 6 in the User’s Guide.

Perform a patch analysis.
Do not save the file.
[Note that some emphasized items
appear bold online.]
Shell Prompts inCommandExamples
The following table shows the default system prompt and superuser prompt
for the
C shell, Bourne shell, and Korn shell.
TABLE P–2 Shell Prompts
Shell Prompt
C shell prompt machine_name%
C shell superuser prompt machine_name#
Bourne shell and Korn shell prompt $
Bourne shell and Korn shell superuser prompt #
Preface
20 Solaris VolumeManagerAdministration Guide • June 2006
Getting Started With Solaris Volume Manager
The Solaris Volume Manager Administration Guide describes how to set up
and maintain systems
using Solaris Volume Manager to manage storage for high availability,
flexibility, and reliability.
This chapter serves as a high-level guide to find information for certain Solaris
Volume Manager
tasks, such as setting up storage capacity. This chapter does not address all
the tasks that you will
need to use Solaris Volume Manager. Instead, this chapter provides an
overview of new features and
an easy way to find procedures describing common tasks associated with
Solaris Volume Manager
concepts.
This chapter includes the following roadmaps:
_ “Solaris Volume Manager Roadmap—What’s New” on page 22
_ “Solaris Volume Manager Roadmap—Storage Capacity” on page 22
_ “Solaris Volume Manager Roadmap—Availability” on page 23

_ “Solaris Volume Manager Roadmap—I/O Performance” on page 24
_ “Solaris Volume Manager Roadmap—Administration” on page 24
_ “Solaris Volume Manager Roadmap—Troubleshooting” on page 25
Caution – If you do not use Solaris Volume Manager correctly, you can
destroy data. Solaris Volume
Manager provides a powerful way to reliably manage your disks and data on
them. However, you
should always maintain backups of your data, particularly before you modify
an active Solaris
Volume Manager configuration.
1C H A P T E R 1
21
Solaris Volume Manager Roadmap—What’sNew
Task Description For Instructions
Manage storage in which one or
more components is greater than 1
TB
Use physical logical unit numbers
(LUNs) that are greater than 1 TB
in size, or create logical volumes
that are greater than 1 TB.
“Overview of Multi-Terabyte
Support in Solaris Volume
Manager” on page 44
Import a disk set from one system
to another
Use the metaimport command to
import disk sets, even disk sets
created on different systems. This
command uses expanded device ID
support to automatically track disk
movement within named disk sets.
“Importing a Disk Set” on page 190
“Asynchronous Shared Storage in

Disk Sets” on page 195
Create and manage multi-owner
disk sets
Use the metaset -M to administer
multi-owner disk sets in a Sun
Cluster environment.
“Tasks AssociatedWith
Multi-Owner Disk Sets” on page 52
Solaris Volume Manager Roadmap—Storage Capacity
Task Description For Instructions
Set up storage Create storage that spans slices by
creating a RAID-0 or a RAID-5
volume. The RAID-0 or RAID-5
volume can then be used for a file
system or any application, such as a
database, that accesses the raw
device.
“How to Create a RAID-0 (Stripe)
Volume” on page 84
“How to Create a RAID-0
(Concatenation) Volume” on page
85
“How to Create a RAID-1 Volume
From Unused Slices” on page 107
“How to Create a RAID-1 Volume
From a File System” on page 109
“How to Create a RAID-5 Volume”
on page 164
Expand an existing file system Increase the capacity of an existing
file system by creating a RAID-0
(concatenation) volume, then
adding additional slices to that
volume.
“How to Expand Storage Capacity

for Existing Data” on page 87
Solaris Volume Manager Roadmap—What’s New
22 Solaris VolumeManagerAdministration Guide • June 2006
Task Description For Instructions
Expand an existing RAID-0
(concatenation or stripe) volume
Expand an existing RAID-0
volume by concatenating
additional slices to it.
“How to Expand an Existing
RAID-0 Volume” on page 88
Expand a RAID-5 volume Expand the capacity of a RAID-5
volume by concatenating
additional slices to it.
“How to Expand a RAID-5
Volume” on page 166
Increase the size of a UFS file
system on an expanded volume
Expand a file system by using the
growfs command to expand the
size of a UFS while it is mounted
and without disrupting access to
the data.
“How to Expand a File System”
on page 227
Subdivide slices or logical volumes
into smaller partitions, breaking
the 8-slice hard partition limit
Subdivide logical volumes or slices
by using soft partitions.
“How to Create a Soft Partition”
on page 150
Create a file system Create a file system on a RAID-0
(stripe or concatenation), RAID-1

(mirror), RAID-5, or on a soft
partition.
Chapter 18, “Creating UFS,
TMPFS, and LOFS File Systems
(Tasks),” in System Administration
Guide: Devices and File Systems
Solaris Volume ManagerRoadmap—Availability
Task Description For Instructions
Maximize data availability Use Solaris Volume Manager’s
mirroring feature to maintain
multiple copies of your data. You
can create a RAID-1 volume from
unused slices in preparation for
data, or you can mirror an existing
file system, including root (/) and
/usr.
“How to Create a RAID-1 Volume
From Unused Slices” on page 107
“How to Create a RAID-1 Volume
From a File System” on page 109
Add data availability with
minimum hardware cost
Increase data availability with a
minimum of hardware by using
Solaris Volume Manager’s RAID-5
volumes.
“How to Create a RAID-5 Volume”
on page 164
Solaris Volume Manager Roadmap—Availability
Chapter 1 • Getting StartedWith Solaris Volume Manager 23
Task Description For Instructions
Increase data availability for an
existing RAID-1 or RAID-5
volume

Increase data availability for a
RAID-1 or a RAID-5 volume, by
creating a hot spare pool then
associating it with the submirrors
of a RAID-1 volume, or a RAID-5
volume.
“Creating a Hot Spare Pool”
on page 176
“Associating a Hot Spare PoolWith
Volumes” on page 178
Solaris Volume Manager Roadmap—I/O Performance
Task Description For Instructions
Tune RAID-1 volume readanwrite
policies
Specify the read and write policies
for a RAID-1 volume to improve
I/O performance for a given
configuration.
“RAID-1 Volume Read-and-Write
Policies” on page 100
“How to Change RAID-1 Volume
Options” on page 128
Optimize device performance Create RAID-0 (stripe) volumes to
optimize I/O performance of
devices that make up the stripe.
The interlace value can be
optimized for random or
sequential access.
“Creating RAID-0 (Stripe)
Volumes” on page 84
Maintain device performance
within a RAID-0 (stripe)
Expand a stripe or concatenation
that has run out of space by

concatenating a new component to
it.Aconcatenation of stripes is
better for I/O performance than a
concatenation of slices.
“Expanding Storage Capacity”
on page 87
Solaris Volume Manager Roadmap—Administration
Task Description For Instructions
Graphically administer your
volume management configuration
Use the Solaris Management
Console graphical user interface
(GUI) to administer your volume
management configuration.
Online help from within Solaris
Volume Manager (Enhanced
Storage) node of the Solaris
Management Console application
Solaris Volume Manager Roadmap—I/O Performance
24 Solaris VolumeManagerAdministration Guide • June 2006
Task Description For Instructions
Graphically administer slices and
file systems
Use the Solaris Management
Console GUI to administer your
disks and file systems, performing
such tasks as partitioning disks and
constructing UFS file systems.
Online help from within the Solaris
Management Console application
Optimize Solaris Volume Manager Solaris Volume Manager
performance is dependent on a
well-designed configuration. Once
created, the configuration needs

monitoring and tuning.
“Solaris Volume Manager
Configuration Guidelines” on page
43
“WorkingWith Configuration
Files” on page 223
Plan for future expansion Because file systems tend to run out
of space, you can plan for future
growth by putting a file system into
a concatenation.
“Creating RAID-0 (Concatenation)
Volumes” on page 85
“Expanding Storage Capacity”
on page 87
Solaris Volume ManagerRoadmap—Troubleshooting
Task Description For Instructions
Replace a failing slice If a disk fails, you must replace the
slices used in your Solaris Volume
Manager configuration. In the case
of RAID-0 volume, you have to use
a new slice, delete and re-create the
volume, then restore data from a
backup. Slices in RAID-1 and
RAID-5 volumes can be replaced
and resynchronized without loss of
data.
“Responding to RAID-1 Volume
Component Failures” on page 135
“How to Replace a Component in a
RAID-5 Volume” on page 168
Recover from boot problems Special problems can arise when
booting the system, due to a
hardware problem or operator
error.

“How to Recover From Improper
/etc/vfstab Entries” on page 282
“How to Recover From Insufficient
State Database Replicas” on page
288
“How to Recover From a Boot
Device Failure” on page 284
Solaris Volume Manager Roadmap—Troubleshooting
Chapter 1 • Getting StartedWith Solaris Volume Manager 25
26
Storage Management Concepts
This chapter provides a brief introduction to some common storage
management concepts.
This chapter contains the following information:
_ “Introduction to Storage Management” on page 27
_ “Configuration Planning Guidelines” on page 29
_ “General Performance Guidelines” on page 30
_ “Random I/O and Sequential I/O Optimization” on page 31
Introduction to Storage Management
How you choose to manage your storage determines how you control the
devices that store the active
data on your system. To be useful, active data must be available and remain
persistent even after
unexpected events, such as a hardware or software failure.
Storage Hardware
There are many different devices on which data can be stored. The selection
of devices to best meet
your storage needs depends primarily on three factors:
_ Performance
_ Availability
_ Cost
You can use Solaris Volume Manager to help manage the trade-offs in
performance, availability, and

cost. You can often mitigate many of the trade-offs with Solaris Volume
Manager.
Solaris Volume Manager works well with any supported storage on any
system that runs the Solaris
operating system.
2C H A P T E R 2
27
RAID Levels
RAID is an acronym for Redundant Array of Inexpensive (or Independent)
Disks. RAID refers to a
set of disks, called an array or a volume, that appears to the user as a single
large disk drive.
Depending on the configuration, this array provides improved reliability,
response time, or storage
capacity.
Technically, there are six RAID levels, 0-5. Each level refers to a method of
distributing data while
ensuring data redundancy. (RAID Level 0 does not provide data redundancy,
but is usually included
as a RAID classification anyway. RAID Level 0 provides the basis for the
majority of RAID
configurations in use.) Very few storage environments support RAID Levels 2,
3, and 4, so those
environments are not described here.
Solaris Volume Manager supports the following RAID levels:
_ RAID LEVEL 0 – Although stripes and concatenations do not provide
redundancy, these
volumes are often referred to as RAID-0. Basically, data are spread across
relatively small,
equally-sized fragments that are allocated alternately and evenly across
multiple physical disks.
Any single drive failure can cause data loss. RAID-0 offers a high data
transfer rate and high I/O

throughput, but suffers lower reliability and lower availability than a single
disk.
_ RAID Level 1 – Mirroring uses equal amounts of disk capacity to store data
and a copy (mirror)
of the data. Data is duplicated, or mirrored, over two or more physical disks.
Data can be read
from both drives simultaneously, meaning that either drive can service any
request, which
provides improved performance. If one physical disk fails, you can continue to
use the mirror
with no loss in performance or loss of data.
Solaris Volume Manager supports both RAID-0+1 and (transparently) RAID-
1+0 mirroring,
depending on the underlying volumes. See “Providing RAID-1+0 and RAID-
0+1” on page 95
for details.
_ RAID Level 5 – RAID-5 uses striping to spread the data over the disks in an
array. RAID-5 also
records parity information to provide some data redundancy.ARAID-5 volume
can withstand
the failure of an underlying device without failing. If a RAID-5 volume is used
in conjunction
with hot spares, the volume can withstand multiple failures without
failing.ARAID-5 volume
will have a substantial performance degradation when operating with a failed
device.
In the RAID-5 model, every device has one area that contains a parity stripe
and other areas that
contain data. The parity is spread over all of the disks in the array, which
reduces the write time.
Write time is reduced because writes do not have to wait until a dedicated
parity disk can accept
the data.
Introduction to Storage Management

28 Solaris VolumeManagerAdministration Guide • June 2006
Configuration Planning Guidelines
When you are planning your storage management configuration, keep in mind
that for any given
configuration, there are trade-offs in performance, availability, and hardware
costs. You might need
to experiment with the different variables to determine what works best for
your configuration.
This section provides guidelines for working with the following types of
volumes:
_ RAID-0 (concatenation and stripe) volumes
_ RAID-1 (mirror) volumes
_ RAID-5 volumes
_ Soft partitions
_ File systems that are constructed on Solaris Volume Manager volumes
Choosing Storage
Before you implement your storage management approach, you need to
decide what kinds of storage
devices to use. This set of guidelines compares the various types of storage
to help you choose.
Additional sets of guidelines apply to specific types of storage as implemented
in Solaris Volume
Manager. See specific chapters about each volume type for details.
Note – The types of storage that are listed here are not mutually exclusive.
You can use these volumes
in combination to meet multiple goals. For example, you could first create a
RAID-1 volume for
redundancy. Next, you could create soft partitions on that RAID-1 volume to
increase the possible
number of discrete file systems.
The following table provides a comparison between the features available for
each type of storage.
TABLE 2–1 Comparison of Types of Storage
Requirements

RAID-0
(Concatenation) RAID-0 (Stripe) RAID-1 (Mirror) RAID-5 Soft Partitions
Redundant data No No Yes Yes No
Improved read
performance
No Yes Depends on
underlying
device
Yes No
Improved write
performance
No Yes No No No
More than 8
slices per device
No No No No Yes
Larger available
storage space
Yes Yes No Yes No
Configuration Planning Guidelines
Chapter 2• Storage Management Concepts 29
The following table outlines the trade-offs in write operations, random reads,
and hardware costs
between RAID-1 and RAID–5 volumes.
TABLE 2–2 Optimizing Redundant Storage
RAID-1 (Mirror) RAID-5
Write operations Faster Slower
Random read Faster Slower
Hardware cost Higher Lower
The following list summarizes the information outlined in the tables:
_ RAID-0 volumes (stripes and concatenations) and soft partitions do not
provide any redundancy
of data.
_ Concatenation works well for small random I/O operations.
_ Striping performs well for large sequential I/O operations and for random I/O
operations.
_ Mirroring might improve read performance, but write performance is always
degraded in
mirrors.
_ Because of the read-modify-write nature of RAID-5 volumes, volumes with
over 20 percent
writes should not be RAID-5. If redundancy is required, consider mirroring.
_ RAID-5 writes cannot be as fast as mirrored writes, which in turn cannot be
as fast as
unprotected writes.
_ Soft partitions are useful for managing very large storage devices.
Note – In addition to these generic storage options, see “Hot Spare Pools” on
page 42 for more
information about using Solaris Volume Manager to support redundant
devices.
General Performance Guidelines
When you design your storage configuration, consider the following
performance guidelines:
_ Striping generally has the best performance, but striping offers no data
redundancy. For
write-intensive applications, RAID-1 volumes generally have better
performance than RAID-5
volumes.
_ RAID-1 and RAID-5 volumes both increase data availability, but both types
of volumes generally
have lower performance for write operations. Mirroring does improve random
read
performance.
_ RAID-5 volumes have a lower hardware cost than RAID-1 volumes, while
RAID-0 volumes have
no additional hardware cost.
General Performance Guidelines
30 Solaris VolumeManagerAdministration Guide • June 2006

_ Both stripes and RAID-5 volumes distribute data across multiple disk drives
and help balance the
I/O load.
_ Identify the most frequently accessed data, and increase access bandwidth
to that data with
mirroring or striping.
_ Use available performance monitoring capabilities and generic tools such as
the iostat
command to identify the most frequently accessed data. Once identified, the
access bandwidth to
this data can be increased using striping, RAID-1 volumes or RAID-5
volumes.
_ The performance of soft partitions can degrade when the soft partition size
is changed multiple
times.
_ RAID-5 volume performance is lower than stripe performance for write
operations. This
performance penalty results from the multiple I/O operations required to
calculate and store the
RAID-5 volume parity.
_ For raw random I/O reads, the stripe and the RAID-5 volume are
comparable. Both the stripe
and RAID-5 volumes split the data across multiple disks. RAID-5 volume
parity calculations are
not a factor in reads except after a slice failure.
_ For raw random I/O writes, the stripe is superior to RAID-5 volumes.
For configuration guidelines specific to Solaris Volume Manager, see “Solaris
Volume Manager
Configuration Guidelines” on page 43.
Random I/O and Sequential I/O Optimization
This section explains strategies for optimizing your configuration.
If you do not know if sequential I/O or random I/O predominates on the Solaris
Volume Manager

volumes you are creating, do not implement these performance tuning tips.
These tips can degrade
performance if the tips are improperly implemented.
The following optimization suggestions assume that you are optimizing a
RAID-0 volume. In
general, you would want to optimize a RAID-0 volume, then mirror that
volume to provide both
optimal performance and data redundancy.
Random I/O
In a random I/O environment, such as an environment used for databases
and general-purpose file
servers, all disks should spend equal amounts of time servicing I/O requests.
For example, assume that you have 40 Gbytes of storage for a database
application. If you stripe
across four 10 Gbyte disk spindles, and if the I/O is random and evenly
dispersed across the volume,
then each of the disks will be equally busy, which generally improves
performance.
The target for maximum random I/O performance on a disk is 35 percent or
lower usage, as reported
by the iostat command. Disk use in excess of 65 percent on a typical basis is
a problem. Disk use in
Random I/O and Sequential I/O Optimization
Chapter 2• Storage Management Concepts 31
excess of 90 percent is a significant problem. The solution to having disk use
values that are too high
is to create a new RAID-0 volume with more disks (spindles).
Note – Simply attaching additional disks to an existing volume cannot improve
performance.You
must create a new volume with the ideal parameters to optimize performance.
The interlace size of the stripe does not matter because you just want to
spread the data across all the
disks. Any interlace value greater than the typical I/O request will suffice.
Sequential Access I/O

You can optimize the performance of your configuration in a sequential I/O
environment, such as
DBMS servers that are dominated by full table scans and NFS servers in very
data-intensive
environments. To take advantage of a sequential I/O environment, set the
interlace value low relative
to the size of the typical I/O request.
For example, assume a typical I/O request size of 256 Kbytes and striping
across 4 spindles.Agood
choice for the stripe unit size in this example would be:
256 Kbytes / 4 = 64 Kbytes, or smaller
This strategy ensures that the typical I/O request is spread across multiple
disk spindles, thus
increasing the sequential bandwidth.
Note – Seek time and rotation time are practically zero in the sequential I/O
environment. When you
optimize sequential I/O, the internal transfer rate of a disk is most important.
In sequential applications, the typical I/O size is usually large, meaning more
than 128Kbytes or even
more than 1 Mbyte. Assume an application with a typical I/O request size of 2
Mbytes and assume
striping across 4 disk spindles, thus:
2048Kbyte s / 4 = 512 Kbytes
So, a good choice for the interlace size would be 256–512 Kbytes.
Random I/O and Sequential I/O Optimization
32 Solaris VolumeManagerAdministration Guide • June 2006
Solaris Volume Manager Overview
This chapter explains the overall structure of Solaris Volume Manager. This
chapter contains the
following information:
_ “What’s New in Solaris Volume Manager” on page 33
_ “Introduction to Solaris Volume Manager” on page 34
_ “Solaris Volume Manager Requirements” on page 36
_ “Overview of Solaris Volume Manager Components” on page 37

_ “Solaris Volume Manager Configuration Guidelines” on page 43
_ “Overview of Creating Solaris Volume Manager Components” on page 44
_ “Overview of Multi-Terabyte Support in Solaris Volume Manager” on page
44
_ “Upgrading to Solaris Volume Manager” on page 46
What’sNewin Solaris Volume Manager
This section describes new features for working with Solaris Volume Manager
in this Solaris release.
For a complete listing of new Solaris features and a description of Solaris
releases, see What’s New in
Solaris Express.
Support for Descriptive Names
Solaris Express 4/06: Solaris Volume Manager has been enhanced to
include the use of descriptive
names for both volumes and hot spare pools. System administrators can now
name volumes and hot
spare pools by using any name that follows the naming guidelines.
Anew option has been added to the metastat command to assist in identifying
volumes and hot
spare pools with descriptive names. The metastat -D command lists all of the
volumes and hot spare
pools with descriptive names. This information is useful if it becomes
necessary to move your storage
to a previous release of the Solaris OS that does not support the use of
descriptive names.
For more information, see “Volume Names” on page 40.
3C H A P T E R 3
33
Introduction to Solaris Volume Manager
Solaris Volume Manager is a software product that lets you manage large
numbers of disks and the
data on those disks. Although there are many ways to use Solaris Volume
Manager, most tasks
include the following:

_ Increasing storage capacity
_ Increasing data availability
_ Easing administration of large storage devices
In some instances, Solaris Volume Manager can also improve I/O
performance.
For information on the types of disks supported in the Solaris operating
system, see Chapter 11,
“Managing Disks (Overview),” in System Administration Guide: Devices and
File Systems.
HowSolaris Volume Manager Manages Storage
Solaris Volume Manager uses virtual disks to manage physical disks and their
associated data. In
Solaris Volume Manager, a virtual disk is called a volume. For historical
reasons, some command-line
utilities also refer to a volume as a metadevice.
From the perspective of an application or a file system, a volume is
functionally identical to a physical
disk. Solaris Volume Manager converts I/O requests directed at a volume into
I/O requests to the
underlying member disks.
Solaris Volume Manager volumes are built from disk slices or from other
Solaris Volume Manager
volumes.An easy way to build volumes is to use the graphical user interface
(GUI) that is built into
the Solaris Management Console. The Enhanced Storage tool within the
Solaris Management
Console presents you with a view of all the existing volumes. By following the
steps in wizards, you
can easily build any kind of Solaris Volume Manager volume or component.
You can also build and
modify volumes by using Solaris Volume Manager command-line utilities.
For example, if you need more storage capacity as a single volume, you could
use Solaris Volume

Manager to make the system treat a collection of slices as one larger volume.
After you create a
volume from these slices, you can immediately begin using the volume just as
you would use any
“real” slice or device.
For a more detailed discussion of volumes, see “Overview of Volumes” on
page 37.
Solaris Volume Manager can increase the reliability and availability of data by
using RAID-1 (mirror)
volumes and RAID-5 volumes. Solaris Volume Manager hot spares can
provide another level of data
availability for mirrors and RAID-5 volumes.
Once you have set up your configuration, you can use the Enhanced Storage
tool within the Solaris
Management Console to report on its operation.
Introduction to Solaris Volume Manager
34 Solaris VolumeManagerAdministration Guide • June 2006
HowtoAdminister Solaris Volume Manager
Use either of these methods to administer Solaris Volume Manager:
_ Solaris Management Console – This tool provides a GUI to administer
volume management
functions. Use the Enhanced Storage tool within the Solaris Management
Console. See Figure
3–1 for an example of the Enhanced Storage tool. This interface provides a
graphical view of
Solaris Volume Manager components, including volumes, hot spare pools,
and state database
replicas. This interface offers wizard-based manipulation of Solaris Volume
Manager
components, enabling you to quickly configure your disks or change an
existing configuration.
_ The command line – You can use several commands to perform volume
management functions.

The Solaris Volume Manager core commands begin with meta, for example
the metainit and
metastat commands. For a list of Solaris Volume Manager commands, see
Appendix B.
Note – Do not attempt to administer Solaris Volume Manager with the
command line and the GUI at
the same time. Conflicting changes could be made to the configuration, and
its behavior would be
unpredictable. You can use both tools to administer Solaris Volume Manager,
but not concurrently.
FIGURE 3–1View of the Enhanced Storage Tool (SolarisVolume Manager) in
the Solaris Management Console
How to Administer Solaris Volume Manager
Chapter 3 • Solaris Volume Manager Overview 35
_ Howto Access the Solaris Volume Manager Graphical
User Interface (GUI)
The Solaris Volume Manager GUI (Enhanced Storage) is part of the Solaris
Management Console.
To access the GUI, use the following instructions:
Start the Solaris Management Console on the host system by using the
following command:
% /usr/sbin/smc
Double-click This Computer in the Navigation pane.
Double-click Storage in the Navigation pane.
Double-click Enhanced Storage in the Navigation pane to load the
Solaris Volume Manager tools.
If prompted to log in, log in as root or as a user who has equivalent
access.
Double-click the appropriate icon to manage volumes, hot spare pools,
state database replicas, and
disk sets.
Tip– All tools in the Solaris Management Console display information in the
bottom section of the

console window or at the left side of a wizard panel. Choose Help at any time
to find additional
information about performing tasks in this interface.
Solaris Volume Manager Requirements
Solaris Volume Manager requirements include the following:
_ You must have root privilege to administer Solaris Volume Manager.
Equivalent privileges
granted through the User Profile feature in the Solaris Management Console
allow
administration through the Solaris Management Console. However, only the
root user can use
the Solaris Volume Manager command-line interface.
_ Before you can create volumes with Solaris Volume Manager, state
database replicas must exist
on the Solaris Volume Manager system.Astate database replica contains
configuration and status
information for all volumes, hot spares, and disk sets. At least three replicas
should exist, and the
replicas should be placed on different controllers and different disks for
maximum reliability. See
“About the Solaris Volume Manager State Database and Replicas” on page
61 for more
information about state database replicas. See “Creating State Database
Replicas” on page 68 for
instructions on how to create state database replicas.
1
2
3
4
5
6
Solaris Volume Manager Requirements
36 Solaris VolumeManagerAdministration Guide • June 2006
Overview of Solaris Volume Manager Components

The five basic types of components that you create with Solaris Volume
Manager are volumes, soft
partitions, disk sets, state database replicas, and hot spare pools. The
following table gives an
overview of these Solaris Volume Manager features.
TABLE 3–1 Summary of SolarisVolume Manager Features
Solaris Volume Manager Feature Definition Purpose For More
Information
_ RAID-0 volume (stripe,
concatenation,
concatenated stripe)
_ RAID-1 (mirror) volume
_ RAID-5 volume
Agroup of physical slices that
appear to the system as a single,
logical device
To increase storage capacity,
performance, or data
availability.
“Overview of Volumes”
on page 37
Soft partition Asubdivision of physical slices
or logical volumes to provide
smaller, more manageable
storage units
To improve manageability of
large storage volumes.
Chapter 12
State database (state database
replicas)
Adatabase that contains
configuration and status
information for all volumes, hot
spares, and disk sets. Solaris

Volume Manager cannot
operate until you have created
the state database replicas.
To store information about the
state of your Solaris Volume
Manager configuration
“State Database and State
Database Replicas” on page 42
Hot spare pool Acollection of slices (hot
spares) reserved. These slices
are automatically substituted
when either a submirror or
RAID-5 volume component
fails.
To increase data availability for
RAID-1 and RAID-5 volumes.
“Hot Spare Pools” on page 42
Disk set Aset of shared disk drives in a
separate namespace that
contains volumes and hot
spares and that can be shared
non-concurrently by multiple
hosts
To provide data redundancy
and data availability and to
provide a separate namespace
for easier administration.
“Disk Sets” on page 43
Overview of Volumes
Avolume is a group of physical slices that appears to the system as a single,
logical device. Volumes
are actually pseudo, or virtual, devices in standard UNIX® terms.
Overview of Solaris Volume Manager Components
Chapter 3 • Solaris Volume Manager Overview 37

Note – Historically, the Solstice DiskSuiteTM product referred to these logical
devices as metadevices.
However, for simplicity and standardization, this book refers to these devices
as volumes.
Classes of Volumes
You create a volume as a RAID-0 (concatenation or stripe) volume, a RAID-1
(mirror) volume, a
RAID-5 volume, .
You can use either the Enhanced Storage tool within the Solaris Management
Console or the
command-line utilities to create and administer volumes.
The following table summarizes the classes of volumes.
TABLE 3–2 Classes ofVolumes
Volume Description
RAID-0 (stripe or
concatenation)
Can be used directly, or as the basic building block for mirrors. RAID-0
volumes do
not directly provide data redundancy.
RAID-1 (mirror) Replicates data by maintaining multiple copies.ARAID-1
volume is composed of
one or more RAID-0 volumes that are called submirrors.
RAID-5 Replicates data by using parity information. In the case of disk failure,
the missing
data can be regenerated by using available data and the parity information.A
RAID-5 volume is generally composed of slices. One slice’s worth of space is
allocated to parity information, but the parity is distributed across all slices in
the
RAID-5 volume.
Soft partition Divides a slice or logical volume into one or more smaller,
extensible volumes.
HowVolumesAre Used
You use volumes to increase storage capacity, performance, and data
availability. In some instances,
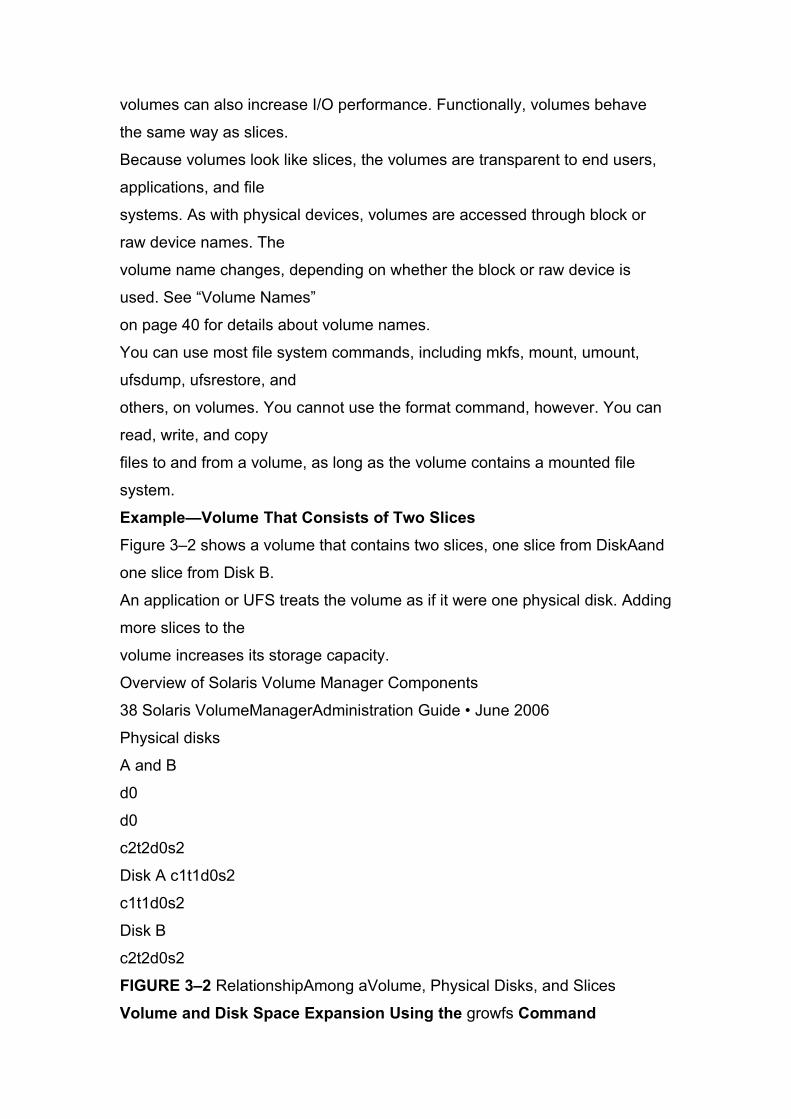
volumes can also increase I/O performance. Functionally, volumes behave
the same way as slices.
Because volumes look like slices, the volumes are transparent to end users,
applications, and file
systems. As with physical devices, volumes are accessed through block or
raw device names. The
volume name changes, depending on whether the block or raw device is
used. See “Volume Names”
on page 40 for details about volume names.
You can use most file system commands, including mkfs, mount, umount,
ufsdump, ufsrestore, and
others, on volumes. You cannot use the format command, however. You can
read, write, and copy
files to and from a volume, as long as the volume contains a mounted file
system.
Example—Volume That Consists of Two Slices
Figure 3–2 shows a volume that contains two slices, one slice from DiskAand
one slice from Disk B.
An application or UFS treats the volume as if it were one physical disk. Adding
more slices to the
volume increases its storage capacity.
Overview of Solaris Volume Manager Components
38 Solaris VolumeManagerAdministration Guide • June 2006
Physical disks
A and B
d0
d0
c2t2d0s2
Disk A c1t1d0s2
c1t1d0s2
Disk B
c2t2d0s2
FIGURE 3–2 RelationshipAmong aVolume, Physical Disks, and Slices
Volume and Disk Space Expansion Using the growfs Command

Solaris Volume Manager enables you to expand a volume by adding
additional slices. You can use
either the Enhanced Storage tool within the Solaris Management Console or
the command-line
interface to add a slice to an existing volume.
You can expand a mounted or unmounted UFS file system that is contained
within a volume without
having to halt or back up your system. Nevertheless, backing up your data is
always a good idea. After
you expand the volume, use the growfs command to grow the file system.
Note – After a file system has been expanded, the file system cannot be
reduced in size. The inability to
reduce the size of a file system is a UFS limitation. Similarly, after a Solaris
Volume Manager partition
has been increased in size, it cannot be reduced.
Applications and databases that use the raw volume must have their own
method to “grow” the
added space so that applications can recognize it. Solaris Volume Manager
does not provide this
capability.
You can expand the disk space in volumes in the following ways:
_ Adding one or more slices to a RAID-0 volume
_ Adding one or more slices to all submirrors of a RAID-1 volume
_ Adding one or more slices to a RAID-5 volume
_ Expanding a soft partition with additional space from the underlying
component
Overview of Solaris Volume Manager Components
Chapter 3 • Solaris Volume Manager Overview 39
The growfs command expands a UFS file system without loss of service or
data. However, write
access to the volume is suspended while the growfs command is running.
You can expand the file
system to the size of the slice or the volume that contains the file system.
The file system can be expanded to use only part of the additional disk space
by using the -s size
option to the growfs command.
Note – When you expand a mirror, space is added to the mirror’s underlying
submirrors. The growfs
command is then run on the RAID-1 volume. The general rule is that space is
added to the
underlying devices, and the growfs command is run on the top-level device.
Volume Names
As with physical slices, volumes have logical names that appear in the file
system. Logical volume
names have entries in the /dev/md/dsk directory for block devices and the
/dev/md/rdsk directory
for raw devices. Instead of specifying the full volume name, such as
/dev/md/dsk/volume-name, you
can often use an abbreviated volume name, such as d1, with any meta*
command. You can generally
rename a volume, as long as the volume is not currently being used and the
new name is not being
used by another volume. For more information, see “Exchanging Volume
Names” on page 221.
Originally, volume names had to begin with the letter “d” followed by a number
(for example, d0).
This format is still acceptable. The following are examples of volume names
that use the “d*” naming
construct:
/dev/md/dsk/d0 Block volume d0
/dev/md/dsk/d1 Block volume d1
/dev/md/rdsk/d126 Raw volume d126
/dev/md/rdsk/d127 Raw volume d127
Beginning with the Solaris Express 4/06 release, Solaris Volume Manager has
been enhanced to
include the use of descriptive names for naming volumes and hot spare
pools.Adescriptive name for

a volume is a name that can be composed of a combination of the following:
_ Alphanumeric characters
_ “-” (a dash)
_ “_” (an underscore)
_ “.” (a period)
Descriptive names must begin with a letter. The words “all” and “none” are
reserved and cannot be
used as names for volumes or hot spare pools. You also cannot use only a “.”
(period) or “..” (two
periods) as the entire name. Finally, you cannot create a descriptive name
that looks like a physical
disk name, such as c0t0d0s0.As noted previously, you can also continue to
use the “d*” naming
convention. The following are examples of descriptive volume names:
account_stripe_1
Overview of Solaris Volume Manager Components
40 Solaris VolumeManagerAdministration Guide • June 2006
mirror.3
d100
d-100
When descriptive names are used in disk sets, each descriptive name must
be unique within that disk
set. Hot spare pools and volumes within the same disk set cannot have the
same name. However, you
can reuse names within different disk sets. For example, if you have two disk
sets, one disk set called
admins and one disk set called managers, you can create a volume named
employee_files in each
disk set.
The functionality of the Solaris Volume Manager commands that are used to
administer volumes
with descriptive names remains unchanged. You can substitute a descriptive
name in any meta*

command where you previously used the “d*” format. For example, to create a
single-stripe volume
of one slice with the name employee_files, you would type the following
command at the
command line:
# metainit employee_files 1 1 c0t1d0s4
If you create volumes and hot spare pools using descriptive names and then
later determine that you
need to use Solaris Volume Manager under previous releases of the Solaris
OS, you must remove the
components that are defined with descriptive names. To determine if the
Solaris Volume Manager
configuration on your system contains descriptive names, you can use the -D
option of the metastat
command. The metastat -D command lists volumes and hot spare pools that
were created using
descriptive names. These components must be removed from the Solaris
Volume Manager
configuration before the remaining configuration can be used with a release
prior to the Solaris
Express 4/06 release. If these components are not removed, the Solaris
Volume Manager in these
prior Solaris releases does not start. For more information about the -D
option, see the
metastat(1M) man page. For information about removing components from a
configuration, see
“Removing RAID-1 Volumes (Unmirroring)” on page 138 and “Removing a
RAID-0 Volume”
on page 90.
Volume Name Guidelines
The use of a standard for your volume names can simplify administration and
enable you at a glance
to identify the volume type. Here are a few suggestions:

_ Use ranges for each type of volume. For example, assign numbers 0–20 for
RAID-1 volumes,
21–40 for RAID-0 volumes, and so on.
_ Use a naming relationship for mirrors. For example, name mirrors with a
number that ends in
zero (0), and submirrors that end in one (1), two (2), and so on. For example,
you might name
mirrors as follows: mirror d10, submirrors d11 and d12; mirror d20, submirrors
d21, d22, d23,
and d24. In an example using descriptive names, you could use a naming
relationship such as
employee_mirror1 for a mirror with employee_sub1 and employee_sub2
comprising the
submirrors.
_ Use a naming method that maps the slice number and disk number to
volume numbers.
Overview of Solaris Volume Manager Components
Chapter 3 • Solaris Volume Manager Overview 41
State Database and State Database Replicas
The state database is a database that stores information about the state of
your Solaris Volume
Manager configuration. The state database records and tracks changes made
to your configuration.
Solaris Volume Manager automatically updates the state database when a
configuration or state
change occurs. Creating a new volume is an example of a configuration
change.Asubmirror failure is
an example of a state change.
The state database is actually a collection of multiple, replicated database
copies. Each copy, referred
to as a state database replica, ensures that the data in the database is always
valid. Multiple copies of
the state database protect against data loss from single points-of-failure. The
state database tracks the

location and status of all known state database replicas.
Solaris Volume Manager cannot operate until you have created the state
database and its state
database replicas.ASolaris Volume Manager configuration must have an
operating state database.
When you set up your configuration, you can locate the state database
replicas on either of the
following:
_ On dedicated slices
_ On slices that will later become part of volumes
Solaris Volume Manager recognizes when a slice contains a state database
replica, and automatically
skips over the replica if the slice is used in a volume. The part of a slice
reserved for the state database
replica should not be used for any other purpose.
You can keep more than one copy of a state database on one slice. However,
you might make the
system more vulnerable to a single point-of-failure by doing so.
The Solaris operating system continues to function correctly if all state
database replicas are deleted.
However, the system loses all Solaris Volume Manager configuration data if a
reboot occurs with no
existing state database replicas on disk.
Hot Spare Pools
Ahot spare pool is a collection of slices (hot spares) reserved by Solaris
Volume Manager to be
automatically substituted for failed components. These hot spares can be
used in either a submirror
or RAID-5 volume. Hot spares provide increased data availability for RAID-1
and RAID-5 volumes.
You can create a hot spare pool with either the Enhanced Storage tool within
the Solaris Management
Console or the command-line interface.

When component errors occur, Solaris Volume Manager checks for the first
available hot spare
whose size is equal to or greater than the size of the failed component. If
found, Solaris Volume
Manager automatically replaces the component and resynchronizes the data.
If a slice of adequate
size is not found in the list of hot spares, the submirror or RAID-5 volume is
considered to have
failed. For more information, see Chapter 16.
Overview of Solaris Volume Manager Components
42 Solaris VolumeManagerAdministration Guide • June 2006
Disk Sets
Adisk set is a set of physical storage volumes that contain logical volumes
and hot spares. Volumes
and hot spare pools must be built on drives from within that disk set. Once
you have created a
volume within the disk set, you can use the volume just as you would a
physical slice.
Adisk set provides data availability in a clustered environment. If one host
fails, another host can
take over the failed host’s disk set. (This type of configuration is known as a
failover configuration.)
Additionally, disk sets can be used to help manage the Solaris Volume
Manager namespace, and to
provide ready access to network-attached storage devices.
For more information, see Chapter 18.
Solaris Volume Manager Configuration Guidelines
Apoorly designed Solaris Volume Manager configuration can degrade
performance. This section
offers tips for achieving good performance from Solaris Volume Manager. For
information on
storage configuration performance guidelines, see “General Performance
Guidelines” on page 30.
General Guidelines

_ Disk and controllers – Place drives in a volume on separate drive paths, or
for SCSI drives,
separate host adapters.An I/O load distributed over several controllers
improves volume
performance and availability.
_ System files – Never edit or remove the /etc/lvm/mddb.cf or /etc/lvm/md.cf
files.
Make sure these files are backed up regularly.
_ Volume Integrity– If a slice is defined as a volume, do not use the
underlying slice for any other
purpose, including using the slice as a dump device.
_ Information about disks and partitions – Keep a copy of output from the
prtvtoc and
metastat -p commands in case you need to reformat a bad disk or recreate
your Solaris Volume
Manager configuration.
File System Guidelines
Do not mount file systems on a volume’s underlying slice. If a slice is used for
a volume of any kind,
you must not mount that slice as a file system. If possible, unmount any
physical device that you
intend to use as a volume before you activate the volume.
Solaris Volume Manager Configuration Guidelines
Chapter 3 • Solaris Volume Manager Overview 43
Overview of Creating Solaris Volume Manager Components
When you create a Solaris Volume Manager component, you assign physical
slices to a logical Solaris
Volume Manager name, such as d0. The Solaris Volume Manager
components that you can create
include the following:
_ State database replicas
_ Volumes (RAID-0 (stripes, concatenations), RAID-1 (mirrors), RAID-5, )
_ Hot spare pools
_ Disk sets

Note – For suggestions on how to name volumes, see “Volume Names” on
page 40.
Prerequisites for Creating Solaris Volume Manager
Components
The prerequisites for creating Solaris Volume Manager components are as
follows:
_ Create initial state database replicas. If you have not done so, see “Creating
State Database
Replicas” on page 68.
_ Identify slices that are available for use by Solaris Volume Manager. If
necessary, use the format
command, the fmthard command, or the Solaris Management Console to
repartition existing
disks.
_ Make sure you have root privilege.
_ Have a current backup of all data.
_ If you are using the GUI, start the Solaris Management Console and
navigate to the Solaris
Volume Manager feature. For information, see “How to Access the Solaris
Volume Manager
Graphical User Interface (GUI)” on page 36.
Overview of Multi-Terabyte Support in Solaris Volume
Manager
Starting with the Solaris 9 4/03 release, Solaris Volume Manager supports
storage devices and logical
volumes greater than 1 terabyte (Tbyte) on systems running a 64-bit kernel.
Note – Use isainfo -v to determine if your system is running a 64-bit kernel. If
the string “64-bit”
appears, you are running a 64-bit kernel.
Solaris Volume Manager allows you to do the following:
Overview of Creating Solaris Volume Manager Components
44 Solaris VolumeManagerAdministration Guide • June 2006
_ Create, modify, and delete logical volumes built on or from logical storage
units (LUNs) greater

than 1 Tbyte in size.
_ Create, modify, and delete logical volumes that exceed 1 Tbyte in size.
Support for large volumes is automatic. If a device greater than 1 Tbyte is
created, Solaris Volume
Manager configures it appropriately and without user intervention.
Large Volume Support Limitations
Solaris Volume Manager only supports large volumes (greater than 1 Tbyte)
on the Solaris 9 4/03 or
later release when running a 64-bit kernel. Running a system with large
volumes under 32-bit kernel
on previous Solaris 9 releases will affect Solaris Volume Manager
functionality. Specifically, note the
following:
_ If a system with large volumes is rebooted under a 32-bit Solaris 9 4/03 or
later kernel, the large
volumes will be visible through metastat output, but they cannot be accessed,
modified or
deleted. In addition, new large volumes cannot be created. Any volumes or
file systems on a large
volume will also be unavailable.
_ If a system with large volumes is rebooted under a Solaris release prior to
Solaris 9 4/03, Solaris
Volume Manager will not start. All large volumes must be removed before
Solaris Volume
Manager will run under another version of the Solaris platform.
Caution – Do not create large volumes if you expect to run the Solaris
software with a 32-bit kernel or
if you expect to use a version of the Solaris OS prior to the Solaris 9 4/03
release.
Using Large Volumes
All Solaris Volume Manager commands work with large volumes. No syntax
differences or special
tasks are required to take advantage of large volume support. Thus, system
administrators who are

familiar with Solaris Volume Manager can immediately work with Solaris
Volume Manager large
volumes.
Tip– If you create large volumes, then later determine that you need to use
Solaris Volume Manager
under previous releases of Solaris or that you need to run under the 32-bit
Solaris 9 4/03 or later
kernel, you will need to remove the large volumes. Use the metaclear
command under the 64-bit
kernel to remove the large volumes from your Solaris Volume Manager
configuration before
rebooting under previous Solaris release or under a 32-bit kernel.
Overview of Multi-Terabyte Support in Solaris Volume Manager
Chapter 3 • Solaris Volume Manager Overview 45
Upgrading to Solaris Volume Manager
Solaris Volume Manager fully supports seamless upgrade from Solstice
DiskSuite versions 4.1, 4.2,
and 4.2.1. Make sure that all volumes are in Okay state (not “Needs
Maintenance” or “Last Erred”)
and that no hot spares are in use. You do not need to do anything else special
to Solaris Volume
Manager for the upgrade to work—it is not necessary to change the
configuration or break down the
root mirror. When you upgrade your system, the Solstice DiskSuite
configuration will be brought
forward and will be accessible after upgrade through Solaris Volume Manager
tools.
The Solaris 10 OS introduced the Service Management Facility (SMF), which
provides an
infrastructure that augments the traditional UNIX start-up scripts, init run
levels, and
configuration files. When upgrading from a previous version of the Solaris OS,
verify that the SMF

services associated with Solaris Volume Manager are online. If the SMF
services are not online, you
might encounter problems when administering Solaris Volume Manager.
To check the SMF services associated with Solaris Volume Manager, use the
following form of the
svcs command:
# svcs -a |egrep "md|meta"
disabled 12:05:45 svc:/network/rpc/mdcomm:default
disabled 12:05:45 svc:/network/rpc/metamed:default
disabled 12:05:45 svc:/network/rpc/metamh:default
online 12:05:39 svc:/system/metainit:default
online 12:05:46 svc:/network/rpc/meta:default
online 12:05:48 svc:/system/fmd:default
online 12:05:51 svc:/system/mdmonitor:default
If the Solaris Volume Manager configuration consists of a local set only, then
these services should be
online:
svc:/system/metainit
svc:/network/rpc/meta
svc:/system/mdmonitor
If the Solaris Volume Manager configuration includes disk sets, then these
additional services should
be online:
svc:/network/rpc/metamed
svc:/network/rpc/metamh
If the Solaris Volume Manager includes multi-node disk sets, then this service
should be online in
addition to the other services already mentioned:
svc:/network/rpc/mdcomm
Upgrading to Solaris Volume Manager
46 Solaris VolumeManagerAdministration Guide • June 2006
For more information on SMF, see Chapter 14, “Managing Services
(Overview),” in System
Administration Guide: Basic Administration.

Upgrading to Solaris Volume Manager
Chapter 3 • Solaris Volume Manager Overview 47
48
Solaris Volume Manager for Sun Cluster
(Overview)
This chapter provides an overview of Solaris Volume Manager for Sun
Cluster.
This chapter includes the following information:
_ “Introduction to Solaris Volume Manager for Sun Cluster” on page 49
_ “Multi-Owner Disk Set Concepts” on page 51
_ “Solaris Volume Manager for Sun Cluster Configuration” on page 53
_ “RAID–1 (Mirror) Volumes in Multi-Owner Disk Sets” on page 54
Introduction to Solaris Volume Manager for Sun Cluster
Starting with the Solaris 9 9/04 release, Solaris Volume Manager can manage
storage in a Sun Cluster
environment using multi-owner disk sets. Multi-owner disk sets allow multiple
nodes to share
ownership of a disk set and to simultaneously write to the shared disks.
Previously, shared disk sets
were visible from all participating hosts in the disk set, but only one host could
access it at a time.
Multi-owner disk sets work with Sun Cluster and with applications such as
Oracle Real Application
Clusters.
Multi-owner disk sets and Solaris Volume Manager shared disk sets can
coexist on the same node.
However, moving disk sets between the two configurations is not supported.
Note – Solaris Volume Manager for Sun Cluster device id support for multi-
owner disk sets is not
available. Therefore, importing multi-owner disk sets from one system to
another is not supported at
this time.
Solaris Volume Manager for Sun Cluster creates the same components that
you can create with

Solaris Volume Manager, including stripes, concatenations, mirrors, soft
partitions, and hot spares.
Solaris Volume Manager for Sun Cluster does not support RAID-5 volumes
and transactional
volumes.
The following figure shows the association between the software and the
shared storage in a typical
cluster configuration.
4C H A P T E R 4
49
Switch
Node 2
Applications
Solaris
Oracle RAC
SunCluster
Node 3
Applications
Solaris
Oracle RAC
SunCluster
Node 1
Applications
Solaris
Oracle RAC
SunCluster
FIGURE 4–1 Sample Cluster Configuration
Each node has local storage as well as at least one path to shared storage.
The multi-owner disk sets in
the cluster are managed by Solaris Volume Manager for Sun Cluster, which is
part of the Solaris
Operating System (Solaris OS).
Prerequisite: Required Software Components for
Multi-Owner Disk Set Functionality

To use Solaris Volume Manager for Sun Cluster, the following software must
be installed in addition
to the Solaris OS:
_ Sun Cluster initial cluster framework
_ Sun Cluster Support for Oracle Real Application Clusters software
_ Oracle Real Application Clusters software
Note – For information on setting up Sun Cluster and Oracle Real Application
Clusters software, see
Sun Cluster Software Installation Guide for Solaris OS and Sun Cluster Data
Service for Oracle RAC
Guide for Solaris OS.
Introduction to Solaris Volume Manager for Sun Cluster
50 Solaris VolumeManagerAdministration Guide • June 2006
Multi-Owner Disk Set Concepts
The storage managed by Solaris Volume Manager for Sun Cluster is grouped
into multi-owner disk
sets. Multi-owner disk sets allow multiple nodes to share ownership of a disk
set and to
simultaneously write to the shared disks.An instance of an application such as
Oracle Real
Application Clusters runs on each node in the cluster, so multi-owner disk sets
provide scalability.
Since each instance of the application directly accesses the shared storage,
multi-owner disk sets also
enhance the performance of the application.
Note – Multi-owner disk set functionality is enabled only in a Sun Cluster
environment. Nodes are the
physical machines that are part of a Sun Cluster system.
Each multi-owner disk set is associated with a list of nodes. These nodes
share ownership of the disk
set. The following metaset -s disk-set command shows the output for a multi-
owner disk set.
# metaset -s blue
Multi-owner Set name = blue, Set number = 1, Master = nodeone

Host Owner Member
nodeone multi-owner Yes
nodetwo multi-owner Yes
Drive Dbase
d9 Yes
d13 Yes
This output shows nodeone and nodetwo in the list of nodes that share
ownership of the disk set.
Additionally, nodeone is designated as the master node.
Each multi-owner disk set has a master node. After a disk set is created, the
node that adds the first
disk to the disk set becomes the master node of the disk set. The master
node creates, deletes, and
updates the state database replicas in the disk set.
Note – For more information on state database replicas, see Chapter 6.
Solaris Volume Manager for Sun Cluster can support disk sets with different,
yet overlapping, node
lists. Because each disk set has a master node, multiple masters can exist
simultaneously on the same
cluster.
The following output from the metaset command shows that nodeone
becomes the master node
when the first disk is added to the disk set.
Multi-Owner Disk Set Concepts
Chapter 4 • Solaris Volume Manager for Sun Cluster (Overview) 51
nodeone# metaset -s red
Multi-owner Set name = red, Set number = 1, Master =
Host Owner Member
nodeone Yes
nodetwo Yes
nodeone# metaset -s red -a /dev/did/dsk/d9
nodeone# metaset -s red
Multi-owner Set name = red, Set number = 1, Master = nodeone
Host Owner Member

nodeone multi-owner Yes
nodetwo multi-owner Yes
Drive Dbase
d9 Yes
Solaris Volume Manager for Sun Cluster can support disk sets with different,
yet overlapping, node
lists. Because each disk set has a master node, multiple masters can exist
simultaneously on the same
cluster.
Tasks AssociatedWith Multi-Owner Disk Sets
Caution – Before configuring multi-owner disk sets, you must have the
following software installed, in
addition to the Solaris OS:
_ Sun Cluster initial cluster framework
_ Sun Cluster Support for Oracle Real Application Clusters software
_ Oracle Real Application Clusters software
For information on setting up Sun Cluster and Oracle Real Application
Clusters software, see Sun
Cluster Software Installation Guide for Solaris OS and Sun Cluster Data
Service for Oracle RAC Guide
for Solaris OS.
Solaris Volume Manager for Sun Cluster generally uses the same set of
Solaris Volume Manager
commands to perform tasks associated with disk sets. Some command
options unique to
multi-owner disk sets have been added to the metaset command. For
example, the task to create a
multi-owner disk set requires the -M to the metaset command. The following
output shows you how
to create a multi-owner disk set using the metaset -s diskset-name -a -M -h
hostname command.
# metaset -s red -a -M -h nodeone
# metaset
Multi-owner Set name = red, Set number = 1, Master =

Multi-Owner Disk Set Concepts
52 Solaris VolumeManagerAdministration Guide • June 2006
Host Owner Member
nodeone Yes
In addition, some of the metaset command options, such as the commands to
take and release disk
sets, are not used with multi-owner disk sets. For more information, see the
metaset(1M) man page.
Another example of how tasks differ in a Sun Cluster environment occurs
when working with disks.
Sun Cluster assigns each disk a unique device ID (DID) number. Rather than
using the cntndn
format to identify a disk, use the Sun Cluster DID path name, /dev/did/dsk/dN.
The variable N is
the device number assigned by Sun Cluster.
The following output shows you how to add a disk to a multi-owner disk set
using the metaset -s
diskset-name -a disk-name command and the Sun Cluster DID path name to
identify the disk.
nodeone# metaset -s red
Multi-owner Set name = red
Multi-owner Set name = red, Set number = 1, Master =
Host Owner Member
nodeone Yes
nodetwo Yes
nodeone# metaset -s red -a /dev/did/dsk/d13
nodeone# metaset -s red
Multi-owner Set name = red, Set number = 1, Master = nodeone
Host Owner Member
nodeone multi-owner Yes
Drive Dbase
d13 Yes
For information on creating multi-owner disk sets for the Oracle Real
Application Clusters, see

“Creating a Multi-Owner Disk Set in Solaris Volume Manager for Sun Cluster
for the Oracle RAC
Database” in Sun Cluster Data Service for Oracle RAC Guide for Solaris OS.
For tasks that are associated with disk sets, see Chapter 19.
Solaris Volume Manager for Sun Cluster Configuration
Solaris Volume Manager for Sun Cluster supports the following configuration:
_ Solaris Volume Manager for Sun Cluster supports up to 32 disk sets. These
disk sets can include
any combination of multi-owner disk sets, shared disk sets, and the local disk
set.
Solaris Volume Manager for Sun Cluster Configuration
Chapter 4 • Solaris Volume Manager for Sun Cluster (Overview) 53
Note – For more information on different types of disk sets, see “Types of
Disk Sets” on page 186.
_ Each multi-owner disk set supports a maximum of 8192 volumes per disk
set.
_ The default size for a state database replica is 16 Mbytes. The minimum
size is 16 Mbytes. The
maximum size is 256 Mbytes.
Many of the extension properties for Sun Cluster Support for Oracle Real
Application Clusters
specify timeouts for steps in reconfiguration processes. For further information
about setting
timeouts, refer to “Tuning Sun Cluster Support for Oracle RAC” in Sun Cluster
Data Service for
Oracle RAC Guide for Solaris OS.
RAID–1 (Mirror) Volumes in Multi-Owner Disk Sets
ARAID–1 volume, or mirror, created in a multi-owner disk set functions
identically to a RAID-1
volume in a Solaris Volume Manager shared disk set. However, RAID-1
volumes in multi-owner disk
sets have some additional features.
Mirror OwnershipWith Multi-Owner Disk Sets

The concept of mirror ownership is unique to multi-owner disk sets. Unlike a
RAID-1 volume in a
Solaris Volume Manager shared disk set, a RAID-1 volume in a multi-owner
disk set usually has an
owner associated with it. The ownership of the mirror volume is chosen by the
volume manager. The
owner of the volume is one of the nodes designated in the node list for the
disk set. Only the owner of
the RAID-1 volume can write to the volume. If a non-owner node wants to
write to the volume, the
ownership switches to the node doing the write operation. The following
output from the metastat
-s diskset-name command shows nodeone as the owner of the RAID-1
volume, d24.
# metastat -s red
red/d24: Mirror
Submirror 0: red/d20
State: Okay
Submirror 1: red/d21
State: Okay
Pass: 1
Read option: roundrobin (default)
Write option: parallel (default)
Resync option: optimizedresync
Owner: nodeone
Size: 825930 blocks (403 MB)
RAID–1 (Mirror) Volumes in Multi-Owner Disk Sets
54 Solaris VolumeManagerAdministration Guide • June 2006
Data Management and Recovery Processes
As with RAID-1 volumes in Solaris Volume Manager, RAID-1 volumes in
Solaris Volume Manager
for Sun Cluster perform operations to ensure consistent data. Solaris Volume
Manager for Sun

Cluster provides RAID-1 volumes with two options for data management and
recovery.
Optimized Resynchronization for Solaris Volume Manager for Sun
Cluster
Optimized resynchronization in Solaris Volume Manager for Sun Cluster
functions identically to
optimized resynchronization in Solaris Volume Manager. However, in a multi-
owner disk set, a
RAID-1 volume with the resynchronization option set to optimized
resynchronization always has a
mirror owner. The following output from the metastat -s diskset-name
command shows the
resynchronization option set to optimizedresync (for optimized
resynchronization).
# metastat -s red
red/d24: Mirror
Submirror 0: red/d20
State: Okay
Submirror 1: red/d21
State: Okay
Pass: 1
Read option: roundrobin (default)
Write option: parallel (default)
Resync option: optimizedresync
Owner: nodeone
Size: 825930 blocks (403 MB)
For more information on optimized resynchronization, see “Optimized
Resynchronization” on page
96.
Application-Based Recovery and Directed Mirror Reads
To optimize data recovery in Solaris Volume Manager for Sun Cluster,
applications such as Oracle
Real Application Clusters require the ability to manage and control the
recovery of data. Enabling an

application to control the recovery improves the performance of the recovery.
The ioctls
DKIOGETVOLCAP, DKIOSETVOLCAP, and DKIODMR provide support for
an application’s data
management recovery in a cluster environment. These ioctls provide an
application with the
following capabilities:
_ Application Based Recovery (ABR)—Allows the application to control the
recovery of data on
mirrored volumes
_ Directed Mirror Reads—Allows the application to direct reads to specific
submirrors and to
determine the state of the data
For more information on the ioctls used with application-based data
management recovery, see the
dkio(7I) man page.
RAID–1 (Mirror) Volumes in Multi-Owner Disk Sets
Chapter 4 • Solaris Volume Manager for Sun Cluster (Overview) 55
ARAID-1 volume with the resynchronization option set to application-based
recovery only has a
mirror owner during the application-based recovery process. The following
output from the
metastat -s diskset-name command shows a RAID-1 volume in a normal
state. The
resynchronization option is set to application-based recovery. There is no
mirror owner.
# metastat -s red
red/d24: Mirror
Submirror 0: red/d20
State: Okay
Submirror 1: red/d21
State: Okay
Pass: 1
Read option: roundrobin (default)

Write option: parallel (default)
Resync option: application based
Owner: None
Size: 825930 blocks (403 MB)
RAID–1 (Mirror) Volumes in Multi-Owner Disk Sets
56 Solaris VolumeManagerAdministration Guide • June 2006
Configuring and Using Solaris Volume Manager
(Scenario)
Throughout the Solaris Volume Manager Administration Guide, the examples
generally relate to a
single storage configuration, whenever that is possible. This chapter
describes the scenario used in
the examples. The chapter provides details about the initial storage
configuration that is used in
subsequent chapters.
This chapter contains the following information:
_ “Scenario Background Information” on page 57
_ “Final Solaris Volume Manager Configuration” on page 58
Scenario Background Information
Throughout this book, the scenarios and many of the examples relate to a
single configuration.
Although this configuration is small (to simplify the documentation), the
conceptsl scale to much
larger storage environments.
Hardware Configuration
The hardware system is configured as follows:
_ There are three physically separate controllers (c0 – IDE, c1 – SCSI, and c2
– SCSI).
_ Each SCSI controller connects to a MultiPack that contains six internal 9-
Gbyte disks (c1t1
through c1t6 and c2t1 through c2t6). This creates a mirror configuration.
_ Each controller/terminator pair (cntn) has 8.49 Gbytes of usable storage
space.
_ Storage space on the root (/) drive c0t0d0 is split into six partitions.
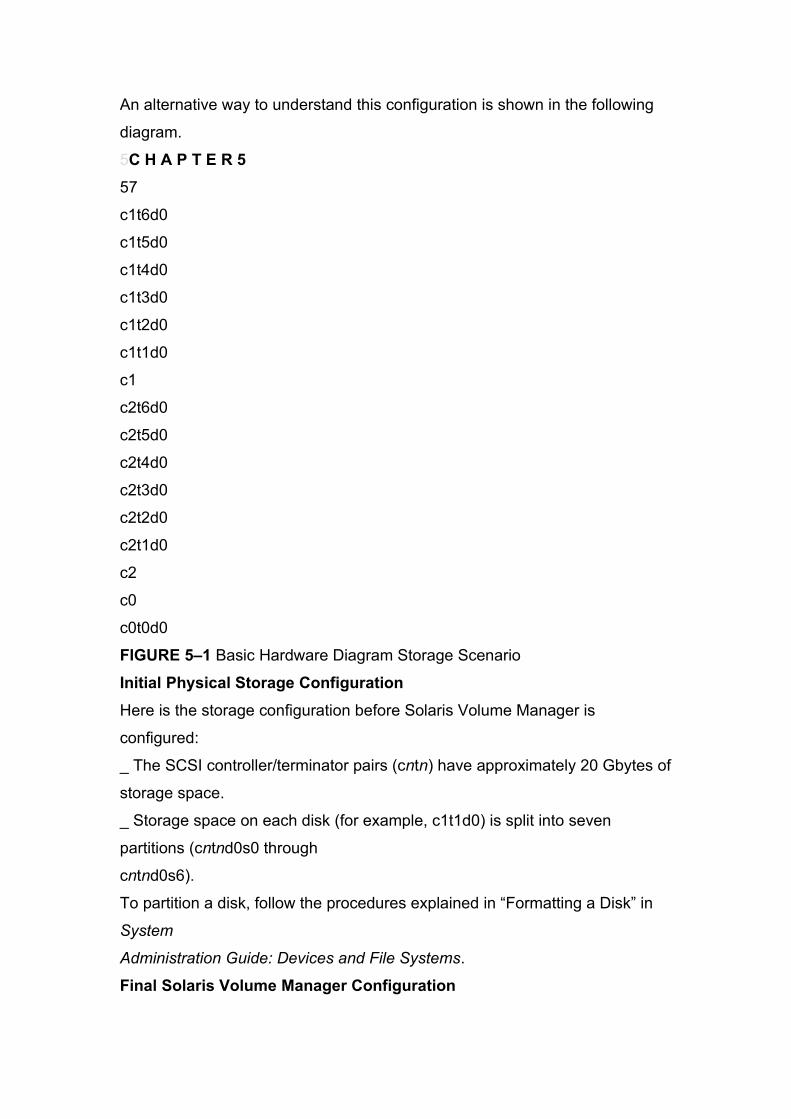
An alternative way to understand this configuration is shown in the following
diagram.
5C H A P T E R 5
57
c1t6d0
c1t5d0
c1t4d0
c1t3d0
c1t2d0
c1t1d0
c1
c2t6d0
c2t5d0
c2t4d0
c2t3d0
c2t2d0
c2t1d0
c2
c0
c0t0d0
FIGURE 5–1 Basic Hardware Diagram Storage Scenario
Initial Physical Storage Configuration
Here is the storage configuration before Solaris Volume Manager is
configured:
_ The SCSI controller/terminator pairs (cntn) have approximately 20 Gbytes of
storage space.
_ Storage space on each disk (for example, c1t1d0) is split into seven
partitions (cntnd0s0 through
cntnd0s6).
To partition a disk, follow the procedures explained in “Formatting a Disk” in
System
Administration Guide: Devices and File Systems.
Final Solaris Volume Manager Configuration

Throughout this book, specific scenarios are provided with specific tasks.
However, so that you can
better understand the examples throughout the book, the final configuration is
approximately as
follows, as displayed by the metastat -p command:
[root@lexicon:/]$ metastat -p
d50 -r c1t4d0s5 c1t5d0s5 c2t4d0s5 c2t5d0s5 c1t1d0s5 c2t1d0s5 -k -i 32b
d1 1 1 c1t2d0s3
d2 1 1 c2t2d0s3
Final Solaris Volume Manager Configuration
58 Solaris VolumeManagerAdministration Guide • June 2006
d12 1 1 c1t1d0s0
d13 1 1 c2t1d0s0
d16 1 1 c1t1d0s1
d17 1 1 c2t1d0s1
d25 2 2 c1t1d0s3 c2t1d0s3 -i 32b \
1 c0t0d0s3
d31 1 2 c1t4d0s4 c2t4d0s4 -i 8192b
d80 -p d70 -o 1 -b 2097152
d81 -p d70 -o 2097154 -b 2097152
d82 -p d70 -o 4194307 -b 2097152
d83 -p d70 -o 6291460 -b 2097152
d84 -p d70 -o 8388613 -b 2097152
d85 -p d70 -o 10485766 -b 2097152
d70 -m d71 d72 1
d71 3 1 c1t3d0s3 \
1 c1t3d0s4 \
1 c1t3d0s5
d72 3 1 c2t3d0s3 \
1 c2t3d0s4 \
1 c2t3d0s5
d123 -p c1t3d0s6 -o 1 -b 204800
d124 -p c1t3d0s6 -o 204802 -b 204800
d125 -p c1t3d0s6 -o 409603 -b 204800

d126 -p c1t3d0s7 -o 3592 -b 20480
d127 -p c2t3d0s7 -o 3592 -b 1433600
hsp010
hsp014 c1t2d0s1 c2t2d0s1
hsp050 c1t2d0s5 c2t2d0s5
hsp070 c1t2d0s4 c2t2d0s4
See the metastat(1M) command for more information on the -p option.
Final Solaris Volume Manager Configuration
Chapter 5 • Configuring and Using Solaris Volume Manager (Scenario) 59
60
State Database (Overview)
This chapter provides conceptual information about state database replicas.
For information about
performing related tasks, see Chapter 7.
This chapter contains the following information:
_ “About the Solaris Volume Manager State Database and Replicas” on page
61
_ “Understanding the Majority Consensus Algorithm” on page 62
_ “Handling State Database Replica Errors” on page 64
_ “Scenario—State Database Replicas” on page 65
About the Solaris Volume Manager State Database and
Replicas
The Solaris Volume Manager state database contains configuration and
status information for all
volumes, hot spares, and disk sets. Solaris Volume Manager maintains
multiple copies (replicas) of
the state database to provide redundancy and to prevent the database from
being corrupted during a
system crash (at most, only one database copy will be corrupted).
The state database replicas ensure that the data in the state database is
always valid. When the state
database is updated, each state database replica is also updated. The
updates occur one at a time (to
protect against corrupting all updates if the system crashes).

If your system loses a state database replica, Solaris Volume Manager must
figure out which state
database replicas still contain valid data. Solaris Volume Manager determines
this information by
using a majority consensus algorithm. This algorithm requires that a majority
(half + 1) of the state
database replicas be available and in agreement before any of them are
considered valid. Because of
the requirements of the majority consensus algorithm, you must create at
least three state database
replicas when you set up your disk configuration.Aconsensus can be reached
as long as at least two
of the three state database replicas are available.
During booting, Solaris Volume Manager ignores corrupted state database
replicas. In some cases,
Solaris Volume Manager tries to rewrite state database replicas that are
corrupted. Otherwise, they
6C H A P T E R 6
61
are ignored until you repair them. If a state database replica becomes
corrupted because its
underlying slice encountered an error, you need to repair or replace the slice
and then enable the
replica.
Caution – Do not place state database replicas on fabric-attached storage,
SANs, or other storage that
is not directly attached to the system. You might not be able to boot Solaris
Volume Manager.
Replicas must be on storage devices that are available at the same point in
the boot process as
traditional SCSI or IDE drives.
If all state database replicas are lost, you could, in theory, lose all data that is
stored on your Solaris

Volume Manager volumes. For this reason, it is good practice to create
enough state database replicas
on separate drives and across controllers to prevent catastrophic failure. It is
also wise to save your
initial Solaris Volume Manager configuration information, as well as your disk
partition
information.
See Chapter 7 for information on adding additional state database replicas to
the system. See
“Recovering From State Database Replica Failures” on page 288 for
information on recovering when
state database replicas are lost.
State database replicas are also used for RAID-1 volume resynchronization
regions. Too few state
database replicas relative to the number of mirrors might cause replica I/O to
impact RAID-1 volume
performance. That is, if you have a large number of mirrors, make sure that
you have at least two
state database replicas per RAID-1 volume, up to the maximum of 50 replicas
per disk set.
By default each state database replica for volumes, the local set and for disk
sets occupies 4 Mbytes
(8192 disk sectors) of disk storage. The default size of a state database
replica for a multi-owner disk
set is 16 Mbytes.
Replicas can be stored on the following devices:
_ Adedicated local disk partition
_ Alocal partition that will be part of a volume
_ Alocal partition that will be part of a UFS logging device
Replicas cannot be stored on the root (/), swap, or /usr slices. Nor can
replicas be stored on slices
that contain existing file systems or data. After the replicas have been stored,
volumes or file systems
can be placed on the same slice.

Understanding the Majority ConsensusAlgorithm
An inherent problem with replicated databases is that it can be difficult to
determine which database
has valid and correct data. To solve this problem, Solaris Volume Manager
uses a majority consensus
algorithm. This algorithm requires that a majority of the database replicas
agree with each other
before any of them are declared valid. This algorithm requires the presence of
at least three initial
replicas, which you create.Aconsensus can then be reached as long as at
least two of the three
replicas are available. If only one replica exists and the system crashes, it is
possible that all volume
configuration data will be lost.
Understanding the Majority Consensus Algorithm
62 Solaris VolumeManagerAdministration Guide • June 2006
To protect data, Solaris Volume Manager does not function unless half of all
state database replicas
are available. The algorithm, therefore, ensures against corrupt data.
The majority consensus algorithm provides the following:
_ The system continues to run if at least half of the state database replicas
are available.
_ The system panics if fewer than half of the state database replicas are
available.
_ The system cannot reboot into multiuser mode unless a majority (half + 1) of
the total number of
state database replicas is available.
If insufficient state database replicas are available, you must boot into single-
user mode and delete
enough of the corrupted or missing replicas to achieve a quorum. See “How to
Recover From
Insufficient State Database Replicas” on page 288.
Note – When the total number of state database replicas is an odd number,
Solaris Volume Manager

computes the majority by dividing the number in half, rounding down to the
nearest integer, then
adding 1 (one). For example, on a system with seven replicas, the majority
would be four (seven
divided by two is three and one-half, rounded down is three, plus one is four).
Administering State Database Replicas
_ By default, the size of a state database replica is 4 Mbytes or 8192 blocks.
You should create state
database replicas on a dedicated slice with at least 4 Mbytes per replica.
Because your disk slices
might not be that small, you might want to resize a slice to hold the state
database replica. For
information about resizing a slice, see Chapter 12, “Administering Disks
(Tasks),” in System
Administration Guide: Devices and File Systems.
_ To avoid single points-of-failure, distribute state database replicas across
slices, drives, and
controllers. You want a majority of replicas to survive a single component
failure. If you lose a
replica (for example, due to a device failure), problems might occur with
running Solaris Volume
Manager or when rebooting the system. Solaris Volume Manager requires at
least half of the
replicas to be available to run, but a majority (half + 1) to reboot into multiuser
mode.
Aminimum of 3 state database replicas are recommended, up to a maximum
of 50 replicas per
Solaris Volume Manager disk set. The following guidelines are recommended:
_ For a system with only a single drive: put all three replicas on one slice.
_ For a system with two to four drives: put two replicas on each drive.
_ For a system with five or more drives: put one replica on each drive.
_ If multiple controllers exist, replicas should be distributed as evenly as
possible across all

controllers. This strategy provides redundancy in case a controller fails and
also helps balance the
load. If multiple disks exist on a controller, at least two of the disks on each
controller should
store a replica.
Administering State Database Replicas
Chapter 6 • State Database (Overview) 63
_ If necessary, you could create state database replicas on a slice that will be
used as part of a
RAID-0, RAID-1, or RAID-5 volume, . You must create the replicas before you
add the slice to
the volume. Solaris Volume Manager reserves the beginning of the slice for
the state database
replica.
When a state database replica is placed on a slice that becomes part of a
volume, the capacity of
the volume is reduced by the space that is occupied by the replica. The space
used by a replica is
rounded up to the next cylinder boundary. This space is skipped by the
volume.
_ RAID-1 volumes are used for small-sized random I/O (as in for a database).
For best
performance, have at least two extra replicas per RAID-1 volume on slices
(and preferably on
separate disks and controllers) that are unconnected to the RAID-1 volume.
_ You cannot create state database replicas on existing file systems, or the
root (/), /usr, and swap
file systems. If necessary, you can create a new slice (provided a slice name
is available) by
allocating space from swap. Then, put the state database replicas on that new
slice.
_ You can create state database replicas on slices that are not in use.
_ You can add additional state database replicas to the system at any time.
The additional state

database replicas help ensure Solaris Volume Manager availability.
Caution – If you upgraded from the Solstice DiskSuite product to
SolarisVolume Manager and
you have state database replicas sharing slices with file systems or logical
volumes (as opposed to
on separate slices), do not delete the existing replicas and replace them with
new replicas in the
same location.
The default state database replica size in Solaris Volume Manager is 8192
blocks, while the default
size in the Solstice DiskSuite product is 1034 blocks. Use caution if you delete
a default-sized state
database replica created in the Solstice DiskSuite product, and then add a
new default-sized
replica with Solaris Volume Manager. You will overwrite the first 7158blocks of
any file system
that occupies the rest of the shared slice, thus destroying the data.
Handling State Database Replica Errors
If a state database replica fails, the system continues to run if at least half of
the remaining replicas are
available. The system panics when fewer than half of the replicas are
available.
The system can into reboot multiuser mode when at least one more than half
of the replicas are
available. If fewer than a majority of replicas are available, you must reboot
into single-user mode
and delete the unavailable replicas (by using the metadb command).
For example, assume you have four replicas. The system continues to run as
long as two replicas (half
the total number) are available. However, to reboot the system, three replicas
(half the total + 1) must
be available.
In a two-disk configuration, you should always create at least two replicas on
each disk. For example,

assume you have a configuration with two disks, and you only create three
replicas (two replicas on
Handling State Database Replica Errors
64 Solaris VolumeManagerAdministration Guide • June 2006
the first disk and one replica on the second disk). If the disk with two replicas
fails, the system panics
because the remaining disk only has one replica. This is less than half the
total number of replicas.
Note – If you create two replicas on each disk in a two-disk configuration,
Solaris Volume Manager
still functions if one disk fails. But because you must have one more than half
of the total replicas
available for the system to reboot, you cannot reboot.
If a slice that contains a state database replica fails, the rest of your
configuration should remain in
operation. Solaris Volume Manager finds a valid state database during boot
(as long as at least half +1
valid state database replicas are available).
When you manually repair or enable state database replicas, Solaris Volume
Manager updates them
with valid data.
Scenario—State Database Replicas
State database replicas provide redundant data about the overall Solaris
Volume Manager
configuration. The following example, is based on the sample system in the
scenario provided in
Chapter 5. This example describes how state database replicas can be
distributed to provide adequate
redundancy.
The sample system has one internal IDE controller and drive, plus two SCSI
controllers. Each SCSI
controller has six disks attached.With three controllers, the system can be
configured to avoid any

single point-of-failure. Any system with only two controllers cannot avoid a
single point-of-failure
relative to Solaris Volume Manager. By distributing replicas evenly across all
three controllers and
across at least one disk on each controller (across two disks, if possible), the
system can withstand
any single hardware failure.
In a minimal configuration, you could put a single state database replica on
slice 7 of the root disk,
then an additional replica on slice 7 of one disk on each of the other two
controllers. To help protect
against the admittedly remote possibility of media failure, add another replica
to the root disk and
then two replicas on two different disks on each controller, for a total of six
replicas, provides more
than adequate security.
To provide even more security, add 12 additional replicas spread evenly
across the 6 disks on each
side of the two mirrors. This configuration results in a total of 18r eplicas with
2 on the root disk and
8on each of the SCSI controllers, distributed across the disks on each
controller.
Scenario—State Database Replicas
Chapter 6 • State Database (Overview) 65
66
State Database (Tasks)
This chapter provides information about performing tasks that are associated
with Solaris Volume
Manager’s state database replicas. For information about the concepts
involved in these tasks, see
Chapter 6.
State Database Replicas (Task Map)
The following task map identifies the procedures that are needed to manage
Solaris Volume Manager

state database replicas.
Task Description For Instructions
Create state database replicas Use the Solaris Volume Manager GUI or the
metadb -a command to create state
database replicas.
“How to Create State Database
Replicas” on page 68
Check the status of state
database replicas
Use the Solaris Volume Manager GUI or the
metadb command to check the status of
existing replicas.
“How to Check the Status of
State Database Replicas”
on page 70
Delete state database replicas Use the Solaris Volume Manager GUI or the
metadb -d command to delete state
database replicas.
“How to Delete State Database
Replicas” on page 71
7C H A P T E R 7
67
Creating State Database Replicas
Caution – If you upgraded from the Solstice DiskSuite product to
SolarisVolume Manager and you
have state database replicas sharing slices with file systems or logical
volumes (as opposed to on
separate slices), do not delete existing replicas and replace them with new
default replicas in the same
location.
The default state database replica size in Solaris Volume Manager is 8192
blocks, while the default
size in the Solstice DiskSuite product is 1034 blocks. Use caution if you delete
a default-sized state

database replica created in the Solstice DiskSuite product, and then add a
new default-sized replica
with Solaris Volume Manager. You will overwrite the first 7158blocks of any
file system that occupies
the rest of the shared slice, thus destroying the data.
Caution – Do not place state database replicas on fabric-attached storage,
SANs, or other storage that
is not directly attached to the system. You might not be able to boot Solaris
Volume Manager.
Replicas must be on storage devices that are available at the same point in
the boot process as
traditional SCSI or IDE drives.
_ Howto Create State Database Replicas
Check “Prerequisites for Creating Solaris Volume Manager Components” on
page 44.
Become superuser.
To create state database replicas, use one of the following methods:
_ From the Enhanced Storage tool within the Solaris Management Console,
open the State
Database Replicas node. Choose Action Create Replicas and follow the⇒
onscreen instructions.
For more information, see the online help.
_ Use the following form of the metadb command. See the metadb(1M).
# metadb -a -c number -l length-of replica -f ctds-of-slice
-a Specifies to add or create a state database replica.
-f Specifies to force the operation, even if no replicas exist. Use the -f to force
the creation of
the initial replicas.
-c number Specifies the number of replicas to add to the specified slice.
-l length-of-replica Specifies the size of the new replicas, in blocks. The
default size is 8192.
This size should be appropriate for virtually all configurations, including
those configurations with thousands of logical volumes.
ctds-of-slice Specifies the name of the component that will hold the replica.

BeforeYou Begin
1
2
Creating State Database Replicas
68 Solaris VolumeManagerAdministration Guide • June 2006
Note – The metadb command entered on the command line without options
reports the status of all
state database replicas.
Creating the First State Database Replica
# metadb -a -f c0t0d0s7
# metadb
flags first blk block count
...
a u 16 8192 /dev/dsk/c0t0d0s7
You must use the -f option along with the -a option to create the first state
database replica. The -a
option adds state database replicas to the system.The -f option forces the
creation of the first replica
(and may be omitted when you add supplemental replicas to the system).
Adding Two State Database Replicas to the Same Slice
# metadb -a -c 2 c1t3d0s1
# metadb
flags first blk block count
...
a u 16 8192 /dev/dsk/c1t3d0s1
a u 8208 8192 /dev/dsk/c1t3d0s1
The -a option adds state database replicas to the system. The -c 2 option
places two replicas on the
specified slice. The metadb command checks that the replicas are active, as
indicated by the a flag in
the metadb command output.
Adding State Database Replicas of a Specific Size
If you are replacing existing state database replicas, you might need to
specify a replica size.

Particularly if you have existing state database replicas (on a system
upgraded from the Solstice
DiskSuite product, perhaps) that share a slice with a file system, you must
replace existing replicas
with other replicas of the same size or add new replicas in a different location.
# metadb -a -c 3 -l 1034 c0t0d0s7
# metadb
flags first blk block count
...
a u 16 1034 /dev/dsk/c0t0d0s7
a u 1050 1034 /dev/dsk/c0t0d0s7
a u 2084 1034 /dev/dsk/c0t0d0s7
Example 7–1
Example 7–2
Example 7–3
Creating State Database Replicas
Chapter 7 • State Database (Tasks) 69
The -a option adds state database replicas to the system. The -l option
specifies the length in blocks
of the replica to add.
Maintaining State Database Replicas
_ Howto Check the Status of State Database Replicas
Become superuser.
To check the status of state database replicas, use one of the following
methods:
_ From the Enhanced Storage tool within the Solaris Management Console,
open the State
Database Replicas node to view all existing state database replicas. For more
information, see the
online help.
_ Use the metadb command to view the status of state database replicas.Add
the -i option to
display an explanation of the status flags, as shown in the following example.
See the

metadb(1M).
Checking the Status of All State Database Replicas
# metadb -i
flags first blk block count
a m p luo 16 8192 /dev/dsk/c0t0d0s7
a p luo 8208 8192 /dev/dsk/c0t0d0s7
a p luo 16400 8192 /dev/dsk/c0t0d0s7
a p luo 16 8192 /dev/dsk/c1t3d0s1
W p l 16 8192 /dev/dsk/c2t3d0s1
a p luo 16 8192 /dev/dsk/c1t1d0s3
a p luo 8208 8192 /dev/dsk/c1t1d0s3
a p luo 16400 8192 /dev/dsk/c1t1d0s3
r - replica does not have device relocation information
o - replica active prior to last mddb configuration change
u - replica is up to date
l - locator for this replica was read successfully
c - replica’s location was in /etc/lvm/mddb.cf
p - replica’s location was patched in kernel
m - replica is master, this is replica selected as input
W - replica has device write errors
a - replica is active, commits are occurring to this replica
M - replica had problem with master blocks
D - replica had problem with data blocks
F - replica had format problems
1
2
Example 7–4
Maintaining State Database Replicas
70 Solaris VolumeManagerAdministration Guide • June 2006
S - replica is too small to hold current data base
R - replica had device read errors
Alegend of all the flags follows the status. The characters in front of the device
name represent the

status. Uppercase letters indicate a problem status. Lowercase letters indicate
an “Okay” status.
_ Howto Delete State Database Replicas
You might need to delete state database replicas to maintain your Solaris
Volume Manager
configuration. For example, if you will be replacing disk drives, you want to
delete the state database
replicas before you remove the drives. Otherwise Solaris Volume Manager
will report them as having
errors.
Become superuser.
To remove state database replicas, use one of the following methods:
_ From the Enhanced Storage tool within the Solaris Management Console,
open the State
Database Replicas node to view all existing state database replicas. Select
replicas to delete, then
choose Edit Delete to remove them. For more information, see the online⇒
help.
_ Use the following form of the metadb command:
# metadb -d -f ctds-of-slice
-d Specifies to delete a state database replica.
-f Specifies to force the operation, even if no replicas exist.
ctds-of-slice Specifies the name of the component that contains the replica.
Note that you need to specify each slice from which you want to remove the
state database
replica. See the metadb(1M) man page for more information.
Deleting State Database Replicas
# metadb -d -f c0t0d0s7
This example shows the last replica being deleted from a slice.
You must add the -f option to force the deletion of the last replica on the
system.
1
2
Example 7–5

Maintaining State Database Replicas
Chapter 7 • State Database (Tasks) 71
72
RAID-0 (Stripe and Concatenation) Volumes
(Overview)
This chapter describes RAID-0 (both stripe and concatenation) volumes that
are available in Solaris
Volume Manager. For information about related tasks, see Chapter 9.
This chapter provides the following information:
_ “Overview of RAID-0 Volumes” on page 73
_ “Background Information for Creating RAID-0 Volumes” on page 80
_ “Scenario—RAID-0 Volumes” on page 81
Overview of RAID-0 Volumes
RAID-0 volumes, are composed of slices or soft partitions. These volumes
enable you to expand disk
storage capacity. They can be used either directly or as the building blocks for
RAID-1 (mirror)
volumes, and soft partitions. There are three kinds of RAID-0 volumes:
_ Stripe volumes
_ Concatenation volumes
_ Concatenated stripe volumes
Note – Acomponent refers to any devices, from slices to soft partitions, used
in another logical
volume.
Astripe volume spreads data equally across all components in the volume,
while a concatenation
volume writes data to the first available component until it is full, then moves
to the next available
component.Aconcatenated stripe volume is simply a stripe volume that has
been expanded from its
original configuration by adding additional components.
RAID-0 volumes allow you to quickly and simply expand disk storage
capacity. The drawback is that

these volumes do not provide any data redundancy, unlike RAID-1 or RAID-5
volumes. If a single
component fails on a RAID-0 volume, data is lost.
8C H A P T E R 8
73
For sequential I/O operations on a stripe volume, Solaris Volume Manager
reads all the blocks in a
segment of blocks (called an interlace) on the first component, then all the
blocks in a segment of
blocks on the second component, and so forth.
For sequential I/O operations on a concatenation volume, Solaris Volume
Manager reads all the
blocks on the first component, then all the blocks of the second component,
and so forth.
On both a concatenation volume and a stripe volume, all I/O operations
occurs in parallel.
You can use a RAID-0 volume that contains a single slice for any file system.
You can use a RAID-0 volume that contains multiple components for any file
system except the
following:
_ root (/)
_ /usr
_ swap
_ /var
_ /opt
_ Any file system that is accessed during an operating system upgrade or
installation
Note – When you mirror root (/), /usr, swap, /var, or /opt, you put the file
system into a one-way
concatenation or stripe (a concatenation of a single slice) that acts as a
submirror. This one-way
concatenation is mirrored by another submirror, which must also be a
concatenation.
RAID-0 (Stripe) Volume
ARAID-0 (stripe) volume is a volume that arranges data across one or more
components. Striping
alternates equally-sized segments of data across two or more components,
forming one logical
storage unit. These segments are interleaved round-robin so that the
combined space is made
alternately from each component, in effect, shuffled like a deck of cards.
Note – To increase the capacity of a stripe volume , you need to build a
concatenated stripe volume.
See “RAID-0 (Concatenated Stripe) Volume” on page 77.
Striping enables multiple controllers to access data at the same time, which is
also called parallel
access. Parallel access can increase I/O throughput because all disks in the
volume are busy most of
the time servicing I/O requests.
An existing file system cannot be converted directly to a stripe. To place an
existing file system on a
stripe volume , you must back up the file system, create the volume, then
restore the file system to the
stripe volume.
Overview of RAID-0 Volumes
74 Solaris VolumeManagerAdministration Guide • June 2006
Interlace Values for a RAID–0 (Stripe) Volume
An interlace is the size, in Kbytes, Mbytes, or blocks, of the logical data
segments on a stripe volume.
Depending on the application, different interlace values can increase
performance for your
configuration. The performance increase comes from having several disk
arms managing I/O
requests. When the I/O request is larger than the interlace size, you might get
better performance.
Note – RAID-5 volumes also use an interlace value. See “Overview of RAID-5
Volumes” on page 155
for more information.

When you create a stripe volume, you can set the interlace value or use the
Solaris Volume Manager
default interlace value of 512 Kbytes. Once you have created the stripe
volume, you cannot change
the interlace value. However, you could back up the data on it, delete the
stripe volume, create a new
stripe volume with a new interlace value, and then restore the data.
Scenario—RAID-0 (Stripe) Volume
Figure 8–1 shows a stripe volume that is built from three components (slices).
It also illustrates how
data is written onto the volume components according to the interlace size
and using the
round-robin technique.
When Solaris Volume Manager writes data onto the components of a stripe
volume, it writes data
blocks of the interlace width to DiskA(interlace 1), Disk B (interlace 2), and
Disk C (interlace 3).
Solaris Volume Manager then repeats the pattern writing to DiskA(interlace 4),
Disk B (interlace 5),
Disk C (interlace 6), and so forth.
The interlace value sets the size of each time data is written to a slice. The
total capacity of the stripe
volume equals the number of components multiplied by the size of the
smallest component. (If each
slice in the following example were 2 Gbytes, the volume would equal 6
Gbytes.)
Overview of RAID-0 Volumes
Chapter 8 • RAID-0 (Stripe and Concatenation) Volumes (Overview) 75
interlace 4
interlace 1
interlace 5
interlace 2
interlace 6
interlace 3

Solaris Volume
Manager
interlace 6
interlace 5
interlace 4
interlace 3
interlace 2
interlace 1
RAID 0 (Stripe) Volume
Physical
Slice A
Physical
Slice B
Physical
Slice C
FIGURE 8–1 RAID-0 (Stripe)Volume Example
RAID-0 (Concatenation) Volume
ARAID–0 (concatenation) volume is a volume whose data is organized
serially and adjacently across
components, forming one logical storage unit.
Use a concatenation volume to get more storage capacity by combining the
capacities of several
components. You can add more components to the concatenation volume as
the demand for storage
grows.
Aconcatenation volume enables you to dynamically expand storage capacity
and file system sizes
online.Aconcatenation volume allows you to add components even if the other
components are
currently active.
Aconcatenation volume can also expand any active and mounted UFS file
system without having to
bring down the system. In general, the total capacity of a concatenation
volume is equal to the total

size of all the components in the volume. If a concatenation volume contains a
slice with a state
database replica, the total capacity of the volume is the sum of the
components minus the space that
is reserved for the replica.
You can also create a concatenation volume from a single component. Later,
when you need more
storage, you can add more components to the volume.
Overview of RAID-0 Volumes
76 Solaris VolumeManagerAdministration Guide • June 2006
Note – You must use a concatenation volume to encapsulate root (/), swap,
/usr, /opt, or /var when
mirroring these file systems.
Scenario—RAID-0 (Concatenation) Volume
Figure 8–2 illustrates a concatenation volume that is built from three
components (slices). It also
illustrates how data is written onto the volume components according to the
interlace size and onto
each slice sequentially.
The data blocks are written sequentially across the components, beginning
with Slice A. You can
envision SliceAas containing logical data blocks 1 through 4. Disk B would
contain logical data
blocks 5 through 8. Drive C would contain logical data blocks 9 through 12.
The total capacity of
volume would be the combined capacities of the three slices. If each slice
were 2 Gbytes, the volume
would have an overall capacity of 6 Gbytes.
interlace 4
interlace 3
interlace 2
interlace 1
interlace 8
interlace 7

interlace 6
interlace 5
interlace 12
interlace 11
interlace 10
interlace 9
Solaris Volume
Manager
interlace 12
. . .
. . .
. . .
interlace 2
interlace 1
RAID 0 (Concatenation) Volume
Physical
Slice A
Physical
Slice B
Physical
Slice C
FIGURE 8–2 RAID-0 (Concatenation)Volume Example
RAID-0 (Concatenated Stripe) Volume
ARAID–0 (concatenated stripe) volume is a stripe that has been expanded by
adding additional
components (stripes).
To set the interlace value for a concatenated stripe volume, at the stripe level,
use either the Enhanced
Storage tool within the Solaris Management Console, or the metattach -i
command. Each stripe
Overview of RAID-0 Volumes
Chapter 8 • RAID-0 (Stripe and Concatenation) Volumes (Overview) 77
within the concatenated stripe volume can have its own interlace value. When
you create a

concatenated stripe volume from scratch, if you do not specify an interlace
value for a particular
stripe, it inherits the interlace value from the previous stripe added to the
volume.
Example—RAID-0 (Concatenated Stripe) Volume
Figure 8–3 illustrates a concatenated stripe volume that is a concatenation of
three stripes.
The first stripe consists of three slices, SliceAthrough C, with an interlace
value of 512 Kbytes. The
second stripe consists of two slices, SliceDand E, and uses an interlace value
of 1024 Kbytes32
Kbytes. The last stripe consists of a two slices, Slice F and G. Because no
interlace value is specified for
the third stripe, it inherits the value from the stripe that was added before it,
which in this case is 1024
Kbytes32 Kbytes. Sequential data blocks are added to the first stripe until that
stripe has no more
space. Data blocks are then added to the second stripe. When this stripe has
no more space, data
blocks are added to the third stripe.Within each stripe, the data blocks are
interleaved according to
the specified interlace value.
Overview of RAID-0 Volumes
78 Solaris VolumeManagerAdministration Guide • June 2006
interlace 10
interlace 7
interlace 4
interlace 1
interlace 11
interlace 8
interlace 5
interlace 2
interlace 12
interlace 9

interlace 6
interlace 3
interlace 19
interlace 17
interlace 15
interlace 13
interlace 20
interlace 18
interlace 16
interlace 14
interlace 27
interlace 25
interlace 23
interlace 21
interlace 28
interlace 26
interlace 24
interlace 22
Solaris Volume
Manager
interlace 28
. . .
interlace 10
interlace 9
interlace 8
interlace 7
interlace 6
interlace 5
interlace 4
interlace 3
interlace 2
interlace 1
RAID 0 Volume
Physical

Slice A
Physical
Slice B
Physical
Slice C
Physical
Slice D
Physical
Slice E
Physical
Slice F
Physical
Slice G
Stripe
Stripe
Stripe
FIGURE 8–3 RAID-0 (Concatenated Stripe)Volume Example
Overview of RAID-0 Volumes
Chapter 8 • RAID-0 (Stripe and Concatenation) Volumes (Overview) 79
Background Information for Creating RAID-0 Volumes
RAID-0 Volume Requirements
When you are working with RAID-0 volumes, consider the following:
_ Use components that are each on different controllers to increase the
number of simultaneous
reads and writes that can be performed.
_ Do not create a stripe from an existing file system or data. Doing so will
destroy data. Instead, use
a concatenation. (You can create a stripe from existing data, but you must
dump and restore the
data to the volume.)
_ Use disk components of the same size for stripes. Striping components of
different sizes results in
wasted disk space.

_ Set up a stripe’s interlace value to better match the I/O requests made by
the system or
applications.
_ Because a stripe or concatenation does not contain replicated data, when
such a volume has a
component failure, you must replace the component, recreate the stripe or
concatenation, and
restore data from a backup.
_ When you recreate a stripe or concatenation, use a replacement component
that has at least the
same size as the failed component.
RAID-0 Volume Guidelines
_ Concatenation uses less CPU cycles than striping and performs well for
small random I/O and
for even I/O distribution.
_ When possible, distribute the components of a stripe or concatenation
across different
controllers and busses. Using stripes that are each on different controllers
increases the number
of simultaneous reads and writes that can be performed.
_ If a stripe is defined on a failing controller and another controller is available
on the system, you
can “move” the stripe to the new controller by moving the disks to the
controller and redefining
the stripe.
_ Number of stripes: Another way of looking at striping is to first determine the
performance
requirements. For example, you might need 10.4 Mbytes/sec performance for
a selected
application, and each disk might deliver approximately 4 Mbyte/sec. Based on
this formula, then
determine how many disk spindles you need to stripe across:
10.4 Mbyte/sec / 4 Mbyte/sec = 2.6

Therefore, you need three disks capable of performing I/O operations in
parallel.
Background Information for Creating RAID-0 Volumes
80 Solaris VolumeManagerAdministration Guide • June 2006
Scenario—RAID-0 Volumes
RAID-0 volumes provide the fundamental building blocks for creating more
complex storage
configurations or for building mirrors. The following example, drawing on the
scenario explained in
Chapter 5, describes how RAID-0 volumes can provide larger storage spaces
and allow you to
construct a mirror of existing file systems, including root (/).
The sample system in the scenario has a collection of relatively small (9
Gbyte) disks, but specific
applications would likely require larger storage spaces. To create larger
spaces (and improve
performance), you can create a stripe that spans multiple disks. For example,
each one of the
following disks, c1t1d0, c1t2d0, c1t3d0, c2t1d0, c2t2d0, and c2t3d0, could be
formatted with a
slice 0 that spans the entire disk. Then, a stripe including all three of the disks
from one controller
could provide approximately 27 Gbytes of storage and allow faster access.
The second stripe, from
the second controller, could be used for redundancy, as described in Chapter
11 and specifically in the
“Scenario—RAID-1 Volumes (Mirrors)” on page 103.
Scenario—RAID-0 Volumes
Chapter 8 • RAID-0 (Stripe and Concatenation) Volumes (Overview) 81
82
RAID-0 (Stripe and Concatenation) Volumes
(Tasks)
This chapter contains information about tasks that are related to RAID-0
volumes. For information

about related concepts, see Chapter 8.
RAID-0 Volumes (Task Map)
The following task map identifies the procedures that are needed to manage
Solaris Volume Manager
RAID-0 volumes.
Task Description For Instructions
Create RAID-0 (stripe)
volumes
Use the Solaris Volume Manager GUI or the
metainit command to create a new volume.
“How to Create a RAID-0
(Stripe) Volume” on page 84
Create RAID-0
(concatenation) volumes
Use the Solaris Volume Manager GUI or the
metainit command to create a new volume.
“How to Create a RAID-0
(Concatenation) Volume”
on page 85
Expand storage space Use the Solaris Volume Manager GUI or the
metainit command to expand an existing
file system.
“How to Expand Storage
Capacity for Existing Data”
on page 87
Expand an existing RAID-0
volume
Use the Solaris Volume Manager GUI or the
metattach command to expand an existing
volume.
“How to Expand an Existing
RAID-0 Volume” on page 88
Remove a RAID-0 volume Use the Solaris Volume Manager GUI or the
metaclear command to delete a volume.

“How to Remove a RAID-0
Volume” on page 90
9C H A P T E R 9
83
Creating RAID-0 (Stripe) Volumes
Caution – Do not create a stripe from an existing file system or data. Doing
so destroys data. To create
a stripe from existing data, you must back up the data, create the stripe
volume, and then restore the
data to the volume.
Caution – Do not create volumes larger than 1Tbyte if you expect to run the
Solaris software with a
32-bit kernel. Additionally, do not create volumes larger than 1Tbyte if you
expect to use a version of
the Solaris OS prior to the Solaris 9 4/03 release. See “Overview of Multi-
Terabyte Support in Solaris
Volume Manager” on page 44 for more information about large volume
support in Solaris Volume
Manager.
_ Howto Create a RAID-0 (Stripe) Volume
Check “Prerequisites for Creating Solaris Volume Manager Components” on
page 44 and
“Background Information for Creating RAID-0 Volumes” on page 80.
To create a stripe volume, use one of the following methods:
_ From the Enhanced Storage tool within the Solaris Management Console,
open the Volumes
node. Choose Action Create Volume, then follow the instructions in the⇒
wizard. For more
information, see the online help.
_ Use the following form of the metainit command:
# metainit volume-name number-of-stripes
components-per-stripe
component-names
[ -i interlace]

volume-name Specifies the name of the volume to create. For information on
naming volumes, see “Volume Names” on page 40.
number-of-stripes Specifies the number of stripes to create.
components-per-stripe Specifies the number of components each stripe
should have.
component-names Specifies the names of the components that are used. If
more than one
component is used, separate each component with a space.
-i interlace Specifies the interlace width to use for the stripe. The interlace
width
is a value, followed by either ‘k’ for kilobytes, ‘m’ for megabytes, or ‘b’
for blocks. The interlace specified cannot be less than 16 blocks, or
greater than 100 megabytes. The default interlace width is 512
kilobytes.
See the following examples and the metainit(1M) man page for more
information.
BeforeYou Begin
◗
Creating RAID-0 (Stripe) Volumes
84 Solaris VolumeManagerAdministration Guide • June 2006
Creating a RAID–0 (Stripe) Volume of Three Slices
# metainit d20 1 3 c0t1d0s2 c0t2d0s2 c0t3d0s2
d20: Concat/Stripe is setup
This example shows the stripe, d20, consists of a single stripe (the number 1).
The stripe is composed
of three slices (the number 3). Because no interlace value is specified, the
stripe uses the default of 512
Kbytes. The system confirms that the volume has been set up.
Creating a RAID-0 (Stripe) Volume of Two Slices With a 32–Kbyte Interlace
Value
# metainit d10 1 2 c0t1d0s2 c0t2d0s2 -i 32k
d10: Concat/Stripe is setup
This example shows the stripe, d10, consists of a single stripe (the number 1).
The stripe is composed

of two slices (the number 2). The -i option sets the interlace value to 32
Kbytes. (The interlace value
cannot be less than 8Kbytes, nor greater than 100 Mbytes.) The system
verifies that the volume has
been set up.
To prepare the newly created stripe for a file system, see Chapter 18,
“Creating UFS, TMPFS, and
LOFS File Systems (Tasks),” in System Administration Guide: Devices and
File Systems. Some
applications, such as a database, do not use a file system. These applications
instead use the raw
device. The application must have its own way of accessing the raw device.
Creating RAID-0 (Concatenation) Volumes
_ Howto Create a RAID-0 (Concatenation) Volume
Caution – Do not create volumes larger than 1Tbyte if you expect to run the
Solaris software with a
32–bit kernel. Additionally, do not create volumes larger than 1 Tbyte if you
expect to use a version of
the Solaris OS prior to the Solaris 9 4/03 release. See “Overview of Multi-
Terabyte Support in Solaris
Volume Manager” on page 44 for more information about multi-terabyte
volumes in Solaris Volume
Manager.
Check “Prerequisites for Creating Solaris Volume Manager Components” on
page 44 and
“Background Information for Creating RAID-0 Volumes” on page 80.
To create a concatenation volume, use one of the following methods:
Example 9–1
Example 9–2
SeeAlso
BeforeYou Begin
◗
Creating RAID-0 (Concatenation) Volumes
Chapter 9 • RAID-0 (Stripe and Concatenation) Volumes (Tasks) 85

_ From the Enhanced Storage tool within the Solaris Management Console,
open the Volumes
node. Choose Action Create Volume, then follow the instructions in the⇒
wizard. For more
information, see the online help.
_ Use the following form of the metainit command:
# metainit volume-name number-of-stripes
components-per-stripe
component-names
volume-name Specifies the name of the volume to create.
number-of-stripes Specifies the number of stripes to create.
components-per-concatenation Specifies the number of components each
concatenation
should have.
component-names Specifies the names of the components that are used. If
more
than one component is used, separate each component with a
space.
For more information, see the following examples and the metainit(1M) man
page.
Creating a Concatenation of One Slice
# metainit d25 1 1 c0t1d0s2
d25: Concat/Stripe is setup
This example shows the creation of a concatenation, d25. This concatenation
consists of one stripe
(the first number 1) composed of a single slice (the second number 1 in front
of the slice). The system
verifies that the volume has been set up.
The example shows a concatenation that can safely encapsulate existing
data.
Creating a Concatenation of Four Slices
# metainit d40 4 1 c0t1d0s2 1 c0t2d0s2 1 c0t2d0s3 1 c0t2d1s3
d40: Concat/Stripe is setup

This example shows the creation of a concatenation, d40. The concatenation
consists of four stripes
(the number 4), each composed of a single slice (the number 1 in front of
each slice). The system
verifies that the volume has been set up.
To prepare the newly created concatenation for a file system, see Chapter 18,
“Creating UFS, TMPFS,
and LOFS File Systems (Tasks),” in System Administration Guide: Devices
and File Systems.
Example 9–3
Example 9–4
SeeAlso
Creating RAID-0 (Concatenation) Volumes
86 Solaris VolumeManagerAdministration Guide • June 2006
Expanding Storage Capacity
To add storage capacity to a file system, create a concatenation volume. To
add storage capacity to an
existing stripe, create a concatenated stripe volume.
_ Howto Expand Storage Capacity for Existing Data
Caution – Do not create volumes larger than 1Tbyte if you expect to run the
Solaris software with a
32-bit kernel. Additionally, do not create volumes larger than 1 Tbyte if you
expect to use a version of
the Solaris OS prior to the Solaris 9 4/03 release. See “Overview of Multi-
Terabyte Support in Solaris
Volume Manager” on page 44 for more information about multi-terabyte
volume support in Solaris
Volume Manager.
Check “Prerequisites for Creating Solaris Volume Manager Components” on
page 44 and
“Background Information for Creating RAID-0 Volumes” on page 80.
Unmount the file system.
# umount /filesystem
To create a concatenation, use one of the following methods:

_ From the Enhanced Storage tool within the Solaris Management Console,
open the Volumes
node. Choose Action Create Volume, then follow the instructions in the⇒
wizard. For more
information, see the online help.
_ Use the following form of the metainit command:
# metainit volume-name number-of-stripes
components-per-stripe
component-names
volume-name Specifies is the name of the volume to create.
number-of-stripes Specifies the number of stripes to create.
components-per-stripe Specifies the number of components each stripe
should have.
component-names Specifies the names of the components that are used. If
more than one
component is used, separate each component with a space.
For more information, see the metainit(1M) man page.
Edit the /etc/vfstab file so that the file system references the name of the
concatenation.
BeforeYou Begin
1
2
3
Expanding Storage Capacity
Chapter 9 • RAID-0 (Stripe and Concatenation) Volumes (Tasks) 87
Remount the file system.
# mount /filesystem
Expanding a File System by Creating a Concatenation
# umount /docs
# metainit d25 2 1 c0t1d0s2 1 c0t2d0s2
d25: Concat/Stripe is setup
(Edit the /etc/vfstab file so that the file system references the volume d25
instead of slice c0t1d0s2)
# mount /docs

This example shows the creation of a concatenation, d25, out of two slices,
/dev/dsk/c0t1d0s2
(which contains a file system mounted on /docs) and /dev/dsk/c0t2d0s2. The
file system must first
be unmounted. Note that the first slice in the metainit command must be the
slice that contains the
file system. If not, you will corrupt your data.
Next, the entry for the file system in the /etc/vfstab file is changed (or entered
for the first time) to
reference the concatenation. For example, initially, the following line appears
in the /etc/vfstab
file:
/dev/dsk/c0t1d0s2 /dev/rdsk/c0t1d0s2 /docs ufs 2 yes -
This line should be changed to the following:
/dev/md/dsk/d25 /dev/md/rdsk/d25 /docs ufs 2 yes -
Finally, the file system is remounted.
For a UFS file system, run the growfs command on the concatenation. See
“How to Expand a File
System” on page 227.
Some applications, such as a database, do not use a file system.An
application such as a database uses
the raw concatenation and must have its own way of recognizing the
concatenation, or of growing
the added space.
_ Howto Expand an Existing RAID-0 Volume
Aconcatenated stripe enables you to expand an existing stripe. For example,
if a stripe has run out of
storage capacity, you convert it into a concatenated stripe. Doing so allows
you to expand your
storage capacity without having to back up and restore data.
This procedure assumes that you are adding an additional stripe to an
existing stripe.
4
Example 9–5

SeeAlso
Expanding Storage Capacity
88 Solaris VolumeManagerAdministration Guide • June 2006
Caution – Do not create volumes larger than 1Tbyte if you expect to run the
Solaris software with a
32-bit kernel. Additionally, do not create volumes larger than 1 Tbyte if you
expect to use a version of
the Solaris OS prior to the Solaris 9 4/03 release. See “Overview of Multi-
Terabyte Support in Solaris
Volume Manager” on page 44 for more information about multi-terabyte
support in Solaris Volume
Manager.
Check “Prerequisites for Creating Solaris Volume Manager Components” on
page 44 and
“Background Information for Creating RAID-0 Volumes” on page 80.
To create a concatenated stripe, use one of the following methods:
_ From the Enhanced Storage tool within the Solaris Management Console,
open the Volumes
node. Choose Action Create Volume, then follow the instructions in the⇒
wizard. For more
information, see the online help.
_ To concatenate existing stripes from the command line, use the following
form of the metattach
command:
# metattach volume-name component-names
volume-name Specifies the name of the volume to expand.
component-names Specifies the names of the components that are used. If
more than one
component is used, separate each component with a space.
See the metattach(1M) man page for more information.
Creating a Concatenated Stripe byAttaching a Single Slice
# metattach d2 c1t2d0s2
d2: components are attached

This example illustrates how to attach a slice to an existing stripe, d2. The
system confirms that the
slice is attached.
Creating a Concatenated Stripe byAdding Several Slices
# metattach d25 c1t2d0s2 c1t2d1s2 c1t2d3s2
d25: components are attached
This example takes an existing three-way stripe, d25, and concatenates
another three-way stripe to it.
Because no interlace value is given for the attached slices, the stripes inherit
the interlace value
configured for d25. The system verifies that the volume has been set up.
BeforeYou Begin
◗
Example 9–6
Example 9–7
Expanding Storage Capacity
Chapter 9 • RAID-0 (Stripe and Concatenation) Volumes (Tasks) 89
For a UFS file system, run the growfs command on the volume. See “How to
Expand a File System”
on page 227.
Some applications, such as a database, do not use a file system.An
application such as a database uses
the raw volume and must have its own way of recognizing the volume, or of
growing the added space.
To prepare a newly created concatenated stripe for a file system, see Chapter
18, “Creating UFS,
TMPFS, and LOFS File Systems (Tasks),” in System Administration Guide:
Devices and File Systems.
Removing a RAID-0 Volume
_ Howto Remove a RAID-0 Volume
Make sure that you have a current backupof all data and that you have
rootprivilege.
Make sure that you no longer need the volume.

If you delete a stripe or concatenation and reuse the slices that were part of
the deleted volume, all
data on the volume is deleted from the system.
Unmount the file system, if needed.
# umount /filesystem
To remove a volume, use one of the following methods:
_ From the Enhanced Storage tool within the Solaris Management Console,
open the Volumes
node. Choose Edit Delete, then follow the onscreen instructions. For more⇒
information, see the
online help.
_ Use the following format of the metaclear command to delete the volume:
metaclear volume-name
See the following example and the metaclear(1M) man page for more
information.
Removing a Concatenation
# umount d8
# metaclear d8
d8: Concat/Stripe is cleared
(Edit the /etc/vfstab file)
This example illustrates removing the concatenation, d8, that also contains a
mounted file system.
The file system must be unmounted before the volume can be removed. The
system displays a
SeeAlso
1
2
3
4
Example 9–8
Removing a RAID-0 Volume
90 Solaris VolumeManagerAdministration Guide • June 2006
confirmation message that the concatenation is removed. If an entry in the
/etc/vfstab file exists

for this volume, delete that entry. You do not want to confuse the system by
asking it to mount a file
system on a nonexistent volume.
Removing a RAID-0 Volume
Chapter 9 • RAID-0 (Stripe and Concatenation) Volumes (Tasks) 91
92
RAID-1 (Mirror) Volumes (Overview)
This chapter explains essential Solaris Volume Manager concepts related to
mirrors and submirrors.
For information about performing related tasks, see Chapter 11.
This chapter contains the following information:
_ “Overview of RAID-1 (Mirror) Volumes” on page 93
_ “RAID-1 Volume (Mirror) Resynchronization” on page 96
_ “Creating and Maintaining RAID-1 Volumes” on page 97
_ “The Affect of Booting Into Single-User Mode on RAID-1 Volumes” on page
102
_ “Scenario—RAID-1 Volumes (Mirrors)” on page 103
Overview of RAID-1 (Mirror) Volumes
ARAID-1 volume, or mirror, is a volume that maintains identical copies of the
data in RAID-0
(stripe or concatenation) volumes. The RAID-0 volumes that are mirrored are
called submirrors.
Mirroring requires an investment in disks. You need at least twice as much
disk space as the amount
of data you have to mirror. Because Solaris Volume Manager must write to all
submirrors, mirroring
can also increase the amount of time it takes for write requests to be written to
disk.
After you configure a mirror, the mirror can be used just like a physical slice.
You can mirror any file system, including existing file systems. These file
systems root (/), swap, and
/usr. You can also use a mirror for any application, such as a database.
Tip– Use Solaris Volume Manager’s hot spare feature with mirrors to keep
data safe and available. For
information on hot spares, see Chapter 16 and Chapter 17.
Overview of Submirrors
Amirror is composed of one or more RAID-0 volumes (stripes or
concatenations) called submirrors.
10 C H A P T E R 1 0
93
Amirror can consist of up to four submirrors. However, two-way mirrors
usually provide sufficient
data redundancy for most applications and are less expensive in terms of disk
drive costs.Athird
submirror enables you to make online backups without losing data
redundancy while one submirror
is offline for the backup.
If you take a submirror “offline,” the mirror stops reading and writing to the
submirror.At this point,
you could access the submirror itself, for example, to perform a backup.
However, the submirror is in
a read-only state. While a submirror is offline, Solaris Volume Manager keeps
track of all writes to the
mirror. When the submirror is brought back online, only the portions of the
mirror that were written
while the submirror was offline (the resynchronization regions) are
resynchronized. Submirrors can
also be taken offline to troubleshoot or repair physical devices that have
errors.
Submirrors can be attached or be detached from a mirror at any time, though
at least one submirror
must remain attached at all times.
Normally, you create a mirror with only a single submirror. Then, you attach a
second submirror
after you create the mirror.
Scenario—RAID-1 (Mirror) Volume
Figure 10–1 illustrates a mirror, d20. The mirror is made of two volumes
(submirrors) d21 and d22.

Solaris Volume Manager makes duplicate copies of the data on multiple
physical disks, and presents
one virtual disk to the application, d20 in the example. All disk writes are
duplicated. Disk reads
come from one of the underlying submirrors. The total capacity of mirror d20
is the size of the
smallest of the submirrors (if they are not of equal size).
interlace 4
interlace 3
interlace 2
interlace 1
d21
interlace 4
interlace 3
interlace 2
interlace 1
d22
Solaris Volume
Manager
interlace 4
interlace 3
interlace 2
interlace 1
RAID 1 Volume d20
FIGURE 10–1 RAID-1 (Mirror) Example
Overview of RAID-1 (Mirror) Volumes
94 Solaris VolumeManagerAdministration Guide • June 2006
Providing RAID-1+0 and RAID-0+1
Solaris Volume Manager supports both RAID-1+0 and RAID-0+1 redundancy.
RAID-1+0
redundancy constitutes a configuration of mirrors that are then striped. RAID-
0+1 redundancy
constitutes a configuration of stripes that are then mirrored. The Solaris
Volume Manager interface

makes it appear that all RAID-1 devices are strictly RAID-0+1. However,
Solaris Volume Manager
recognizes the underlying components and mirrors each individually, when
possible.
Note – SolarisVolume Manager cannot always provide RAID-1+0
functionality. However, where both
submirrors are identical to each other and are composed of disk slices (and
not soft partitions),
RAID-1+0 is possible.
Consider a RAID-0+1 implementation with a two-way mirror that consists of
three striped slices.
Without Solaris Volume Manager, a single slice failure could fail one side of
the mirror. Assuming
that no hot spares are in use, a second slice failure would fail the mirror.
Using Solaris Volume
Manager, up to three slices could potentially fail without failing the mirror. The
mirror does not fail
because each of the three striped slices are individually mirrored to their
counterparts on the other
half of the mirror.
Figure 10–2 illustrates how a RAID-1 volume can experience the loss of a
slice, yet the RAID-1+0
implementation prevents data loss.
Physical
Slice A
(Submirror 1)
RAID 1 Volume
Physical
Slice B
Physical
Slice C
Physical
Slice D
(Submirror 2) Physical

Slice E
Physical
Slice F
FIGURE 10–2 RAID-1+0 Example
The RAID-1 volume consists of two submirrors. Each of the submirrors
consist of three identical
physical disks that have the same interlace value.Afailure of three disks, A, B,
and F, is tolerated. The
entire logical block range of the mirror is still contained on at least one good
disk. All of the volume’s
data is available.
However, if disksAandDfail, a portion of the mirror’s data is no longer
available on any disk. Access
to these logical blocks fail. However, access to portions of the mirror where
data is available still
succeed. Under this situation, the mirror acts like a single disk that has
developed bad blocks. The
damaged portions are unavailable, but the remaining portions are available.
Overview of RAID-1 (Mirror) Volumes
Chapter 10 • RAID-1 (Mirror) Volumes (Overview) 95
RAID-1 Volume (Mirror) Resynchronization
RAID-1 volume (mirror) resynchronization is the process of copying data from
one submirror to
another submirror when one of the following occurs:
_ Submirrors fail
_ The system crashes
_ Asubmirror has been taken offline and brought back online
_ Anew submirror has been added
While the resynchronization takes place, the mirror remains readable and
writable by users.
Amirror resynchronization ensures proper mirror operation by maintaining all
submirrors with
identical data, with the exception of writes in progress.

Note – Amirror resynchronization should not be bypassed.You do not need to
manually initiate a
mirror resynchronization. This process occurs automatically.
Full Resynchronization
When a new submirror is attached (added) to a mirror, all the data from
another submirror in the
mirror is automatically written to the newly attached submirror. Once the
mirror resynchronization
is done, the new submirror is readable.Asubmirror remains attached to a
mirror until it is detached.
If the system crashes while a resynchronization is in progress, the
resynchronization is restarted
when the system finishes rebooting.
Optimized Resynchronization
During a reboot following a system failure, or when a submirror that was
offline is brought back
online, Solaris Volume Manager performs an optimized mirror
resynchronization. The metadisk
driver tracks submirror regions. This functionality enables the metadisk driver
to know which
submirror regions might be out-of-sync after a failure.An optimized mirror
resynchronization is
performed only on the out-of-sync regions. You can specify the order in which
mirrors are
resynchronized during reboot. You can omit a mirror resynchronization by
setting submirror pass
numbers to zero. For tasks associated with changing a pass number, see
Example 11–15.
Caution – Apass number of zero should only be used on mirrors that are
mounted as read-only.
RAID-1 Volume (Mirror) Resynchronization
96 Solaris VolumeManagerAdministration Guide • June 2006
Partial Resynchronization
Following the replacement of a slice within a submirror, Solaris Volume
Manager performs a partial
mirror resynchronization of data. Solaris Volume Manager copies the data
from the remaining good
slices of another submirror to the replaced slice.
Canceling and Resuming ResynchronizationWith the
metasync Command
The resynchronization process affects both the performance of a system, as
well as the user’s ability
to perform tasks. For example, resynchronizations impact the I/O performance
and the response
time of a system. Additionally, during a resynchronization process, a disk set
cannot be released from
a host. In another example, if a volume is attached by mistake, the volume
cannot be released until
the resynchronization has completed. Because of situations such as these,
allowing a
resynchronization process to complete is not always advantageous.
The metasync -c volume command cancels the resynchronization process on
a given volume. The
following functionality is associated with canceling resynchronization
processes:
_ Canceled resynchronization processes are logged by using the syslog utility
_ After a reboot, any canceled resynchronization process is resumed from the
point that it stopped
_ When a disk set is taken, any canceled resynchronization process within
that disk set resumes
automatically from the point of the cancellation
Acanceled resynchronization process can be resumed manually from the
point that it stopped by
issuing the metasync volume command.
For the tasks associated with canceling and resuming resynchroniztion
processes using the metasync

command, see “How to Cancel a Volume Resynchronization Process” on
page 130 and “How to
Resume a Volume Resynchronization Process” on page 133.
Creating and Maintaining RAID-1 Volumes
This section provides guidelines can assist you in creating mirrors. This
section also provides
performance guidelines for the mirrors that you create.
Configuration Guidelines for RAID-1 Volumes
_ Before you create a mirror, create the RAID-0 (stripe or concatenation)
volumes that comprise
the mirror.
_ When creating a mirror, first create a one-way mirror, then attach a second
submirror. This
strategy starts a resynchronization operation. This strategy also ensures that
data is not
corrupted. You can also create a one-way mirror for use as a future two-way
or multi-way mirror.
Creating and Maintaining RAID-1 Volumes
Chapter 10 • RAID-1 (Mirror) Volumes (Overview) 97
_ You can create a two-way mirror, three-way mirror, or four-way mirror from
a one-way mirror
with a single command. You can speed the creation process by creating all
submirrors with a
single command. Use this process only if you are not mirroring existing data
and if you are
comfortable destroying the data on all of the submirrors.
_ You can create a RAID-1 volume from an existing file system that is built on
a slice. Only the
single slice may be included in the primary RAID-0 volume (submirror). If you
are mirroring
root or other system-critical file systems, all submirrors must consist of only a
single slice.
_ Use the swap -l command to check for all swap devices. Each slice that is
specified as swap must

be mirrored independently from the remaining swap slices.
_ The Enhanced Storage tool within the Solaris Management Console does
not support
unmirroring root (/), /opt, /usr, or swap. In fact, the tool does not support
unmirroring any file
system that cannot be unmounted while the system is running. Instead, use
the command-line
procedure for these file systems.
_ Use submirrors of the same size. Submirrors of different sizes result in
unused disk space.
_ Use only similarly configured submirrors within a mirror. In particular, if you
create a mirror
with an unlabeled submirror, you cannot attach any submirrors that contain
disk labels.
_ You can have a mirrored file system in which the first submirror attached
does not start on
cylinder 0. All additional submirrors you attach must also not start on cylinder
0. If you attempt
to attach a submirror starting in this situation, the following error message
displays:
can’t attach labeled submirror to an unlabeled mirror
Either all submirrors intended for use within a specific mirror must start on
cylinder 0, or all of
the submirrors must not start on cylinder 0.
Starting cylinders do not have to be the same across all submirrors. However,
all submirrors must
either include or not include cylinder 0.
_ You can improve a mirror’s performance by adding additional state
database replicas before you
create the mirror.As a general rule, add two additional replicas for each mirror
you add to the
system. Solaris Volume Manager uses these additional replicas to store the
dirty region log

(DRL), which is used to provide optimized resynchronization. By providing
adequate numbers
of replicas, you can minimize I/O impact on RAID-1 volume performance.
Using at least two
replicas on the same disks or controllers as the mirror that the replicas log
also helps to improve
overall performance.
_ Only mount the mirror device directly.Do not try to mount a submirror
directly, unless the
submirror is offline and mounted read-only.Do not mount a slice that is part of
a submirror. This
process could destroy data and crash the system.
Creating and Maintaining RAID-1 Volumes
98 Solaris VolumeManagerAdministration Guide • June 2006
Performance Guidelines for RAID-1 Volumes
_ Keep the slices of different submirrors on different disks and controllers.
Data protection is
diminished considerably if slices of two or more submirrors of the same mirror
are on the same
disk. Likewise, organize submirrors across separate controllers, because
controllers and
associated cables tend to fail more often than disks. This practice also
improves mirror
performance.
_ Use the same type of disks and controllers in a single mirror. Particularly in
old SCSI storage
devices, different models or different brands of disks or controllers can have
widely varying
performance. If disks and controller that have the different performance levels
are used in a
single mirror, performance can degrade significantly.
_ Mirroring might improve read performance, but write performance is always
degraded.

Mirroring improves read performance only in threaded or asynchronous I/O
situations.Asingle
thread reading from the volume does not provide a performance gain.
_ You can experiment with the mirror read policies can improve performance.
For example, the
default read mode is to alternate reads in a round-robin fashion among the
disks. This policy is
the default because round-robin tends to work best for UFS multiuser,
multiprocessor activity.
In some cases, the geometric read option improves performance by
minimizing head motion
and access time. This option is most effective when:
_ There is only one slice per disk
_ Only one process at a time is using the slice or file system
_ I/O patterns are highly sequential or when all accesses are read
_ You can attach a submirror to a mirror without interrupting service. You
attach submirrors to
mirrors to create two-way, three-way, and four-way mirrors.
_ When you place a submirror offline, you prevent the mirror from reading
from and writing to the
submirror. However, you preserve the submirror’s logical association to the
mirror. While the
submirror is offline, Solaris Volume Manager keeps track of all writes to the
mirror. The writes
are written to the submirror when it is brought back online. By performing an
optimized
resynchronization, Solaris Volume Manager only has to resynchronize data
that has changed, not
the entire submirror. When you detach a submirror, you sever its logical
association to the
mirror. Typically, you place a submirror offline to perform maintenance. You
detach a submirror
to remove it.
About RAID-1 Volume Options
The following options are available to optimize mirror performance:
_ Mirror read policy
_ Mirror write policy
_ The order in which mirrors are resynchronized (pass number)
You can define mirror options when you initially create the mirror. You can
also change mirror
options after a mirror has been set up and is running. For tasks related to
changing these options, see
“How to Change RAID-1 Volume Options” on page 128.
Creating and Maintaining RAID-1 Volumes
Chapter 10 • RAID-1 (Mirror) Volumes (Overview) 99
RAID-1 Volume Read-and-Write Policies
Solaris Volume Manager enables different read-and-write policies to be
configured for a RAID-1
volume. Properly set read-and-write policies can improve performance for a
given configuration.
TABLE 10–1 RAID-1Volume Read Policies
Read Policy Description
Round-Robin (Default) Attempts to balance the load across the submirrors. All
reads are made in a
round-robin order (one after another) from all submirrors in a mirror.
Geometric Enables reads to be divided among submirrors on the basis of a
logical disk block
address. For example, with a two-way submirror, the disk space on the mirror
is
divided into two equally-sized logical address ranges. Reads from one
submirror are
restricted to one half of the logical range. Reads from the other submirror are
restricted to the other half. The geometric read policy effectively reduces the
seek
time that is necessary for reads. The performance gained by this read policy
depends
on the system I/O load and the access patterns of the applications.

First Directs all reads to the first submirror. This policy should be used only
when the
device or devices that comprise the first submirror are substantially faster than
the
devices of the second submirror.
TABLE 10–2 RAID-1VolumeWrite Policies
Write Policy Description
Parallel (Default) Performs writes to a mirror that are replicated and
dispatched to all of the
submirrors simultaneously.
Serial Performs writes to submirrors serially (that is, the first submirror write
completes
before the second submirror write is started). This policy specifies that writes
to one
submirror must be completed before the next submirror write is initiated. This
policy is provided in case a submirror becomes unreadable, for example, due
to a
power failure.
Pass Number
The pass number, a number in the range 0–9, determines the order in which a
particular mirror is
resynchronized during a system reboot. The default pass number is 1. The
lower pass numbers are
resynchronized first. If zero is used, the mirror resynchronization is
skipped.Apass number of zero
should be used only for mirrors that are mounted as read-only. Mirrors with
the same pass number
are resynchronized at the same time.
Creating and Maintaining RAID-1 Volumes
100 Solaris VolumeManagerAdministration Guide • June 2006
Understanding Submirror Status to Determine
MaintenanceActions
The metastat command of Solaris Volume Manager reports status information
on RAID 1 volumes

and submirrors. The status information helps you to determine if maintenance
action is required on
a RAID-1 volume. The following table explains submirror states shown when
you run the metastat
command on a RAID-1 volume.
TABLE 10–3 Submirror States
State Meaning
Okay The submirror has no errors and is functioning correctly.
Resyncing The submirror is actively being resynchronized.An error has
occurred and has been
corrected, the submirror has just been brought back online, or a new
submirror has
been added.
Resync canceled The resynchronization process on the submirror has been
canceled using the
metasync command.
Needs Maintenance Aslice (or slices) in the submirror has encountered an I/O
error or an open error. All
reads and writes to and from this slice in the submirror have been
discontinued.
Additionally, for each slice in a submirror, the metastat command shows the
following:
Device Indicates the device name of the slice in the stripe
Start Block Indicates the block on which the slice begins
Dbase Indicates if the slice contains a state database replica
State Indicates the state of the slice
Hot Spare Indicates that a slice is being used as a hot spare for a failed slice
The submirror state only provides general information on the status of the
submirror. The slice state
is perhaps the most important information to review when you are
troubleshooting mirror errors. If
the submirror reports a “Needs Maintenance” state, you must refer to the slice
state for more
information.

You take a different recovery action depending on if the slice is in the
“Maintenance” state or in the
“Last Erred” state. If you only have slices in the “Maintenance” state, they can
be repaired in any
order. If you have slices both in the “Maintenance” state and in the “Last
Erred” state, you must fix
the slices in the “Maintenance” state first. Once the slices in the
“Maintenance” state have been fixed,
then fix the slices in the “Last Erred” state. For more information, see
“Overview of Replacing and
Enabling Components in RAID-1 and RAID-5 Volumes” on page 228.
The following table explains the slice states for submirrors and possible
actions to take.
Creating and Maintaining RAID-1 Volumes
Chapter 10 • RAID-1 (Mirror) Volumes (Overview) 101
TABLE 10–4 Submirror Slice States
State Meaning Action
Okay The slice has no errors and is functioning
correctly.
None.
Resyncing The slice is actively being
resynchronized.An error has occurred
and been corrected, the submirror has
just been brought back online, or a new
submirror has been added.
If desired, monitor the submirror status until the
resynchronization is done.
Maintenance The slice has encountered an I/O error or
an open error. All reads and writes to and
from this component have been
discontinued.
Enable or replace the failed slice. See “How to
Enable a Slice in a Submirror” on page 125, or
“How to Replace a Slice in a Submirror” on page

135. The metastat command will show an
invoke recovery message with the appropriate
action to take with the metareplace command.
You can also use the metareplace -e command.
Last Erred The slice has encountered an I/O error or
an open error. However, the data is not
replicated elsewhere due to another slice
failure. I/O is still performed on the slice.
If I/O errors result, the mirror I/O fails.
First, enable or replace slices in the
“Maintenance” state. See “How to Enable a Slice
in a Submirror” on page 125, or “How to Replace
a Slice in a Submirror” on page 135. Usually, this
error results in some data loss, so validate the
mirror after it is fixed. For a file system, use the
fsck command, then check the data.An
application or database must have its own
method of validating the device.
TheAffect of Booting Into Single-User Mode on RAID-1
Volumes
Sometimes, you may need to boot a system with mirrors for root (/), /usr, and
swap, the so-called
“boot” file systems, into single-user mode (by using the boot -s command). In
this case, these
mirrors and possibly all mirrors on the system will appear in the “Needing
Maintenance” state when
viewed with the metastat command. Furthermore, if writes occur to these
slices, the metastat
command shows an increase in dirty regions on the mirrors.
This situation appears to be potentially dangerous. However, the metasync -r
command, which
normally runs during boot to resynchronize mirrors, is interrupted when the
system is booted into

single-user mode. Once the system is rebooted, the metasync -r command
will run and
resynchronize all mirrors.
If this situation is a concern, you can run the metasync -r command manually.
The Affect of Booting Into Single-User Mode on RAID-1 Volumes
102 Solaris VolumeManagerAdministration Guide • June 2006
Scenario—RAID-1 Volumes (Mirrors)
RAID-1 volumes provide a means of constructing redundant volumes. Thus,
when a partial or
complete failure of one of the underlying RAID-0 volumes occurs, there is no
data loss or
interruption of access to the file systems. The following example, drawing on
the scenario explained
in Chapter 5 and continued in “Scenario—RAID-0 Volumes” on page 81,
describes how RAID-1
volumes can provide redundant storage.
As described in “Scenario—RAID-0 Volumes” on page 81, the sample system
has two RAID-0
volumes. Each volume is approximately 27 Gbytes in size and spans three
disks. By creating a
RAID-1 volume to mirror these two RAID-0 volumes, a fully redundant storage
space can provide
resilient data storage.
Within this RAID-1 volume, the failure of either disk controller does not
interrupt access to the
volume. Similarly, failure of up to three individual disks might be tolerated
without access
interruption.
To provide additional protection against problems that could interrupt access,
use hot spares, as
described in Chapter 16. Specifically, see “How Hot SparesWork” on page
172.
Scenario—RAID-1 Volumes (Mirrors)
Chapter 10 • RAID-1 (Mirror) Volumes (Overview) 103
104
RAID-1 (Mirror) Volumes (Tasks)
This chapter explains how to perform Solaris Volume Manager tasks that are
related to RAID-1
volumes. For information about related concepts, see Chapter 10.
RAID-1 Volumes (Task Map)
The following task map identifies the procedures that are needed to manage
Solaris Volume Manager
RAID-1 volumes.
Task Description For Instructions
Create a mirror from unused
slices
Use the Solaris Volume Manager GUI or the
metainit command to create a mirror from
unused slices.
“How to Create a RAID-1
Volume From Unused Slices”
on page 107
Create a mirror from an
existing file system
Use the Solaris Volume Manager GUI or the
metainit command to create a mirror from
an existing file system.
“How to Create a RAID-1
Volume From a File System”
on page 109
Create a mirror from the
root (/) file system
Use the Solaris Volume Manager GUI or the
metainit command to create a mirror from
the root (/) file system.
“SPARC: How to Create a
RAID-1 Volume From the root
(/) File System” on page 113

“x86: How to Create a RAID-1
Volume From the root (/) File
System” on page 117
Attach a submirror Use the Solaris Volume Manager GUI or the
metattach command to attach a submirror.
“How to Attach a Submirror”
on page 122
Detach a submirror Use the Solaris Volume Manager GUI or the
metadetach command to detach the
submirror.
“How to Detach a Submirror”
on page 124
11 C H A P T E R 1 1
105
Task Description For Instructions
Place a submirror online or
take a submirror offline
Use the Solaris Volume Manager GUI or the
metaonline command to put a submirror
online. Use the Solaris Volume Manager GUI
or the metaoffline command to take a
submirror offline.
“How to Place a Submirror
Offline and Online” on page 124
Enable a slice within a
submirror
Use the Solaris Volume Manager GUI or the
metareplace command to enable a slice in a
submirror.
“How to Enable a Slice in a
Submirror” on page 125
Check mirror status Use the Solaris Volume Manager GUI or the
metastat command to check the status of
RAID-1 volumes.

“How to View the Status of
Mirrors and Submirrors”
on page 126
Change mirror options Use the Solaris Volume Manager GUI or the
metaparam command to change the options
for a specific RAID-1 volume.
“How to Change RAID-1
Volume Options” on page 128
Expand a mirror Use the Solaris Volume Manager GUI or the
metattach command to expand the capacity
of a mirror.
“How to Expand a RAID-1
Volume” on page 129
Replace a slice within a
submirror
Use the Solaris Volume Manager GUI or the
metareplace command to replace a slice in a
submirror.
“How to Replace a Slice in a
Submirror” on page 135
Replace a submirror Use the Solaris Volume Manager GUI or the
metattach command to replace a submirror.
“How to Replace a Submirror”
on page 136
Remove a mirror (unmirror) Use the Solaris Volume Manager GUI, the
metadetach command, or the metaclear
command to unmirror a file system.
“How to Unmirror a File
System” on page 138
Remove a mirror (unmirror)
of a file system that cannot
be unmounted
Use the Solaris Volume Manager GUI, the
metadetach command, or the metaclear

command to unmirror a file system that
cannot be unmounted.
“How to Unmirror a File
System That Cannot Be
Unmounted” on page 140
Use a mirror to perform
backups
Use the Solaris Volume Manager GUI, the
metaonline command, or the metaoffline
commands to perform backups with mirrors.
“How to Perform an Online
Backup of a RAID-1 Volume”
on page 143
Cancel or resume the
resynchronization process
on a mirror
Use the metasync command to cancel and
resume the resynchronization process on a
mirror
“How to Cancel a Volume
Resynchronization Process”
on page 130
“How to Resume a Volume
Resynchronization Process”
on page 133
RAID-1 Volumes (Task Map)
106 Solaris VolumeManagerAdministration Guide • June 2006
Creating a RAID-1 Volume
_ Howto Create a RAID-1 Volume From Unused Slices
This procedure shows you how to create a two-way mirror. If you want to
create a three-way mirror
or a four-way mirror, use the same procedure.
Check “Prerequisites for Creating Solaris Volume Manager Components” on
page 44 and “Creating
and Maintaining RAID-1 Volumes” on page 97.
Create two stripes or concatenations. These components become the
submirrors.
See “How to Create a RAID-0 (Stripe) Volume” on page 84 or “How to Create
a RAID-0
(Concatenation) Volume” on page 85.
To create the mirror, use one of the following methods:
_ From the Enhanced Storage tool within the Solaris Management Console,
open the Volumes
node, then choose Action Create Volume and follow the onscreen⇒
instructions. For more
information, see the online help.
_ Use the following form of the metainit command to create a one-way mirror:
# metainit volume-name -m submirror-name
volume-name Specifies the name of the volume to create
-m Specifies to create a mirror
submirror-name Specifies the name of the component that will be the first
submirror in the
mirror
See the following examples and the metainit(1M) man page for more
information.
To add the second submirror, use one of the following methods:
_ From the Enhanced Storage tool within the Solaris Management Console,
open the Volumes
node, then choose the mirror you want to modify. Choose Action Properties,⇒
then the
Submirrors. Follow the onscreen instructions to attach the submirror. For
more information, see
the online help.
_ Use the following form of the metattach command:
# metattach volume-name submirror-name
volume-name Specifies the name of the RAID-1 volume on which to add the
submirror

submirror-name Specifies the name of the component that will be the second
submirror
attached to the mirror
BeforeYou Begin
1
2
3
Creating a RAID-1 Volume
Chapter 11 • RAID-1 (Mirror) Volumes (Tasks) 107
See the following examples and the metattach(1M) man page for more
information.
Creating a Two-Way Mirror
# metainit d51 1 1 c0t0d0s2
d51: Concat/Stripe is setup
# metainit d52 1 1 c1t0d0s2
d52: Concat/Stripe is setup
# metainit d50 -m d51
d50: Mirror is setup
# metattach d50 d52
d50: Submirror d52 is attached
This example shows you how to create the two-way mirror, d50. The metainit
command creates two
submirrors (d51 and d52), which are RAID-0 volumes. The metainit -m
command creates the
one-way mirror from the d51 RAID-0 volume. The metattach command
attaches d52, creating a
two-way mirror and causing a resynchronization. Any data on the attached
submirror is overwritten
by the other submirror during the resynchronization.
Creating a Two-Way Mirror Without Resynchronization
# metainit d51 1 1 c0t0d0s2
d51: Concat/Stripe is setup
# metainit d52 1 1 c1t0d0s2
d52: Concat/Stripe is setup

# metainit d50 -m d51 d52
metainit: d50: WARNING: This form of metainit is not recommended.
The submirrors may not have the same data.
Please see ERRORS in metainit(1M) for additional information.
d50: Mirror is setup
This example shows the creation a two-way mirror, d50. The metainit
command creates two
submirrors (d51 and d52), which are RAID-0 volumes. The metainit -m
command is then run with
both submirrors to create the mirror. When you create a mirror using the
metainit command rather
than the metattach command , no resynchronization operations occur.As a
result, data could
become corrupted when Solaris Volume Manager assumes that both sides of
the mirror are identical
and can be used interchangeably.
To prepare a newly created mirror for a file system, see Chapter 18, “Creating
UFS, TMPFS, and
LOFS File Systems (Tasks),” in System Administration Guide: Devices and
File Systems. Some
applications, such as a database, do not use a file system. These applications
instead use the raw
device. The application must have its own way of accessing the raw device.
Example 11–1
Example 11–2
SeeAlso
Creating a RAID-1 Volume
108 Solaris VolumeManagerAdministration Guide • June 2006
_ Howto Create a RAID-1 Volume From a File System
Use this procedure to mirror an existing file system. If the file system can be
unmounted, the entire
procedure can be completed without a reboot. For file systems that cannot be
unmounted, such as
/usr and /swap, the system must be rebooted to complete the procedure.
When creating a RAID-1 volume from an existing file system built on a slice,
only the single slice
may be included in the primary RAID-0 volume (submirror). If you are
mirroring system-critical file
systems, all submirrors must consist of only a single slice.
For the procedures associated with mirroring the root (/) file system, see
“SPARC: How to Create a
RAID-1 Volume From the root (/) File System” on page 113 and “x86: How to
Create a RAID-1
Volume From the root (/) File System” on page 117.
In the example used in this procedure, the existing slice is c1t0d0s0. The
second slice, c1t1d0s0, is
available for the second half of the mirror. The submirrors are d1 and d2,
respectively, and the mirror
is d0.
Caution – Be sure to create a one-way mirror with the metainit command
then attach the additional
submirrors with the metattach command. When the metattach command is
not used, no
resynchronization operations occur.As a result, data could become corrupted
when Solaris Volume
Manager assumes that both sides of the mirror are identical and can be used
interchangeably.
Check “Prerequisites for Creating Solaris Volume Manager Components” on
page 44 and “Creating
and Maintaining RAID-1 Volumes” on page 97.
Identify the slice that contains the existing file system to be mirrored
This example uses the slice
c1t0d0s0.
Create a new RAID-0 volume on the slice from the previous step by
using one of the following
methods:
_ From the Enhanced Storage tool within the Solaris Management Console,
open the Volumes

node, then choose Action Create Volume. Follow the onscreen instructions .⇒
For more
information, see the online help.
_ Use the following form of the metainit command:
# metainit -f volume-name number-of-stripes components-per-stripe
component-name
-f Forces the command to continue. You must use this option when the
slice contains a mounted file system.
volume-name Specifies the name of the volume to create. For information on
naming volumes, see “Volume Names” on page 40.
number-of-stripes Specifies the number of stripes to create.
BeforeYou Begin
1
2
Creating a RAID-1 Volume
Chapter 11 • RAID-1 (Mirror) Volumes (Tasks) 109
components-per-stripe Specifies the number of components each stripe
should have.
component-names Specifies the names of the components that are used.
This example
uses the root slice, c0t0d0s0.
Create a second RAID-0 volume (concatenation) on an unused slice
(c1t1d0s0 in this example) to act
as the second submirror. The second submirror must be the same size
as the original submirror or
larger. Use one of the following methods:
_ From the Enhanced Storage tool within the Solaris Management Console,
open the Volumes
node, then choose Action->Create Volume and follow the instructions on
screen. For more
information, see the online help.
_ Use the following form of the metainit command.
# metainit volume-name number-of-stripes components-per-stripe
component-name

Note – See Step 2 for an explanation of the options.
Create a one-way mirror by using one of the following methods:
_ From the Enhanced Storage tool within the Solaris Management Console,
open the Volumes
node, then choose Action Create Volume. Follow the onscreen instructions .⇒
For more
information, see the online help.
_ Use the following form of the metainit command.
# metainit volume-name -m submirror-name
volume-name Specifies the name of the volume to create.
-m Specifies to create a mirror.
submirror-name Specifies the name of the component that will be the first
submirror in the
mirror. In this example, it is the RAID-0 volume that contains the root slice.
See the metainit(1M) man page for more information.
Caution – When you create a mirror from an existing file system, you must
follow the next two steps
precisely to avoid data corruption.
Edit the /etc/vfstab file so that the file system mount instructions refer to
the mirror, not to the
block device. For more information about the/etc/vfstab file, see
“Mounting File Systems” in
System Administration Guide: Devices and File Systems.
For example, if the /etc/vfstab file contains the following entry for the file
system:
/dev/dsk/slice /dev/rdsk/slice /var ufs 2 yes -
3
4
5
Creating a RAID-1 Volume
110 Solaris VolumeManagerAdministration Guide • June 2006
Change the entry to read as follows:
/dev/md/dsk/mirror-name /dev/md/rdsk/mirror-name /var ufs 2 yes -

Remount your newly mirrored file system according to one of the
following procedures:
_ If you are mirroring a file system that can be unmounted, then unmount and
remount the file
system.
# umount /filesystem
# mount /filesystem
_ If you are mirroring a file system that cannot be unmounted, then reboot
your system.
# reboot
Use the following form of the metattach command to attach the second
submirror.
# metattach volume-name submirror-name
volume-name Specifies the name of the RAID-1 volume on which to add the
submirror
submirror-name Specifies the name of the component that will be the second
submirror attached
to the mirror
See the metattach(1M) man page for more information.
Creating a Two-Way Mirror From a File System That Can Be Unmounted
# metainit -f d1 1 1 c1t0d0s0
d1: Concat/Stripe is setup
# metainit d2 1 1 c1t1d0s0
d2: Concat/Stripe is setup
# metainit d0 -m d1
d0: Mirror is setup
# umount /master
(Edit the /etc/vfstab file so that the file system references the mirror)
# mount /master
# metattach d0 d2
d0: Submirror d2 is attached
In this example, the -f option forces the creation of the first concatenation, d1,
which contains the

mounted file system /master on /dev/dsk/c1t0d0s0. The second
concatenation, d2, is created from
/dev/dsk/c1t1d0s0. This slice must be the same size as , or larger than the
size of d1.) The metainit
command with the -m option creates the one-way mirror, d0, fromd1.
Next, the entry for the file system should be changed in the /etc/vfstab file to
reference the mirror.
The following line in the /etc/vfstab file initially appears as follows:
6
7
Example 11–3
Creating a RAID-1 Volume
Chapter 11 • RAID-1 (Mirror) Volumes (Tasks) 111
/dev/dsk/c1t0d0s0 /dev/rdsk/c1t0d0s0 /var ufs 2 yes -
The entry is changed to the following:
/dev/md/dsk/d0 /dev/md/rdsk/d0 /var ufs 2 yes -
Finally, the file system is remounted and submirror d2 is attached to the
mirror, causing a mirror
resynchronization. The system confirms that the RAID-0 and RAID-1 volumes
are set up, and that
submirror d2 is attached.
Creating a Two-way Mirror From a File System That Cannot Be Unmounted
# metainit -f d12 1 1 c0t3d0s6
d12: Concat/Stripe is setup
# metainit d22 1 1 c1t0d0s6
d22: Concat/Stripe is setup
# metainit d2 -m d12
d2: Mirror is setup
(Edit the /etc/vfstab file so that /usr references the mirror)
# reboot
...
# metattach d2 d22
d2: Submirror d22 is attached
This example creates a two-way mirror using a slice containing the /usr file
system. The -f option
forces the creation of the first concatenation, d12, which contains the mounted
file system /usr on
/dev/dsk/c0t3d0s6. The second concatenation, d22, is created from
/dev/dsk/c1t0d0s6. This slice
must be the same size as, or larger than the size of d12. The metainit
command with the -m option
creates the one-way mirror d2 using the concatenation that contains the /usr
file system. Next, the
/etc/vfstab file must be edited to change the entry for /usr to reference the
mirror.
The /etc/vfstab file contains the following entry for the /usr file system:
/dev/dsk/c0t3d0s6 /dev/rdsk/c0t3d0s6 /usr ufs 1 yes -
Change the entry to read as follows:
/dev/md/dsk/d2 /dev/md/rdsk/d2 /usr ufs 1 yes -
After a reboot, the second submirror d22 is attached to the mirror, causing a
mirror
resynchronization.
Creating a Mirror From the /swap Space
# metainit -f d11 1 1 c0t0d0s1
d11: Concat/Stripe is setup
# metainit d21 1 1 c1t0d0s1
Example 11–4
Example 11–5
Creating a RAID-1 Volume
112 Solaris VolumeManagerAdministration Guide • June 2006
d21: Concat/Stripe is setup
# metainit d1 -m d11
d1: Mirror is setup
(Edit the /etc/vfstab file so that swap references the mirror)
# reboot
...
# metattach d1 d21

d1: Submirror d21 is attached
In this example, the -f option forces the creation of the first concatenation,
d11, which contains the
mounted file system swap on /dev/dsk/c0t0d0s1. The second concatenation,
d21, is created from
/dev/dsk/c1t0d0s1. This slice must be the same size as, or larger than the
size of d11. The metainit
command with the -m option creates the one-way mirror d1 using the
concatenation that contains
swap. Next, if there is an entry for swap in the /etc/vfstab file, it must be edited
to reference the
mirror.
The /etc/vfstab file contains the following entry for the swap space:
/dev/dsk/c0t0d0s1 - - swap - no -
Change the entry to read as follows:
/dev/md/dsk/d1 - - swap - no -
After a reboot, the second submirror d21 is attached to the mirror, causing a
mirror
resynchronization.
To save the crash dump when you have mirrored the swap space, use the
dumpadm command to
configure the dump device as a volume. For instance, if the swap device is
named /dev/md/dsk/d2,
use the dumpadm command to set this device as the dump device.
_ SPARC:Howto Create a RAID-1 Volume From the root
(/) File System
The process for mirroring the root (/) file system on a SPARC platform is
similar to mirroring any
other file system that you cannot unmount. The procedure differs in that the
metaroot command is
run instead of manually editing the /etc/vfstab file. Mirroring the root (/) file
system also requires
recording the path to the alternate boot device. This device reboots the
system if the submirror fails.

In the example used in this procedure, the existing slice is c1t0d0s0. The
second slice, c1t1d0s0, is
available for the second half of the mirror. The submirrors are d1 and d2,
respectively, and the mirror
is d0.
Creating a RAID-1 Volume
Chapter 11 • RAID-1 (Mirror) Volumes (Tasks) 113
Caution – Be sure to create a one-way mirror with the metainit command
then attach the additional
submirrors with the metattach command. When the metattach command is
not used, no
resynchronization operations occur.As a result, data could become corrupted
when Solaris Volume
Manager assumes that both sides of the mirror are identical and can be used
interchangeably.
Check “Prerequisites for Creating Solaris Volume Manager Components” on
page 44 and “Creating
and Maintaining RAID-1 Volumes” on page 97.
Identify the slice that contains the existing root (/) file system to be
mirrored. This example uses the
slice c1t0d0s0.
Create a new RAID-0 volume on the slice from the previous step by
using one of the following
methods. Only the single slice can be included in the RAID-0 volume.
_ From the Enhanced Storage tool within the Solaris Management Console,
open the Volumes
node, then choose Action Create Volume. Follow the onscreen instructions .⇒
For more
information, see the online help.
_ Use the following form of the metainit command:
# metainit -f volume-name number-of-stripes components-per-stripe
component-name
-f Forces the command to continue. You must use this option when the
slice contains a mounted file system.

volume-name Specifies the name of the volume to create. For information on
naming volumes, see “Volume Names” on page 40.
number-of-stripes Specifies the number of stripes to create.
components-per-stripe Specifies the number of components each stripe
should have.
component-names Specifies the names of the components that are used.
This example
uses the root slice, c0t0d0s0.
Create a second RAID-0 volume on an unused slice (c1t1d0s0 in this
example) to act as the second
submirror. The secondary submirror must be the same size as the
original submirror, or larger. Use
one of the following methods:
_ From the Enhanced Storage tool within the Solaris Management Console,
open the Volumes
node, then choose Action->Create Volume and follow the instructions on
screen. For more
information, see the online help.
_ Use the following form of the metainit command.
# metainit volume-name number-of-stripes components-per-stripe
component-name
BeforeYou Begin
1
2
3
Creating a RAID-1 Volume
114 Solaris VolumeManagerAdministration Guide • June 2006
Note – See Step 2 for and explanation of the options.
Create a one-way mirror by using one of the following methods:
_ From the Enhanced Storage tool within the Solaris Management Console,
open the Volumes
node, then choose Action Create Volume. Follow the onscreen instructions .⇒
For more
information, see the online help.

_ Use the following form of the metainit command.
# metainit volume-name -m submirror-name
volume-name Specifies the name of the volume to create.
-m Specifies to create a mirror.
submirror-name Specifies the name of the component that will be the first
submirror in the
mirror. In this example, it is the RAID-0 volume that contains the root slice.
Remount your newly mirrored file system. Run the metaroot volume-
name command, replacing
volume-name with the name of the mirror you have created. Then, reboot
your system.
# metaroot volume-name
# reboot
For more information, see the metaroot(1M) man page.
Use the following form of the metattach command to attach the second
submirror.
# metattach volume-name submirror-name
volume-name Specifies the name of the RAID-1 volume on which to add the
submirror
submirror-name Specifies the name of the component that will be the second
submirror attached
to the mirror
See the metattach(1M) man page for more information.
Record the alternate boot path.
a. Determine the path to the alternate root device. Use the ls -l command
on the slice that is being
attached as the second submirror to the root (/) file system mirror.
# ls -l /dev/dsk/c1t1d0s0
lrwxrwxrwx 1 root root 55 Mar 5 12:54 /dev/rdsk/c1t1d0s0 -> \
../../devices/sbus@1,f8000000/esp@1,200000/sd@3,0:a
b. Record the string that follows the /devices directory:
/sbus@1,f8000000/esp@1,200000/sd@3,0:a.
4
5

6
7
Creating a RAID-1 Volume
Chapter 11 • RAID-1 (Mirror) Volumes (Tasks) 115
Note – Because the system might not be available, this information should
also be written down
somewhere other than on the system. See “Recovering From Boot Problems”
on page 281 for
details on booting from the alternate boot device.
c. Edit the string to change the major name (sd, in this case) to disk,
resulting in
/sbus@1,f8000000/esp@1,200000/disk@3,0:a. If the system uses an IDE
bus, the original full
path might look like
$ ls -l /dev/dsk/c1t1d0s0
lrwxrwxrwx 1 root root 38 Mar 13 15:03 /dev/dsk/c0t0d0s0 -> \
../../devices/pci@1f,0/ide@d/dad@0,0:a
After changing the major name dad to disk, you would have
/pci@1f,0/ide@d/disk@0,0:a
d. Use the OpenBootTM PROM nvalias command to define a
“backuproot” device alias for the
secondary root (/) file system mirror. For example:
ok nvalias backup_root /sbus@1,f8000000/esp@1,200000/disk@3,0:a
e. Redefine the boot-device alias to reference both the primary and
secondary submirrors, in the
order in which you want them to be used, and store the configuration.
ok printenv boot-device
boot-device = disk net
ok setenv boot-device disk backup_root net
boot-device = disk backup_root net
ok nvstore
Note – In the event that the primary submirror fails, the system would
automatically boot to the

second submirror.Or, if you boot manually, rather than using autoboot, you
would enter:
ok boot backup_root
SPARC: Creating a Mirror From the root (/) File System
# metainit -f d1 1 1 c0t0d0s0
d1: Concat/Stripe is setup
# metainit d2 1 1 c0t1d0s0
d2: Concat/Stripe is setup
# metainit d0 -m d1
d0: Mirror is setup
# metaroot d0
# lockfs -fa
# reboot
...
# metattach d0 d2
Example 11–6
Creating a RAID-1 Volume
116 Solaris VolumeManagerAdministration Guide • June 2006
d0: Submirror d2 is attached
# ls -l /dev/dsk/c0t1d0s0
lrwxrwxrwx 1 root root 88 Feb 8 15:51 /dev/rdsk/c1t3d0s0 ->
../../devices/pci@1f,0/pci@1,1/ide@3/dad@0,0:a
# init 0
.
.
.
ok nvalias backup_root /pci@1f,0/pci@1,1/ide@3/disk@0,0:a
ok setenv boot-device disk backup_root net
ok nvstore
In this example, the -f option forces the creation of the first RAID-0 volume,
d1, which contains the
mounted root (/) file system on /dev/dsk/c0t0d0s0. The second concatenation,
d2, is created from

/dev/dsk/c0t1d0s0. This slice must be the same size as, or larger than the
size of d1. The metainit
command with the -m option creates the one-way mirror d0 using the
concatenation that contains
root (/).
Next, the metaroot command edits the /etc/vfstab and /etc/system files so that
the system can be
booted with the root (/) file system on a volume. It is a good idea to run the
lockfs -fa command
before rebooting. For more information, see the lockfs(1M) man page.
Do not attach the second submirror before the system is rebooted. You must
reboot after running the
metaroot command and before attaching the second submirror.
After a reboot, the submirror d2 is attached to the mirror, causing a mirror
resynchronization. The
system confirms that the concatenations and the mirror are set up, and that
submirror d2 is attached.
The ls -l command is run on the root raw device to determine the path to the
alternate root device
in case the system might later need to be booted from it.
_ x86:Howto Create a RAID-1 Volume From the root (/)
File System
The process for mirroring the root (/) file system on an x86 based system is
similar to mirroring root
on a SPARC system. However, on x86 based systems, the BIOS and fdisk
partitioning add an
additional layer of complexity.
In the example used in the procedures, the existing slice is c1t0d0s0. The
second slice, c1t1d0s0, is
available for the second half of the mirror. The submirrors are d1 and d2,
respectively, and the mirror
is d0.
Before implementing any of the procedures, check “Prerequisites for Creating
Solaris Volume

Manager Components” on page 44 and “Creating and Maintaining RAID-1
Volumes” on page 97.
BeforeYou Begin
Creating a RAID-1 Volume
Chapter 11 • RAID-1 (Mirror) Volumes (Tasks) 117
Verify that the ordering for the BIOS boot device can be configured to
allow the system to boot off of
the second disk in the mirror.
Before the kernel is started, the system is controlled by the read-only-memory
(ROM) Basic
Input/Output System (BIOS), which is the firmware interface on an x86 based
system. The BIOS is
analogous to the boot PROM on a SPARC based system. Some of the
BIOS’s tasks are as follows:
_ Perform startup functions.
_ Detect the correct device from which to boot the system.
_ Load the master boot record fromthat device to allow the system to self-
boot.
You can usually configure the BIOS to select the order of devices to probe for
the boot record.
Additionally, most modern BIOS implementations allow you to configure your
devices so that the
failover to the secondary submirror is automatic. If your system’s BIOS does
not have this feature
and the primary submirror fails, you need to access the BIOS during system
boot to reconfigure the
system to boot from the secondary root slice. Consult the user’s guide for your
BIOS for instructions
on how to configure settings in your BIOS
Before setting up a root mirror, check the BIOS on your system to verify that
you can boot off of more
than one disk. Some device drivers are configured to only see one disk on the
system.
Verify that the fdisk partitions are configured to support root mirroring.

The existence of a separate x86 boot partition presents a problem when
mirroring the root (/) file
system. Because it exists outside of the Solaris fdisk partition, the x86 boot
partition cannot be
mirrored by Solaris Volume Manager. Additionally, because only one copy of
the x86 boot partition
exists, it represents a single point of failure.
The GRUB-based installation program of the Solaris 10 1/06 software and
subsequent releases no
longer automatically creates an x86 boot partition. However, if the x86 already
exists in the system,
the installation program preserves that partition by default.
To determine if your system has a separate x86 boot partition, check the
/etc/vfstab file. The x86
boot partition exists if the file contains an entry similar to the following:
/dev/dsk/c2t1d0p0:boot - /boot pcfs - no -
To use the Solaris Volume Manager to mirror the root (/) file system, the file
system must use the
single Solaris fdisk partition. Therefore, if the x86 boot partition already exists
in the system, delete
this partition with the fdisk command and then reinstall the Solaris software.
When you reinstall,
the boot partition is no longer recreated.
Note – Solaris Volume Manager can only mirror slices within the Solaris fdisk
partition If you have
multiple fdisk partitions, you need to use another approach to protect the data
outside of the Solaris
fdisk partition.
1
2
Creating a RAID-1 Volume
118 Solaris VolumeManagerAdministration Guide • June 2006
Make the secondary submirror bootable with a master boot program.
a. Specify the master boot program.

# fdisk -b /usr/lib/fs/ufs/mboot /dev/rdsk/c1t1d0p0
The following screen appears:
Total disk size is 31035 cylinders
Cylinder size is 1146 (512 byte) blocks
Cylinders
Partition Status Type Start End Length %
========= ====== ============ ===== === ====== ===
1 Active Solaris 1 31034 31034 100
SELECT ONE OF THE FOLLOWING:
1. Create a partition
2. Specify the active partition
3. Delete a partition
4. Change between Solaris and Solaris2 Partition IDs
5. Exit (update disk configuration and exit)
6. Cancel (exit without updating disk configuration)
Enter Selection:
b. Choose number 5 from the menu, and press return.
Make the secondary disk bootable.
# /sbin/installgrub /boot/grub/stage1 /boot/grub/stage2
/dev/rdsk/c1t1d0s0
For more information about installgrub, refer to the installgrub(1M) man page.
Identify the slice that contains the existing root (/) file system to be
mirrored.
This example uses the slice c1t0d0s0.
Create a new RAID-0 volume on the slice from the previous step.
Only the single slice can be included in the RAID-0 volume. Use one of the
following methods:
_ From the Enhanced Storage tool within the Solaris Management Console,
open the Volumes
node, then choose Action Create Volume. Follow the onscreen instructions.⇒
For more
information, see the online help.
_ Use the following form of the metainit command:
# metainit -f volume-name number-of-stripes components-per-stripe
component-name
3
4
5
6
Creating a RAID-1 Volume
Chapter 11 • RAID-1 (Mirror) Volumes (Tasks) 119
-f Forces the command to continue. You must use this option when the
slice contains a mounted file system.
volume-name Specifies the name of the volume to create. For information on
naming volumes, see “Volume Names” on page 40.
number-of-stripes Specifies the number of stripes to create.
components-per-stripe Specifies the number of components each stripe
should have.
component-names Specifies the names of the components that are used.
This example
uses the root slice, c0t0d0s0.
Create a second RAID-0 volume (c1t1d0s0 in this example) on an unused
slice to act as the second
submirror.
Note – The secondary submirror must be the same size as the original
submirror, or larger. Also, the
slice you use as the second submirror must have a slice tag of “root” and the
root slice must be slice 0.
For information on configuring the slice tag field, see the format(1M) man
page.
Use either of the following methods:
_ From the Enhanced Storage tool within the Solaris Management Console,
open the Volumes
node, then choose Action->Create Volume and follow the instructions on
screen. For more
information, see the online help.
_ Use the following form of the metainit command.

# metainit volume-name number-of-stripes components-per-stripes
component-names
Note – See Step 6 for an explanation of the options.
Create a one-way mirror by using one of the following methods:
_ From the Enhanced Storage tool within the Solaris Management Console,
open the Volumes
node, then choose Action Create Volume. Follow the onscreen instructions.⇒
For more
information, see the online help.
_ Use the following form of the metainit command.
# metainit volume-name -m submirror-name
volume-name Specifies the name of the volume to create.
-m Specifies to create a mirror.
submirror-name Specifies the name of the component that will be the first
submirror in the
mirror. In this example, it is the RAID-0 volume that contains the root slice.
7
8
Creating a RAID-1 Volume
120 Solaris VolumeManagerAdministration Guide • June 2006
Remount your newly mirrored file system, then reboot the system.
# metaroot volume-name
# reboot
For more information, see the metaroot(1M) man page.
Attach the second submirror.
# metattach volume-name submirror-name
volume-name Specifies the name of the RAID-1 volume on which to add the
submirror.
submirror-name Specifies the name of the component that will be the second
submirror attached
to the mirror.
See the metattach(1M) man page for more information.
Define the alternative boot path in the menu.lst file.

To enable the system to boot off of the disk that holds the secondary
submirror, configure the system
to see the disk as the alternate boot device. In the current example, c1t1d0s0,
the alternative path is
on the first slice of the first fdisk partition on the second disk. Thus, you would
edit the menu.lst with
the following entry:
title alternate boot
root (hd1,0,a)
kernel /boot/multiboot
module /boot/x86.miniroot-safe
Note – To properly edit entries in menu.lst, you must be familiar with disk-
naming conventions in
GRUB. For details, see Chapter 11, “GRUB Based Booting (Tasks),” in
System Administration Guide:
Basic Administration
After you have completed editing the menu.lst file, the system is set to failover
to the second disk. If
the primary disk fails, disk numbering changes so that the system boots from
the secondary disk.
Caution – On certain cases, the automatic disk-renumbering feature of the
BIOS might affect recovery
from an unavailable primary disk. When disk renumbering forces the system
to boot from the
secondary disk, the primary disk’s boot archive becomes stale. If the same
primary disk becomes
available later and you boot the system, the disk numbering switches again to
use the default primary
disk for the system boot. However, at this stage, the primary disk’s boot
archive remains stale.
Consequently, the system might not boot at all. Therefore make sure that in
such cases, you select the
correct entry from the GRUB menu to boot the system from the valid boot
archive. After the system

completes the boot up process, perform the normal metadevice maintenance
which synchronizes
both primary and secondary disks and restores the valid boot archive to the
primary disk.
9
10
11
Creating a RAID-1 Volume
Chapter 11 • RAID-1 (Mirror) Volumes (Tasks) 121
Understanding Boot TimeWarnings When Mirroring
the root (/) File System
After you mirror your root (/) file system, error messages will be displayed in
the console and logged
in the system log that is defined in the /etc/syslog.conf file. These error
messages do not indicate a
problem. These messages are displayed for each device type that you are not
currently using, because
an unused module cannot be force loaded. The error messages are similar to
the following:
Jul 13 10:17:42 ifr genunix: [ID 370176 kern.warning] WARNING: forceload of
misc/md_trans failed
Jul 13 10:17:42 ifr genunix: [ID 370176 kern.warning] WARNING: forceload of
misc/md_raid failed
Jul 13 10:17:42 ifr genunix: [ID 370176 kern.warning] WARNING: forceload of
misc/md_hotspares failed
You can safely disregard these error messages.
WorkingWith Submirrors
_ HowtoAttach a Submirror
Note – An error message stating “can’t attach labeled submirror to an
unlabeled mirror”
indicates that you unsuccessfully attempted to attach a RAID-0 volume to a
mirror.Alabeled volume
(submirror) is a volume whose first component starts at cylinder 0, while an
unlabeled volume’s first

component starts at cylinder 1. To prevent the labeled submirror’s label from
being corrupted,
Solaris Volume Manager does not allow labeled submirrors to be attached to
unlabeled mirrors.
Read “Creating and Maintaining RAID-1 Volumes” on page 97.
Identify the component (concatenation or stripe) to be used as a
submirror.
The component must be the same size as, or larger than the existing
submirror in the mirror. If you
have not yet created a volume to be a submirror, see “Creating RAID-0
(Stripe) Volumes” on page 84
or “Creating RAID-0 (Concatenation) Volumes” on page 85.
Make sure that you have root privilege and that you have a current
backup of all data.
Verify that the status of the mirror you want to work with is in an “Okay”
state using the metastat
command.
# metastat mirror
BeforeYou Begin
1
2
3
WorkingWith Submirrors
122 Solaris VolumeManagerAdministration Guide • June 2006
Use one of the following methods to attach a submirror.
_ From the Enhanced Storage tool within the Solaris Management Console,
open the Volumes
node. Choose the mirror. Then, choose Action Properties and click the⇒
Submirror tab. Follow
the onscreen instructions. For more information, see the online help.
_ Use the metattach mirror submirror command.
# metattach mirror submirror
See the metattach(1M) man page for more information.
View the status of the mirror using the metastat command.

# metastat mirror
Attaching a Submirror
# metastat d30
d30: mirror
Submirror 0: d60
State: Okay
...
# metattach d30 d70
d30: submirror d70 is attached
# metastat d30
d30: mirror
Submirror 0: d60
State: Okay
Submirror 1: d70
State: Resyncing
Resync in progress: 41 % done
Pass: 1
Read option: roundrobin (default)
Write option: parallel (default)
Size: 2006130 blocks
...
This example shows the attaching of a submirror, d70, to a one-way mirror,
d30. You create a
two-way mirror when your attach the submirror to the mirror. The mirror d30
initially consists of
submirror d60. The submirror d70 is a RAID-0 volume. You verify that the
status of the mirror is
“Okay” with the metastat command, then attach the submirror. When the
metattach command is
run, the new submirror is resynchronized with the existing mirror. When you
attach an additional
submirror to the mirror, the system displays a message. To verify that the
mirror is resynchronizing,
use the metastat command.

4
5
Example 11–7
WorkingWith Submirrors
Chapter 11 • RAID-1 (Mirror) Volumes (Tasks) 123
_ Howto Detach a Submirror
Read “Creating and Maintaining RAID-1 Volumes” on page 97.
Make sure that you have root privilege. Make sure that you have a
current backup of all data.
Verify that the status of the mirror you want to work with is in an “Okay”
state using the metastat
command.
Use one of the following methods to detach a submirror.
_ From the Enhanced Storage tool within the Solaris Management Console,
open the Volumes
node. Choose the mirror. Then, choose Action Properties and click the⇒
Submirror tab. Follow
the onscreen instructions. For more information, see the online help.
_ Use the metadetach command to detach a submirror from a mirror.
# metadetach mirror submirror
See the metadetach(1M) man page for more information.
Detaching a Submirror
# metastat
d5: mirror
Submirror 0: d50
...
# metadetach d5 d50
d5: submirror d50 is detached
In this example, mirror d5 has a submirror, d50. You detach the submirror with
the metadetach
command. The underlying slices from d50 can be reused elsewhere. After the
submirror is detached
from the mirror, the system displays a confirmation message.
_ Howto Place a Submirror Offline and Online

The metaonline command can only be used when a submirror was taken
offline by the metaoffline
command. After the metaonline command runs, Solaris Volume Manager
automatically begins
resynchronizing the submirror with the mirror.
Note – The metaoffline command’s capabilities are similar to the capabilities
offered by the
metadetach command. However, the metaoffline command does not sever
the logical association
between the submirror and the mirror.
BeforeYou Begin
1
2
3
Example 11–8
WorkingWith Submirrors
124 Solaris VolumeManagerAdministration Guide • June 2006
Read “Creating and Maintaining RAID-1 Volumes” on page 97.
Make sure that you have root privilege and that you have a current
backup of all data.
Use one of the following methods to place a submirror online or offline.
_ From the Enhanced Storage tool within the Solaris Management Console,
open the Volumes
node. Choose the mirror. Then, choose Action Properties and click the⇒
Submirror tab. Follow
the onscreen instructions . For more information, see the online help.
_ Use the metaoffline command to a submirror offline.
# metaoffline mirror submirror
See the metaoffline(1M) man page for more information.
_ Use the metaonline command to place a submirror online.
# metaonline mirror submirror
See the metaonline(1M) man page for more information.
Placing a Submirror Offline
# metaoffline d10 d11

d10: submirror d11 is offlined
In this example, submirror d11 is taken offline from mirror d10. Reads
continue to be made from the
other submirror. The mirror is out of sync as soon as the first write is made.
This inconsistency is
corrected when the offlined submirror is brought back online.
Placing a Submirror Online
# metaonline d10 d11d10: submirror d11 is onlined
In this example, submirror d11 is brought back online in mirror d10.
_ Howto Enable a Slice in a Submirror
Read “Overview of Replacing and Enabling Components in RAID-1 and
RAID-5 Volumes” on page
228 and “Creating and Maintaining RAID-1 Volumes” on page 97.
Make sure that you have root privilege and that you have a current
backup of all data.
Use one of the following methods to enable a slice in a submirror.
BeforeYou Begin
1
2
Example 11–9
Example 11–10
BeforeYou Begin
1
2
WorkingWith Submirrors
Chapter 11 • RAID-1 (Mirror) Volumes (Tasks) 125
_ From the Enhanced Storage tool within the Solaris Management Console,
open the Volumes
node. Choose the mirror. Then, choose Action Properties and click the⇒
Submirror tab. Follow
the onscreen instructions. For more information, see the online help.
_ Use the metareplace command to enable a failed slice in a submirror.
# metareplace -e mirror failed-slice

The metareplace command automatically starts a resynchronization to
synchronize the repaired
or replaced slice with the rest of the mirror.
See the metareplace(1M) man page for more information.
Enabling a Slice in a Submirror
# metareplace -e d11 c1t4d0s7
d11: device c1t4d0s7 is enabled
In this example, the mirror d11 has a submirror that contains slice, c1t4d0s7,
which had a soft error.
The metareplace command with the -e option enables the failed slice.
If a physical disk is defective, you can replace it with another available disk
(and its slices) on the
system as documented in “How to Replace a Slice in a Submirror” on page
135. Alternatively, you can
repair or replace the disk, format it, and then run the metareplace command
with the -e option as
shown in this example.
Maintaining RAID-1 Volumes
_ Howto View the Status of Mirrors and Submirrors
For an overview of the status information associated with RAID-1 volumes
and submirrors, see
“Understanding Submirror Status to Determine Maintenance Actions” on page
101.
Use one of the following methods to the check mirror or submirror
status.
_ From the Enhanced Storage tool within the Solaris Management Console,
open the Volumes
node. Choose the mirror. Then, choose Action Properties. Follow the⇒
onscreen instructions.
For more information, see the online help.
_ Run the metastat command on the mirror to view the status of each
submirror.
# metastat mirror

See “How to Change RAID-1 Volume Options” on page 128 to change a
mirror’s pass number,
read option, or write option.
Example 11–11
BeforeYou Begin
◗
Maintaining RAID-1 Volumes
126 Solaris VolumeManagerAdministration Guide • June 2006
See metastat(1M) for more information about checking device status.
Checking Status of RAID-1 Volumes
Here is sample output from the metastat command. Use metastat command
without a mirror
name to display all the status of all mirrors.
# metastatd70: Mirror
Submirror 0: d71
State: Okay
Pass: 1
Read option: roundrobin (default)
Write option: parallel (default)
Size: 12593637 blocks
d71: Submirror of d70
State: Okay
Size: 12593637 blocks
Stripe 0:
Device Start Block Dbase State Reloc Hot Spare
c1t3d0s3 0 No Okay Yes
Stripe 1:
Device Start Block Dbase State Reloc Hot Spare
c1t3d0s4 0 No Okay Yes
Stripe 2:
Device Start Block Dbase State Reloc Hot Spare
c1t3d0s5 0 No Okay Yes
d0: Mirror
Submirror 0: d1

State: Okay
Submirror 1: d2
State: Okay
Pass: 1
Read option: roundrobin (default)
Write option: parallel (default)
Size: 5600 blocks
d1: Submirror of d0
State: Okay
Size: 5600 blocks
Stripe 0:
Device Start Block Dbase State Hot Spare
c0t2d0s7 0 No Okay
...
Use the metastat command with a mirror name argument to display output for
a specific mirror.
Example 11–12
Maintaining RAID-1 Volumes
Chapter 11 • RAID-1 (Mirror) Volumes (Tasks) 127
metastat d70
d70: Mirror
Submirror 0: d71
State: Okay
Pass: 1
Read option: roundrobin (default)
Write option: parallel (default)
Size: 12593637 blocks
d71: Submirror of d70
State: Okay
Size: 12593637 blocks
Stripe 0:
Device Start Block Dbase State Reloc Hot Spare
c1t3d0s3 0 No Okay Yes
Stripe 1:

Device Start Block Dbase State Reloc Hot Spare
c1t3d0s4 0 No Okay Yes
Stripe 2:
Device Start Block Dbase State Reloc Hot Spare
c1t3d0s5 0 No Okay Yes
For each submirror in the mirror, the metastat command shows the status, an
“invoke” line if there
is an error, the assigned hot spare pool (if any), the size in blocks, and
information about each slice in
the submirror.
_ Howto Change RAID-1 Volume Options
Check “About RAID-1 Volume Options” on page 99.
Make sure that you have root privilege and that you have a current
backup of all data.
Use one of the following methods to change the RAID-1 options.
_ From the Enhanced Storage tool within the Solaris Management Console,
open the Volumes
node. Choose the mirror. Then, choose Action Properties. Follow the⇒
onscreen instructions.
For more information, see the online help.
_ Use the metaparam command to display and change a mirror’s options.
# metaparam [mirror options] mirror
See “About RAID-1 Volume Options” on page 99 for a description of mirror
options. Also, see
the metaparam(1M) man page.
BeforeYou Begin
1
2
Maintaining RAID-1 Volumes
128 Solaris VolumeManagerAdministration Guide • June 2006
Changing a RAID-1 Volume’s Read Policy
# metaparam -r geometric d30
# metaparam d30
d30: mirror current parameters are:

Pass: 1
Read option: geometric (-g)
Write option: parallel (default)
In this example, the -r option changes a mirror’s read policy to geometric.
Changing a RAID-1 Volume’sWrite Policy
# metaparam -w serial d40
# metaparam d40
d40: mirror current parameters are:
Pass: 1
Read option: roundrobin (default)
Write option: serial (-S)
In this example, the -w option changes a mirror’s write policy to serial.
Changing a RAID-1 Volume’s Pass Number
# metaparam -p 5 d50
# metaparam d50
d50: mirror current parameters are:
Pass: 5
Read option: roundrobin (default)
Write option: parallel (default)
In this example, the -p option changes a mirror’s pass number to 5.
_ Howto Expand a RAID-1 Volume
Read “Creating and Maintaining RAID-1 Volumes” on page 97.
Make sure that you have root privilege and that you have a current
backup of all data.
Use one of the following methods to expand a mirror.
_ From the Enhanced Storage tool within the Solaris Management Console,
open the Volumes
node. Choose the mirror. Then, choose Action->Properties and click the
Submirror tab. Follow
the onscreen instructions. For more information, see the online help.
_ Use the metattach command to attach additional slices to each submirror.
Example 11–13
Example 11–14
Example 11–15

BeforeYou Begin
1
2
Maintaining RAID-1 Volumes
Chapter 11 • RAID-1 (Mirror) Volumes (Tasks) 129
# metattach submirror slice
Each submirror in a mirror must be expanded. See the metattach(1M) man
page for more
information.
Use the metattach command to cause the mirror to recompute its size
based on the size of the
submirror.
# metattach mirror
Expanding a Two-Way Mirror That Contains a Mounted File System
# metastat
d8: Mirror
Submirror 0: d9
State: Okay
Submirror 1: d10
State: Okay
...
# metattach d9 c0t2d0s5
d9: component is attached
# metattach d10 c0t3d0s5
d10: component is attached
# metattach d8
This example shows how to expand a mirrored, mounted file system by
concatenating two disk
drives to the mirror’s two submirrors. The mirror is named d8 and contains two
submirrors named
d9 and d10.
For a UFS, run the growfs(1M) command on the mirror volume. See “How to
Expand a File System”
on page 227.
An application, such as a database, that uses the raw volume must have its
own way of expanding the
added storage.
_ Howto Cancel a Volume Resynchronization Process
Assume the Primary Administrator role, or become superuser.
The Primary Administrator role includes the Primary Administrator profile. To
create the role and
assign the role to a user, see Chapter 2, “WorkingWith the Solaris
Management Console (Tasks),” in
System Administration Guide: Basic Administration.
Use the metastat command to view the status of the RAID-1 volume and
associated submirrors.
# metastat mirror-name
3
Example 11–16
SeeAlso
1
2
Maintaining RAID-1 Volumes
130 Solaris VolumeManagerAdministration Guide • June 2006
or
metastat -a
Use the metasync -c volume command to cancel the resynchronization
process.
Canceling a Volume Resynchronization Process
The following example illustrates how to cancel the resynchronization process
on a volume that is
part of the disk set blue. Notice that the submirrors are in the “Resync
cancelled” state after running
the metasync command.
# metastat -a
blue/d10: Mirror
Submirror 0: blue/d1
State: Resyncing

Submirror 1: blue/d2
State: Okay
Resync in progress: 0 % done
Pass: 1
Read option: roundrobin (default)
Write option: parallel (default)
Size: 10485760 blocks (5.0 GB)
blue/d1: Submirror of blue/d10
State: Resyncing
Size: 10485760 blocks (5.0 GB)
Stripe 0:
Device Start Block Dbase State Reloc
Hot Spare
/dev/dsk/c3t50020F230000FA57d0s0 0 No Okay Yes
blue/d2: Submirror of blue/d10
State: Okay
Size: 10485760 blocks (5.0 GB)
Stripe 0:
Device Start Block Dbase State Reloc
Hot Spare
/dev/dsk/c3t50020F230000FA57d0s1 0 No Okay Yes
3
Example 11–17
Maintaining RAID-1 Volumes
Chapter 11 • RAID-1 (Mirror) Volumes (Tasks) 131
Device Relocation Information:
Device Reloc Device ID
/dev/dsk/c3t50020F230000FA57d0 Yes
id1,ssd@n60020f200000fa574033661f000c641
4
# metasync -s blue -c d10
Mar 1 12:46:18 SunSystem1 md_mirror: WARNING: md: blue/d10: Resync
cancelled
# metastat -a

blue/d10: Mirror
Submirror 0: blue/d1
State: Resync cancelled
Submirror 1: blue/d2
State: Okay
Resync cancelled: 3 % done
Pass: 1
Read option: roundrobin (default)
Write option: parallel (default)
Size: 10485760 blocks (5.0 GB)
blue/d1: Submirror of blue/d10
State: Resync cancelled
Invoke: metasync blue/d10
Size: 10485760 blocks (5.0 GB)
Stripe 0:
Device Start Block Dbase State Reloc
Hot Spare
/dev/dsk/c3t50020F230000FA57d0s0 0 No Okay Yes
blue/d2: Submirror of blue/d10
State: Okay
Size: 10485760 blocks (5.0 GB)
Stripe 0:
Device Start Block Dbase State Reloc
Hot Spare
/dev/dsk/c3t50020F230000FA57d0s1 0 No Okay Yes
Device Relocation Information:
Device Reloc Device ID
/dev/dsk/c3t50020F230000FA57d0 Yes
id1,ssd@n60020f200000fa574033661f000c641
4
Maintaining RAID-1 Volumes
132 Solaris VolumeManagerAdministration Guide • June 2006
_ Howto Resume a Volume Resynchronization Process
Assume the Primary Administrator role, or become superuser.

The Primary Administrator role includes the Primary Administrator profile. To
create the role and
assign the role to a user, see Chapter 2, “WorkingWith the Solaris
Management Console (Tasks),” in
System Administration Guide: Basic Administration.
Use the metastat command to view the status of the RAID-1 volume and
associated submirrors.
# metastat mirror-name
or
metastat -a
Use the metasync volume command to resume the resynchronization
process.
# metasync volume
Resuming a Volume Resynchronization Process
The following example illustrates how to resume the resynchronization
process on a volume that is
part of the disk set blue. Notice that the submirrors are in the “Resync
cancelled” state before
running the metasync command. Once the metasync command is issued, the
resynchronization
process resumes.
# metastat -a
blue/d10: Mirror
Submirror 0: blue/d1
State: Resync cancelled
Submirror 1: blue/d2
State: Okay
Resync cancelled: 3 % done
Pass: 1
Read option: roundrobin (default)
Write option: parallel (default)
Size: 10485760 blocks (5.0 GB)
blue/d1: Submirror of blue/d10
State: Resync cancelled

Invoke: metasync blue/d10
Size: 10485760 blocks (5.0 GB)
Stripe 0:
Device Start Block Dbase State Reloc
Hot Spare
/dev/dsk/c3t50020F230000FA57d0s0 0 No Okay Yes
1
2
3
Example 11–18
Maintaining RAID-1 Volumes
Chapter 11 • RAID-1 (Mirror) Volumes (Tasks) 133
blue/d2: Submirror of blue/d10
State: Okay
Size: 10485760 blocks (5.0 GB)
Stripe 0:
Device Start Block Dbase State Reloc
Hot Spare
/dev/dsk/c3t50020F230000FA57d0s1 0 No Okay Yes
Device Relocation Information:
Device Reloc Device ID
/dev/dsk/c3t50020F230000FA57d0 Yes
id1,ssd@n60020f200000fa574033661f000c641
4
# metasync -s blue d10
# metastat -a
blue/d10: Mirror
Submirror 0: blue/d1
State: Resyncing
Submirror 1: blue/d2
State: Okay
Resync in progress: 3 % done
Pass: 1
Read option: roundrobin (default)

Write option: parallel (default)
Size: 10485760 blocks (5.0 GB)
blue/d1: Submirror of blue/d10
State: Resyncing
Size: 10485760 blocks (5.0 GB)
Stripe 0:
Device Start Block Dbase State Reloc
Hot Spare
/dev/dsk/c3t50020F230000FA57d0s0 0 No Okay Yes
blue/d2: Submirror of blue/d10
State: Okay
Size: 10485760 blocks (5.0 GB)
Stripe 0:
Device Start Block Dbase State Reloc
Hot Spare
Maintaining RAID-1 Volumes
134 Solaris VolumeManagerAdministration Guide • June 2006
/dev/dsk/c3t50020F230000FA57d0s1 0 No Okay Yes
Device Relocation Information:
Device Reloc Device ID
/dev/dsk/c3t50020F230000FA57d0 Yes
id1,ssd@n60020f200000fa574033661f000c641
4
Responding to RAID-1 Volume Component Failures
_ Howto Replace a Slice in a Submirror
Read “Overview of Replacing and Enabling Components in RAID-1 and
RAID-5 Volumes” on page
228 and “Creating and Maintaining RAID-1 Volumes” on page 97.
Make sure that you have root privilege and that you have a current
backup of all data.
Use the metastat command to view the status of the RAID-1 volume and
associated submirrors.
# metastat mirror-name
Use one of the following methods to replace a slice in a submirror.

_ From the Enhanced Storage tool within the Solaris Management Console,
open the Volumes
node. Choose the mirror. Then, choose Action Properties and click the⇒
Submirror tab. Follow
the onscreen instructions. For more information, see the online help.
_ Use the following form of the metareplace command to replace a slice in a
submirror:
# metareplace mirror-name component-name
_ mirror-name is the name of the volume to create.
_ component-name specifies the name of the component to replace.
mirror-name Specifies the name of the volume to create
component-name Specifies the name of the component to replace
See the following examples and the metainit(1M) man page for more
information.
Replacing a Failed Slice in a Mirror
The following example illustrates how to replace a failed slice when the
system is not configured to
use hot spare pools for the automatic replacement of failed disks. See
Chapter 16 for more
information about using hot spare pools.
BeforeYou Begin
1
2
3
Example 11–19
Responding to RAID-1 Volume Component Failures
Chapter 11 • RAID-1 (Mirror) Volumes (Tasks) 135
# metastat d6
d6: Mirror
Submirror 0: d16
State: Okay
Submirror 1: d26
State: Needs maintenance
...

d26: Submirror of d6
State: Needs maintenance
Invoke: metareplace d6 c0t2d0s2 <new device>
...
# metareplace d6 c0t2d0s2 c0t2d2s2
d6: device c0t2d0s2 is replaced with c0t2d2s2
The metastat command confirms that mirror d6 has a submirror, d26, with a
slice in the “Needs
maintenance” state. The metareplace command replaces the slice as
specified in the “Invoke” line of
the metastat output with another available slice on the system. The system
confirms that the slice is
replaced, and starts resynchronizing the submirror.
_ Howto Replace a Submirror
Read “Overview of Replacing and Enabling Components in RAID-1 and
RAID-5 Volumes” on page
228 and “Creating and Maintaining RAID-1 Volumes” on page 97.
Make sure that you have root privilege and that you have a current
backup of all data.
Use the metastat command to view the status of the RAID-1 volume and
associated submirrors.
# metastat mirror-name
Use one of the following methods to replace a submirror.
_ From the Enhanced Storage tool within the Solaris Management Console,
open the Volumes
node. Choose the mirror. Then, choose Action Properties and click the⇒
Submirror tab. Follow
the onscreen instructions. For more information, see the online help.
_ Use the metadetach, metaclear, metatinit, and metattach commands to
replace an entire
submirror.
a. Use the metadetach command to the failed submirror from the mirror.
# metadetach -f mirror-name submirror
-f Forces the detach to occur

mirror-name Specifies the name of the mirror
submirror Specifies the submirror to detach
BeforeYou Begin
1
2
3
Responding to RAID-1 Volume Component Failures
136 Solaris VolumeManagerAdministration Guide • June 2006
b. Use the metaclear command to delete the submirror.
# metaclear -f submirror
-f Forces the deletion of the submirror to occur
submirror Specifies the submirror to delete
c. Use the metainit command to create a new submirror.
# metainit volume-name number-of-stripes components-per-stripe
component-name
volume-name Specifies the name of the volume to create. For information on
naming volumes, see “Volume Names” on page 40.
number-of-stripes Specifies the number of stripes to create.
components-per-stripe Specifies the number of components each stripe
should have.
component-names Specifies the names of the components that are used.
This example
uses the root slice, c0t0d0s0.
d. Use the metattach command to attach the new submirror.
# metattach mirror submirror
Replacing a Submirror in a Mirror
The following example illustrates how to replace a submirror in an active
mirror.
# metastat d20
d20: Mirror
Submirror 0: d21
State: Okay
Submirror 1: d22
State: Needs maintenance

...
# metadetach -f d20 d22
d20: submirror d22 is detached
# metaclear -f d22
d22: Concat/Stripe is cleared
# metainit d22 2 1 c1t0d0s2 1 c1t0d1s2
d22: Concat/Stripe is setup
# metattach d20 d22
d20: components are attached
In this example, the metastat command confirms that the two-way mirror, d20,
has a submirror,
d22, in the “Needs maintenance” state. In this case, the entire submirror
needs to be cleared and
recreated. The metadetach command detaches the failed submirror from the
mirror by using the -f
option, which forces the detachment to occur. The metaclear command clears
the submirror. The
Example 11–20
Responding to RAID-1 Volume Component Failures
Chapter 11 • RAID-1 (Mirror) Volumes (Tasks) 137
metainit command recreates submirror, d22, with new slices. Finally, the
metattach command
attaches the rebuilt submirror.Amirror resynchronization begins automatically.
The specific configuration of the new volume, d22, depends on the
component you are replacing.A
concatenation, as shown here, can sufficiently replace a concatenation.
However, a concatenation
would not be an ideal replacement for a stripe because it could impact
performance.
You temporarily lose the capability for data redundancy while the mirror is a
one-way mirror.
Removing RAID-1 Volumes (Unmirroring)
_ Howto Unmirror a File System

Use this procedure to unmirror a file system that can be unmounted while the
system is running. To
unmirror root (/), /var, /usr, or swap, or any other file system that cannot be
unmounted while the
system is running, see “How to Unmirror a File System That Cannot Be
Unmounted” on page 140.
Read “Creating and Maintaining RAID-1 Volumes” on page 97.
Make sure that you have root privilege and that you have a current
backup of all data.
Verify that at least one submirror is in the Okay state.
# metastat mirror
Unmount the file system.
# umount /file-system
Detach the submirror that will continue to be used for the file system.
# metadetach mirror submirror
For more information, see the metadetach(1M) man page.
Clear the mirror and remaining subcomponents.
# metaclear -r mirror
For more information, see the metaclear(1M) man page.
Edit the /etc/vfstab file to use the component detached in Step4 , if
necessary.
Remount the file system.
# mount /file-system
BeforeYou Begin
1
2
3
4
5
6
7
Removing RAID-1 Volumes (Unmirroring)
138 Solaris VolumeManagerAdministration Guide • June 2006
Unmirroring the /opt File System

# metastat d4
d4: Mirror
Submirror 0: d2
State: Okay
Submirror 1: d3
State: Okay
Pass: 1
Read option: roundrobin (default)
Write option: parallel (default)
Size: 2100735 blocks (1.0 GB)
d2: Submirror of d4
State: Okay
Size: 2100735 blocks (1.0 GB)
Stripe 0:
Device Start Block Dbase State Reloc Hot Spare
c0t0d0s0 0 No Okay Yes
d3: Submirror of d4
State: Okay
Size: 2100735 blocks (1.0 GB)
Stripe 0:
Device Start Block Dbase State Reloc Hot Spare
c1t0d0s0 0 No Okay Yes
...
# umount /opt
# metadetach d4 d2
d4: submirror d2 is detached
# metaclear -r d4
d4: Mirror is cleared
d3: Concat/Stripe is cleared
(Edit the /etc/vfstab file so that the entry for /opt is changed from d4 to the
underlying slice or volume)
# mount /opt
In this example, the /opt file system is composed of a two-way mirror, d4. The
submirrors of the

mirror are d2 and d3. The submirrors are composed of slices
/dev/dsk/c0t0d0s0 and
/dev/dsk/c1t0d0s0. The metastat command verifies that at least one submirror
is in the “Okay”
state. (Amirror with no submirrors in the “Okay” state must be repaired first.)
The file system is
unmounted. Then, submirror d2 is detached. The metaclear -r command
deletes the mirror and
the other submirror, d3.
Next, the entry for /opt in the /etc/vfstab file is changed to reference the
underlying slice.
In this example the /etc/vfstab file contains the following entry for the /opt file
system:
Example 11–21
Removing RAID-1 Volumes (Unmirroring)
Chapter 11 • RAID-1 (Mirror) Volumes (Tasks) 139
/dev/md/dsk/d4 /dev/md/rdsk/d4 /opt ufs 2 yes -
Change the entry to read as follows:
/dev/md/dsk/d2 /dev/md/rdsk/d2 /opt ufs 2 yes -
By using the submirror name, you can continue to have the file system
mounted on a volume. Finally,
the /opt file system is remounted.
By using d2 instead of d4 in the /etc/vfstab file, you have unmirrored the
mirror. Because d2
consists of a single slice, you can mount the file system on the slice name
(/dev/dsk/c0t0d0s0) if
you do not want the device to support a volume.
_ Howto Unmirror a File System That Cannot Be
Unmounted
Use this task to unmirror file systems, including root (/), /usr, /opt, and swap,
that cannot be
unmounted during normal system operation.
Make sure that you have root privilege and that you have a current
backup of all data.

Verify that at least one submirror is in the Okay state.
# metastat mirror
Detach the submirror that will continue to be used for the file system.
# metadetach mirror submirror
For more information, see the metadetach(1M) man page.
Use one of the following commands, depending the file system you want
to unmirror:
_ For the /usr, /opt, or swap file systems, change the file system entry in the
/etc/vfstab file to
use a non-Solaris Volume Manager device (slice).
_ For the root (/) file system only: run the metaroot command.
# metaroot rootslice
For more information, see the metaroot(1M) man page.
Reboot the system.
# reboot
Clear the remaining mirror and submirrors.
# metaclear -r mirror
1
2
3
4
5
6
Removing RAID-1 Volumes (Unmirroring)
140 Solaris VolumeManagerAdministration Guide • June 2006
For more information, see the metaclear(1M) man page.
Unmirroring the root (/) File System
# metastat d0
d0: Mirror
Submirror 0: d10
State: Okay
Submirror 1: d20
State: Okay
Pass: 1

Read option: roundrobin (default)
Write option: parallel (default)
Size: 2100735 blocks (1.0 GB)
d10: Submirror of d0
State: Okay
Size: 2100735 blocks (1.0 GB)
Stripe 0:
Device Start Block Dbase State Reloc Hot Spare
c0t3d0s0 0 No Okay Yes
d20: Submirror of d0
State: Okay
Size: 2100735 blocks (1.0 GB)
Stripe 0:
Device Start Block Dbase State Reloc Hot Spare
c1t3d0s0 0 No Okay Yes
# metadetach d0 d20
d0: submirror d20 is detached
# metaroot /dev/dsk/c0t3d0s0
# reboot
...
# metaclear -r d0
d0: Mirror is cleared
d10: Concat/Stripe is cleared
# metaclear d20
d20: Concat/Stripe is cleared
In this example, the root (/) file system is a two-way mirror, d0. The submirrors
of the mirror are d10
and d20. The submirrors are composed of slices /dev/dsk/c0t3d0s0 and
/dev/dsk/c1t3d0s0. The
metastat command verifies that at least one submirror is in the “Okay” state.
(Amirror with no
submirrors in the “Okay” state must be repaired first.) Submirror d20 is
detached to make d0 a
one-way mirror.

Example 11–22
Removing RAID-1 Volumes (Unmirroring)
Chapter 11 • RAID-1 (Mirror) Volumes (Tasks) 141
The rootslice is the slice containing the root (/) file system. The metaroot
command is run, using the
rootslice from which the system is going to boot. This command edits the
/etc/system and
/etc/vfstab files. The command removes information that specifies mirroring of
the root (/) file
system.
After rebooting the system, the metaclear -r command deletes the mirror and
the other submirror,
d10. The last metaclear command clears submirror d20.
Unmirroring the swap File System
# metastat d1
d1: Mirror
Submirror 0: d11
State: Okay
Submirror 1: d21
State: Okay
...
# metadetach d1 d21
d1: submirror d21 is detached
(Edit the /etc/vfstab file to change the entry for swap from metadevice to slice
name)
# reboot
...
# metaclear -r d1
d1: Mirror is cleared
d11: Concat/Stripe is cleared
# metaclear d21
d21: Concat/stripe is cleared
In this example, the swap file system is made of a two-way mirror, d1. The
submirrors of the mirror

are d11 and d21. The submirrors are composed of slices /dev/dsk/c0t3d0s1
and
/dev/dsk/c1t3d0s1. The metastat command verifies that at least one submirror
is in the “Okay”
state. (Amirror with no submirrors in the “Okay” state must be repaired first.)
Submirror d21 is
detached to make d1 a one-way mirror. Next, the /etc/vfstab file is edited to
change the entry for
swap to reference the slice that is in submirror d21.
In this example, the /etc/vfstab file contains the following entry for the swap
file system:
/dev/md/dsk/d4 /dev/md/rdsk/d4 /opt ufs 2 yes -
/dev/md/dsk/d1 - - swap - no -
Change the entry to read as follows:
/dev/dsk/c0t3d0s1 - - swap - no -
After rebooting the system, the metaclear -r command deletes the mirror and
the other submirror,
d11. The final metaclear command clears submirror d21.
Example 11–23
Removing RAID-1 Volumes (Unmirroring)
142 Solaris VolumeManagerAdministration Guide • June 2006
Backing Up Data on a RAID-1 Volume
Solaris Volume Manager is not meant to be a “backup product.” Solaris
Volume Manager does
provide a means for backing up mirrored data without causing any of the
following to occur:
_ Unmounting the mirror
_ Taking the entire mirror offline
_ Halting the system
_ Denying users access to data
Solaris Volume Manager backs up mirrored data by first taking one of the
submirrors offline. During
the backup, mirroring is temporarily unavailable. As soon as the backup is
complete, the submirror is

then placed back online and resynchronized.
Note – The UFS Snapshots feature provides an alternative way to backup a
system without taking the
file system offline. You can perform the backup without detaching the
submirror and incurring the
performance penalty of resynchronizing the mirror later. Before performing a
backup using the UFS
Snapshots feature, make sure you have enough space available on your UFS
file system. For more
information, see Chapter 26, “Using UFS Snapshots (Tasks),” in System
Administration Guide:
Devices and File Systems.
_ Howto Perform an Online Backup of a RAID-1 Volume
You can use this procedure on any file system except the root (/) file system.
Be aware that this type of
backup creates a “snapshot” of an active file system. Depending on how the
file system is being used
when it is write-locked, some files on the backup might not correspond to the
actual files on disk.
The following limitations apply to this procedure:
_ If you use this procedure on a two-way mirror, be aware that data
redundancy is lost while one
submirror is offline for backup.Amulti-way mirror does not have this problem.
_ There is some overhead on the system when the reattached submirror is
resynchronized after the
backup is complete.
The high-level steps in this procedure are as follows:
_ Write-locking the file system (UFS only). Do not lock root (/).
_ Flushing all data from cache to disk.
_ Using the metadetach command to take one submirror off of the mirror
_ Unlocking the file system
_ Using the fsck command to check the file system on the detached submirror
_ Backing up the data on the detached submirror

_ Using the metattach command to place the detached submirror back in the
mirror
Backing Up Data on a RAID-1 Volume
Chapter 11 • RAID-1 (Mirror) Volumes (Tasks) 143
Note – If you use these procedures regularly, put them into a script for ease
of use.
Tip– The safer approach to this process is to attach a third or fourth submirror
to the mirror, allow it
to resynchronize, and use it for the backup. This technique ensures that data
redundancy is
maintained at all times.
Verify that the mirror is in the “Okay” state.
Amirror that is in the “Maintenance” state should be repaired first.
# metastat mirror
Flush data and UFS logging data from cache to disk and write-lock the
file system.
# /usr/sbin/lockfs -w mount-point
Only a UFS volume needs to be write-locked. If the volume is set up as a raw
device for database
management software or some other application, running the lockfs command
is not necessary.
You might, however, want to run the appropriate vendor-supplied utility to
flush any buffers and
lock access.
Caution – Do not write-lock the root (/) file system.Write-locking the root (/)
file system causes the
system to hang. If you are backing up your root (/) file system, skip this step.
Detach one submirror from the mirror.
# metadetach mirror submirror
mirror Is the volume name of the mirror.
submirror Is the volume name of the submirror (volume) being detached.
Reads continue to be made from the other submirror. The mirror is out of sync
as soon as the first

write is made. This inconsistency is corrected when the detached submirror is
reattached in Step 7.
Unlock the file system and allow writes to continue.
# /usr/sbin/lockfs -u mount-point
You might need to perform necessary unlocking procedures based on vendor-
dependent utilities
used in Step 2.
Use the fsck command to check the file system on the detached
submirror. This stepensures a clean
backupoccurs.
# fsck /dev/md/rdsk/name
1
2
3
4
5
Backing Up Data on a RAID-1 Volume
144 Solaris VolumeManagerAdministration Guide • June 2006
Perform a backupof the offlined submirror.
Use the ufsdump command or your usual backup utility. For information on
performing the backup
using the ufsdump command, see “Performing Mounted Filesystem Backups
Using the ufsdump
Command” on page 301.
Note – To ensure a proper backup, use the raw volume name, such as
/dev/md/rdsk/d4. Using the
raw volume name access to storage that is greater than 2 Gbytes.
Attach the submirror.
# metattach mirror submirror
Solaris Volume Manager automatically begins resynchronizing the submirror
with the mirror.
Performing an Online Backup of a RAID-1 Volume
This example uses a mirror, d1. The mirror consists of submirrors d2, d3 and
d4. The submirror d3 is

detached and backed up while submirrors d2 and d4 stay online. The file
system on the mirror is
/home1.
# metastat d1
d1: Mirror
Submirror 0: d2
State: Okay
Submirror 1: d3
State: Okay
Submirror 1: d4
State: Okay
...
# /usr/sbin/lockfs -w /home1
# metadetach d1 d3
# /usr/sbin/lockfs -u /home1
# /usr/sbin/fsck /dev/md/rdsk/d3
(Perform backup using /dev/md/rdsk/d3)
# metattach d1 d3
6
7
Example 11–24
Backing Up Data on a RAID-1 Volume
Chapter 11 • RAID-1 (Mirror) Volumes (Tasks) 145
146
Soft Partitions (Overview)
This chapter provides information about Solaris Volume Manager soft
partitions. For information
about related tasks, see Chapter 13.
This chapter contains the following information:
_ “Overview of Soft Partitions” on page 147
_ “Configuration Guidelines for Soft Partitions” on page 148
Overview of Soft Partitions
As the storage capacity of disks has increased, disk arrays present larger
logical devices to Solaris

systems. In order to create more manageable file systems or partition sizes,
users might need to
subdivide disks or logical volumes into more than eight partitions. Solaris
Volume Manager’s soft
partition feature addresses this need.
Solaris Volume Manager can support up to 8192 logical volumes per disk set.
This number includes
the local, or unspecified, disk set. Solaris Volume Manager configures
volumes dynamically as they
are needed.
You can use soft partitions to divide a disk slice or logical volume into as
many partitions as needed.
You must provide a name for each division, or soft partition, just like you do
for other storage
volumes, such as stripes or mirrors.Asoft partition, once named, can be
accessed by applications,
including file systems, as long as the soft partition is not included in another
volume. Once included
in a volume, the soft partition should no longer be directly accessed.
Soft partitions can be placed directly above a disk slice, or on top of a mirror,
stripe, or RAID-5
volume.Asoft partition may not be both above and below other volumes. For
example, a soft
partition built on a stripe with a mirror built on the soft partition is not allowed.
Asoft partition appears to file systems and other applications as a single
contiguous logical volume.
However, the soft partition actually comprises a series of extents that could be
located at arbitrary
12 C H A P T E R 1 2
147
locations on the underlying media. In addition to the soft partitions, extent
headers (also called
system recovery data areas) on disk record information about the soft
partitions to facilitate recovery

in the event of a catastrophic system failure.
Configuration Guidelines for Soft Partitions
_ Slices that are used for soft partitions cannot be used for other purposes.
_ When you partition a disk and build file systems on the resulting slices, you
cannot later extend a
slice without modifying or destroying the disk format. Soft partitions behave
differently. You can
extend a soft partition up to the amount of space on the underlying device
without moving or
destroying data on other soft partitions.
_ While it is technically possible to manually place extents of soft partitions at
arbitrary locations
on disk, you should allow the system to place them automatically. For an
example of an extent
that has been manually placed, see the output of the metastat command in
“Viewing the Solaris
Volume Manager Configuration” on page 216.
_ You can build soft partitions on any slice. However, creating a single slice
that occupies the entire
disk and then creating soft partitions on that slice is the most efficient way to
use soft partitions at
the disk level.
_ The maximum size of a soft partition is limited to the size of the slice or
logical volume on which
it is built. Because of this limitation, you should build a volume on top of your
disk slices, then
build soft partitions on top of the volume. This strategy allows you to add
components to the
volume later, and then expand the soft partitions as needed.
_ For maximum flexibility and high availability, build RAID-1 (mirror) or RAID-5
volumes on
disk slices, then create soft partitions on the mirror or RAID-5 volume.
Scenario—Soft Partitions

Soft partitions provide tools with which to subdivide larger storage spaces into
more manageable
spaces. For example, in other scenarios (“Scenario—RAID-1 Volumes
(Mirrors)” on page 103 or
“Scenario—RAID-5 Volumes” on page 161), large storage aggregations
provided redundant storage
of many gigabytes. However, many possible scenarios would not initially,
require so much space. Soft
partitions allow you to subdivide that storage space into more manageable
partitions. Each of those
partitions can have a complete file system. For example, you could create
1000 soft partitions on top
of a RAID-1 or RAID-5 volume so that each of your users can have a home
directory on a separate
file system. If a user needs more space, you could simply expand the soft
partition.
Configuration Guidelines for Soft Partitions
148 Solaris VolumeManagerAdministration Guide • June 2006
Soft Partitions (Tasks)
This chapter provides information about performing tasks that are associated
with Solaris Volume
Manager soft partitions. For conceptual information regarding soft partitions,
see Chapter 12.
Soft Partitions (Task Map)
The following task map identifies the procedures that are needed to manage
Solaris Volume Manager
soft partitions.
Task Description For Instructions
Create soft partitions Use the Solaris Volume Manager GUI or the
metainit command to create soft partitions.
“How to Create a Soft Partition”
on page 150
Check the status of soft
partitions

Use the Solaris Volume Manager GUI or the
metastat command to check the status of
soft partitions.
“How to Check the Status of a
Soft Partition” on page 151
Expand soft partitions Use the Solaris Volume Manager GUI or the
metattach command to expand soft
partitions.
“How to Expand a Soft
Partition” on page 152
Remove soft partitions Use the Solaris Volume Manager GUI or the
metaclear command to remove soft
partitions.
“How to Remove a Soft
Partition” on page 153
13 C H A P T E R 1 3
149
Creating Soft Partitions
_ Howto Create a Soft Partition
Check the “Configuration Guidelines for Soft Partitions” on page 148.
Use one of the following methods to create a soft partition:
_ From the Enhanced Storage tool within the Solaris Management Console,
open the Volumes
node. Choose Action Create Volume. Then, follow the instructions in the⇒
wizard. For more
information, see the online help.
_ To create a soft partition, use the following form of the metainit command:
# metainit [-s diskset] soft-partition -p [-e] component size
-sdiskset Specifies which disk set is being used. If -s is not specified, the local
(default)
disk set is used.
-p Specifies that a soft partition be configured.
-e Specifies that the entire disk should be reformatted. Formatting the disk
provides a slice 0, which takes most of the disk. Formatting the disk also

provides a slice 7 of a minimum of 4 Mbytes in size. Slice 7 contains a state
database replica.
soft-partition Specifies the name of the soft partition. The name is of the form
dnnn, where
nnn is a number in a range between 0 and 8192.
component Specifies the disk, slice, or logical volume from which to create the
soft
partition. All existing data on the component is destroyed because the soft
partition headers are written at the beginning of the component.
size Specifies the size of the soft partition. The size is specified as a number
followed
by one of the following:
_ M or m for megabytes
_ G or g for gigabytes
_ T or t for terabytes
_ B or b for blocks (sectors)
See the following examples and the metainit(1M) man page for more
information.
Creating a Soft Partition
In the following example, a 4-Gbyte soft partition called d20 is created on
c1t3d0s2.
# metainit d20 -p c1t3d0s2 4g
BeforeYou Begin
◗
Example 13–1
Creating Soft Partitions
150 Solaris VolumeManagerAdministration Guide • June 2006
Taking a Whole Disk for Soft Partitions
The following example creates a soft partition and formats disk c1t2d0. This
action destroys any data
on that disk and creates a new soft partition on slice 0.
# metainit d7 -p -e c1t2d0 1G
Maintaining Soft Partitions

Maintaining soft partitions is no different from maintaining other logical
volumes.
_ Howto Check the Status of a Soft Partition
Read the “Configuration Guidelines for Soft Partitions” on page 148.
Use one of the following methods to check the status of a soft partition:
_ From the Enhanced Storage tool within the Solaris Management Console,
open the Volumes
node. Choose the soft partition that you want to monitor. Then, choose
Action Properties.⇒
Follow the onscreen instructions . For more information, see the online help.
_ To view the existing configuration, use the following form of the metastat
command:
# metastat soft-partition
soft-partition Specifies the name of the partition you want to check.
Checking the Status of a Soft Partition
In the following example, the status of soft partition d1 is checked. This soft
partition includes two
extents and is built on the RAID-1 volume d100.
# metastat d1
d1: soft partition
component: d100
state: OKAY
size: 42674285 blocks
Extent Start Block Block Count
0 10234 40674285
1 89377263 2000000
d100: Mirror
Submirror 0: d10
State: OKAY
Read option: roundrobin (default)
Write option: parallel (default)
Example 13–2
BeforeYou Begin
◗

Example 13–3
Maintaining Soft Partitions
Chapter 13 • Soft Partitions (Tasks) 151
Size: 426742857 blocks
d10: Submirror of d100
State: OKAY
Hot spare pool: hsp002
Size: 426742857 blocks
Stripe 0: (interlace: 32 blocks)
Device Start Block Dbase State Hot Spare
c3t3d0s0 0 No Okay
_ Howto Expand a Soft Partition
When no other logical volumes have been built on a soft partition, you can
add space to the soft
partition. Free space is located and used to extend the partition. Existing data
is not moved.
Note – If a soft partition has been used to create another volume (for
example, if it is a component of a
RAID-0 volume), the soft partition cannot be expanded. In most cases, the
same objective (providing
more space for the device that contains the soft partition) can be achieved by
concatenating other
volumes onto the containing device. See “Expanding Storage Capacity” on
page 87 for more
information.
Read the “Configuration Guidelines for Soft Partitions” on page 148.
Use one of the following methods to expand a soft partition:
_ From the Enhanced Storage tool within the Solaris Management Console,
open the Volumes
node. Choose the soft partition that you want to expand, then choose
Action Properties. Follow⇒
the onscreen instructions. For more information, see the online help.
_ To add space to a soft partition, use the following form of the metattach
command:

# metattach [-s diskset] soft-partition size
diskset Specifies the name of the disk set in which the soft partition exists.
soft-partition Specifies the name of an existing soft partition.
size Specifies the amount of storage space to add.
Expanding a Soft Partition
The following example shows how to attach space to a soft partition. The file
system is then expanded
using the growfs command while the soft partition is online and mounted.
BeforeYou Begin
◗
Example 13–4
Maintaining Soft Partitions
152 Solaris VolumeManagerAdministration Guide • June 2006
# mount /dev/md/dsk/d20 /home2
# metattach d20 10g
# growfs -M /home2 /dev/md/rdsk/d20
For more information on the growfs command, see “Expanding a File System
Using the growfs
Command” on page 225.
_ Howto Remove a Soft Partition
Read the “Configuration Guidelines for Soft Partitions” on page 148.
Use one of the following methods to delete a soft partition:
_ From the Enhanced Storage tool within the Solaris Management Console,
open the Volumes
node. Choose the soft partition that you want to delete. Then choose
Action Properties. Follow⇒
the onscreen instructions. For more information, see the online help.
_ To delete a soft partition, use one of the following forms of the metaclear
command:
# metaclear [-s diskset] component
# metaclear [-s diskset] -r soft-partition
# metaclear [-s diskset] -p component
diskset Specifies the disk set in which the soft partition exists.
soft-partition Specifies the soft partition to delete.

-r Specifies to recursively delete logical volumes, but not volumes on which
others depend.
-p Specifies to purge all soft partitions on the specified component, except
those
soft partitions that are open.
component Specifies the component from which to clear all of the soft
partitions.
Removing a Soft Partition
This example shows how to delete all soft partitions on c1t4d2s0.
# metaclear -p c1t4d2s0
BeforeYou Begin
◗
Example 13–5
Maintaining Soft Partitions
Chapter 13 • Soft Partitions (Tasks) 153
154
RAID-5 Volumes (Overview)
This chapter provides conceptual information about Solaris Volume
Manager’s RAID-5 volumes.
For information about performing related tasks, see Chapter 15.
This chapter contains the following:
_ “Overview of RAID-5 Volumes” on page 155
_ “Background Information for Creating RAID-5 Volumes” on page 158
_ “Overview of Checking Status of RAID-5 Volumes” on page 159
_ “Overview of Replacing and Enabling Slices in RAID-5 Volumes” on page
161
_ “Scenario—RAID-5 Volumes” on page 161
Overview of RAID-5 Volumes
RAID level 5 is similar to striping, but with parity data distributed across all
components (disk or
logical volume). If a component fails, the data on the failed component can be
rebuilt from the
distributed data and parity information on the other components. In Solaris
Volume Manager, a

RAID-5 volume is a volume that supports RAID level 5.
ARAID-5 volume uses storage capacity equivalent to one component in the
volume to store
redundant information (parity). This parity information contains information
about user data
stored on the remainder of the RAID-5 volume’s components. That is, if you
have three components,
the equivalent of one component is used for the parity information. If you have
five components,
then the equivalent of one component is used for parity information. The parity
information is
distributed across all components in the volume. Similar to a mirror, a RAID-5
volume increases data
availability, but with a minimum of cost in terms of hardware and only a
moderate penalty for write
operations. However, you cannot use a RAID-5 volume for the root (/), /usr,
and swap file systems,
or for other existing file systems.
Solaris Volume Manager automatically resynchronizes a RAID-5 volume
when you replace an
existing component. Solaris Volume Manager also resynchronizes RAID-5
volumes during
rebooting if a system failure or panic took place.
14 C H A P T E R 1 4
155
Example—RAID-5 Volume
Figure 14–1 illustrates a RAID-5 volume that consists of four disks
(components).
The first three data segments are written to ComponentA(interlace 1),
Component B (interlace 2),
and Component C (interlace 3). The next data segment that is written is a
parity segment. This parity
segment is written to ComponentD(P 1–3). This segment consists of an
exclusive OR of the first

three segments of data. The next three data segments are written to
ComponentA(interlace 4),
Component B (interlace 5), and ComponentD(interlace 6). Then, another
parity segment is written
to Component C (P 4–6).
This pattern of writing data and parity segments results in both data and parity
being spread across
all disks in the RAID-5 volume. Each drive can be read independently. The
parity protects against a
single disk failure. If each disk in this example were 2 Gbytes, the total
capacity of the RAID-5
volume would be 6 Gbytes. One drive’s worth of space is allocated to parity.
P(10-12)
interlace 7
interlace 4
interlace 1
interlace 10
P(7-9)
interlace 5
interlace 2
interlace 11
interlace 8
P(4-6)
interlace 3
Solaris Volume
Manager
interlace 12
interlace 11
interlace 10
interlace 9
interlace 8
interlace 7
interlace 6
interlace 5

interlace 4
interlace 3
interlace 2
interlace 1
RAID 5 Volume
Component
A
Component
B
Component
C
interlace 12
interlace 9
interlace 6
P(1-3)
Component
D
FIGURE 14–1 RAID-5Volume Example
Overview of RAID-5 Volumes
156 Solaris VolumeManagerAdministration Guide • June 2006
Example—Concatenated (Expanded) RAID-5 Volume
The following figure shows an example of an RAID-5 volume that initially
consisted of four disks
(components).Afifth disk has been dynamically concatenated to the volume to
expand the RAID-5
volume.
P(10-12, 16)
interlace 7
interlace 4
interlace 1
interlace 10
P(7-9, 15)
interlace 5
interlace 2

interlace 11
interlace 8
P(4-6, 14)
interlace 3
Solaris Volume
Manager
Component
A
Component
B
Component
C
interlace 12
interlace 9
interlace 6
P(1-3, 13)
Component
D
interlace 16
interlace 15
interlace 14
interlace 13
Component
E
interlace 16
interlace 15
interlace 14
interlace 13
interlace 12
interlace 11
interlace 10
interlace 9
interlace 8
interlace 7

interlace 6
interlace 5
interlace 4
interlace 3
interlace 2
RAID 5 Volume
interlace 1
FIGURE 14–2 Expanded RAID-5Volume Example
The parity areas are allocated when the initial RAID-5 volume is created. One
component’s worth of
space is allocated to parity, although the actual parity blocks are distributed
across all of the original
components to distribute I/O. When additional components are concatenated
to the RAID-5
Overview of RAID-5 Volumes
Chapter 14 • RAID-5 Volumes (Overview) 157
volume, the additional space is devoted entirely to data. No new parity blocks
are allocated. The data
on the concatenated component is, however, included in the parity
calculations, so the data is
protected against single device failures.
Concatenated RAID-5 volumes are not suited for long-term use. Use a
concatenated RAID-5 volume
until it is possible to reconfigure a larger RAID-5 volume. Then, copy the data
to the larger volume.
Note – When you add a new component to a RAID-5 volume, Solaris Volume
Manager “zeros” all the
blocks in that component. This process ensures that the parity protects the
new data. As data is
written to the additional space, Solaris Volume Manager includes the data in
the parity calculations.
Background Information for Creating RAID-5 Volumes
When you work with RAID-5 volumes, consider the “Requirements for RAID-5
Volumes” on page

158 and “Guidelines for RAID-5 Volumes” on page 158. Many striping
guidelines also apply to
RAID-5 volume configurations. See “RAID-0 Volume Requirements” on page
80.
Requirements for RAID-5 Volumes
_ ARAID-5 volume must consist of at least three components. The more
components a RAID-5
volume contains, however, the longer read and write operations take when a
component fails.
_ RAID-5 volumes cannot be striped, concatenated, or mirrored.
_ Do not create a RAID-5 volume from a component that contains an existing
file system. Doing so
will erase the data during the RAID-5 initialization process.
_ When you create a RAID-5 volume, you can define the interlace value. If not
specified, the
interlace value defaults to 512 Kbytes. This value is reasonable for most
applications.
_ ARAID-5 volume (with no hot spares) can only handle a single component
failure.
_ When you create RAID-5 volumes, use components across separate
controllers. Controllers and
associated cables tend to fail more often than disks.
_ Use components of the same size. Creating a RAID-5 volume with
components of different sizes
results in unused disk space.
Guidelines for RAID-5 Volumes
_ Because of the complexity of parity calculations, volumes with greater than
about 20 percent
writes should probably not be RAID-5 volumes. If data redundancy on a write-
heavy volume is
needed, consider mirroring.
_ If the different components in a RAID-5 volume reside on different
controllers and the accesses
to the volume are primarily large sequential accesses, then setting the
interlace value to 32 Kbytes
might improve performance.
Background Information for Creating RAID-5 Volumes
158 Solaris VolumeManagerAdministration Guide • June 2006
_ You can expand a RAID-5 volume by concatenating additional components
to the volume.
Concatenating a new component to an existing RAID-5 volume decreases the
overall
performance of the volume because the data on concatenations is sequential.
Data is not striped
across all components. The original components of the volume have data and
parity striped
across all components. This striping is lost for the concatenated component.
However, the data is
still recoverable from errors because the parity is used during the component
I/O. The resulting
RAID-5 volume continues to handle a single component failure.
Concatenated components also differ in the sense that they do not have parity
striped on any of
the regions. Thus, the entire contents of the component are available for data.
Any performance enhancements for large or sequential writes are lost when
components are
concatenated.
_ You can create a RAID-5 volume without having to “zero out” the data
blocks. To do so, do one of
the following:
_ Use the metainit command with the -k option. The -k option recreates the
RAID-5 volume
without initializing it, and sets the disk blocks to the “Okay” state. This option
is potentially
dangerous, as any errors that exist on disk blocks within the volume will cause
unpredictable

behavior from Solaris Volume Manager, including the possibility of fabricated
data.
_ Initialize the device and restore data from tape. See the metainit(1M) man
page for more
information.
Overview of Checking Status of RAID-5 Volumes
You can check the status of RAID-5 volumes by looking at the volume states
and the slice states for
the volume. The slice state provides the most specific information when you
are troubleshooting
RAID-5 volume errors. The RAID-5 volume state only provides general status
information, such as
“Okay” or “Maintenance.”
If the RAID-5 volume state reports a “Maintenance” state, refer to the slice
state. The slice state
specifically reports if the slice is in the “Maintenance” state or the “Last Erred”
state. You take a
different recovery action depending on if the the slice is in the “Maintenance”
state or the “Last
Erred” state. If you only have a slice in the “Maintenance” state, it can be
repaired without loss of
data. If you have a slice in the “Maintenance” state and a slice in the “Last
Erred” state, data has
probably been corrupted. You must fix the slice in the “Maintenance” state
first, then fix the “Last
Erred” slice.
The following table explains RAID-5 volume states.
Overview of Checking Status of RAID-5 Volumes
Chapter 14 • RAID-5 Volumes (Overview) 159
TABLE 14–1 RAID-5Volume States
State Meaning
Initializing Slices are in the process of having all disk blocks zeroed. This
process is necessary due

to the nature of RAID-5 volumes with respect to data and parity interlace
striping.
Once the state changes to “Okay,” the initialization process is complete and
you are
able to open the device. Until then, applications receive error messages.
Okay The device is ready for use and is currently free from errors.
Maintenance Aslice has been marked as failed due to I/O or open errors.
These errors were
encountered during a read or write operation.
The following table explains the slice states for a RAID-5 volume and possible
actions to take.
TABLE 14–2 RAID-5 Slice States
State Meaning Action
Initializing Slices are in the process of having
all disk blocks zeroed. This
process is necessary due to the
nature of RAID-5 volumes with
respect to data and parity
interlace striping.
Normally, none. If an I/O error occurs during this
process, the device goes into the “Maintenance”
state. If the initialization fails, the volume is in the
“Initialization Failed” state, and the slice is in the
“Maintenance” state. If this happens, clear the
volume and recreate it.
Okay The device is ready for use and is
currently free from errors.
None. Slices can be added or replaced, if
necessary.
Resyncing The slice is actively being
resynchronized.An error has
occurred and been corrected, a
slice has been enabled, or a slice
has been added.

If desired, monitor the RAID-5 volume status
until the resynchronization is done.
Maintenance Asingle slice has been marked as
failed due to I/O or open errors.
These errors were encountered
during a read or write operation.
Enable or replace the failed slice. See “How to
Enable a Component in a RAID-5 Volume”
on page 167, or “How to Replace a Component in
a RAID-5 Volume” on page 168. The metastat
command will show an invoke recovery message
with the appropriate action to take with the
metareplace command.
Overview of Checking Status of RAID-5 Volumes
160 Solaris VolumeManagerAdministration Guide • June 2006
TABLE 14–2 RAID-5 Slice States (Continued)
State Meaning Action
Maintenance/Last
Erred
Multiple slices have encountered
errors. The state of the failed
slices is either “Maintenance” or
“Last Erred.” In this state, no I/O
is attempted on the slice that is in
the “Maintenance” state.
However, I/O is attempted on the
slice marked “Last Erred” with
the outcome being the overall
status of the I/O request.
Enable or replace the failed slices. See “How to
Enable a Component in a RAID-5 Volume”
on page 167, or “How to Replace a Component in
a RAID-5 Volume” on page 168. The metastat
command will show an invoke recovery message

with the appropriate action to take with the
metareplace command. This command must be
run with the -f flag. This state indicates that data
might be fabricated due to multiple failed slices.
Overview of Replacing and Enabling Slices in RAID-5 Volumes
Solaris Volume Manager has the capability to replace and enable components
within mirrors and
RAID-5 volumes. The issues and requirements for doing so are the same for
mirrors and RAID-5
volumes. For more information, see “Overview of Replacing and Enabling
Components in RAID-1
and RAID-5 Volumes” on page 228.
Scenario—RAID-5 Volumes
RAID-5 volumes allow you to have redundant storage without the overhead of
RAID-1 volumes,
which require two times the total storage space to provide data redundancy.
By setting up a RAID-5
volume, you can provide redundant storage of greater capacity than you could
achieve with a
RAID-1 volume on the same set of disk components. In addition, with the help
of hot spares (see
Chapter 16 and specifically “How Hot SparesWork” on page 172), you can
achieve nearly the same
level of safety. The drawbacks are increased write time and markedly
impaired performance in the
event of a component failure. However, those tradeoffs might be insignificant
for many situations.
The following example, drawing on the sample scenario explained in Chapter
5, describes how
RAID-5 volumes can provide extra storage capacity.
Other scenarios for RAID-0 and RAID-1 volumes used 6 slices (c1t1d0,
c1t2d0, c1t3d0, c2t1d0,
c2t2d0, c2t3d0) on 6 disks, spread over 2 controllers, to provide 27 Gbytes of
redundant storage. By
using the same slices in a RAID-5 configuration, 45 Gbytes of storage is
available. Also, the
configuration can withstand a single component failure without data loss or
access interruption. By
adding hot spares to the configuration, the RAID-5 volume can withstand
additional component
failures. The most significant drawback to this approach is that a controller
failure would result in
data loss to this RAID-5 volume, while it would not with the RAID-1 volume
described in
“Scenario—RAID-1 Volumes (Mirrors)” on page 103.
Scenario—RAID-5 Volumes
Chapter 14 • RAID-5 Volumes (Overview) 161
162
RAID-5 Volumes (Tasks)
This chapter provides information about performing Solaris Volume Manager
tasks that are
associated with RAID-5 volumes. For information about the concepts involved
in these tasks, see
Chapter 14.
RAID-5 Volumes (Task Map)
The following task map identifies the procedures that are needed to manage
Solaris Volume
Manager’s 5 volumes.
Task Description For Instructions
Create RAID-5 volumes Use the Solaris Volume Manager GUI or the
metainit command to create RAID-5
volumes.
“How to Create a RAID-5
Volume” on page 164
Check the status of RAID-5
volumes
Use the Solaris Volume Manager GUI or the
metastat command to check the status of

RAID-5 volumes.
“How to Check the Status of a
RAID-5 Volume” on page 165
Expand a RAID-5 volume Use the Solaris Volume Manager GUI or the
metattach command to expand RAID-5
volumes.
“How to Expand a RAID-5
Volume” on page 166
Enable a slice in a RAID-5
volume
Use the Solaris Volume Manager GUI or the
metareplace command to enable slices in
RAID-5 volumes.
“How to Enable a Component
in a RAID-5 Volume” on page
167
Replace a slice in a RAID-5
volume
Use the Solaris Volume Manager GUI or the
metareplace command to replace slices in
RAID-5 volumes.
“How to Replace a Component
in a RAID-5 Volume” on page
168
15 C H A P T E R 1 5
163
Creating RAID-5 Volumes
Caution – Do not create volumes larger than 1 Tbyte if you expect to run the
Solaris software with a
32-bit kernel or if you expect to use a version of the Solaris OS prior to the
Solaris 9 4/03 release. See
“Overview of Multi-Terabyte Support in Solaris Volume Manager” on page 44
for more information
about large volume support in Solaris Volume Manager.

_ Howto Create a RAID-5 Volume
Check “Prerequisites for Creating Solaris Volume Manager Components” on
page 44 and
“Background Information for Creating RAID-5 Volumes” on page 158.
To create a RAID-5 volume, use one of the following methods:
_ From the Enhanced Storage tool within the Solaris Management Console,
open the Volumes
node. Choose Action Create Volume. Then, follow the steps in the wizard.⇒
For more
information, see the online help.
_ Use the following form of the metainit command:
# metainit wolume-name -r component component component -i interlace-
value
volume-name Specifies the name of the volume to create.
-r Specifies to create a RAID-5 volume.
component Specifies a slice or soft partition to include in the RAID-5 volume.
At least 3
components are required.
-i Specifies an interlace value.
For more information, see the metainit(1M) man page.
Creating a RAID-5 Volume of Three Slices
In this example, the RAID-5 volume d45 is created with the -r option from 3
slices. Because no
interlace value is specified, d45 uses the default of 512 Kbytes. The system
verifies that the RAID-5
volume has been set up and begins initializing the volume.
You must wait for the initialization to finish before you can use the RAID-5
volume.
# metainit d45 -r c2t3d0s2 c3t0d0s2 c4t0d0s2
d45: RAID is setup
To prepare the newly created RAID-5 volume for a file system, see Chapter
18, “Creating UFS,
TMPFS, and LOFS File Systems (Tasks),” in System Administration Guide:
Devices and File Systems.

BeforeYou Begin
◗
Example 15–1
SeeAlso
Creating RAID-5 Volumes
164 Solaris VolumeManagerAdministration Guide • June 2006
Some applications, such as a database, do not use a file system. These
applications instead use the raw
volume. The application must have its own way of recognizing the volume.
To associate a hot spare pool with a RAID-5 volume, see “How to Associate a
Hot Spare PoolWith a
Volume” on page 178.
Maintaining RAID-5 Volumes
_ Howto Check the Status of a RAID-5 Volume
When checking status of RAID-5 volumes, you need to check both the RAID-5
state and the slice
state to fully understand the state of the volume and the possibility of data
loss if the volumes are not
in an Okay state. See “Overview of Checking Status of RAID-5 Volumes” on
page 159 for details.
Note – RAID-5 volume initialization or resynchronization cannot be
interrupted.
To check the status of a RAID-5 volume, use one of the following
methods:
_ From the Enhanced Storage tool within the Solaris Management Console,
open the Volumes
node and view the status of the volumes. Choose a volume. Then, choose
Action Properties to⇒
see more detailed information. For more information, see the online help.
_ Use the metastat command to display the status of a RAID-5 volume.
# metastat [-s diskset] [volume]
-s diskset Specifies the name of the disk set on which to perform the
command.
volume Specifies the volume to display.

For each slice in the RAID-5 volume, the metastat command shows the
following:
Device Specifies the device name of the slice in the stripe.
Start Block Specifies the block on which the slice begins.
Dbase Specifies whether the slice contains a state database replica
State Specifies the state of the slice.
Hot Spare Specifies whether the slice is being used to hot spare a failed slice
Viewing RAID-5 Volume Status
The following example shows RAID-5 volume output from the metastat
command.
◗
Example 15–2
Maintaining RAID-5 Volumes
Chapter 15 • RAID-5 Volumes (Tasks) 165
# metastat d10
d10: RAID
State: Okay
Interlace: 32 blocks
Size: 10080 blocks
Original device:
Size: 10496 blocks
Device Start Block Dbase State Hot Spare
c0t0d0s1 330 No Okay
c1t2d0s1 330 No Okay
c2t3d0s1 330 No Okay
The metastat command output identifies the volume as a RAID-5 volume.
This information is
indicated by the “RAID” notation after the volume name. For each slice in the
RAID-5 volume, the
output shows the following:
_ The name of the slice in the stripe.
_ The block on which the slice begins.
_ An indicator that none of these slices contain a state database replica.
_ The state of the slices. In this example all slices are in the “Okay” state.

_ If a slice is a hot spare replacement for a failed slice.
_ Howto Expand a RAID-5 Volume
In general, attaching components is a short-term solution to a RAID-5 volume
that is running out of
space. For performance reasons, it is best to have a “pure” RAID-5 volume. If
you must expand an
existing RAID-5 volume to gain extra storage space, use this procedure.
Caution – Do not create volumes larger than 1 Tbyte if you expect to run the
Solaris software with a
32–bit kernel or if you expect to use a version of the Solaris OS prior to the
Solaris 9 4/03 release. See
“Overview of Multi-Terabyte Support in Solaris Volume Manager” on page 44
for more information
about multiterabyte volume support in Solaris Volume Manager.
Read “Background Information for Creating RAID-5 Volumes” on page 158.
Make sure that you have a current backupof all data and that you have
superuser access.
To attach additional components to a RAID-5 volume, use one of the
following methods:
_ From the Enhanced Storage tool within the Solaris Management Console,
open the Volumes
node, then open the RAID-5 volume. Choose the Components pane. Then,
choose Attach
Component. Follow the onscreen instructions. For more information, see the
online help.
BeforeYou Begin
1
2
Maintaining RAID-5 Volumes
166 Solaris VolumeManagerAdministration Guide • June 2006
_ Use the following form of the metattach command:
# metattach volume-name name-of-component-to-add
volume-name Specifies the name of the RAID-5 volume to expand.

name-of-component-to-add Specifies the name of the component to attach to
the RAID-5
volume.
See the metattach(1M) man page for more information.
Adding a Component to a RAID-5 Volume
The following example shows the addition of slice c2t1d0s2 to an existing
RAID-5 volume, d2.
# metattach d2 c2t1d0s2
d2: column is attached
For a UFS file system, run the growfs command on the RAID-5 volume. See
“Volume and Disk
Space Expansion Using the growfs Command” on page 39.
Some applications, such as a database, do not use a file system. These
applications instead use the raw
volume. In these cases, the application must have its own way of growing the
added space.
_ Howto Enable a Component in a RAID-5 Volume
If a disk drive is defective, you can replace it with another available disk (and
its slices) on the system
as documented in “How to Replace a Component in a RAID-5 Volume” on
page 168. Alternatively,
you can repair the disk, label it, and run the metareplace command with the -e
option to re-enable
the disk.
Make sure that you have a current backupof all data and that you have
superuser access.
To enable a failed component in a RAID-5 volume, use one of the
following methods:
_ From the Enhanced Storage tool within the Solaris Management Console,
open the Volumes
node, then open the RAID-5 volume. Choose the Components pane. Then,
choose the failed
component. Click Enable Component. Follow the onscreen instructions. For
more information,

see the online help.
_ Use the following form of the metareplace command:
# metareplace -e volume-name component-name
-e Specifies to place the failed component into an available state and to
perform a resynchronization on the failed component.
Example 15–3
SeeAlso
1
2
Maintaining RAID-5 Volumes
Chapter 15 • RAID-5 Volumes (Tasks) 167
volume-name Specifies the name of the volume containing the failed
component.
component-name Specifies the name of the failed component.
The metareplace command automatically starts resynchronizing the new
component with the
rest of the RAID-5 volume.
Enabling a Component in a RAID-5 Volume
In the following example, the RAID-5 volume d20 has a slice, c2t0d0s2, which
had a soft error. The
metareplace command with the -e option enables the slice.
# metareplace -e d20 c2t0d0s2
_ Howto Replace a Component in a RAID-5 Volume
This task replaces a failed slice of a RAID-5 volume in which only one slice
has failed.
Caution – Replacing a failed slice when multiple slices are in error might
cause data to be fabricated. In
this instance, the integrity of the data in this instance would be questionable.
You can use the metareplace command on non-failed devices to change a
disk slice or other
component. This procedure can be useful for tuning the performance of RAID-
5 volumes.
Make sure that you have a current backupof all data and that you have
superuser access.

Use one of the following methods to determine which slice of the RAID-5
volume needs to be
replaced:
_ From the Enhanced Storage tool within the Solaris Management Console,
open the Volumes
node. Then open the RAID-5 volume. Choose the Components pane. View
the status of the
individual components. For more information, see the online help.
_ Use the metastat command.
# metastat volume
volume Specifies the name of the RAID-5 volume.
Look for the keyword phrase “Needs Maintenance” to identify the state of the
RAID-5 volume. Look
for the keyword “Maintenance” to identify the failed slice.
Use one of the following methods to replace the failed slice with another
slice:
Example 15–4
1
2
3
Maintaining RAID-5 Volumes
168 Solaris VolumeManagerAdministration Guide • June 2006
_ From the Enhanced Storage tool within the Solaris Management Console,
open the Volumes
node. Then open the RAID-5 volume. Choose the Components pane. Choose
the failed
component. Click Replace Component and follow the onscreen instructions.
For more
information, see the online help.
_ Use the following form of the metareplace command:
# metareplace volume-name failed-component new-component
_ volume-name is the name of the RAID-5 volume with a failed component.
_ failed-component specifies the name of the component to replace.

_ new-component specifies the name of the component to add to the volume
in place of the
failed component.
See the metareplace(1M) man page for more information.
To verify the status of the replacement slice, use one of the methods
described in Step2 .
The state of the replaced slice should be “Resyncing” or “Okay.”
Replacing a RAID-5 Component
# metastat d1
d1: RAID
State: Needs Maintenance
Invoke: metareplace d1 c0t14d0s6 <new device>
Interlace: 32 blocks
Size: 8087040 blocks
Original device:
Size: 8087520 blocks
Device Start Block Dbase State Hot Spare
c0t9d0s6 330 No Okay
c0t13d0s6 330 No Okay
c0t10d0s6 330 No Okay
c0t11d0s6 330 No Okay
c0t12d0s6 330 No Okay
c0t14d0s6 330 No Maintenance
# metareplace d1 c0t14d0s6 c0t4d0s6
d1: device c0t14d0s6 is replaced with c0t4d0s6
# metastat d1
d1: RAID
State: Resyncing
Resync in progress: 98% done
Interlace: 32 blocks
Size: 8087040 blocks
Original device:
Size: 8087520 blocks
4

Example 15–5
Maintaining RAID-5 Volumes
Chapter 15 • RAID-5 Volumes (Tasks) 169
Device Start Block Dbase State Hot Spare
c0t9d0s6 330 No Okay
c0t13d0s6 330 No Okay
c0t10d0s6 330 No Okay
c0t11d0s6 330 No Okay
c0t12d0s6 330 No Okay
c0t4d0s6 330 No Resyncing
In this example, the metastat command displays the failed slice in the RAID-5
volume, d1. After
locating an available slice, the metareplace command is run, specifying the
failed slice first, then the
replacement slice.
If no other slices are available, run the metareplace command with the -e
option to attempt to
recover from possible soft errors by resynchronizing the failed device. For
more information on this
procedure, see “How to Enable a Component in a RAID-5 Volume” on page
167. If multiple errors
exist, the slice in the “Maintenance” state must first be replaced or enabled.
Then the slice in the “Last
Erred” state can be repaired. After running the metareplace command, you
can use the metastat
command to monitor the progress of the resynchronization. During the
replacement, the state of the
volume and the new slice is “Resyncing.” You can continue to use the volume
while it is in this state.
Maintaining RAID-5 Volumes
170 Solaris VolumeManagerAdministration Guide • June 2006
Hot Spare Pools (Overview)
This chapter explains how Solaris Volume Manager uses hot spare pools. For
information about

performing related tasks, see Chapter 17.
This chapter contains the following information:
_ “Overview of Hot Spares and Hot Spare Pools” on page 171
_ “Scenario—Hot Spares” on page 174
Overview of Hot Spares and Hot Spare Pools
Ahot spare pool is collection of slices (hot spares) that Solaris Volume
Manager uses to provide
increased data availability for RAID-1 (mirror) and RAID-5 volumes. In a slice
failure occurs, in
either a submirror or a RAID-5 volume, Solaris Volume Manager automatically
substitutes the hot
spare for the failed slice.
Note – Hot spares do not apply to RAID-0 volumes or one-way mirrors. For
automatic substitution to
work, redundant data must be available.
Ahot spare cannot be used to hold data or state database replicas while it is
idle.Ahot spare must
remain ready for immediate use a slice failure occurs in the volume with which
it is associated. To use
hot spares, you must invest in additional disks beyond those disks that the
system actually requires to
function.
Solaris Volume Manager enables you to dynamically add, delete, replace, and
enable hot spares
within hot spare pools. You can use either the Solaris Management Console
or the command-line
utilities to administer hot spares and hot spare pools. See Chapter 17 for
details on these tasks.
16 C H A P T E R 1 6
171
Hot Spares
Ahot spare is a slice (not a volume) that is functional and available, but not in
use.Ahot spare is

reserved, meaning that it stands ready to substitute for a failed slice in a
submirror or RAID-5
volume.
Hot spares provide protection from hardware failure. Slices from RAID-1 and
RAID-5 volumes are
automatically replaced by hot spares when they fail. The hot spares are
resynchronized available for
use in the volume. The hot spare can be used temporarily until the failed
submirror or RAID-5
volume slice can either be fixed or replaced.
You create hot spares within hot spare pools. Individual hot spares can be
included in one or more
hot spare pools. For example, you might have two submirrors and two hot
spares. The hot spares can
be arranged as two hot spare pools, with each pool having the two hot spares
in a different order of
preference. This strategy enables you to specify which hot spare is used first.
This strategy also
improves availability by having more hot spares available.
Asubmirror or RAID-5 volume can use only a hot spare whose size is equal to
or greater than the size
of the failed slice in the submirror or RAID-5 volume. If, for example, you have
a submirror made of
1-Gbyte drives, a hot spare for the submirror must be 1 Gbyte or greater.
Hot Spare Pools
Ahot spare pool is an ordered list (collection) of hot spares.
You can place hot spares into one or more hot spare pools to get the most
flexibility and protection
from the fewest slices. You could put a single slice designated for use as a
hot spare into multiple hot
spare pools, with each hot spare pool having different slices and
characteristics. Then, you could
assign a hot spare pool to any number of submirror volumes or RAID-5
volumes.

Note – You can assign a single hot spare pool to multiple submirrors or RAID-
5 volumes. However, a
submirror or a RAID-5 volume can be associated with only one hot spare
pool.
HowHot SparesWork
When I/O errors occur, Solaris Volume Manager searches the hot spare pool
for a hot spare based on
the order in which hot spares were added to the hot spare pool. Solaris
Volume Manager checks the
hot spare pool for the first available hot spare whose size is equal to or
greater than the size of the slice
that is being replaced. The first hot spare found by Solaris Volume Manager
that is large enough is
used as a replacement. Solaris Volume Manager changes the hot spare’s
status to “In-Use” and
automatically resynchronizes the data if necessary. The order of hot spares in
the hot spare pool is not
changed when a replacement occurs.
Overview of Hot Spares and Hot Spare Pools
172 Solaris VolumeManagerAdministration Guide • June 2006
In the case of a mirror, the hot spare is resynchronized with data from a
functional submirror. In the
case of a RAID-5 volume, the hot spare is resynchronized with the other
slices in the volume. If a slice
of adequate size is not found in the list of hot spares, the submirror or RAID-5
volume that failed
goes into a failed state and the hot spares remain unused. In the case of the
submirror, the submirror
no longer replicates the data completely. In the case of the RAID-5 volume,
data redundancy is no
longer available.
Tip– When you add hot spares to a hot spare pool, add them from smallest to
largest in size. This

strategy avoids potentially wasting “large” hot spares as replacements for
small slices.
When a slice experiences an I/O error, the failed slice is placed in the
“Broken” state. To fix this
condition, first repair or replace the failed slice. Then, bring the slice back to
the “Available” state by
using the Enhanced Storage tool within the Solaris Management Console. Or,
use the metahs -e
command.
Asubmirror or RAID-5 volume is uses a hot spare in place of a failed slice until
that failed slice is
enabled or replaced. The hot spare is then marked “Available” in the hot spare
pool. This hot spare is
again ready for use.
Hot Spare Pool States
The following table explains hot spare pool states and possible actions to
take.
TABLE 16–1 Hot Spare Pool States (Command Line)
State Meaning Action
Available The hot spares in the hot spare pool are running
and ready to accept data. The hot spares are not
currently being written to or read from.
None.
In-Use This hot spare pool includes hot spares that are
being used to replace failed slices in a redundant
volume.
Diagnose how the hot spares are being
used. Then, repair the slice in the
volume for which the hot spare is
being used.
Broken Aproblem exists with a hot spare or hot spare
pool. However, there is no immediate danger of
losing data. This status is also displayed if all the
hot spares are in use.

Diagnose how the hot spares are being
used or why they are broken. You can
add more hot spares to the hot spare
pool, if desired.
Example—Hot Spare Pool
Figure 16–1 illustrates a hot spare pool that is associated with submirrors d11
and d12 in mirror d1. If
a slice in either submirror were to fail, a hot spare would automatically be
substituted for the failed
slice. The hot spare pool itself is associated with each submirror volume, not
the mirror. The hot
spare pool could also be associated with other submirrors or RAID-5 volumes,
if desired.
Overview of Hot Spares and Hot Spare Pools
Chapter 16 • Hot Spare Pools (Overview) 173
interlace 4
interlace 3
interlace 2
interlace 1
Submirror d12
interlace 4
interlace 3
interlace 2
interlace 1
Submirror d11
interlace 4
interlace 3
interlace 2
interlace 1
RAID 1 Volume d1
Slice 1 Slice 2
Hot Spare Pool
FIGURE 16–1 Hot Spare Pool Example
Scenario—Hot Spares

Hot spares provide extra protection for redundant volumes (RAID-1 and
RAID-5) to help guard
against data loss. By associating hot spares with the underlying slices that
comprise your RAID-0
submirrors or RAID-5 configuration, you can have the system automatically
replace failed slices with
working slices from the hot spare pool. Those slices that were swapped into
use are updated with the
information they should have. The slices then can continue to function just like
the original slices.
You can replace the failed slices at your convenience.
Scenario—Hot Spares
174 Solaris VolumeManagerAdministration Guide • June 2006
Hot Spare Pools (Tasks)
This chapter explains how to work with Solaris Volume Manager’s hot spares
and hot spare pools.
For information about related concepts, see Chapter 16.
Hot Spare Pools (Task Map)
The following task map identifies the procedures that are needed to manage
Solaris Volume Manager
hot spare pools.
Task Description For Instructions
Create a hot spare pool Use the Solaris Volume Manager GUI or the
metainit command to create a hot spare
pool.
“How to Create a Hot Spare
Pool” on page 176
Add slices to a hot spare pool Use the Solaris Volume Manager GUI or the
metahs command to add slices to a hot spare
pool.
“How toAddAdditional Slices
to a Hot Spare Pool” on page
177
Associate a hot spare pool

with a volume
Use the Solaris Volume Manager GUI or the
metaparam command to associate a hot spare
pool with a volume.
“How to Associate a Hot Spare
PoolWith a Volume” on page
178
Change which hot spare pool
is associated with a volume
Use the Solaris Volume Manager GUI or the
metaparam command to change which hot
spare pool is associated with a volume.
“How to Change the Associated
Hot Spare Pool” on page 179
Check the status of hot
spares and hot spare pools
Use the Solaris Volume Manager GUI, the
metastat command, or metahs -i
command to check the status of a hot spare
or hot spare pool.
“How to Check the Status of
Hot Spares and Hot Spare
Pools” on page 181
17 C H A P T E R 1 7
175
Task Description For Instructions
Replace a hot spare in a hot
spare pool
Use the Solaris Volume Manager GUI or the
metahs command to replace a hot spare in a
hot spare pool.
“How to Replace a Hot Spare in
a Hot Spare Pool” on page 182
Delete a hot spare froma hot

spare pool
Use the Solaris Volume Manager GUI or the
metahs command to delete a hot spare froma
hot spare pool.
“How to Delete a Hot Spare
From a Hot Spare Pool”
on page 183
Enable a hot spare Use the Solaris Volume Manager GUI or the
metahs command to enable a hot spare in a
hot spare pool.
“How to Enable a Hot Spare”
on page 184
Creating a Hot Spare Pool
_ Howto Create a Hot Spare Pool
Caution – Do not create volumes or hot spares larger than 1 Tbyte if you
expect to run the Solaris
software with a 32–bit kernel or if you expect to use a version of the Solaris
OS prior to the Solaris 9
4/03 release. See “Overview of Multi-Terabyte Support in Solaris Volume
Manager” on page 44 for
more information about multiterabyte volume support in Solaris Volume
Manager.
Caution – Solaris Volume Manager does not warn you if you create a hot
spare that is not large
enough. If the hot spare is not equal to, or larger than, the volume to which it
is attached, the hot
spare will not work.
Check “Prerequisites for Creating Solaris Volume Manager Components” on
page 44.
Become superuser.
To create a hot spare pool, use one of the following methods:
_ From the Enhanced Storage tool within the Solaris Management Console,
open the Hot Spare

Pools node. Then, choose Action Create Hot Spare Pool. For more⇒
information, see the online
help.
_ Use the following form of the metainit command:
# metainit hot-spare-pool-name ctds-for-slice
hot-spare-pool-name Specifies the name of the hot spare pool.
ctds-for-slice Specifies the slice being added to the hot spare pool. The option
is
repeated for each slice being added to the hot spare pool.
BeforeYou Begin
1
2
Creating a Hot Spare Pool
176 Solaris VolumeManagerAdministration Guide • June 2006
See the metainit(1M) man page for more information.
Note – The metahs command can also be used to create hot spare pools.
Creating a Hot Spare Pool
# metainit hsp001 c2t2d0s2 c3t2d0s2
hsp001: Hotspare pool is setup
In this example, the hot spare pool hsp001 contains two disks as the hot
spares. The system confirms
that the hot spare pool has been set up.
To add more hot spares to the hot spare pool, see “How toAddAdditional
Slices to a Hot Spare Pool”
on page 177. After you create the hot spare pool, you need to associate it with
a submirror or RAID-5
volume. See “How to Associate a Hot Spare PoolWith a Volume” on page
178.
_ HowtoAddAdditional Slices to a Hot Spare Pool
Check “Prerequisites for Creating Solaris Volume Manager Components” on
page 44.
Become superuser.
To add a slice to an existing hot spare pool, use one of the following
methods:

_ From the Enhanced Storage tool within the Solaris Management Console,
open the Hot Spare
Pools node. Choose the hot spare pool you want to change. Choose
Action Properties. Then,⇒
choose the Hot Spares panel. For more information, see the online help.
_ Use one of the following forms of the metahs command:
# metahs -a hot-spare-pool-name slice-to-add
# metahs -a -all hot-spare-pool-name slice-to-add
-a hot-spare-pool-name Specifies to add the slice to the specified hot spare
pool.
-a all Specifies to add the slice to all hot spare pools.
slice-to-add Specifies the slice to add to the hot spare pool.
See the metahs(1M) man page for more information.
Note – You can add a hot spare to one or more hot spare pools. When you
add a hot spare to a hot
spare pool, the hot spare is added to the end of the list of slices in the hot
spare pool.
Example 17–1
SeeAlso
BeforeYou Begin
1
2
Creating a Hot Spare Pool
Chapter 17 • Hot Spare Pools (Tasks) 177
Adding a Hot Spare Slice to One Hot Spare Pool
In this example, the -a option adds the slice /dev/dsk/c3t0d0s2 to hot spare
pool hsp001. The
system verifies that the slice has been added to the hot spare pool.
# metahs -a hsp001 /dev/dsk/c3t0d0s2
hsp001: Hotspare is added
Adding a Hot Spare Slice to All Hot Spare Pools
In this example, the -a option used with all adds the slice /dev/dsk/c3t0d0s2 to
all hot spare pools

configured on the system. The system verifies that the slice has been added
to all hot spare pools.
# metahs -a -all /dev/dsk/c3t0d0s2
hsp001: Hotspare is added
hsp002: Hotspare is added
hsp003: Hotspare is added
Associating a Hot Spare PoolWith Volumes
_ Howto Associate a Hot Spare PoolWith a Volume
Check “Prerequisites for Creating Solaris Volume Manager Components” on
page 44.
Become superuser.
To associate a hot spare pool with a RAID-5 volume or submirror, use
one of the following methods:
_ From the Enhanced Storage tool within the Solaris Management Console,
open the Volumes and
choose a volume. Choose Action Properties. Then, choose the Hot Spare⇒
Pool panel. Finally,
choose Attach HSP. For more information, see the online help.
_ Use the following form of the metaparam command:
# metaparam -h hot-spare-pool component
-h Specifies to modify the named hot spare pooll.
hot-spare-pool Specifies the name of the hot spare pool.
component Specifies the name of the submirror or RAID-5 volume to which
the hot spare
pool is being associated.
See the metaparam(1M) man page for more information.
Example 17–2
Example 17–3
BeforeYou Begin
1
2
Associating a Hot Spare PoolWith Volumes
178 Solaris VolumeManagerAdministration Guide • June 2006
Associating a Hot Spare Pool With Submirrors

In the following example, the -h option associates a hot spare pool, hsp100,
with two submirrors, d10
and d11, of mirror, d0. The metastat command shows that the hot spare pool
is associated with the
submirrors.
# metaparam -h hsp100 d10
# metaparam -h hsp100 d11
# metastat d0
d0: Mirror
Submirror 0: d10
State: Okay
Submirror 1: d11
State: Okay
...
d10: Submirror of d0
State: Okay
Hot spare pool: hsp100
...
d11: Submirror of d0
State: Okay
Hot spare pool: hsp100
...
Associating a Hot Spare Pool With a RAID-5 Volume
In the following example, the -h option associates a hot spare, hsp001, with a
RAID-5 volume,d10.
The metastat command shows that the hot spare pool is associated with the
RAID-5 volume.
# metaparam -h hsp001 d10
# metastat d10
d10: RAID
State: Okay
Hot spare pool: hsp001
...
_ Howto Change theAssociated Hot Spare Pool

Check “Prerequisites for Creating Solaris Volume Manager Components” on
page 44.
Become superuser.
Example 17–4
Example 17–5
BeforeYou Begin
1
Associating a Hot Spare PoolWith Volumes
Chapter 17 • Hot Spare Pools (Tasks) 179
To change a volume’s associated hot spare pool, use one of the
following methods:
_ From the Enhanced Storage tool within the Solaris Management Console,
open the Volumes
node and choose the volume. Choose Action Properties. Then choose the⇒
Hot Spare Pool
panel. Detach the unwanted hot spare pool and attach the new hot spare pool
by following the
onscreen instructions. For more information, see the online help.
_ Use the following form of the metaparam command:
# metaparam -h hot-spare-pool-name RAID5-volume-or-submirror-name
-h Specifies to modify the hot spare pool named.
hot-spare-pool Specifies the name of the new hot spare pool, or the special
keyword none to
remove hot spare pool associations.
component Specifies the name of the submirror or RAID-5 volume to which
the hot spare
pool is being attached.
See the metaparam(1M) man page for more information.
Changing the Hot Spare PoolAssociation
In the following example, the hot spare pool, hsp001, is initially associated
with a RAID-5 volume,d4.
The hot spare pool association for the volume is then changed to hsp002. The
metastat command
shows the hot spare pool association before and after this change.

# metastat d4
d4: RAID
State: Okay
Hot spare pool: hsp001
...
# metaparam -h hsp002 d4
# metastat d4
d4: RAID
State: Okay
Hot spare pool: hsp002
...
Removing a Volume’s Hot Spare PoolAssociation
In the following example, the hot spare pool, hsp001, is initially associated
with a RAID-5 volume,
d4. The hot spare pool association is then changed to none, which indicates
that no hot spare pool
should be associated with this volume. The metastat command shows the hot
spare pool association
before and after this change.
# metastat d4
d4: RAID
2
Example 17–6
Example 17–7
Associating a Hot Spare PoolWith Volumes
180 Solaris VolumeManagerAdministration Guide • June 2006
State: Okay
Hot spare pool: hsp001
...
# metaparam -h none d4
# metastat d4
d4: RAID
State: Okay
Hot spare pool:

...
Maintaining Hot Spare Pools
The following sections show how to perform maintenance tasks on hot spare
pools.
_ Howto Check the Status of Hot Spares and Hot Spare
Pools
To view the status of a hot spare pool and its hot spares, use one of the
following methods:
_ From the Enhanced Storage tool within the Solaris Management Console,
open the Hot Spare
Pools node and select a hot spare pool. Choose Action Properties to view⇒
detailed status
information. For more information, see the online help.
_ Run the following form of the metastat command:
# metastat hot-spare-pool-name
Viewing the Status of a Hot Spare Pool
The following example shows sample output from the metastat command on a
hot spare pool.
# metastat hsp001
hsp001: 1 hot spare
c1t3d0s2 Available 16800 blocks
The metahs command can also be used to check the status of a hot spare
pool.
For information on the hot spare pool states and the possible actions to take,
see “Hot Spare Pool
States” on page 173.
◗
Example 17–8
Maintaining Hot Spare Pools
Chapter 17 • Hot Spare Pools (Tasks) 181
_ Howto Replace a Hot Spare in a Hot Spare Pool
Become superuser.
Verify whether the hot spare is currently being used by using one of the
following methods:

_ From the Enhanced Storage tool within the Solaris Management Console,
open the Hot Spare
Pools node and select a hot spare pool. Choose Action Properties. Then⇒
choose the Hot Spares
panel. Follow the onscreen instructions. For more information, see the online
help.
_ Use the following form of the metastat command to view the status of the
hot spare pool:
# metastat hot-spare-pool-name
For more information, see the metastat(1M) man page.
To replace the hot spare, use one of the following methods:
_ From the Enhanced Storage tool within the Solaris Management Console,
open the Hot Spare
Pools node and select a hot spare pool. Choose Action Properties. Then⇒
choose the Hot Spares
panel. Follow the onscreen instructions. For more information, see the online
help.
_ Use the following form of the metahs command:
# metahs -r hot-spare-pool-name current-hot-spare replacement-hot-spare
-r Specifies to replace disks in the named hot spare pool.
hot-spare-pool-name Specifies the name of the hot spare pool. You can also
use the special
keyword all to change all hot spare pool associations.
current-hot-spare Specifies the name of the current hot spare that will be
replaced.
replacement-hot-spare Specifies the name of the slice that will replace the
current hot spare in
the named hot spare pool.
For more information, see the metahs(1M) man page.
Replacing a Hot Spare in One Hot Spare Pool
In the following example, the metastat command shows that the hot spare is
not in use. The metahs
-r command replaces the hot spare, /dev/dsk/c0t2d0s2, with the hot spare,
/dev/dsk/c3t1d0s2, in

the hot spare pool, hsp003.
# metastat hsp003
hsp003: 1 hot spare
c0t2d0s2 Broken 5600 blocks
# metahs -r hsp003 c0t2d0s2 c3t1d0s2
hsp003: Hotspare c0t2d0s2 is replaced with c3t1d0s2
1
2
3
Example 17–9
Maintaining Hot Spare Pools
182 Solaris VolumeManagerAdministration Guide • June 2006
Replacing a Hot Spare in AllAssociated Hot Spare Pools
In the following example, the keyword all replaces the hot spare,
/dev/dsk/c1t0d0s2, with the hot
spare, /dev/dsk/c3t1d0s2, in all its associated hot spare pools.
# metahs -r all c1t0d0s2 c3t1d0s2
hsp001: Hotspare c1t0d0s2 is replaced with c3t1d0s2
hsp002: Hotspare c1t0d0s2 is replaced with c3t1d0s2
hsp003: Hotspare c1t0d0s2 is replaced with c3t1d0s2
_ Howto Delete a Hot Spare From a Hot Spare Pool
Become superuser.
Verify whether the hot spare is currently being used by using one of the
following methods:
_ From the Enhanced Storage tool within the Solaris Management Console,
open the Hot Spare
Pools node and select a hot spare pool. Choose Action Properties. Then⇒
choose the Hot Spares
panel. Follow the onscreen instructions. For more information, see the online
help.
_ Use the following form of the metastat command to view the status of the
hot spare pool:
# metastat hot-spare-pool-name
See the metastat(1M) man page.

To delete the hot spare, use one of the following methods:
_ From the Enhanced Storage tool within the Solaris Management Console,
open the Hot Spare
Pools node and select a hot spare pool. Choose Action Properties. Then⇒
choose the Hot Spares
panel. Follow the onscreen instructions. For more information, see the online
help.
_ Use the following form of the metahs command:
# metahs -d hot-spare-pool-name current-hot-spare
-d Specifies to delete a hot spare fromthe named hot spare pool.
hot-spare-pool Specifies the name of the hot spare pool. You can also use the
special
keyword all to delete the hot spare fromall hot spare pools.
current-hot-spare Specifies the name of the current hot spare that will be
deleted.
For more information, see the metahs(1M) man page.
Example 17–10
1
2
3
Maintaining Hot Spare Pools
Chapter 17 • Hot Spare Pools (Tasks) 183
Deleting a Hot Spare from One Hot Spare Pool
In the following example, the metastat command shows that the hot spare is
not in use. The metahs
-d command deletes the hot spare, /dev/dsk/c0t2d0s2, in the hot spare pool,
hsp003.
# metastat hsp003
hsp003: 1 hot spare
c0t2d0s2 Broken 5600 blocks
# metahs -d hsp003 c0t2d0s2
_ Howto Enable a Hot Spare
Become superuser.

To return a hot spare to the “available” state, use one of the following
methods:
_ From the Enhanced Storage tool within the Solaris Management Console,
open the Hot Spare
Pools node and select a hot spare pool. Choose Action Properties. Then,⇒
choose the Hot Spares
panel. Follow the onscreen instructions. For more information, see the online
help.
_ Use the following form of the metahs command:
# metahs -e hot-spare-slice
-e Specifies to enable a hot spare.
hot-spare-slice Specifies the name of the slice to enable.
For more information, see the metahs(1M) man page.
Enabling a Hot Spare
In the following example, the metahs command places the hot spare,
/dev/dsk/c0t0d0s2 in the
“Available” state after it has been repaired. It is unnecessary to specify a hot
spare pool.
# metahs -e c0t0d0s2
Example 17–11
1
2
Example 17–12
Maintaining Hot Spare Pools
184 Solaris VolumeManagerAdministration Guide • June 2006
Disk Sets (Overview)
This chapter provides conceptual information about disk sets. For information
about performing
related tasks, see Chapter 19.
This chapter includes the following information:
_ “What’s New in Disk Sets” on page 185
_ “Introduction to Disk Sets” on page 186
_ “Solaris Volume Manager Disk Set Administration” on page 188
_ “Guidelines forWorkingWith Disk Sets” on page 194

_ “Asynchronous Shared Storage in Disk Sets” on page 195
_ “Scenario—Disk Sets” on page 195
What’sNewin Disk Sets
This section describes new disk set features in this Solaris release.
For a complete listing of new Solaris features and a description of Solaris
releases, see What’s New in
Solaris Express.
Enhanced OutputWith the metaimport Command
Solaris Express 6/06: The metaimport command has been enhanced to
allow you to import partial
disk sets.Apartial disk set is a disk set that has at least one disk that is not
available.With this
enhancement, a partial disk set can still be imported provided one disk with a
metadb is present in the
set.
This new functionality is associated with enhancements in the metaimport -r
command. The
command’s output now includes the following information:
Time stamp The time the disk set is created is displayed.
Unavailable disks If a disk has become unresponsive or might have been
removed from
the system, the disk is labeled unavailable.
18 C H A P T E R 1 8
185
Disk conflicts If a disk is listed as belonging to more than one disk set, the
disk is
marked as in conflict.
Import recommendation If disk conflicts exist, metaimport recommends which
disk set to
import with the disk in conflict.
The information generated by metaimport -r helps reduce the risk of data
corruption when
importing disk sets. In cases of disk conflicts, metaimport imports only the
most recent disk set that

is created with the disk in conflict. If a user imports a disk set with time
conflicts contrary to the
recommendation, the attempt is blocked.
The metaimport -rv command now contains more information in the output.
This information
allows the user to see the basic structure of the volumes that are available for
import.
Finally, you can import the recommended partial disk set by using the
following syntax:
metaimport -s setname -f diskname
For examples of the output of the metaimport -r and metaimport -rv
commands, see “How to
Print a Report on Disk SetsAvailable for Import” on page 210.
Introduction to Disk Sets
Adisk set is a set of physical storage volumes that contain logical volumes
and hot spares. Volumes
and hot spare pools must be built on drives from within that disk set. Once
you have created a
volume within the disk set, you can use the volume just as you would use a
physical slice. You can use
the volume to create and to mount a file system and to store data.
Note – Disk sets are supported on both SPARC and x86 based platforms.
Types of Disk Sets
This section discusses the different types of disk sets available in Solaris
Volume Manager.
Local Disk Sets
Each host has a local disk set. The local disk set consists of all of the disks on
a host that are not in a
named disk set.Alocal disk set belongs exclusively to a specific host. The
local disk set contains the
state database for that specific host’s configuration. Volumes and hot spare
pools in the local disk set
consist only of drives from within the local disk set.
Introduction to Disk Sets

186 Solaris VolumeManagerAdministration Guide • June 2006
Named Disk Sets
In addition to local disk sets, hosts can participate in named disk sets.Anamed
disk set is any disk set
that is not in the local disk set. You can implement the following types of
named disk sets to manage
volumes, depending on the configuration of your system.
Shared Disk Sets
Ashared disk set can be shared by multiple hosts. Although a shared disk set
is visible from all the
participating hosts, only the owner of the disk set can access it. Each host can
control a shared disk
set, but only one host can control it at a time. Additionally, shared disk sets
provide a distinct
namespace within which the volume is managed.
Ashared disk set supports data redundancy and data availability. If one host
fails, another host can
take over the failed host’s disk set (this type of configuration is known as a
failover configuration).
Note – Shared disk sets are intended, in part, for use with Sun Cluster,
SolsticeHA(HighAvailability),
or another supported third-partyHAframework. Solaris Volume Manager by
itself does not provide
all the functionality necessary to implement a failover configuration.
Although each host can control the set of disks, only one host can control it at
a time.
Autotake Disk Sets
Before the autotake feature became available in the Solaris 9 4/04 release,
Solaris Volume Manager
did not support the automatic mounting of file systems on disk sets through
the /etc/vfstab file.
Solaris Volume Manager required the system administrator to manually issue
a disk set take

command by using the metaset -s setname -t command before the file
systems on the disk set
could be accessed.
With the autotake feature, you can set a disk set to be automatically accessed
at boot time by using the
metaset -s setname -A enable command. The autotake feature makes it
possible for you to define at
boot the mount options for a file system in the /etc/vfstab file. This feature
allows you to define the
mount options in the /etc/vfstab file for file systems on volumes in the enabled
disk set.
Only single-host disk sets support the autotake feature. The autotake feature
requires that the disk set
is not shared with any other systems.Adisk set that is shared cannot be set to
use the autotake
feature, and the metaset -A command will fail. However, after other hosts are
removed from the disk
set, it may then be set to autotake. Similarly, an autotake disk set cannot have
other hosts added to it.
If the autotake feature is disabled, additional hosts can then be added to the
disk set.
Note – In a Sun Cluster environment, the autotake feature is disabled. Sun
Cluster handles the take
and release of a disk set.
For more information on the autotake feature see the -A option of the
metaset(1M) command.
Types of Disk Sets
Chapter 18 • Disk Sets (Overview) 187
Multi-Owner Disk Sets
Named disk sets created in a Sun Cluster environment are called multi-owner
disk sets. Multi-owner
disk sets allow multiple nodes to share the ownership of the disk sets and to
simultaneously access

the shared disks. All disks and volumes in a multi-owner disk set can be
directly accessed by all the
nodes in a cluster. Each multi-owner disk set contains a list of hosts that have
been added to the disk
set. Consequently, each multi-owner disk set within a cluster configuration
can have a different (and
sometimes overlapping) set of hosts.
Each multi-owner disk set has a master node. The function of the master
node is to manage and
update the state database replica changes. Since there is a master node per
disk set, multiple masters
can exist simultaneously. There are two ways that the master is chosen. The
first way is that a node
becomes the master if it is the first node to add a disk to the disk set. The
second way is when a master
node panics and fails. The node with the lowest node id becomes the master
node.
Multi-owner disk set functionality is enabled only in a Sun Cluster environment
to manage
multi-owner disk set storage. The Solaris Volume Manager for Sun Cluster
feature works with
releases of Sun Cluster beginning with the Sun Cluster 10/04 software
collection and with
applications like Oracle Real Applications Clusters. For more information on
Solaris Volume
Manager for Sun Cluster, see Chapter 4, Solaris Volume Manager for Sun
Cluster (Overview).
Before you can configure multi-owner disk sets, the following software must
be installed in addition
to the Solaris OS:
_ Sun Cluster initial cluster framework
_ Sun Cluster Support for Oracle Real Application Clusters software
_ Oracle Real Application Clusters software

Note – For information on setting up Sun Cluster and Oracle Real Application
Clusters software, see
Sun Cluster Software Installation Guide for Solaris OS and Sun Cluster Data
Service for Oracle RAC
Guide for Solaris OS.
Solaris Volume Manager Disk Set Administration
Unlike local disk set administration, you do not need to manually create or
delete disk set state
databases. Solaris Volume Manager places one state database replica (on
slice 7) on each disk across
all disks in the disk set, up to a maximum of 50 total replicas in the disk set.
When you add disks to a disk set, Solaris Volume Manager automatically
creates the state database
replicas on the disk set. When a disk is accepted into a disk set, Solaris
Volume Manager might
repartition the disk so that the state database replica for the disk set can be
placed on the disk (see
“Automatic Disk Partitioning” on page 191).
Afile system that resides on a volume in a disk set normally is not mounted
automatically at boot
time with the /etc/vfstab file. The necessary Solaris Volume Manager RPC
daemons (rpc.metad
Solaris Volume Manager Disk Set Administration
188 Solaris VolumeManagerAdministration Guide • June 2006
and rpc.metamhd) do not start early enough in the boot process to permit this.
Additionally, the
ownership of a disk set is lost during a reboot. Do not disable the Solaris
Volume Manager RPC
daemons in the /etc/inetd.conf file. They are configured to start by default.
These daemons must
remain enabled to allow Solaris Volume Manager to use its full functionality.
When the autotake feature is enabled using the -A option of the metaset
command, the disk set is

automatically taken at boot time. Under these circumstances, a file system
that resides on a volume in
a disk set can be automatically mounted with the /etc/vfstab file. To enable an
automatic take
during the boot process, the disk set must be associated with only a single
host, and must have the
autotake feature enabled.Adisk set can be enabled either during or after disk
set creation. For more
information on the autotake feature, see “Autotake Disk Sets” on page 187.
Note – Although disk sets are supported in single-host configurations, they
are often not appropriate
for “local” (not dual-connected) use. Two common exceptions are the use of
disk sets to provide a
more manageable namespace for logical volumes, and to more easily
manage storage on a Storage
Area Network (SAN) fabric (see “Scenario—Disk Sets” on page 195.
Disk sets can be created and configured by using the Solaris Volume
Manager command-line
interface (the metaset command) or the Enhanced Storage tool within the
Solaris Management
Console.
After disks are added to a disk set, the disk set can be reserved (or taken)
and released by hosts in the
disk set. When a disk set is reserved by a host, the other host in the disk set
cannot access the data on
the disks in the disk set. To perform maintenance on a disk set, a host must
be the owner of the disk
set or have reserved the disk set.Ahost takes implicit ownership of the disk set
by putting the first
disk into the set.
Disk sets, including disk sets created on a different system, can be imported
into existing Solaris
Volume Manager configurations using the metaimport command.
Reserving a Disk Set

Before a host can use the disks in a disk set, the host must reserve the disk
set. There are two methods
of reserving a disk set:
_ Safely- When you safely reserve a disk set, Solaris Volume Manager
attempts to take the disk set,
and the other host attempts to release the disk set. The release (and therefore
the reservation)
might fail.
_ Forcibly- When you forcibly reserve a disk set, Solaris Volume Manager
reserves the disk set
whether or not another host currently has the set reserved. This method is
generally used when a
host in the disk set is down or not communicating. All disks within the disk set
are taken over.
The state database is read in on the host performing the reservation and the
shared volumes
configured in the disk set become accessible. If the other host had the disk
set reserved at this
point, it would panic due to reservation loss.
Solaris Volume Manager Disk Set Administration
Chapter 18 • Disk Sets (Overview) 189
Normally, two hosts in a disk set cooperate with each other to ensure that the
disks in a disk set
are reserved by only one host at a time.Anormal situation is defined as both
hosts being up and
communicating with each other.
Note – If a disk has been determined unexpectedly not to be reserved
(perhaps because another host
using the disk set forcibly took the disk), the host will panic. This behavior
helps to minimize data
loss which would occur if two hosts were to simultaneously access the same
disk.
For more information about taking or reserving a disk set, see “How to Take a
Disk Set” on page 205.

Releasing a Disk Set
Releasing a disk set can be useful when you perform maintenance on the
physical disks in the disk
set. When a disk set is released, it cannot be accessed by the host. If both
hosts in a disk set release the
set, neither host in the disk set can access the disks in the disk set.
For more information about releasing a disk set, see “How to Release a Disk
Set” on page 207.
Importing a Disk Set
Beginning with the Solaris 9 9/04 release, the metaimport command enables
you to import disk sets,
including replicated disk sets, into existing Solaris Volume Manager
configurations that have device
ID support in the disk set. You can also use the metaimport command to
report on disk sets that are
available for import.
Replicated disk sets are created using remote replication software. In order
for a replicated disk set to
be imported with the metaimport command, the slice containing the state
database replica for each
disk in the disk set must also be replicated onto the same slice of the
replicated disk set. This
corresponds to slice 7 for non-EFI disks and slice 6 for EFI disks. Before
replicating a disk set, make
sure that the disk configurations of the data to be replicated and of the remote
site match. This step
ensures that both the state database replica and the data are replicated
accurately.
The metaimport command also does not import a disk in a disk set if the disk
does not contain a
volume or a state database replica. This scenario occurs if a volume or a state
database replica have
not been added to a disk or have been deleted from a disk. In this case, when
you import the disk set

to another system, you would find that the disk is missing from the disk set.
For example, maximum
of 50 state database replicas are allowed per Solaris Volume Manager disk
set. If you have 60 disks in a
disk set, the 10 disks that do not contain a state database replica must
contain a volume in order to be
imported with the disk set.
For tasks associated with importing a disk set, see “Importing Disk Sets” on
page 210.
Solaris Volume Manager Disk Set Administration
190 Solaris VolumeManagerAdministration Guide • June 2006
Note – In a Sun Cluster environment, the metaimport command is not
available.
Automatic Disk Partitioning
When you add a new disk to a disk set, Solaris Volume Manager checks the
disk format. If necessary,
Solaris Volume Manager repartitions the disk to ensure that the disk has an
appropriately configured
slice 7 with adequate space for a state database replica. The precise size of
slice 7 depends on the disk
geometry. However, the size will be no less than 4 Mbytes, and probably
closer to 6 Mbytes
(depending on where the cylinder boundaries lie).
By default, Solaris Volume Manager places one state database replica on
slice 7. You can increase the
default size of slice 7 or decrease the size of the state database replica in
order to fit more than one
state database replica onto the slice.
Note – The minimal size for slice 7 will likely change in the future, based on a
variety of factors,
including the size of the state database replica and information to be stored in
the state database
replica. The default size for a state database replica in a multi-owner disk set
is 16 Mbytes.

For use in disk sets, disks must have a slice 7 that meets these criteria:
_ Starts at sector 0
_ Includes enough space for a disk label and state database replicas
_ Cannot be mounted
_ Does not overlap with any other slices, including slice 2
If the existing partition table does not meet these criteria, Solaris Volume
Manager repartitions the
disk.Asmall portion of each drive is reserved in slice 7 for use by Solaris
Volume Manager. The
remainder of the space on each drive is placed into slice 0. Any existing data
on the disks is lost by
repartitioning.
Tip– After you add a drive to a disk set, you may repartition it as necessary,
with the exception that
slice 7 is not altered in any way.
The following output from the prtvtoc command shows a disk before it is
added to a disk set.
[root@lexicon:apps]$ prtvtoc /dev/rdsk/c1t6d0s0
* /dev/rdsk/c1t6d0s0 partition map
*
* Dimensions:
* 512 bytes/sector
* 133 sectors/track
* 27 tracks/cylinder
* 3591 sectors/cylinder
Solaris Volume Manager Disk Set Administration
Chapter 18 • Disk Sets (Overview) 191
* 4926 cylinders
* 4924 accessible cylinders
*
* Flags:
* 1: unmountable
* 10: read-only
*

* First Sector Last
* Partition Tag Flags Sector Count Sector Mount Directory
0 2 00 0 4111695 4111694
1 3 01 4111695 1235304 5346998
2 5 01 0 17682084 17682083
3 0 00 5346999 4197879 9544877
4 0 00 9544878 4197879 13742756
5 0 00 13742757 3939327 17682083
The above output shows that the disk does not contain a slice 7. Therefore,
when the disk is added to
a disk set, Solaris Volume Manager repartitions the disk. The following output
from the prtvtoc
command shows the disk after it is added to a disk set.
[root@lexicon:apps]$ prtvtoc /dev/rdsk/c1t6d0s0
* /dev/rdsk/c1t6d0s0 partition map
*
* Dimensions:
* 512 bytes/sector
* 133 sectors/track
* 27 tracks/cylinder
* 3591 sectors/cylinder
* 4926 cylinders
* 4924 accessible cylinders
*
* Flags:
* 1: unmountable
* 10: read-only
*
* First Sector Last
* Partition Tag Flags Sector Count Sector Mount Directory
0 0 00 10773 17671311 17682083
7 0 01 0 10773 10772
[root@lexicon:apps]$

The output shows that the disk has been repartitioned to include a slice 7 that
starts at cylinder 0 and
that has sufficient space for the state database replica. If disks you add to a
disk set each have an
acceptable slice 7, they are not reformatted.
Solaris Volume Manager Disk Set Administration
192 Solaris VolumeManagerAdministration Guide • June 2006
Note – If you have disk sets that you upgraded from Solstice DiskSuite
software, the default state
database replica size on those sets is 1034 blocks, not the 8192 block size
from Solaris Volume
Manager. Also, slice 7 on the disks that were added under Solstice DiskSuite
software are
correspondingly smaller than slice 7 on disks that were added under Solaris
Volume Manager.
Disk SetNameRequirements
Disk set volume names are similar to other Solaris Volume Manager
component names. However,
the disk set name is included as part of the name. For example, volume path
names include the disk
set name after /dev/md/ and before the actual volume name in the path.
The following table shows some example disk set volume names.
TABLE 18–1 ExampleVolume Names for Disk Sets
/dev/md/blue/dsk/d0 Block volume d0 in disk set blue
/dev/md/blue/dsk/d1 Block volume d1 in disk set blue
/dev/md/blue/rdsk/d126 Raw volume d126 in disk set blue
/dev/md/blue/rdsk/d127 Raw volume d127 in disk set blue
Similarly, hot spare pools have the disk set name as part of the hot spare
name.
Example—TwoShared Disk Sets
Figure 18–1 shows an example configuration that uses two disk sets.
In this configuration, HostAand Host B share the disk sets red and blue. They
each have their own
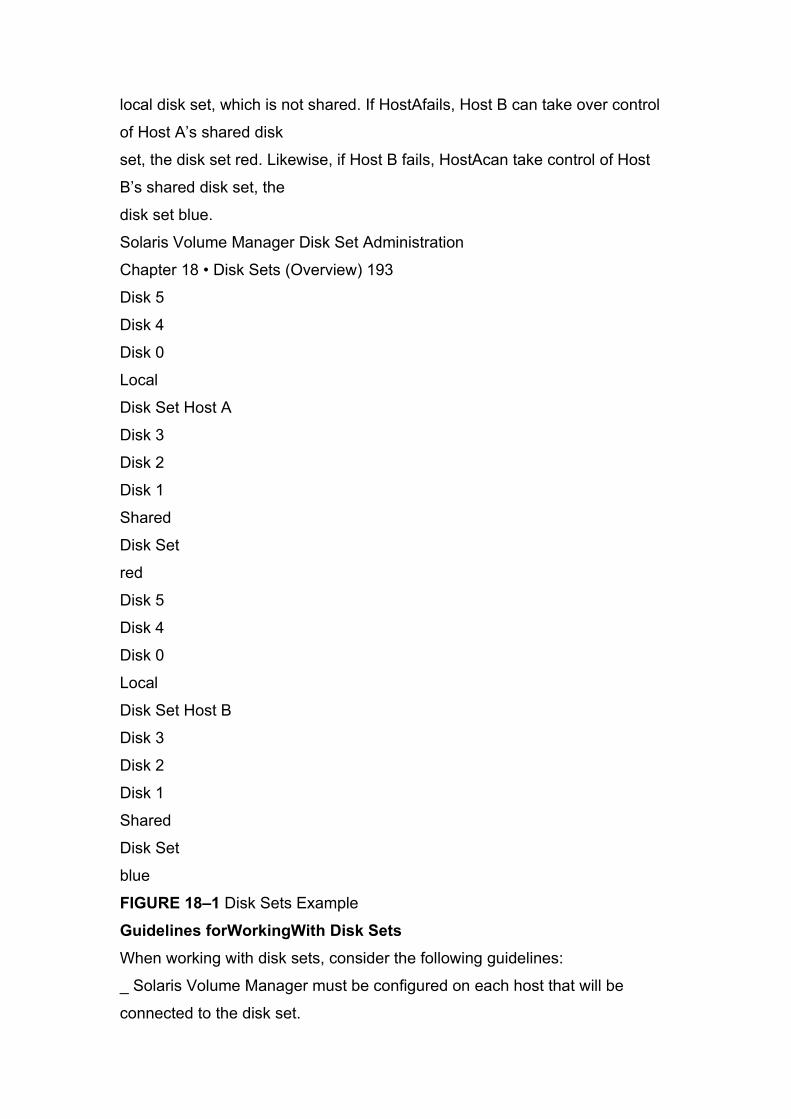
local disk set, which is not shared. If HostAfails, Host B can take over control
of Host A’s shared disk
set, the disk set red. Likewise, if Host B fails, HostAcan take control of Host
B’s shared disk set, the
disk set blue.
Solaris Volume Manager Disk Set Administration
Chapter 18 • Disk Sets (Overview) 193
Disk 5
Disk 4
Disk 0
Local
Disk Set Host A
Disk 3
Disk 2
Disk 1
Shared
Disk Set
red
Disk 5
Disk 4
Disk 0
Local
Disk Set Host B
Disk 3
Disk 2
Disk 1
Shared
Disk Set
blue
FIGURE 18–1 Disk Sets Example
Guidelines forWorkingWith Disk Sets
When working with disk sets, consider the following guidelines:
_ Solaris Volume Manager must be configured on each host that will be
connected to the disk set.

_ Each host must have its local state database set up before you can create
disk sets.
_ The sequence of steps for creating a disk set and creating the volumes for
that disk set is to, first,
create the disk set. Then, add the disks to the disk set. Finally, create the
volumes in the disk set.
_ To create and work with a disk set in a clustering environment, root must be
a member of Group
14. Alternatively, the /.rhosts file on each host must contain an entry for the
other host names
associated with the disk set.
Note – This step is not necessary in a SunCluster 3.x environment.
_ To perform maintenance on a disk set, a host must be the owner of the disk
set or have reserved
the disk set.Ahost takes implicit ownership of the disk set by putting the first
drives into the disk
set.
_ You cannot add a drive to a disk set that is in use for a file system, database
or any other
application. Before you add a drive, make sure that it is not currently being
used.
_ Do not add to a disk set a drive containing existing data that you want to
preserve. The process of
adding the disk to the disk set repartitions the disk and destroys existing data.
_ Unlike local volume administration, it is not necessary to manually create or
delete state database
replicas on the disk set. Solaris Volume Manager tries to balance a
reasonable number of state
database replicas across all drives in a disk set.
Guidelines forWorkingWith Disk Sets
194 Solaris VolumeManagerAdministration Guide • June 2006
_ When drives are added to a disk set, Solaris Volume Manager rebalances
the state database

replicas across the remaining drives. Later, if necessary, you can change the
replica layout with the
metadb command.
Asynchronous Shared Storage in Disk Sets
In previous versions of Solaris Volume Manager, all of the disks that you
planned to share between
hosts in the disk set had to be connected to each host. They also had to have
the exact same path,
driver, and name on each host. Specifically, a shared disk drive had to be
seen by both hosts in the
same location (/dev/rdsk/c#t#d#). In addition, the shared disks had to use the
same driver name
(ssd).
In the current Solaris OS release, systems that have different views of
commonly accessible storage
can nonconcurrently share access to a disk set.With the introduction of device
ID support for disk
sets, Solaris Volume Manager automatically tracks disk movement within
named disk sets.
Note – Device ID support for disk sets is not supported in a Sun Cluster
environment.
When you upgrade to the latest Solaris OS, you need to take the disk set
once in order to enable disk
tracking. For more information on taking a disk set, see “How to Take a Disk
Set” on page 205.
If the autotake feature is not enabled, you have to take each disk set
manually. If this feature is
enabled, this step is done automatically when the system is rebooted. For
more information on the
autotake feature, see “Autotake Disk Sets” on page 187.
This expanded device ID support also enables you to import disk sets, even
disk sets that were
created on different systems. For more information on importing disk sets, see
“Importing a Disk

Set” on page 190.
Scenario—Disk Sets
The following example, drawing on the sample system shown in Chapter 5,
describes how disk sets
should be used to manage storage that resides on a SAN (Storage Area
Network) fabric.
Assume that the sample system has an additional controller that connects to a
fiber switch and SAN
storage. Storage on the SAN fabric is unavailable to the system as early in the
boot process as other
devices, such as SCSI and IDE disks. In addition, Solaris Volume Manager
would report logical
volumes on the fabric as unavailable at boot. However, by adding the storage
to a disk set, and then
using the disk set tools to manage the storage, this problem with boot time
availability is avoided.
Also, the fabric-attached storage can be easily managed within a separate,
disk set-controlled,
namespace from the local storage.
Scenario—Disk Sets
Chapter 18 • Disk Sets (Overview) 195
196
Disk Sets (Tasks)
This chapter provides information about performing tasks that are associated
with disk sets. For
information about the concepts that are involved in these tasks, see Chapter
18.
Disk Sets (Task Map)
The following task map identifies the procedures that are needed to manage
Solaris Volume Manager
disk sets and Solaris Volume Manager for Sun Cluster multi-owner disk sets.
All commands work for
both types of disk sets except where noted. The Solaris Volume Manager GUI
is not available for

tasks associated with multi-owner disk sets.
Task Description For Instructions
Create a disk set Use the Solaris Volume Manager GUI or the
metaset command to create a disk set.
Use the metaset -Mcommand to create a
multi-owner disk set.
“How to Create a Disk Set”
on page 198
Add disks to a disk set Use the Solaris Volume Manager GUI or the
metaset command to add disks to a disk set.
“How toAdd Disks to a Disk
Set” on page 200
Add a host to a disk set Use the Solaris Volume Manager GUI or the
metaset command to add a host to a disk set.
“How toAddAnother Host to a
Disk Set” on page 201
Create Solaris Volume
Manager volumes in a disk
set
Use the Solaris Volume Manager GUI or the
metainit command to create volumes in a
disk set.
“How to Create Solaris Volume
Manager Components in a Disk
Set” on page 202
Check the status of a disk set Use the Solaris Volume Manager GUI, or use
the metaset command to check the status of
a disk set.
“How to Check the Status of a
Disk Set” on page 204
19 C H A P T E R 1 9
197
Task Description For Instructions
Remove disks from a disk set Use the Solaris Volume Manager GUI or the

metaset command to remove disks from a
disk set.
“How to Delete Disks From a
Disk Set” on page 204
Take a disk set Use the Solaris Volume Manager GUI or the
metaset command to take a disk set.
“How to Take a Disk Set”
on page 205
Release a disk set Use the Solaris Volume Manager GUI or the
metaset command to release a disk set.
“How to Release a Disk Set”
on page 207
Delete a host from a disk set Use the Solaris Volume Manager GUI or the
metaset command to delete hosts from a
disk set.
“How to Delete a Host or Disk
Set” on page 208
Delete a disk set Use the Solaris Volume Manager GUI or the
metaset command to delete the last host
from a disk set, thus deleting the disk set.
“How to Delete a Host or Disk
Set” on page 208
Import a disk set Use the metaimport command to run reports
on disk sets to determine which disk sets can
be imported and to import disk sets from one
system to another.
“Importing Disk Sets” on page
210
Creating Disk Sets
_ Howto Create a Disk Set
Check “Guidelines forWorkingWith Disk Sets” on page 194.
To create a disk set, use one of the following methods:
_ From the Enhanced Storage tool within the Solaris Management Console,
open the Disk Sets

node. Choose Action Create Disk Set. Then, follow the instructions in the⇒
wizard. For more
information, see the online help.
_ To create a disk set from scratch from the command line, use the following
form of the metaset
command:
# metaset -s diskset-name -a -h -M hostname
-s diskset-name Specifies the name of a disk set on which the metaset
command will work.
-a Adds hosts to the named disk set. Solaris Volume Manager supports up to
four hosts per disk set.
-M Specifies that the disk set being created is a multi-owner disk set.
BeforeYou Begin
1
Creating Disk Sets
198 Solaris VolumeManagerAdministration Guide • June 2006
-h hostname Specifies one or more hosts to be added to a disk set. Adding
the first host
creates the set. The second host can be added later. However, the second
host
is not accepted if all the disks within the set cannot be found on the specified
hostname. hostname is the same name found in the /etc/nodename file.
See the metaset(1M) man page for more information.
Check the status of the new disk set.
# metaset
Creating a Disk Set
In the following example, you create a shared disk set called blue, fromthe
host host1. The metaset
command shows the status. At this point, the disk set has no owner. The host
that adds disks to the
set becomes the owner by default.
# metaset -s blue -a -h host1
# metaset
Set name = blue, Set number = 1

Host Owner
host1
Creating a Multi-Owner Disk Set
In the following example, you create a multi-owner disk set called red. The
first line of the output
from the metaset command displays “Multi-owner,” indicating that the disk set
is a multi-owner
disk set.
# metaset -s red -a -M -h nodeone
# metaset -s red
Multi-owner Set name = red, Set number = 1, Master =
Host Owner Member
nodeone Yes
2
Example 19–1
Example 19–2
Creating Disk Sets
Chapter 19 • Disk Sets (Tasks) 199
Expanding Disk Sets
_ HowtoAdd Disks to a Disk Set
Caution – Do not add disks larger than 1Tbyte to disk sets if you expect to
run the Solaris software
with a 32–bit kernel or if you expect to use a version of the Solaris OS prior to
the Solaris 9 4/03
release. See “Overview of Multi-Terabyte Support in Solaris Volume Manager”
on page 44 for more
information about multi-terabyte volume support in Solaris Volume Manager.
Only disks that meet the following conditions can be added to a disk set:
_ The disk must not be in use in a volume or hot spare pool.
_ The disk must not contain a state database replica.
_ The disk must not be currently mounted, swapped on, or otherwise opened
for use by an
application.
Check “Guidelines forWorkingWith Disk Sets” on page 194.

To add disks to a disk set, use one of the following methods:
_ From the Enhanced Storage tool within the Solaris Management Console,
open the Disk Sets
node. Select the disk set that you want to modify. Then click the right mouse
button and choose
Properties. Select the Disks tab. ClickAdd Disk. Then follow the instructions in
the wizard. For
more information, see the online help.
_ To add disks to a disk set from the command line, use the following form of
the metaset
command:
# metaset -s diskset-name -a disk-name
-s diskset-name Specifies the name of a disk set on which the metaset
command will work.
-a Adds disks to the named disk set.
disk-name Specifies the disks to add to the disk set. disk names are in the
form cxtxdx.
NThe “sx” slice identifiers are not included when adding a disk to a disk set.
See the metaset(1M)man page for more information.
The first host to add a disk to a disk set becomes the owner of the disk set.
Caution – Do not add a disk with data to a disk set. The process of adding a
disk with data to a disk set
might repartition the disk, destroying the data.
BeforeYou Begin
1
Expanding Disk Sets
200 Solaris VolumeManagerAdministration Guide • June 2006
Verify the status of the disk set and disks.
# metaset
Adding a Disk to a Disk Set
# metaset -s blue -a c1t6d0
# metaset
Set name = blue, Set number = 1
Host Owner
host1 Yes
Drive Dbase
c1t6d0 Yes
In this example, the host name is host1. The shared disk set is blue. Only the
disk, c1t6d0, has been
added to the disk set blue.
Optionally, you could add multiple disks at once by listing each disk on the
command line. For
example, you could use the following command to add two disks to the disk
set simultaneously:
# metaset -s blue -a c1t6d0 c2t6d0
_ HowtoAddAnother Host to a Disk Set
This procedure explains how to add another host to an existing disk set that
only has one host. Solaris
Volume Manager supports up to four hosts per disk set.
Check “Guidelines forWorkingWith Disk Sets” on page 194.
To add a host to a disk set, use one of the following methods:
_ From the Enhanced Storage tool within the Solaris Management Console,
open the Disk Sets
node and choose the disk set you want to modify. Select the disk set you want
to modify. Then
click the right mouse button , and choose Properties. Select the Hosts tab.
ClickAdd Host. Then
follow the instructions in the wizard. For more information, see the online help.
_ To add hosts to a disk set from the command line, use the following form of
the metaset
command:
# metaset -s diskset-name -a -h hostname
-s diskset-name Specifies the name of a disk set on which to add the host.
-a Adds the host to the named disk set.
2
Example 19–3
BeforeYou Begin
1

Expanding Disk Sets
Chapter 19 • Disk Sets (Tasks) 201
-h hostname Specifies one or more host names to be added to the disk set.
Adding the first
host creates the disk set. The host name is the same name found in the
/etc/nodename file.
See the metaset(1M) man page for more information.
Verify that the host has been added to the disk set.
# metaset
AddingAnother Host to a Disk Set
# metaset -s blue -a -h host2
# metaset
Set name = blue, Set number = 1
Host Owner
host1 Yes
host2
Drive Dbase
c1t6d0 Yes
c2t6d0 Yes
This example shows the addition of the host, host2, to the disk set, blue.
_ Howto Create Solaris Volume Manager Components
in a Disk Set
After you create a disk set, you can create volumes and hot spare pools using
the disks you added to
the disk set. You can use either the Enhanced Storage tool within the Solaris
Management Console or
the command-line utilities.
To create volumes or other Solaris Volume Manager components within
a disk set, use one of the
following methods:
_ From the Enhanced Storage tool within the Solaris Management Console,
open the Volumes,
State Database Replicas, or Hot Spare Pools node. Choose Action Create.⇒
Then follow the

instructions in the wizard. For more information, see the online help.
_ Use the same command line utilities with the same basic syntax to create
volumes, state database
replicas, or hot spare pools. However, add -s disk-set immediately after the
command for every
command.
# command -s disk-set
2
Example 19–4
◗
Expanding Disk Sets
202 Solaris VolumeManagerAdministration Guide • June 2006
Creating Solaris Volume Manager Volumes in a Disk Set
The following example shows the creation of a mirror, d10, in the disk set,
blue. The mirror consists
of submirrors (RAID-0 volumes), d11 and d12.
# metainit -s blue d11 1 1 c1t6d0s0
blue/d11: Concat/Stripe is setup
# metainit -s blue d12 1 1 c2t6d0s0
blue/d12: Concat/Stripe is setup
# metainit -s blue d10 -m d11
blue/d10: Mirror is setup
# metattach -s blue d10 d12
blue/d10: submirror blue/d12 is attached
# metastat -s blue
blue/d10: Mirror
Submirror 0: blue/d11
State: Okay
Submirror 1: blue/d12
State: Resyncing
Resync in progress: 0 % done
Pass: 1
Read option: roundrobin (default)
Write option: parallel (default)

Size: 17674902 blocks
blue/d11: Submirror of blue/d10
State: Okay
Size: 17674902 blocks
Stripe 0:
Device Start Block Dbase State Reloc Hot Spare
c1t6d0s0 0 No Okay
blue/d12: Submirror of blue/d10
State: Resyncing
Size: 17674902 blocks
Stripe 0:
Device Start Block Dbase State Reloc Hot Spare
c2t6d0s0 0 No Okay
Example 19–5
Expanding Disk Sets
Chapter 19 • Disk Sets (Tasks) 203
Maintaining Disk Sets
_ Howto Check the Status of a Disk Set
Use one of the following methods to check the status of a disk set.
_ From the Enhanced Storage tool within the Solaris Management Console,
open the Disk Sets
node. Click the right mouse button on the Disk Set you want to monitor. Then
choose Properties
from the menu. For more information, see the online help.
_ Use the following form of the metaset command to view disk set status.
# metaset -s diskset-name
See the metaset(1M) man page for more information.
Note – Disk set ownership is only shown on the owning host.
Checking the Status of a Specified Disk Set
The following example shows the metaset command with the -s option
followed by the name of the
disk set, blue. The output from this command displays status information for
that disk set. The

output indicates that host1 is the disk set owner. The metaset command also
displays the disks in
the disk set.
red# metaset -s blue
Set name = blue, Set number = 1
Host Owner
host1 Yes
Drive Dbase
c1t6d0 Yes
c2t6d0 Yes
The metaset command by itself displays the status of all disk sets.
_ Howto Delete Disks From a Disk Set
To delete a disk from a disk set, use one of the following methods:
◗
Example 19–6
1
Maintaining Disk Sets
204 Solaris VolumeManagerAdministration Guide • June 2006
_ From the Enhanced Storage tool within the Solaris Management Console,
open the Disk Sets
node. Click the right mouse on the Disk Set that you want to release. Then
choose Properties
from the menu. Click the Disks tab. Follow the instructions in the online help.
_ Use the following form of the metaset command to delete a disk from a disk
set.
# metaset -s diskset-name -d disk-name
-s diskset-name Specifies the name of a disk set on which to delete the disk.
-d disk-name Specifies the disks to delete from the disk set. Disk names are
in the form
cxtxdx. The “sx” slice identifiers are not included when deleting a disk from
a disk set.
See the metaset(1M) man page for more information.
Verify that the disk has been deleted from the disk.
# metaset -s diskset-name

Note – To delete a disk set, you must first delete all the disks from the disk
set.
Deleting a Disk from a Disk Set
The following example shows the deletion of the disk, c1t6d0 from the disk
set, blue.
host1# metaset -s blue -d c1t6d0
host1# metaset -s blue
Set name = blue, Set number = 1
Host Owner
host1
host2
Drive Dbase
c2t6d0 Yes
_ Howto Take a Disk Set
Note – This option is not available for multi-owner disk sets.
Use one of the following methods to take a disk set:
2
Example 19–7
◗
Maintaining Disk Sets
Chapter 19 • Disk Sets (Tasks) 205
_ From the Enhanced Storage tool within the Solaris Management Console,
open the Disk Sets
node. Click the right mouse on the disk set you want to take. Then, hen
choose Take Ownership
from the menu. For more information, see the online help.
_ Use the following form of the metaset command.
# metaset -s diskset-name -t -f
-s diskset-name Specifies the name of a disk set to take.
-t Specifies to take the disk set.
-f Specifies to take the disk set forcibly.
See the metaset(1M) man page for more information.
Only one host at a time can own a disk set. When one host in a disk set takes
the disk set, the other

host in the disk set cannot access data on the disks in the disk set.
The default behavior of the metaset command is to allow your host to take the
disk set only if a
release is possible on the host that has ownership of the disk set. Use the -f
option to forcibly take the
disk set. This option takes the disk set whether or not another host currently
has the set. Use this
method when a host in the disk set is down or not communicating. If the other
host had the disk set
taken at this point, it would panic when it attempts to perform an I/O operation
on the disk set.
Note – Disk set ownership is only shown on the owning host.
Taking a Disk Set
In the following example, the host, host1, communicates with the host, host2.
This communication
ensures that the host host2 has released the disk set before the host, host1,
attempts to take the disk
set.
host1# metaset
...
Set name = blue, Set number = 1
Host Owner
host1
host2
...
host1# metaset -s blue -t
host2# metaset
...
Set name = blue, Set number = 1
Host Owner
host1 Yes
Example 19–8
Maintaining Disk Sets
206 Solaris VolumeManagerAdministration Guide • June 2006

host2
...
If host2 owned the disk set, blue, the “Owner” column in the preceding output
would still have been
blank. The metaset command only shows whether the host issuing the
command owns the disk set.
Taking a Disk Set Forcibly
In the following example, the host that is taking the disk set does not
communicate with the other
host. Instead, the -f option allows the disks in the disk set to be forcibly taken
without warning. If the
other host had owned the disk set, that host would panic when it attempted an
I/O operation on the
disk set.
# metaset -s blue -t -f
_ Howto Release a Disk Set
Releasing a disk set is useful when you perform maintenance on the physical
disks in the disk set.
When a disk set is released, it cannot be accessed by the host. If both hosts
in a disk set release the set,
neither host in the disk set can access directly the volumes or hot spare pools
that are defined in the
disk set . However, if both hosts release the disk set, the hosts can access the
disks directly through
their c*t*d* names.
Note – This option is not available for multi-owner disk sets.
Check “Guidelines forWorkingWith Disk Sets” on page 194.
Use one of the following methods to release a disk set:
_ From the Enhanced Storage tool within the Solaris Management Console,
open the Disk Sets
node. Click the right mouse on the disk set that you want to release. Then
choose Release
Ownership from the menu. For more information, see the online help.

_ To release ownership of the disk set, use the following form of the metaset
command:
# metaset -s diskset-name -r
-s diskset-name Specifies the name of a disk set on which the metaset
command will work.
-r Releases ownership of a disk set. The reservation of all the disks within the
disk set is removed. The volumes within the disk set are no longer accessible.
See the metaset(1M) man page for more information.
Example 19–9
BeforeYou Begin
1
Maintaining Disk Sets
Chapter 19 • Disk Sets (Tasks) 207
Note – Disk set ownership is only shown on the owning host.
Verify that the disk set has been released on this host.
# metaset
Releasing a Disk Set
The following example shows the release of the disk set, blue. Note that there
is no owner of the disk
set. Viewing status from the host host1 could be misleading.Ahost can only
determine if it does or
does not own a disk set. For example, if he host, host2, were to take
ownership of the disk set, the
ownership would not appear from the host, host1. Only the host, host2, would
display that host2
has ownership of the disk set.
host1# metaset -s blue -r
host1# metaset -s blue
Set name = blue, Set number = 1
Host Owner
host1
host2
Drive Dbase
c1t6d0 Yes

c2t6d0 Yes
_ Howto Delete a Host or Disk Set
Deleting a disk set requires that the disk set contains no disks and that no
other hosts are attached to
the disk set. Deleting the last host destroys the disk set.
Use one of the following methods to delete a host from a disk set, or to
delete a disk set:
_ From the Enhanced Storage tool within the Solaris Management Console,
open the Disk Sets
node. Click the right mouse on the disk set you want to release, then choose
Delete from the
menu. Follow the instructions in the online help.
_ To delete the host use the following form of the metaset command.
metaset -s diskset-name -d -h hostname
-s diskset-name Specifies the name of a disk set on which the metaset
command will work.
-d Deletes a host from a disk set.
2
Example 19–10
1
Maintaining Disk Sets
208 Solaris VolumeManagerAdministration Guide • June 2006
-h hostname Specifies the name of the host to delete.
Use the same form of the preceding metaset command to delete a disk set.
Deleting a disk set
requires that the disk set contains no disks and that no other hosts own the
disk set. Deleting the
last host destroys the disk set.
See the metaset(1M) man page for more information.
Verify that the host has been deleted from the disk set by using the
metaset command. Note that
only the current (owning) host is shown. Other hosts have been deleted.
# metaset -s disk-set
Deleting a Host From a Disk Set

The following example shows the deletion of the host, host2 from the disk set,
blue.
# metaset -s blue
Set name = blue, Set number = 1
Host Owner
host1 Yes
..host2
Drive Dbase
c1t2d0 Yes
c1t3d0 Yes
c1t4d0 Yes
c1t5d0 Yes
c1t6d0 Yes
c2t1d0 Yes
# metaset -s blue -d -h host2
# metaset -s blue
Set name = blue, Set number = 1
Host Owner
host1 Yes
Drive Dbase
c1t2d0 Yes
c1t3d0 Yes
c1t4d0 Yes
c1t5d0 Yes
c1t6d0 Yes
c2t1d0 Yes
2
Example 19–11
Maintaining Disk Sets
Chapter 19 • Disk Sets (Tasks) 209
Deleting the Last Host from a Disk Set
The following example shows the deletion of the last host from the disk set,
blue.
host1# metaset -s blue -d -h host1

host1# metaset -s blue
metaset: host: setname "blue": no such set
Importing Disk Sets
importing a disk set
The metaimport command allows you to import disk sets from one system to
another.
_ Howto Print a Report on Disk SetsAvailable for Import
Become superuser.
Obtain a report on disk sets available for import.
# metaimport -r -v
-r Provides a report of the unconfigured disk sets available for import on the
system.
-v Provides detailed information about the state database (metadb) replica
location and status
on the disks of unconfigured disk sets available for import on the system.
Reporting on Disk SetsAvailable for Import
The following examples show how to print a report on disk sets available for
import. The output
from the metaimport command distinguishes between regular disk sets and
replicated disk sets.
# metaimport -r
Disksets eligible for import:
1) Found replicated diskset containing disks :
c1t2d0
c1t3d0
Creation time: Tue May 3 14:27:29 2006
For more information about this set:
metaimport -r -v c1t2d0
To import this set:
metaimport -s <newsetname> c1t2d0
Example 19–12
1
2
Example 19–13

Importing Disk Sets
210 Solaris VolumeManagerAdministration Guide • June 2006
2) Found replicated diskset containing disks :
c1t12d0
c1t9d0
Creation time: Tue May 3 14:30:00 2006
For more information about this set:
metaimport -r -v c1t12d0
To import this set:
metaimport -s <newsetname> c1t12d0
Number of disksets eligible for import: 2
# metaimport -r -v c1t2d0
Disksets eligible for import:
1) Found regular diskset containing disks:
c1t2d0
c1t3d0
Metadatabase information:
flags first blk block count
a u 16 8192 /dev/dsk/c1t2d0s7
a u 16 8192 /dev/dsk/c1t3d0s7
Metadevice information:
Creation time: Tue May 23 13:05:39 2006
Last modified time: Tue May 23 13:05:39 2006
To import this diskset:
metaimport -s <newsetname> c1t2d0
The following output of metaimport -r reports the following conditions in the
system’s disk set
configuration.
_ Apartial disk set in which one or more disks are unavailable
_ Disk conflicts where the disk is detected in more than one disk set
_ Areplicated disk set
_ The recommended disk set to import
Note – Adisk can also be reported as unavailable and in conflict at the same
time.

# metaimport -r
Disksets eligible for import:
1) Found partial regular diskset containing disks:
c1t2d0 (CONFLICT)
Importing Disk Sets
Chapter 19 • Disk Sets (Tasks) 211
c3t50020F230000FA57d0 (UNAVAIL)
c3t50020F230000FA57d1 (UNAVAIL)
(UNAVAIL) WARNING: This disk is unavailable on this system.
Import may corrupt data in the diskset.
(CONFLICT) WARNING: This disk has been reused
in another diskset or system c onfiguration.
Import may corrupt data in the diskset.
Creation time: Tue May 23 13:05:39 2006
For more information about this diskset:
metaimport -r -v c1t2d0
To import this diskset:
metaimport -f -s <newsetname> c1t2d0
2) Found regular diskset containing disks:
c1t2d0 (CONFLICT)
c1t3d0
c1t4d0
(CONFLICT) WARNING: This disk has been reused
in another diskset or system c onfiguration.
Import may corrupt data in the diskset.
Creation time: Tue May 23 13:04:57 2006
For more information about this diskset:
metaimport -r -v c1t3d0
To import this diskset:
metaimport -f -s <newsetname> c1t3d0
3) Found replicated diskset containing disks:
c3t50020F23000100F7d13
c3t50020F23000100F7d15
c3t50020F23000100F7d14

Creation time: Thu May 25 14:56:13 2006
For more information about this diskset:
metaimport -r -v c3t50020F23000100F7d13
To import this diskset:
metaimport -s <newsetname> c3t50020F23000100F7d13
Number of disksets eligible for import: 3
Warning: The following disks have been detected in more than one set.
Import recommendation based upon set creation time.
Importing Disk Sets
212 Solaris VolumeManagerAdministration Guide • June 2006
Proceed with the import with caution.
c1t2d0 - must import with set created at : Tue May 23 13:05:39 2006
#
Importing a disk set is blocked if the disk set has disk conflicts. The preceding
example recommends
that c1t2d0 be imported with the set created at 13:05:39 on Tuesday, May 23.
If you import a different
disk set instead, the following message is displayed:
# metaimport -f -s <setname> c1t3d0
Importing regular diskset containing disks:
c1t2d0 (CONFLICT)
c1t3d0
c1t4d0
(CONFLICT) WARNING: This disk has been reused in another diskset
or system configuration.
Import may corrupt data in the diskset.
Creation time: Tue May 23 13:04:57 2006
Warning: The following disks have been detected in more than one set.
Import recommendation based upon set creation time.
Proceed with the import with caution.
c1t2d0 - must import with set created at : Tue May 23 13:05:39 2006
To import this set, c1t2d0 must be removed from the system
#
_ Howto Import a Disk Set From One System toAnother

System
Become superuser.
Verify that a disk set is available for import.
# metaimport -r -v
Import an available disk set.
# metaimport -s diskset-name disk-name
- s diskset-name Specifies the name of the disk set being created.
disk-name Identifies a disk (c#t#d#) containing a state database replica from
the disk set
being imported.
1
2
3
Importing Disk Sets
Chapter 19 • Disk Sets (Tasks) 213
Verify that the disk set has been imported.
# metaset -s diskset-name
Importing a Disk Set
The following example shows how to import a disk set.
# metaimport -s red c1t2d0
Drives in diskset including disk c1t2d0:
c1t2d0
c1t3d0
c1t8d0
# metaset -s red
Set name = red, Set number = 1
Host Owner
host1 Yes
Drive Dbase
c1t2d0 Yes
c1t3d0 Yes
c1t8d0 Yes
4
Example 19–14

Importing Disk Sets
214 Solaris VolumeManagerAdministration Guide • June 2006
Maintaining Solaris Volume Manager (Tasks)
This chapter provides information about performing general storage
administration maintenance
tasks with Solaris Volume Manager.
This is a list of the information in this chapter:
_ “Solaris Volume Manager Maintenance (Task Map)” on page 215
_ “Viewing the Solaris Volume Manager Configuration” on page 216
_ “Renaming Volumes” on page 220
_ “WorkingWith Configuration Files” on page 223
_ “Changing Solaris Volume Manager Default Values” on page 225
_ “Expanding a File System Using the growfs Command” on page 225
_ “Overview of Replacing and Enabling Components in RAID-1 and RAID-5
Volumes” on page
228
Solaris Volume Manager Maintenance (Task Map)
The following task map identifies the procedures that are needed to maintain
Solaris Volume
Manager.
Task Description For Instructions
View the Solaris Volume
Manager configuration
Use the Solaris Volume Manager GUI or the
metastat command to view the system
configuration.
“How to View the Solaris
Volume Manager Volume
Configuration” on page 216
Rename a volume Use the Solaris Volume Manager GUI or the
metarename command to rename a volume.
“How to Rename a Volume”
on page 221
Create configuration files Use the metastat -p command and the

metadb command to create configuration
files.
“How to Create Configuration
Files” on page 223
20 C H A P T E R 2 0
215
Task Description For Instructions
Initialize Solaris Volume
Manager from configuration
files
Use the metainit command to initialize
Solaris Volume Manager from configuration
files.
“How to Initialize Solaris
Volume Manager From a
Configuration File” on page 223
Expand a file system Use the growfs command to expand a file
system.
“How to Expand a File System”
on page 227
Enable components Use the Solaris Volume Manager GUI or the
metareplace command to enable
components.
“Enabling a Component”
on page 228
Replace components Use the Solaris Volume Manager GUI or the
metareplace command to replace
components.
“Replacing a ComponentWith
AnotherAvailable Component”
on page 229
Viewing the Solaris Volume Manager Configuration
Tip– The metastat command does not sort output. Pipe the output of the
metastat -p command to

the sort or grep commands for a more manageable listing of your
configuration.
_ Howto View the Solaris Volume Manager Volume
Configuration
To view the volume configuration, use one of the following methods:
_ From the Enhanced Storage tool within the Solaris Management Console,
open the Volumes
node. For more information, see the online help.
_ Use the following form of the metastat command:
# metastat -p -i component-name
-p Specifies to show output in a condensed summary. This output is suitable
for use in creating the md.tab file.
-i Specifies to verify that RAID-1 (mirror) volumes, RAID-5 volumes, and
hot spares can be accessed.
component-name Specifies the name of the volume to view. If no volume
name is specified, a
complete list of components is displayed.
Viewing the Solaris Volume Manager Volume Configuration
The following example illustrates output from the metastat command.
◗
Example 20–1
Viewing the Solaris Volume Manager Configuration
216 Solaris VolumeManagerAdministration Guide • June 2006
# metastat
d50: RAID
State: Okay
Interlace: 32 blocks
Size: 20985804 blocks
Original device:
Size: 20987680 blocks
Device Start Block Dbase State Reloc Hot Spare
c1t4d0s5 330 No Okay Yes
c1t5d0s5 330 No Okay Yes
c2t4d0s5 330 No Okay Yes

c2t5d0s5 330 No Okay Yes
c1t1d0s5 330 No Okay Yes
c2t1d0s5 330 No Okay Yes
d1: Concat/Stripe
Size: 4197879 blocks
Stripe 0:
Device Start Block Dbase Reloc
c1t2d0s3 0 No Yes
d2: Concat/Stripe
Size: 4197879 blocks
Stripe 0:
Device Start Block Dbase Reloc
c2t2d0s3 0 No Yes
d80: Soft Partition
Device: d70
State: Okay
Size: 2097152 blocks
Extent Start Block Block count
0 1 2097152
d81: Soft Partition
Device: d70
State: Okay
Size: 2097152 blocks
Extent Start Block Block count
0 2097154 2097152
d70: Mirror
Submirror 0: d71
State: Okay
Submirror 1: d72
State: Okay
Viewing the Solaris Volume Manager Configuration
Chapter 20 • Maintaining Solaris Volume Manager (Tasks) 217
Pass: 1
Read option: roundrobin (default)

Write option: parallel (default)
Size: 12593637 blocks
d71: Submirror of d70
State: Okay
Size: 12593637 blocks
Stripe 0:
Device Start Block Dbase State Reloc Hot Spare
c1t3d0s3 0 No Okay Yes
Stripe 1:
Device Start Block Dbase State Reloc Hot Spare
c1t3d0s4 0 No Okay Yes
Stripe 2:
Device Start Block Dbase State Reloc Hot Spare
c1t3d0s5 0 No Okay Yes
d72: Submirror of d70
State: Okay
Size: 12593637 blocks
Stripe 0:
Device Start Block Dbase State Reloc Hot Spare
c2t3d0s3 0 No Okay Yes
Stripe 1:
Device Start Block Dbase State Reloc Hot Spare
c2t3d0s4 0 No Okay Yes
Stripe 2:
Device Start Block Dbase State Reloc Hot Spare
c2t3d0s5 0 No Okay Yes
hsp010: is empty
hsp014: 2 hot spares
Device Status Length Reloc
c1t2d0s1 Available 617652 blocks Yes
c2t2d0s1 Available 617652 blocks Yes
hsp050: 2 hot spares
Device Status Length Reloc
c1t2d0s5 Available 4197879 blocks Yes

c2t2d0s5 Available 4197879 blocks Yes
hsp070: 2 hot spares
Device Status Length Reloc
c1t2d0s4 Available 4197879 blocks Yes
Viewing the Solaris Volume Manager Configuration
218 Solaris VolumeManagerAdministration Guide • June 2006
c2t2d0s4 Available 4197879 blocks Yes
Device Relocation Information:
Device Reloc Device ID
c1t2d0 Yes
id1,sd@SSEAGATE_ST39204LCSUN9.0G3BV0N1S200002103AF29
c2t2d0 Yes
id1,sd@SSEAGATE_ST39204LCSUN9.0G3BV0P64Z00002105Q6J7
c1t1d0 Yes
id1,sd@SSEAGATE_ST39204LCSUN9.0G3BV0N1EM00002104NP2J
c2t1d0 Yes
id1,sd@SSEAGATE_ST39204LCSUN9.0G3BV0N93J000071040L3S
c0t0d0 Yes
id1,dad@s53554e575f4154415f5f53543339313430412525415933
Viewing a Multi-Terabyte Solaris Volume Manager Volume
The following example illustrates output from the metastat command for a
multi-terabyte storage
volume (11 Tbytes).
# metastat d0
d0: Concat/Stripe
Size: 25074708480 blocks (11 TB)
Stripe 0: (interlace: 32 blocks)
Device Start Block Dbase Reloc
c27t8d3s0 0 No Yes
c4t7d0s0 12288 No Yes
Stripe 1: (interlace: 32 blocks)
Device Start Block Dbase Reloc
c13t2d1s0 16384 No Yes
c13t4d1s0 16384 No Yes

c13t6d1s0 16384 No Yes
c13t8d1s0 16384 No Yes
c16t3d0s0 16384 No Yes
c16t5d0s0 16384 No Yes
c16t7d0s0 16384 No Yes
c20t4d1s0 16384 No Yes
c20t6d1s0 16384 No Yes
c20t8d1s0 16384 No Yes
c9t1d0s0 16384 No Yes
c9t3d0s0 16384 No Yes
c9t5d0s0 16384 No Yes
c9t7d0s0 16384 No Yes
Stripe 2: (interlace: 32 blocks)
Device Start Block Dbase Reloc
c27t8d2s0 16384 No Yes
c4t7d1s0 16384 No Yes
Stripe 3: (interlace: 32 blocks)
Device Start Block Dbase Reloc
c10t7d0s0 32768 No Yes
c11t5d0s0 32768 No Yes
Example 20–2
Viewing the Solaris Volume Manager Configuration
Chapter 20 • Maintaining Solaris Volume Manager (Tasks) 219
c12t2d1s0 32768 No Yes
c14t1d0s0 32768 No Yes
c15t8d1s0 32768 No Yes
c17t3d0s0 32768 No Yes
c18t6d1s0 32768 No Yes
c19t4d1s0 32768 No Yes
c1t5d0s0 32768 No Yes
c2t6d1s0 32768 No Yes
c3t4d1s0 32768 No Yes
c5t2d1s0 32768 No Yes
c6t1d0s0 32768 No Yes

c8t3d0s0 32768 No Yes
Where To Go From Here
For more information, see the metastat(1M) man page.
Renaming Volumes
Background Information for Renaming Volumes
Solaris Volume Manager enables you to rename most types of volumes at
any time, subject to some
constraints. You can use either the Enhanced Storage tool within the Solaris
Management Console or
the command line (the metarename(1M) command) to rename volumes.
Renaming volumes or switching volume names is an administrative
convenience for the
management of volume names. For example, you could arrange all file
system mount points in a
desired numeric range. You might rename volumes to maintain a naming
scheme for your logical
volumes or to allow a transactional volume to use the same name as the
name of the underlying
volume.
Note – Transactional volumes are no longer valid in SolarisVolume
Manager.You can rename
transactional volumes to replace them.
Before you rename a volume, make sure that it is not currently in use. For a
file system, make sure
that it is not mounted or being used as swap. Other applications that use the
raw device, such as a
database, should have their own way of stopping access to the data.
Specific considerations for renaming volumes include the following:
_ You can rename any volume except the following:
Renaming Volumes
220 Solaris VolumeManagerAdministration Guide • June 2006
_ Soft partitions
_ Volumes on which soft partitions are directly built
_ Volumes that are being used as log devices

_ Hot spare pools
_ You can rename volumes within a disk set. However, you cannot rename
volumes to move them
from one disk set to another disk set.
Exchanging Volume Names
Using the metarename command with the -x option exchanges the names of
volumes that have a
parent-child relationship. For more information, see “How to Rename a
Volume” on page 221 and
the metarename(1M) man page. The name of an existing volume is
exchanged with one of its
subcomponents. For example, this type of exchange can occur between a
mirror and one of its
submirrors. The metarename -x command can make it easier to mirror or
unmirror an existing
volume.
Note – You must use the command line to exchange volume names. This
functionality is currently
unavailable in the Solaris Volume Manager GUI. However, you can rename a
volume with either the
command line or the GUI.
Consider the following guidelines when you want to rename a volume:
_ You cannot rename a volume that is currently in use. This restriction
includes volumes that are
used as mounted file systems, as swap, or as active storage for applications
or databases. Thus,
before you use the metarename command, stop all access to the volume that
is being renamed.
For example, unmount a mounted file system.
_ You cannot exchange volumes in a failed state.
_ You cannot exchange volumes that are using a hot spare replacement.
_ An exchange can only take place between volumes with a direct parent-
child relationship.

_ You cannot exchange (or rename) a log device. The workaround is to
detach the log device and
attach another log device of the desired name.
_ Only volumes can be exchanged. You cannot exchange slices or hot
spares.
_ Howto Rename a Volume
Check the volume name requirements (“Volume Names” on page 40), and
“Background
Information for Renaming Volumes” on page 220.
Unmount the file system that uses the volume.
# umount /filesystem
BeforeYou Begin
1
Renaming Volumes
Chapter 20 • Maintaining Solaris Volume Manager (Tasks) 221
To rename the volume, use one of the following methods:
_ From the Enhanced Storage tool within the Solaris Management Console,
open the Volumes.
Select the volume you want to rename. Click the right mouse on the icon.
Choose the Properties
option. Then, follow the onscreen instructions. For more information, see the
online help.
_ Use the following form of the metarename command:
# metarename old-volume-name new-volume-name
old-volume-name Specifies the name of the existing volume.
new-volume-name Specifies the new name for the existing volume.
See the metarename(1M) man page for more information.
Edit the /etc/vfstab file to refer to the new volume name, if necessary.
Remount the file system.
# mount /filesystem
Renaming a Volume Used for a File System
In the following example, the volume, d10, is renamed to d100.
# umount /home
# metarename d10 d100

d10: has been renamed to d100
(Edit the /etc/vfstab file so that the file system references the new volume)
# mount /home
Because d10 contains a mounted file system, the file system must be
unmounted before the volume
can be renamed. If the volume is used for a file system with an entry in the
/etc/vfstab file, the entry
must be changed to reference the new volume name.
For example, if the /etc/vfstab file contains the following entry for the file
system:
/dev/md/dsk/d10 /dev/md/rdsk/d10 /docs home 2 yes -
Change the entry to read as follows:
/dev/md/dsk/d100 /dev/md/rdsk/d100 /docs home 2 yes -
Then, remount the file system.
2
3
4
Example 20–3
Renaming Volumes
222 Solaris VolumeManagerAdministration Guide • June 2006
If you have an existing mirror or transactional volume, you can use the
metarename -x command to
remove the mirror or transactional volume and keep data on the underlying
volume. For a
transactional volume, as long as the master device is a volume ( either a
RAID-0, RAID-1, or RAID-5
volume), you can keep data on that volume.
WorkingWith Configuration Files
Solaris Volume Manager configuration files contain basic Solaris Volume
Manager information, as
well as most of the data that is necessary to reconstruct a configuration. The
following procedures
illustrate how to work with these files.
_ Howto Create Configuration Files

Once you have defined all appropriate parameters for the Solaris
Volume Manager environment, use
the metastat -p command to create the /etc/lvm/md.tab file.
# metastat -p > /etc/lvm/md.tab
This file contains all parameters for use by the metainit command and metahs
command. Use this
file if you need to set up several similar environments or if you need to
recreate the configuration
after a system failure.
For more information about the md.tab file, see “Overview of the md.tab File”
on page 306 and the
md.tab(4) man page.
_ Howto Initialize Solaris Volume Manager From a
Configuration File
Caution – Use this procedure in the following circumstances:
_ If you have experienced a complete loss of your Solaris Volume Manager
configuration
_ If you have no configuration yet, and you want to create a configuration from
a saved
configuration file
On occasion, your system loses the information maintained in the state
database. For example, this
loss might occur if the system was rebooted after all of the state database
replicas were deleted. As
long as no volumes were created after the state database was lost, you can
use the md.cf or md.tab
files to recover your Solaris Volume Manager configuration.
◗
WorkingWith Configuration Files
Chapter 20 • Maintaining Solaris Volume Manager (Tasks) 223
Note – The md.cf file does not maintain information on active hot spares.
Thus, if hot spares were in
use when the Solaris Volume Manager configuration was lost, those volumes
that were using active

hot spares are likely corrupted.
For more information about these files, see the md.cf(4) and the md.tab(4)
man pages.
Create state database replicas.
See “Creating State Database Replicas” on page 68 for more information.
Create or update the /etc/lvm/md.tab file.
_ If you are attempting to recover the last known Solaris Volume Manager
configuration, copy the
md.cf file into the /etc/lvm/md.tab file.
_ If you are creating a new Solaris Volume Manager configuration based on a
copy of the md.tab
file that have you preserved, copy the preserved file into the /etc/lvm/md.tab
file.
Edit the “new” /etc/lvm/md.tab file and do the following:
_ If you are creating a new configuration or recovering a configuration after a
crash, configure the
mirrors as one-way mirrors. For example:
d80 -m d81 1
d81 1 1 c1t6d0s3
If the submirrors of a mirror are not the same size, be sure to use the smallest
submirror for this
one-way mirror. Otherwise, data could be lost.
_ If you are recovering an existing configuration and Solaris Volume Manager
was cleanly stopped,
leave the mirror configuration as multi-way mirrors. For example:
d70 -m d71 d72 1
d71 1 1 c1t6d0s2
d72 1 1 c1t5d0s0
_ Specify RAID-5 volumes with the -k option, to prevent reinitialization of the
device. For
example:
d45 -r c1t3d0s5 c1t3d0s3 c1t3d0s4 -k -i 32b
See the metainit(1M) man page for more information.

Check the syntax of the /etc/lvm/md.tab file entries without committing
changes by using one of
the following forms of the metainit command:
# metainit -n md.tab-entry
# metainit -n -a
1
2
3
4
WorkingWith Configuration Files
224 Solaris VolumeManagerAdministration Guide • June 2006
The metainit command does not maintain a hypothetical state of the devices
that might have been
created while running with the -n, so creating volumes that rely on other,
nonexistent volumes will
result in errors with the -n even though the command may succeed without
the -n option.
-n Specifies not to actually create the devices. Use this option to verify that
the results
are as you expected.
md.tab-entry Specifies the name of the component to initialize.
-a Specifies to check all components.
If no problems were apparent from the previous step, recreate the
volumes and hot spare pools from
the md.tab file:
# metainit -a
-a Specifies to activate the entries in the /etc/lvm/md.tab file.
As needed, make the one-way mirrors into multi-way mirrors by using
the metattach command.
# mettach mirror submirror
Validate the data on the volumes to confirm that the configuration has
been reconstructed
accurately.
# metastat

Changing Solaris Volume Manager Default Values
With the Solaris 10 release, Solaris Volume Manager has been enhanced to
configure volumes
dynamically. You no longer need to edit the nmd and the md_nsets
parameters in the
/kernel/drv/md.conf file. New volumes are dynamically created, as needed.
The maximum Solaris Volume Manager configuration values remain
unchanged:
_ The maximum number of volumes that is supported is 8192.
_ The maximum number of disk sets supported is 32.
Expanding a File System Using the growfs Command
After a volume that contains a UFS file system is expanded (meaning that
more space is added), you
also need to expand the file system in order to recognize the added space.
You must manually expand
the file system with the growfs command. The growfs command expands the
file system, even while
the file system is mounted. However, write access to the file system is not
possible while the growfs
command is running.
5
6
7
Expanding a File System Using the growfs Command
Chapter 20 • Maintaining Solaris Volume Manager (Tasks) 225
An application, such as a database, that uses the raw device must have its
own method to incorporate
the added space. Solaris Volume Manager does not provide this capability.
The growfs command “write-locks” a mounted file system as it expands the
file system. The length
of time the file system is write-locked can be shortened by expanding the file
system in stages. For
instance, to expand a 1-Gbyte file system to 2 Gbytes, the file system can be
grown in 16 Mbyte stages

by using the -s option. This option specifies the total size of the new file
system at each stage.
During the expansion, the file system is not available for write access because
of the write-lock
feature.Write accesses are transparently suspended and are restarted when
the growfs command
unlocks the file system. Read accesses are not affected. However, access
times are not kept while the
lock is in effect.
Background Information for Expanding Slices and
Volumes
Note – SolarisVolume Manager volumes can be expanded. However,
volumes cannot be reduced in
size.
_ Avolume can be expanded whether it is used for a file system, application,
or database. You can
expand RAID-0 (stripe and concatenation) volumes, RAID-1 (mirror) volumes,
and RAID-5
volumes and soft partitions.
_ You can concatenate a volume that contains an existing file system while
the file system is in use.
As long as the file system is a UFS file system, the file system can be
expanded (with the growfs
command) to fill the larger space. You can expand the file system without
interrupting read
access to the data.
_ Once a file system is expanded, it cannot be reduced in size, due to
constraints in the UFS file
system.
_ Applications and databases that use the raw device must have their own
method to expand the
added space so that they can recognize it. Solaris Volume Manager does not
provide this
capability.

_ When a component is added to a RAID-5 volume, it becomes a
concatenation to the volume. The
new component does not contain parity information. However, data on the
new component is
protected by the overall parity calculation that takes place for the volume.
_ You can expand a log device by adding additional components. You do not
need to run the
growfs command, as Solaris Volume Manager automatically recognizes the
additional space on
reboot.
_ Soft partitions can be expanded by adding space from the underlying
volume or slice. All other
volumes can be expanded by adding slices.
Expanding a File System Using the growfs Command
226 Solaris VolumeManagerAdministration Guide • June 2006
_ Howto Expand a File System
Check “Prerequisites for Creating Solaris Volume Manager Components” on
page 44.
Review the disk space associated with a file system.
# df -hk
See the df(1M) man page for more information.
Expand a UFS file system on a logical volume.
# growfs -M /mount-point /dev/md/rdsk/volume-name
-M /mount-point Specifies the mount point for the file system to be expanded.
/dev/md/rdsk/volume-name Specifies the name of the volume on which you
want to expand.
See the following example and the growfs(1M) man page for more
information.
Expanding a File System
In the following example, a new slice is added to a volume, d10, which
contains the mounted file
system, /home2. The growfs command specifies the mount point with the -M
option to be /home2,

which is expanded onto the raw volume /dev/md/rdsk/d10. The file system will
span the entire
volume when the growfs command is complete. You can use the df -hk
command before and after
expanding the file system to verify the total disk capacity.
# df -hk
Filesystem kbytes used avail capacity Mounted on
...
/dev/md/dsk/d10 69047 65426 0 100% /home2
...
# growfs -M /home2 /dev/md/rdsk/d10
/dev/md/rdsk/d10: 295200 sectors in 240 cylinders of 15 tracks, 82 sectors
144.1MB in 15 cyl groups (16 c/g, 9.61MB/g, 4608 i/g)
super-block backups (for fsck -F ufs -o b=#) at:
32, 19808, 39584, 59360, 79136, 98912, 118688, 138464, 158240, 178016,
197792,
217568, 237344, 257120, 276896,
# df -hk
Filesystem kbytes used avail capacity Mounted on
...
/dev/md/dsk/d10 138703 65426 59407 53% /home2
...
For mirror volumes, always run the growfs command on the top-level volume.
Do not run the
command on a submirror or master device, even though space is added to
the submirror or master
device.
BeforeYou Begin
1
2
Example 20–4
Expanding a File System Using the growfs Command
Chapter 20 • Maintaining Solaris Volume Manager (Tasks) 227
Overview of Replacing and Enabling Components in RAID-1

and RAID-5 Volumes
Solaris Volume Manager can replace and enable components within RAID-1
(mirror) and RAID-5
volumes.
In Solaris Volume Manager terminology, replacing a component is a way to
substitute an available
component on the system for a selected component in a submirror or RAID-5
volume. You can think
of this process as logical replacement, as opposed to physically replacing the
component. For more
information see “Replacing a ComponentWith AnotherAvailable Component”
on page 229.
Enabling a component means to “activate” or substitute a component with
itself (that is, the
component name is the same). For more information, see “Enabling a
Component” on page 228.
Note – When recovering from disk errors, scan /var/adm/messages to see
what kind of errors
occurred. If the errors are transitory and the disks themselves do not have
problems, try enabling the
failed components. You can also use the format command to test a disk.
Enabling a Component
You can enable a component when any of the following conditions exist:
_ Solaris Volume Manager cannot access the physical drive. This problem
might occur, for
example, due to a power loss, or a loose drive cable. In this case, Solaris
Volume Manager puts the
components in the “Maintenance” state. You need to make sure that the drive
is accessible
(restore power, reattach cables, and so on), and then enable the components
in the volumes.
_ You suspect that a physical drive is having transitory problems that are not
disk-related. You

might be able to fix a component in the “Maintenance” state by simply
enabling it. If enabling the
component does not fix the problem, then you need to do one of the following:
_ Physically replace the disk drive and enable the component
_ Replace the component with another available component on the system
When you physically replace a disk, be sure to partition the disk like the
replaced disk to ensure
adequate space on each used component.
Note – Always check for state database replicas and hot spares on the disk
that is being replaced.Any
state database replica in an erred state should be deleted before you replace
the disk. Then, after you
enable the component, recreate the state database replicas using the same
size. You should treat hot
spares in the same manner.
Overview of Replacing and Enabling Components in RAID-1 and RAID-5
Volumes
228 Solaris VolumeManagerAdministration Guide • June 2006
Replacing a ComponentWithAnotherAvailable
Component
You use the metareplace command when you replace or swap an existing
component with a
different component that is available and not in use on the system.
You can use this command when any of the following conditions exist:
_ Adisk drive has problems, and you do not have a replacement drive.
However, you do have
available components elsewhere on the system.
You might want to use this strategy when a replacement is absolutely
necessary, but you do not
want to shut down the system.
_ You see soft errors on the physical disks.
Physical disks might report soft errors even though Solaris Volume Manager
shows the

mirror/submirror or RAID-5 volume in the “Okay” state. Replacing the
component in question
with another available component enables you to perform preventative
maintenance and
potentially prevent hard errors from occurring.
_ You want to do performance tuning.
One way that you can evaluate components is by using the performance
monitoring feature
available from the Enhanced Storage tool within the Solaris Management
Console. For example,
you might see that a particular component in a RAID-5 volume is experiencing
a high load
average, even though it is in the “Okay” state. To balance the load on the
volume, you can replace
that component with a component from a disk that is less utilized. You can
perform this type of
replacement online without interrupting service to the volume.
Maintenance and Last Erred States
When a component in a RAID-1 or RAID-5 volume experiences errors, Solaris
Volume Manager
puts the component in the “Maintenance” state. No further reads or writes are
performed to a
component in the “Maintenance” state.
Sometimes a component goes into a “Last Erred” state. For a RAID-1 volume,
this usually occurs
with a one-sided mirror. The volume experiences errors. However, there are
no redundant
components to read from. For a RAID-5 volume this occurs after one
component goes into
“Maintenance” state, and another component fails. The second component to
fail goes into the “Last
Erred” state.
When either a RAID-1 volume or a RAID-5 volume has a component in the
“Last Erred” state, I/O is

still attempted to the component marked “Last Erred.” This I/O attempt occurs
because a “Last
Erred” component contains the last good copy of data from Solaris Volume
Manager’s point of view.
With a component in the “Last Erred” state, the volume behaves like a normal
device (disk) and
returns I/O errors to an application. Usually, at this point, some data has been
lost.
Overview of Replacing and Enabling Components in RAID-1 and RAID-5
Volumes
Chapter 20 • Maintaining Solaris Volume Manager (Tasks) 229
The subsequent errors on other components in the same volume are handled
differently, depending
on the type of volume.
RAID-1 Volume ARAID-1 volume might be able to tolerate many components
in the
“Maintenance” state and still be read from and written to. If components are in
the “Maintenance” state, no data has been lost. You can safely replace or
enable
the components in any order. If a component is in the “Last Erred” state, you
cannot replace it until you first replace the components in the “Maintenance”
state. Replacing or enabling a component in the “Last Erred” state usually
means that some data has been lost. Be sure to validate the data on the
mirror
after you repair it.
RAID-5 Volume ARAID-5 volume can tolerate a single component in the
“Maintenance” state.
You can safely replace a single component in the “Maintenance” state without
losing data. If an error on another component occurs, it is put into the “Last
Erred” state. At this point, the RAID-5 volume is a read-only device. You need
to perform some type of error recovery so that the state of the RAID-5 volume
is stable and the possibility of data loss is reduced. If a RAID-5 volume
reaches a

“Last Erred” state, there is a good chance it has lost data. Be sure to validate
the
data on the RAID-5 volume after you repair it.
Always replace components in the “Maintenance” state first, followed by those
in the “Last Erred”
state. After a component is replaced and resynchronized, use the metastat
command to verify its
state. Then, validate the data.
Background Information for Replacing and Enabling
Components in RAID-1 and RAID-5 Volumes
When you replace components in a RAID-1 volume or a RAID-5 volume,
follow these guidelines:
_ Always replace components in the “Maintenance” state first, followed by
those components in
the “Last Erred” state.
_ After a component is replaced and resynchronized, use the metastat
command to verify the state
of the volume. Then, validate the data. Replacing or enabling a component in
the “Last Erred”
state usually means that some data has been lost. Be sure to validate the
data on the volume after
you repair it. For a UFS, run the fsck command to validate the “metadata” (the
structure of the
file system). Then, check the actual user data. (Practically, users will have to
examine their files.)
Adatabase or other application must have its own way of validating its internal
data structure.
_ Always check for state database replicas and hot spares when you replace
components. Any state
database replica in an erred state should be deleted before you replace the
physical disk. The state
database replica should be added back before you enable the component.
The same procedure
applies to hot spares.

Overview of Replacing and Enabling Components in RAID-1 and RAID-5
Volumes
230 Solaris VolumeManagerAdministration Guide • June 2006
_ During component replacement for a RAID-5 volume, data is recovered in
one of two ways. The
data is recovered either from a hot spare currently in use or from using the
RAID-5 parity, when
no hot spare is in use.
_ When you replace a component for a RAID-1 volume, Solaris Volume
Manager automatically
starts resynchronizing the new component with the rest of the volume. When
the
resynchronization completes, the replaced component becomes readable and
writable. If the
failed component has been replaced with data from a hot spare, the hot spare
is placed in the
“Available” state and made available for other hot spare replacements.
_ The new component must be large enough to replace the old component.
_ As a precaution, back up all data before you replace “Last Erred” devices.
Overview of Replacing and Enabling Components in RAID-1 and RAID-5
Volumes
Chapter 20 • Maintaining Solaris Volume Manager (Tasks) 231
232
Best Practices for Solaris Volume Manager
This chapter provides general best practices information from a real-world
storage scenario using
Solaris Volume Manager. In this chapter, you will see a typical configuration,
followed by an analysis,
followed by a recommended (“Best Practices”) configuration to meet the same
needs.
This chapter includes the following information:
_ “Deploying Small Servers” on page 233
_ “Using Solaris Volume ManagerWith Networked Storage Devices” on page
235

Deploying Small Servers
Distributed computing environments, often need to deploy similar or identical
servers at multiple
locations. These environments include ISPs, geographically distributed sales
offices, and
telecommunication service providers. Servers in a distributed computing
environment might
provide some of the following services:
_ Router or firewall services
_ Email services
_ DNS caches
_ Usenet (Network News) servers
_ DHCPservices
_ Other services best provided at a variety of locations
These small servers have several characteristics in common:
_ High-reliability requirements
_ High-availability requirements
_ Routine hardware and performance requirements
As a starting point, consider a NetraTM server with a single SCSI bus and two
internal disks. This
off-the-shelf configuration is a good starting point for distributed servers.
Solaris Volume Manager
could easily be used to mirror some or all of the slices, thus providing
redundant storage to help
guard against disk failure. See the following figure for an example of this small
system configuration.
21 C H A P T E R 2 1
233
c0t0d0 c0t1d0
SCSI
controller
FIGURE 21–1 Small System Configuration
This configuration might include mirrors for the root (/), /usr, swap, /var, and
/export file systems,

plus state database replicas (one per disk). As such, a failure of either side of
any of the mirrors would
not necessarily result in system failure. Also, up to five discrete failures could
possibly be tolerated.
However, the system is not sufficiently protected against disk or slice
failure.Avariety of potential
failures could result in a complete system failure, requiring operator
intervention.
While this configuration does help provide some protection against
catastrophic disk failure, it
exposes key possible single points of failure:
_ The single SCSI controller represents a potential point of failure. If the
controller fails, the system
is down, pending replacement of the part.
_ The two disks do not provide adequate distribution of state database
replicas. The majority
consensus algorithm requires that half of the state database replicas be
available for the system to
continue to run. This algorithm also requires half plus one replica for a reboot.
So, if one state
database replica were on each disk and one disk or the slice that contains the
replica failed, the
system could not reboot. As a result a mirrored root (/) file system would
become ineffective. If
two or more state database replicas were on each disk, a single slice failure
would likely not be
problematic. However, a disk failure would still prevent a reboot. If different
number of replicas
were on each disk, one disk would have more than half and one disk would
have fewer than half.
If the disk with fewer replicas failed, the system could reboot and continue.
However, if the disk
with more replicas failed, the system would immediately panic.

A“Best Practices” approach would be to modify the configuration by adding
one more controller
and one more hard drive. The resulting configuration would be far more
resilient.
Deploying Small Servers
234 Solaris VolumeManagerAdministration Guide • June 2006
Using Solaris Volume ManagerWith Networked Storage
Devices
Solaris Volume Manager works well with networked storage devices,
particularly those devices that
provide configurable RAID levels and flexible options. Usually, the
combination of Solaris Volume
Manager and such devices can result in performance and flexibility that is
superior to either product
alone.
Generally, do not establish Solaris Volume Manager’s RAID-5 volumes on
any hardware storage
devices that provide redundancy (for example, RAID-1 and RAID-5 volumes).
Unless you have a
very unusual situation, performance suffers. Also, you will gain very little in
terms of redundancy or
higher availability.
Configuring underlying hardware storage devices with RAID-5 volumes, on
the other hand, is very
effective. Doing so provides a good foundation for Solaris Volume Manager
volumes. Hardware
RAID-5 provides additional redundancy for Solaris Volume Manager’s RAID-1
volumes, soft
partitions, or other volumes.
Note – Do not configure similar software and hardware devices. For example,
do not build software
RAID-1 volumes on top of hardware RAID-1 devices. Configuring similar
devices in hardware and

software results in performance penalties without offsetting any gains in
reliability.
Solaris Volume Manager’s RAID-1 volumes that are built on underlying
hardware storage devices
are not RAID-1+0. Solaris Volume Manager cannot understand the underlying
storage well enough
to offer RAID-1+0 capabilities.
Configuring soft partitions on top of Solaris Volume Manager RAID-1 volume,
built in turn on a
hardware RAID-5 device, is a very flexible and resilient configuration.
Using Solaris Volume ManagerWith Networked Storage Devices
Chapter 21 • Best Practices for Solaris Volume Manager 235
236
Top-Down Volume Creation (Overview)
This chapter provides conceptual information about Solaris Volume Manager
top-down volume
creation.
This chapter contains the following information:
_ “Overview of Top-Down Volume Creation” on page 237
_ “Top-Down Volume Creation ImplementationWith Disk Sets” on page 238
_ “Top-Down Volume Creation Processes” on page 238
_ “Determining Which Disks AreAvailable for Top-Down Volume Creation” on
page 240
For information about performing related tasks, see Chapter 23.
Overview of Top-Down Volume Creation
Top-down volume creation enables you to automatically create Solaris
Volume Manager volume
configurations using the metassist command. You no longer need to manually
go through the
process of partitioning disks, creating RAID-0 volumes (as submirrors),
creating hot spare pools and
hot spares, and finally creating a mirror. Instead, you can issue the metassist
command to create a
volume. Solaris Volume Manager does the rest for you.

The metassist command enables you to create Solaris Volume Manager
volume configurations
with a single command. You can specify volume characteristics in terms of
quality-of-service.
Quality-of-service characteristics means that without specifying the hardware
components to be
used in a volume, you can use input to the metassist command to provide the
following:
_ Volume size
_ Level of redundancy, which refers to the number of copies of the data
_ Number of data paths to the volume
_ Fault recovery, which indicates whether the volume is associated with a hot
spare pool
You can specify the volume by quality-of-service with command-line options
or in an input file
named on the command line.
22 C H A P T E R 2 2
237
In some cases, it is important to more specifically define the volume
characteristics or the constraints
under which the volumes should be created. In such cases, you can also
specify the following
characteristics:
_ Volume types (for example, a RAID-0 (concatenation) or RAID-0 (stripe)
volume).
_ Components to use in specific volumes.
_ Components that are available or unavailable for use.
_ Number of components to use.
_ Details specific to the type of volume being created. Details include the
stripes, the read policy for
mirrors, and similar characteristics.
If you prefer to specify the names, sizes, and components of a volume in
more detail, use an input file.

Input files include volume request files and volume specification files. For
more information on how
to use input files, see “Top-Down Volume Creation Processes” on page 238.
Finally, you can constrain the metassist command to use (or not use) specific
disks or paths.
Top-Down Volume Creation ImplementationWith Disk Sets
The metassist command uses Solaris Volume Manager disk sets to manage
volumes and available
disks for top-down volume creation. For any given top-down volume creation
process, all the disks
used as building blocks must be either in the disk set or available to add to the
disk set. You can use
the top-down creation process to create volumes in different disk sets.
However, the disks and
components that are available are constrained by disk set functionality.
Top-Down Volume Creation Processes
The top-down volume creation process provides flexibility by offering the
following processes:
_ Afully automated end-to-end process through which you can specify needed
constraints and
have the necessary volumes created when the command completes
_ Amore granular process with breakpoints at which you can write to an XML-
based file
The following figure shows how the metassist command supports end-to-end
processing based on
command-line input and input files. The figure also shows how the metassist
command supports
partial processing, which allows you to provide file-based data or to check
volume characteristics.
Top-Down Volume Creation ImplementationWith Disk Sets
238 Solaris VolumeManagerAdministration Guide • June 2006
metassist
Processing
Volume

Specification
File
Command
File
Volume
Request
File
Command Line
Created
Volumes
FIGURE 22–1 Processing Options for Top-DownVolume Creation
For an automatic, hands-off approach to volume creation, use the command
line to specify the
quality-of-service characteristics you require. The metassist command
automatically creates the
requested volumes for you. For example:
# metassist create -s storagepool -S 10Gb
This command creates a stripe volume of 10 Gbytes in size in the storagepool
disk set. The
command uses available storage that exists in the storagepool disk set.
Alternatively, you can use a volume request file to define the characteristics of
a volume. Then, you
can use the metassist -F request-file command to create a volume with those
characteristics.
You can use the metassist -d command to produce a volume specification file.
You can use this file
to assess the intended implementation and edit the file, if needed. The volume
specification file can
then be used as input to the metassist command to create volumes.
Finally, you can use the metassist -c command to create a command file. The
command file is a shell
script that implements the Solaris Volume Manager device configuration
specified by the metassist

command. You can use this file for repeated volume creation and edit the file,
as appropriate.
When you use the metassist command to create these files, you learn what
the metassist
command does and how it makes decisions. This information can be useful
for troubleshooting some
of the following:
_ Why a volume was created in a certain way
_ Why a volume was not created
_ What volumes the metassist command would create, without actually
creating the volumes
Top-Down Volume Creation Processes
Chapter 22 • Top-Down Volume Creation (Overview) 239
Determining Which DisksAreAvailable for Top-Down Volume
Creation
The metassist command checks disks to determine which disks appear to be
unused. The
command attempts to conservatively determine which disks are available. Any
disk or slice that is in
use is unavailable for use by the metassist command. The metassist
command checks the
following:
_ Disks used in other disk sets
_ Mounted slices
_ Slices with a file system superblock, indicating a mountable file system
_ Slices used in other Solaris Volume Manager volumes
Any slices that meet one of these criteria are unavailable for top-down volume
creation.
Determining Which Disks AreAvailable for Top-Down Volume Creation
240 Solaris VolumeManagerAdministration Guide • June 2006
Top-Down Volume Creation (Tasks)
This chapter provides tasks associated with Solaris Volume Manager top-
down volume creation
using the metassist command.

This is a list of the information in this chapter:
_ “Top-Down Volume Creation (Task Map)” on page 241
_ “Prerequisites for Top-Down Volume Creation” on page 242
_ “Creating Volumes Automatically” on page 243
_ “WorkingWith File-Based Data Using the metassist Command” on page 246
_ “Changing the Default Behavior of the metassist Command” on page 254
For conceptual information about top-down volume creation, see Chapter 22.
Top-Down Volume Creation (Task Map)
The following task map identifies the procedures needed to create Solaris
Volume Manager volumes
using the metassist command. This command enables you to specify volumes
based on
quality-of-service characteristics and to create sets of layered volumes with a
single command.
Task Description Instructions
Create volumes automatically Enables you to use the metassist
command to create one or more
Solaris Volume Manager volumes.
Also, enables you to control the
amount of information about the
volume creation process that the
metassist command provides for
troubleshooting or for diagnosing
problems.
“Creating Volumes Automatically”
on page 243
“Analyzing Volume Creation by
Specifying Output Verbosity”
on page 243
23 C H A P T E R 2 3
241
Task Description Instructions
Create a command file Helps you create a shell script with
the metassist command to

generate the volumes that the
command specifies.
“Creating a Volume Configuration
FileWith the metassist
Command” on page 252
Create a volume with a shell script Shows you how to create the Solaris
Volume Manager volumes that the
metassist command specified
with the shell script previously
generated by the command.
“Creating a VolumeWith a Saved
Shell Script Created by the
metassist Command” on page
251
Create a volume configuration file Helps you create a volume
configuration file, describing the
characteristics of the volumes you
want to create.
“Creating a Volume Configuration
FileWith the metassist
Command” on page 252
Change the volume defaults file Allows you to set default volume
characteristics to customize the
behavior of metassist command.
“Changing the Volume Defaults
File” on page 254
Prerequisites for Top-Down Volume Creation
Creating volumes and volume configurations automatically using the
metassist command requires
that you have a functional Solaris Volume Manager configuration. Before you
begin, you should have
the following:
_ Superuser access, or be able to assume an equivalent role-based access
control (RBAC) role. See

“Becoming Superuser (root) or Assuming a Role” in System Administration
Guide: Basic
Administration for more information.
_ State database replicas, distributed appropriately for your system. See
“About the Solaris Volume
Manager State Database and Replicas” on page 61 for more information
about state database
replicas.
_ Available disks for creating volumes. The metassist command uses disk
sets to help manage
storage. Completely unused disks (or an existing disk set) must be available
to create new
volumes using the metassist command. See “Determining Which Disks
AreAvailable for
Top-Down Volume Creation” on page 240 for more information about disk
availability.
In addition to these minimum requirements, do not disable the Solaris Volume
Manager RPC
daemons (rpc.metad, rpc.metamhd, and rpc.metamedd) in the /etc/inetd.conf
file. These
daemons are configured to start by default. They must remain enabled to
allow Solaris Volume
Manager to use shared disk sets.
Prerequisites for Top-Down Volume Creation
242 Solaris VolumeManagerAdministration Guide • June 2006
Creating VolumesAutomatically
The metassist command enables you to create Solaris Volume Manager
volumes, as well as sets of
volumes, based on quality-of-service criteria. The metassist command creates
volumes for you with
one command, rather than the series of commands that Solaris Volume
Manager traditionally
requires to create volumes.

You can use the metassist command to create RAID-1 (mirror) volumes
directly. Thus, you do not
have to first create the submirrors (concatenations or stripes) that are used as
components of the
RAID-1 (mirror) volume.
Analyzing Volume Creation by Specifying Output
Verbosity
When you run the metassist command, you can specify the level of verbose
output. More verbose
output can help diagnose problems, such as determining why disks were or
were not selected for use
in a volume, or to determine why a specific attempted command failed. Less
verbose output can
reduce the amount of extraneous information that you must review.
When you specify output verbosity, you can learn what the metassist
command does and how it
makes its decisions. This information is useful for troubleshooting some of the
following:
_ Why a volume was created in a certain way
_ Why a volume was not created
_ What volumes the metassist command would create, without actually
creating the volumes
_ Howto Create RAID-1 (mirror) Volumes Using the
metassist Command
Check “Prerequisites for Top-Down Volume Creation” on page 242.
Identify the available storage on which to create the volume.
If you do not explicitly specify storage, Solaris Volume Manager identifies
unused storage on the
system and uses it, as appropriate. If you choose to specify storage, either
broadly (for example, all
storage on controller 1) or specifically (for example, use c1t4d2, but do not
use c1t4d1), Solaris
Volume Manager uses the storage you specify.
Use the metassist command and the appropriate options for your task.

_ To create volumes from the command line, use the following form of the
metassist command.
# metassist create -s diskset-name -f -r redundancy -a device1, device2... -S
size -v verbosity
create Is the subcommand used to create volumes.
BeforeYou Begin
1
2
Creating Volumes Automatically
Chapter 23 • Top-Down Volume Creation (Tasks) 243
-s diskset-name Specifies the name of the disk set to use for the volume.
-f Specifies that the volume be associated with a hot spare.
-r redundancy Specifies the level of redundancy (number of data copies) to
create.
-a device1, device2... Specifies the devices that are available for creating the
volume.
-S size Specifies the size of the volume to create in KB, MB, GB, or TB, for
kilobytes, megabytes, gigabytes, and terabytes, respectively.
-v verbosity Specifies how verbose the output should be. Allowable values
range
from 0 (nearly silent output) to 2 (significant output). The default level
is 1 (moderate output).
_ To create volumes using an input file to specify volume characteristics, use
one of the following
forms of the metassist command.
# metassist create [-v n] [-c] -F config_file
# metassist create [-v n] [-c | -d] -F request_file
-c Specifies to output the command script that would implement the
specified or generated volume configuration. The command script
is not run, and processing stops at this stage.
-d Specifies to output the volume configuration that satisfies the
specified or generated volume request. No command script is
generated or executed, and processing stops at this stage.

-F config_file | request_file Specifies the volume request or volume
configuration file to
process. If config_file or request_file is specified as a dash (-), it is
read from standard input. The -d option cannot be specified when
input file is a volume configuration file.
Avolume configuration file describes detailed configurations of
the volumes to be created, while a volume request file provides
characteristics for the volumes to be produced. For more
information, see volume-config(4)volume-config(4) and
volume-request(4) man pages.
-v verbosity Specifies how verbose the output should be. Allowable values
range from 0 (nearly silent output) to 2 (significant output). The
default level is 1 (moderate output).
See the following examples and the metassist(1M) man page for more
information.
Once you have created the volumes, view the new volumes.
# metastat -s diskset-name
3
Creating Volumes Automatically
244 Solaris VolumeManagerAdministration Guide • June 2006
Creating a Two-Way Mirror Using the metassist Command
The following example shows how to create a two-way mirror, 10 Mbytes in
size. The metassist
command identifies unused disks and creates the best mirror possible using
those disks. The
-s myset argument specifies that the volumes will be created in the myset disk
set. The disk set is
created, if necessary.
# metassist create -s myset -r 2 -S 10mb
Creating a Two-Way Mirror and Hot Spare Using the metassist Command
The following example shows how to use the metassist command to create a
two-way mirror, 10
Mbytes in size, with a hot spare to provide additional fault tolerance. The -f
option specifies the fault

tolerance.
# metassist create -s myset -f -r 2 -S 10mb
Creating a Stripe With a Specific Controller Using the metassist Command
The following example shows how to use the metassist command to create a
stripe using disks
available on controller 1. The -a option specifies the available controller.
# metassist create -s myset -a c1 -S 10mb
Specifying Output Verbosity From the metassist Command
The following example shows how to use the metassist command to create a
two-way mirror, 10
Mbytes in size, with a hot spare to provide additional fault tolerance. The -f
option specifies fault
tolerance. The final argument (-v 2) specifies a verbosity level of two, which is
the maximum level
and will provide the most information possible about how the metassist
command worked.
# metassist create -s myset -f -r 2 -S 10mb -v 2
Scanning system physical device configuration...
These HBA/Controllers are known:.
c0 /pci@1f,0/pci@1,1/ide@3
c1 /pci@1f,0/pci@1/pci@2/SUNW,isptwo@4
These disks are known:
c0t0d0 id1,dad@AST34342A=____________VGD97101
c1t1d0 id1,sd@SSEAGATE_ST39204LCSUN9.0G3BV0L88P000021097XNL
c1t2d0 id1,sd@SSEAGATE_ST39102LCSUN9.0GLJW22867000019171JDF
c1t3d0 id1,sd@SSEAGATE_ST39204LCSUN9.0G3BV0L7RV00007108TG0H
Example 23–1
Example 23–2
Example 23–3
Example 23–4
Creating Volumes Automatically
Chapter 23 • Top-Down Volume Creation (Tasks) 245
c1t4d0 id1,sd@SSEAGATE_ST39204LCSUN9.0G3BV0LDFR000021087R1T
c1t5d0 id1,sd@SSEAGATE_ST39204LCSUN9.0G3BV0L0M200002109812L

c1t6d0 id1,sd@SSEAGATE_ST39204LCSUN9.0G3BV0L8K8000021087R0Z
.
.
.
(output truncated)
The following example shows how to use the metassist command to create a
two-way mirror, 10
Mbytes in size, with a hot spare to provide additional fault tolerance. The -f
option specifies fault
tolerance. The final argument (-v 0) specifies a verbosity level of zero, which
is the minimum level
and will provide nearly silent output when the command runs.
# metassist create -s myset -f -r 2 -S 10mb -v 0
myset/hsp000: Hotspare pool is setup
myset/hsp000: Hotspare is added
myset/d2: Concat/Stripe is setup
myset/d1: Concat/Stripe is setup
myset/d0: Mirror is setup
myset/d0: submirror myset/d1 is attached
Creating a Volume Using an Input File
The following example shows how to use the metassist command to create a
volume using an input
file.
# metassist create -F request.xml
For more information on using input files with the metassist command, see
“WorkingWith
File-Based Data Using the metassist Command” on page 246.
WorkingWith File-Based Data Using the metassist Command
The metassist command enables you to create files that you can use to
evaluate volume
characteristics or for actual volume creation.
Creating aCommandFile (Shell Script) Using the
metassist Command

By running the metassist command with the -c argument, you can generate a
Bourne shell script
containing the commands that would be used to create the volume
configuration. This technique
enables you to review the commands before actually creating the volume, or
even to modify the
script somewhat to meet specific needs.
Example 23–5
WorkingWith File-Based Data Using the metassist Command
246 Solaris VolumeManagerAdministration Guide • June 2006
_ Howto Create aCommandFile (Shell Script) Using the
metassist Command
Check “Prerequisites for Top-Down Volume Creation” on page 242.
Identify the available storage on which to create the volume.
If you do not explicitly specify storage, Solaris Volume Manager identifies
unused storage on the
system and uses it, as appropriate. If you choose to specify storage, either
broadly (for example, all
storage on controller 1) or specifically (for example, use c1t4d2, but do not
use c1t4d1), Solaris
Volume Manager uses the storage you specify.
Use the metassist command and the appropriate options for your task.
Use the -c option to specify that the volume should not actually be created.
# metassist create -s diskset-name -f -r redundancy -a device1, device2... \
-S size -v verbosity [-c]
create Is the subcommand used to create volumes.
-s diskset-name Specifies the name of the disk set to use for the volume.
-f Specifies that the volume be associated with a hot spare.
-r redundancy Specifies the level of redundancy (number of data copies) to
create.
-a device1, device2... Specifies the devices that are available for creating the
volume.
-S size Specifies the size of the volume to create in KB, MB, GB, or TB, for
kilobytes,

megabytes, gigabytes, and terabytes, respectively.
-v verbosity Specifies how verbose the output should be. Allowable values
range from 0
(nearly silent output) to 2 (significant output). The default level is 1
(moderate output).
-c Specifies that the volume should not actually be created. Instead, a shell
script that can be used to create the specified configuration is sent to
standard output.
Note – The shell script required by the -c argument is sent to standard
output, while the rest of the output from the metassist command goes to
standard error. You can redirect the output streams as you choose.
See the following examples and the metassist(1M) man page for more
information.
BeforeYou Begin
1
2
WorkingWith File-Based Data Using the metassist Command
Chapter 23 • Top-Down Volume Creation (Tasks) 247
Creating a Command File (Shell Script) Using the metassist Command
The following example shows how to use the metassist command to create a
two-way mirror, 10
Mbytes in size, with a hot spare to provide additional fault tolerance. The -f
option specifies fault
tolerance. The final argument (-c) specifies that the volume should not
actually be created. Rather, a
shell script that could be used to create the specified configuration should be
sent to standard output.
# metassist create -s myset -f -r 2 -S 10mb -c
(output truncated)
.
.
.
Volume request completed successfully.
#!/bin/sh

#
# Environment
#
# Amend PATH
PATH="/usr/sbin:/usr/bin:$PATH"
export PATH
# Disk set name
diskset=’myset’
#
# Functions
#
# Echo (verbose) and exec given command, exit on error
execho () {
test -n "$verbose" && echo "$@"
"$@" || exit
}
# Get full /dev/rdsk path of given slice
fullpath () {
case "$1" in
/dev/dsk/*|/dev/did/dsk/*) echo "$1" | sed ’s/dsk/rdsk/’ ;;
/*) echo "$1" ;;
*) echo /dev/rdsk/"$1" ;;
esac
}
# Run fmthard, ignore partboot error, error if output
fmthard_special () {
Example 23–6
WorkingWith File-Based Data Using the metassist Command
248 Solaris VolumeManagerAdministration Guide • June 2006
ignore=’Error writing partboot’
out=‘fmthard "$@" 2>&1‘
result=$?
echo "$out" |
case "$out" in

*"$ignore"*) grep -v "$ignore"; return 0 ;;
’’) return "$result" ;;
*) cat; return 1 ;;
esac >&2
}
#
# Main
#
# Verify root
if [ "‘id | sed ’s/^[^(]*(\([^)]*\).*/\1/’‘" != root ]
then
echo "This script must be run as root." >&2
exit 1;
fi
# Check for verbose option
case "$1" in
-v) verbose=1 ;;
*) verbose= ;;
esac
# Does the disk set exist?
if metaset -s "$diskset" >/dev/null 2>&1
then
# Take control of disk set
execho metaset -s "$diskset" -t
else
# Create the disk set
autotakeargs=
/usr/sbin/clinfo || autotakeargs=’-A enable’
execho metaset -s "$diskset" $autotakeargs -a -h ‘uname -n | cut -f1 -d.‘
fi
# Format slices
execho fmthard_special -d 7:0:0:0:0 ‘fullpath c1t3d0s7‘
execho fmthard_special -d 7:0:0:0:0 ‘fullpath c1t6d0s7‘
execho fmthard_special -d 7:0:0:0:0 ‘fullpath c1t4d0s7‘

# Add disks to set
execho metaset -s "$diskset" -a c1t3d0
WorkingWith File-Based Data Using the metassist Command
Chapter 23 • Top-Down Volume Creation (Tasks) 249
execho metaset -s "$diskset" -a c1t6d0
execho metaset -s "$diskset" -a c1t4d0
# Format slices
execho fmthard_special -d 0:4:0:10773:17649765 ‘fullpath c1t3d0s0‘
execho fmthard_special -d 0:4:0:10773:17649765 ‘fullpath c1t6d0s0‘
execho fmthard_special -d 0:4:0:10773:17649765 ‘fullpath c1t4d0s0‘
execho fmthard_special -d 1:4:0:17660538:21546 ‘fullpath c1t3d0s1‘
execho fmthard_special -d 1:4:0:17660538:21546 ‘fullpath c1t4d0s1‘
execho fmthard_special -d 1:4:0:17660538:21546 ‘fullpath c1t6d0s1‘
# Does hsp000 exist?
metahs -s "$diskset" -i hsp000 >/dev/null 2>&1 || {
# Create hsp hsp000
execho metainit -s "$diskset" hsp000
}
# Add slices to hsp000
execho metahs -s "$diskset" -a hsp000 c1t3d0s1
# Create concat d2
execho metainit -s "$diskset" d2 1 1 c1t4d0s1
# Associate concat d2 with hot spare pool hsp000
execho metaparam -s "$diskset" -h hsp000 d2
# Create concat d1
execho metainit -s "$diskset" d1 1 1 c1t6d0s1
# Associate concat d1 with hot spare pool hsp000
execho metaparam -s "$diskset" -h hsp000 d1
# Create mirror d0
execho metainit -s "$diskset" d0 -m d2 1
execho metattach -s "$diskset" d0 d1
#
Saving a Command File (Shell Script) Using the metassist Command

The following example shows how to use the metassist command to create a
two-way mirror, 10
Mbytes in size, with a hot spare to provide additional fault tolerance. The -f
option specifies fault
tolerance. The final argument (-c) specifies that the volume should not
actually be created. Rather, a
shell script that could be used to create the specified configuration should be
sent to standard output.
The end of the command redirects standard output to create the
/tmp/metassist-shell-script.sh
shell script that can later be used to create the specified volume.
Example 23–7
WorkingWith File-Based Data Using the metassist Command
250 Solaris VolumeManagerAdministration Guide • June 2006
# metassist create -s myset -f -r 2 -S 10mb -c > \
/tmp/metassist-shell-script.sh
Creating a VolumeWith a Saved Shell Script Created
by the metassist Command
After you have created a shell script with the metassist command, you can
use that script to create
the volumes that you specified when the shell script was created.
Caution – The command script created by the metassist command has
significant dependencies on
the specific system configuration of the system on which the script was
created, at the time the script
was created. Using the script on different systems or after any changes to the
system configuration
can lead to data corruption or loss.
_ Howto Execute a Saved metassist CommandShell Script
Check “Prerequisites for Top-Down Volume Creation” on page 242.
Ensure that the system configuration has not changed since the shell
script was created, and that you
are executing the script on the same system it was created on.
Execute the saved shell script.

# sh ./metassist-shell-script-name
View the new volume.
# metastat -s diskset-name
Executing a Saved metassist Command Shell Script
The following example shows how to use the metassist command to create a
volume using a shell
script.
# sh ./tmp/metassist-shell-script.sh
myset/hsp000: Hotspare pool is setup
myset/hsp000: Hotspare is added
myset/d2: Concat/Stripe is setup
myset/d1: Concat/Stripe is setup
myset/d0: Mirror is setup
myset/d0: submirror myset/d1 is attached
BeforeYou Begin
1
2
3
Example 23–8
WorkingWith File-Based Data Using the metassist Command
Chapter 23 • Top-Down Volume Creation (Tasks) 251
Creating a Volume Configuration FileWith the
metassist Command
By running the metassist command with the -d argument, you can generate
an XML-based volume
configuration file that specifies the volumes and their components in detail,
including all options and
relevant information about the volumes. Reviewing this file helps you to
understand the
configuration that the metassist command recommends. Making careful
changes to this file can
also enable you to fine-tune the configuration, then to use the volume
configuration file as input to
the metassist command to actually create volumes.

_ Howto Create a Volume Configuration File Using the
metassist Command
Check “Prerequisites for Top-Down Volume Creation” on page 242.
Identify the available storage on which to create the volume.
If you do not explicitly specify storage, Solaris Volume Manager identifies
unused storage on the
system and uses it, as appropriate. If you choose to specify storage, either
broadly (for example, all
storage on controller 1) or specifically (for example, use c1t4d2, but do not
use c1t4d1), Solaris
Volume Manager uses the storage you specify.
Use the metassist command and the appropriate options for your task.
Use the -d option to specify that the volume should not actually be created.
Instead, an XML-based
volume configuration file is sent to standard output:
# metassist create -s diskset-name -f -r redundancy -a device1, device2... \
-S size -v verbosity [-d]
create Is the subcommand used to create volumes.
-s diskset-name Specifies the name of the disk set to use for the volume.
-f Specifies that the volume be associated with a hot spare.
-r redundancy Specifies the level of redundancy (number of data copies) to
create.
-a device1, device2... Specifies the devices that are available for creating the
volume.
-S size Specifies the size of the volume to create in KB, MB, GB, or TB, for
kilobytes,
megabytes, gigabytes, and terabytes, respectively.
-v verbosity Specifies how verbose the output should be. Allowable values
range from 0
(nearly silent output) to 2 (significant output). The default level is 1
(moderate output).
-d Specifies that the volume should not actually be created.
BeforeYou Begin
1

2
WorkingWith File-Based Data Using the metassist Command
252 Solaris VolumeManagerAdministration Guide • June 2006
Note – The XML-based volume configuration file required by the -d
argument is sent to standard output. However, the rest of the output from
the metassist command goes to standard error. You can redirect the
output streams as you choose.
See the following examples and the metassist(1M) man page for more
information.
Creating a Volume Configuration File Using the metassist Command
This example shows how to use the metassist command to create a two-way
mirror, 10 Mbytes in
size, with a hot spare to provide additional fault tolerance. The -f option
specifies fault tolerance.
The final argument (-d) specifies that the volume should not actually be
created. Rather, a volume
configuration file that could eventually be used to create the specified
configuration should be sent to
standard output.
# metassist create -s myset -f -r 2 -S 10mb -d
.(output truncated)
.
.
Volume request completed successfully.
<?xml version="1.0"?>
<!DOCTYPE volume-config SYSTEM "/usr/share/lib/xml/dtd/volume-
config.dtd">
<volume-config>
<diskset name="myset"/>
<disk name="c1t3d0"/>
<disk name="c1t6d0"/>
<disk name="c1t4d0"/>
<slice name="c1t3d0s7" sizeinblocks="0"/>
<slice name="c1t3d0s0" sizeinblocks="17649765" startsector="10773"/>

<slice name="c1t6d0s7" sizeinblocks="0"/>
<slice name="c1t6d0s0" sizeinblocks="17649765" startsector="10773"/>
<slice name="c1t4d0s7" sizeinblocks="0"/>
<slice name="c1t4d0s0" sizeinblocks="17649765" startsector="10773"/>
<hsp name="hsp000">
<slice name="c1t3d0s1" sizeinblocks="21546" startsector="17660538"/>
</hsp>
<mirror name="d0" read="ROUNDROBIN" write="PARALLEL" passnum="1">
<concat name="d2">
<slice name="c1t4d0s1" sizeinblocks="21546" startsector="17660538"/>
<hsp name="hsp000"/>
</concat>
<concat name="d1>
Example 23–9
WorkingWith File-Based Data Using the metassist Command
Chapter 23 • Top-Down Volume Creation (Tasks) 253
<slice name="c1t6d0s1"sizeinblocks="21546" startsector="17660538"/>
<hsp name="hsp000"/>
</concat>
</mirror>
</volume-config>
#
Saving a Volume Configuration File Using the metassist Command
This example shows how to use the metassist command to create a two-way
mirror, 10 Mbytes in
size, with a hot spare to provide additional fault tolerance. The -f option
specifies fault tolerance.
The final argument (-d) specifies that the volume should not actually be
created. Rather, a volume
configuration file that could eventually be used to create the specified
configuration should be sent to
standard output. The end of the command redirects standard output to create
the

/tmp/metassist-volume-config.xml volume configuration file that can later be
used to create the
specified volume.
# metassist create -s myset -f -r 2 -S 10mb -d > \
/tmp/metassist-volume-config.xml
Changing the Default Behavior of the metassist Command
You can use the volume defaults file (/etc/defaults/metassist.xml) to change
the default
behavior for the metassist command. By changing the defaults file, you can
explicitly exclude from
consideration, or include for consideration, specific disks or controllers. You
can also specify
requirements for most volume settings used by the metassist command.
The format of the /etc/defaults/metassist.xml is specified by the
/usr/share/lib/xml/dtd/volume-defaults.dtd Document Type Definition (DTD).
The format
is documented in the volume-defaults(4) man page.
Changing the Volume Defaults File
Edit the volume defaults file (/etc/defaults/metassist.xml) to specify how the
metassist
command should behave.
Note – When you edit the file, you must ensure that the file continues to be
compliant with the
/usr/share/lib/xml/dtd/volume-defaults.dtd Document Type Definition (DTD). If
the XML
file is not compliant with the DTD, the metassist command will fail with an
error message.
Example 23–10
Changing the Default Behavior of the metassist Command
254 Solaris VolumeManagerAdministration Guide • June 2006
EXAMPLE 23–11 Creating aVolumeWith Changed Defaults Using the
metassist Command
Before creating a volume, edit the /etc/default/metassist.xml file to specify the
default settings

that you want to apply to all volumes you will create with the metassist
command. In this example,
the metassist command only creates volumes on controller c1 and, when
creating stripes, only
creates stripes with exactly four components and an interlace of value 512KB.
These constraints apply
to all uses of the metassist command until the /etc/default/metassist.xml file is
changed again.
# cat /etc/default/metassist.xml
<!DOCTYPE volume-defaults SYSTEM \
"/usr/share/lib/xml/dtd/volume-defaults.dtd">
<volume-defaults>
<available name="c1" />
<stripe mincomp="4" maxcomp="4" interlace="512KB" ></stripe>
</volume-defaults>
# metassist create -s myset -S 10Gb
The metassist command creates a 10-Gbyte stripe, using exactly four slices
and an interlace value of
512 Kbytes, as specified in the /etc/default/metassist.xml file.
Changing the Default Behavior of the metassist Command
Chapter 23 • Top-Down Volume Creation (Tasks) 255
256
Monitoring and Error Reporting (Tasks)
Sometimes Solaris Volume Manager encounters a problem, such as being
unable to write to a volume
due to physical errors at the slice level. When problems occur, Solaris Volume
Manager changes the
status of the volume so that system administrators can stay informed.
However, unless you regularly
check the status in the Solaris Volume Manager GUI through the Solaris
Management Console, or by
running the metastat command, you might not see these status changes
promptly.

This chapter provides information about various monitoring tools that are
available for Solaris
Volume Manager One tool is the Solaris Volume Manager SNMPagent, which
is a subagent of the
Solstice Enterprise AgentsTM monitoring software. In addition to configuring
the this tool to report
SNMPtraps, you can create a shell script to actively monitor many Solaris
Volume Manager
functions. This shell script could run as a cron job and be valuable in
identifying issues before they
become problems.
This is a list of the information in this chapter:
_ “Solaris Volume Manager Monitoring and Reporting (Task Map)” on page
257
_ “Configuring the mdmonitord Command for Periodic Error Checking” on
page 258
_ “Solaris Volume Manager SNMPAgents Overview” on page 259
_ “Configuring the Solaris Volume Manager SNMPAgents” on page 259
_ “Limitations of the Solaris Volume Manager SNMPAgent” on page 262
_ “Monitoring Solaris Volume ManagerWith a cron Job” on page 262
Solaris Volume Manager Monitoring and Reporting (Task
Map)
The following task map identifies the procedures that are needed to manage
error reporting for
Solaris Volume Manager.
24 C H A P T E R 2 4
257
Task Description For Instructions
Configure the mdmonitord
daemon to periodically
check for errors
Configure the error-checking interval used
by the mdmonitord daemon by editing the
/lib/svc/method/svc-mdmonitor script.

“Configuring the mdmonitord
Command for Periodic Error
Checking” on page 258
Configure the Solaris
Volume Manager SNMP
agent
Edit the configuration files in the
/etc/snmp/conf directory so that Solaris
Volume Manager will throw traps
appropriately, to the correct system.
“Configuring the Solaris
Volume Manager SNMP
Agents” on page 259
Monitor Solaris Volume
Manager with scripts run by
the cron command
Create or adapt a script to check for errors,
then run the script from the cron command.
“Monitoring Solaris Volume
ManagerWith a cron Job”
on page 262
Configuring the mdmonitord Commandfor Periodic Error
Checking
Solaris Volume Manager includes the /usr/sbin/mdmonitord daemon. When a
disk fails, Solaris
Volume Manager detects the failure and generates an error. This error event
triggers the mdmonitord
daemon to perform a check of RAID-1 (mirror) volumes, RAID-5 volumes, and
hot spares.
However, you can also configure this program to actively check for errors at
an interval that you
specify.
_ Howto Configure the mdmonitord Commandfor
Periodic Error Checking

Edit the /lib/svc/method/svc-mdmonitor script to add a time interval for
periodic checking.
Become superuser.
Open the /lib/svc/method/svc-mdmonitor script in the editor of your choice.
Locate the following
section in the script:
$MDMONITORD
error=$?
case $error in
0) exit 0
;;
*) echo "Could not start $MDMONITORD. Error $error."
exit 0
1
2
Configuring the mdmonitord Command for Periodic Error Checking
258 Solaris VolumeManagerAdministration Guide • June 2006
Change the line that starts the mdmonitord command by adding a -t flag
and the number of seconds
between checks.
$MDMONITORD -t 3600
error=$?
case $error in
0) exit 0
;;
*) echo "Could not start $MDMONITORD. Error $error."
exit 0
;;
esac
Restart the mdmonitord command to activate your changes.
# svcadm restart system/mdmonitor
For more information, see the mdmonitord(1M) man page.
Solaris Volume ManagerSNMPAgents Overview

The Solaris Volume Manager SNMPtrap agents requires the core packages
SUNWlvmr, and the
packages for the SUNWlvma and the Solstice Enterprise Agents. These core
packages include the
following:
_ SUNWmibii
_ SUNWsacom
_ SUNWsadmi
_ SUNWsasnm
These packages are part of the Solaris operating system. They are normally
installed by default unless
the package selection was modified at install time or a minimal set of
packages was installed. To
confirm that these packages are available, use the pkginfo pkgname
command, as in pkginfo
SUNWsasnm. After you confirm that all five packages are available, you need
to configure the Solaris
Volume Manager SNMPagent, as described in the following section.
Configuring the Solaris Volume ManagerSNMPAgents
The Solaris Volume Manager SNMPagents is not enabled by default. Use the
following procedure to
enable SNMPtraps.
Whenever you upgrade your Solaris operating system, you will probably need
to edit
the/etc/snmp/conf/enterprises.oid file and append the line in Step 6 again,
then restart the
Solaris Enterprise Agents server.
3
4
Configuring the Solaris Volume Manager SNMPAgents
Chapter 24 • Monitoring and Error Reporting (Tasks) 259
After you have completed this procedure, your system will issue SNMPtraps
to the host or hosts that
you specified. You will need to use an appropriate SNMPmonitor, such as
Solstice Enterprise Agents
software, to view the traps as they are issued.
Set the mdmonitord command to probe your system regularly to help ensure
that you receive traps if
problems arise. See “Configuring the mdmonitord Command for Periodic Error
Checking” on page
258. Also, refer to “Monitoring Solaris Volume ManagerWith a cron Job” on
page 262 for additional
error-checking options.
_ Howto Configure the Solaris Volume ManagerSNMP
Agents
Become superuser.
Move the /etc/snmp/conf/mdlogd.rsrc– configuration file to
/etc/snmp/conf/mdlogd.rsrc.
# mv /etc/snmp/conf/mdlogd.rsrc- /etc/snmp/conf/mdlogd.rsrc
Edit the /etc/snmp/conf/mdlogd.acl file to specify which hosts should
receive SNMP traps. Look in
the file for the following:
trap = {
{
trap-community = SNMP-trap
hosts = corsair
{
enterprise = "Solaris Volume Manager"
trap-num = 1, 2, 3
}
Change the line that contains hosts = corsair to specify the host name that
you want to receive
Solaris Volume Manager SNMPtraps. For example, to send SNMPtraps to
lexicon, you would
change the line to hosts = lexicon. If you want to include multiple hosts,
provide a
comma-delimited list of host names, as in hosts = lexicon, idiom.

Also edit the /etc/snmp/conf/snmpdx.acl file to specify which hosts should
receive the SNMP traps.
Find the block that begins with trap = and add the same list of hosts that you
added in the previous
step. This section might be commented out with #’s. If so, you must remove
the # at the beginning of
the required lines in this section. Additional lines in the trap section are also
commented out.
However, you can leave those lines alone or delete them for clarity. After
uncommenting the required
lines and updating the hosts line, this section could look similar to the
following:
###################
# trap parameters #
###################
trap = {
1
2
3
4
Configuring the Solaris Volume Manager SNMPAgents
260 Solaris VolumeManagerAdministration Guide • June 2006
{
trap-community = SNMP-trap
hosts =lexicon
{
enterprise = "sun"
trap-num = 0, 1, 2-5, 6-16
}
# {
# enterprise = "3Com"
# trap-num = 4
# }
# {

# enterprise = "snmp"
# trap-num = 0, 2, 5
# }
# }
# {
# trap-community = jerry-trap
# hosts = jerry, nanak, hubble
# {
# enterprise = "sun"
# trap-num = 1, 3
# }
# {
# enterprise = "snmp"
# trap-num = 1-3
# }
}
}
Note – Make sure that you have the same number of opening and closing
brackets in the
/etc/snmp/conf/snmpdx.acl file.
Add a new Solaris Volume Manager section to the
/etc/snmp/conf/snmpdx.acl file, inside the
section you that uncommented in the previous step.
trap-community = SNMP-trap
hosts = lexicon
{
enterprise = "sun"
trap-num = 0, 1, 2-5, 6-16
}
{
enterprise = "Solaris Volume Manager"
trap-num = 1, 2, 3
}

Note that the added four lines are placed immediately after the enterprise =
“sun” block.
5
Configuring the Solaris Volume Manager SNMPAgents
Chapter 24 • Monitoring and Error Reporting (Tasks) 261
Append the following line to the /etc/snmp/conf/enterprises.oid file:
"Solaris Volume Manager" "1.3.6.1.4.1.42.104"
Restart the Solstice Enterprise Agents server.
# svcadm restart svc:/application/management/snmpdx
Limitations of the Solaris Volume ManagerSNMPAgent
The Solaris Volume Manager SNMPagent does not issue traps for all of the
Solaris Volume Manager
problems that system administrators need to be aware oft. Specifically, the
agent issues traps only in
the following instances:
_ ARAID-1 or RAID-5 subcomponent goes into a “Needs Maintenance” state
_ Ahot spare is swapped into service
_ Ahot spare starts to resynchronize
_ Ahot spare completes resynchronization
_ Amirror is taken offline
_ Adisk set is taken by another host and the current host panics
Many problems, such as an unavailable disk with RAID-0 volumes or soft
partitions on it, do not
result in SNMPtraps, even when reads and writes to the device are attempted.
SCSI or IDE errors are
generally reported in these cases. However, other SNMPagents must issue
traps for those errors to be
reported to a monitoring console.
Monitoring Solaris Volume ManagerWith a cron Job
_ HowtoAutomate Checking for Errors in Volumes
To automatically check your Solaris Volume Manager configuration for
errors, create a script that the
cron utility can periodically run.

The following example shows a script that you can adapt and modify for your
needs.
Note – This script serves as a starting point for automating error checking for
SolarisVolume
Manager. You probably need to modify this script for your own configuration.
#
#!/bin/ksh
#ident "@(#)metacheck.sh 1.3 96/06/21 SMI"
# ident=’%Z%%M% %I% %E% SMI’
6
7
◗
Limitations of the Solaris Volume Manager SNMPAgent
262 Solaris VolumeManagerAdministration Guide • June 2006
#
# Copyright (c) 1999 by Sun Microsystems, Inc.
#
# metacheck
#
# Check on the status of the metadevice configuration. If there is a problem
# return a non zero exit code. Depending on options, send email notification.
#
# -h
# help
# -s setname
# Specify the set to check. By default, the ’local’ set will be checked.
# -m recipient [recipient...]
# Send email notification to the specified recipients. This
# must be the last argument. The notification shows up as a short
# email message with a subject of
# "Solaris Volume Manager Problem: metacheck.who.nodename.setname"
# which summarizes the problem(s) and tells how to obtain detailed
# information. The "setname" is from the -s option, "who" is from
# the -w option, and "nodename" is reported by uname(1).

# Email notification is further affected by the following options:
# -f to suppress additional messages after a problem
# has been found.
# -d to control the supression.
# -w to identify who generated the email.
# -t to force email even when there is no problem.
# -w who
# indicate who is running the command. By default, this is the
# user-name as reported by id(1M). This is used when sending
# email notification (-m).
# -f
# Enable filtering. Filtering applies to email notification (-m).
# Filtering requires root permission. When sending email notification
# the file /etc/lvm/metacheck.setname.pending is used to
# controll the filter. The following matrix specifies the behavior
# of the filter:
#
# problem_found file_exists
# yes no Create file, send notification
# yes yes Resend notification if the current date
# (as specified by -d datefmt) is
# different than the file date.
# no yes Delete file, send notification
# that the problem is resolved.
# no no Send notification if -t specified.
#
# -d datefmt
# Specify the format of the date for filtering (-f). This option
Monitoring Solaris Volume ManagerWith a cron Job
Chapter 24 • Monitoring and Error Reporting (Tasks) 263
# controls the how often re-notification via email occurs. If the
# current date according to the specified format (strftime(3C)) is
# identical to the date contained in the
# /etc/lvm/metacheck.setname.pending file then the message is

# suppressed. The default date format is "%D", which will send one
# re-notification per day.
# -t
# Test mode. Enable email generation even when there is no problem.
# Used for end-to-end verification of the mechanism and email addresses.
#
#
# These options are designed to allow integration of metacheck
# into crontab. For example, a root crontab entry of:
#
# 0,15,30,45 * * * * /usr/sbin/metacheck -f -w SVMcron \
# -d ’\%D \%h’ -m [email protected]
#
# would check for problems every 15 minutes, and generate an email to
# [email protected] (and send to an email pager service) every hour
when
# there is a problem. Note the \ prior to the ’%’ characters for a
# crontab entry. Bounced email would come back to root@nodename.
# The subject line for email generated by the above line would be
# Solaris Volume Manager Problem: metacheck.SVMcron.nodename.local
#
# display a debug line to controlling terminal (works in pipes)
decho()
{
if [ "$debug" = "yes" ] ; then
echo "DEBUG: $*" < /dev/null > /dev/tty 2>&1
fi
}
# if string $1 is in $2-* then return $1, else return ""
strstr()
{
typeset look="$1"
typeset ret=""

shift
# decho "strstr LOOK .$look. FIRST .$1."
while [ $# -ne 0 ] ; do
if [ "$look" = "$1" ] ; then
ret="$look"
fi
shift
done
echo "$ret"
Monitoring Solaris Volume ManagerWith a cron Job
264 Solaris VolumeManagerAdministration Guide • June 2006
}
# if string $1 is in $2-* then delete it. return result
strdstr()
{
typeset look="$1"
typeset ret=""
shift
# decho "strdstr LOOK .$look. FIRST .$1."
while [ $# -ne 0 ] ; do
if [ "$look" != "$1" ] ; then
ret="$ret $1"
fi
shift
done
echo "$ret"
}
merge_continued_lines()
{
awk -e ’\
BEGIN { line = "";} \
$NF == "\\" { \
$NF = ""; \
line = line $0; \

next; \
} \
$NF != "\\" { \
if ( line != "" ) { \
print line $0; \
line = ""; \
} else { \
print $0; \
} \
}’
}
# trim out stuff not associated with metadevices
find_meta_devices()
{
typeset devices=""
# decho "find_meta_devices .$*."
while [ $# -ne 0 ] ; do
case $1 in
d+([0-9]) ) # metadevice name
devices="$devices $1"
Monitoring Solaris Volume ManagerWith a cron Job
Chapter 24 • Monitoring and Error Reporting (Tasks) 265
;;
esac
shift
done
echo "$devices"
}
# return the list of top level metadevices
toplevel()
{
typeset comp_meta_devices=""
typeset top_meta_devices=""
typeset devices=""

typeset device=""
typeset comp=""
metastat$setarg -p | merge_continued_lines | while read line ; do
echo "$line"
devices=‘find_meta_devices $line‘
set -- $devices
if [ $# -ne 0 ] ; then
device=$1
shift
# check to see if device already refered to as component
comp=‘strstr $device $comp_meta_devices‘
if [ -z $comp ] ; then
top_meta_devices="$top_meta_devices $device"
fi
# add components to component list, remove from top list
while [ $# -ne 0 ] ; do
comp=$1
comp_meta_devices="$comp_meta_devices $comp"
top_meta_devices=‘strdstr $comp $top_meta_devices‘
shift
done
fi
done > /dev/null 2>&1
echo $top_meta_devices
}
#
# - MAIN
#
METAPATH=/usr/sbin
PATH=//usr/bin:$METAPATH
USAGE="usage: metacheck [-s setname] [-h] [[-t] [-f [-d datefmt]] \
[-w who] -m recipient [recipient...]]"
Monitoring Solaris Volume ManagerWith a cron Job
266 Solaris VolumeManagerAdministration Guide • June 2006

datefmt="%D"
debug="no"
filter="no"
mflag="no"
set="local"
setarg=""
testarg="no"
who=‘id | sed -e ’s/^uid=[0-9][0-9]*(//’ -e ’s/).*//’‘
while getopts d:Dfms:tw: flag
do
case $flag in
d) datefmt=$OPTARG;
;;
D) debug="yes"
;;
f) filter="yes"
;;
m) mflag="yes"
;;
s) set=$OPTARG;
if [ "$set" != "local" ] ; then
setarg=" -s $set";
fi
;;
t) testarg="yes";
;;
w) who=$OPTARG;
;;
\?) echo $USAGE
exit 1
;;
esac
done
# if mflag specified then everything else part of recipient

shift ‘expr $OPTIND - 1‘
if [ $mflag = "no" ] ; then
if [ $# -ne 0 ] ; then
echo $USAGE
exit 1
fi
else
if [ $# -eq 0 ] ; then
echo $USAGE
exit 1
fi
fi
Monitoring Solaris Volume ManagerWith a cron Job
Chapter 24 • Monitoring and Error Reporting (Tasks) 267
recipients="$*"
curdate_filter=‘date +$datefmt‘
curdate=‘date‘
node=‘uname -n‘
# establish files
msg_f=/tmp/metacheck.msg.$$
msgs_f=/tmp/metacheck.msgs.$$
metastat_f=/tmp/metacheck.metastat.$$
metadb_f=/tmp/metacheck.metadb.$$
metahs_f=/tmp/metacheck.metahs.$$
pending_f=/etc/lvm/metacheck.$set.pending
files="$metastat_f $metadb_f $metahs_f $msg_f $msgs_f"
rm -f $files > /dev/null 2>&1
trap "rm -f $files > /dev/null 2>&1; exit 1" 1 2 3 15
# Check to see if metadb is capable of running
have_metadb="yes"
metadb$setarg > $metadb_f 2>&1
if [ $? -ne 0 ] ; then
have_metadb="no"
fi

grep "there are no existing databases" < $metadb_f > /dev/null 2>&1
if [ $? -eq 0 ] ; then
have_metadb="no"
fi
grep "/dev/md/admin" < $metadb_f > /dev/null 2>&1
if [ $? -eq 0 ] ; then
have_metadb="no"
fi
# check for problems accessing metadbs
retval=0
if [ "$have_metadb" = "no" ] ; then
retval=1
echo "metacheck: metadb problem, can’t run ’$METAPATH/metadb$setarg’" \
>> $msgs_f
else
# snapshot the state
metadb$setarg 2>&1 | sed -e ’1d’ | merge_continued_lines > $metadb_f
metastat$setarg 2>&1 | merge_continued_lines > $metastat_f
metahs$setarg -i 2>&1 | merge_continued_lines > $metahs_f
#
# Check replicas for problems, capital letters in the flags
# indicate an error, fields are seperated by tabs.
Monitoring Solaris Volume ManagerWith a cron Job
268 Solaris VolumeManagerAdministration Guide • June 2006
#
problem=‘awk < $metadb_f -F\t ’{if ($1 ~ /[A-Z]/) print $1;}’‘
if [ -n "$problem" ] ; then
retval=‘expr $retval + 64‘
echo "\
metacheck: metadb problem, for more detail
run:\n\t$METAPATH/metadb$setarg -i" \
>> $msgs_f
fi
#

# Check the metadevice state
#
problem=‘awk < $metastat_f -e \
’/State:/ {if ($2 != "Okay" && $2 != "Resyncing") print $0;}’‘
if [ -n "$problem" ] ; then
retval=‘expr $retval + 128‘
echo "\
metacheck: metadevice problem, for more detail run:" \
>> $msgs_f
# refine the message to toplevel metadevices that have a problem
top=‘toplevel‘
set -- $top
while [ $# -ne 0 ] ; do
device=$1
problem=‘metastat $device | awk -e \
’/State:/ {if ($2 != "Okay" && $2 != "Resyncing") print $0;}’‘
if [ -n "$problem" ] ; then
echo "\t$METAPATH/metastat$setarg $device" >> $msgs_f
# find out what is mounted on the device
mp=‘mount|awk -e ’/\/dev\/md\/dsk\/’$device’[ \t]/{print $1;}’‘
if [ -n "$mp" ] ; then
echo "\t\t$mp mounted on $device" >> $msgs_f
fi
fi
shift
done
fi
#
# Check the hotspares to see if any have been used.
#
problem=""
grep "no hotspare pools found" < $metahs_f > /dev/null 2>&1
if [ $? -ne 0 ] ; then
problem=‘awk < $metahs_f -e \

’/blocks/ { if ( $2 != "Available" ) print $0;}’‘
fi
Monitoring Solaris Volume ManagerWith a cron Job
Chapter 24 • Monitoring and Error Reporting (Tasks) 269
if [ -n "$problem" ] ; then
retval=‘expr $retval + 256‘
echo "\
metacheck: hot spare in use, for more detail
run:\n\t$METAPATH/metahs$setarg -i" \
>> $msgs_f
fi
fi
# If any errors occurred, then mail the report
if [ $retval -ne 0 ] ; then
if [ -n "$recipients" ] ; then
re=""
if [ -f $pending_f ] && [ "$filter" = "yes" ] ; then
re="Re: "
# we have a pending notification, check date to see if we resend
penddate_filter=‘cat $pending_f | head -1‘
if [ "$curdate_filter" != "$penddate_filter" ] ; then
rm -f $pending_f > /dev/null 2>&1
else
if [ "$debug" = "yes" ] ; then
echo "metacheck: email problem notification still pending"
cat $pending_f
fi
fi
fi
if [ ! -f $pending_f ] ; then
if [ "$filter" = "yes" ] ; then
echo "$curdate_filter\n\tDate:$curdate\n\tTo:$recipients" \
> $pending_f
fi

echo "\
Solaris Volume Manager: $node: metacheck$setarg: Report: $curdate" >>
$msg_f
echo "\
--------------------------------------------------------------" >> $msg_f
cat $msg_f $msgs_f | mailx -s \
"${re}Solaris Volume Manager Problem: metacheck.$who.$set.$node"
$recipients
fi
else
cat $msgs_f
fi
else
# no problems detected,
if [ -n "$recipients" ] ; then
# default is to not send any mail, or print anything.
echo "\
Solaris Volume Manager: $node: metacheck$setarg: Report: $curdate" >>
$msg_f
echo "\
--------------------------------------------------------------" >> $msg_f
Monitoring Solaris Volume ManagerWith a cron Job
270 Solaris VolumeManagerAdministration Guide • June 2006
if [ -f $pending_f ] && [ "$filter" = "yes" ] ; then
# pending filter exista, remove it and send OK
rm -f $pending_f > /dev/null 2>&1
echo "Problem resolved" >> $msg_f
cat $msg_f | mailx -s \
"Re: Solaris Volume Manager Problem: metacheck.$who.$node.$set"
$recipients
elif [ "$testarg" = "yes" ] ; then
# for testing, send mail every time even thought there is no problem
echo "Messaging test, no problems detected" >> $msg_f
cat $msg_f | mailx -s \

"Solaris Volume Manager Problem: metacheck.$who.$node.$set" $recipients
fi
else
echo "metacheck: Okay"
fi
fi
rm -f $files > /dev/null 2>&1
exit $retval
For information on invoking scripts by using the cron utility, see the cron(1M)
man page.
Monitoring Solaris Volume ManagerWith a cron Job
Chapter 24 • Monitoring and Error Reporting (Tasks) 271
272
Troubleshooting Solaris Volume Manager
(Tasks)
This chapter describes how to troubleshoot problems that are related to
Solaris Volume Manager.
This chapter provides both general troubleshooting guidelines and specific
procedures for resolving
some known problems.
This chapter includes the following information:
_ “Troubleshooting Solaris Volume Manager (Task Map)” on page 273
_ “Overview of Troubleshooting the System” on page 274
_ “Replacing Disks” on page 276
_ “Recovering From Disk Movement Problems” on page 278
_ “Device ID Discrepancies After Upgrading to the Solaris 10 Release” on
page 279
_ “Recovering From Boot Problems” on page 281
_ “Recovering From State Database Replica Failures” on page 288
_ “Recovering From Soft Partition Problems” on page 291
_ “Recovering Storage From a Different System” on page 293
_ “Recovering From Disk Set Problems” on page 300
_ “Performing Mounted Filesystem Backups Using the ufsdump Command”
on page 301

_ “Performing System Recovery” on page 303
This chapter describes some Solaris Volume Manager problems and their
appropriate solution. This
chapter is not intended to be all-inclusive. but rather to present common
scenarios and recovery
procedures.
Troubleshooting Solaris Volume Manager (Task Map)
The following task map identifies some procedures that are needed to
troubleshoot Solaris Volume
Manager.
25 C H A P T E R 2 5
273
Task Description For Instructions
Replace a failed disk Replace a disk, then update state database
replicas and logical volumes on the new disk.
“How to Replace a Failed Disk”
on page 276
Recover from disk
movement problems
Restore disks to original locations or contact
product support.
“Recovering From Disk
Movement Problems” on page
278
Recover from improper
/etc/vfstab entries
Use the fsck command on the mirror, then
edit the /etc/vfstab file so that the system
boots correctly.
“How to Recover From
Improper /etc/vfstab Entries”
on page 282
Recover from a boot device
failure
Boot from a different submirror. “How to Recover From a Boot
Device Failure” on page 284
Recover from insufficient
state database replicas
Delete unavailable replicas by using the
metadb command.
“How to Recover From
Insufficient State Database
Replicas” on page 288
Recover configuration data
for a lost soft partition
Use the metarecover command to recover
configuration data for a soft partition.
“How to Recover Configuration
Data for a Soft Partition”
on page 291
Recover a Solaris Volume
Manager configuration from
salvaged disks
Attach disks to a new system and have Solaris
Volume Manager rebuild the configuration
from the existing state database replicas.
“How to Recover Storage From
a Local Disk Set” on page 293
Recover storage from a
different system
Import storage from known disk sets to a
different system.
“Recovering Storage From a
Different System” on page 293
Purge an inaccessible disk
set.
Use the metaset command to purge
knowledge of a disk set that you cannot take

or use.
“Recovering From Disk Set
Problems” on page 300
Recover a system
configuration stored on
Solaris Volume Manager
volumes.
Use Solaris OS installation media to recover a
system configuration stored on Solaris
Volume Manager volumes.
“Performing System Recovery”
on page 303
Overview of Troubleshooting the System
Prerequisites for Troubleshooting the System
To troubleshoot storage management problems that are related to Solaris
Volume Manager, you need
to do the following:
_ Have root privilege
_ Have a current backup of all data
Overview of Troubleshooting the System
274 Solaris VolumeManagerAdministration Guide • June 2006
General Guidelines for Troubleshooting Solaris
Volume Manager
You should have the following information on hand when you troubleshoot
Solaris Volume Manager
problems:
_ Output from the metadb command
_ Output from the metastat command
_ Output from the metastat -p command
_ Backup copy of the /etc/vfstab file
_ Backup copy of the /etc/lvm/mddb.cf file
_ Disk partition information from the prtvtoc command (SPARC® systems) or
the fdisk
command (x86 based systems)

_ The Solaris version on your system
_ Alist of the Solaris patches that have been installed
_ Alist of the Solaris Volume Manager patches that have been installed
Tip– Any time you update your SolarisVolume Manager configuration, or
make other storage or
operating system-related changes to your system, generate fresh copies of
this configuration
information. You could also generate this information automatically with a cron
job.
General TroubleshootingApproach
Although no single procedure enables you to evaluate all problems with
Solaris Volume Manager, the
following process provides one general approach that might help.
1. Gather information about current the configuration.
2. Review the current status indicators, including the output from the metastat
and metadb
commands. This information should indicate which component is faulty.
3. Check the hardware for obvious points of failure:
_ Is everything connected properly?
_ Was there a recent electrical outage?
_ Have there been equipment changes or additions?
Overview of Troubleshooting the System
Chapter 25 • Troubleshooting Solaris Volume Manager (Tasks) 275
Replacing Disks
This section describes how to replace disks in a Solaris Volume Manager
environment.
Caution – If you have soft partitions on a failed disk or on volumes that are
built on a failed disk, you
must put the new disk in the same physical location Also, use the same
cntndn number as the disk
being replaced.
_ Howto Replace a Failed Disk
Identify the failed disk to be replaced by examining the
/var/adm/messages file and the metastat

command output.
Locate any state database replicas that might have been placed on the
failed disk.
Use the metadb command to find the replicas.
The metadb command might report errors for the state database replicas that
are located on the failed
disk. In this example, c0t1d0 is the problem device.
# metadb
flags first blk block count
a m u 16 1034 /dev/dsk/c0t0d0s4
a u 1050 1034 /dev/dsk/c0t0d0s4
a u 2084 1034 /dev/dsk/c0t0d0s4
W pc luo 16 1034 /dev/dsk/c0t1d0s4
W pc luo 1050 1034 /dev/dsk/c0t1d0s4
W pc luo 2084 1034 /dev/dsk/c0t1d0s4
The output shows three state database replicas on each slice 4 of the local
disks, c0t0d0 and c0t1d0.
The W in the flags field of the c0t1d0s4 slice indicates that the device has
write errors. Three replicas
on the c0t0d0s4 slice are still good.
Record the slice name where the state database replicas reside and the
number of state database
replicas. Then, delete the state database replicas.
The number of state database replicas is obtained by counting the number of
appearances of a slice in
the metadb command output. In this example, the three state database
replicas that exist on
c0t1d0s4 are deleted.
# metadb -d c0t1d0s4
Caution – If, after deleting the bad state database replicas, you are left with
three or fewer, add more
state database replicas before continuing. Doing so helps to ensure that
configuration information
remains intact.

1
2
3
Replacing Disks
276 Solaris VolumeManagerAdministration Guide • June 2006
Locate and delete any hot spares on the failed disk.
Use the metastat command to find hot spares. In this example, hot spare pool
hsp000 included
c0t1d0s6, which is then deleted from the pool.
# metahs -d hsp000 c0t1d0s6
hsp000: Hotspare is deleted
Replace the failed disk.
This step might entail using the cfgadm command, the luxadm command, or
other commands as
appropriate for your hardware and environment. When performing this step,
make sure to follow
your hardware’s documented procedures to properly manipulate the Solaris
state of this disk.
Repartition the new disk.
Use the format command or the fmthard command to partition the disk with
the same slice
information as the failed disk. If you have the prtvtoc output from the failed
disk, you can format
the replacement disk with the fmthard -s /tmp/failed-disk-prtvtoc-output
command.
If you deleted state database replicas, add the same number back to the
appropriate slice.
In this example, /dev/dsk/c0t1d0s4 is used.
# metadb -a -c 3 c0t1d0s4
If any slices on the disk are components of RAID-5 volumes or are
components of RAID-0 volumes
that are in turn submirrors of RAID-1 volumes, run the metareplace -e
command for each slice.
In this example, /dev/dsk/c0t1d0s4 and mirror d10 are used.

# metareplace -e d10 c0t1d0s4
If any soft partitions are built directly on slices on the replaced disk, run
the metarecover -m -p
command on each slice that contains soft partitions. This command
regenerates the extent headers
on disk.
In this example, /dev/dsk/c0t1d0s4 needs to have the soft partition markings
on disk regenerated.
The slice is scanned and the markings are reapplied, based on the
information in the state database
replicas.
# metarecover c0t1d0s4 -m -p
If any soft partitions on the disk are components of RAID-5 volumes or
are components of RAID-0
volumes that are submirrors of RAID-1 volumes, run the metareplace -e
command for each slice.
In this example, /dev/dsk/c0t1d0s4 and mirror d10 are used.
# metareplace -e d10 c0t1d0s4
If any RAID-0 volumes have soft partitions built on them, run the
metarecover command for each
RAID-0 volume.
In this example, RAID-0 volume, d17, has soft partitions built on it.
# metarecover d17 -m -p
4
5
6
7
8
9
10
11
Replacing Disks
Chapter 25 • Troubleshooting Solaris Volume Manager (Tasks) 277

Replace hot spares that were deleted, and add them to the appropriate
hot spare pool or pools.
In this example, hot spare pool, hsp000 included c0t1d0s6. This slice is added
to the hot spare pool.
# metahs -a hsp000 c0t1d0s6hsp000: Hotspare is added
If soft partitions or nonredundant volumes were affected by the failure,
restore data from backups. If
only redundant volumes were affected, then validate your data.
Check the user and application data on all volumes. You might have to run an
application-level
consistency checker, or use some other method to check the data.
Recovering From Disk Movement Problems
This section describes how to recover from unexpected problems after
moving disks in the Solaris
Volume Manager environment.
Disk Movement and Device ID Overview
Solaris Volume Manager uses device IDs, which are associated with a
specific disk, to track all disks
that are used in a Solaris Volume Manager configuration. When disks are
moved to a different
controller or when the SCSI target numbers change, Solaris Volume Manager
usually correctly
identifies the movement and updates all related Solaris Volume Manager
records accordingly.No
system administrator intervention is required. In isolated cases, Solaris
Volume Manager cannot
completely update the records and reports an error on boot.
Resolving Unnamed Devices Error Message
If you add new hardware or move hardware (for example, you move a string
of disks from one
controller to another controller), Solaris Volume Manager checks the device
IDs that are associated
with the disks that moved, and updates the cntndn names in internal Solaris
Volume Manager

records accordingly. If the records cannot be updated, the boot processes that
are spawned by the
svc:/system/mdmonitor service report an error to the console at boot time:
Unable to resolve unnamed devices for volume management.
Please refer to the Solaris Volume Manager documentation,
Troubleshooting section, at http://docs.sun.com or from
your local copy.
No data loss has occurred, and none will occur as a direct result of this
problem. This error message
indicates that the Solaris Volume Manager name records have been only
partially updated. Output
from the metastat command shows some of the cntndn names that were
previously used. The
output also shows some of the cntndn names that reflect the state after the
move.
If you need to update your Solaris Volume Manager configuration while this
condition exists, you
must use the cntndn names that are reported by the metastat command when
you issue any meta*
commands.
12
13
Recovering FromDisk Movement Problems
278 Solaris VolumeManagerAdministration Guide • June 2006
If this error condition occurs, you can do one of the following to resolve the
condition:
_ Restore all disks to their original locations. Next, do a reconfiguration
reboot, or run (as a single
command):
/usr/sbin/devfsadm && /usr/sbin/metadevadm -r
After these commands complete, the error condition is resolved.
_ Contact your support representative for guidance.
Note – This error condition is quite unlikely to occur. If it does occur, it is most
likely to affect

Fibre Channel-attached storage.
Device ID Discrepancies After Upgrading to the Solaris 10
Release
Beginning with the Solaris 10 release, device ID output is displayed in a new
format. Solaris Volume
Manager may display the device ID output in a new or old format depending
on when the device id
information was added to the state database replica.
Previously, the device ID was displayed as a hexadecimal value. The new
format displays the device
ID as an ASCII string. In many cases, the change is negligible, as in the
following example:
old format: id1,ssd@w600c0ff00000000007ecd255a9336d00
new format: id1,ssd@n600c0ff00000000007ecd255a9336d00
In other cases, the change is more noticeable, as in the following example:
old format: id1,sd@w4849544143484920444b3332454a2d33364
e4320202020203433334239383939
new format: id1,ssd@n600c0ff00000000007ecd255a9336d00
When you upgrade to the Solaris 10 release, the format of the device IDs that
are associated with
existing disk sets that were created in a previous Solaris release are not
updated in the Solaris Volume
Manager configuration. If you need to revert back to a previous Solaris
release, configuration
changes made to disk sets after the upgrade might not available to that
release. These configuration
changes include:
_ Adding a new disk to a disk set that existed before the upgrade
_ Creating a new disk set
_ Creating state database replicas
These configuration changes can affect all disk sets that you are able to
create in Solaris Volume
Manager, including the local set. For example, if you implement any of these
changes to a disk set

created in the Solaris 10 release, you cannot import the disk set to a previous
Solaris release. As
Device ID Discrepancies After Upgrading to the Solaris 10 Release
Chapter 25 • Troubleshooting Solaris Volume Manager (Tasks) 279
another example, you might upgrade one side of a mirrored root to the Solaris
10 release and then
make configuration changes to the local set. These changes would not be
recognized if you then
incorporated the submirror back into the previous Solaris release.
The Solaris 10 OS configuration always displays the new format of the device
ID, even in the case of
an upgrade. You can display this information using the prtconf -v command.
Conversely, Solaris
Volume Manager displays either the old or the new format. Which format is
displayed in Solaris
Volume Manager depends on which version of the Solaris OS you were
running when you began
using the disk. To determine if Solaris Volume Manager is displaying a
different, but equivalent, form
of the device ID from that of the Solaris OS configuration, compare the output
from the metastat
command with the output from the prtconf -v command.
In the following example, the metastat command output displays a different,
but equivalent, form of
the device ID for c1t6d0 from the prtconf -v command output for the same
disk.
# metastat
d127: Concat/Stripe
Size: 17629184 blocks (8.4 GB)
Stripe 0:
Device Start Block Dbase Reloc
c1t6d0s2 32768 Yes Yes
Device Relocation Information:

Device Reloc Device ID c1t6d0 Yes
id1,sd@w4849544143484920444b3332454a2d33364e43202020202034333
34239383939
# prtconf -v
.(output truncated)
.
.
sd, instance #6
System properties:
name=’lun’ type=int items=1
value=00000000
name=’target’ type=int items=1
value=00000006
name=’class’ type=string items=1
value=’scsi’
Driver properties:
name=’pm-components’ type=string items=3 dev=none
value=’NAME=spindle-motor’ + ’0=off’ + ’1=on’
name=’pm-hardware-state’ type=string items=1 dev=none
value=’needs-suspend-resume’
name=’ddi-failfast-supported’ type=boolean dev=none
name=’ddi-kernel-ioctl’ type=boolean dev=none
Hardware properties:
name=’devid’ type=string items=1
Device ID Discrepancies After Upgrading to the Solaris 10 Release
280 Solaris VolumeManagerAdministration Guide • June 2006
value=’id1,@THITACHI_DK32EJ-36NC_____433B9899’
.
.
.
(output truncated)
The line containing “instance #6” in the output from the prtconf -v command
correlates to the disk
c1t6d0 in the output from the metastat command. The device id,

id1,@THITACHI_DK32EJ-36NC_____433B9899, in the output from the
prtconf -v command
correlates to the device id,
id1,sd@w4849544143484920444b3332454a2d33364e432020202020343333
4239383939, in the
output from the metastat command. This difference in output indicates that
Solaris Volume
Manager is displaying the hexadecimal form of the device ID in the output
from the metastat
command, while the Solaris 10 OS configuration is displaying an ASCII string
in the output from the
prtconf command.
Recovering From Boot Problems
Because Solaris Volume Manager enables you to mirror the root (/), swap,
and /usr directories,
special problems can arise when you boot the system. These problems can
arise either through
hardware failures or operator error. The procedures in this section provide
solutions to such
potential problems.
The following table describes these problems and points you to the
appropriate solution.
TABLE 25–1 Common Boot ProblemsWith SolarisVolume Manager
Reason for the Boot Problem For Instructions
The /etc/vfstab file contains incorrect
information.
“How to Recover From Improper /etc/vfstab Entries”
on page 282
Not enough state database replicas have been
defined.
“How to Recover From Insufficient State Database Replicas”
on page 288
Aboot device (disk) has failed. “How to Recover From a Boot Device Failure”
on page 284
Background Information for Boot Problems
_ If Solaris Volume Manager takes a volume offline due to errors, unmount all
file systems on the
disk where the failure occurred.
Recovering FromBoot Problems
Chapter 25 • Troubleshooting Solaris Volume Manager (Tasks) 281
Because each disk slice is independent, multiple file systems can be mounted
on a single disk. If
the software has encountered a failure, other slices on the same disk will
likely experience failures
soon. File systems that are mounted directly on disk slices do not have the
protection of Solaris
Volume Manager error handling. Leaving such file systems mounted can
leave you vulnerable to
crashing the system and losing data.
_ Minimize the amount of time you run with submirrors that are disabled or
offline. During
resynchronization and online backup intervals, the full protection of mirroring
is gone.
Howto Recover From Improper /etc/vfstab Entries
If you have made an incorrect entry in the /etc/vfstab file, for example, when
mirroring the root
(/) file system, the system appears at first to be booting properly. Then, the
system fails. To remedy
this situation, you need to edit the /etc/vfstab file while in single-user mode.
The high-level steps to recover from improper /etc/vfstab file entries are as
follows:
1. Booting the system to single-user mode
2. Running the fsck command on the mirror volume
3. Remounting file system read-write options enabled
4. Optional: running the metaroot command for a root (/) mirror
5. Verifying that the /etc/vfstab file correctly references the volume for the file
system entry
6. Rebooting the system

_ Recovering the root (/) RAID-1 (Mirror) Volume
In the following example, the root (/) file system is mirrored with a two-way
mirror, d0. The root (/)
entry in the /etc/vfstab file has somehow reverted back to the original slice of
the file system.
However, the information in the /etc/system file still shows booting to be from
the mirror d0. The
most likely reason is that the metaroot command was not used to maintain the
/etc/system and
/etc/vfstab files. Another possible reason is that an old copy of the/etc/vfstab
file was copied
back into the current /etc/vfstab file.
The incorrect /etc/vfstab file looks similar to the following:
#device device mount FS fsck mount mount
#to mount to fsck point type pass at boot options
#
/dev/dsk/c0t3d0s0 /dev/rdsk/c0t3d0s0 / ufs 1 no -
/dev/dsk/c0t3d0s1 - - swap - no -
/dev/dsk/c0t3d0s6 /dev/rdsk/c0t3d0s6 /usr ufs 2 no -
#
/proc - /proc proc - no -
swap - /tmp tmpfs - yes -
Recovering FromBoot Problems
282 Solaris VolumeManagerAdministration Guide • June 2006
Because of the errors, you automatically go into single-user mode when the
system is booted:
ok boot
...
configuring network interfaces: hme0.
Hostname: host1
mount: /dev/dsk/c0t3d0s0 is not this fstype.
setmnt: Cannot open /etc/mnttab for writing
INIT: Cannot create /var/adm/utmp or /var/adm/utmpx
INIT: failed write of utmpx entry:" "

INIT: failed write of utmpx entry:" "
INIT: SINGLE USER MODE
Type Ctrl-d to proceed with normal startup,
(or give root password for system maintenance): <root-password>
At this point, the root (/) and /usr file systems are mounted read-only. Follow
these steps:
Run the fsck command on the root (/) mirror.
Note – Be careful to use the correct volume for the root (/) mirror.
# fsck /dev/md/rdsk/d0
** /dev/md/rdsk/d0
** Currently Mounted on /
** Phase 1 - Check Blocks and Sizes
** Phase 2 - Check Pathnames
** Phase 3 - Check Connectivity
** Phase 4 - Check Reference Counts
** Phase 5 - Check Cyl groups
2274 files, 11815 used, 10302 free (158 frags, 1268 blocks,
0.7% fragmentation)
Remount the root (/) file system as read/write file system so that you can
edit the /etc/vfstab file.
# mount -o rw,remount /dev/md/dsk/d0 /
mount: warning: cannot lock temp file </etc/.mnt.lock>
Run the metaroot command.
# metaroot d0
This command edits the /etc/system and /etc/vfstab files to specify that the
root (/) file system is
now on volume d0.
1
2
3
Recovering FromBoot Problems
Chapter 25 • Troubleshooting Solaris Volume Manager (Tasks) 283
Verify that the /etc/vfstab file contains the correct volume entries.

The root (/) entry in the /etc/vfstab file should appear as follows so that the
entry for the file
system correctly references the RAID-1 volume:
#device device mount FS fsck mount mount
#to mount to fsck point type pass at boot options
#
/dev/md/dsk/d0 /dev/md/rdsk/d0 / ufs 1 no -
/dev/dsk/c0t3d0s1 - - swap - no -
/dev/dsk/c0t3d0s6 /dev/rdsk/c0t3d0s6 /usr ufs 2 no -
#
/proc - /proc proc - no -
swap - /tmp tmpfs - yes -
Reboot the system.
The system returns to normal operation.
_ Howto Recover From a Boot Device Failure
If you have a root (/) mirror and your boot device fails, you need to set up an
alternate boot device.
The high-level steps in this task are as follows:
_ Booting from the alternate root (/) submirror
_ Determining the erred state database replicas and volumes
_ Repairing the failed disk
_ Restoring state database replicas and volumes to their original state
Initially, when the boot device fails, you’ll see a message similar to the
following. This message might
differ among various architectures.
Rebooting with command:
Boot device: /iommu/sbus/dma@f,81000/esp@f,80000/sd@3,0
The selected SCSI device is not responding
Can’t open boot device
...
When you see this message, note the device. Then, follow these steps:
Boot from another root (/) submirror.
Since only two of the six state database replicas in this example are in error,
you can still boot. If this

were not the case, you would need to delete the inaccessible state database
replicas in single-user
mode. This procedure is described in “How to Recover From Insufficient State
Database Replicas”
on page 288.
4
5
1
Recovering FromBoot Problems
284 Solaris VolumeManagerAdministration Guide • June 2006
When you created the mirror for the root (/) file system, you should have
recorded the alternate boot
device as part of that procedure. In this example, disk2 is that alternate boot
device.
ok boot disk2
SunOS Release 5.9 Version s81_51 64-bit
Copyright 1983-2001 Sun Microsystems, Inc. All rights reserved.
Hostname: demo
...
demo console login: root
Password: <root-password>
Dec 16 12:22:09 host1 login: ROOT LOGIN /dev/console
Last login: Wed Dec 12 10:55:16 on console
Sun Microsystems Inc. SunOS 5.9 s81_51 May 2002
...
Determine how many state database replicas have failed by using the
metadb command.
# metadb
flags first blk block count
M p unknown unknown /dev/dsk/c0t3d0s3
M p unknown unknown /dev/dsk/c0t3d0s3
a m p luo 16 1034 /dev/dsk/c0t2d0s3
a p luo 1050 1034 /dev/dsk/c0t2d0s3
a p luo 16 1034 /dev/dsk/c0t1d0s3

a p luo 1050 1034 /dev/dsk/c0t1d0s3
In this example, the system can no longer detect state database replicas on
slice /dev/dsk/c0t3d0s3,
which is part of the failed disk.
Determine that half of the root (/), swap, and /usr mirrors have failed by
using the metastat
command.
# metastat
d0: Mirror
Submirror 0: d10
State: Needs maintenance
Submirror 1: d20
State: Okay
...
d10: Submirror of d0
State: Needs maintenance
Invoke: "metareplace d0 /dev/dsk/c0t3d0s0 <new device>"
Size: 47628 blocks
Stripe 0:
Device Start Block Dbase State Hot Spare
/dev/dsk/c0t3d0s0 0 No Maintenance
d20: Submirror of d0
State: Okay
Size: 47628 blocks
2
3
Recovering FromBoot Problems
Chapter 25 • Troubleshooting Solaris Volume Manager (Tasks) 285
Stripe 0:
Device Start Block Dbase State Hot Spare
/dev/dsk/c0t2d0s0 0 No Okay
d1: Mirror
Submirror 0: d11
State: Needs maintenance

Submirror 1: d21
State: Okay
...
d11: Submirror of d1
State: Needs maintenance
Invoke: "metareplace d1 /dev/dsk/c0t3d0s1 <new device>"
Size: 69660 blocks
Stripe 0:
Device Start Block Dbase State Hot Spare
/dev/dsk/c0t3d0s1 0 No Maintenance
d21: Submirror of d1
State: Okay
Size: 69660 blocks
Stripe 0:
Device Start Block Dbase State Hot Spare
/dev/dsk/c0t2d0s1 0 No Okay
d2: Mirror
Submirror 0: d12
State: Needs maintenance
Submirror 1: d22
State: Okay
...
d12: Submirror of d2
State: Needs maintenance
Invoke: "metareplace d2 /dev/dsk/c0t3d0s6 <new device>"
Size: 286740 blocks
Stripe 0:
Device Start Block Dbase State Hot Spare
/dev/dsk/c0t3d0s6 0 No Maintenance
d22: Submirror of d2
State: Okay
Size: 286740 blocks
Stripe 0:
Device Start Block Dbase State Hot Spare

/dev/dsk/c0t2d0s6 0 No Okay
Recovering FromBoot Problems
286 Solaris VolumeManagerAdministration Guide • June 2006
In this example, the metastat command shows that the following submirrors
need maintenance:
_ Submirror d10, device c0t3d0s0
_ Submirror d11, device c0t3d0s1
_ Submirror d12, device c0t3d0s6
Halt the system, replace the disk. Use the format command or the fmthard
command, to partition
the disk as it was before the failure.
Tip– If the new disk is identical to the existing disk (the intact side of the
mirror, in this example),
quickly format the new disk. To do so, use the prtvtoc /dev/rdsk/c0t2d0s2 |
fmthard -s -
/dev/rdsk/c0t3d0s2 command (c0t3d0, in this example).
# halt
...
Halted
...
ok boot
...
# format /dev/rdsk/c0t3d0s0
Reboot the system.
Note that you must reboot from the other half of the root (/) mirror. You should
have recorded the
alternate boot device when you created the mirror.
# halt
...
ok boot disk2
To delete the failed state database replicas and then add them back, use
the metadb command.
# metadb
flags first blk block count
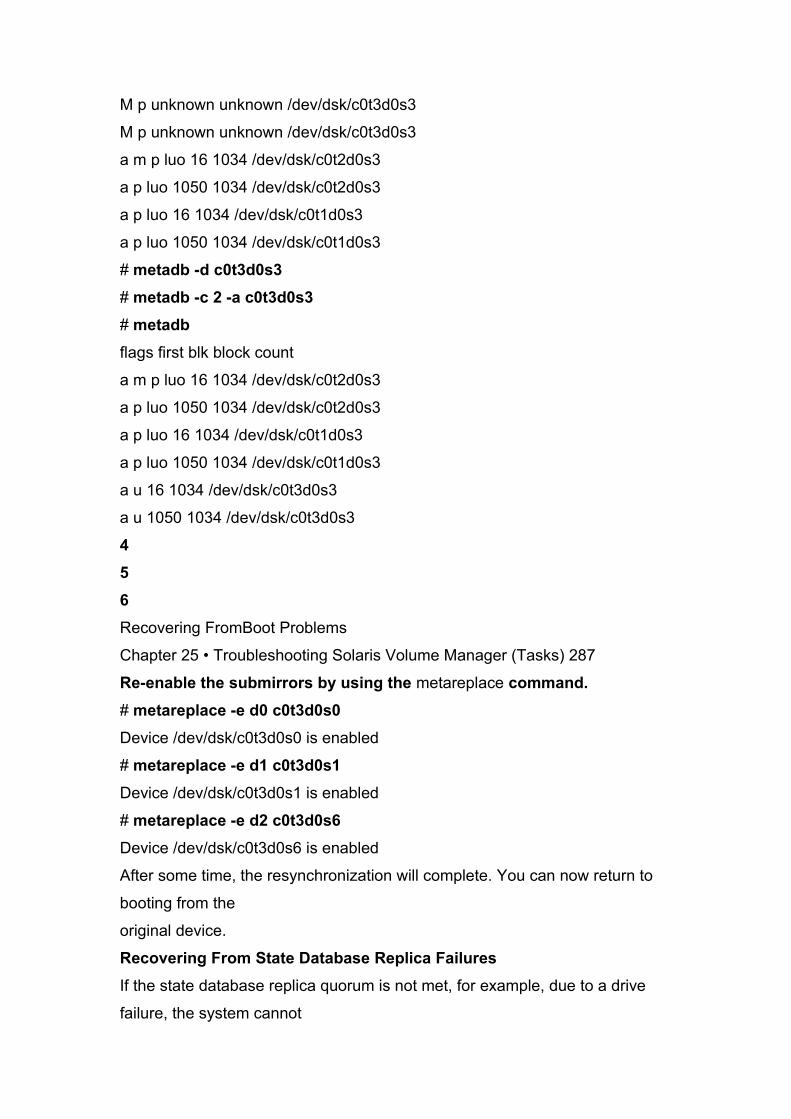
M p unknown unknown /dev/dsk/c0t3d0s3
M p unknown unknown /dev/dsk/c0t3d0s3
a m p luo 16 1034 /dev/dsk/c0t2d0s3
a p luo 1050 1034 /dev/dsk/c0t2d0s3
a p luo 16 1034 /dev/dsk/c0t1d0s3
a p luo 1050 1034 /dev/dsk/c0t1d0s3
# metadb -d c0t3d0s3
# metadb -c 2 -a c0t3d0s3
# metadb
flags first blk block count
a m p luo 16 1034 /dev/dsk/c0t2d0s3
a p luo 1050 1034 /dev/dsk/c0t2d0s3
a p luo 16 1034 /dev/dsk/c0t1d0s3
a p luo 1050 1034 /dev/dsk/c0t1d0s3
a u 16 1034 /dev/dsk/c0t3d0s3
a u 1050 1034 /dev/dsk/c0t3d0s3
4
5
6
Recovering FromBoot Problems
Chapter 25 • Troubleshooting Solaris Volume Manager (Tasks) 287
Re-enable the submirrors by using the metareplace command.
# metareplace -e d0 c0t3d0s0
Device /dev/dsk/c0t3d0s0 is enabled
# metareplace -e d1 c0t3d0s1
Device /dev/dsk/c0t3d0s1 is enabled
# metareplace -e d2 c0t3d0s6
Device /dev/dsk/c0t3d0s6 is enabled
After some time, the resynchronization will complete. You can now return to
booting from the
original device.
Recovering From State Database Replica Failures
If the state database replica quorum is not met, for example, due to a drive
failure, the system cannot

be rebooted into multiuser mode. This situation could follow a panic when
Solaris Volume Manager
discovers that fewer than half of the state database replicas are available.
This situation could also
occur if the system is rebooted with exactly half or fewer functional state
database replicas. In Solaris
Volume Manager terminology, the state database has gone “stale.” This
procedure explains how to
recover from this problem.
_ Howto Recover From Insufficient State Database
Replicas
Boot the system.
Determine which state database replicas are unavailable.
# metadb -i
If one or more disks are known to be unavailable, delete the state
database replicas on those disks.
Otherwise, delete enough erred state database replicas (W,M,D, F, or R
status flags reported by
metadb) to ensure that a majority of the existing state database replicas
are not erred.
# metadb -d disk-slice
Tip– State database replicas with a capitalized status flag are in error. State
database replicas with a
lowercase status flag are functioning normally.
Verify that the replicas have been deleted.
# metadb
7
1
2
3
4
Recovering FromState Database Replica Failures
288 Solaris VolumeManagerAdministration Guide • June 2006
Reboot the system.

# reboot
If necessary, replace the disk, format it appropriately, then add any state
database replicas that are
needed to the disk.
Follow the instructions in “Creating State Database Replicas” on page 68.
Once you have a replacement disk, halt the system, replace the failed disk,
and once again, reboot the
system. Use the format command or the fmthard command to partition the
disk as it was configured
before the failure.
Recovering From Stale State Database Replicas
In the following example, a disk that contains seven replicas has gone bad. As
a result, the system has
only three good replicas. The system panics, then cannot reboot into
multiuser mode.
panic[cpu0]/thread=70a41e00: md: state database problem
403238a8 md:mddb_commitrec_wrapper+6c (2, 1, 70a66ca0, 40323964,
70a66ca0, 3c)
%l0-7: 0000000a 00000000 00000001 70bbcce0 70bbcd04 70995400
00000002 00000000
40323908 md:alloc_entry+c4 (70b00844, 1, 9, 0, 403239e4, ff00)
%l0-7: 70b796a4 00000001 00000000 705064cc 70a66ca0 00000002
00000024 00000000
40323968 md:md_setdevname+2d4 (7003b988, 6, 0, 63, 70a71618, 10)
%l0-7: 70a71620 00000000 705064cc 70b00844 00000010 00000000
00000000 00000000
403239f8 md:setnm_ioctl+134 (7003b968, 100003, 64, 0, 0, ffbffc00)
%l0-7: 7003b988 00000000 70a71618 00000000 00000000 000225f0
00000000 00000000
40323a58 md:md_base_ioctl+9b4 (157ffff, 5605, ffbffa3c, 100003, 40323ba8,
ff1b5470)
%l0-7: ff3f2208 ff3f2138 ff3f26a0 00000000 00000000 00000064 ff1396e9
00000000

40323ad0 md:md_admin_ioctl+24 (157ffff, 5605, ffbffa3c, 100003, 40323ba8,
0)
%l0-7: 00005605 ffbffa3c 00100003 0157ffff 0aa64245 00000000 7efefeff
81010100
40323b48 md:mdioctl+e4 (157ffff, 5605, ffbffa3c, 100003, 7016db60,
40323c7c)
%l0-7: 0157ffff 00005605 ffbffa3c 00100003 0003ffff 70995598 70995570
0147c800
40323bb0 genunix:ioctl+1dc (3, 5605, ffbffa3c, fffffff8, ffffffe0, ffbffa65)
%l0-7: 0114c57c 70937428 ff3f26a0 00000000 00000001 ff3b10d4 0aa64245
00000000
panic:
stopped at edd000d8: ta %icc,%g0 + 125
Type ’go’ to resume
ok boot -s
Resetting ...
Sun Ultra 5/10 UPA/PCI (UltraSPARC-IIi 270MHz), No Keyboard
OpenBoot 3.11, 128 MB memory installed, Serial #9841776.
Ethernet address 8:0:20:96:2c:70, Host ID: 80962c70.
5
6
Example 25–1
Recovering FromState Database Replica Failures
Chapter 25 • Troubleshooting Solaris Volume Manager (Tasks) 289
Rebooting with command: boot -s
Boot device: /pci@1f,0/pci@1,1/ide@3/disk@0,0:a File and args: -s
SunOS Release 5.9 Version s81_39 64-bit
Copyright 1983-2001 Sun Microsystems, Inc. All rights reserved.
configuring IPv4 interfaces: hme0.
Hostname: dodo
metainit: dodo: stale databases
Insufficient metadevice database replicas located.
Use metadb to delete databases which are broken.
Ignore any "Read-only file system" error messages.

Reboot the system when finished to reload the metadevice database.
After reboot, repair any broken database replicas which were deleted.
Type control-d to proceed with normal startup,
(or give root password for system maintenance): root-password
single-user privilege assigned to /dev/console.
Entering System Maintenance Mode
Jun 7 08:57:25 su: ’su root’ succeeded for root on /dev/console
Sun Microsystems Inc. SunOS 5.9 s81_39 May 2002
# metadb -i
flags first blk block count
a m p lu 16 8192 /dev/dsk/c0t0d0s7
a p l 8208 8192 /dev/dsk/c0t0d0s7
a p l 16400 8192 /dev/dsk/c0t0d0s7
M p 16 unknown /dev/dsk/c1t1d0s0
M p 8208 unknown /dev/dsk/c1t1d0s0
M p 16400 unknown /dev/dsk/c1t1d0s0
M p 24592 unknown /dev/dsk/c1t1d0s0
M p 32784 unknown /dev/dsk/c1t1d0s0
M p 40976 unknown /dev/dsk/c1t1d0s0
M p 49168 unknown /dev/dsk/c1t1d0s0
# metadb -d c1t1d0s0
# metadb
flags first blk block count
a m p lu 16 8192 /dev/dsk/c0t0d0s7
a p l 8208 8192 /dev/dsk/c0t0d0s7
a p l 16400 8192 /dev/dsk/c0t0d0s7
#
The system panicked because it could no longer detect state database
replicas on slice
/dev/dsk/c1t1d0s0. This slice is part of the failed disk or is attached to a failed
controller. The first
metadb -i command identifies the replicas on this slice as having a problem
with the master blocks.
Recovering FromState Database Replica Failures

290 Solaris VolumeManagerAdministration Guide • June 2006
When you delete the stale state database replicas, the root (/) file system is
read-only. You can ignore
the mddb.cf error messages that are displayed.
At this point, the system is again functional, although it probably has fewer
state database replicas
than it should. Any volumes that used part of the failed storage are also either
failed, erred, or
hot-spared. Those issues should be addressed promptly.
Recovering From Soft Partition Problems
This section shows how to recover configuration information for soft partitions.
You should only use
the following procedure if all of your state database replicas have been lost
and you do not have one
of the following:
_ Acurrent or accurate copy of metastat -p output
_ Acurrent or accurate copy of the md.cf file
_ An up-to-date md.tab file
_ Howto Recover Configuration Data for a Soft Partition
At the beginning of each soft partition extent, a sector is used to mark the
beginning of the soft
partition extent. These hidden sectors are called extent headers. These
headers do not appear to the
user of the soft partition. If all Solaris Volume Manager configuration data is
lost, the disk can be
scanned in an attempt to generate the configuration data.
This procedure is a last option to recover lost soft partition configuration
information. The
metarecover command should only be used when you have lost both your
metadb and md.cf files,
and your md.tab file is lost or out of date.
Note – This procedure only works to recover soft partition information. This
procedure does not

assist in recovering from other lost configurations or for recovering
configuration information for
other Solaris Volume Manager volumes.
Note – If your configuration included other SolarisVolume Manager volumes
that were built on top
of soft partitions, you should recover the soft partitions before attempting to
recover the other
volumes.
Configuration information about your soft partitions is stored on your devices
and in your state
database. Since either source could be corrupt, you must indicate to the
metarecover command
which source is reliable.
First, use the metarecover command to determine whether the two sources
agree. If they do agree,
the metarecover command cannot be used to make any changes. However, if
the metarecover
command reports an inconsistency, you must examine its output carefully to
determine whether the
disk or the state database is corrupt. Then, you should use the metarecover
command to rebuild the
configuration based on the appropriate source.
Recovering FromSoft Partition Problems
Chapter 25 • Troubleshooting Solaris Volume Manager (Tasks) 291
Read the “Configuration Guidelines for Soft Partitions” on page 148.
Review the soft partition recovery information by using the metarecover
command.
# metarecover component-p -d
component Specifies the cntndnsnname of the raw component
-p Specifies to regenerate soft partitions
-d Specifies to scan the physical slice for extent headers of soft partitions
Recovering Soft Partitions from On-Disk Extent Headers
# metarecover c1t1d0s1 -p -d
The following soft partitions were found and will be added to

your metadevice configuration.
Name Size No. of Extents
d10 10240 1
d11 10240 1
d12 10240 1
# metarecover c1t1d0s1 -p -d
The following soft partitions were found and will be added to
your metadevice configuration.
Name Size No. of Extents
d10 10240 1
d11 10240 1
d12 10240 1
WARNING: You are about to add one or more soft partition
metadevices to your metadevice configuration. If there
appears to be an error in the soft partition(s) displayed
above, do NOT proceed with this recovery operation.
Are you sure you want to do this (yes/no)?yes
c1t1d0s1: Soft Partitions recovered from device.
bash-2.05# metastat
d10: Soft Partition
Device: c1t1d0s1
State: Okay
Size: 10240 blocks
Device Start Block Dbase Reloc
c1t1d0s1 0 No Yes
Extent Start Block Block count
0 1 10240
d11: Soft Partition
Device: c1t1d0s1
State: Okay
Size: 10240 blocks
1
2
Example 25–2

Recovering FromSoft Partition Problems
292 Solaris VolumeManagerAdministration Guide • June 2006
Device Start Block Dbase Reloc
c1t1d0s1 0 No Yes
Extent Start Block Block count
0 10242 10240
d12: Soft Partition
Device: c1t1d0s1
State: Okay
Size: 10240 blocks
Device Start Block Dbase Reloc
c1t1d0s1 0 No Yes
Extent Start Block Block count
0 20483 10240
In this example, three soft partitions are recovered from disk, after the state
database replicas were
accidentally deleted.
Recovering Storage From a Different System
You can recover a Solaris Volume Manager configuration, even onto a
different system from the
original system.
_ Howto Recover Storage From a Local Disk Set
If you experience a system failure, you can attach the storage to a different
system and recover the
complete configuration from the local disk set. For example, assume you have
a system with an
external disk pack of six disks in it and a Solaris Volume Manager
configuration, including at least
one state database replica, on some of those disks. If you have a system
failure, you can physically
move the disk pack to a new system and enable the new system to recognize
the configuration. This
procedure describes how to move the disks to another system and recover
the configuration from a

local disk set.
Note – This recovery procedure works only with Solaris 9, and later,
SolarisVolume Manager
volumes.
Attach the disk or disks that contain the Solaris Volume Manager
configuration to a system with no
preexisting Solaris Volume Manager configuration.
Do a reconfiguration reboot to ensure that the system recognizes the
newly added disks.
# reboot -- -r
1
2
Recovering Storage Froma Different System
Chapter 25 • Troubleshooting Solaris Volume Manager (Tasks) 293
Determine the major/minor number for a slice containing a state
database replica on the newly
added disks.
Use ls -lL, and note the two numbers between the group name and the date.
These numbers are the
major/minor numbers for this slice.
# ls -Ll /dev/dsk/c1t9d0s7
brw-r----- 1 root sys 32, 71 Dec 5 10:05 /dev/dsk/c1t9d0s7
If necessary, determine the major name corresponding with the major
number by looking up the
major number in /etc/name_to_major.
# grep "32"/etc/name_to_major sd 32
Update the /kernel/drv/md.conf file with the information that instructs
Solaris Volume Manager
where to find a valid state database replica on the new disks.
For example, in the line that begins with mddb_bootlist1, replace the sd with
the major name you
found in step 4. Replace 71 in the example with the minor number you
identified in Step 3.
#pragma ident "@(#)md.conf 2.2 04/04/02 SMI"

#
# Copyright 2004 Sun Microsystems, Inc. All rights reserved.
# Use is subject to license terms.
#
# The parameters nmd and md_nsets are obsolete. The values for these
# parameters no longer have any meaning.
name="md" parent="pseudo" nmd=128 md_nsets=4;
# Begin MDD database info (do not edit)
mddb_bootlist1="sd:71:16:id0";
# End MDD database info (do not edit)
Reboot to force Solaris Volume Manager to reload your configuration.
You will see messages similar to the following displayed on the console.
volume management starting.
Dec 5 10:11:53 host1 metadevadm: Disk movement detected
Dec 5 10:11:53 host1 metadevadm: Updating device names in
Solaris Volume Manager
The system is ready.
Verify your configuration. Use the metadb command to verify the status
of the state database
replicas. and metastat command view the status for each volume.
# metadb
flags first blk block count
a m p luo 16 8192 /dev/dsk/c1t9d0s7
a luo 16 8192 /dev/dsk/c1t10d0s7
a luo 16 8192 /dev/dsk/c1t11d0s7
a luo 16 8192 /dev/dsk/c1t12d0s7
3
4
5
6
7
Recovering Storage Froma Different System
294 Solaris VolumeManagerAdministration Guide • June 2006
a luo 16 8192 /dev/dsk/c1t13d0s7

# metastat
d12: RAID
State: Okay
Interlace: 32 blocks
Size: 125685 blocks
Original device:
Size: 128576 blocks
Device Start Block Dbase State Reloc Hot Spare
c1t11d0s3 330 No Okay Yes
c1t12d0s3 330 No Okay Yes
c1t13d0s3 330 No Okay Yes
d20: Soft Partition
Device: d10
State: Okay
Size: 8192 blocks
Extent Start Block Block count
0 3592 8192
d21: Soft Partition
Device: d10
State: Okay
Size: 8192 blocks
Extent Start Block Block count
0 11785 8192
d22: Soft Partition
Device: d10
State: Okay
Size: 8192 blocks
Extent Start Block Block count
0 19978 8192
d10: Mirror
Submirror 0: d0
State: Okay
Submirror 1: d1
State: Okay
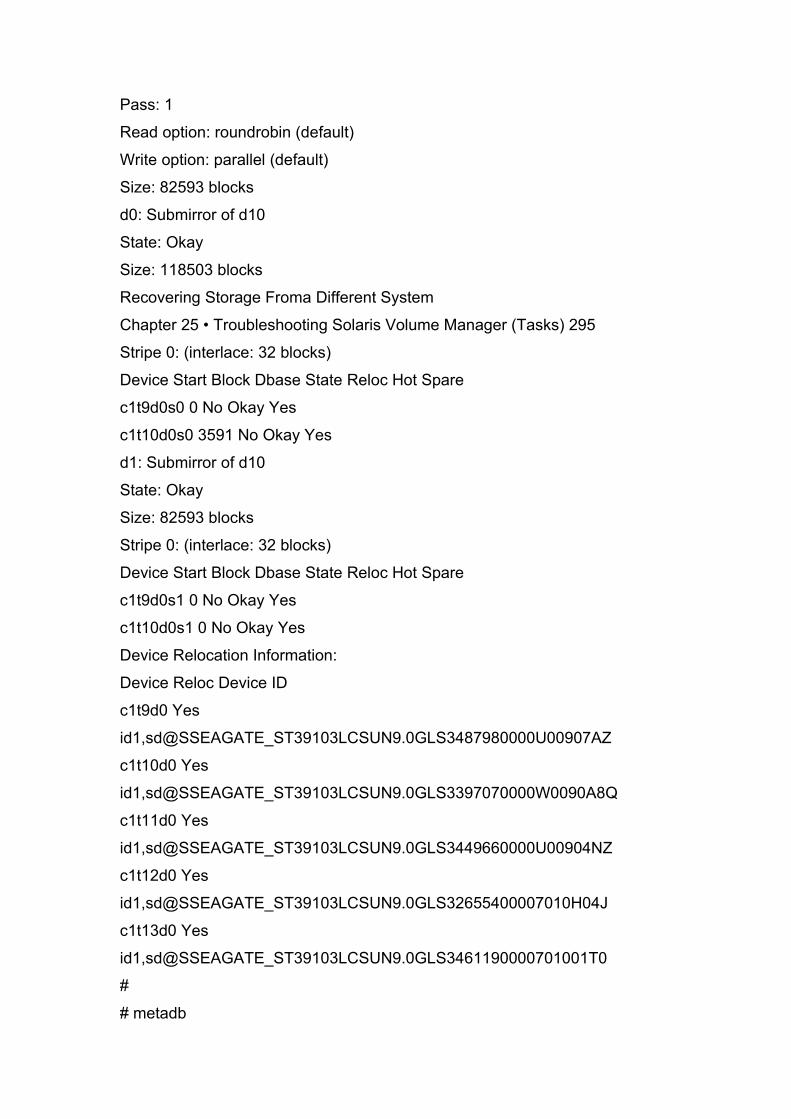
Pass: 1
Read option: roundrobin (default)
Write option: parallel (default)
Size: 82593 blocks
d0: Submirror of d10
State: Okay
Size: 118503 blocks
Recovering Storage Froma Different System
Chapter 25 • Troubleshooting Solaris Volume Manager (Tasks) 295
Stripe 0: (interlace: 32 blocks)
Device Start Block Dbase State Reloc Hot Spare
c1t9d0s0 0 No Okay Yes
c1t10d0s0 3591 No Okay Yes
d1: Submirror of d10
State: Okay
Size: 82593 blocks
Stripe 0: (interlace: 32 blocks)
Device Start Block Dbase State Reloc Hot Spare
c1t9d0s1 0 No Okay Yes
c1t10d0s1 0 No Okay Yes
Device Relocation Information:
Device Reloc Device ID
c1t9d0 Yes
id1,sd@SSEAGATE_ST39103LCSUN9.0GLS3487980000U00907AZ
c1t10d0 Yes
id1,sd@SSEAGATE_ST39103LCSUN9.0GLS3397070000W0090A8Q
c1t11d0 Yes
id1,sd@SSEAGATE_ST39103LCSUN9.0GLS3449660000U00904NZ
c1t12d0 Yes
id1,sd@SSEAGATE_ST39103LCSUN9.0GLS32655400007010H04J
c1t13d0 Yes
id1,sd@SSEAGATE_ST39103LCSUN9.0GLS3461190000701001T0
#
# metadb

flags first blk block count
a m p luo 16 8192 /dev/dsk/c1t9d0s7
a luo 16 8192 /dev/dsk/c1t10d0s7
a luo 16 8192 /dev/dsk/c1t11d0s7
a luo 16 8192 /dev/dsk/c1t12d0s7
a luo 16 8192 /dev/dsk/c1t13d0s7
# metastat
d12: RAID
State: Okay
Interlace: 32 blocks
Size: 125685 blocks
Original device:
Size: 128576 blocks
Device Start Block Dbase State Reloc Hot Spare
c1t11d0s3 330 No Okay Yes
c1t12d0s3 330 No Okay Yes
c1t13d0s3 330 No Okay Yes
d20: Soft Partition
Device: d10
State: Okay
Size: 8192 blocks
Extent Start Block Block count
Recovering Storage Froma Different System
296 Solaris VolumeManagerAdministration Guide • June 2006
0 3592 8192
d21: Soft Partition
Device: d10
State: Okay
Size: 8192 blocks
Extent Start Block Block count
0 11785 8192
d22: Soft Partition
Device: d10
State: Okay
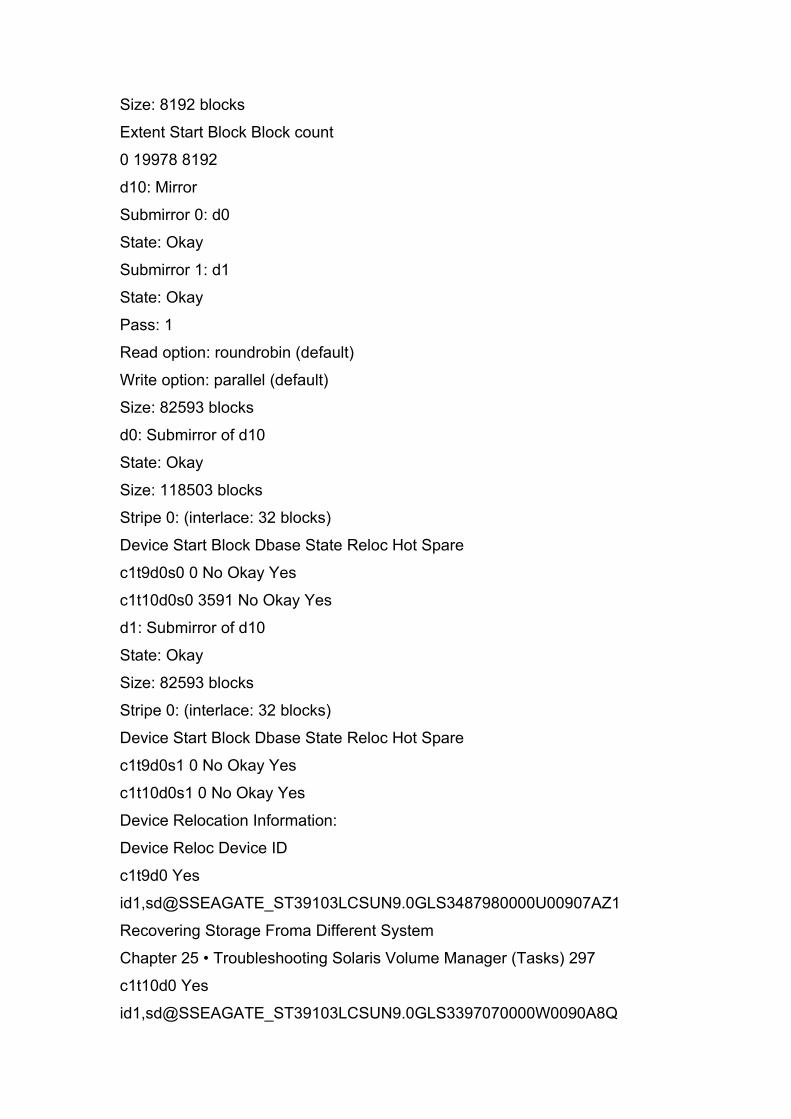
Size: 8192 blocks
Extent Start Block Block count
0 19978 8192
d10: Mirror
Submirror 0: d0
State: Okay
Submirror 1: d1
State: Okay
Pass: 1
Read option: roundrobin (default)
Write option: parallel (default)
Size: 82593 blocks
d0: Submirror of d10
State: Okay
Size: 118503 blocks
Stripe 0: (interlace: 32 blocks)
Device Start Block Dbase State Reloc Hot Spare
c1t9d0s0 0 No Okay Yes
c1t10d0s0 3591 No Okay Yes
d1: Submirror of d10
State: Okay
Size: 82593 blocks
Stripe 0: (interlace: 32 blocks)
Device Start Block Dbase State Reloc Hot Spare
c1t9d0s1 0 No Okay Yes
c1t10d0s1 0 No Okay Yes
Device Relocation Information:
Device Reloc Device ID
c1t9d0 Yes
id1,sd@SSEAGATE_ST39103LCSUN9.0GLS3487980000U00907AZ1
Recovering Storage Froma Different System
Chapter 25 • Troubleshooting Solaris Volume Manager (Tasks) 297
c1t10d0 Yes
id1,sd@SSEAGATE_ST39103LCSUN9.0GLS3397070000W0090A8Q

c1t11d0 Yes
id1,sd@SSEAGATE_ST39103LCSUN9.0GLS3449660000U00904NZ
c1t12d0 Yes
id1,sd@SSEAGATE_ST39103LCSUN9.0GLS32655400007010H04J
c1t13d0 Yes
id1,sd@SSEAGATE_ST39103LCSUN9.0GLS3461190000701001T0
# metastat -p
d12 -r c1t11d0s3 c1t12d0s3 c1t13d0s3 -k -i 32b
d20 -p d10 -o 3592 -b 8192
d21 -p d10 -o 11785 -b 8192
d22 -p d10 -o 19978 -b 8192
d10 -m d0 d1 1
d0 1 2 c1t9d0s0 c1t10d0s0 -i 32b
d1 1 2 c1t9d0s1 c1t10d0s1 -i 32b
#
Recovering Storage From a Known Disk Set
The introduction of device ID support for disk sets in Solaris Volume Manager
allows you to recover
storage from known disk sets and to import the disk set to a different system.
The metaimport
command allows you to import known disk sets from one system to another
system. Both systems
must contain existing Solaris Volume Manager configurations that include
device ID support. For
more information on device ID support, see “Asynchronous Shared Storage in
Disk Sets” on page
195. For more information on the metaimport command, see the
metaimport(1M) man page.
_ Howto Print a Report on Disk SetsAvailable for Import
Become superuser.
Obtain a report on disk sets available for import.
# metaimport -r -v
-r Provides a report of the unconfigured disk sets available for import on the
system.

-v Provides detailed information about the state database replica location and
status on the disks
of unconfigured disk sets available for import on the system.
Reporting on Disk SetsAvailable for Import
The following examples show how to print a report on disk sets available for
import.
# metaimport -r
Drives in regular diskset including disk c1t2d0:
c1t2d0
c1t3d0
More info:
metaimport -r -v c1t2d0
1
2
Example 25–3
Recovering Storage Froma Different System
298 Solaris VolumeManagerAdministration Guide • June 2006
Import: metaimport -s <newsetname> c1t2d0
Drives in replicated diskset including disk c1t4d0:
c1t4d0
c1t5d0
More info:
metaimport -r -v c1t4d0
Import: metaimport -s <newsetname> c1t4d0
# metaimport -r -v c1t2d0
Import: metaimport -s <newsetname> c1t2d0
Last update: Mon Dec 29 14:13:35 2003
Device offset length replica flags
c1t2d0 16 8192 a u
c1t3d0 16 8192 a u
c1t8d0 16 8192 a u
_ Howto Import a Disk Set From One System toAnother System
Become superuser.
Verify that a disk set is available for import .

# metaimport -r -v
Import an available disk set.
# metaimport -s diskset-name drive-name
- s diskset-name Specifies the name of the disk set being created.
drive-name Identifies a disk (c#t#d#) containing a state database replica from
the disk set
being imported.
Verify that the disk set has been imported.
# metaset -s diskset-name
Importing a Disk Set
The following example shows how to import a disk set.
# metaimport -s red c1t2d0
Drives in diskset including disk c1t2d0:
c1t2d0
c1t3d0
c1t8d0
# metaset -s red
1
2
3
4
Example 25–4
Recovering Storage Froma Different System
Chapter 25 • Troubleshooting Solaris Volume Manager (Tasks) 299
Set name = red, Set number = 1
Host Owner
host1 Yes
Drive Dbase
c1t2d0 Yes
c1t3d0 Yes
c1t8d0 Yes
Recovering From Disk Set Problems
The following sections detail how to recover from specific disk set related
problems.

What to Do WhenYou Cannot Take Ownership ofA
Disk Set
In cases in which you cannot take ownership of a disk set from any node
(perhaps as a result of a
system failure, disk failure, or communication link failure), and therefore
cannot delete the disk set
record, it is possible to purge the disk set from the Solaris Volume Manager
state database replica
records on the current host.
Purging the disk set records does not affect the state database information
contained in the disk set,
so the disk set could later be imported (with the metaimport command,
described at “Importing
Disk Sets” on page 210).
If you need to purge a disk set from a Sun Cluster configuration, use the
following procedure, but use
the -C option instead of the -P option you use when no Sun Cluster
configuration is present.
_ Howto Purge a Disk Set
Attempt to take the disk set with the metaset command.
# metaset -s setname -t -f
This command will attempt to take (-t) the disk set named setname forcibly (-
f). If the set can be
taken, this command will succeed. If the set is owned by another host when
this command runs, the
other host will panic to avoid data corruption or loss. If this command
succeeds, you can delete the
disk set cleanly, without the need to purge the set.
1
Recovering FromDisk Set Problems
300 Solaris VolumeManagerAdministration Guide • June 2006
If it is not possible to take the set, you may purge ownership records.
Use the metaset command with the -P to purge the disk set from the
current host.

# metaset -s setname -P
This command will purge (-P) the disk set named setname from the host on
which the command is
run.
Use the metaset command to verify that the set has been purged.
# metaset
Purging a Disk Set
host1# metaset -s red -t -f
metaset: host1: setname "red": no such set
host2# metaset
Set name = red, Set number = 1
Host Owner
host2
Drive Dbase
c1t2d0 Yes
c1t3d0 Yes
c1t8d0 Yes
host2# metaset -s red -P
host2# metaset
_ Chapter 18, for conceptual information about disk sets.
_ Chapter 19, for information about tasks associated with disk sets.
Performing Mounted Filesystem Backups Using the ufsdump
Command
The following procedure describes how to increase the performance of the
ufsdump command when
you use it to backup a mounted filesystem located on a RAID-1 volume.
2
3
Example 25–5
SeeAlso
Performing Mounted Filesystem Backups Using the ufsdump Command
Chapter 25 • Troubleshooting Solaris Volume Manager (Tasks) 301
_ Howto Perform a Backup of a Mounted Filesystem
Located on a RAID-1 Volume

You can use the ufsdump command to backup the files of a mounted
filesystem residing on a RAID-1
volume. Set the read policy on the volume to "first" when the backup utility is
ufsdump. This
improves the rate at which the backup is performed.
Become superuser.
Run the metastat command to make sure the mirror is in the “Okay”
state.
# metastat d40
d40: Mirror
Submirror 0: d41
State: Okay
Submirror 1: d42
State: Okay
Pass: 1
Read option: roundrobin (default)
Write option: parallel (default)
Size: 20484288 blocks (9.8 GB)
Amirror that is in the “Maintenance” state should be repaired first.
Set the read policy on the mirror to “first.”
# metaparam -r first d40
# metastat d40
d40: Mirror
Submirror 0: d41
State: Okay
Submirror 1: d42
State: Okay
Pass: 1
Read option: first
Write option: parallel (default)
Size: 20484288 blocks (9.8 GB)
Perform a backupthe filesystem.
# ufsdump 0f /dev/backup /opt/test

After the ufsdump command is done, set the read policy on the mirror to
“roundrobin.”
# metaparam -r roundrobin d40
# metastat d40
d40: Mirror
Submirror 0: d41
State: Okay
1
2
3
4
5
Performing Mounted Filesystem Backups Using the ufsdump Command
302 Solaris VolumeManagerAdministration Guide • June 2006
Submirror 1: d42
State: Okay
Pass: 1
Read option: roundrobin
Write option: parallel (default)
Size: 20484288 blocks (9.8 GB)
Performing System Recovery
Sometimes it is useful to boot from a Solaris OS install image on DVD or CD
media to perform a
system recovery. Resetting the root password is one example of when using
the install image is
useful.
If you are using a Solaris Volume Manager configuration, then you want to
mount the Solaris
Volume Manager volumes instead of the underlying disks. This step is
especially important if the
root (/) file system is mirrored. Because Solaris Volume Manager is part of the
Solaris OS, mounting
the Solaris Volume Manager volumes ensures that any changes are reflected
on both sides of the

mirror.
Use the following procedure to make the Solaris Volume Manager volumes
accessible from a Solaris
OS DVD or CD-ROM install image.
_ Howto Recover a System Using a Solaris Volume
Manager Configuration
Boot your system from the Solaris OS installation DVD or CD media. Perform
this procedure from
the root prompt of the Solaris miniroot.
Mount as read only the underlying disk containing the Solaris Volume
Manager configuration.
# mount -o ro /dev/dsk/c0t0d0s0 /a
Copy the md.conf file into /kernel/drv directory.
# cp /a/kernel/drv/md.conf /kernel/drv/md.conf
Unmount the file system from the miniroot.
# umount /a
Update the Solaris Volume Manager driver to load the configuration.
Ignore any warning messages
printed by the update_drv command.
# update_drv -f md
1
2
3
4
Performing System Recovery
Chapter 25 • Troubleshooting Solaris Volume Manager (Tasks) 303
Configure the system volumes.
# metainit -r
If you have RAID-1 volumes in the Solaris Volume Manager
configuration, resynchronize them.
# metasync mirror-name
Solaris Volume Manager volumes should be accessible using the mount
command.
# mount /dev/md/dsk/volume-name /a

Recovering a System Using a Solaris Volume Manager Configuration
# mount -o ro /dev/dsk/c0t0d0s0 /a
# cp /a/kernel/drv/md.conf /kernel/drv/md.conf
# umount /a
# update_drv -f md
Cannot unload module: md
Will be unloaded upon reboot.
Forcing update of md.conf.
devfsadm: mkdir fialed for /dev 0xled: Read-only file system
devfsadm: inst_sync failed for /etc/path_to_inst.1359: Read-only file system
devfsadm: WARNING: failed to update /etc/path_to_inst
# metainit -r
# metasync d0
# mount /dev/md/dsk/d0 /a
5
6
7
Example 25–6
Performing System Recovery
304 Solaris VolumeManagerAdministration Guide • June 2006
Important Solaris Volume Manager Files
This appendix contains information about Solaris Volume Manager files for
reference purposes. This
appendix contains the following:
_ “System Files and Startup Files” on page 305
_ “Manually Configured Files” on page 306
System Files and Startup Files
This section explains the files that are necessary for Solaris Volume Manager
to operate correctly.
With the exception of a few specialized configuration changes, you do not
need to access or modify
these files.
_ /etc/lvm/mddb.cf

Caution – Do not edit this file. If you change this file, you could corrupt your
Solaris Volume
Manager configuration.
The /etc/lvm/mddb.cf file records the locations of state database replicas.
When state database
replica locations change, Solaris Volume Manager makes an entry in the
mddb.cf file that records
the locations of all state databases. See the mddb.cf(4) man page for more
information.
_ /etc/lvm/md.cf
The /etc/lvm/md.cf file contains automatically generated configuration
information for the
default (unspecified or local) disk set. When you change the Solaris Volume
Manager
configuration, Solaris Volume Manager automatically updates the md.cf file
(except for
information about hot spares in use). See the md.cf(4) man page for more
information.
Caution – Do not edit this file. If you change this file, you could corrupt or be
unable to recover
your Solaris Volume Manager configuration.
AA P P E N D I X A
305
If your system loses the information that is maintained in the state database,
and as long as no
volumes were changed or created in the meantime, you can use the md.cf file
to recover your
configuration. See “How to Initialize Solaris Volume Manager From a
Configuration File”
on page 223.
_ /kernel/drv/md.conf
The md.conf configuration file is read by Solaris Volume Manager at startup.
The md.conf file

contains the state database replica configuration information. As of Solaris 10,
the nmd and
md_nsets parameters are no longer edited manually. Solaris Volume
Manager has been enhanced
to configure volumes dynamically, as needed.
_ /etc/rcS.d/S35svm.init
This file configures and starts Solaris Volume Manager at boot and allows
administrators to start
and stop the daemons.
_ /etc/rc2.d/S95svm.sync
This file checks the Solaris Volume Manager configuration at boot, starts
resynchronization of
mirrors if necessary, and starts the active monitoring daemon. (For more
information, see
mdmonitord(1M).)
Manually Configured Files
Overview of the md.tab File
The /etc/lvm/md.tab file contains Solaris Volume Manager configuration
information that can be
used to reconstruct your Solaris Volume Manager configuration. Solaris
Volume Manager can use
this file as input to the command-line utilities metainit, metadb, and metahs to
reconstruct a
configuration. Volumes, disk sets, and hot spare pools might have entries in
this file. See “How to
Create Configuration Files” on page 223 for instructions on creating this file
(by using the metastat
-p > /etc/lvm/md.tab command).
Note – The configuration information in the /etc/lvm/md.tab file might differ
from the current
volumes, hot spares, and state database replicas in use. This file is used
manually, by the system
administrator, to capture the intended configuration. After you change your
Solaris Volume

Manager configuration, recreate this file and preserve a backup copy.
Once you have created and updated the file, the metainit, metahs, and
metadb commands then
activate the volumes, hot spare pools, and state database replicas defined in
the file.
In the /etc/lvm/md.tab file, one complete configuration entry for a single
volume appears on each
line using the syntax of the metainit, metadb, and metahs commands.
Manually Configured Files
306 Solaris VolumeManagerAdministration Guide • June 2006
Note – If you use the metainit -an command to simulate initializing all of the
volumes in the md.tab
file, you might see error messages for volumes that have dependencies on
other volumes defined in
md.tab. These error messages occur because Solaris Volume Manager does
not maintain state of the
volumes that would have been created when running metainit -an. Each line is
evaluated based on
the existing configuration, if a configuration exists. Therefore, even if it
appears that the metainit
-an command would fail, it might succeed without the -n option.
You then run the metainit command with either the -a option, to activate all
volumes in the
/etc/lvm/md.tab file, or with the volume name that corresponds to a specific
entry in the file.
Note – SolarisVolume Manager does not write to or store configuration
information in the
/etc/lvm/md.tab file. You must manually edit the file and run the metainit,
metahs, or metadb
commands to create Solaris Volume Manager components.
For more information, see the md.tab(4) man page.
Manually Configured Files
AppendixA • Important Solaris Volume Manager Files 307
308

Solaris Volume Manager Quick Reference
This appendix provides quick access information about the features and
functions available with
Solaris Volume Manager.
Command-Line Reference
Listed here are all the commands that you use to administer Solaris Volume
Manager. For more
detailed information, see the man pages.
TABLE B–1 SolarisVolume Manager Commands
Solaris Volume
ManagerCommand Description Man page
growfs Expands a UFS file system in a nondestructive fashion. growfs(1M)
metaclear Deletes active volumes and hot spare pools. metaclear(1M)
metadb Creates and deletes state database replicas. metadb(1M)
metadetach Detaches a volume from a RAID-0 or RAID-1 (mirror)
volume, or a log device from a transactional volume.
Note – Transactional volumes are no longer supported.
metadetach(1M)
metadevadm Checks device ID configuration. metadevadm(1M)
metahs Manages hot spares and hot spare pools. metahs(1M)
metaimport Import disk sets, including replicated disk sets, into
existing Solaris Volume Manager configurations that
have device ID support in the disk set.
metaimport(1M)
metainit Configures volumes. metainit(1M)
metaoffline Places submirrors offline. metaoffline(1M)
BA P P E N D I X B
309
TABLE B–1 SolarisVolume Manager Commands (Continued)
Solaris Volume
ManagerCommand Description Man page
metaonline Places submirrors online. metaonline(1M)
metaparam Modifies volume parameters. metaparam(1M)

metarecover Recovers configuration information for soft partitions.
metarecover(1M)
metarename Renames and exchanges volume names. metarename(1M)
metareplace Replaces components in submirrors and RAID-5
volumes.
metareplace(1M)
metaroot Sets up system files for mirroring the root (/) file system.
metaroot(1M)
metaset Administers disk sets. metaset(1M)
metastat Displays the status of volumes or hot spare pools. metastat(1M)
metasync Resynchronizes volumes during reboot. metasync(1M)
metattach Attaches a component to a RAID-0 or RAID-1 volume.
metattach(1M)
Command-Line Reference
310 Solaris VolumeManagerAdministration Guide • June 2006
Solaris Volume Manager CIM/WBEMAPI
Managing Solaris Volume Manager
The Solaris Volume Manager CIM/WBEMApplication Programming Interface
(API) provides a
public, standards-based programmatic interface to observe and configure
Solaris Volume Manager.
This API is based on the Distributed Management Task Force (DMTF)
Common Information
Model (CIM). For more information about DMTF, see http://www.dmtf.org.
CIM defines the data model, referred to as the “schema“ which describes the
following:
_ Attributes of and the operations against Solaris Volume Manager devices
_ Relationships among the various Solaris Volume Manager devices
_ Relationships among the Solaris Volume Manager devices and other
aspects of the operating
system, such as file systems
This model is made available through the SolarisWeb Based Enterprise
Management (WBEM) SDK.

TheWBEMSDK is a set of JavaTM technology-based API’s that allow access
to system management
capabilities that are represented by CIM.
For more information about the CIM/WBEM SDK, see the
SolarisWBEMDeveloper’s Guide.
CA P P E N D I X C
311
312
Index
A
adding a host to a disk set, 201-202
adding disks to a disk set, 200
adding hot spares, 178
administering disk sets, 188-194
application based recovery, 54-56
automatic disk partitioning, 191-193
autotake disk set, 186
B
boot problems, 281-288
booting into single-user mode, 102
C
changing default values, 225
checking status of a disk set, 204
component, definition of, 73
concatenated stripe
See RAID–0 (concatenated stripe volume
definition
See also RAID–0 (concatenated stripe) volume
removing, 90
concatenation
creating, 86
definition
See also RAID–0 (concatenation) volume
example with three slices, 77

expanding, 89
expanding UFS file system, 76
removing, 90
concatenation (Continued)
usage, 76
concatenation volume, See RAID–0 (concatenation)
volume
configuration, viewing, 216-220
configuration file, creating, 223-225
configuration planning
guidelines, 29
overview, 29
trade-offs, 30
creating a disk set, 198-199
creating components in a disk set, 202-203
creating configuration files, 223-225
cron command, 262
D
deleting a disk set, 208-210
deleting a host from a disk set, 208-210
deleting disks from a disk set, 204-205
device ID, formats of, 279-281
directed mirror reads, 54-56
disk set, 186
adding disks to, 200
adding host to, 201-202
administering, 188-194
asynchronous shared storage, 195
automatic disk partitioning, 191-193
autotake, 186
checking status, 204
creating, 198-199
creating components, 202-203
definition, 37, 43
313
disk set (Continued)
deleting a disk set, 208-210
deleting a host from a disk set, 208-210
deleting disks, 204-205
example with two shared disk sets, 193
guidelines, 194-195
importing, 190-191
local, 186
multi-owner, 186
See multi-owner disk set
named, 186
naming conventions, 193
releasing, 190, 207-208
reserving, 189-190, 207
scenario, 195
shared, 186
taking, 205-207
usage, 186
disk sets
importing, 210-214
maximum number supported, 225
DiskSuite Tool, See graphical interface
E
enabling a slice in a RAID-5 volume, 168
enabling a slice in a submirror, 126
Enhanced Storage, See graphical interface
error checking, 258-259
errors, checking for using a script, 262-271
/etc/lvm/md.cf file, 305
/etc/lvm/mddb.cf file, 305
/etc/rc2.d/S95lvm.sync file, 306
/etc/rcS.d/S35lvm.init file, 306
/etc/vfstab file, 140

recovering from improper entries, 282
exchanging volume names, 221
F
failover configuration, 43
file system
expanding, 225-227
expanding by creating a concatenation, 88
file system (Continued)
expansion overview, 39
guidelines, 43
unmirroring, 142
first read policy, 100
fmthard command, 287, 289
format command, 287, 289
G
general performance guidelines, 30
geometric read policy, 100
graphical interface, overview, 34
growfs command, 225-227, 309
growfs command, 39, 227
GUI, sample, 35
H
hot spare
adding to a hot spare pool, 178
conceptual overview, 172
definition, 172
enabling, 184
how hot spares work with Solaris Volume
Manager, 172
replacing in a hot spare pool, 183
hot spare pool, 42
adding slices to, 177-178
associating, 179
associating with a volume, 178-181

basic operation, 42
changing association, 180
changing association of, 179-181
checking status, 181-184
conceptual overview, 171-174
creating, 176-177
definition, 37, 42, 172
deleting hot spare, 183-184
example with mirror, 173
maintaining, 181-184
replacing hot spare, 182-183
states, 173
Index
314 Solaris VolumeManagerAdministration Guide • June 2006
I
I/O, 31
importing a disk set, 190-191
install program, system recovery, 303-304
interfaces, See Solaris Volume Manager interfaces
interlace, specifying, 85
interlace value, 74
K
/kernel/drv/md.conf file, 306
L
local disk set, 186
lockfs command, 144
M
majority consensus algorithm, 61
master node, 51-53
md.cf file, 306
recovering a Solaris Volume Manager
configuration, 223
md.tab file, 224
overview, 306-307

mdmonitord command, 258-259
metaclear command, 309
metaclear command, 90, 137, 138, 140-142
metadb command, 309
metadb command, 71
metadb command, replacing a failed disk and, 276
metadetach command, 309
metadetach command, 124, 137, 138
metadevadm command, 309
replacing a failed disk and, 276
metadevice, See volume
metahs command, 309
adding slices to a hot spare pool, 177-178
deleting hot spare, 183-184
enabling, 184
replacing a failed disk and, 276
replacing hot spare, 182-183
metaimport command, 190-191, 210-214, 298-300, 309
metainit command, 309
metainit command, 224
metainit command, creating hot spare pool, 176-177
metaoffline command, 309
metaoffline command, 125
metaonline command, 310
metaparam command, 310
metaparam command, 129
metaparam command
associating hot spare pool with volume, 178-181
changing association of hot spare pool, 179-181
metarecover command, 310
replacing a failed disk and, 276
metarename command, 221, 310
metarename command, 222
metareplace command, 310

metareplace command, 126, 168, 288
metareplace command, replacing a failed disk and, 276
metaroot command, 310
metaset command, 310
adding a host to a disk set, 201-202
adding disks to a disk set, 200
checking status of a disk set, 204
creating a disk set, 198-199
deleting a disk set, 208-210
deleting a host from a disk set, 208-210
deleting disks from a disk set, 204-205
releasing a disk set, 207-208
taking a disk set, 205-207
metastat command, 310
metastat command, 128, 165
metasync command, 310
metattach
task, 111, 115, 121
metattach command, 310
metattach command, 89, 123, 130
attach RAID-5 component, 167
attach submirror, 225
mirror
See RAID-1 Volume
See also RAID-1 volume
and online backup, 143
attaching a submirror, 123
changing options, 129
creating, 107-122
Index
315
mirror (Continued)
definition, 38
example with two submirrors, 94-95

expanding, 130
replacing and enabling components, 161
resynchronization, 96, 97
canceling, 130-132
resuming, 133-135
sample status output, 127
two-way mirror, 245, 248-250, 250-251, 253-254, 254,
255
updating the size of, 129-130
mirroring
file system, 109-113
file system that can be unmounted, 111
read and write performance, 30
root (/), /usr, and swap, 112
root file system
SPARC, 113-117
x86, 117-122
multi-owner disk set, 186
defined, 49-50
device id support, 49-50
importing, 49-50
master node, 51-53
multi-owner disk sets
RAID-1 volumes, 54-56
tasks, 52-53
N
named disk set, 186
O
Oracle Real Application Clusters, 49-50
P
parallel access, definition of, 74
parallel write policy, 100
pass number
and read-only mirror, 96

pass number (Continued)
defined, 100
prtconf command, viewing device IDs, 279-281
R
RAID, levels supported in Solaris Volume Manager, 28
RAID-0 (stripe) Volume, example with three slices, 74
RAID-0+1, 95
RAID-0 volume
definition, 73
usage, 73
RAID-1+0, 95
RAID-1 Volume, 93-95
booting into single-user mode, 102
RAID-1 volume
creating, 107-122
information for replacing and enabling
components, 230-231
maintenance vs. last erred, 229-230
RAID-1 Volume
mirror, 93-95
options, 99-100
pass number, 100
RAID-0+1, 95
RAID-1+0, 95
read-and-write policies, 100
RAID-1 volume
replacing and enabling components, 228-231
RAID-1 Volume
submirror, 93-95
RAID-5 volume
and interlace, 158
checking status of, 165-166
creating, 164-165
definition, 28, 38

enabling a component, 167-168
enabling a failed slice, 168
example with an expanded device, 157
example with four disks, 156
expanding, 166-167, 167
guidelines, 158
information for replacing and enabling
components, 230
maintenance vs. last erred, 229-230
Index
316 Solaris VolumeManagerAdministration Guide • June 2006
RAID-5 volume (Continued)
overview, 155-158
parity calculations, 158
parity information, 155, 157
replacing a component, 168-170
replacing a failed slice, 170
replacing and enabling components, 161, 228-231
requirements for, 158-159
resynchronizing slices, 155
slice states, 159-161
states, 159-161
tasks, 163-164
RAID–0 (concatenated stripe) volume
example with three stripes, 78
interlace value for, 77
RAID–0 (concatenation) volume, information for
creating, 80
RAID–0 (stripe) volume, 74
information for creating, 80
RAID–0 volume
guidelines, 80
types of, 73
random I/O, 31-32

releasing a disk set, 190, 207-208
renaming volumes, 220
repartitioning a disk, 191-193
replica, 42
reserving a disk set, 189-190
resynchronization
canceling, 130-132
full, 96
optimized, 96
partial, 97
resuming, 133-135
round-robin read policy, 100
S
SCSI disk
replacing, 276, 278
sequential I/O, 32
serial write policy, 100
Service Management Facility (SMF), See SMF
shared disk set, 186
simple volume, definition, 38
slices, expanding, 88
small servers, overview of deploying, 233-234
SMF
Solaris Volume Manager services, 46-47
upgrading Solaris Volume Manager and, 46-47
soft partition
creating, 150-151
deleting, 153
recovering configuration for, 291
removing, 153
soft partitions, 147-148
checking status of, 151-153
definition, 147
expanding, 152-153

guidelines, 148
locations, 147
maintaining, 151-153
tasks, 149
Solaris Volume Manager
See Solaris Volume Manager
configuration guidelines, 43
networked storage devices and, 235
Oracle Real Applications Clusters and, 49-50
recovering the configuration, 223
Sun Cluster and, 49-50
Solaris Volume Manager elements, overview, 37
Solaris Volume Manager for Sun Cluster
application based recovery, 54-56
configuration, 53-54
data management and recovery, 54-56
directed mirror reads, 54-56
optimized resynchronization, 54-56
software components, 50
timeouts, 53-54
Solaris Volume Manager interfaces
command line, 35
sample GUI, 35
Solaris Management Console, 35
state database
conceptual overview, 42, 62
corrupt, 61
definition, 37, 42
state database replica
criteria for disk set, 191-193
size of, 191-193
state database replicas, 42
Index
317

state database replicas (Continued)
adding larger replicas, 71
basic operation, 61
creating multiple on a single slice, 63-64
definition, 42
errors, 65
location, 42, 63-64
minimum number, 63-64
two-disk configuration, 64-65
usage, 61
status, 204
stripe
creating, 85
definition
See also RAID–0 (stripe) volume
expanding, 89
removing, 90
stripe volume, See RAID–0 (stripe) volume
striping, definition, 74
submirror, 93-94
See RAID-1 Volume
attaching, 94
detaching, 94
enabling a failed slice, 126
operation while offline, 94
replacing a failed slice, 136
replacing entire, 138
Sun Cluster, 49-50
svc-mdmonitor script, 258-259
swap, unmirroring, 142
system files, 305-306
system recovery from install program, 303-304
T
taking a disk set, 205-207

topdown volume creation
defaults, 254-255
RAID 1 volume, creating, 243-246
shell script, 246-254
volume configuration file, 252
troubleshooting
boot problems, 281-288
device ID discrepancies, 279-281
general guidelines, 275
troubleshooting (Continued)
importing a disk set, 298-300
improper /etc/vfstab file entries, 282
metaimport command, 298-300
recovering from disk movement problems, 278
replacing a failed disk, 276
V
/var/adm/messages file, 228
replacing a failed disk, 276
viewing Solaris Volume Manager configuration, 216-220
volume
conceptual overview, 37
definition, 37
exchanging name, 221
expanding disk space, 39-40
renaming, 222
types, 38
uses, 38
using file system commands on, 38
virtual disk, 34
volume name switching, 41
volumes, maximum number supported, 225
Index
318 Solaris VolumeManagerAdministration Guide • June 2006