5.3.2.8 Lab - Configure Browser Settings in Windows Vista · 5.3.2.8 Lab - Configure Browser...
11
© 2013 Cisco and/or its affiliates. All rights reserved. This document is Cisco Public. Page 1 of 11 IT Essentials 5.0 5.3.2.8 Lab - Configure Browser Settings in Windows Vista Introduction Print and complete this lab. In this lab, you will configure browser settings in Microsoft Internet Explorer. Recommended Equipment • A computer with Windows Vista • An Internet connection Step 1 Choose Start > Start Search. Type www.cisco.com, and click Search the Internet. Which browser was used to open the web page? If you did not answer “Internet Explorer”, make Internet Explorer your default browser. Choose Start > All Programs > Internet Explorer.
Transcript of 5.3.2.8 Lab - Configure Browser Settings in Windows Vista · 5.3.2.8 Lab - Configure Browser...
© 2013 Cisco and/or its affiliates. All rights reserved. This document is Cisco Public. Page 1 of 11
IT Essentials 5.0
5.3.2.8 Lab - Configure Browser Settings in Windows Vista Introduction Print and complete this lab. In this lab, you will configure browser settings in Microsoft Internet Explorer. Recommended Equipment
• A computer with Windows Vista • An Internet connection
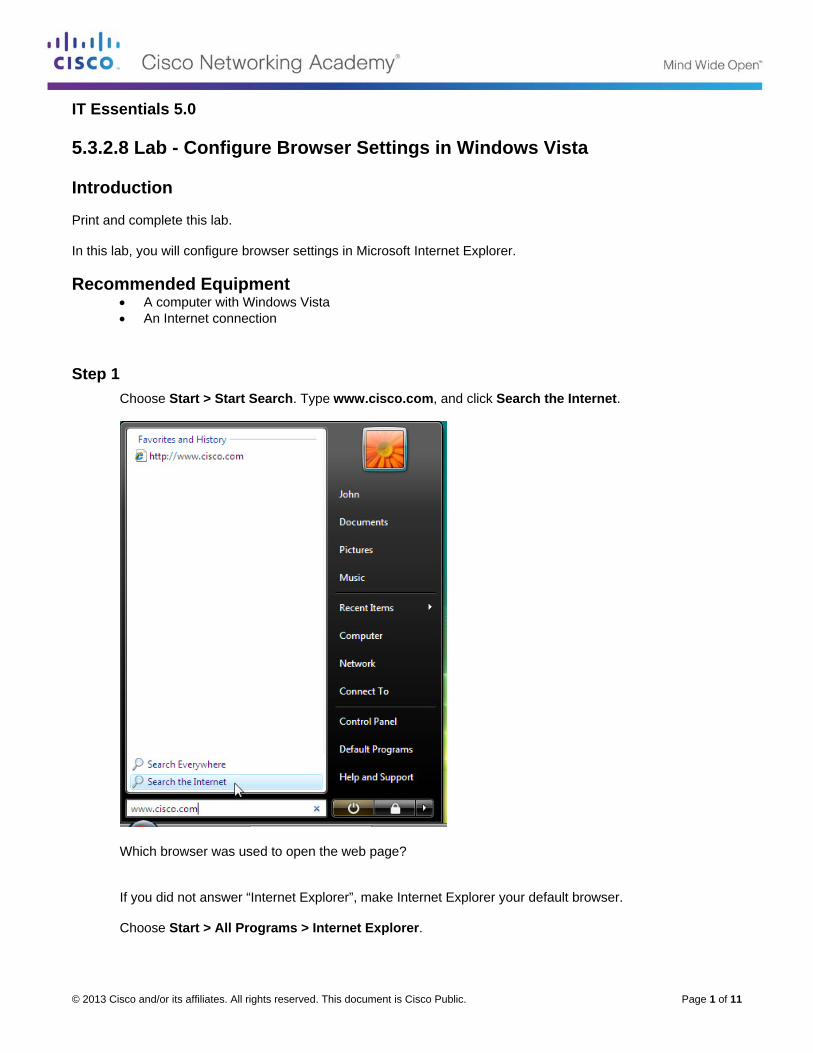
Step 1 Choose Start > Start Search. Type www.cisco.com, and click Search the Internet.
Which browser was used to open the web page? If you did not answer “Internet Explorer”, make Internet Explorer your default browser. Choose Start > All Programs > Internet Explorer.

IT Essentials Chapter 5 Lab
© 2013 Cisco and/or its affiliates. All rights reserved. This document is Cisco Public. Page 2 of 11
Choose Tools > Internet Options, and then click the Programs tab.
Select Tell me if Internet Explorer is not the default web browser. and then click OK. Close the browser. Choose Start > All Programs > Internet Explorer. Click Yes to make Internet Explorer the default browser.
Click Help > About Internet Explorer.
Which version of Internet Explorer is installed on your computer?
Step 2 Choose Tools > Internet Options. The “Internet Options” window opens.

IT Essentials Chapter 5 Lab
© 2013 Cisco and/or its affiliates. All rights reserved. This document is Cisco Public. Page 3 of 11
Click the Settings button in the “Browsing history” section. The “Temporary Internet Files and History Settings” window opens.

IT Essentials Chapter 5 Lab
© 2013 Cisco and/or its affiliates. All rights reserved. This document is Cisco Public. Page 4 of 11
Which setting is configured to “Check for newer versions of stored pages”? How many days is “History” set to store visited websites? Click the View files button. The “Temporary Internet Files” window opens.

IT Essentials Chapter 5 Lab
© 2013 Cisco and/or its affiliates. All rights reserved. This document is Cisco Public. Page 5 of 11
How many temporary Internet files were listed? Close the “Temporary Internet Files” window. Close the “Temporary Internet Files and History Settings” window
Click the Delete button in the “Browsing history” section.

IT Essentials Chapter 5 Lab
© 2013 Cisco and/or its affiliates. All rights reserved. This document is Cisco Public. Page 6 of 11
The “Delete Browsing History” window opens.
Which options are there for deleting browsing history? Remove all selected options except for Temporary Internet files. Click Delete. When completed, you will see this message in the browser.
Click the Settings button, and then click the View files button.

IT Essentials Chapter 5 Lab
© 2013 Cisco and/or its affiliates. All rights reserved. This document is Cisco Public. Page 7 of 11
How many temporary Internet files were listed? Close all opened windows.
Step 3 Open up Internet Explorer and visit a few web sites all with the same tab. Click the down arrow at the right end of the “address” field to view previously visited sites.
How many sites are listed in the drop-down box for “History”? To clear the browser history, choose Tools > Internet Options > Delete.
IT Essentials Chapter 5 Lab
© 2013 Cisco and/or its affiliates. All rights reserved. This document is Cisco Public. Page 8 of 11
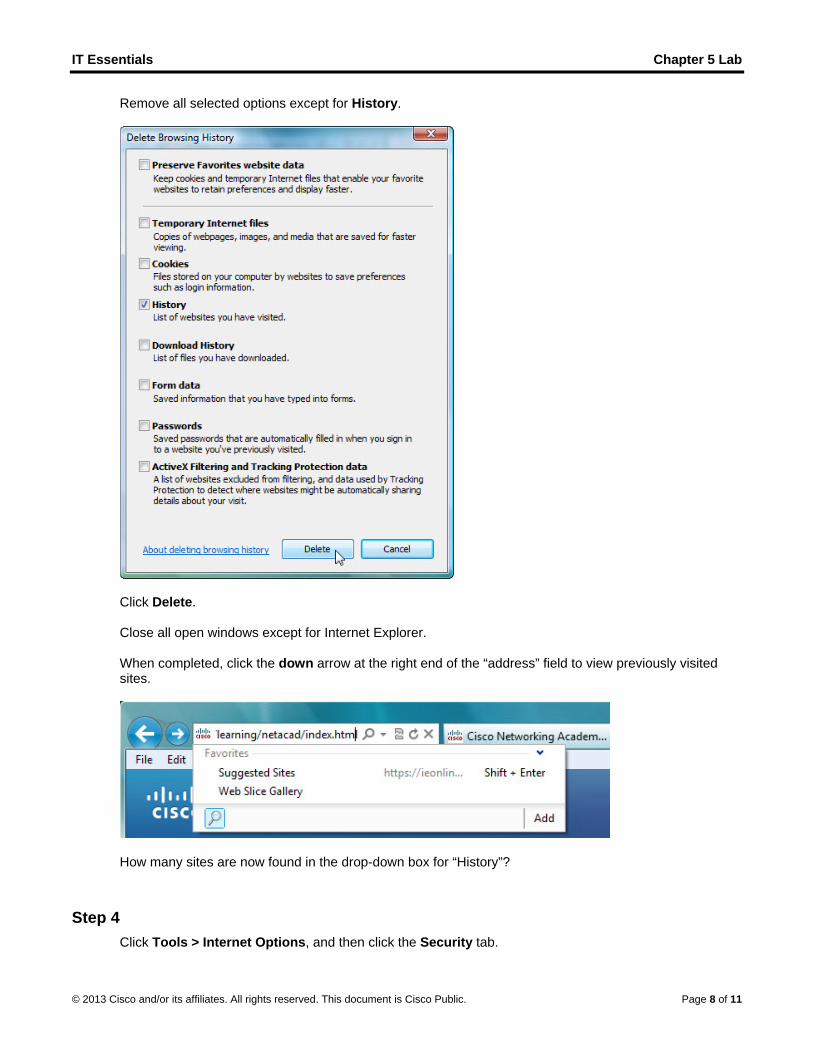
Remove all selected options except for History.
Click Delete. Close all open windows except for Internet Explorer. When completed, click the down arrow at the right end of the “address” field to view previously visited sites.
How many sites are now found in the drop-down box for “History”?
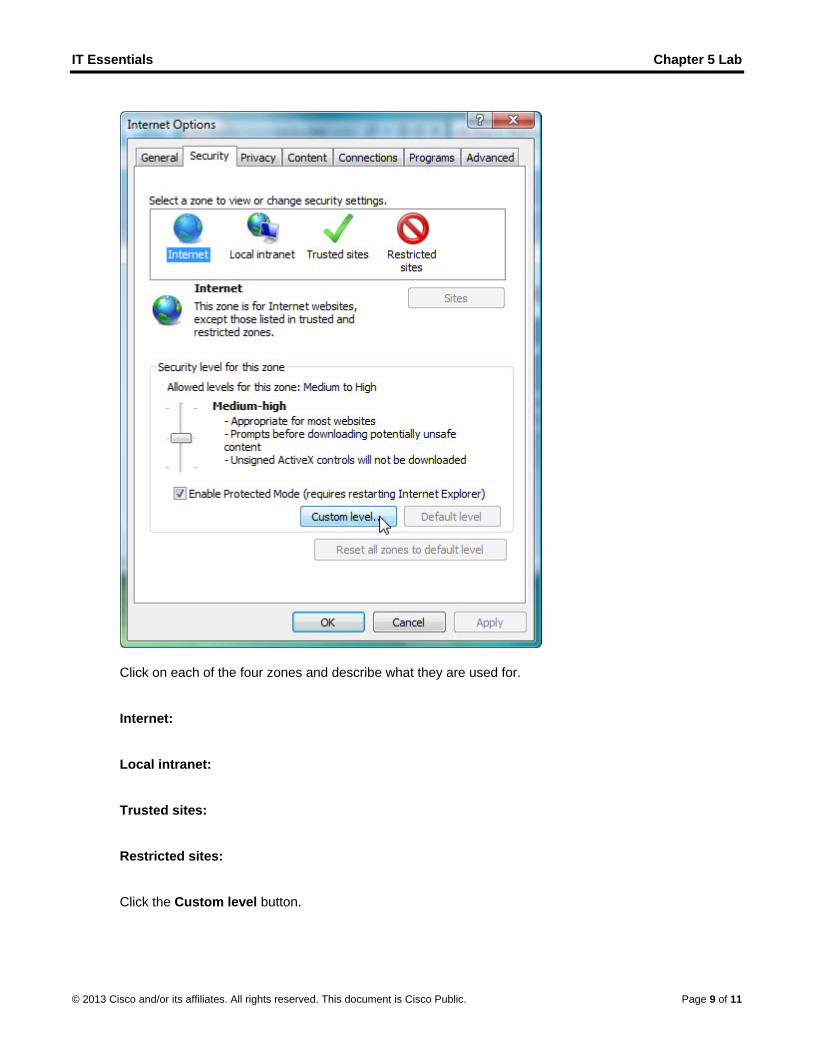
Step 4 Click Tools > Internet Options, and then click the Security tab.
IT Essentials Chapter 5 Lab
© 2013 Cisco and/or its affiliates. All rights reserved. This document is Cisco Public. Page 9 of 11
Click on each of the four zones and describe what they are used for. Internet: Local intranet: Trusted sites: Restricted sites: Click the Custom level button.

IT Essentials Chapter 5 Lab
© 2013 Cisco and/or its affiliates. All rights reserved. This document is Cisco Public. Page 10 of 11
The “Security Settings – Internet Zone” window opens.
Here is where you select the options in the list that you wish to change for a zone. Click OK.
Step 5 Click the Privacy tab > Advanced.

IT Essentials Chapter 5 Lab
© 2013 Cisco and/or its affiliates. All rights reserved. This document is Cisco Public. Page 11 of 11
The “Advanced Privacy Settings” window opens.
Set the following settings: Override automatic cookie handling box has a check mark. First-party Cookies is set to Accept. Third-party Cookies is set to Prompt. Click OK.