
43038 CH34 0319d2jw81rkebrcvk.cloudfront.net/...10e/...CH34.pdf · 43038_CH34_0319.qxd 1/3/07 3:59...
18
Microbiology of Soil icroorganisms enhance the quality of life through their activ- ities in the soil. The bacteria, fungi, and other microbes play substantial roles in the carbon, sulfur, and nitrogen cycles in the environment. In addition, many soil microorganisms produce the anti- biotics used in medicine. In the first part of this exercise, certain bacteria will be observed in their natural habitat in the soil and isolated from the roots of plants. Other sections deal with important aspects of the nitrogen and carbon cycles and the production of antibiotic substances. A determination also will be made of the number of bacteria in a gram of soil. Isolation of Rhizobium from Legume Roots Members of the genus Rhizobium are gram-negative bacteria that live in a symbiotic relationship with legumes (plants that bear their seeds in pods). The bacteria live in nodules on the legume roots and trap atmospheric nitrogen and convert it to ammonia. The excess ammonia is released by the bacteria and becomes available to the plant as part of the nitrogen cycle in the soil. In this section, Rhizobium species will be observed from root nodules and cultivated on Emerson agar. This medium contains yeast extract and glu- cose, which encourage the growth of rhizobia, as well as cycloheximide, a drug that inhibits eukaryotic protein synthesis and therefore mold growth. pecial Materials • Leguminous plants, such as peas, beans, or clover • Crystal violet or methylene blue • Plates of Emerson agar containing cycloheximide rocedure 1. Obtain a fresh legume plant, and examine the roots for nodules, which contain Rhizobium species. Select one nodule, and clean it thoroughly before proceeding. 2. Place a drop of water on a clean slide, and crush the nodule in the water, using a convenient instrument such as the edge of a second slide. This will produce a milky suspension. P S A. MICROBIOLOGY OF SOIL 34 319 34 M PURPOSE: to isolate Rhizobium and observe cell morphology.
Transcript of 43038 CH34 0319d2jw81rkebrcvk.cloudfront.net/...10e/...CH34.pdf · 43038_CH34_0319.qxd 1/3/07 3:59...

Microbiology of Soil
icroorganisms enhance the quality of life through their activ-ities in the soil. The bacteria, fungi, and other microbes playsubstantial roles in the carbon, sulfur, and nitrogen cycles in
the environment. In addition, many soil microorganisms produce the anti-biotics used in medicine.
In the first part of this exercise, certain bacteria will be observed intheir natural habitat in the soil and isolated from the roots of plants. Othersections deal with important aspects of the nitrogen and carbon cycles andthe production of antibiotic substances. A determination also will be madeof the number of bacteria in a gram of soil.
Isolation of Rhizobium from Legume Roots
Members of the genus Rhizobium are gram-negative bacteria that live in asymbiotic relationship with legumes (plants that bear their seeds in pods). Thebacteria live in nodules on the legume roots and trap atmospheric nitrogenand convert it to ammonia. The excess ammonia is released by the bacteriaand becomes available to the plant as part of the nitrogen cycle in the soil.
In this section, Rhizobium species will be observed from root nodules andcultivated on Emerson agar. This medium contains yeast extract and glu-cose, which encourage the growth of rhizobia, as well as cycloheximide, adrug that inhibits eukaryotic protein synthesis and therefore mold growth.
pecial Materials
• Leguminous plants, such as peas, beans, or clover• Crystal violet or methylene blue• Plates of Emerson agar containing cycloheximide
rocedure
1. Obtain a fresh legume plant, and examine the roots for nodules, whichcontain Rhizobium species. Select one nodule, and clean it thoroughly beforeproceeding.
2. Place a drop of water on a clean slide, and crush the nodule in the water,using a convenient instrument such as the edge of a second slide. Thiswill produce a milky suspension.
P
S
A.
M I C R O B I O L O G Y O F S O I L 34 319
34
M
PURPOSE: to isolateRhizobium and observe cellmorphology.
43038_CH34_0319.qxd 1/3/07 3:59 PM Page 319

3. Transfer a loopful of the suspension to a slide, air-dry and heat-fix thesmear, and perform a simple stain using crystal violet (Exercise 4B). Ob-serve the pleomorphic rods under oil immersion, and note the X, Y, star,club, and other shapes characteristic of Rhizobium species. A representa-tion should be entered in the Results section.
4. Obtain a second loopful of the suspension, and streak it for isolated colonieson Emerson agar as described in Exercise 6A. Incubate the plate at 25° C orroom temperature for 1 week. Examine the plate for colonies with a glisteningappearance that are white at the edges. Prepare Gram stains of samples ofprospective Rhizobium colonies, and note whether small gram-negativerods are present. Representations may be drawn in the Results section.
Ammonification by Soil Microorganisms
An important aspect of the nitrogen cycle takes place when soil bacteriaconvert protein to amino acids and then digest the amino acids to yield am-monia. This process, known as ammonification, is critical to the cycle be-cause the ammonia is next converted to nitrite or the nitrogen is releasedto the atmosphere. In this section, ammonification will be demonstrated byincubating soil bacteria in a protein solution and then testing for the pres-ence of ammonia.
pecial Materials
• Tubes of peptone broth• Samples of rich soil• Depression plates• Nessler’s reagent in dropper bottles• Test tubes
rocedure
1. Suspend a 1-gram sample of rich soil in several milliliters of water in a testtube. Obtain a tube of peptone broth, and label it in the prescribed manner.
2. Inoculate the peptone broth with two loopfuls of the soil suspension, andincubate the tube at room temperature for 48 hours. An uninoculated con-trol tube should be included.
3. Test the broth for the presence of ammonia by adding a loopful of broth toa drop of Nessler’s reagent in one area of a depression plate or on aslide. Mix the reactants well. A loopful of the uninoculated control brothshould be combined with a second drop of Nessler’s reagent in a secondarea and mixed.
4. Observe for a faint yellow color in the experimental mixture, which in-dicates a “trace” amount of ammonia. A deep yellow color points to a“moderate amount” of ammonia, while a brown color indicates a “largeamount” of ammonia. The control broth should show no color change.Note the incubation period tested and the amount of ammonia produced
P
S
B.
320 34 M I C R O B I O L O G Y O F S O I L
PURPOSE: to detect theprocess of ammonification.
43038_CH34_0319.qxd 1/3/07 3:59 PM Page 320

M I C R O B I O L O G Y O F S O I L 34 321
in Table 34.1 of the Results section. This test should be repeated afteradditional incubation periods, and the relative amount of ammonia pre-sent should be indicated.
Isolation of Streptomyces from Soil
Streptomyces species commonly found in the soil produce many of the an-tibiotics used in medicine. These organisms grow well on Emerson agarwith cycloheximide to inhibit the proliferation of molds. In this section,Streptomyces species will be isolated from the soil.
pecial Materials
• Plates of Emerson agar with cycloheximide• Sample of rich soil• Sterile swabs and disinfectant
rocedure
1. Suspend a sample of soil in water as described in Part B. Prepare or selecta plate of Emerson agar, and label it in the prescribed manner.
2. Obtain a loopful of the soil suspension, and streak it for isolated colonies asoutlined in Exercise 2A (Figure 2.1). Incubate the plate at room tempera-ture for 1 week.
3. Examine the plate for hard white colonies shaped like tiny volcanoes.These are possible Streptomyces species. The material in the colony will bedry and difficult to remove, but a section should be pried from the edge ofthe colony and examined in a wet mount preparation under the high-power (40x) lens. A comparison to fungal hyphae should be made, and arepresentation should be placed in the Results section. Be careful not to con-fuse the organism’s conidiospores with cocci. When your observationsare complete, place the wet mount in a beaker of disinfectant to kill the cells.
Antibiotic Production by Streptomyces
The ability to produce antibiotics may be examined in isolated species ofStreptomyces by incubating the organism with certain test organisms anddetermining whether an inhibition of the test organism takes place. Themethod is outlined in this section.
pecial Materials
• Plates of Emerson agar with cycloheximide• Broth tubes of selected bacterial species
S
D.
P
S
C.
PURPOSE: to isolate Strepto-myces species and detect an-tibiotic production.
PURPOSE: to perform aninhibition test to screen forantibiotic production.
43038_CH34_0319.qxd 1/3/07 3:59 PM Page 321

322 34 M I C R O B I O L O G Y O F S O I L
• Sterile swabs and disinfectants• Rich soil samples• Plates from Part C
rocedure
1. Obtain or prepare a plate of Emerson agar, and label it in the prescribedmanner.
2. Using the bacteriological loop, take a section of the Streptomyces colonyidentified in Part C, and make a single streak across the center of the plate,as shown in Figure 34.1. Because the inoculum is dry, slight pressure maybe needed to ensure that the organisms have been deposited on the plate.Incubate the plate at room temperature for 3 to 4 days until the growth ofthe Streptomyces is apparent.
3. After the initial incubation period, make single streaks of available testorganisms at right angles to the Streptomyces streak, using different sterileswabs for each organism (Figure 34.1). Be careful not to touch the Strep-tomyces growth with the swab. Reincubate the plate for an additional weekat room temperature.
4. Examine the growth of the test organisms where the streak crosses that ofStreptomyces. Note a reduction in the amount of growth of the test organ-ism, indicative of antibiotic activity. Illustrate your results in the appropriatespace.
5. It may also be possible to test antibiotic activity of various soil bacteriaby swabbing a plate of Emerson agar with a test organism and thenlightly sprinkling a tiny amount of soil over the growth. As soil organismsproliferate, certain ones will produce antibiotic substances that inhibit the growth of the test organism. Colonies of soil bacteria will besurrounded by clear zones of inhibition where antibiotic activity hastaken place. A representation of the plate should be placed in the Resultssection.
P
!Avoid carrying Petri dishescontaining bacterial coloniesplus additives over to yourinstructor to give him or hera look. Ask the instructor tostop by your desk to see yourresults.
Test organism #1
Test organism #2
Test organism #3
Streptomyces
F I G U R E 3 4 . 1Procedure for testing antibioticactivity of Streptomyces onvarious test organisms.
43038_CH34_0319.qxd 1/3/07 3:59 PM Page 322

M I C R O B I O L O G Y O F S O I L 34 323
Plate Count of Soil Bacteria
Some samples of rich soil may contain over a million bacteria per gram. Thebacteria add to the fertility of the soil and, with the fungi, serve as the pri-mary decomposers of organic material. In this section, a determinationwill be made of the quantity of bacteria in a soil sample.
pecial Materials
• Samples of rich soil• Sterile Petri dishes• Sterile 1.1-ml pipettes and mechanical pipetters• Sterile 99-ml water dilution blanks• Melted nutrient agar
rocedure
1. Obtain two sterile 99-ml water dilution blanks, a sterile 1.1-ml pipette,and four sterile Petri dishes. Label the dishes with your name, the date, andthe designations 1:100, 1:1000, 1:10,000, and 1:100,000.
2. Weigh 1 gram of rich soil and add it to the first dilution blank. Shake the bot-tle vigorously for 2 minutes. Allow the large particles to settle. Using a me-chanical pipetter, pipette 0.1 ml of the fluid to the plate labeled 1:1000, and1.0 ml to the plate labeled 1:100. Be careful to avoid airborne contamination.
3. Using a mechanical pipetter, pipette 1 ml from the first dilution blank to thesecond 99-ml dilution blank, then draw up and release the fluid severaltimes to wash out the pipette. Shake the bottle vigorously for 2 minutes.Pipette 0.1 ml to the 1:100,000 plate, and 1.0 ml to the 1:10,000 plate. Thepipette may now be discarded.
4. Aseptically add to each plate enough melted nutrient agar to cover thebottom. Mix the medium and fluid by rotating the plates in a wide arc. Afterthe medium has solidified, invert the plates and incubate them at 37° C. Soilbacteria tend to grow rapidly, so a 24-hour incubation time or less shouldbe sufficient. Refrigerate the plates until observed.
5. Observe the plates, and perform a plate count as described in step 7 ofExercise 32A. Enter the plate count per gram of soil in Table 34.2 of theResults section. Consult with the instructor if you wish to examine thevarious types of bacteria that have appeared in the plates.
Microbial Ecology in the Soil—The Winogradsky Column
Microorganisms live in a complex ecological system where changing envi-ronments stimulate the emergence of various microbial populations includ-ing bacteria, cyanobacteria (formerly called blue-green algae), protozoa,
F.
P
S
E.
Quick ProcedureStandard PlateCount (Soil)
1. Blend soil sample withsterile water in firstdilution blank andshake.
2. Pipette 1.0 and 0.1 mlsamples of diluted soilto Petri dishes.
3. Pipette 1.0 ml dilutedsoil to a second 99-mlwater blank and shake.
4. Pipette 1.0 and 0.1 mlsamples of diluted soilfrom the second waterblank to Petri dishes.
5. Add liquid nutrientagar to all Petri dishesand mix.
6. Incubate.
7. Perform colony countsand locate valid count.
8. Multiply valid count bydilution factor.
PURPOSE: to quantify soilbacteria.
PURPOSE: to study theemergence of microbialpopulations in a constructedecosystem.
43038_CH34_0319.qxd 1/3/07 3:59 PM Page 323
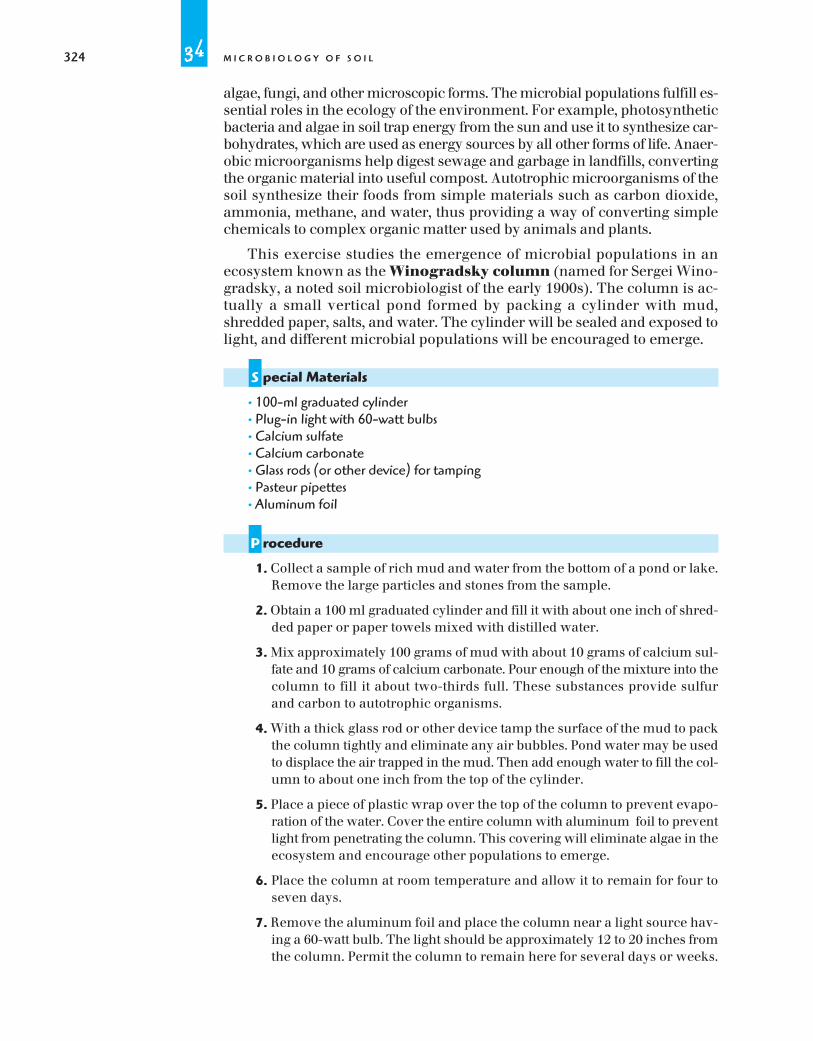
algae, fungi, and other microscopic forms. The microbial populations fulfill es-sential roles in the ecology of the environment. For example, photosyntheticbacteria and algae in soil trap energy from the sun and use it to synthesize car-bohydrates, which are used as energy sources by all other forms of life. Anaer-obic microorganisms help digest sewage and garbage in landfills, convertingthe organic material into useful compost. Autotrophic microorganisms of thesoil synthesize their foods from simple materials such as carbon dioxide,ammonia, methane, and water, thus providing a way of converting simplechemicals to complex organic matter used by animals and plants.
This exercise studies the emergence of microbial populations in anecosystem known as the Winogradsky column (named for Sergei Wino-gradsky, a noted soil microbiologist of the early 1900s). The column is ac-tually a small vertical pond formed by packing a cylinder with mud,shredded paper, salts, and water. The cylinder will be sealed and exposed tolight, and different microbial populations will be encouraged to emerge.
pecial Materials
• 100-ml graduated cylinder• Plug-in light with 60-watt bulbs• Calcium sulfate• Calcium carbonate• Glass rods (or other device) for tamping• Pasteur pipettes• Aluminum foil
rocedure
1. Collect a sample of rich mud and water from the bottom of a pond or lake.Remove the large particles and stones from the sample.
2. Obtain a 100 ml graduated cylinder and fill it with about one inch of shred-ded paper or paper towels mixed with distilled water.
3. Mix approximately 100 grams of mud with about 10 grams of calcium sul-fate and 10 grams of calcium carbonate. Pour enough of the mixture into thecolumn to fill it about two-thirds full. These substances provide sulfurand carbon to autotrophic organisms.
4. With a thick glass rod or other device tamp the surface of the mud to packthe column tightly and eliminate any air bubbles. Pond water may be usedto displace the air trapped in the mud. Then add enough water to fill the col-umn to about one inch from the top of the cylinder.
5. Place a piece of plastic wrap over the top of the column to prevent evapo-ration of the water. Cover the entire column with aluminum foil to preventlight from penetrating the column. This covering will eliminate algae in theecosystem and encourage other populations to emerge.
6. Place the column at room temperature and allow it to remain for four toseven days.
7. Remove the aluminum foil and place the column near a light source hav-ing a 60-watt bulb. The light should be approximately 12 to 20 inches fromthe column. Permit the column to remain here for several days or weeks.
P
S
324 34 M I C R O B I O L O G Y O F S O I L
43038_CH34_0319.qxd 1/3/07 3:59 PM Page 324

8. During the extended incubation period, various colors will develop in thecolumn as various pigmented organisms emerge (Figure 34.2). Watch thecolumn for the development of brown, green, or red patches and make anote of where they occur in the column. These patches contain various pho-tosynthetic bacteria. The bacteria are using the light as an energy source tosynthesize their carbohydrates.
9. Using a Pasteur pipette, fish some of the colored growth from the Wino-gradsky column, and place it on a clean glass slide. Place a cover glass overthe drop and observe the organisms under the low power (10x) and highpower (40x) lenses of the microscope. Stained slides may be made for oilimmersion microscopy at the direction of the instructor. Enter your resultsin the Results section.
10. Note: It is a good idea to let the column develop for an unusually long pe-riod of time––a month or a year is not unheard of. You will see an unusualarray of colors and an equally interesting number of microbial popula-tions as they flourish and die off.
Recycling of Carbon in Food
In nature, microorganisms are primarily responsible for breaking down(decomposing) most of the remains of foods, including the vegetables andvegetable peelings that we discard in the garbage. This exercise demon-strates how a population of soil bacteria breaks down the starches of pota-toes and potato plants. The exercise uses the reaction occurring between
G.
M I C R O B I O L O G Y O F S O I L 34 325
Green algae,diatoms,
cyanobacteria
Green anaerobic
zone
Red andpurple
anaerobiczone
Air
Aerobic zone
Microaerophilic zone
Anaerobic zone
F I G U R E 3 4 . 2A Winogradsky column showingthe different gaseous zones andtypes of pigmented organismsthat develop in these zones.
PURPOSE: to examine theability of soil bacteria todigest starch.
43038_CH34_0319.qxd 1/3/07 3:59 PM Page 325

starch and iodine. When iodine reacts with starch molecules, the iodine isincorporated among the glucose molecules and a blue-black chemicalcomplex forms. If no starch is available for a reaction, there is no colorchange, and the only color seen is that of the iodine (light brownish-yellow).
pecial Materials
• Flasks of melted nutrient agar• Petri dishes• Potato and sharp knife
rocedure
1. Prepare or obtain a plate of nutrient agar and label it with your name, thedate, and the carbon source it will contain. Select a fresh potato, and peelit completely. Using a sharp knife, slice the potato to obtain flat, broadslices to use for layering. Place a slice of potato on the surface of a plate ofnutrient agar and press the potato slightly into the agar to ensure firmcontact. An alternative method is to pour nutrient agar into a plate, waitabout five minutes, then place the potato slice into the agar surface to holdit firmly to the agar. Repeat the procedure with several of the potato peelson a second plate of nutrient agar.
2. Prepare a soil suspension, and dip a swab into the soil suspension. Now passthe swab one time across the center of the potato slice and across some ofthe vegetable peelings. Discard the swab in the beaker of disinfectant.During incubation, the bacteria will grow on the potato slice while draw-ing additional nutrients from the nutrient agar. A control plate containinguninoculated potato slices should be included.
3. As a second exercise, place a potato slice in an empty, sterile Petri dish orother environment where it will not be exposed easily to the air. A cleandish may be used if the cover does not come in contact with the surface ofthe potato slice. Again, pass a swab one time across the center of the potatoslice. In this exercise there is no nutrient agar to provide additional nutri-ents, so the bacteria are using the potato for all their nutritional needs. Inthe 1880s, before the development of nutrient agar, Robert Koch usedslices of potato as a growth medium.
4. Incubate the plates in the upright position at room temperature or at 37° Cfor 48 hours or as directed by the instructor. During this time, colonies ofbacteria and fungi will appear on the surface of the potato and use thestarch for their metabolism while recycling the carbon portion of the starchmolecules.
5. To determine starch digestion, place drops of iodine onto the potato slicein the area close to the microorganisms. If the starch has been used, thearea near the bacterial or fungal colony will remain without any blue-blackcolor. It the microorganisms have not used the starch, the entire potato slicewill turn blue-black. Repeat with the peelings and the control plate.
6. Record your observations in the Results section indicating whether the starchwas used. Include a statement explaining your results, and add a carefullylabeled diagram of the potato slice and peelings illustrating your results.
P
S
326 34 M I C R O B I O L O G Y O F S O I L
43038_CH34_0319.qxd 1/3/07 3:59 PM Page 326

Recycling of Carbon in Cloth
Old shirts, sheets, trousers, towels, and other cloth items contain carbon,nitrogen, calcium, phosphorus, and other elements that microorganisms re-turn to the environment. Microorganisms such as bacteria, protozoa, andfungi are well known for their ability to decompose and recycle the elementsin cloth and make those elements available to plants and animals for theirgrowth. In this exercise, you will incubate microorganisms from soiltogether with various cloth samples to demonstrate the ability of differentmicroorganisms to degrade different kinds of cloth.
pecial Materials
• Flasks of melted nutrient agar• Petri dishes• Soil suspension• Samples of discarded cloth• Sterile water
rocedure
1. Prepare a number of cloth samples, each about 1 cm square. Samples ofwool, rayon, canvas, and cotton can be used from any of samples citedabove. The cloth need not be sterile, but it should be clean. Natural and syn-thetic fibers may be used.
2. Obtain two labeled Petri dishes and two flasks of melted nutrient agar.Mark one plate as “+ bacteria” and the other as “– bacteria.” Pour the twoplates. Do not allow the agar to harden completely. Instead, after it hasremained in the Petri dish for about five minutes, add the squares of clothto each nutrient agar and press them slightly into the surface, causingthem to hold firmly with the agar. Permit the cloth and agar to dry for appro-ximately 10 minutes.
3. Prepare a soil suspension containing about a gram of soil in about ten mlof water. Dip a sterile swab into the soil suspension, then carefully swab thesurface of the nutrient agar-cloth combination in several directions. Becareful not to disturb or move the cloth as you swab. When your swabbingis complete, place the swabs into the beaker of disinfectant. A suspensionof fresh feces may be used as an alternative or on a second plate.
4. Dip a second sterile swab into a tube of sterile water. Then, swab the “– bac-teria” plate in a similar manner to the “+ bacteria” plate.
5. Incubate the plates in the upright position at room temperature or 37° C for48 hours or as directed by the instructor. Alternative times and temperaturesmay be used to determine their effect on the recycling. Up to a month orlonger may be used but care should be taken to prevent dehydration of theagar by adding sterile water from time to time. Still longer periods may beused. Remember that antimicrobial substances in the soil may retard mi-crobial growth for a spell. Also recall that nutrient agar will encourage thegrowth of numerous types of bacteria and fungi in the soil so the plate maybe overgrown with microorganisms after a short time.
P
S
H.
M I C R O B I O L O G Y O F S O I L 34 327
PURPOSE: to determine theability of microorganisms todegrade cloth.
43038_CH34_0319.qxd 1/3/07 3:59 PM Page 327

6. After a suitable period of incubation, examine the pieces of cloth by remov-ing them from the agar plate to an empty Petri dish. Compare the differentkinds of bacteria and/or fungi have grown on the surface of the agar and onthe cloth of each plate. Compare the various forms of disintegration takingplace in various cloths. If you used both fecal and soil suspensions on dif-ferent plates, note where disintegration was more vigorous. Compare bac-terial and fungal disintegration. Also note whether the disintegration tookplace at a more rapid rate when the temperature was higher. Determine theeffect of time by examining the plate at several periods during the course ofa month or more. Draw labeled diagrams of the plates in the Results sectionshowing the disintegration taking place as a result of microbial action.
7. At the instructor’s direction, examine the cloth samples microscopically byplacing the Petri dishes directly under the microscope lens. Caution shouldbe exercised in performing this procedure since there are live bacteria pre-sent. Alternately, disinfect a tweezers in the beaker of disinfectant, then lift offthe cloth square with the tweezers and place the cloth in the beaker of dis-infectant. After swirling it about in the disinfectant, place the cloth square ona clean glass slide and examine it with the low power objective of the micro-scope. Use the high power (40x) objective only at the direction of your instructor. You will note various areas of digestion and disintegration rep-resenting areas where the microorganisms have broken down the cloth andrecycled the elements. Note any differences in the digestion of various kindsof cloth and postulate why these differences exist. Place your explanations in the Results section and include labeled diagrams of the cloth squaresobserved microscopically.
Recycling of Carbon in Leaves
An incalculable number of dead leaves fall from trees every year. Theseleaves contain enormous amounts of carbon that must be recycled forplant life to continue on Earth. For example, carbon is found in the poly-saccharide cellulose in plant cell walls, and it must be recycled for photo-synthesis to take place in next year’s plant growth.
Cellulose can be broken down by the enzyme cellulase. Unfortunately,animals and plants are unable to produce this enzyme. But many species ofmicroorganisms have that ability. As bacteria and fungi in the soil breakdown the cellulose in plants, the entire plant leaf is decomposed. Indeed, partof the conversion of plant material into compost (in a compost heap) isthe digestion of cellulose by cellulase-producing microorganisms.
pecial Materials
• Flasks of melted nutrient agar• Petri dishes• Punches• Soil suspension• Various leaf or plant samples
• Sterile water
S
I.
328 34 M I C R O B I O L O G Y O F S O I L
PURPOSE: to examine cellu-lose digestion (carbon recy-cling) by microorganismsdecomposing leaves.
43038_CH34_0319.qxd 1/3/07 3:59 PM Page 328

M I C R O B I O L O G Y O F S O I L 34 329
rocedure
1. Using the punch provided, punch out a series of leaf disks from live anddead leaves. As an alternative, other plants such as grasses, broad leafplants, or vegetable leaves such as lettuce, celery, or parsley may be used.
2. Obtain two labeled Petri dishes and two flasks of melted nutrient agar.Label one plate “+ bacteria” and the other “– bacteria.” Pour the two plates.Do not allow the agar to harden completely. Instead, after it has remainedin the Petri dish for about five minutes, add the leaf disks to the nutrient agarand press them slightly into the surface, causing them to hold firmly. Per-mit the leaf disks and agar to dry for approximately 10 minutes.
3. Obtain a soil sample or prepare one as indicated in Part H. Dip a sterile swabinto the soil suspension then carefully swab the surface of the “+ bacteria”plate. Be careful not to disturb or move the leaf disks as you swab. Swab inseveral directions to ensure even coverage of the leaf surfaces. When yourswabbing is complete, place the swabs into the beaker of disinfectant.
4. Also prepare the “– bacteria” plate as indicated in Part H.
5. Incubate the plates in the upright position at 37°C for 48 hours or longer asdirected by the instructor. Alternative temperatures may be used to deter-mine their effect on the leaf breakdown. Up to a month or longer may be used. Remember that antimicrobial substances in the soil may retardmicrobial growth for a period.
6. After a suitable period of incubation, remove the plates from the incubatingenvironment and examine the leaf disks as noted in Part H. Draw labeled diagrams of the plates in the Results section showing the disintegration tak-ing place as a result of microbial action. At the instructor’s direction, you mayremove the leaf disk samples and examine them under a microscope asnoted in Part H. Place your explanations below and include labeled diagramsof the leaf disks observed microscopically in the Results section.
uestions
1. Why are Rhizobium species from root nodules considered pleomorphicbacteria?
2. What does peptone contain that is necessary for the demonstration ofammonification by soil microorganisms?
3. Explain the relationship that exists between Rhizobium species and legu-minous plants.
4. Explain why “– bacteria” plates were prepared in Parts H and I.
5. Compare the microscopic appearance of Streptomyces species with that ofthe fungi.
Q
P
43038_CH34_0319.qxd 1/3/07 3:59 PM Page 329

43038_CH34_0319.qxd 1/3/07 3:59 PM Page 330

M I C R O B I O L O G Y O F S O I L 34 331
Name
Date Section
Exercise Results
Microbiology of Soil
A. Isolation of Rhizobium from Legume Roots
34
Source:
Magnif.:
B. Ammonification by Soil Microorganisms
Table 34.1. Amount of Ammonia Present after Various Incubation Periods
Incubation time hr hr hr
Amount of ammonia
Observations and Conclusions:
43038_CH34_0319.qxd 1/3/07 3:59 PM Page 331

332 34 M I C R O B I O L O G Y O F S O I L
C-D. Streptomyces from the Soil
Wet Mount of Streptomyces
Antibiotic Production on Emerson Agar
Observations and Conclusions:
43038_CH34_0319.qxd 1/3/07 3:59 PM Page 332

M I C R O B I O L O G Y O F S O I L 34 333
E. Plate Count of Soil Bacteria
Table 34.2. Plate Counts at Various Dilutions
Dilution 1:100 1:1000 1:10,000 1:100,000
Plate count
�
(valid count) (dilution factor)� total bacteria/gram of soil
Source of soil:
F. The Winogradsky Column
Stained Smears of Microbial Samples from the Column
Magnif.:
Magnif.:
43038_CH34_0319.qxd 1/3/07 3:59 PM Page 333

334 34 M I C R O B I O L O G Y O F S O I L
G. Recycling of Carbon in Food
Content:
Nutrient Agar Plate #1 Nutrient Agar Plate #2
Observations and Conclusions:
Observations and Conclusions:
43038_CH34_0319.qxd 1/3/07 3:59 PM Page 334

M I C R O B I O L O G Y O F S O I L 34 335
Observations and Conclusions:
Content:
Plate #1 Plate #2
H. Recycling of Carbon in Cloth
Cloth:
Magnif.:
Microscopic Observations
43038_CH34_0319.qxd 1/3/07 3:59 PM Page 335

336 34 M I C R O B I O L O G Y O F S O I L
Observations and Conclusions:
Content:
Plate #1 Plate #2
I. Recycling of Carbon in Leaves
Leaf:
Magnif.:
Microscopic Observations
43038_CH34_0319.qxd 1/3/07 3:59 PM Page 336