400W Mobile Power Pack - Kotula's · Leave at least 2” (5cm) clearance around the Mobile Booster...
28
IMPORTANT: PLEASE BE SURE TO READ AND SAVE THE ENTIRE MANUAL BEFORE USING YOUR JUMPSTARTER. ANY MISOPERATION OR MISUSING MAY DAMAGE THE EQUIPMENT OR CREATE HAZARDOUS CONDITIONS FOR THE USER. PLEASE KEEP THIS MANUAL FOR FUTURE REFERENCE. 400W Mobile Power Pack Model number-457402 OWNER’S MANUAL
-
Upload
phungkhuong -
Category
Documents
-
view
216 -
download
0
Transcript of 400W Mobile Power Pack - Kotula's · Leave at least 2” (5cm) clearance around the Mobile Booster...

IMPORTANT: PLEASE BE SURE TO READ AND SAVE THE ENTIRE MANUAL BEFORE USING YOUR JUMPSTARTER. ANY MISOPERATION OR MISUSING MAY DAMAGE THE EQUIPMENT OR CREATE HAZARDOUS CONDITIONS FOR THE USER. PLEASE KEEP THIS MANUAL FOR FUTURE REFERENCE.
400W Mobile Power Pack
Model number-457402
OWNER’S MANUAL
CONTENTS
1. Introduction..............................................................................................
2. Scope of delivery.....................................................................................
3.Important Safety Instructions....................................................................
4. Features..................................................................................................
5. Operations...............................................................................................
6. Recharging the Powerpack Battery.........................................................
7. Troubleshooting......................................................................................
8. Specifications..........................................................................................
9. Warranty.................................................................................................
1.
2
2
2
6
9
16
21
24
26

2.
Easy-to-use and designed for reliable service, the 400W Mobile Powerpack can run many AC appliances and 12V DC appliance whenever you need power for work or play, at home or on the road. The 400W Mobile Powerpack: Powers 110V AC appliances Powers 12V DC appliances Charges USB-chargeable devices Jumpstarts vehicle engines LED light for emergency Over load protection for 12V DC outlet Inflates tires and small sports equipment with a 150 psi air compressor.
1. INTRODUCTION
2. SCOPE OF DELIVERY
3. IMPORTANT SAFETY INSTRUCTIONS
NO.
1 Powerpack with jumpstart cables It is the main body of the unit.
2AC charging adapter lets you recharge the unit from a standard AC wall outlet and it can only be used to recharge the internal battery of the unit.
3 Owner’s instructions Read the instruction carefully before using the unit.
Description
WARNING:The 400W Mobile Power Pack is not intended for use in connection with life support systems or other medical equipment or devices.WARNING: Shock Hazard. Keep away from childrenThe Powerpack generates the same potentially lethal AC power as a normal

3.
household wall outlet. Do not insert foreign objects into the AC outlet, the DC Powerpack Socket, the Jumpstart Cable Port, or the ventilation hole, do not expose this product to water, rain, snow, condensation, or spray.Do not open the Powerpack and expect to replace the internal battery. Have a qualified technician perform any service work.WARNING: Explosion HazardDo not use this product where there are flammable fumes or gases, such as in the bilge of a gasoline-powered boat, or near propane tanks. Do not use this product in an enclosure containing automotive-type lead-acid batteries. These batteries, unlike the sealed AGM battery in Powerpack, vent explosive hydrogen gas which can be ignited by sparks from electrical connections.
When working on electrical equipment, always ensure someone is nearby to help you in an emergency.WARNING: Heated SurfaceEnsure at least 2” (5cm) air space is maintained on all sides of the Powerpack. During operation, keep away from materials that may be affected by high temperatures such as blankets, pillows and sleeping bags.WARNING: Fire HazardNever allow jumpstart cables’ red and black clips to touch each other or another common metal conductor. This could cause damage to the unit and/or create a sparking/explosion hazard. Always disconnect the jumpstart cables from the unit after use and clip the plastic guard over the jumpstart cable port.WARNING: Fire HazardJumpstart cable clips must be connected positive to positive (red clip to battery “+”) and negative to negative (black clip to battery “-“or engine ground). A reverse polarity connection (positive to negative) may cause damage to the unit and/or create a sparking/explosion hazard.WARNING: Fire HazardThe jumpstart feature is designed for short term operation only- less than 5 seconds. Operating the jumpstart feature for more than 5 seconds may cause

4.
damage to the unit. Allow the Powerpack to cool down for at least 3 minutes after each jumpstart.WARNING: Risk of Explosion, Fire or BurnsThe battery terminals exposed at the Jumpstart Cable Port have enough energy present to cause a spark, creating an explosion hazard, or to cause burns if a metal object contacts both terminals. Always clip the plastic guard over the Port when not in use.WARNING: Fire HazardDo not leave the compressor unattended while operating. The compressor is designed for short term operation only. Operation of the compressor over an extended period of time will cause the compressor unit to overheat and may cause damage. Allow the compressor to cool down for 10 minutes after each 10 minutes of continuous operation.CAUTION: Equipment DamageDo not connect any AC appliance with neutral conductor connected to ground to the Powerpack.CAUTION: Equipment DamageDo not expose the Powerpack to temperatures over 104℉(40℃).Precautions when working with batteriesWARNING: Explosion and Fire Hazard1. Follow all instructions published by the battery manufacturer and the manufacturer of the equipment in which the battery is installed.2. Make sure the area around the battery is well-ventilated.3. Never smoke or allow a spark or flame in vicinity of the engine or batteries.4. Be careful not to drop a metal object on the battery or allow a metal tool to simultaneously touch the positive and negative cable ends or battery terminals. It might spark or short-circuit the battery or other electrical parts and cause an explosion.5. Remove personal metal items such as rings, bracelets, necklaces, and watches when working with batteries. Batteries produce a short-circuit current high enough to weld a ring or other similar objects to metal, causing a severe burn.
5.
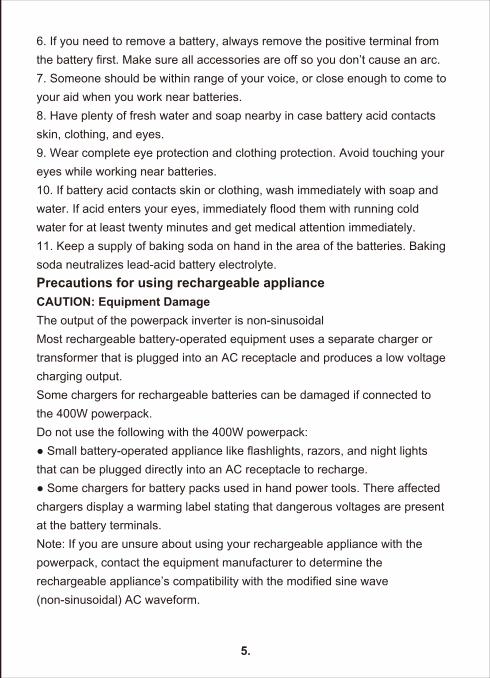
6. If you need to remove a battery, always remove the positive terminal from the battery first. Make sure all accessories are off so you don’t cause an arc.7. Someone should be within range of your voice, or close enough to come to your aid when you work near batteries.8. Have plenty of fresh water and soap nearby in case battery acid contacts skin, clothing, and eyes.9. Wear complete eye protection and clothing protection. Avoid touching your eyes while working near batteries.10. If battery acid contacts skin or clothing, wash immediately with soap and water. If acid enters your eyes, immediately flood them with running cold water for at least twenty minutes and get medical attention immediately.11. Keep a supply of baking soda on hand in the area of the batteries. Baking soda neutralizes lead-acid battery electrolyte.Precautions for using rechargeable applianceCAUTION: Equipment DamageThe output of the powerpack inverter is non-sinusoidalMost rechargeable battery-operated equipment uses a separate charger or transformer that is plugged into an AC receptacle and produces a low voltage charging output.Some chargers for rechargeable batteries can be damaged if connected to the 400W powerpack.Do not use the following with the 400W powerpack:● Small battery-operated appliance like flashlights, razors, and night lights that can be plugged directly into an AC receptacle to recharge. ● Some chargers for battery packs used in hand power tools. There affected chargers display a warming label stating that dangerous voltages are present at the battery terminals.Note: If you are unsure about using your rechargeable appliance with the powerpack, contact the equipment manufacturer to determine the rechargeable appliance’s compatibility with the modified sine wave (non-sinusoidal) AC waveform.
6.
Attention: Charge Before UseCharge the powerpack for at least 48 hours immediately after purchase. Recharge after each use and at least once every three months. See “recharging the powerpack battery”. Failure to follow these instructions will void the product warranty.
4. FEATURES
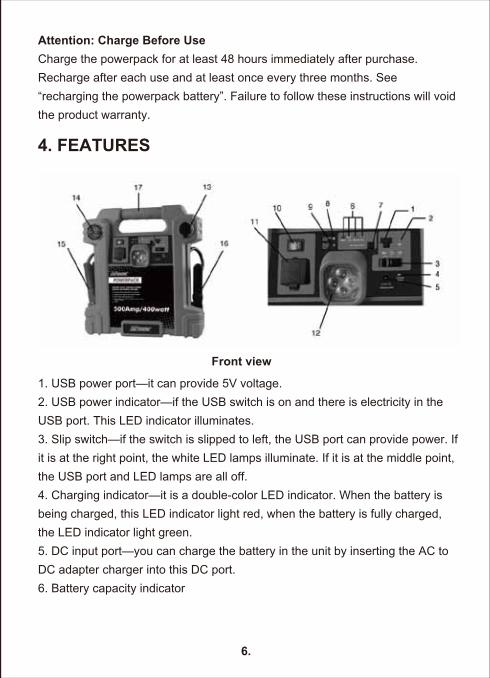
Front view
1. USB power port—it can provide 5V voltage. 2. USB power indicator—if the USB switch is on and there is electricity in the USB port. This LED indicator illuminates.3. Slip switch—if the switch is slipped to left, the USB port can provide power. If it is at the right point, the white LED lamps illuminate. If it is at the middle point, the USB port and LED lamps are all off. 4. Charging indicator—it is a double-color LED indicator. When the battery is being charged, this LED indicator light red, when the battery is fully charged, the LED indicator light green.5. DC input port—you can charge the battery in the unit by inserting the AC to DC adapter charger into this DC port.6. Battery capacity indicator

7.
T the value of the battery.
U<12.2V12.2V<U<12.4V12.4V<U<12.6V
U>12.6V
Display mode
Only red LED indicator lights.Red and yellow LED light.Red, yellow and one green LED light.
Red, yellow and two green LED all light.
Note: It is recommended that you should look over the battery voltage after 30 minutes charging.7. Battery capacity button— When pressed, you can see the battery level according to the battery capacity indicator.8. Connecting correct indicator— It is a green LED indicator. When you connect the clamps to the battery correctly, that is red clamp to the positive and black clamp to the negative, this LED lights. 9. Reverse polarity LED indicator— It is a red LED indicator. When you connect the clamps to the battery in the wrong way, this LED lights, there is an alarming sound from the buzzer, indicating error. 10. 110V AC socket switch—only when this switch is on, the 110V AC is available.11. 110V AC socket—it is a 110V AC output port. It allows you insert the AC plug of accessory you want to power.12. White LED lamps—there are four white LED lamps for emergency use. 13. 12V DC socket— it is an input or output easy-access port. You can insert the cigarette plug into it to charge the interior battery or power 12V accessories.Note:The unit contains 15A fuse for 12V DC socket over current protection.Note:It is recommended that you use the unit to power 12V accessories less than 8A.Note: It is recommended that you charge the interior battery by the AC to DC adapter charger (provided) which has protection function. There is no protection function if you choose to charge the battery by using the clamps or the cigarette plug.

8.
14. Jumpstart power switch— It is a manual rotary switch. When you jump start a vehicle, you should turn off the switch and the vehicle engine,connect the unit to the vehicle, then you can turn on the switch, you must pay attention to the operation process.15. Red battery clip16. Black battery clipNote: They should connect with vehicle when the unit is used to jump start a vehicle. Be sure that the jumpstart switch is on off position and the clips are connected in the right way, that is red to positive polarity, and black to negative polarity.17. Portable handle
Rear view
18. Pressure gauge shows the PSI (lbs/in2)19. Compressor switch turns the compressor unit on and off.20. Valve connector with connector hose
17
9.
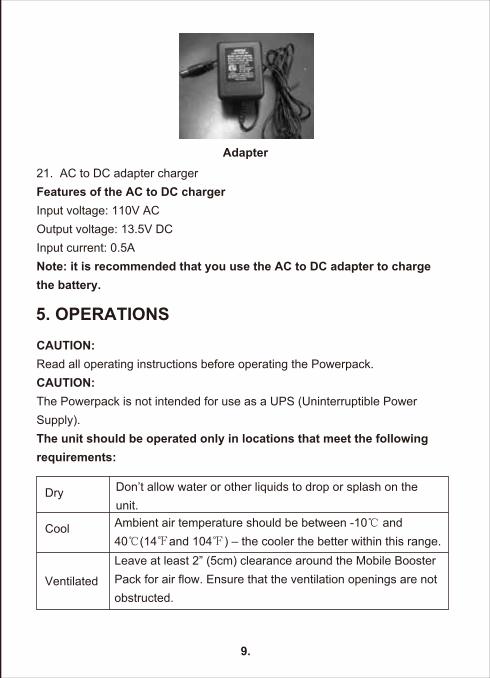
Adapter21. AC to DC adapter chargerFeatures of the AC to DC chargerInput voltage: 110V ACOutput voltage: 13.5V DCInput current: 0.5ANote: it is recommended that you use the AC to DC adapter to charge the battery.
5. OPERATIONSCAUTION: Read all operating instructions before operating the Powerpack.CAUTION: The Powerpack is not intended for use as a UPS (Uninterruptible Power Supply).The unit should be operated only in locations that meet the following requirements:
Dry Don’t allow water or other liquids to drop or splash on the unit.
Cool Ambient air temperature should be between -10℃ and 40℃(14℉and 104℉) – the cooler the better within this range.
Ventilated
Leave at least 2” (5cm) clearance around the Mobile Booster Pack for air flow. Ensure that the ventilation openings are not obstructed.

10.
Safe
Do not operate the unit in the same compartment as batteries or in any compartment capable of storing flammable liquids like gasoline.
Do not operate the unit where it will be exposed to battery gases.These gases are very corrosive and prolonged exposure will damage the Mobile Booster Pack
Protected from battery gases
AC Appliance
The Powerpack has one AC power outlet for use with AC appliance. You can either plug the appliance directly into the AC outlet or you can use an AC power bar to increase the number of outlets available. However, for continuous operations, the combined loads must be less than 320W. The less wattage used, the longer the Powerpack will operate before recharging is required.Some appliances may be difficult or impossible to operate from the Powerpack. They may have high surge requirements or may be incompatible with the output waveform of the Powerpack. See “High Surge Appliances” and “Trouble Appliance”,Typical AC appliances that can be used on the Powerpack are listed in the table below.
AC appliance Watts
5
5
142025
40
60
190
Hours
40
40
1486
4
2
27 minutes
Home security work light
Fluorescent work lightFireplace fanLaptop computer
Table lamp
Color TV-13”
3/8” drill
Cordless telephone(stand by)

11.
Operating AC Appliance1. Check battery status to ensure the battery is fully charged.2. Open the AC Outlet cover.3. Turn the AC socket switch ON.4. Plug the AC appliance into AC outlets.5. Turn the AC appliance ON.6. Recharge the Powerpack immediately after use. See “recharging the Powerpack Battery”.Low battery alarmAn audible alarm will begin to beep intermittently when the battery reaches11.0VDC. The Powerpack must be reset manually after all AC and DC loads are removed. If after a while the voice guided warning is ignored and a manual reset is not performed the unit will do a complete shutdown automatically.Overload and Over-Temperature ProtectionIn the event of an overload (>320W) or overheating, the Powerpack automatically shuts down power to the AC outlets. If after a while the voice guided warning is ignored and a manual reset is not performed the unit will do a complete shutdown automatically.High surge appliance The wattage rating of AC appliance is the average power used by the appliance. Appliances such as televisions, computer monitors and appliances with motors consume much more power than their average rating when they are first switched on.Although Powerpack can supply momentary surge power up to 600W, some appliances may exceed the capabilities of the Powerpack and trigger the inverter’s safety overload shutdown circuit.Trouble ApplianceThe output of the Powerpcak inverter is non-sinusoidal. Some equipment may be damaged by the inverter’s modified sine wave output (non-sinusoidal).Some appliance, including the types listed below, may be damaged if they are connected to the inverter.

12.
Electronics that modulate RF (radio frequency) signals on the AC line will not work and may be damaged.Speed controllers found in some fans, power tools, kitchen appliance, and other loads may be damaged.Some chargers for small rechargeable batteries can be damaged. Metal halide arc (MHI) lights can be damaged.
Note: If you are unsure about powering any device with the inverter, contact the manufacturer of the device to determine whether it is compatible with the modified sine wave output of the inverter.
12 V DC Appliances The Powerpack can operate one 12V DC auto, RV, marine, or other portable DC appliance that draws 15 amps or less from its DC socket. When the unit’s emergency light, USB port, and air compressor are also running, the combined load must not exceed 124 W, The less combined wattage used, the longer the Powerpack will operate before recharging is required.Typical 12V DC appliances that can be used on the Powerpack are listed in the table below.
12V DC appliance
5W incandescent light (built into the unit)Cellular telephoneSmall portable cooler
Watts
5
630
Hours
48
408
Operating DC Appliance:1. Check battery status to ensure the battery is fully charged.2. Open the DC socket/USB port cover. 3. Plug the DC appliance into the DC socket.4. Turn the DC appliance ON.5. Recharge the Powerpack immediately after use.NOTE:There is no 12V cigarette plug attached for this unit!

13.
USB DevicesThe Powerpack can charge one USB-chargeable device through its USB port. Compatible devices include most MP3 players, PDAs, digital cameras, and camcorders that have internal batteries which can be charged via the USB port of a desktop/laptop computer.USB-chargeable devices usually include a special USB cable (not supplied) that attaches one end to the USB port and the other end to the device.
Jumpstarting a vehicle’s engineYou can use the Powerpack to jumpstart a vehicle (or boat engine) that has a 12V starting battery using the jumpstart cables supplied with the unit.WARNING: Fire HazardNever allow cables’ red and black clamps to touch each other or another common metal conductor. This could cause damage to the unit and/or create a sparking/explosion hazard. WARNING: Fire HazardThe connection of the cables to the vehicle’s battery terminals must be positive to positive (red clamp to battery “+”) and negative to negative (black clamp to battery “-“). A reverse polarity connection may cause damage to the unit and/or create a sparking/explosion hazard.NOTE:Closely follow these instructions for boosting your vehicle as they may be different from the instructions supplied with other boosting products or boosting cables.To jump start a vehicle with the powerpack:(1). Turn off the vehicle and all accessories.(2). Place the Powerpack on a flat and stable surface near the battery which need to be started. Ensure that the Powerpack’s jumpstart power switch is “OFF”.(3). Connect the red positive (+) clamp of the cables to the positive (+) terminal of the engine battery.

(4). Connect the black negative (-) clamp of the cables to the engine block, cylinder head, or other stationary heavy metal part of the motor. If the red “Reverse Polarity” LED illuminates, then reverse polarity has been detected. Correct polarity must be established before proceeding. Disconnect the boosting clamps from the vehicle’s battery and do the steps (3) and (4) again.(5). Switch on the jumpstart power switch. Before starting the engine, make sure the booster pack and the cables are clear of the metal parts and other moving things.(6). Crank the engine for 5 seconds or until it starts, whichever is first.WARNING: Fire hazardDo not crank the engine for more than 5 seconds. The jumpstart feature is designed for short term operation only. Operating the boosting feature for more than 5 seconds may cause damage to the unit. Allow the VOT Mobile Powerpack to cool down for at least 3 minutes after each boost.(7). Switch off the jumpstart power switch.(8). Remove the red positive (+) clamp and then the black negative (-) clamp from the engine battery.Using the air compressorWARNING: Fire HazardThe compressor is designed for short term operation only.Operating the compressor over an extended period of time will cause the compressor unit to overheat, which could lead to fire.Allow the compressor to cool down for 10 minutes after each 10 minutes of continuous operations.WARNING: Fire HazardDo not leave the compressor unattended while in operation. Keep out of reach of children.WARNING: Risk of Personal Injury or Damage to EquipmentDo not exceed the recommended pressure of either the compressor or the object being inflated. The compressor is capable of inflating to 150 PSI. If the recommended pressure is exceeded, an explosion may result.
14.
15.
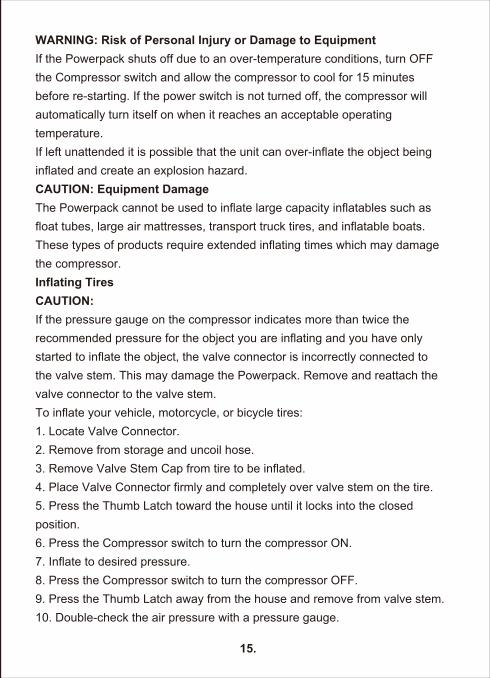
WARNING: Risk of Personal Injury or Damage to EquipmentIf the Powerpack shuts off due to an over-temperature conditions, turn OFF the Compressor switch and allow the compressor to cool for 15 minutes before re-starting. If the power switch is not turned off, the compressor will automatically turn itself on when it reaches an acceptable operating temperature.If left unattended it is possible that the unit can over-inflate the object being inflated and create an explosion hazard.CAUTION: Equipment DamageThe Powerpack cannot be used to inflate large capacity inflatables such as float tubes, large air mattresses, transport truck tires, and inflatable boats. These types of products require extended inflating times which may damage the compressor.Inflating TiresCAUTION: If the pressure gauge on the compressor indicates more than twice the recommended pressure for the object you are inflating and you have only started to inflate the object, the valve connector is incorrectly connected to the valve stem. This may damage the Powerpack. Remove and reattach the valve connector to the valve stem.To inflate your vehicle, motorcycle, or bicycle tires:1. Locate Valve Connector.2. Remove from storage and uncoil hose. 3. Remove Valve Stem Cap from tire to be inflated.4. Place Valve Connector firmly and completely over valve stem on the tire.5. Press the Thumb Latch toward the house until it locks into the closed position.6. Press the Compressor switch to turn the compressor ON.7. Inflate to desired pressure.8. Press the Compressor switch to turn the compressor OFF.9. Press the Thumb Latch away from the house and remove from valve stem.10. Double-check the air pressure with a pressure gauge.

11. Replace Valve Stem Cap.Inflating small sport equipment You can use the compressor to inflate small sports equipment such as balls (Soccer balls and footballs).CAUTION:The Powerpack cannot be used to inflate large capacity inflatable such as float tubes, large air mattresses, transport truck tires, and inflatable boats. These types of products require extended inflating times which may damage the compressor.To inflate small sports equipment:1. Choose the appropriate nozzle adapter (not supplied).2. If an adapter is required, insert the nozzle adapter into the valve connector, turning it clockwise to tighten, and close the thumb latch,3. Place the valve connector fully on the valve stem or into the valve receptacle on the item to be inflated.4. Turn the compressor ON and inflate to appropriate pressure.5. Turn the compressor OFF before removing valve connector from the valve stem.6. Remove nozzle adapter form the valve connector and store in storage compartment or Accessory Bag.CAUTION:Allow the compressor to cool down for 10 minutes after each 10 minutes of continuous operation. Repeat if necessary.Note: Leave the thumb latch in the open position for storing to relieve pressure on the internal mechanism.
16.
6. RECHARGING THE POWERPACK BATTERY
You can recharge the battery using one of the following methods: The AC Charger (supplied) plugged into a standard 110 V wall outlet. Use the DC-to-DC charging cable (not supplied) with the cigarette 12V power outlet in your vehicle as you drive.

17.
CAUTION: Do not operate AC or DC appliance while the Powerpack is being charged.
Charging with the AC chargerUsing the AC Charger is the simplest method for recharging the battery. While charging from an AC source, the charging status LED indicator will light red. When the battery has reached capacity, the indicator will light green.Charging when the battery is fully discharged takes around 28 hours.NOTE:Recharge the 400W Mobile Powerpack as soon as possible after each use.When not used the Booster Pack, it should be recharged every 3 months!To recharge with AC charger:(1)Turn the rotary switch to the “OFF” position.(2) Plug 110V AC charger into charger input socket on the front of the unit.(3) Plug 110V AC charger into 110V AC electrical socket.(4)Never stop until the battery is fully charged for about 28 hours.CAUTION: The 28-hour charging time for the unit assumes that there is 110V at the AC wall outlet. If the voltage is less than 110V AC, it may take more than 28 hours to fully recharging.Once fully charged, the charging current automatically reduces to a floating charge mode, and the unit may be left permanently connected to the AC charger. Charging with the DC to DC charging cable with cigarette 12 V Power outletWARNING: Fire and Explosion HazardDo not use this recharging method if your vehicle’s electrical system operates above 15V. This may lead to accumulations of hydrogen, causing exposure to fire and explosion hazard. This condition is typically found in marine appliances or portable generators with DC output.

Important: The powerpack will automatically shutdown, i.e., disconnect from the DC source in the event of an over-voltage condition such as reaching over 15DC.However, it is recommended to detach the DC to DC charging cable from the unit and vehicle as soon as the battery is fully charged or if the vehicle’s engine is turned off. Do not leave the powerpack permanently connected to the vehicle’s 12 accessory outlet.To recharge with the DC to DC charging cable with cigarette 12V power outlet:1. Open the plastic cover that protects the DC socket.2. Insert one plug of the DC to DC charging cable into the 12VDC accessory socket in the vehicle.3. Insert the other plug of the DC to DC charging cable into the DC socket on the front of the powerpack.
Replace an Internal batteryBattery LifeThe NPower Power Pack uses a high quality lead-acid AGM battery and it serves as a reliable power source for years when properly maintained. To maximize battery life, we recommend users to recharge the PowerTunes after each use or every 3 months when not in use.Obtaining a Replacement BatteryWhen the battery reaches the end of its service life, you may purchase a replacement battery through Northern Tool + Equipment. The items # of replacement batteries are listed as below - Item 82491 – NPower 18AH Sealed Lead Acid AGM battery - Item 82942 – NPower 22AH Sealed Lead Acid AGM battery
Installing the BatteryCAUTION: Batteries contain acid and produce explosive gases. Shield eyes and face from batteries at all times.
18.

19.
CAUTION: Incorrect connection of the battery terminals will damage the Power Pack. PLEASE MAKE SURE TO CONNECT THE BATTERY TERMINAL TO THE CORRECT BATTERY TERMINAL CABLEBattery Installation Procedures:(1) Turn OFF ALL for Power Pack (includes: Jumpstart, AC, USB, and Compressor)(2) Unscrew the back cover of the Power Pack (total 16 screws)(3) Remove the back cover(4) Pull out the internal battery out a little to to access the terminal connections and unscrew the battery terminal Connections. (Black negative (-) first, and Red positive (+) last).(5) Remove the damaged or dead battery from housing(6) Place the correct new battery into housing(7) Connect the red battery terminal cable to the red positive (+) terminal of your battery. Fasten the screw as pictured below.Note: Make sure the screw is fastened as tight as possible. If it is not fastened tightly, Jump Starter capability will be impacted.
WARNING: Make sure red terminal cable is connected with red battery terminal. DO NOT REVERSE POLARITY. Otherwise, it may damage the Power Pack or even your vehicle when using it to boost vehicle.(8) Connect the two black terminal cables to the black negative (-) terminal of your battery. Fasten the screw as pictured below.Note: 1. There are two black terminal cables. Both of them should be fastened to the battery terminal to make Power Pack work properly.2. Make sure the screw is fastened as tight as possible. If it is notfastened tightly, Jump Starter capability will be impacted

WARNING: Make sure red terminal cable is connected with red battery terminal. DO NOT REVERSE POLARITY. Otherwise, it may damage the Power Pack or even your vehicle when using it to boost vehicle.
(9) Put back the back cover and tighten the 16 screws. Note: Make sure the hose of compressor is in the slot of back cover to prevent it being damaged. Refer to below picture
20.

WARNING: Electric Shock HazardDo not remove the cover of the Powerpack or disassemble the Powerpack. The Powerpack does not contain any internal user-serviceable parts and attempting to service the unit yourself could result in electrical shock or burn.
21.
7. TROUBLESHOOTINGBuzzing and in audio systems and radiosSome inexpensive stereo systems and AM-FM radios have inadequate internal power supply filtering and “buzz” slightly when powered by the powerpack. Generally, the only solution is an audio product with a higher quality filter.Television interferenceThe Powerpack is shielded to minimize its interference with TV signals. However, with weak TV signals interference may be visible in the form of lines scrolling across the screen. The following should minimize or eliminate the problem:
Increase the distance between the inverter and the TV, antenna and cables.Adjust the orientation of the inverter television, antenna and cables.Maximize TV signal strength by using a better antenna and use shielded antenna cable where possible.

22.
Problem Cause Solution
The powerpack can not jump startvehicle
The battery in the powerpack is not fully charged
The engine start capacity exceeds the Powerpack jumpstart capacity.The Powerpack’s battery has been damaged
Replace the powerpack’s battery
No AC power at the AC wall outlet.
Ensure power is available at the AC wall outlet.
AC charger is faulty.
The charging statusLED indicator does not light. Replace 110V AC charger
The AC charger’s outputis too low.
Replace the AC charger.
Internal battery is permanently damaged.
The charging status LED indicator still lights red and has not charged to steady after 50 hours of charging.
Replace the battery.
Charge it for at least 28 hours

23.
Problem Cause Solution
The AC appliance does not operate; audible alarm is not sounding.
AC appliance rated more than 320W, the safety overload has tripped.
Use AC appliance with a power rating less than 320W.
AC appliance rated lessthan 320W, high startingsurge has tripped the safety overload.
AC appliance may exceed the Powerpack’s surge capability. Use an AC appliance with a starting surge within the Powerpack surge rating.
Battery has discharged to 11V
The AC appliance does not operate; audible alarm is sounding.
Recharge the battery.
Inverter has overheated due to poor ventilation or excessively warm environmental condition.
Internal battery is not fully charged,
Run time for appliance is lessthan expected.
Recharge using the AC charger, until the charging status LED indicator light green.
AC appliance power consumption is higher than expected.
Check AC appliance power or wattage rating (or current draw for 12V DC appliance).
Allow the Powerpack to cool for 15 minutes or more. Clearblocked fan opening or remove objects covering the unit, then restart the Powerpack. Move to a cooler environment.

24.
Problem Cause Solution
The compressor runs slowly.
The compressor may have overheated from excessive use.
Turn off the compressor and let it cool down.
Battery voltage is too low. Check the condition of the internal battery. The battery may need to be recharged or replaced.
The valve connector may not be securely placed on the valve stem.The compressor
runs but won’t inflate.
Check that the valve connector is securely placed on the valve stem before closing the thumblatch.
The item being inflatedmay have a leak.
Check that the item being inflated has no leaks.Check the compressor hose for any breaks orleaks at connections.
8. SPECIFICATIONSElectrical specifications
12 DC sectionInternal battery (Capacity/Type)
Built-in incandescent light (replaceable)
DC fuse
20Ah/12V Sealed Lead-acid Battery
0.5W bulb
15A
25.
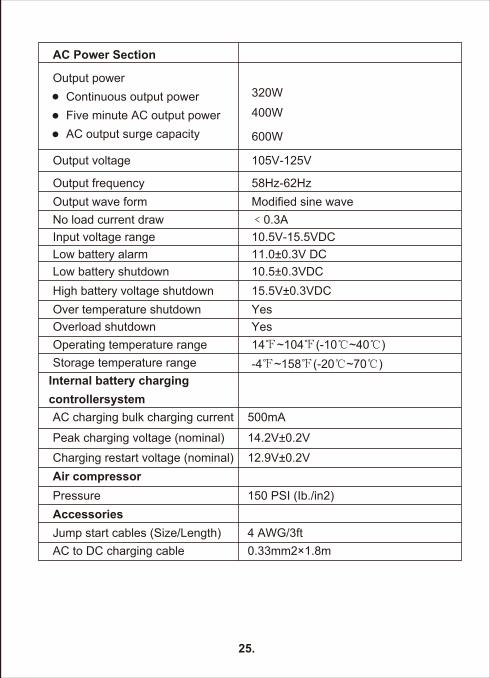
AC Power Section
Output power Continuous output power Five minute AC output power AC output surge capacity
Output voltage
320W
400W
600W
105V-125V
Output frequency 58Hz-62HzOutput wave form Modified sine waveNo load current draw ﹤0.3AInput voltage range 10.5V-15.5VDCLow battery alarm 11.0±0.3V DCLow battery shutdown 10.5±0.3VDCHigh battery voltage shutdown 15.5V±0.3VDCOver temperature shutdown Yes Overload shutdown Yes Operating temperature range 14℉~104℉(-10℃~40℃)Storage temperature range
AC charging bulk charging current 500mA
Peak charging voltage (nominal) 14.2V±0.2V
Charging restart voltage (nominal) 12.9V±0.2V
Pressure 150 PSI (Ib./in2)
Jump start cables (Size/Length) 4 AWG/3ftAC to DC charging cable 0.33mm2×1.8m
Accessories
Air compressor
-4℉~158℉(-20℃~70℃)Internal battery charging controllersystem

26.
Physical specifications
Dimensions L*W*H (13.0*6.5*13.98 in (330*165*355mm)weight 20lb.(9.1Kg)
9. WARRANTY
One Year Limited Warranty ProgramNPower warrants this product for one year limited against any defects in materials or workmanship. The defective products will be replaced and repaired at no charge in either of one year.This warranty lasts for 12 months from the date of purchase at the point of sale to you. This warranty does not apply where the product has been misused, improperly installed, physically damaged or altered, either internally or externally, or damaged from improper use.NPower will repair or replace the defective product free of charge. Proof of purchase may be required. Warranty term is not extended if NPower repairs or replaces a product. NPower owns all parts removed from repaired products.To qualify for the warranty, make sure the product has not been disassembled or modified without the prior authorization. If you require warranty service with your product, please return it to the place of purchase along with a copy of your dated proof of purchase or call customer service at 800-222-5381 for details.

Conventions UsedThe following conventions are used in this manual.
WARNINGWarnings identify conditions that could result in personal injury or loss of life.CAUTIONCautions identify conditions or practices that could result in damage to the unit or to other equipment. NOTE: These notes describe an important action item or an item that you must pay attention to.Abbreviations and AcronymsA AmpereAC Alternating CurrentAh Amp-hoursDC Direct CurrentmA milli-AmpereV VoltLED light-emitting diode