40 FORD FENDER FIX by Shannon Lilly - TACHREV.com · 40 FORD FENDER FIX by Shannon Lilly 1. I have...
38
40 FORD FENDER FIX by Shannon Lilly 1. I have grown up around metal work and show quality paint jobs in my fathers shop since I could walk and even though I am only 11 years old my Father has been training me on old discarded fenders and such for sometime now. Together we are going to show you step by step how you can do these procedures your self at home with some practice. Lets get started ! 2. Here are some of the materials we will be using. Aviation paint stripper, safety gloves, spread bowl for smaller amounts to apply, wide paint brush made of hair so it will not melt or friz using the stripper. Wire brushes small to large. Scrapers and razor blades and always use a face shield/eye protection and gloves. Do not panic if stripper gets on your skin simply rinse with water quickly and it will come off and neutralize. Be quick about it though 60 seconds or less is best! Auto body paint stores supply this type of stripper usually in 1 gallon size. If done properly you can strip a car or truck with 3-5 gallons depending on how many layers of paint are on the body.
Transcript of 40 FORD FENDER FIX by Shannon Lilly - TACHREV.com · 40 FORD FENDER FIX by Shannon Lilly 1. I have...

40 FORD FENDER FIX by Shannon Lilly
1. I have grown up around metal work and show quality paint jobs in my fathers shop since I could walk and even though I am only 11 years old my Father has been training me on old discarded fenders and such for sometime now. Together we are going to show you step by step how you can do these procedures your self at home with some practice. Lets get started !
2. Here are some of the materials we will be using. Aviation paint stripper, safety gloves, spread bowl for smaller amounts to apply, wide paint brush made of hair so it will not melt or friz using the stripper. Wire brushes small to large. Scrapers and razor blades and always use a face shield/eye protection and gloves. Do not panic if stripper gets on your skin simply rinse with water quickly and it will come off and neutralize. Be quick about it though 60 seconds or less is best! Auto body paint stores supply this type of stripper usually in 1 gallon size. If done properly you can strip a car or truck with 3-5 gallons depending on how many layers of paint are on the body.

3. Coat the stripper on liberally, thick coats work best. My fathers shop is fully equipped so it makes it a lot easier for me. You would do best to have a contained area to do this operation. I am using an old 36 Ford Truck bed to keep all debris etc from getting on the ground.
4. A Close up of the stripper working shows a bubbling texture. This is good, usually urethanes, enamels and undercoats strip in this manner. Lacquer based paint and primers tend to melt and run off the sides of the panels which is messy and takes more clean up time.
5. I am wire brushing hard to reach areas like the backside of the wheel house in order to get everything clean. Simply putty knife the large easy areas.
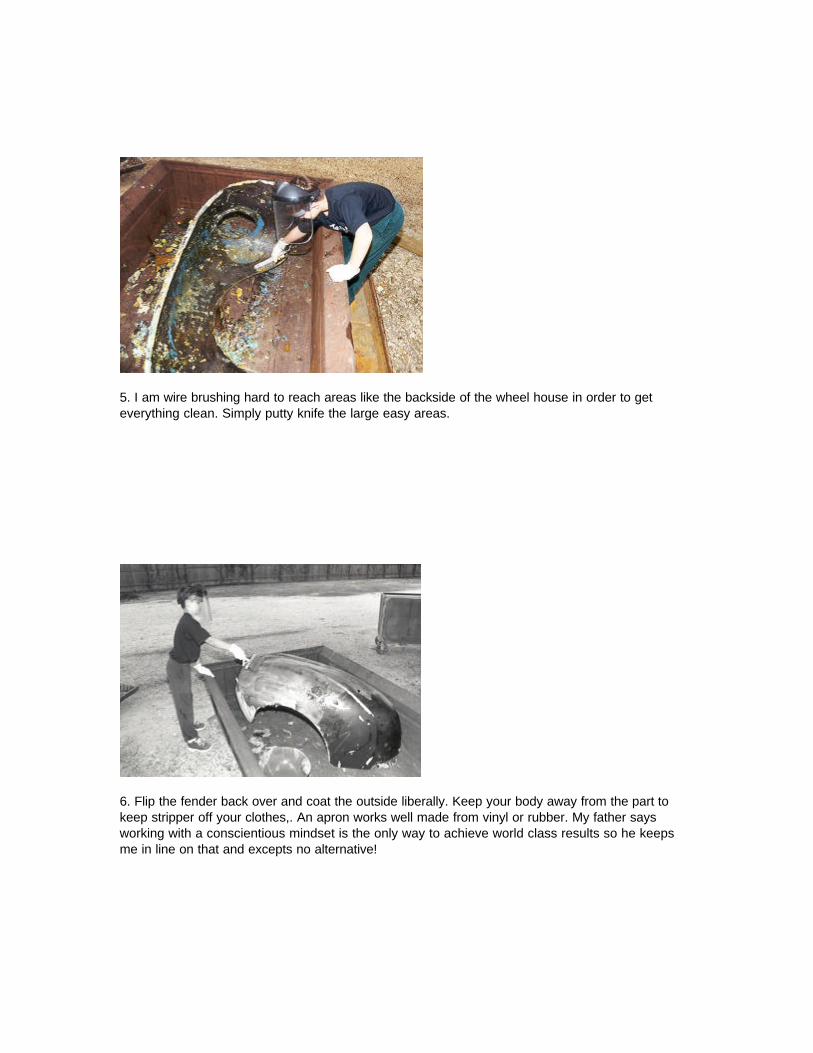
6. Flip the fender back over and coat the outside liberally. Keep your body away from the part to keep stripper off your clothes,. An apron works well made from vinyl or rubber. My father says working with a conscientious mindset is the only way to achieve world class results so he keeps me in line on that and excepts no alternative!

7. Using a razor blade holder it is best to back drag the material off then pushing the blade because it will tend to break and or chip the blade edge as it gets caught on any metal spurs when pushing. Depending on how many coats of material you are removing the stripper is ready when it comes off easily. Recoat as necessary. Never apply in the direct sun light and try to do this phase in the cooler morning hours to keep it from drying out so fast.
8. Small detail brushes are used on areas like the recessed headlight edges and such. Be careful when pulling the brush strokes back toward you as it will tend to flick residue at you during that particular movement. It is best to wire brush pushing away only if possible to keep your self clean.

9. Using a plastic tub I cleaned up and disposed of all debris properly in trash bags etc. Let it sit out a while and dry up before disposing.

10. Using 7447 3M red scuff pads I used a combo of water and elbow grease. To avoid contact with skin I am still wearing gloves. Scrub all remaining remnants of material off until only steel is exposed.
11. She is clean and looking good as only a few spots were bare steel exposed for some time which left those areas rusted and pitted, probably way before I was even born. I am only 11 you know but my Dad likes training me early on, “ you know the story “ when I was your age I was already doing this and that and this etc etc.

12. Tools of the trade I will be using. Body hammer, cut off tool, dolly’s, battery drill, pliers, slap files, straight edge, face shield etc These can be purchased at auto body supply stores or US Industrial Tool if needed.
13. There are a lot of nails/tacks that held the original welt cord where the fender mated against the hood cowl. I will be carefully cutting the heads off and removing them.

14 Notice how I steady my hand against the fender so I can be precise.
15. A close up shows exactly where you need to cut the head without grinding any fender metal if

possible.
16. I then pull off the tack from the other side with a pair of pliers removing them all.
17. I held up yellow card board paper to show how wavy this edge has gotten from years of abuse.

18. First I take metal roofing squeeze pliers and straighten/shrink back the edge as best I can. Home Depot has these tools.

19. A close up shows how well these pliers work.
20. First off I am using a hammer and dolly to smooth out edges nice for a good fit.
21 This angle shows how nice the edge is coming along.
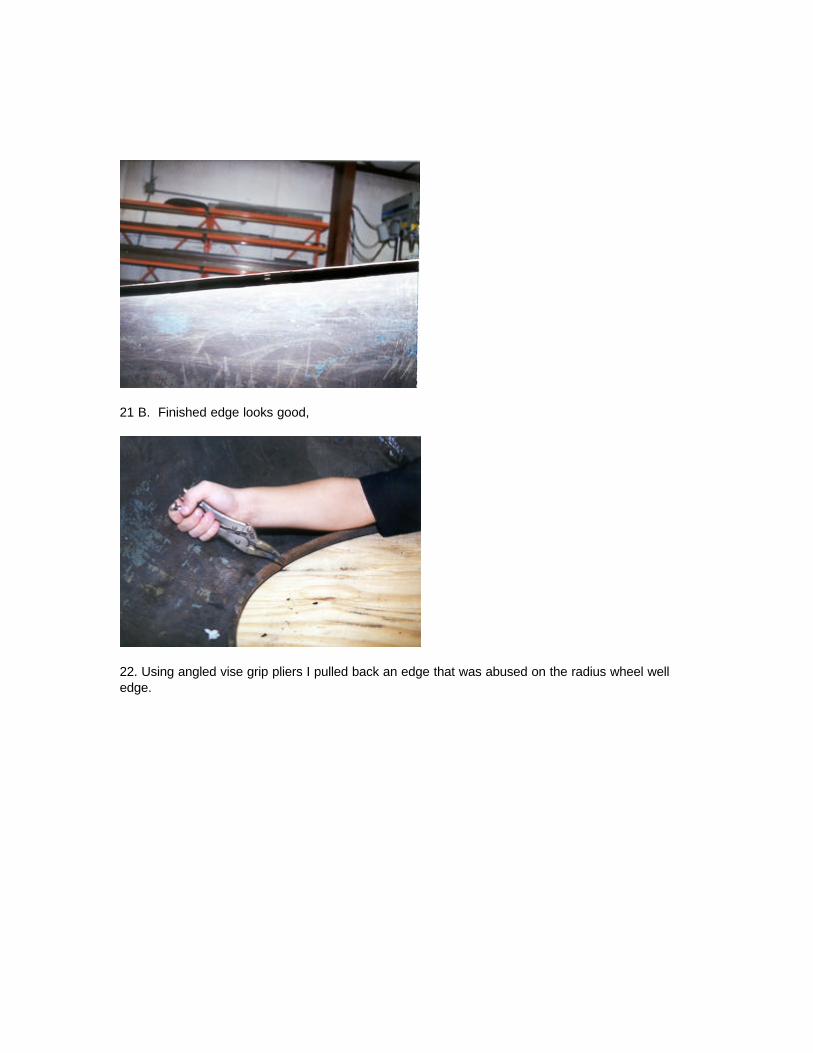
21 B. Finished edge looks good,
22. Using angled vise grip pliers I pulled back an edge that was abused on the radius wheel well edge.

23. Using an arched body hammer and dolly I took it a bit farther by tapping back in place the outer edge radius.
24. A home made tubing radius dolly fits nicely into the back side to finish off its shape.
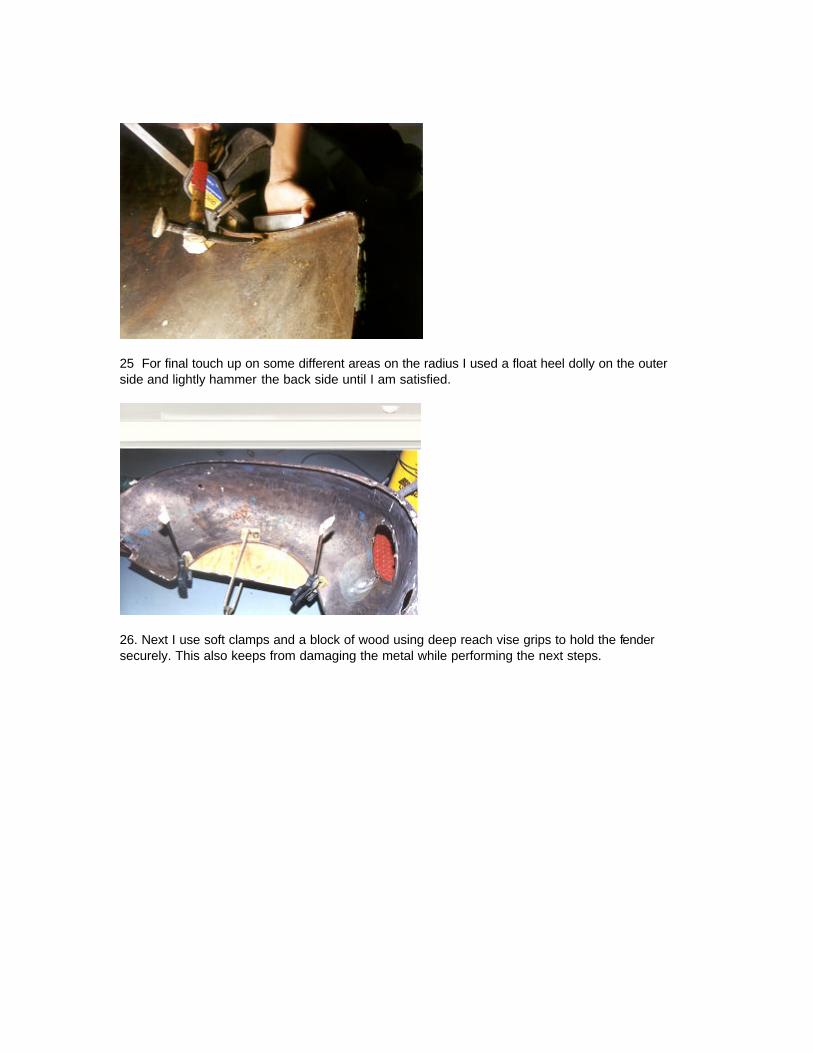
25 For final touch up on some different areas on the radius I used a float heel dolly on the outer side and lightly hammer the back side until I am satisfied.
26. Next I use soft clamps and a block of wood using deep reach vise grips to hold the fender securely. This also keeps from damaging the metal while performing the next steps.

27. Using a 007 Uniram vacuum blaster I blasted all the cracks in the metal to pin point the problem areas.
28. Finding the very end of any cracks I drilled a small 7/64 hole to stop the crack from running. and or creeping any more. Even though I will weld the crack up solid if I did not drill the very end I would not create a permanent stopping point for the molecules of the metal to no longer have stress so It must be done this way.

29. A close up shows where I have drilled at the very end of this crack.

30. I then use a cut off tool and slice a line to the drilled hole from the very edge. This needed to be done to allow for metal fill and to allow for shrinking the fender in that area because the metal had stretched so much that their was excess metal creating a bowed radius which did not look good.
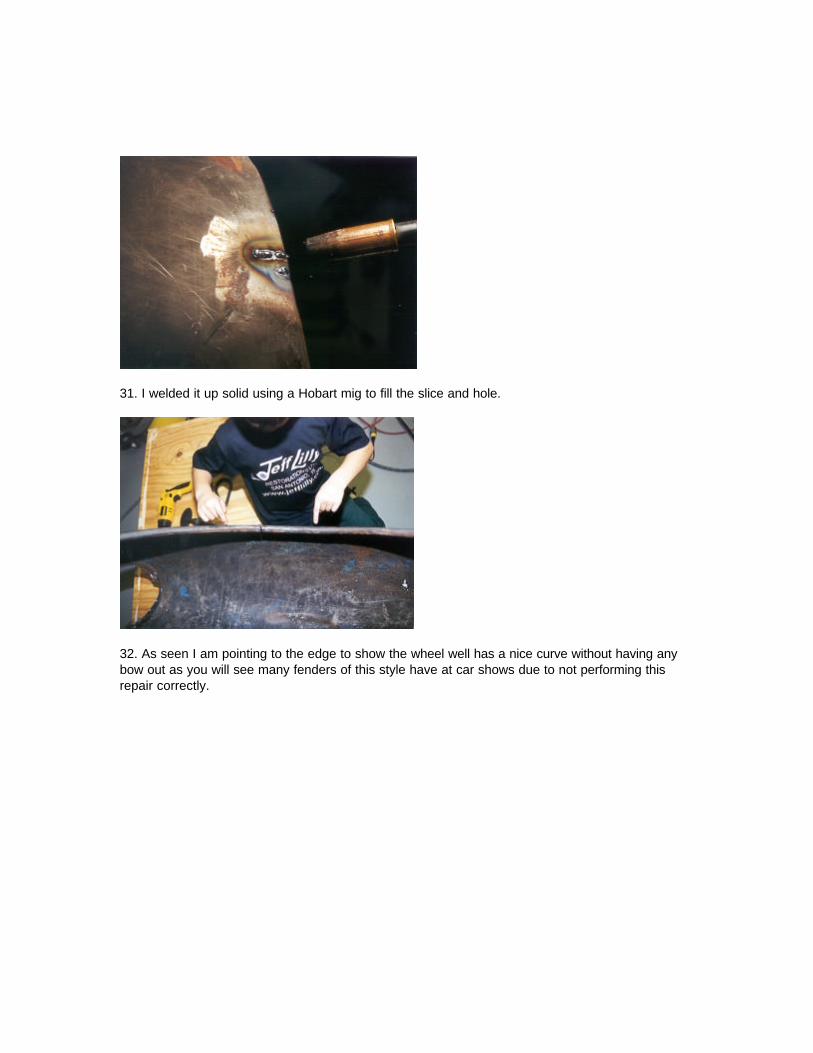
31. I welded it up solid using a Hobart mig to fill the slice and hole.
32. As seen I am pointing to the edge to show the wheel well has a nice curve without having any bow out as you will see many fenders of this style have at car shows due to not performing this repair correctly.

33. On the back side edge I used a copper spoon to back up the slice to weld it properly.
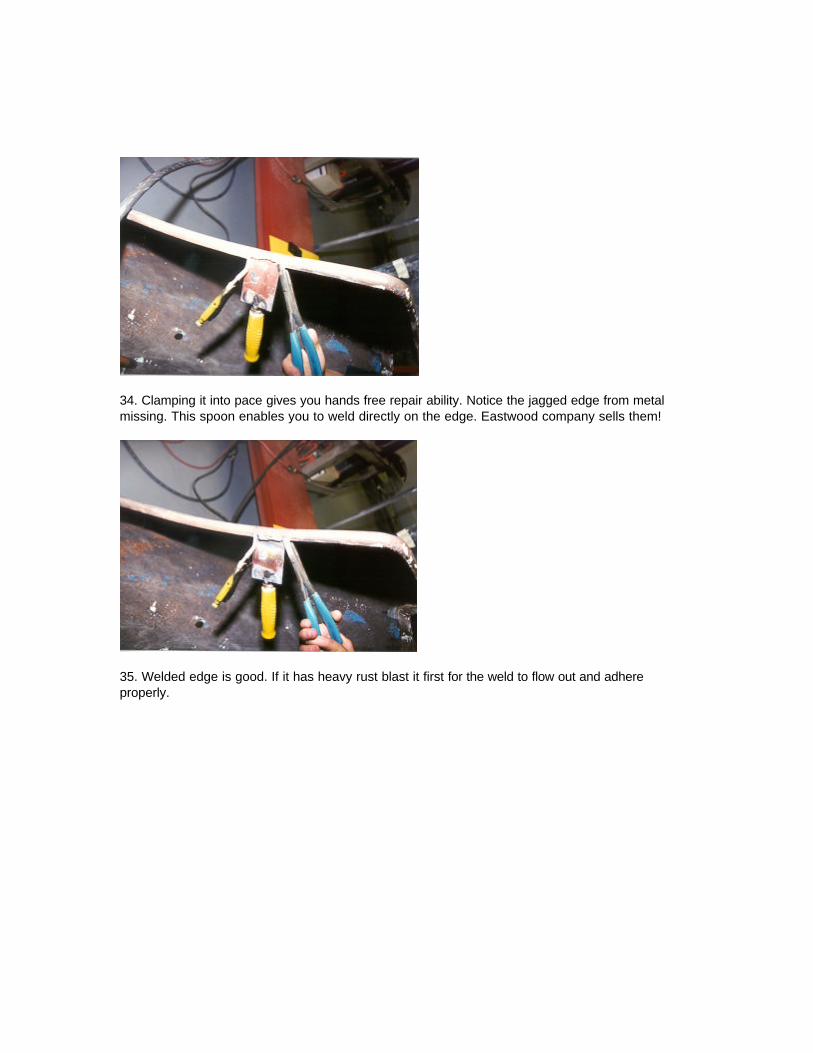
34. Clamping it into pace gives you hands free repair ability. Notice the jagged edge from metal missing. This spoon enables you to weld directly on the edge. Eastwood company sells them!
35. Welded edge is good. If it has heavy rust blast it first for the weld to flow out and adhere properly.
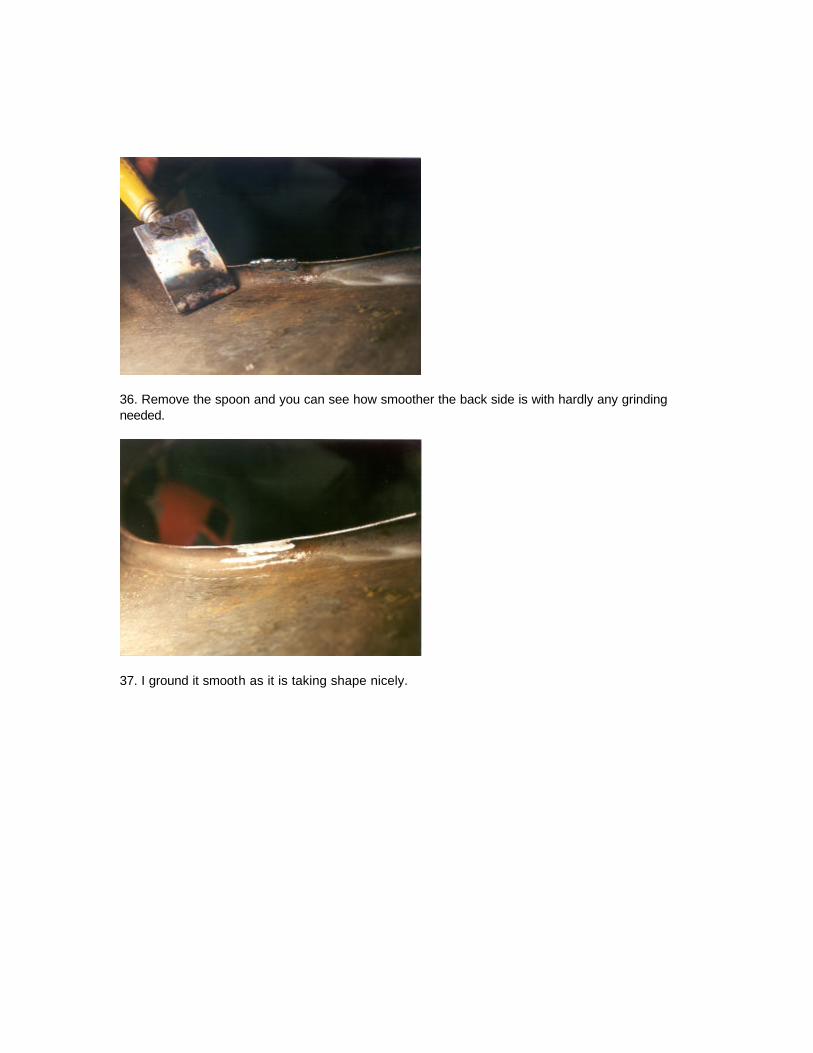
36. Remove the spoon and you can see how smoother the back side is with hardly any grinding needed.
37. I ground it smooth as it is taking shape nicely.

38. My Father and I attached some braces and bolted them up to the fender so it would sit upright. This makes it easier to work on and photograph for demonstration purpose. On my Fathers customer projects the metal work employees always attach the fenders on to the actual car/truck body and take them from this point on. I am now sanding the entire fender with 80 grit to find all the dents.
39. As seen this really makes lows and high’s stand out so you know exactly where to hammer, dolly and slap file back in to place.
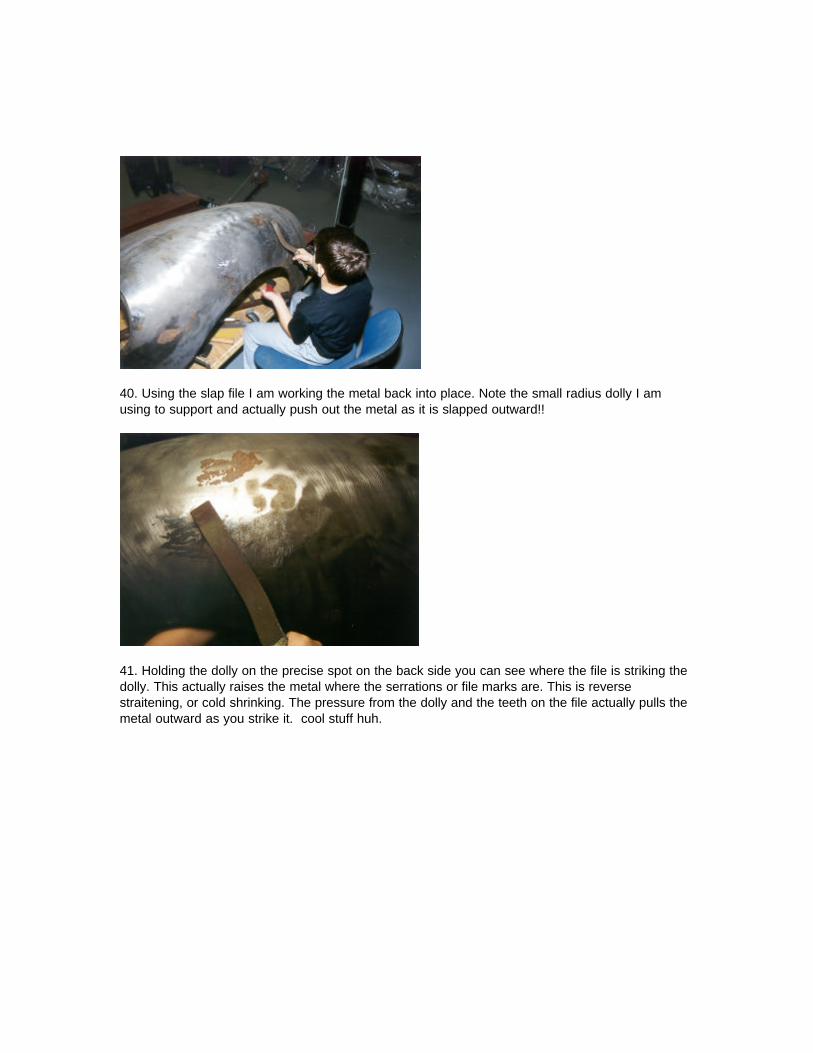
40. Using the slap file I am working the metal back into place. Note the small radius dolly I am using to support and actually push out the metal as it is slapped outward!!
41. Holding the dolly on the precise spot on the back side you can see where the file is striking the dolly. This actually raises the metal where the serrations or file marks are. This is reverse straitening, or cold shrinking. The pressure from the dolly and the teeth on the file actually pulls the metal outward as you strike it. cool stuff huh.

42. I am now metal filing the area. It is like block sanding and checking for highs and lows. Do not file much, just enough to check for highs and lows. Or you will thin out the metal too much.
43 I am using an adjustable file so it can be flexed to concave or convex shapes which will match the round 40 fender shape.

44. I have noticed a few stubborn spots that need hammer and dolly adjustment’s. I am now using a serrated dolly in my left hand. The HIGH spots I found will push down easily into the serrations while I lightly tap with the body hammer! This in reverse of cold shrinking. NOTICE the ear muffs as it gets a bit noisy slapping metal.
45. The shiny spots are the highs as I am holding the serrated dolly against the back side of these .
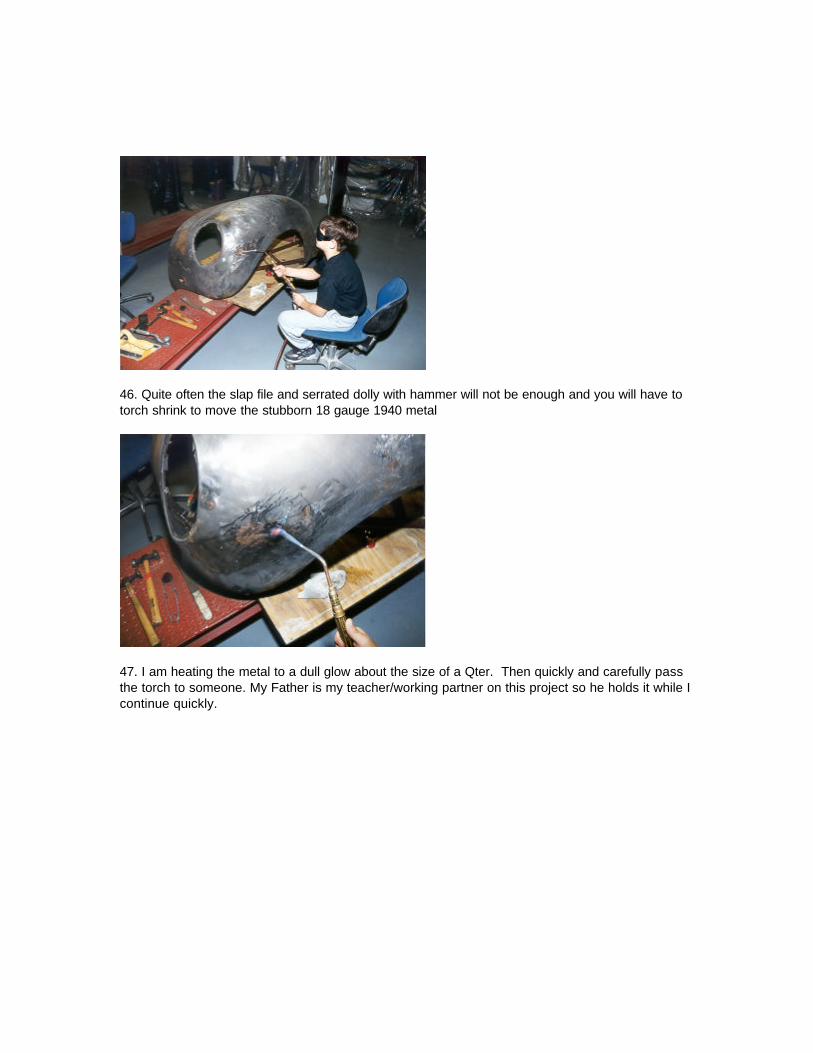
46. Quite often the slap file and serrated dolly with hammer will not be enough and you will have to torch shrink to move the stubborn 18 gauge 1940 metal
47. I am heating the metal to a dull glow about the size of a Qter. Then quickly and carefully pass the torch to someone. My Father is my teacher/working partner on this project so he holds it while I continue quickly.
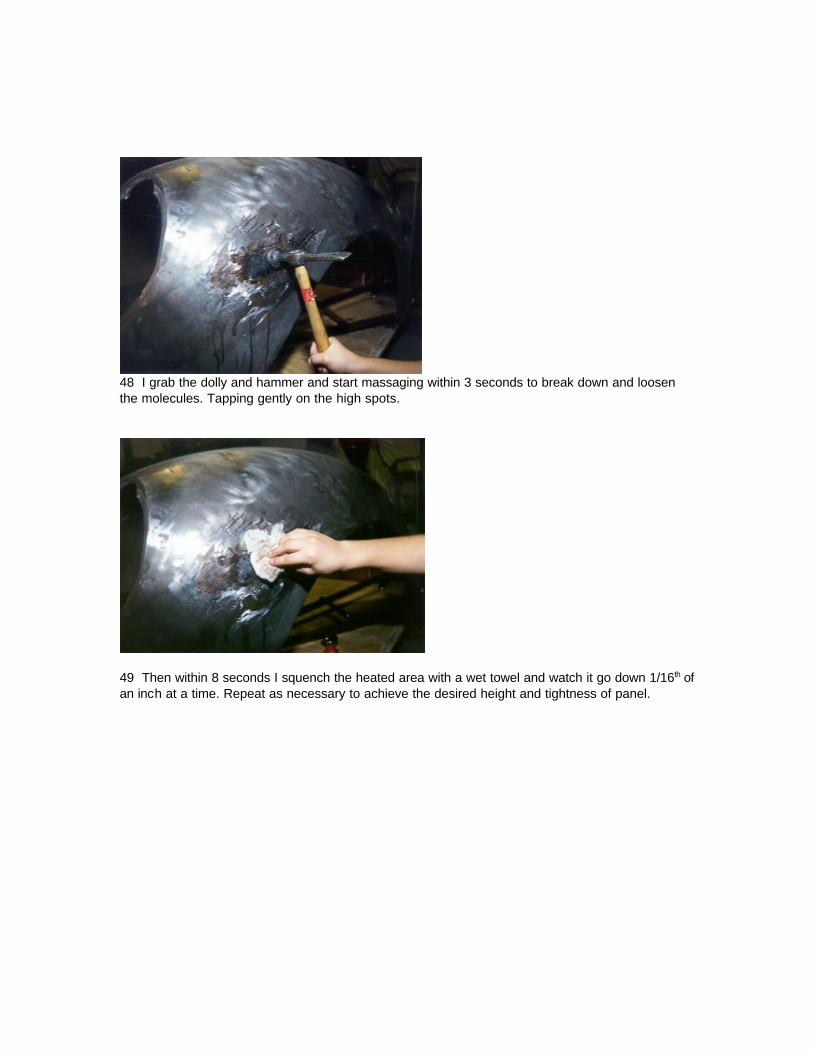
48 I grab the dolly and hammer and start massaging within 3 seconds to break down and loosen the molecules. Tapping gently on the high spots.
49 Then within 8 seconds I squench the heated area with a wet towel and watch it go down 1/16th of an inch at a time. Repeat as necessary to achieve the desired height and tightness of panel.

50 We have a few unwanted holes. This is the same way you would approach rust out holes. We are cleaning the hole out making it more round then it was. A square hole is actually easier to do but we will show you this technique on a round hole.
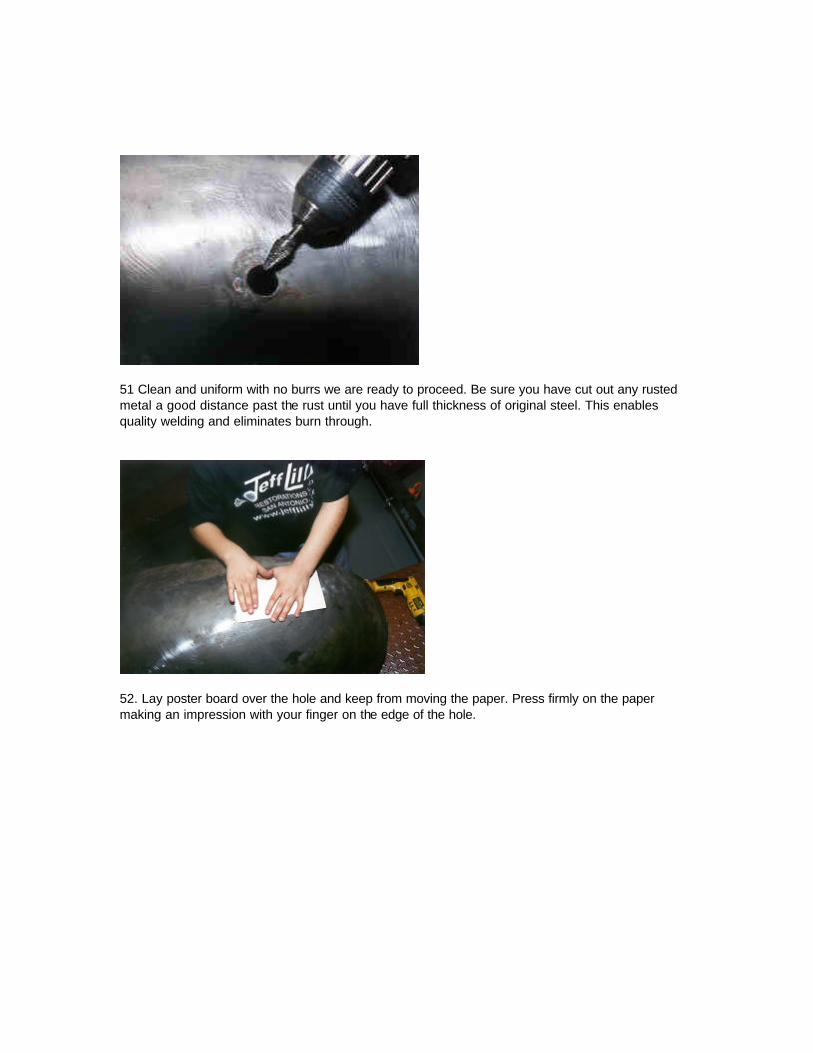
51 Clean and uniform with no burrs we are ready to proceed. Be sure you have cut out any rusted metal a good distance past the rust until you have full thickness of original steel. This enables quality welding and eliminates burn through.
52. Lay poster board over the hole and keep from moving the paper. Press firmly on the paper making an impression with your finger on the edge of the hole.

53 Simply cut out or razor blade the template.
54 Pre fit to be sure you cut out trimmed etc correctly. A 3/32 razor blade gap is the ultimate. Too tight and the metal tends to buckle in or out around the patch during welding. Too loose and burn through takes place.
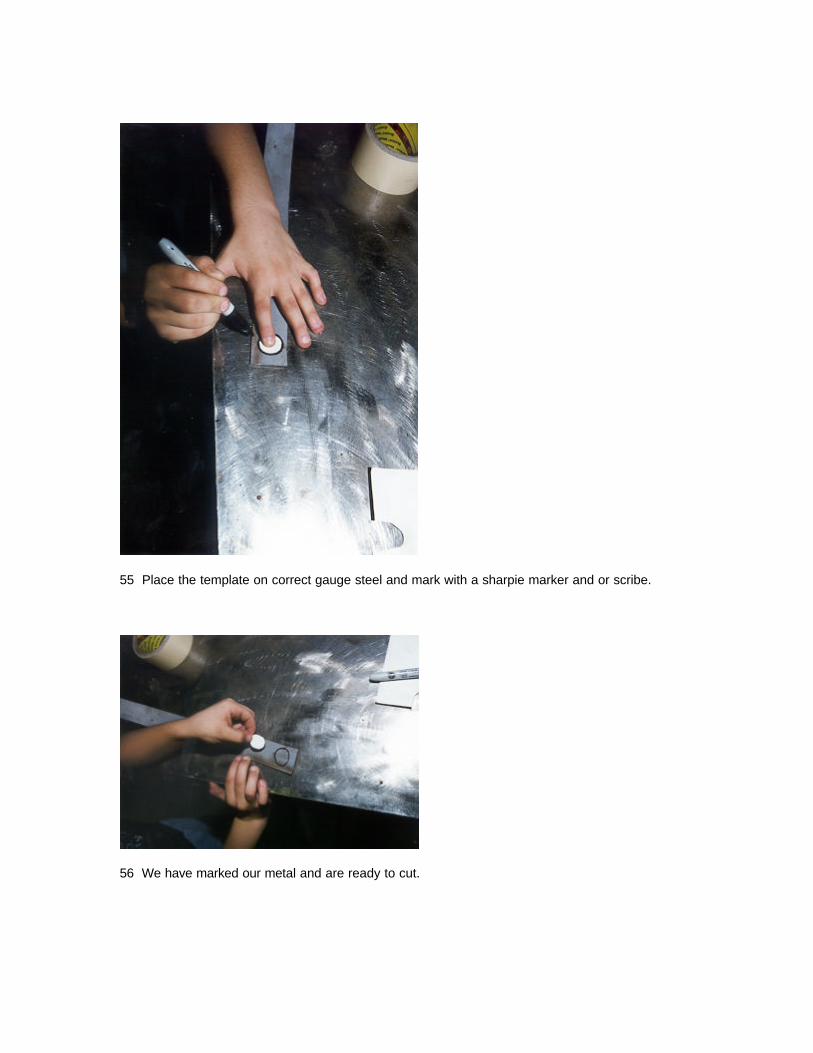
55 Place the template on correct gauge steel and mark with a sharpie marker and or scribe.
56 We have marked our metal and are ready to cut.
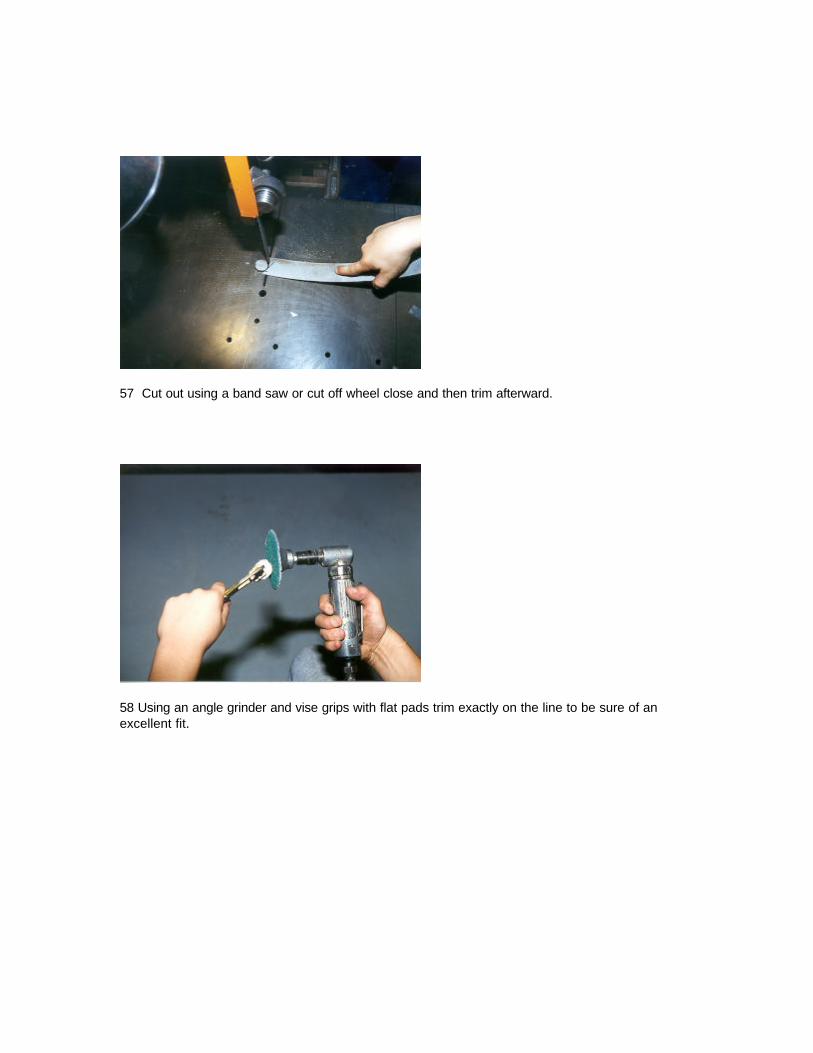
57 Cut out using a band saw or cut off wheel close and then trim afterward.
58 Using an angle grinder and vise grips with flat pads trim exactly on the line to be sure of an excellent fit.

59. The pre fit looks good and is ready to rock and roll as my Father would say.
60 Now Mig weld in place. We have auto darkening helmets which makes it easy to accomplish this!

61 Grind smooth using a cut off wheel to about 85 % close, then finish it off with an angle grinder and roloc disc from 3M with 36 grit
62. Off to the blast shop to clean up the steel of all rust. We use pressure blasters and aluminum oxide which can cost around 80 cents per pound. This is expensive so you need a way of recovery. This is the only way for it to be cost effective. Aluminum oxide will blast without warping as the aluminum absorbs the heat instead of the steel unlike silica sand. Which is only 5 cents a pound. We do not use silica because of the risk of damaging fragile body panels on rare vehicles and breathing it can cause silicosis which is a Bummer dude.
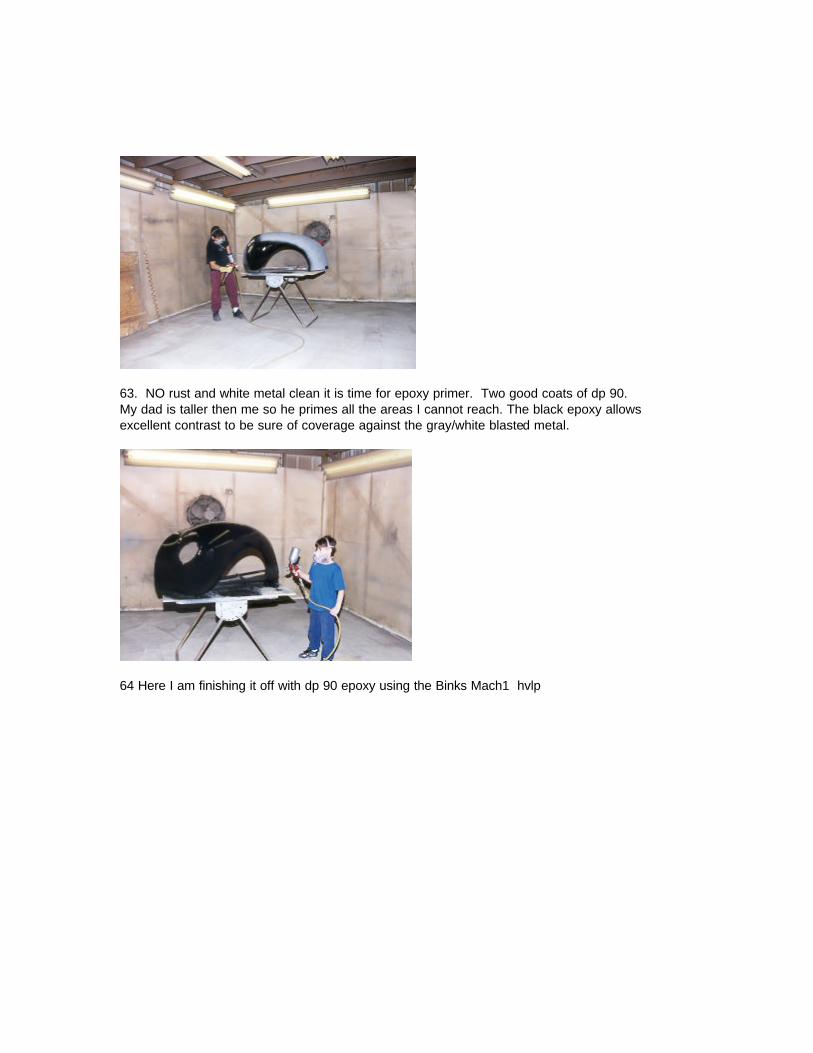
63. NO rust and white metal clean it is time for epoxy primer. Two good coats of dp 90. My dad is taller then me so he primes all the areas I cannot reach. The black epoxy allows excellent contrast to be sure of coverage against the gray/white blasted metal.
64 Here I am finishing it off with dp 90 epoxy using the Binks Mach1 hvlp
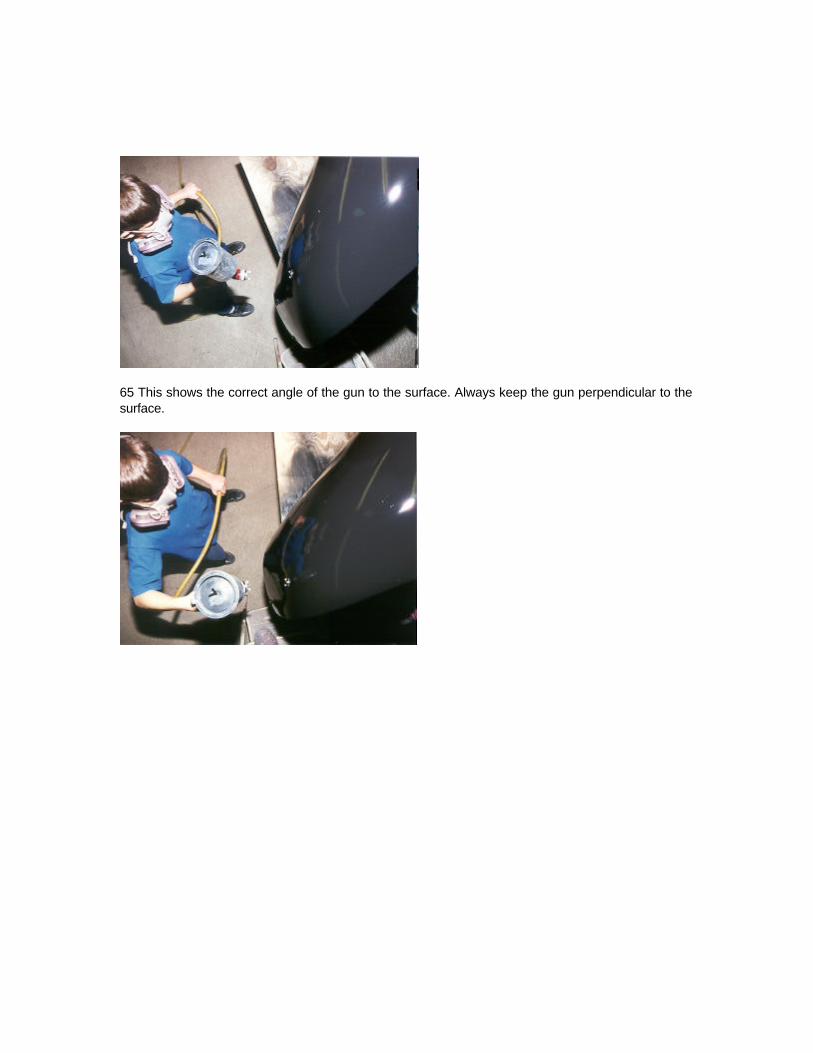
65 This shows the correct angle of the gun to the surface. Always keep the gun perpendicular to the surface.

67 This is a wrong angle. You have to keep perpendicular to the surface.
68 It is now time to order parts such as headlight bucket and trim to fit while doing the body work stage.

End of metal work stage