4-Tray Vermicompost System - Microsoftbwgs.blob.core.windows.net/docs/Wom_Farm_Manual_11.pdfSWF400 3...
12
Congratulations on purchasing your new Sunleaves Worm Farm! You’ve invested in a healthy and fun way to recycle kitchen and daily waste by using red wiggler worms, part of nature’s recycling team. Your red wiggler worms will thrive in your Sunleaves Worm Farm as they eat vegetables, fruit, bread, and paper scraps, producing rich vermicompost, one of nature’s finest fertilizers. Sunleaves Garden Products 7854 N. State Road 37 Bloomington, IN 47404 SWF400 REV 032011 Operating guidelines 2 Parts list 2 Assembling the Sunleaves Worm Farm 3 Startup 4 Adding a processing tray 5 Feeding guidelines 6 When to harvest 7 Tips for vermicomposting 7-8 Vermicompost usage 8 Troubleshooting 9-10 About red wiggler worms 11 4-Tray Vermicompost System
Transcript of 4-Tray Vermicompost System - Microsoftbwgs.blob.core.windows.net/docs/Wom_Farm_Manual_11.pdfSWF400 3...
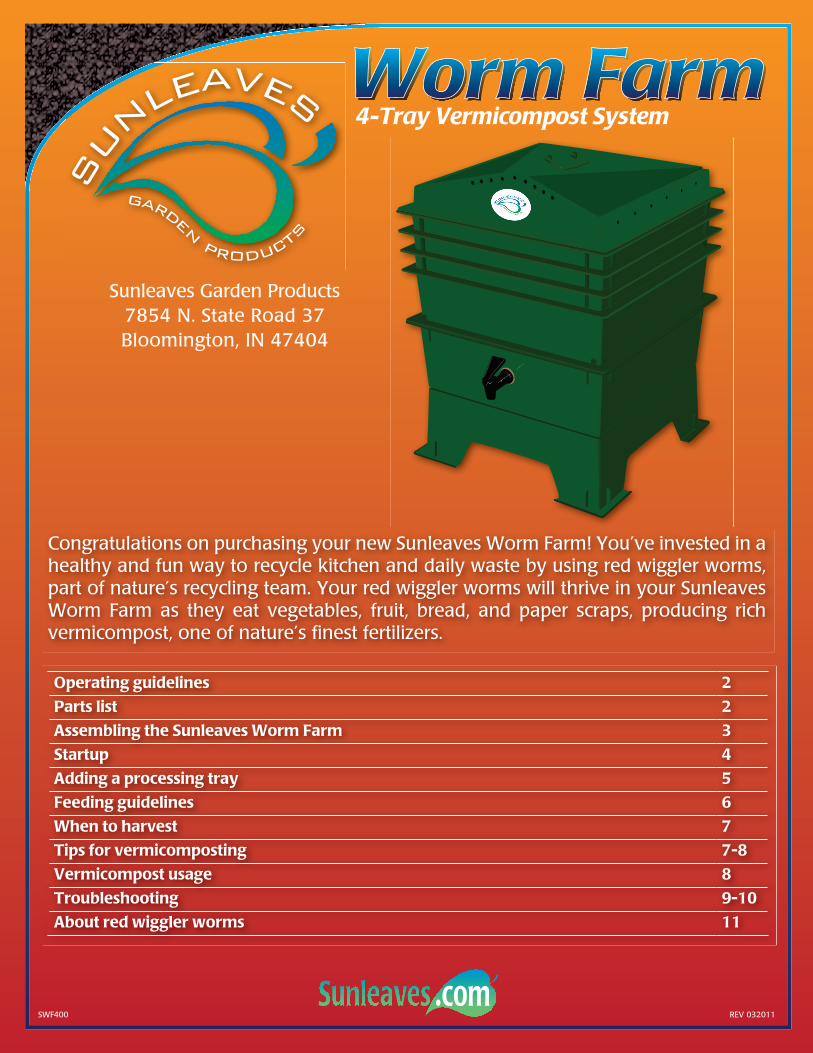
Congratulations on purchasing your new Sunleaves Worm Farm! You’ve invested in a healthy and fun way to recycle kitchen and daily waste by using red wiggler worms, part of nature’s recycling team. Your red wiggler worms will thrive in your Sunleaves Worm Farm as they eat vegetables, fruit, bread, and paper scraps, producing rich vermicompost, one of nature’s fi nest fertilizers.
Sunleaves Garden Products7854 N. State Road 37Bloomington, IN 47404
SWF400 REV 032011
Operating guidelines 2
Parts list 2
Assembling the Sunleaves Worm Farm 3
Startup 4
Adding a processing tray 5
Feeding guidelines 6
When to harvest 7
Tips for vermicomposting 7-8
Vermicompost usage 8
Troubleshooting 9-10
About red wiggler worms 11
4-Tray Vermicompost System
2 SWF400
Operating guidelines
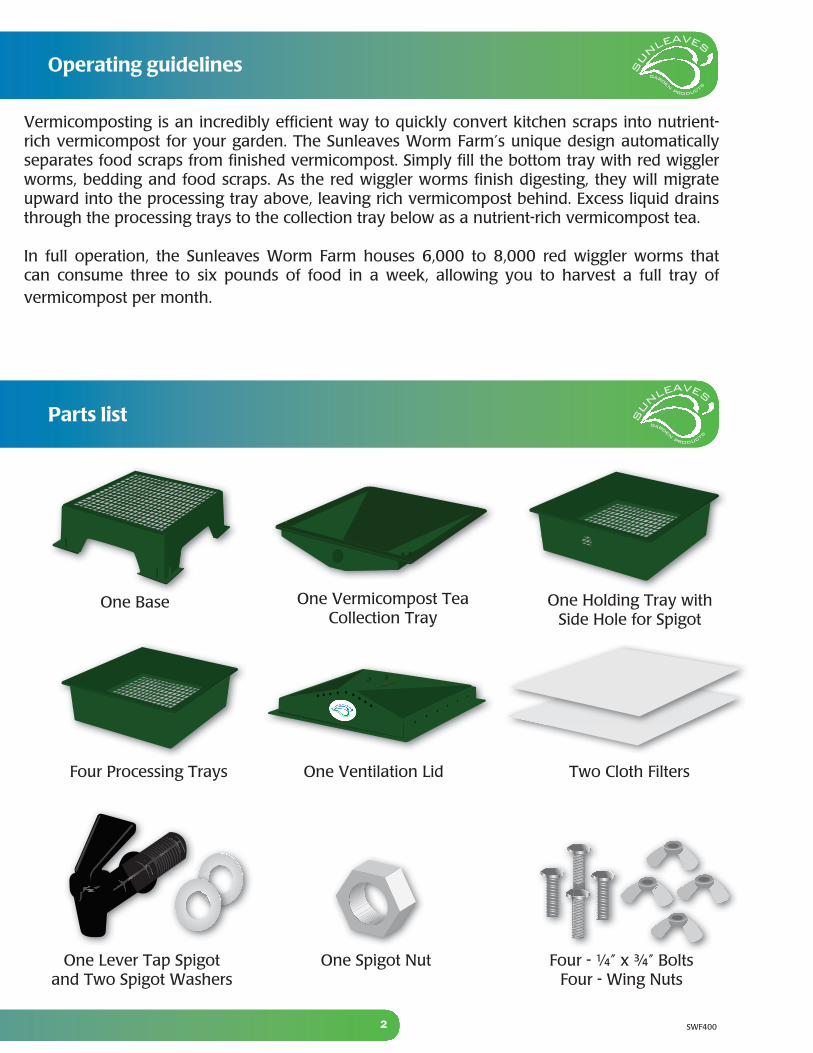
One Holding Tray with Side Hole for Spigot
One Base
Four Processing Trays One Ventilation Lid Two Cloth Filters
One Lever Tap Spigot and Two Spigot Washers
One Vermicompost Tea Collection Tray
One Spigot Nut Four - ¼” x ¾” BoltsFour - Wing Nuts
Parts list
Vermicomposting is an incredibly effi cient way to quickly convert kitchen scraps into nutrient-rich vermicompost for your garden. The Sunleaves Worm Farm’s unique design automatically separates food scraps from fi nished vermicompost. Simply fi ll the bottom tray with red wiggler worms, bedding and food scraps. As the red wiggler worms fi nish digesting, they will migrate upward into the processing tray above, leaving rich vermicompost behind. Excess liquid drains through the processing trays to the collection tray below as a nutrient-rich vermicompost tea.
In full operation, the Sunleaves Worm Farm houses 6,000 to 8,000 red wiggler worms that can consume three to six pounds of food in a week, allowing you to harvest a full tray of vermicompost per month.

3SWF400
Place the holding tray on top of the base tray aligning the grids. Insert one steel bolt through each corner a few squares from the edge. Attach wing nuts by hand to connect the holding tray and base. Do not use tools as this may cause damage to the tray or base.
Place the collection tray into the holding tray and align the spigot holes.
Place one cloth fi lter on top of the collection tray, cloth fi lter will hang over all sides. Then add the fi rst processing tray. Pull fi rmly on all sides of the fi lter to ensure the fi lter is in direct contact with the bottom of the processing tray. This will prevent red wiggler worms and debris from falling into the collection tray.
Assembling the Sunleaves Worm Farm
NOTE: After assembly, pour water in the bottom of the collection tray. If water leaks around the tap, check the placement of the plastic spigot nut and fi rmly tighten. Remove any water from the collection tray before you set up the bedding.
Locate the spigot, the clear washers and the large plastic spigot nut. Slide one clear washer over the threaded end of the spigot. Insert the spigot through the holding tray and collection tray. Slide the second clear washer over the threaded end now inside the trays. Secure to the trays with the large plastic spigot nut, tightening by hand.
Separate the four processing trays from the other parts.

4 SWF400
Startup
LocationPlace the Sunleaves Worm Farm anywhere the temperature stays between 50-85º F, indoors or out. Direct sunlight can raise the Sunleaves Worm Farm’s internal temperature to levels that are deadly to your red wiggler worms. Be aware of weather conditions if your Sunleaves Worm Farm is kept outside, as heavy rain, cold temperatures and strong winds can negatively affect the red wiggler worm’s environment.
Bedding materialsWorm bedding is where your red wiggler worms live. Red wiggler worms need to have a comfortable living environment before they can work on vermicomposting. The following materials are good for bedding:• Moist coconut coir• Soil• Old newspaper• Shredded paper• Decayed backyard leaves or grasses (NOTE: These should not be green. Green compost will generate heat as it decays, increasing the temperature in the Sunleaves Worm Farm. Never use leaves from plants such as bay, eucalyptus or magnolia trees, and never use needles from pine, fir and cedar trees. These types of leaves are toxic to red wiggler worms.)
Bedding preparationPrepare bedding a few days before your red wiggler worms arrive. Soak half of a coconut coir brick (Sunleaves Classic Coir is recommended) in a bucket of water for a couple of minutes. Scoop the coconut coir out of the bucket and squeeze out any excess water. The worm bedding should be damp, not wet. Mix the damp coconut coir with one handful of soil, approximately 0.5 lb of damp shredded paper and four to five crushed egg shells. Spread this mixture in the first processing tray. The mixture should be about 2” in height. Add a couple sheets of moist newspaper on top of bedding mixture.
Red wiggler worm arrivalRed wiggler worms are not included with your Sunleaves Worm Farm. Separately purchase red wiggler worms, also known as Eisenia Fetida, in a quantity large enough for a heathy population. Start with as few as a half pound of red wiggler worms (approximately 500), but a full pound of red wiggler worms (approximately 1,000) will work even better. If you really want to jump start the Sunleaves Worm Farm, start with two pounds of red wiggler worms!
Red wiggler worms will arrive packed in a special bedding material. Remove the Sunleaves Worm Farm lid and lift the top layer of moist newspaper in the processing tray. Gently remove the red wiggler worms and bedding from their package and place on the prepared bedding in the processing tray.
Red wiggler worms can become stressed during shipment, and they may take a week or so to adapt to their new environment. Leave a light on at night to encourage them to burrow into their new home.

5SWF400
Adding a processing tray
When the red wiggler worms make progress on the first processing tray, a second processing tray will be required. The top of the bedding in the lower processing tray needs to come in complete contact with the bottom of the processing tray that is being added. Red wiggler worms will eventually migrate upward into the next tray to search for food as they process the food and bedding in the lower processing tray.
The material in the tray should be configured from the top down as follows: (Note: In layers two and three, you do not need to add everything listed. If you only have a few of the items, the processing tray will still function properly.)
Lid – The plastic lid keeps the light out of the processing tray, but more importantly allows heat and gases generated in the vermicomposting process to escape from around the perimeter and vent holes.
Layer 1 – A layer of three or four sheets of moist newspaper.
Layer 2 – A layer consisting of one or more of the following:• Moist shredded cardboard• Moist shredded newspaper• Moist shredded junk mail (glossy junk mail is OK, but do not use plastic coated paper or paper with colored inks)• Moist coconut coir
Layer 3 – A layer consisting of decayed plant materials such as grass clippings and leaves.
Layer 4 – A bottom layer of food waste.
Red wiggler worms need space to move around, and the middle layer is where they like to hang out when not working in the food scrap layer. Place the food waste under moist paper and other materials.
Place the new processing tray on top of the Sunleaves Worm Farm and continue adding trays in this manner until you run out of trays to stack.
Layer 1
Layer 2
Layer 3
Layer 4

6 SWF400
Feeding guidelines
Always add food to the top processing tray, never to the lower processing trays. Red wiggler worms have very small brains, but they are smart enough to crawl up through the grid and into the upper processing trays to look for food once the food in the lower processing trays is exhausted.
It is preferable to feed the red wiggler worms with small quantities of food once a week. In the event of an extended absence, feed a three week amount of food into the system before your departure. The food is more easily digested by the red wiggler worms when it is cut or shredded into smaller pieces.
Add new food to the uppermost processing tray at any time. Red wiggler worms will eat three times their weight every week, but you have to take care to not overfeed your red wiggler worms. If you see a large quantity of unprocessed food in the system for a prolonged period of time, stop feeding food into the system.
Vermicompost friendly foodsPaper Products Cardboard, dryer lint, paper egg cartons, vacuum dust, tissues,
napkins, paper towels, coffee filters with used grounds, tea bags, paper bags, junk mail.
Fruit Melon, banana, pineapple, apple, grapes, peaches, plums, berries.
Grain-based Foods Breads, oatmeal, muffins, cereal, pasta, rice, pizza crust (with no toppings).
NOTE: Use grain-based foods sparingly. Too much can cause your Sunleaves Worm Farm to overheat.
Garden Trimmings Dead flowers, dead disease-free plants, dried leaves gathered in the fall.
Vegetables Corn, broccoli, cabbage, beans, tomatoes, squash, carrots, peas, cooked potatoes, green salad (without dressing).

7SWF400
When to harvest
VermicompostMost of the red wiggler worms will migrate to the upper processing trays for food. The bottom processing tray will contain the vermicompost. When the material in the bottom tray is nearly black, looks like soil, and has only a few small chunks of mostly vermicomposted bedding matter, it is time to harvest the bin.
If the bottom processing tray is ready to harvest but there are still some red wiggler worms in it, it is very easy to separate them. Simply remove the garden-ready bottom tray and place it on top of the system with the lid off. Stir the vermicompost several times a day. The remaining red wiggler worms will move down into the tray below to get away from the light, leaving a red wiggler worm-free vermicompost tray.
Empty the harvest-ready tray onto a piece of plastic sheeting. The vermicompost is now ready to be used in your garden to help produce healthy plants. Rinse the empty tray with water. The runoff is also rich in nutrition and can be used for plant watering. This rinsed tray is now a new processing tray. Place this processing tray on the top of the last processing tray, adding new food scraps and continuing the cycle.
Vermicompost tea During the vermicomposting process, gravity pulls moisture through the trays, dragging nutrient-rich particles with it. This nutrient-rich liquid is called leachate, which eventually lands in the collection tray. The leachate can be drained at any time during the vermicomposting process. Note: It will take some time before your vermicompost produces enough liquid in the collection tray to be drained from the spigot. It is suggested that mixing a cup of water to the collection tray will help to increase the rate in which the liquid vermicompost flows through the spigot.
To collect the tea, place a small plastic container under the spigot and turn the valve to drain. Before applying tea directly to your plants, it is a good idea to pour it from one bucket to another to add oxygen. You can use it at full strength on your outside plants. For houseplants, dilute it using one part water to one part tea. You can also recycle the tea back through the Sunleaves Worm Farm if the contents of the vermicomposter are running a little dry.
1. It normally takes two to three months before the red wiggler worms process the first tray. At the beginning when food is added, do not put in too much each time. The best way is to add a little each time and add it regularly.
2. As a rule of thumb, the height of the foods should be less than one inch.3. If it seems as though the red wiggler worms are not eating, stop feeding for a few days. Remember
that red wiggler worms have no teeth and the food must be soft for them to eat. The smaller and softer the bedding, the better the environment for the necessary bacteria, fungi, molds and protozoa.
Tips for vermicomposting

1. 2. 3. 4. As humans, we like a variation of foods, and red wiggler worms are the same way. Feed them
different kinds of foods. If you notice the red wiggler worms do not like some kinds of foods, don’t add them into the processing tray next time.
5. When the pH is less than 6, it is harmful to the red wiggler worms. It is ideal to have a pH level around 7. pH ranging from 6 to 8 is acceptable. The presense of white worms (entrachyadides) indicates that the system is too acidic or the pH is too low. Avoid feeding acidic food such as lemons, oranges and onions. To correct the pH level sprinkle a handful of calcium carbonate lime, oyster shell powders, or egg shells every month or carbon-containing wastes, such as cardboard, paper or egg boxes to reduce the degree of acidity in the system. (Note: never use slaked or hydrated lime)
6. Red wiggler worms require moisture to breathe because they take in oxygen through their skin and will die if they dry out. Too much moisture and your Sunleaves Worm Farm will start to produce unpleasant odors and your red wiggler worms could drown. The moisture in bedding should range from 60% to 80%.
8 SWF400
Use as a topsoilMicro-organisms in vermicompost maintain the ground soil in a good, healthy condition. Used on the roots of plants, it will nourish the plants and keep the root area humid. The vermicompost may also be used as a nutrient-rich fertilizer for houseplants.
Ground soil regenerationVermicompost can be used for ground soil regeneration. The ground soil can be improved from the natural fertilizer and organic matter. To enrich your ground soil, mix one gallon of the vermicompost with two cubic feet of ground soil. Till the ground that’s going to be treated, and mix in the vermicompost and ground soil at the ratio of one half gallon per one square yard.
Liquid fertilizerThe liquid that you harvest from the spigot can be used as a fertilizer for your plants, too. To make fresh vermicompost tea, mix one cup of well processed vermicompost in a gallon of water. Steep overnight, shake, mix or aerate with an aquarium pump if desired, then use the solution within 12 hours to water or spray plants.
Vermicompost usage
Tips for vermicomposting

9SWF400
Troubleshooting
TemperatureRed wiggler worms normally live and feed within a few inches of the ground surface. The ground maintains a consistent temperature. In extreme heat or cold, red wiggler worms will go as deep as two feet under the surface to maintain their temperature. When we put red wiggler worms in plastic processing trays above ground, we must consider their natural behavior as a factor when managing the Sunleaves Worm Farm.
Red wiggler worms thrive in temperatures between 50° and 85° F. They will slow down in cold or hot conditions. When in temperatures of 90° to 100° F, they will move to the lower processing trays. In hot conditions the Sunleaves Worm Farm must be kept moist. Never place the Sunleaves Worm Farm in direct sunlight. Find a cool, shady spot with plenty of air movement.
In northern climates, the Sunleaves Worm Farm must be kept indoors during the winter. A well-managed vermicomposter will not create any offensive odors. Red wiggler worms will not survive freezing conditions.
Cooling bedding material in hot weatherFrom time to time the bedding in your Sunleaves Worm Farm will become hot to the touch. This is often the result of using certain types of foods like grains, extremely hot weather, or exposure to direct sunlight.
To solve this problem, find some pieces of wood no more than 1/4” thick. Lath, dowel, or paint stirring sticks from a local hardware store work well. Separate your processing trays by adding strips of the wood between them to allow additional air circulation. For best results, do this at night and remove the wood strips during the day. Make sure that the openings are too small for rodents, and add a fan if more air circulation is needed.
Red wiggler worms may try to escape from the Sunleaves Worm Farm. Regularly check around your Sunleaves Worm Farm for escaped red wiggler worms and place them back in the processing tray.
Too moist?If there is too much moisture and the system is too wet, drain the liquid from the spigot. Then add pieces of dry paper and cardboard to the processing trays. If the system generates too much liquid, leave the spigot open and place a container underneath to collect any liquid. If excess water continues to be a problem, the bedding may become compressed and water logged. This will restrict flow of oxygen needed for the vermicomposting process to work effectively. To remedy this and avoid any odors, stir up the processing tray to create more air spaces in order to increase oxygen and allow the red wiggler worms to work more efficiently.
Too dry?You should never see dry scraps, especially paper, in a processing tray. The Sunleaves Worm Farm runs a little dry in contrast to sealed vermiculture systems because it is so well aerated. If it is too dry, you have several options. You can add wet shredded paper, or spray water in the processing tray. In very dry conditions, small amounts of water can be poured in. Allow the water to work its way down the processing trays before adding more. Excessive water compacts the bedding creating thick globs. To avoid these problems, add very small amounts of water at a time.
10 SWF400
Troubleshooting
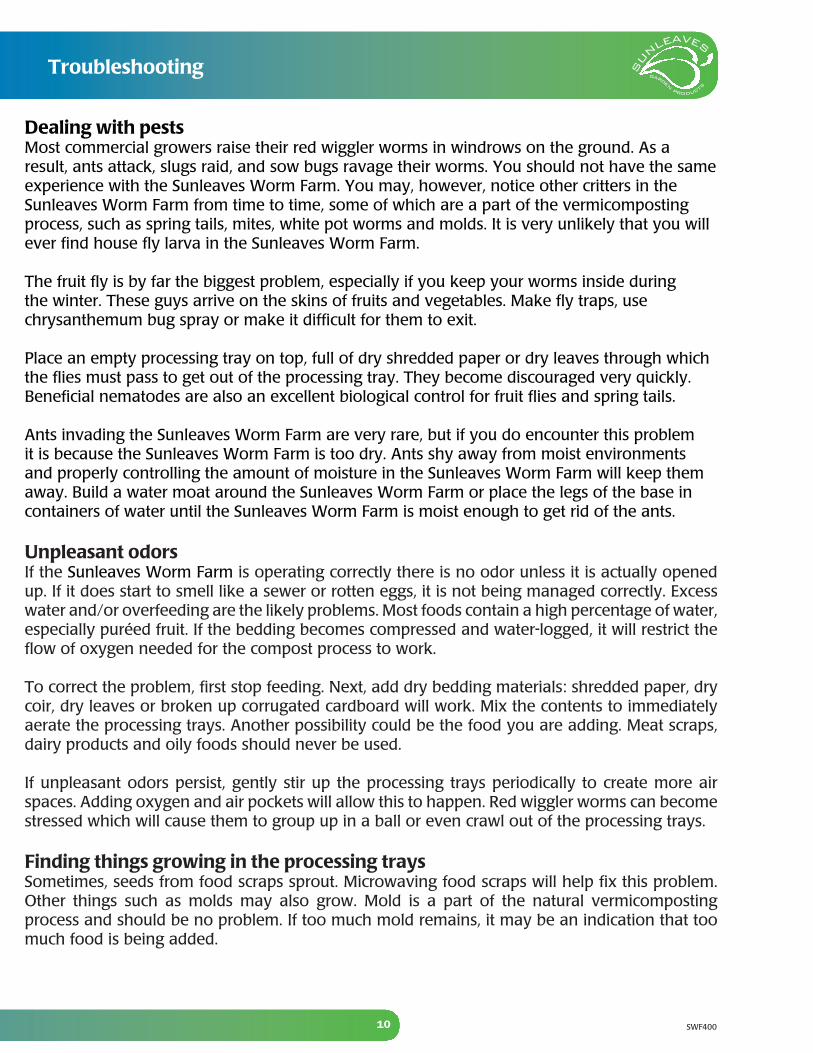
Dealing with pestsMost commercial growers raise their red wiggler worms in windrows on the ground. As a result, ants attack, slugs raid, and sow bugs ravage their worms. You should not have the same experience with the Sunleaves Worm Farm. You may, however, notice other critters in the Sunleaves Worm Farm from time to time, some of which are a part of the vermicomposting process, such as spring tails, mites, white pot worms and molds. It is very unlikely that you will ever find house fly larva in the Sunleaves Worm Farm.
The fruit fly is by far the biggest problem, especially if you keep your worms inside during the winter. These guys arrive on the skins of fruits and vegetables. Make fly traps, use chrysanthemum bug spray or make it difficult for them to exit.
Place an empty processing tray on top, full of dry shredded paper or dry leaves through which the flies must pass to get out of the processing tray. They become discouraged very quickly. Beneficial nematodes are also an excellent biological control for fruit flies and spring tails.
Ants invading the Sunleaves Worm Farm are very rare, but if you do encounter this problem it is because the Sunleaves Worm Farm is too dry. Ants shy away from moist environments and properly controlling the amount of moisture in the Sunleaves Worm Farm will keep them away. Build a water moat around the Sunleaves Worm Farm or place the legs of the base in containers of water until the Sunleaves Worm Farm is moist enough to get rid of the ants.
Unpleasant odorsIf the Sunleaves Worm Farm is operating correctly there is no odor unless it is actually opened up. If it does start to smell like a sewer or rotten eggs, it is not being managed correctly. Excess water and/or overfeeding are the likely problems. Most foods contain a high percentage of water, especially puréed fruit. If the bedding becomes compressed and water-logged, it will restrict the flow of oxygen needed for the compost process to work.
To correct the problem, first stop feeding. Next, add dry bedding materials: shredded paper, dry coir, dry leaves or broken up corrugated cardboard will work. Mix the contents to immediately aerate the processing trays. Another possibility could be the food you are adding. Meat scraps, dairy products and oily foods should never be used.
If unpleasant odors persist, gently stir up the processing trays periodically to create more air spaces. Adding oxygen and air pockets will allow this to happen. Red wiggler worms can become stressed which will cause them to group up in a ball or even crawl out of the processing trays.
Finding things growing in the processing traysSometimes, seeds from food scraps sprout. Microwaving food scraps will help fix this problem. Other things such as molds may also grow. Mold is a part of the natural vermicomposting process and should be no problem. If too much mold remains, it may be an indication that too much food is being added.

11SWF400
In nature, many earthworms live in permanent burrows in solitude. They are excellent soil aerators in the garden, but we want a worm that is communal and burrows randomly through the litter layer of top soil. The red wiggler does exactly this.
Red wiggler worms love darkness. Some other varieties are accustomed to light and will exit the processing tray without any warning or notice.
The red wigglers have what can be described as a rudimentary digestive system. Because they have no teeth and very few digestive fluids, they depend on bacteria, fungi, molds and other organisms to pre-digest their food. In other words, red wiggler worms can survive on any organic matter, including cellulose, wood fibers and starches, but they need microorganisms, bacteria, fungi, nematodes and protozoa to break down the fibers. The diagram at right illustrates a basic red wiggler worm anatomy and the digestive process.
Red wiggler worms don’t eat garbage directly. Garbage must be broken down so they can digest it. Usable worm food is created when plant growth has stopped and the cells become separated by either bacterial action and/or oxidation (exposure to air and water). When the food is small enough, the red wiggler worms suck the food through their mouth. Sand particles and strong muscles continue to grind and break down food before it is actually digested. The intestines of the red wiggler worm house the tiny microbes mentioned above. The microbes are what actually digest the food and turn it into nutrient-rich vermicompost that will ultimately be used on your plants and garden.
Every three months, red wiggler worms in the Sunleaves Worm Farm can be expected to double in population. The red wiggler worms lay eggs and are incubated in cocoons. Each tray of the Sunleaves Worm Farm can hold about three pounds of red wiggler worms, or about 3,000 red wiggler worms. Overpopulation is not a concern as red wiggler worms can migrate freely between trays.
Red wiggler worms in nature control most of their environment. Because the red wiggler worms are taken out of the ground and placed into processing trays, you must play an important role in the management of the Sunleaves Worm Farm’s environment to ensure their health and survival.
Strong muscles pull in food
Sand particles & musclesbreak down food
PharynxEsophagus
Crop Intestine
Small food particlesdigested by bacteria
Mouth
About red wiggler worms
4-Tray Vermicompost System
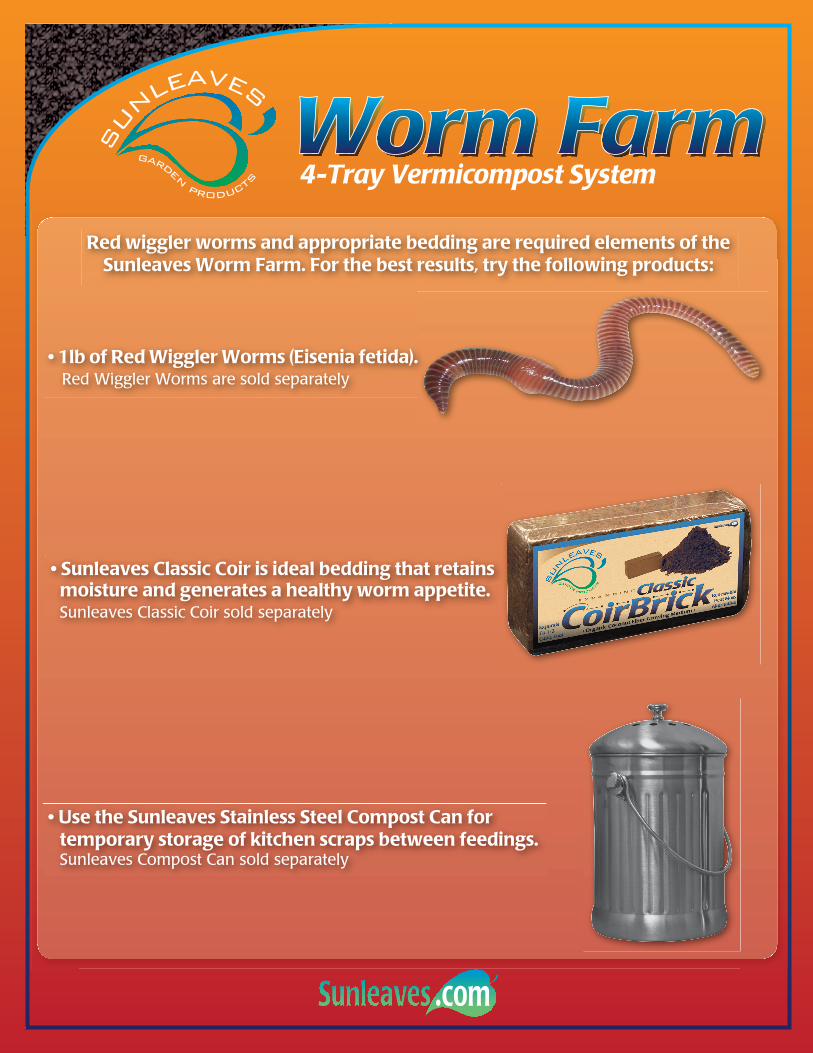
Red wiggler worms and appropriate bedding are required elements of the Sunleaves Worm Farm. For the best results, try the following products:
• 1lb of Red Wiggler Worms (Eisenia fetida). Red Wiggler Worms are sold separately
• Sunleaves Classic Coir is ideal bedding that retains moisture and generates a healthy worm appetite. Sunleaves Classic Coir sold separately
• Sunleaves Classic Coir is ideal bedding that retains • Sunleaves Classic Coir is ideal bedding that retains
• Use the Sunleaves Stainless Steel Compost Can for temporary storage of kitchen scraps between feedings. Sunleaves Compost Can sold separately