3 Axis Brushless Gimbal Controller Manual - Multicopter … · P a g e | 2 Page 2 of 9 When you...
9
3 Axis Brushless Gimbal Controller Manual © 2013 G Miller
Transcript of 3 Axis Brushless Gimbal Controller Manual - Multicopter … · P a g e | 2 Page 2 of 9 When you...
3 Axis Brushless
Gimbal Controller
Manual
© 2013 G Miller
P a g e | 2
Page 2 of 9
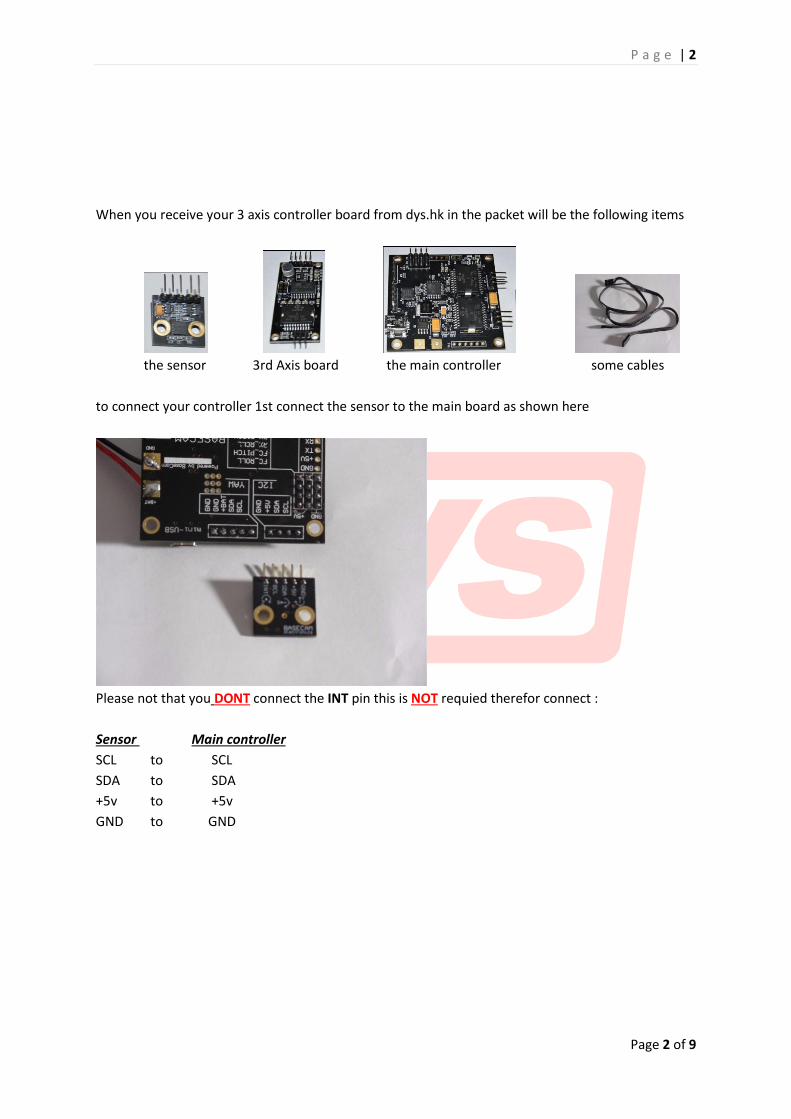
When you receive your 3 axis controller board from dys.hk in the packet will be the following items
the sensor 3rd Axis board the main controller some cables
to connect your controller 1st connect the sensor to the main board as shown here
Please not that you DONT connect the INT pin this is NOT requied therefor connect :
Sensor Main controller
SCL to SCL
SDA to SDA
+5v to +5v
GND to GND
P a g e | 3
Page 3 of 9
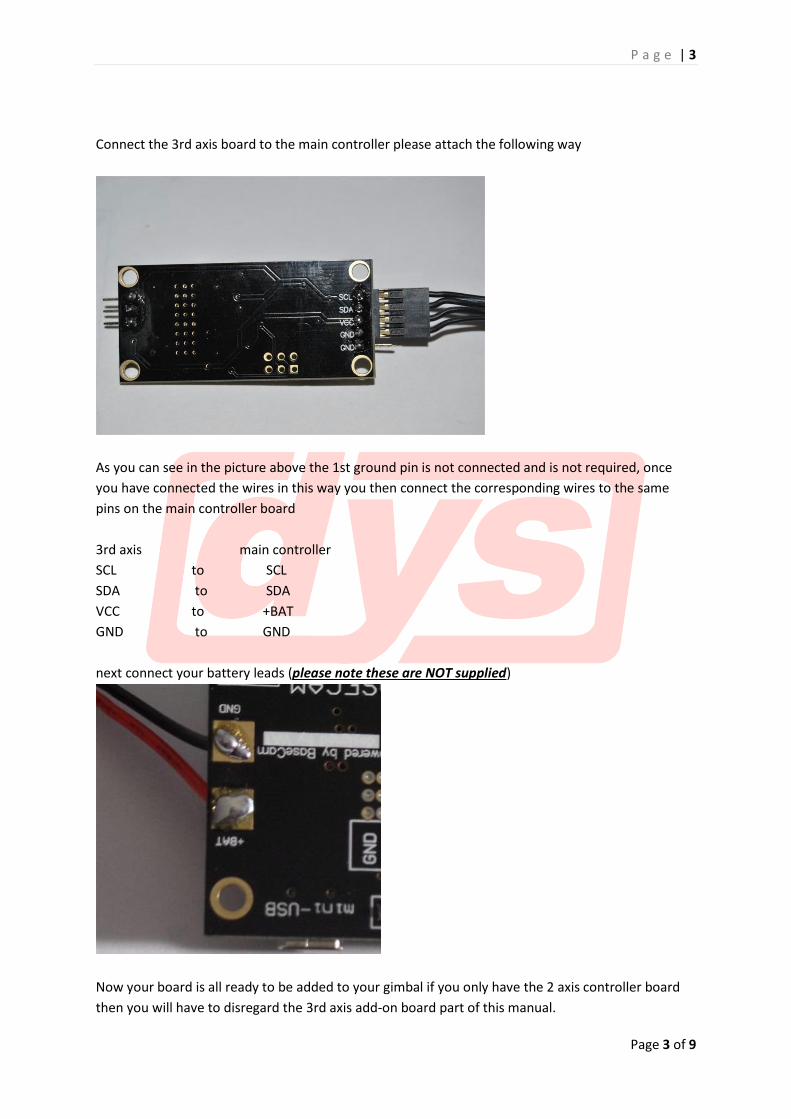
Connect the 3rd axis board to the main controller please attach the following way
As you can see in the picture above the 1st ground pin is not connected and is not required, once
you have connected the wires in this way you then connect the corresponding wires to the same
pins on the main controller board
3rd axis main controller
SCL to SCL
SDA to SDA
VCC to +BAT
GND to GND
next connect your battery leads (please note these are NOT supplied)
Now your board is all ready to be added to your gimbal if you only have the 2 axis controller board
then you will have to disregard the 3rd axis add-on board part of this manual.
P a g e | 4
Page 4 of 9
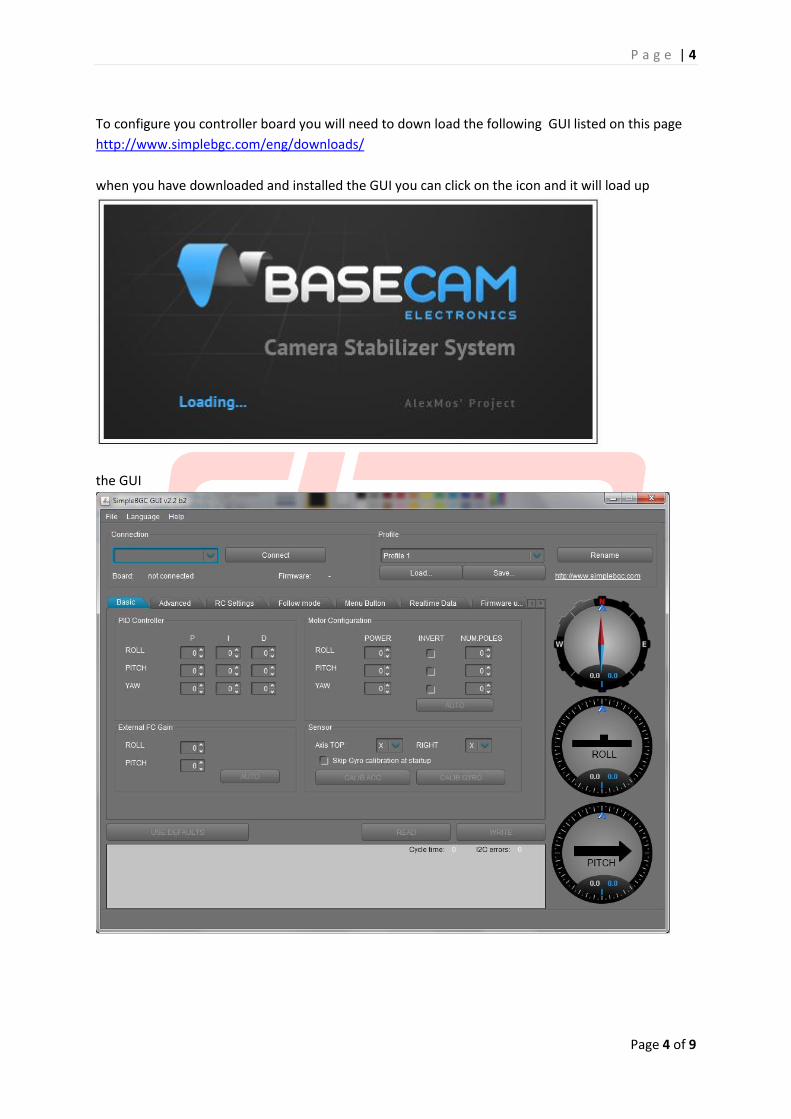
To configure you controller board you will need to down load the following GUI listed on this page
http://www.simplebgc.com/eng/downloads/
when you have downloaded and installed the GUI you can click on the icon and it will load up
the GUI
P a g e | 5
Page 5 of 9
The first thing that has to be done before we start to configure the controller is you have to
balance the camera on the gimbal, if you fail to do this properly then you will have issues when
trying to set up the controller
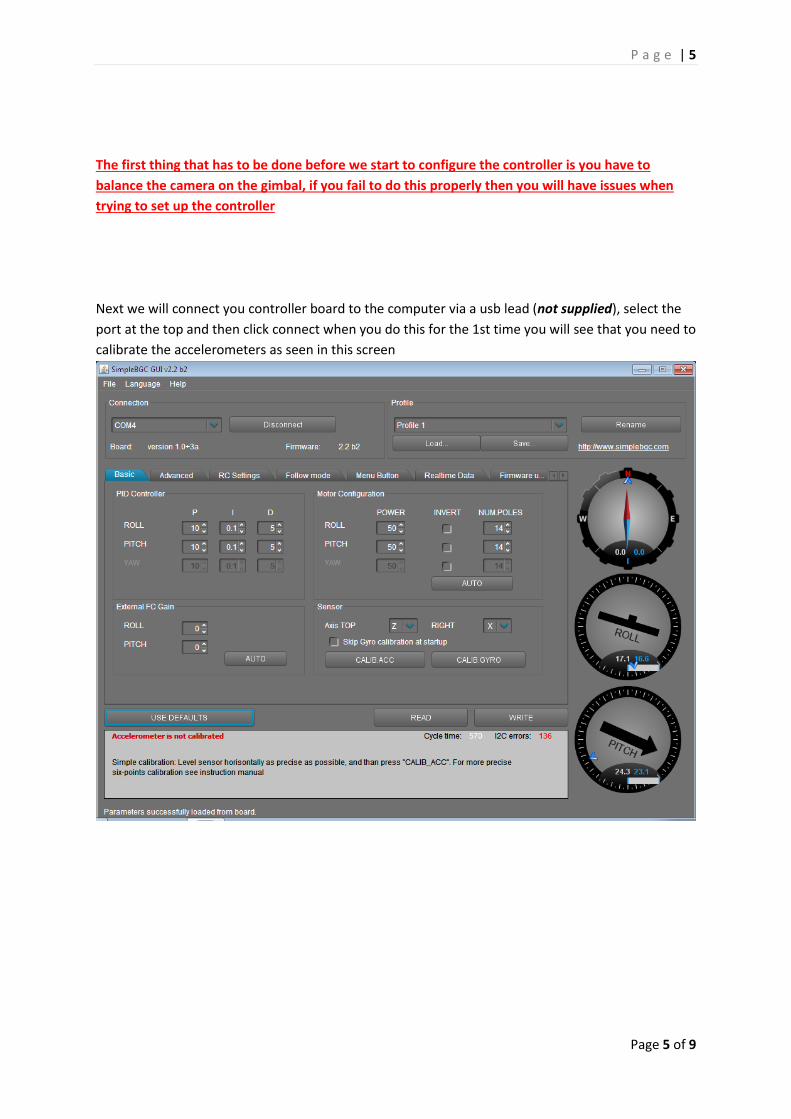
Next we will connect you controller board to the computer via a usb lead (not supplied), select the
port at the top and then click connect when you do this for the 1st time you will see that you need to
calibrate the accelerometers as seen in this screen
P a g e | 6
Page 6 of 9
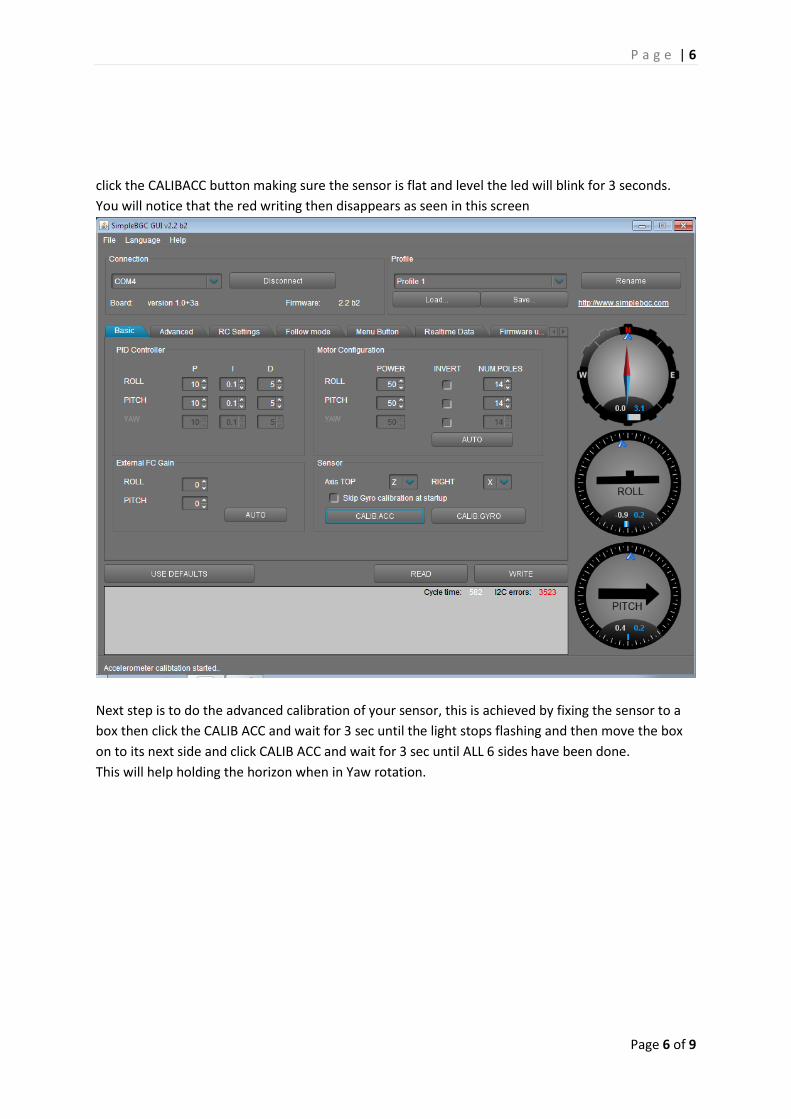
click the CALIBACC button making sure the sensor is flat and level the led will blink for 3 seconds.
You will notice that the red writing then disappears as seen in this screen
Next step is to do the advanced calibration of your sensor, this is achieved by fixing the sensor to a
box then click the CALIB ACC and wait for 3 sec until the light stops flashing and then move the box
on to its next side and click CALIB ACC and wait for 3 sec until ALL 6 sides have been done.
This will help holding the horizon when in Yaw rotation.
P a g e | 7
Page 7 of 9
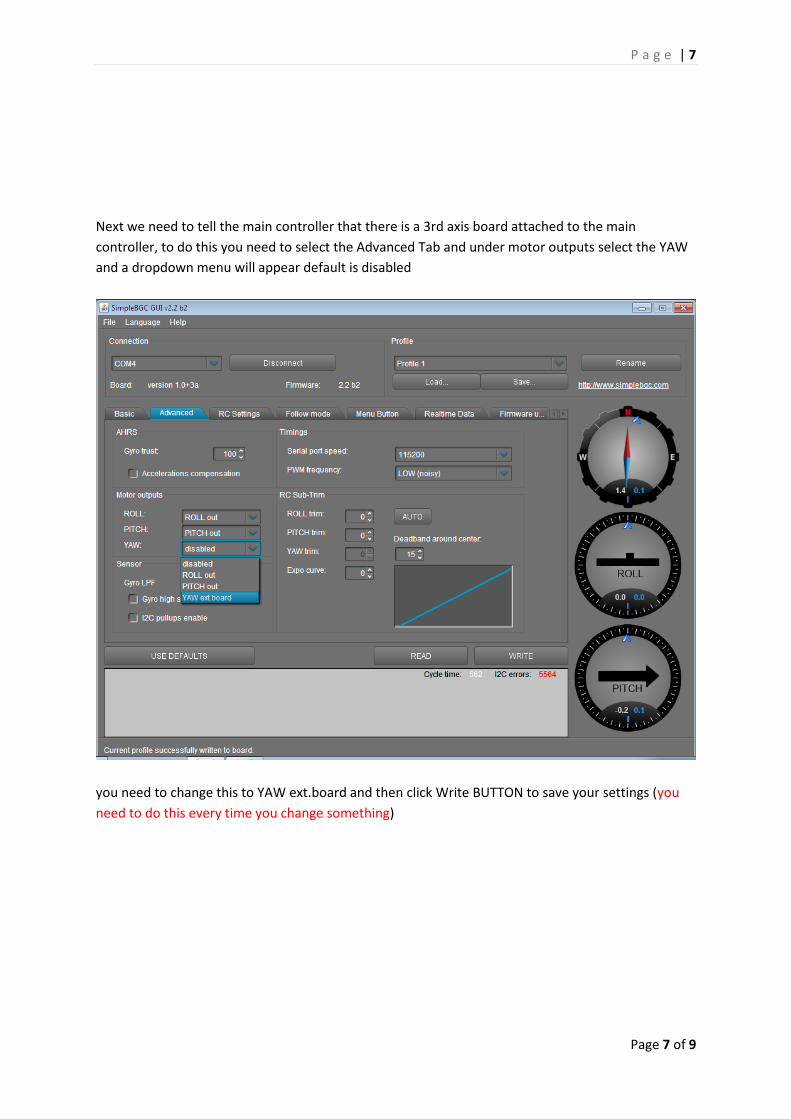
Next we need to tell the main controller that there is a 3rd axis board attached to the main
controller, to do this you need to select the Advanced Tab and under motor outputs select the YAW
and a dropdown menu will appear default is disabled
you need to change this to YAW ext.board and then click Write BUTTON to save your settings (you
need to do this every time you change something)
P a g e | 8
Page 8 of 9
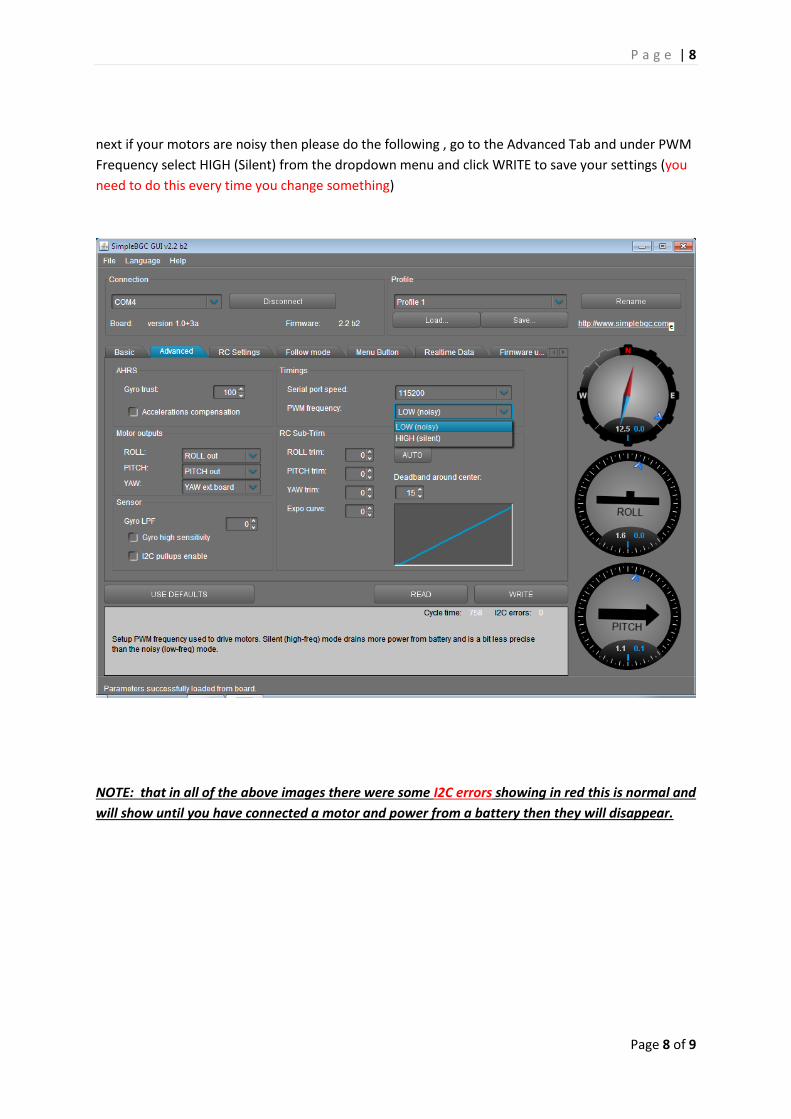
next if your motors are noisy then please do the following , go to the Advanced Tab and under PWM
Frequency select HIGH (Silent) from the dropdown menu and click WRITE to save your settings (you
need to do this every time you change something)
NOTE: that in all of the above images there were some I2C errors showing in red this is normal and
will show until you have connected a motor and power from a battery then they will disappear.
P a g e | 9
Page 9 of 9
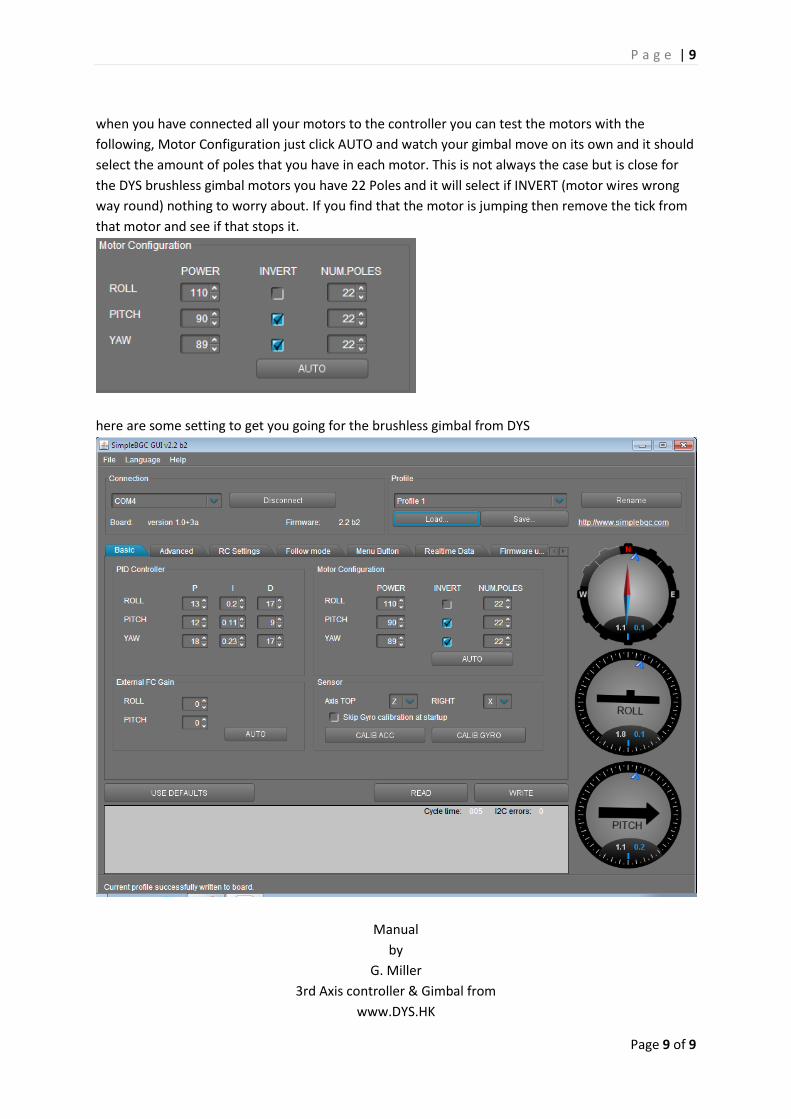
when you have connected all your motors to the controller you can test the motors with the
following, Motor Configuration just click AUTO and watch your gimbal move on its own and it should
select the amount of poles that you have in each motor. This is not always the case but is close for
the DYS brushless gimbal motors you have 22 Poles and it will select if INVERT (motor wires wrong
way round) nothing to worry about. If you find that the motor is jumping then remove the tick from
that motor and see if that stops it.
here are some setting to get you going for the brushless gimbal from DYS
Manual
by
G. Miller
3rd Axis controller & Gimbal from
www.DYS.HK