2015 TCNA HANDBOOK · 2015-08-19 · 2015 TCNA HANDBOOK The TCNA Handbook for Ceramic, Glass, and...
6
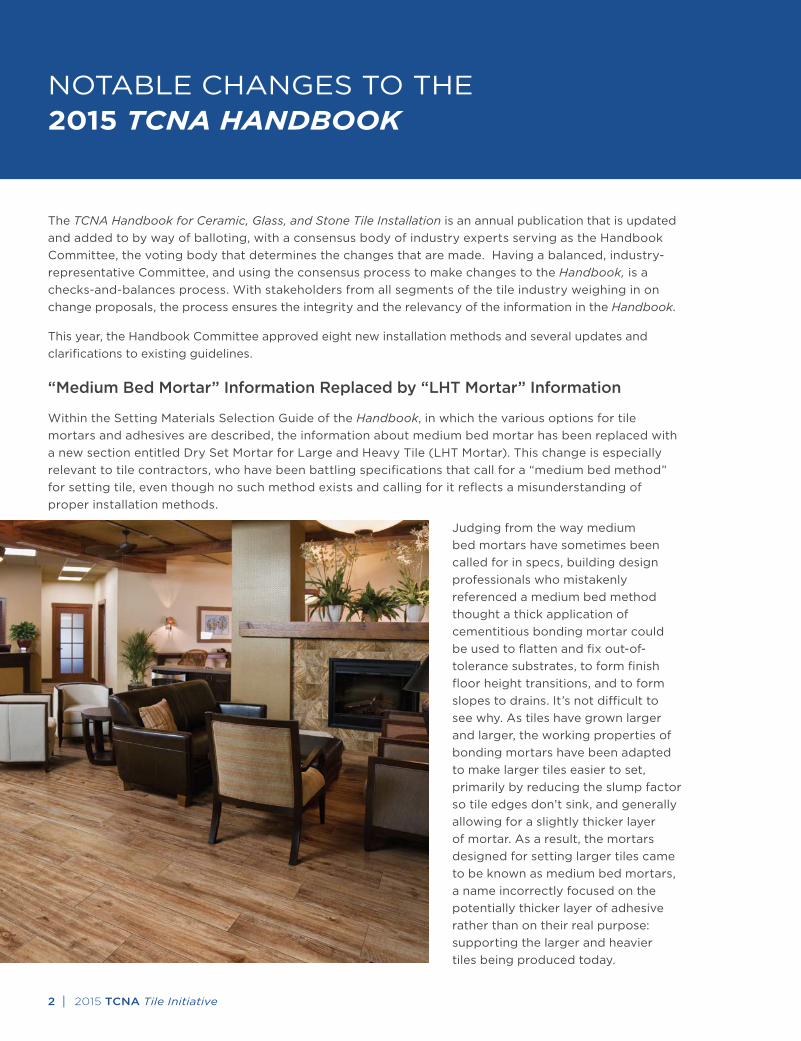
NOTABLE CHANGES TO THE 2015 TCNA HANDBOOK The TCNA Handbook for Ceramic, Glass, and Stone Tile Installation is an annual publication that is updated and added to by way of balloting, with a consensus body of industry experts serving as the Handbook Committee, the voting body that determines the changes that are made. Having a balanced, industry- representative Committee, and using the consensus process to make changes to the Handbook, is a checks-and-balances process. With stakeholders from all segments of the tile industry weighing in on change proposals, the process ensures the integrity and the relevancy of the information in the Handbook. This year, the Handbook Committee approved eight new installation methods and several updates and clarifications to existing guidelines. “Medium Bed Mortar” Information Replaced by “LHT Mortar” Information Within the Setting Materials Selection Guide of the Handbook, in which the various options for tile mortars and adhesives are described, the information about medium bed mortar has been replaced with a new section entitled Dry Set Mortar for Large and Heavy Tile (LHT Mortar). This change is especially relevant to tile contractors, who have been battling specifications that call for a “medium bed method” for setting tile, even though no such method exists and calling for it reflects a misunderstanding of proper installation methods. Judging from the way medium bed mortars have sometimes been called for in specs, building design professionals who mistakenly referenced a medium bed method thought a thick application of cementitious bonding mortar could be used to flatten and fix out-of- tolerance substrates, to form finish floor height transitions, and to form slopes to drains. It’s not difficult to see why. As tiles have grown larger and larger, the working properties of bonding mortars have been adapted to make larger tiles easier to set, primarily by reducing the slump factor so tile edges don’t sink, and generally allowing for a slightly thicker layer of mortar. As a result, the mortars designed for setting larger tiles came to be known as medium bed mortars, a name incorrectly focused on the potentially thicker layer of adhesive rather than on their real purpose: supporting the larger and heavier tiles being produced today. 2 | 2015 TCNA Tile Initiative
Transcript of 2015 TCNA HANDBOOK · 2015-08-19 · 2015 TCNA HANDBOOK The TCNA Handbook for Ceramic, Glass, and...
NOTABLE CHANGES TO THE2015 TCNA HANDBOOK
The TCNA Handbook for Ceramic, Glass, and Stone Tile Installation is an annual publication that is updated and added to by way of balloting, with a consensus body of industry experts serving as the Handbook Committee, the voting body that determines the changes that are made. Having a balanced, industry-representative Committee, and using the consensus process to make changes to the Handbook, is a checks-and-balances process. With stakeholders from all segments of the tile industry weighing in on change proposals, the process ensures the integrity and the relevancy of the information in the Handbook.
This year, the Handbook Committee approved eight new installation methods and several updates and clarifications to existing guidelines.
“Medium Bed Mortar” Information Replaced by “LHT Mortar” Information
Within the Setting Materials Selection Guide of the Handbook, in which the various options for tile mortars and adhesives are described, the information about medium bed mortar has been replaced with a new section entitled Dry Set Mortar for Large and Heavy Tile (LHT Mortar). This change is especially relevant to tile contractors, who have been battling specifications that call for a “medium bed method” for setting tile, even though no such method exists and calling for it reflects a misunderstanding of proper installation methods.
Judging from the way medium bed mortars have sometimes been called for in specs, building design professionals who mistakenly referenced a medium bed method thought a thick application of cementitious bonding mortar could be used to flatten and fix out-of-tolerance substrates, to form finish floor height transitions, and to form slopes to drains. It’s not difficult to see why. As tiles have grown larger and larger, the working properties of bonding mortars have been adapted to make larger tiles easier to set, primarily by reducing the slump factor so tile edges don’t sink, and generally allowing for a slightly thicker layer of mortar. As a result, the mortars designed for setting larger tiles came to be known as medium bed mortars, a name incorrectly focused on the potentially thicker layer of adhesive rather than on their real purpose: supporting the larger and heavier tiles being produced today.
2 | 2015 TCNA Tile Initiative

The new section in the Handbook aims to clarify the misconception of a medium bed method by renaming mortars designed for setting large tiles and by more clearly explaining what these mortars are—and aren’t—designed to do.
The new section, “Dry Set Mortar for Large and Heavy Tile (LHT Mortar)” has replaced the “Medium Bed Mortar” section that had been added to the Handbook in 2011. The new section for LHT mortar includes a “note to specifier” section that restates the product limitations that the 2011-2014 versions included, that such mortars are “designed as direct bond adhesives and are not intended to be used in truing or leveling underlying substrates or the work of others” and that “medium bed mortar is a product, not an installation method.” The new section explains further, adding that “where substrate variation exceeds allowances, LHT mortar (formerly medium bed mortar) cannot be used to remedy such, because the application would exceed the limitations of the mortar.” It goes on to say that “project plans and specifications that call for or refer to setting tile by a ‘medium bed method’ or ‘large and heavy method’ or that call for the use of bonding mortar to level, flatten, or fill substrates or to create slopes or transitions between finish floor heights do not conform to tile industry standards or norms.”
Like the now-eliminated medium bed mortar definition, the LHT mortar definition relays the usefulness of the mortar type for setting large tiles—still defined as tiles with at least one side greater than 15"—and adds that “when setting such tiles, larger trowels are used and needed to apply enough bonding mortar to achieve mortar coverage requirements. For large tiles, a thicker bond coat is often required to achieve mortar coverage requirements.” The LHT mortar definition additionally defines “heavy” tiles as those weighing over five pounds per square foot, and it states that the bond coat thickness after the tile is embedded is intended to be 3/32" to 1/2" nominally. Previously, the medium bed mortar definition allowed up to a 3/4" thick bond coat, but after further review and industry experience, only the narrower range is now specified.
Together, the name change, improved clarity, and added information more clearly communicate limitations on how manufacturers intend LHT mortars (formerly medium bed mortars) to be used. This Handbook change should also provide contractors with support when faced with specifications that conflict with manufacturer recommendations.
Stay tuned for more on this topic. Although the LHT mortar definition notes that “there are no ANSI or ISO standards specific to this type of mortar,” this is expected to change before long. Draft standards for LHT mortars have been circulated within the industry by the Materials and Methods Standards Association (MMSA), which researched and drafted the proposals, with the intent for their eventual adoption as standards by the ANSI A108 Accredited Standards Committee responsible for tile and stone ANSI standards.
2015 TCNA Tile Initiative | 3
NOTABLE CHANGES TO THE2015 TCNA HANDBOOK
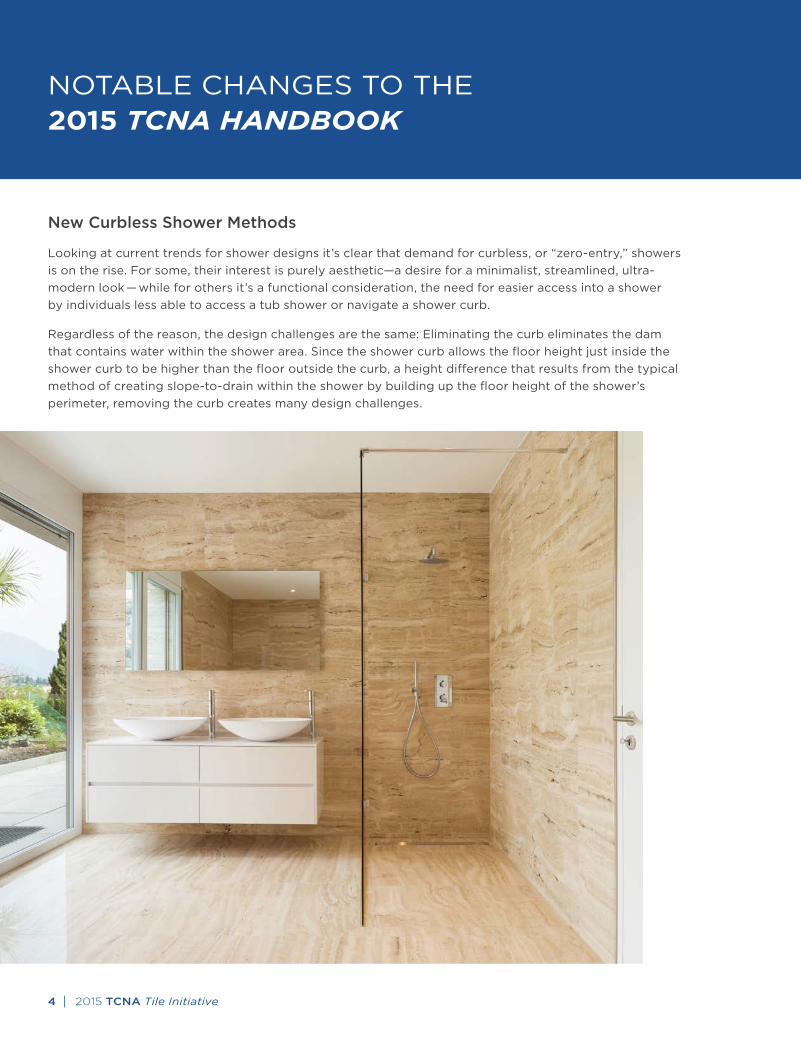
New Curbless Shower Methods
Looking at current trends for shower designs it’s clear that demand for curbless, or “zero-entry,” showers is on the rise. For some, their interest is purely aesthetic—a desire for a minimalist, streamlined, ultra-modern look— while for others it’s a functional consideration, the need for easier access into a shower by individuals less able to access a tub shower or navigate a shower curb.
Regardless of the reason, the design challenges are the same: Eliminating the curb eliminates the dam that contains water within the shower area. Since the shower curb allows the floor height just inside the shower curb to be higher than the floor outside the curb, a height difference that results from the typical method of creating slope-to-drain within the shower by building up the floor height of the shower’s perimeter, removing the curb creates many design challenges.
4 | 2015 TCNA Tile Initiative
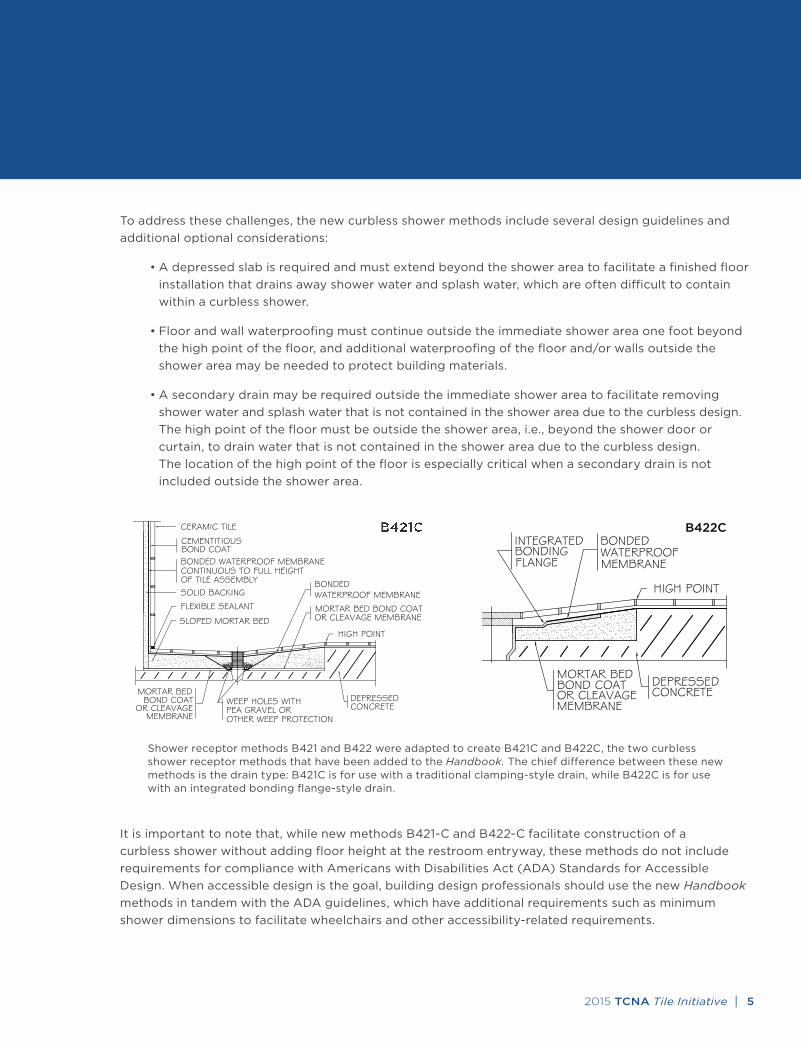
To address these challenges, the new curbless shower methods include several design guidelines and additional optional considerations:
• A depressed slab is required and must extend beyond the shower area to facilitate a finished floor installation that drains away shower water and splash water, which are often difficult to contain within a curbless shower.
• Floor and wall waterproofing must continue outside the immediate shower area one foot beyond the high point of the floor, and additional waterproofing of the floor and/or walls outside the shower area may be needed to protect building materials.
• A secondary drain may be required outside the immediate shower area to facilitate removing shower water and splash water that is not contained in the shower area due to the curbless design. The high point of the floor must be outside the shower area, i.e., beyond the shower door or curtain, to drain water that is not contained in the shower area due to the curbless design. The location of the high point of the floor is especially critical when a secondary drain is not included outside the shower area.
It is important to note that, while new methods B421-C and B422-C facilitate construction of a curbless shower without adding floor height at the restroom entryway, these methods do not include requirements for compliance with Americans with Disabilities Act (ADA) Standards for Accessible Design. When accessible design is the goal, building design professionals should use the new Handbook methods in tandem with the ADA guidelines, which have additional requirements such as minimum shower dimensions to facilitate wheelchairs and other accessibility-related requirements.
BONDING
B422C
FLANGE
INTEGRATED
MORTAR BEDBOND COATOR CLEAVAGEMEMBRANE
DEPRESSEDCONCRETE
BONDEDWATERPROOFMEMBRANE
HIGH POINT
CERAMIC TILE
CEMENTITIOUSBOND COAT
SOLID BACKING
SLOPED MORTAR BED
BONDED WATERPROOF MEMBRANE
WEEP HOLES WITHMORTAR BEDBOND COAT
FLEXIBLE SEALANT
CONTINUOUS TO FULL HEIGHTOF TILE ASSEMBLY
PEA GRAVEL OROTHER WEEP PROTECTION
OR CLEAVAGEMEMBRANE
DEPRESSEDCONCRETE
BONDEDWATERPROOF MEMBRANE
MORTAR BED BOND COATOR CLEAVAGE MEMBRANE
HIGH POINT
Shower receptor methods B421 and B422 were adapted to create B421C and B422C, the two curbless shower receptor methods that have been added to the Handbook. The chief difference between these new methods is the drain type: B421C is for use with a traditional clamping-style drain, while B422C is for use with an integrated bonding flange-style drain.
2015 TCNA Tile Initiative | 5
NOTABLE CHANGES TO THE2015 TCNA HANDBOOK
New Stone Methods
The installation methods in the Handbook have long been used for installing natural stone tile in addition to ceramic tile.
In 2011, several methods were adapted to more specifically address stone-specific installation considerations, and a separate Handbook stone section was created.
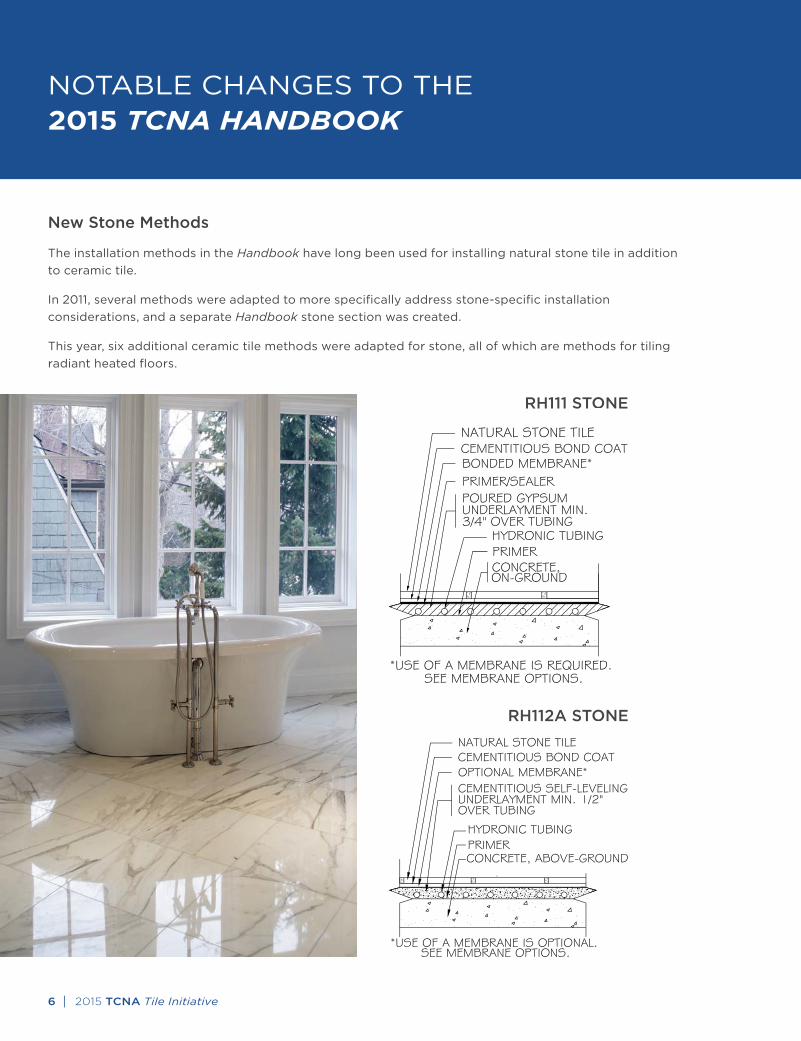
This year, six additional ceramic tile methods were adapted for stone, all of which are methods for tiling radiant heated floors.
RH112A STONE
RH111 STONE
6 | 2015 TCNA Tile Initiative

Four adapted methods are for installing heated stone tile floors in installations utilizing a hydronic heat system where the underlayment is poured gypsum or cementitious self leveler over on-ground and above-ground concrete substrates, and two are for installations utilizing an electric radiant heat system where the underlayment is cementitious self-leveler over on-ground and above-ground concrete substrates.
To achieve stone floors that are flat and lippage free, the substrate flattening that generally results from using pourable underlayments makes these new methods nice options to have available. The existing ceramic tile methods were adapted for stone by adding the standard stone-related information and considerations found in all other stone methods:
• The service rating is dependent on the compressive strength, flexural strength, and resistance to abrasion of the actual stone being used.
• A minimum grout joint width of 1/16" is noted, as is a maximum grout joint width of 1/8" (nominal) when unsanded grout is used, which is required for softer stones that could be scratched if grouted with sanded grout.
• A caution is included in the mortar recommendation, to “use white for light-colored marble, limestone, and other stones where staining or darkening from grey setting materials is possible.”
• A reference is included regarding the possibility that epoxy may be needed for setting the stone, if the stone is water sensitive or if fiberglass mesh reinforcing is used on the stone that cementitious mortars will not bond to reliably.
RH116 STONE
2015 TCNA Tile Initiative | 7