15.564 – Microsoft Access Form Practice DESCRIPTION · PDF file15.564 – Microsoft...
11
15.564 – Microsoft Access Form Practice This paper is designed to walk through the process of creating and modifying forms in Microsoft Access. We will be using the Northwind Trader’s database (nwind.mdb) that is provided as the sample database with Access. The main steps to this exercise are as follows: 1. Create a query 2. Create a new form based on the query 3. Add a combo box to the form 4. Add a sub-form to the main form DESCRIPTION: We will be creating a form that shows order and customer information. There will be a combo box that allows you to pick an order # and go directly to that record. The final form should look something like this: This screenshot is from the Microsoft Access software program. QUERY: The first step is to create a new query that contains the following tables: - Customer - Orders 1
Transcript of 15.564 – Microsoft Access Form Practice DESCRIPTION · PDF file15.564 – Microsoft...

15.564 – Microsoft Access Form Practice
This paper is designed to walk through the process of creating and modifying forms in Microsoft Access. We will be using the Northwind Trader’s database (nwind.mdb) that is provided as the sample database with Access. The main steps to this exercise are as follows:
1. Create a query 2. Create a new form based on the query 3. Add a combo box to the form 4. Add a sub-form to the main form
DESCRIPTION: We will be creating a form that shows order and customer information. There will be a combo box that allows you to pick an order # and go directly to that record. The final form should look something like this:
This screenshot is from the Microsoft Access software program.
QUERY: The first step is to create a new query that contains the following tables: - Customer - Orders
1
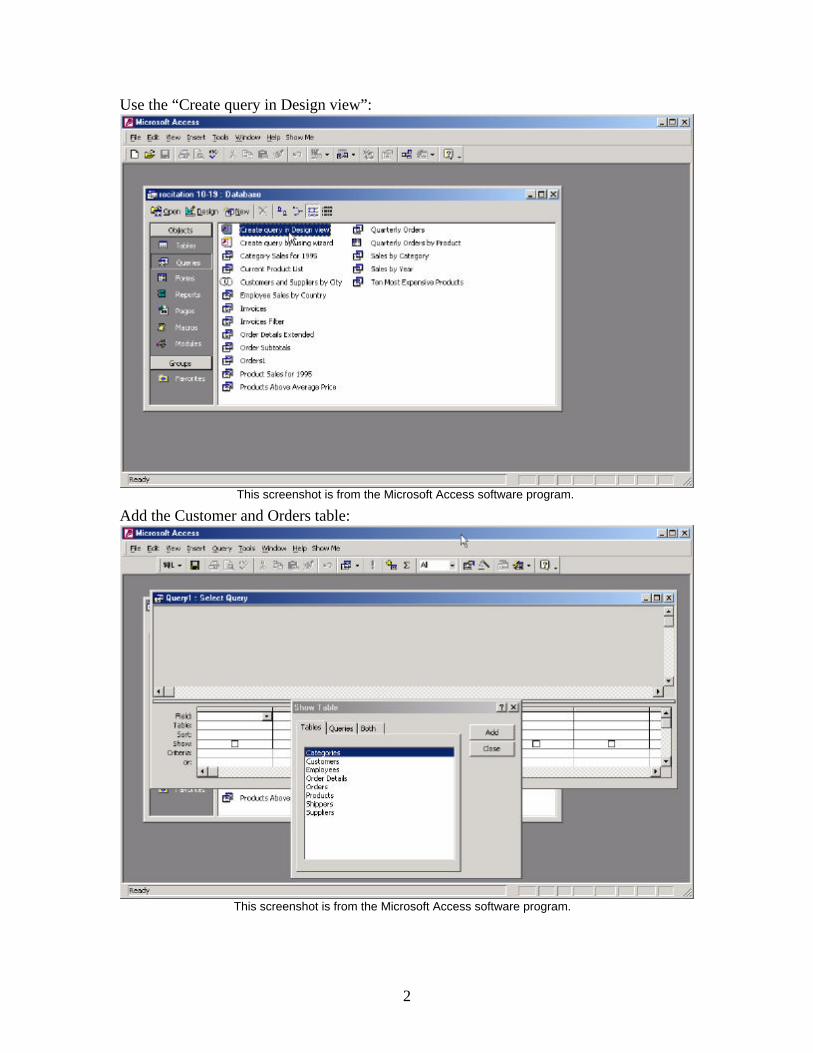
Use the “Create query in Design view”:
This screenshot is from the Microsoft Access software program.
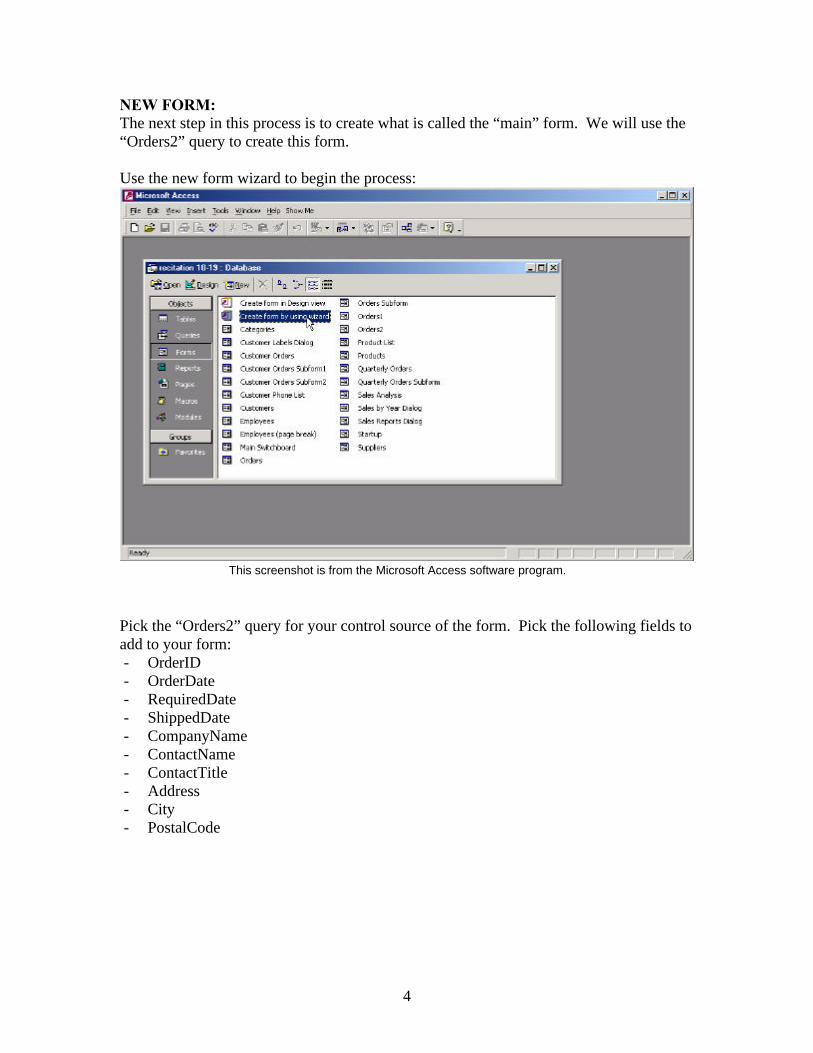
Add the Customer and Orders table:
This screenshot is from the Microsoft Access software program.
2

Select all the fields from both tables to add to your query. NOTE: This is not a great design technique, you should only pick the fields that are necessary to create a query, this saves processing time when the query is run. Save the query as:
“Orders2”
This screenshot is from the Microsoft Access software program.
3
NEW FORM: The next step in this process is to create what is called the “main” form. We will use the “Orders2” query to create this form.
Use the new form wizard to begin the process:
This screenshot is from the Microsoft Access software program.
Pick the “Orders2” query for your control source of the form. Pick the following fields to add to your form: - OrderID - OrderDate - RequiredDate - ShippedDate - CompanyName - ContactName - ContactTitle - Address - City - PostalCode
4
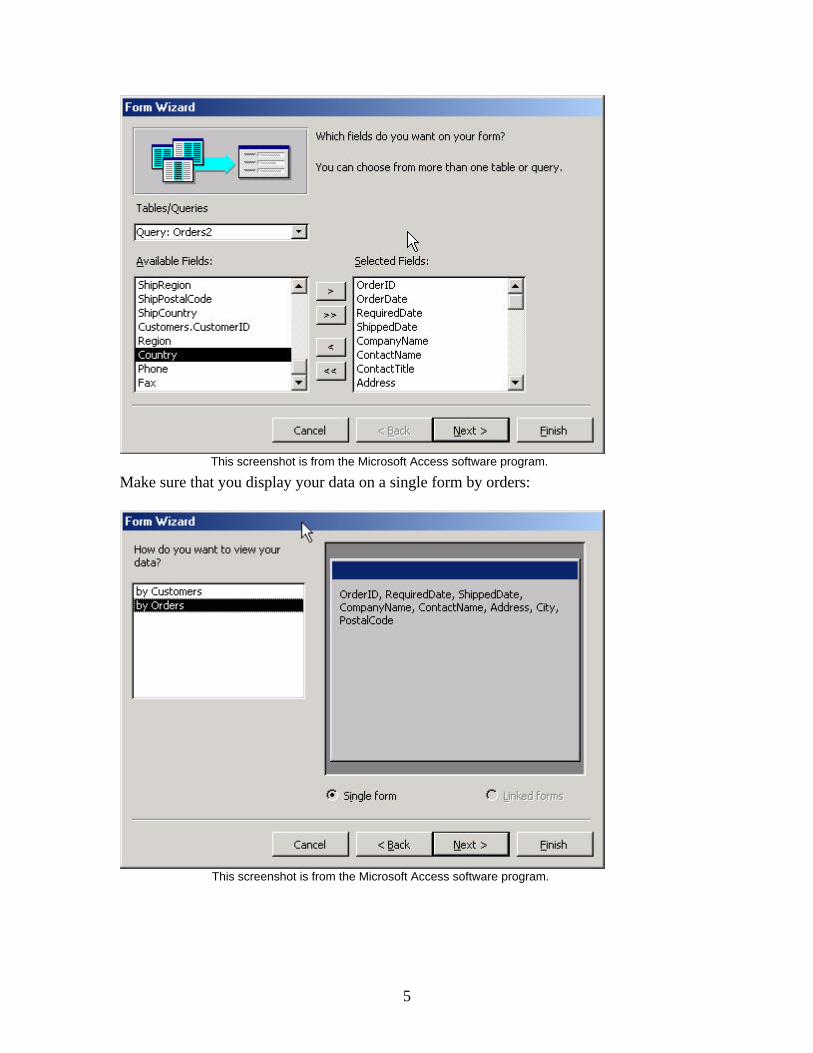
This screenshot is from the Microsoft Access software program.
Make sure that you display your data on a single form by orders:
This screenshot is from the Microsoft Access software program.
5

In columnar format:
This screenshot is from the Microsoft Access software program.
Name the form “Orders2”
COMBO BOX:
The next step in the process is to add a combo box on the form so that we can pick the order number and go directly to that record.
6

Open the form, “Orders2” in design view, select all of the fields and shift them down far enough to add one more field at the top of the form:
This screenshot is from the Microsoft Access software program.
Click the toolbox icon from the toolbar. You can also open the toolbox window from the View menu.
This screenshot is from the Microsoft Access software program.
is pressed on the toolbox window):
Select the combo-box icon from the toolbox window (make sure that the wizard icon
These screenshots are from the Microsoft Access software program.
7

Place the combo box at the top of the form and the combo-box wizard should appear. Pick the third option of “Find a record on my form based on the value I selected in my combo box.”
This screenshot is from the Microsoft Access software program.
Select OrderID for the field to show values:
This screenshot is from the Microsoft Access software program.
Finish the wizard. NOTE: You could receive some type of SQL error while going through this wizard (I did!). If you do, exit the wizard and check the form properties.
8
Make sure that the form’s record source is the query, “Orders2” and not a long SQL statement. It is sometimes difficult to check the actual form properties because Access will only show you the properties for the active control (you might be stuck on the combo box as the active control). A quick way to make the form active is to switch to the form view and then back to design view. As soon as you switch back to design view, go to the view menu and pick properties. You will now be able to see the record source.
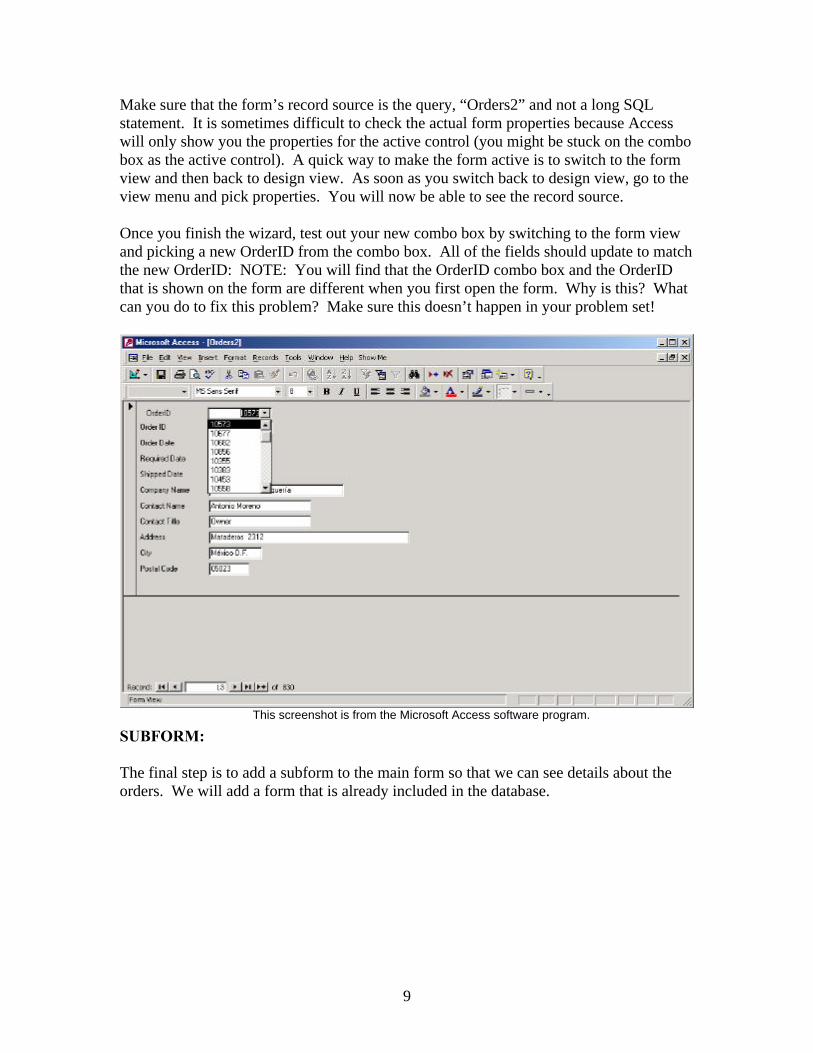
Once you finish the wizard, test out your new combo box by switching to the form view and picking a new OrderID from the combo box. All of the fields should update to match the new OrderID: NOTE: You will find that the OrderID combo box and the OrderID that is shown on the form are different when you first open the form. Why is this? What can you do to fix this problem? Make sure this doesn’t happen in your problem set!
This screenshot is from the Microsoft Access software program.
SUBFORM:
The final step is to add a subform to the main form so that we can see details about the orders. We will add a form that is already included in the database.
9

Open the “Orders2” form in design view and get the toolbox window ready to go. This time we will pick the subform icon to add to our form:
This screenshot is from the Microsoft Access software program.
Add the subform at the bottom of the “Orders2” form. The subform wizard should become visible, make sure to pick “Use an Existing Form” and pick the “Orders Subform” to add.
This screenshot is from the Microsoft Access software program.
The next window is asking how to link the main form and the subform. We will link on OrderID. This means that whichever OrderID is picked in the main form, the data with the same OrderID will show up in the subform.
10
This screenshot is from the Microsoft Access software program.
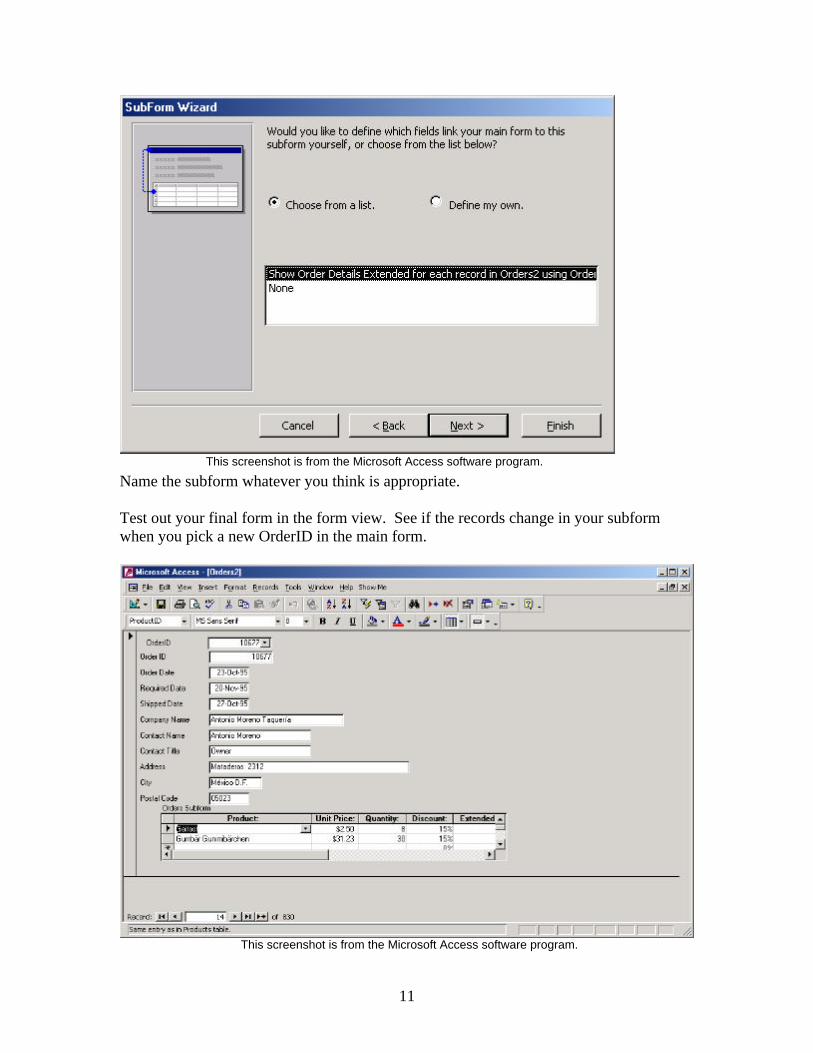
Name the subform whatever you think is appropriate.
Test out your final form in the form view. See if the records change in your subform when you pick a new OrderID in the main form.
This screenshot is from the Microsoft Access software program.
11


![เรียน-เล่น-เป็นง่าย Access 2007 · Microsoft Access Microsoft Office Professional Access "adî... Access Access Access "îl]î" muùouañoo:ls Access](https://static.fdocuments.in/doc/165x107/5f5793511c90a77e406f5980/aaaaa-aaaa-aaaaaaaa-access-2007-microsoft-access.jpg)