Tutorial 3 – Designing a Web Page Working with Color & Graphics Mrs. Wilson.

Cricut Design Space User Manual
Page | 1
13. Working with color
C. Changing color for images with a Print line type
Selecting colors for individual image layers not only helps you visualize your final project, but also
determines how images are laid out on the cutting mats. For Print then Cut images, the color on the
Canvas reflects the color that will be printed.
All changes to layer colors need to be made prior to flattening the image. If you would like to change the
colors of a flattened image, you will need to unflatten it first.
There are three ways to select new colors for images with a Print line type.
1. Basic Colors swatches
2. Custom Color picker
3. Hex values
Tip You can change individual layer colors within a grouped image without ungrouping the image as long
as the layers aren’t flattened together.
Option 1 Basic Colors swatches To quickly select a color of an image layer with a Print line type, use one of the 30 Basic Colors offered in
the Basic Colors swatches.
Step 1 Click the layer thumbnail in the Layers Panel.

Cricut Design Space User Manual
Page | 2
You’ll find the Basic Colors swatches on the Layer Attributes Panel under Colors.
Step 2 Select a color by clicking on one of the Basic Colors swatches. The new color is reflected on the
Canvas and in the Layers Panel. Click outside of the Layer Attributes Panel to close it.

Cricut Design Space User Manual
Page | 3
Tip Once you are done changing the colors, you can flatten the image into one layer for printing. Click
Flatten on the Layers Panel.
Option 2 Custom Color picker You have many more color options for your designs when you use the Custom Color picker.
Step 1 Click the layer thumbnail in the Layers Panel.

Cricut Design Space User Manual
Page | 4
You’ll find the Custom Color picker on the Layer Attributes Panel under Colors.
Click on the eyedropper icon for the Custom Color selector to appear.

Cricut Design Space User Manual
Page | 5
Step 2 Move the vertical slider up or down to change the color across the spectrum. The new color is
reflected on the Canvas and in the Layers Panel.
Step 3 Select a specific hue within the color family by moving the circle within the square color area.
Click outside of the Layer Attributes Panel to close it.
Cricut Design Space User Manual
Page | 6
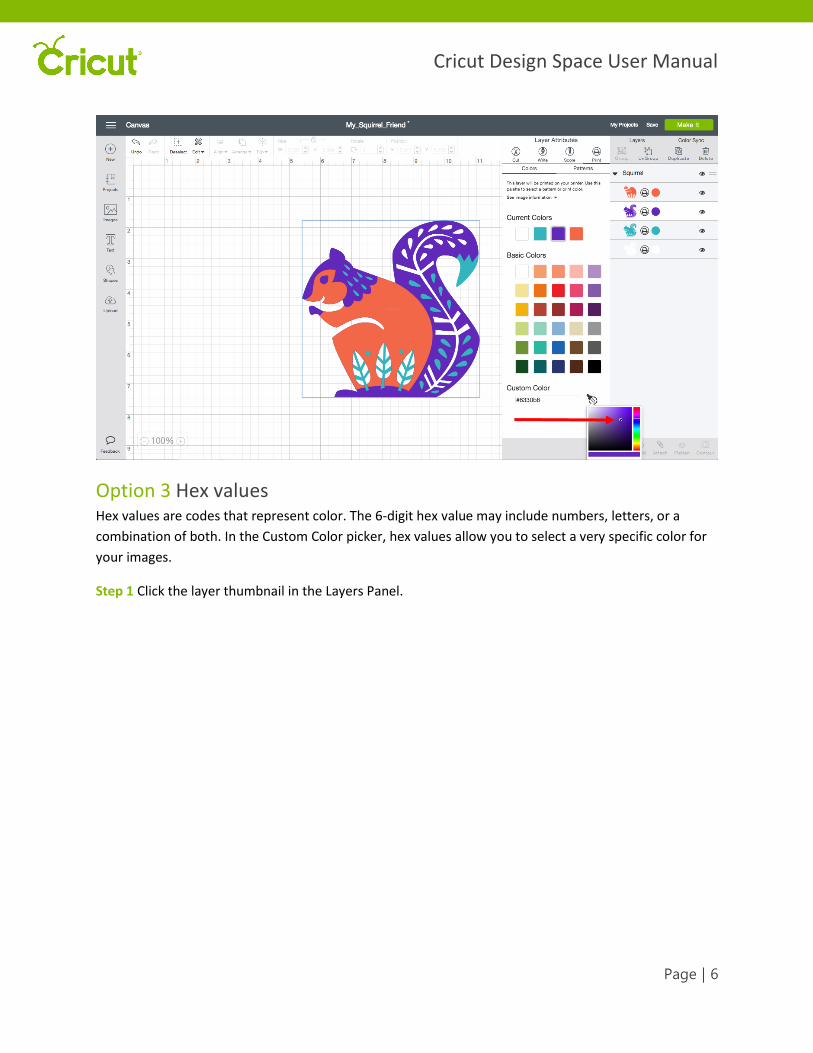
Option 3 Hex values Hex values are codes that represent color. The 6-digit hex value may include numbers, letters, or a
combination of both. In the Custom Color picker, hex values allow you to select a very specific color for
your images.
Step 1 Click the layer thumbnail in the Layers Panel.
Cricut Design Space User Manual
Page | 7
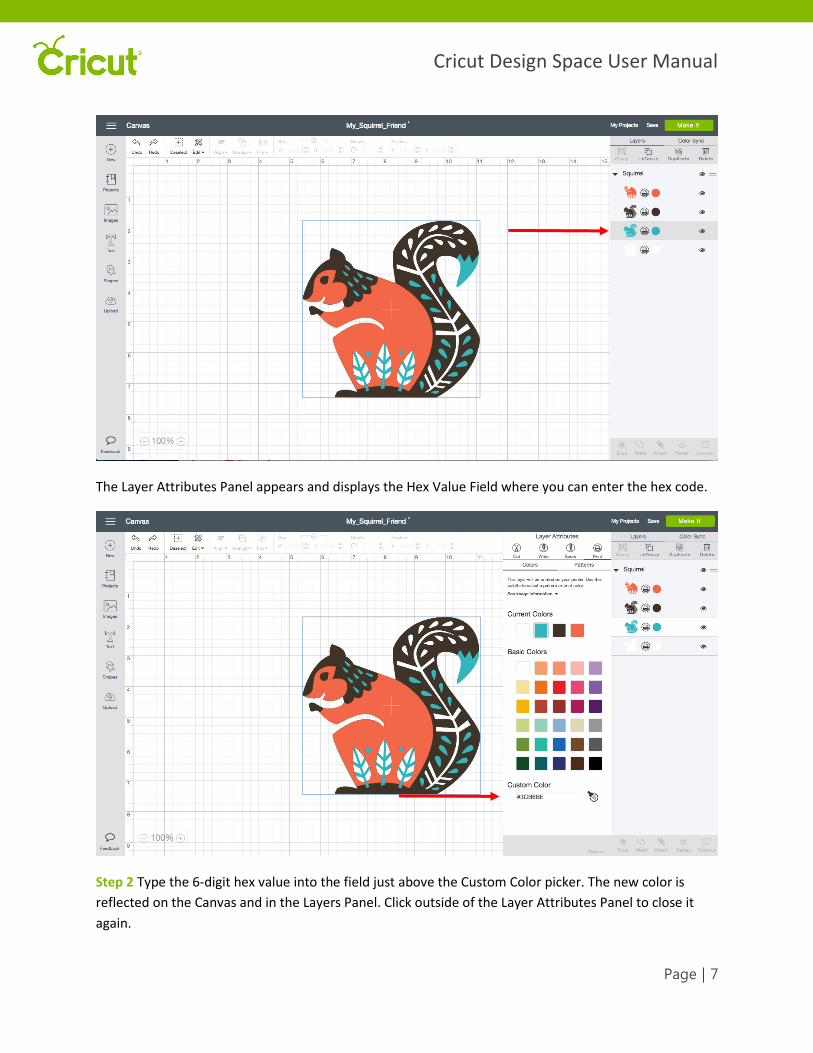
The Layer Attributes Panel appears and displays the Hex Value Field where you can enter the hex code.
Step 2 Type the 6-digit hex value into the field just above the Custom Color picker. The new color is
reflected on the Canvas and in the Layers Panel. Click outside of the Layer Attributes Panel to close it
again.

Cricut Design Space User Manual
Page | 8
Tip Once you are done changing the colors, you can select multiple layers and flatten the image into one
layer for printing. Click Flatten on the Layers Panel.