1100Replacement parts for all of Pioneer’s machines are fully stocked and available for immediate...
16
BRITE STRIPER ® INSTRUCTION MANUAL & PARTS LISTING 1100
Transcript of 1100Replacement parts for all of Pioneer’s machines are fully stocked and available for immediate...
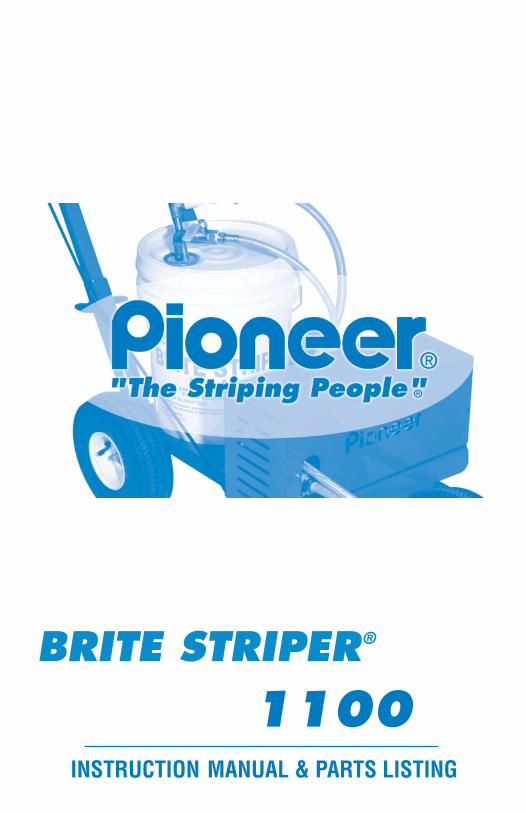
BRITE STRIPER®
INSTRUCTION MANUAL & PARTS LISTING
1100

BRITE STRIPER®
Call 800.877.1500PN08027
FULLY ADJUSTABLE SPRAY BOXChange line width easily from 2” to 8”.
Two-headed sprayer standard.
Optional 6’, 12’, 20’ & 25’Hand Hose with Wand Available.Get professional results on yardline stencils,
endzones and out-of-bounds
Check Out Our Website At:www.pioneerathletics.com
Paints
Stripers
Stencils
Interactive Field
Sports Accessories
Instructional Videos
Field Specifications
Windscreens
Wallpads
Replacement parts for all of Pioneer’s machines are fully stocked and available for immediate de-livery. We also carry replacement parts for many other airless line stripers.
Call your local representative or Pioneer for more information.
1 1 0 0Versatility
The 1100 handles all athleticfield needs with ease. So sim-ple to operate that anyone cando a professional job.
BUILT STURDY FORYEARS OF SERVICE
Heavy-gauge welded steelframe rolls smoothly on threelarge, fully pneumatic wheels.The 1100 has a cable-oper-ated control valve to paint crisplines.
SIMPLE DESIGN- LOW MAINTENANCE
The 1100’s simple designmeans low maintenance. Easyto clean system allows user tofill empty pail with water andP.H.D. solution and run cycle toclean paint lines.

PN08027
THE BRITE STRIPER® 1100ASSEMBLY INSTRUCTIONSTools Necessary for Assembly . . . . . . . . . . . . . . . . . . . . . . . . . . . . . . 1
Assembly Instructions . . . . . . . . . . . . . . . . . . . . . . . . . . . . . . . . . . . . 1
Charging Instructions . . . . . . . . . . . . . . . . . . . . . . . . . . . . . . . . . . . . 2
Indicator Light Operation . . . . . . . . . . . . . . . . . . . . . . . . . . . . . . . . . 3
OPERATION & CAREBefore Starting. . . . . . . . . . . . . . . . . . . . . . . . . . . . . . . . . . . . . . . . . . 2
Operation of Machine . . . . . . . . . . . . . . . . . . . . . . . . . . . . . . . . . . . . 4
Striping Tips. . . . . . . . . . . . . . . . . . . . . . . . . . . . . . . . . . . . . . . . . . . . 4
Clean-up Tips . . . . . . . . . . . . . . . . . . . . . . . . . . . . . . . . . . . . . . . . . . . 7
How to Store. . . . . . . . . . . . . . . . . . . . . . . . . . . . . . . . . . . . . . . . . . . . 7
IDENTIFYING PROBLEMS & PARTSParts List & Parts Explosion Drawings . . . . . . . . . . . . . . . . . . . . 5-6
Trouble Shooting the #1100 . . . . . . . . . . . . . . . . . . . . . . . . . . . . . 9-10
Limited Warranty. . . . . . . . . . . . . . . . . . . . . . . . . . . . . . . . . . . . . . . 11
If you have any questions concerning the assembly or operation, please call our CUSTOMER SERVICE
DEPARTMENT at 800.877.1500.
TABLE OF CONTENTS

1REV 4/08
TOOLS NEEDED FOR ASSEMBLYSnap ring pliers or screwdriverAllen Wrenches (supplied in hardware kit)
ASSEMBLY INSTRUCTIONS FOR BRITE STRIPER® MODEL #1100
After Removing Box from Shipping Carton:
STEP 1.Remove Brite Striper 1100 – two people necessary to lift
STEP 2.Remove handle bar
STEP 3.Handle AssemblyParts required:
a. Handleb. Handle adjustment bolts
Step 1: Slide handle into frameStep 2: Insert handle adjustment boltsStep 3: Attach paint control lever to handleStep 4: Insert switch/meter bracket
NOTE: TEST CONTROL TRIGGER TO MAKE SURE CABLE IS ADJUSTED PROPERLY.CABLE SHOULD HAVE SMALL AMOUNT OF SLACK.
STEP 4.Adjustable Spray BoxParts required:
a. Snap ringb. Adjustable spray box
Step 1: Slide adjustable spray box bar on the front axleStep 2: Attach carriage bolt, washer, lock washer and wingnutStep 3: Attach snap ring on end of axle to prevent spray box bar
from sliding off

2 MODEL 1100
Use supplied allen wrenches to adjust side plates for properwidth. Adjust bar length by loosening wing nut and setting de-sired height, retighten wing nut. Side plates may need to beadjusted up or down depending on the height of spray box bar.Use supplied allen wrenches. Do not over-tighten side plates.SIDE PLATES SHOULD BE ABLE TO MOVE UP ANDDOWN BY HAND.
BEFORE STARTINGThe Brite Striper 1100 is shipped as a ready to use striper, completewith a premium, sealed battery, automatic charger. Beforeoperating, follow these directions.
1. Check all hose connections and fittings making sure they aretight.
2. Any fittings, if replaced, should have Teflon tape applied before tightening. Do not force fittings.
CHARGER OPERATIONIntitialization: Red Light On, Green Light Off: Monitor Circuitverifies appropriate battery voltage levels and good electricalcontinuity.Bulk Charge: Red Light On, Green Light Off: Constant Current atFull Power. Switch to Absorption at 75%-80% full recharge.Absorption Charge: Red Light On, Green Light Flashing: ConstantVoltage at Absorption Level. This conditions the battery for maximumperformance. Tranisition to Float Maintenance either by charge cur-rent threshold or fixed absorption timer.Float Charge: Red Light Off, Green Light On: Constant Voltage atFloat/Maintenance Level. Keeps battery fully charged and maintainsoptimum specific gravity. Charge reset monitor protects battery againstdeep discharge from excessive appliance current draw.
3REV 4/08
INDICATOR LIGHT OPERATIONRED.
When the red light is On, the charger is functioning normally and it isin the process of fully charging the battery. The charger will automati-cally apply the optimum charging voltage and current values to the bat-tery in the proper timing sequence.
GREEN.When the green light is On and the red light is Off, the battery chargeris in the storage/float/maintenance mode of operation. In this mode thecharger will maintain the battery at optimum voltage levels to maintainfull charge.
GREEN FLASHING.When the green light is flashing and the red light is On, the battery isapproximately 80% charged. Do not use the battery until the green lightstops flashing, indicating that the battery is fully charged.
RED & GREEN ALTERNATING.This is an abnormal indication. Check all connections between thecharger and the battery. If this condition persists, contact technical sup-port for assistance.
APPLICATION INFORMATION
• Always operate the charger in a well ventilated area.• If no indicatior lights come on after you plug in the AC
cord, then check the AC power receptacle.• If the green indicator light comes on too soon, check
the battery and the output connections from thecharger.
• It may take a long time for the green light to come onwhen charging a large battery

4 MODEL 1100
OPERATION OF MACHINE
1. The Brite Striper 1100 needs to be charged completely before youcan use. The striper is shipped with an automatic charger.
2. Once charged, test run the machine with water to see how it op-erates. You may wish to practice with paint in an off-area beforestarting your job.
3. Strain and make sure your paint is diluted to a minimum of 1part paint to 1 part water for Pioneer natural grass paints. Westrongly recommend the use of Pioneer Brite Stripe Pre-Mixpaint. Insert your paint bucket, with lid fully attached, into thebucket holder.
4. Insert both the discharge and suction tubes through the lid’s pourspout. Do not stripe without the lid in place, as this will cause asafety hazard.
5. Start your striper by turning the switch to the On position on theleft hand side of the component box and slowly open the ballvalve on the suction tube to you achieve your desired pressure.
6. Adjust the ball valve to the pressure you feel desire and walk atyour normal striping speed. If pump is rapidly cycling, open ballvalve until cycling stops. Cycling for more than 15 seconds candamage pump motor. It is best to operate the pump only whenstriping since the pump is self priming. This will greatly reducewear.
7. When done or when changing paint, place pick-up tube in cleanbucket of water with with P.H.D Cleaner. Turn on pump untilwater comes out clean.
STRIPING TIPSWhen striping, always have the machine in motion before opening thespray valve, thus eliminating a heavy “blob” of paint at the beginning.
Simplest method for running test lines is to apply lines on paper or in anoff-area. For a sharp cut-off at the end of a line, place paper or cardboardat the end, so the line is square.
Periodically clean or replace the nozzle screen and nozzle tip locatedinside the spray box assembly. Inspect and clean the strainer on thesuction tube with each use.
Do not run your pump dry. This will greatly add wear and tear on yourpump and shorten its life.

5REV 4/08
PARTS LISTBRITE STRIPER® MODEL 1100
KEY# PART # DESCRIPTION
1 1503 Hand Grip
2 1621 Handle
-- 1625 Frame
-- 1600 Nut & Bolt Kit
3 1110 Switch
4 1152 Battery Meter
5 1118 Pick-up Tube(Copper 18”)
6 1165 Strainer 1/2
7 1136 Hose Paint 36”(1/2” Pick-up Tube)
8 1117 Shut-off Ball Valve 1/2
9 1116 Return Tube(Copper 16”)
10 1153 Component Box
-- 1105 Wire Black
-- 1106 Wire Orange
-- 1107 Wire Yellow
11 1216 Front Tire
-- 1531 Front Axle
12 1542 Height Adjustment
Bracket
13 1546 Spray Arm
14 1120 Hose Paint 20”(1/2” Pump to SprayNozzle)
-- 1178 Hose Clamp
KEY# PART # DESCRIPTION
15 1122 Tee 1/2”
-- 1124 Adapter 1/2” to 1/4”
-- 0104 Tee w/Nipple
-- 1125 1/4” Plug
16 1541 Nozzle Assy. w/9508 Tip
-- 1513 Male x Female Elbow
-- 0116 Nozzle Body
-- 0115 Nozzle Screen
-- 0108 Nozzle Tip 9508
-- 0114 Nozzle Cap
17 1524 Side Plate
-- 1544 Side Plate Clamp
18 1635 Shut-off Valve
19 1158 3/8” Hose Paint 60”
20 1151 Battery
-- 2050 Battery Strap
21 1160 Pump
-- 1164 Pump Fitting
22 1215 Rear Tire
-- 1528 Rear Axle
23 1636 Control Cable
24 1505 Control Lever
-- 1150 Battery Charger
-- 1155 Backet Holder
Optional Accessories:
-- 1212 12’ Hand Hose with Wand
-- 5088 Female Quick Disconnect

6 MODEL 1100
PARTS LISTBRITE STRIPER® MODEL 1100
1 2
765
8
9
10
11
12
1314
15
1617
1819
22
23
24
3
4
2021

7REV 4/08
CLEAN-UP TIPSAll parts, except those enclosed in the component box, should be cleanedimmediately after each use. We recommend Pioneer P.H.D. Cleaner. Aclean, lint-free rag should be used to wipe dry the machine.
We recommend putting the pick-up tube into a bucket with a dilution of 2gallons water to one cup P.H.D. Run the striper until you no longer seeany paint and water is clearly coming through the tip.
A final step should then be to remove the nozzle cap and clean the nozzletip and screens. This can easily be done by placing all three parts in asmall amount of P.H.D. and allow them to soak for a few minutes. An oldtooth brush can be used for stubborn spots. Rinse the nozzle assemblyparts with clean water and allow to air dry.
CAUTION: DO NOT USE WIRE OR ANY OTHER RIGID OBJECT TO CLEAN NOZZLE TIPAS THIS MAY CAUSE TIP ORFICE TO BECOME ENLARGED WHICH WILL RESULT INPOOR PERFORMANCE WHEN STRIPING.
HOW TO STORECleaning your machine thoroughly cannot be overemphasized. A little extraeffort at the end of each job will save you time and money when it is time tostripe again. As stated previously, run a gallon or so of water and P.H.D. so-lution through the machine. Be sure to clean out the screen inside the noz-zle assembly and filter on the suction tube.
IMPORTANT: DO NOT EXPOSE THE COMPONENT BOX TO WATER. DONOT HOSE DOWN THIS MACHINE, AS IT IS ELECTRICAL AND MAYCAUSE PERMANENT DAMAGE. BE SURE TO CLEAN OUT THE PUMPSYSTEM. FAILURE TO DO THIS MAY RESULT IN FAILURE AND MAL-FUNCTION OF THE UNIT.
When storing your striper for an extended period of time, do the following:1. Flush machine out thoroughly.2. Remove hoses and drain.3. Lubricate spray valve (shut-off valve).4. Keep battery charger connected.
NORMAL WEARWarranty will not cover repair where normal use has exhausted the life ofthe part. Line stripers, like all mechanical devices, need periodic parts re-placement and service to perform well. It should be remembered that theservice life of any equipment is dependent on the care it receives and theconditions under which it has to operate.

8 MODEL 1100
PUMP PRECAUTIONS• “Intermittent Duty” is defined as; operated and/or frequently
started within a period of time that would cause the motor to reachits maximum thermal limits. Once the maximum thermal limit isobtained, the motor must be allowed to return to ambienttemperature before resuming operation.
• DO NOT use to pump flammable liquids. Never operate the pump inan explosive environment. Arcing from the motor brushes, swith orexcessive heat from an improperly cycled motor may cause an explosion.
• DO NOT assume fluid compatibility. If the fluid is improperlymatched to the pumps’ elastomers, a leak may occur. Pumps used totransfer hazardous or hot (max. temeperature 170˚F {76˚C} vitononly) chemicals must be in a vented area to guard against thepossibility of injury due to harmful or explosive liquid/vapors.
• DO NOT operate the pump at pressures which cause the motor toexceed the amperes rating indicated on the name plate. Variouspump models are equipped with thermal breakers to interruptoperation due to excessive heat. Once the temperature of the motoris within proper limits it will automatically reset and the pumpwill start operation without warning.
PRESSURE SWITCH OPERATIONThe pressure switch reacts to outlet pressure, and interrupts power at thepreset shut-off pressure indicated on the pump labe. When outlet pres-sure drops below a predetermined limit (typically 15-20 pse.{1-1.4 bar}less than the shut-off pressure) the switch will close and the pump will op-erate until the shut-off (high) pressure is achieved. The shut-off pressureis set to factory calibrated standards. See the motor label for specific pumpspecifications.
CAUTION: Improper adjustment of the pressure switch may cause se-vere overload or premature failure. Failures due to improper adjustmentof the pressure switch will not be covered under the limited warranty.
If the flow rate is very low, the pump may re-pressurize the outlet fasterthan the fluid is being released causing rapid cycling (On/Off within 2 sec-onds). If the pump is subjected to rapid cycling during normal operation,or for infrequent periods, damage may occur.

9REV 4/08
TROUBLE SHOOTINGA. STRIPER DOES NOT STRIPE FULL LINE
1. Was the paint strained?2. Check the paint level.3. Check the screens for clogs. Clean as needed.4. Check the suction tube strainer for clogs. Clean as needed.5. Check nozzle tip for proper alignment – horizontal.6. Is the ball valve on the suction tube in the open position?7. Check the operating pressure.8. Check the shut-off valve for clogs – clean. Adjust control cable.9. Check paint line hose for clogs – clean.
B. STRIPER WILL NOT SHUT OFF COMPLETELY1. Check control cable adjustments. Adjust as needed.
C. STRIPER WILL NOT TURN ON1. Is the battery connected to pump– connect.2. Is the battery charged – check battery status indicator.3. Check all connections inside component box.4. Is On/Off switch in the upright position?
D. STRIPER DOES NOT STRIPE FULL LINE1. Opening in nozzle tip enlarged – replace with new nozzle tip.2. Pump building too much pressure – adjust with ball valve.
E. PUMP WILL NOT STARTCHECK:
• Fuse• For correct voltage ( 10%) and electrical connections• Pressure switch operation and correct voltage at switch or motor
wires (as equipped)• Recifier or motor for open or grounded circuit
F. WILL NOT PRIME (No discharge/Motor runs)CHECK:
• Out of product• Strainer for debris• Inlet tubing/plumbing for severe vacuum leak• Inlet/Outlet tubing severely restricted (kinked)• Debris in pump inlet/outlet valves• Proper voltage with the pump operating ( 10%)• Pump housing for cracks
G. LEAKS FROM PUMP HEAD OR SWITCH:CHECK:
• For loose screws at switch or pump head• Switch diaphragm ruptured or pinched• For punctured diaphragm if fluid is present at bottom drain
+-
+-

10 MODEL 1100
CALL OUR CUSTOMER SERVICE REPSFROM 8:00am - 5:00pm (EST) 800.877.1500
With any questions you may have concerning the care, assembly, operation, or maintenance of this product. Before you call be sure
that unsatisfactory operation is not due to inadequate care or cleaning, abuse, or neglect. This may save you time and money. See our warranty for specific coverage.
IF YOU SHIP THE PRODUCTPRIOR AUTHORIZATION MUST BE RECEIVED BEFORE RETURN
Carefully pack unit and send it prepaid and adequately insured. Attach a postage-affixed letter, detailing the complaint, to the outside
of the carton. BE SURE TO SHOW RETURN AUTHORIZATION CODE NUMBER ON OUTSIDE OF ENVELOPE.
FOR ANY REPAIRS INCLUDING WARRANTY REPAIRS:
Call 1-800-877-1500 for repair cost estimates, and full service information. INCLUDE RETURN AUTHORIZATION CODE NUMBER BEFORE SENDING YOUR UNIT.
SEND YOUR UNIT WITH FREIGHT PREPAID TO:PIONEER MANUFACTURING COMPANY
4529 Industrial ParkwayCleveland, Ohio 44135
H. PUMP WILL NOT SHUT-OFF: (Pressure switch equipped)CHECK:
• Output line closed and no leaks• For air trapped in outlet line or pump head• For correct voltage to pump ( 10%)• Inlet/Outlet valves for debris or swelling• For loose drive assembly or pump head screws• Pressure switch operation/adjustment incorrect
I. NOISY/ROUGH OPERATION:CHECK:
• Mounting feet that are compressed to tight• Does the mounting surface multiply noise (flexible)• For loose pump head or drive screws• Is the pump plumbed with rigid pipe causing noise to transmit
+-

LIMITED WARRANTY
For a period of three years from date of purchase, PIONEER MANUFACTURINGCOMPANY will replace for the original PURCHASERS, any part or parts* of theline Striper, found upon examination by a PIONEER FACTORY-trained represen-tative, to be defective in material or workmanship or both; this is the exclusiveremedy. This warranty is pro-rated as to cover 100% of the cost of materials, partsand labor for the first twelve months of ownership, 60% the second twelve months,and 40% for the third twelve month period. The customer is responsible for all re-maining costs. The customer may elect to return the entire unit to the factory at hisexpense for repair. Or he may, at his expense, return the defective part for factoryinspection AND replacement. In no case will PIONEER MANUFACTURING au-thorize outside repair on any unit nor will PIONEER MANUFACTURING reimburseany customer for unauthorized work. Prior to returning any part or machine, theCUSTOMER must obtain a RETURN MATERIAL AUTHORIZATION CODE. Calltoll free 1-800-877-1500. This warranty gives the customer specific legal rights aswell as other rights which may vary by state. There are no WARRANTIES whichextend beyond the face hereof and the warranties set forth above are in lieu of allother warranties, EXPRESS or implied, including any and all implied warranties ofmerchantability or fitness for a particular purpose, and any other obligation or lia-bility on the part of PIONEER.
PIONEER SHALL IN NO EVENT BE RESPONSIBLE OR LIABLE TO THEOWNER OR ANY THIRD PARTY FOR INDIRECT, SPECIAL OR CONSEQUEN-TIAL DAMAGES WHETHER ARISING FROM DEFICIENCIES IN THE DESIGN,MANUFACTURE, LABELING OR OPERATION OF THE BRITE STRIPER ORFROM ANY OTHER CAUSE WHATSOEVER AND WHETHER BASED ON TORT,CONTRACT, WARRANTY, STRICT LIABILITY OR OTHERWISE. IN ANY EVENT,PIONEER MANUFACTURING COMPANY INC.’S RESPONSIBILITY IS LIMITEDTO THE COST OF THE PRODUCT ITSELF.
No representative employee, agent of Pioneer, or any other person has any au-thority to assume for Pioneer any additional or other liability or responsibility, otherthan as described above, in connection with the BRITE STRIPER. Either director indirect acceptance of this limited warranty constitutes approval of, and agree-ment with, all of its terms and conditions by the owner. This limited warranty be-comes effective only when all invoices for the Brite Striper have been paid in full.
* The battery, battery charger and pump are covered exclusively by the manufac-turer’s warranty.
11REV 4/08

to order BRITE STRIPER® Accessories
a l s o a v a i l a b l e f r o m
Call 800.877.1500
• Premium grade paint with Halogen2000® for greater brightness
• Fast-drying with professionalresults
• No dilution necessary• Unsurpassed resistance to severe
weather• Concentrated and homogenized
for smooth consistency• Finely ground ingredients will not
clog your striping machine• Painted areas are ready in about
one hour
Brite Stripe® Pre-Mix STENCILSConvenient Ready-to-use formula
• Specially designed to clean PioneerAthletic Field Marking Machines.
• Biodegradable• Contains no flammable solvents• Economical - highly concentrated,
P.H.D. cleans more at less cost• Fast Acting - Leaves no soap scum
or residue. Keeps your athletic fieldmarker cleaner and brighter longer.
P.H.D.Specially Design Cleaning Concentrate
• Exclusive formula provides thebrightest, whitest lines in theindustry
• Premium field marking paint forspecial events, playoffs and highprofile teams
• Higher concentration of premiumpigment and optical brightenerthan any other natural turf paint
• Ideal choice for majorchampionships and othernationally televised events
GameDay®
The Ultimate Field Marking Paint
• Helmet Stencil Kit allows you tocustomize your field with yourschools helmet design.
• Available Stencil Kits: YardlineStencil Kit, Hash Mark Kit, LetterStencil Kit.
• Custom Stencils made with our newstencil technology means fewerpieces. Customizing your field hasnever been as easy or affordable.
Pioneer’s Athletic Field Stencilsare made of rugged, easy to use
clean plastic for years of use. Theyare lightweight enough for one
person to handle and pre-markedfor easy assembly

Easy to Use•Homogenized to prevent
separation in the container.• Finely ground ingredients
will not clog your machine.
Convenient•Painted areas are ready to
use in one hour.•Equipment can be washed
with soap and water.
Applications•Football & Soccer Fields •Walkways • Campsites •Band Practice Areas • Tracks • Golf Courses•Volleyball Courts •Baseball Fields •Bicycle Paths•Grass & Clay Tennis Courts•Grass Parking Areas •Any grass or paved areas
PackagingFive gallon pails
“The Striping People”
ATHLETIC FIELD MARKING PAINTwith Halogen® 2000 for Exceptional Brightness
BRITE STRIPE® pre-mix
®
HIGHLIGHTS• Premium grade • Now contains Halogen® 2000for greater brightness • Unsurpassed resistance to
severe weather • Fast-drying • Concentrated • Easy-to-use • Professional results • Homogenized for
smooth consistency
Improved Formula• Now 400% brighter under UV light.
• Up to 25% brighter in sunlight.
Brite Stripe® Available in a
Variety of Colors
•Pioneer offers 16 standard colors and an unlimited
variety of custom colors.
• Customize your fields with your school
colors or logo.
Phone: 800.877.1500 Fax: 800.877.1511www.pioneerathletics.com
4529 Industr ial Parkway
Cleveland, OH 44135