101 P C O L S Role: A/OPC How to Complete Your A/OPC User Profile in AIM I N T E R A C T I V E T U T...
30
101 P C O L S Role: A/OPC How to Complete Your A/OPC User Profile in AIM I N T E R A C T I V E T U T O R I A L
-
Upload
berniece-holland -
Category
Documents
-
view
214 -
download
0
Transcript of 101 P C O L S Role: A/OPC How to Complete Your A/OPC User Profile in AIM I N T E R A C T I V E T U T...

101P C O L S
Role: A/OPC
How to Complete Your A/OPC User Profile in AIM
I N T E R A C T I V E T U T O R I A L

TUTORIAL ICON LEGEND:
HOME/BACK: This icon will take you back to the List of Actions or back one action
NEXT:This icon will allow you to continue to the next action
REPLAY:This icon will allow you to replay the action
EMAIL:This icon will take you to the email message
INFO:This icon will take you to additional information
SCROLL:This icon will allow you to scroll down

The button will appear on many screens throughout this tutorial. Click on
this button to view additional information.
Click the button to return to the previous screen.Clicking on an area highlighted by a
red box will advance the tutorial to the next step.

Scenario: As an A/OPC recently provision in EMMA and has redeem their token. The following interactive tutorial will demonstrate the process of
logging into PCOLS to complete the A/OPC’s user Profile tab in AIM.

Click the “OK” button.Click the “OK” button.

Click the “CAC Log on” button.
Click Log the “CAC Log on” button.

The A/OPC enters their PIN. Click the “OK” button.

Click on the “Log on” button for Authorization, Issuance & Maintenance (AIM)
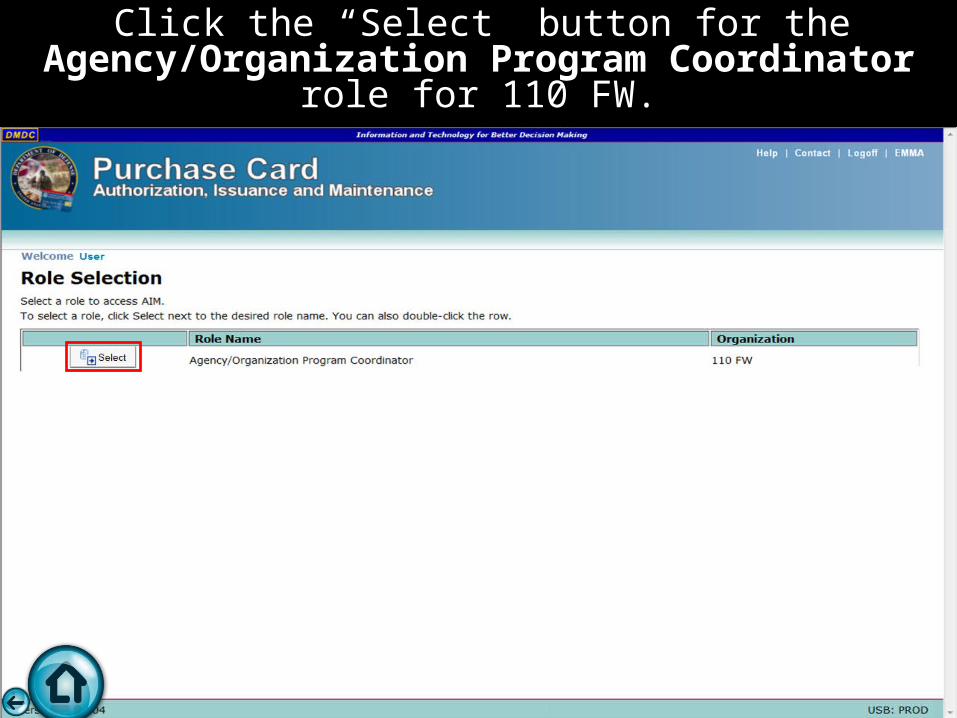
Click the “Select” button for the Agency/Organization Program Coordinator role for 110 FW.
Coordinator role for 110 FW.

Your are now in the Profile Page. Enter the DoDAAC for the organization that issued your letter of delegation.

Note: If you need assistance finding your DoDAAC, visit the following Web sites:
https://dodaac.wpafb.af.mil/dodaacsearch.cfm or https://www.daas.dla.mil/daasinq/default.asp
Provided to you with procurement authority. You are only required to enter one DoDAAC, you can provide up to five, if
necessary.
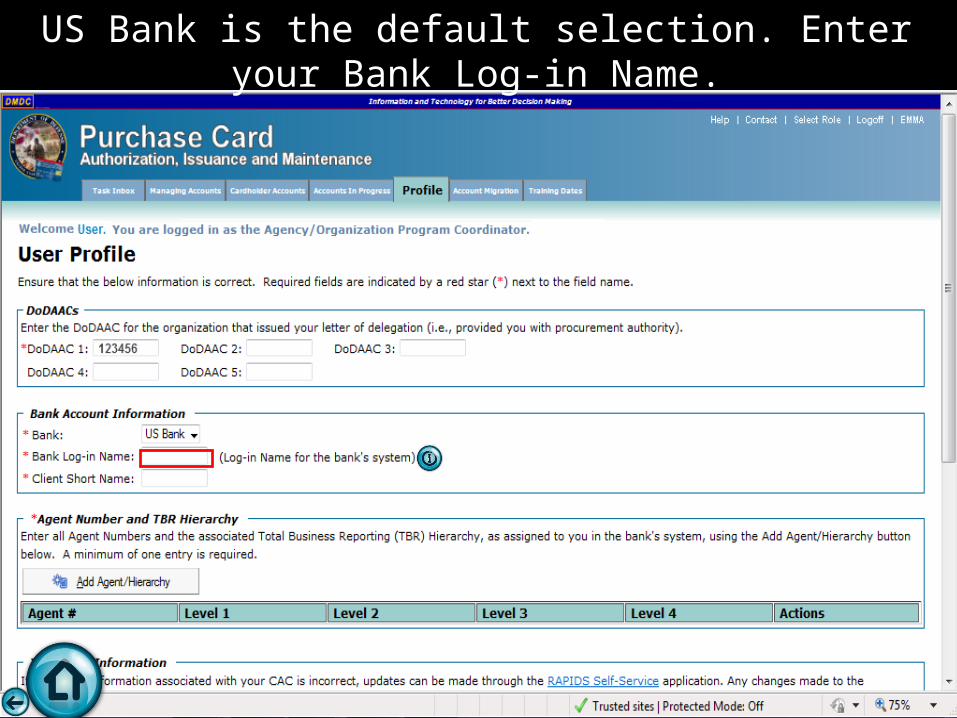
US Bank is the default selection. Enter your Bank Log-in Name.

US Bank (AXOL)- Prior to using AIM, Army, Air Force, and Defense Agency customers will need to log in to US Bank’s Access Online system and ensure that your Access Online profile reflects a Functional Entitlement Group (FEG) of PA_AIM. If you need assistance adding this FEG, you must contact your US Bank representative.
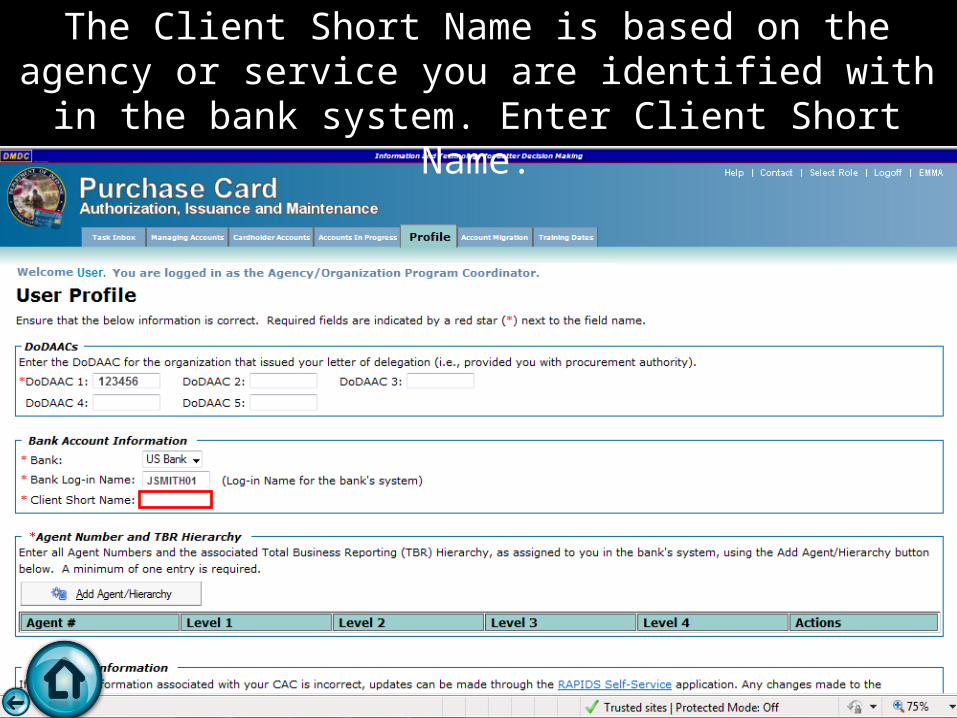
The Client Short Name is based on the agency or service you are identified with in the bank system. Enter Client Short
Name.

TBR Hierarchy values are assigned to you in the bank system. You must have at least one entry in the Agent Number and
TBR Hierarchy section. To do so, click “Add Agent/Hierarchy”.
USAF

Army, Air Force, and Defense Agency customers Enter your Agent Number and the appropriate values (Levels 1-4)
for the TBR Hierarchy. These values are assigned by your bank system.

Level 1This number identifies the bank.
Click on the red box.

Level 2This number identifies the branch of service or Other Defense
Agency. Click on the red box.

Level 3This number identifies the Command or the sub- agency. Click
on the red box.

Level 4This number identifies the organizational level and is tied to
the A/OPC. Click on the red box.

Click on the “Add button”. This will complete the process of adding a TBR Hierarchy.

TBR Hierarchy has been successfully added.

Work address, work phone, and email address are required. If any of the information associated with your CAC is missing or
incorrect, updates can be made using the links below.
Any changes made to the information may take up to 24 hours to process and will automatically be reflected once complete. Click on the information icon to learn more.
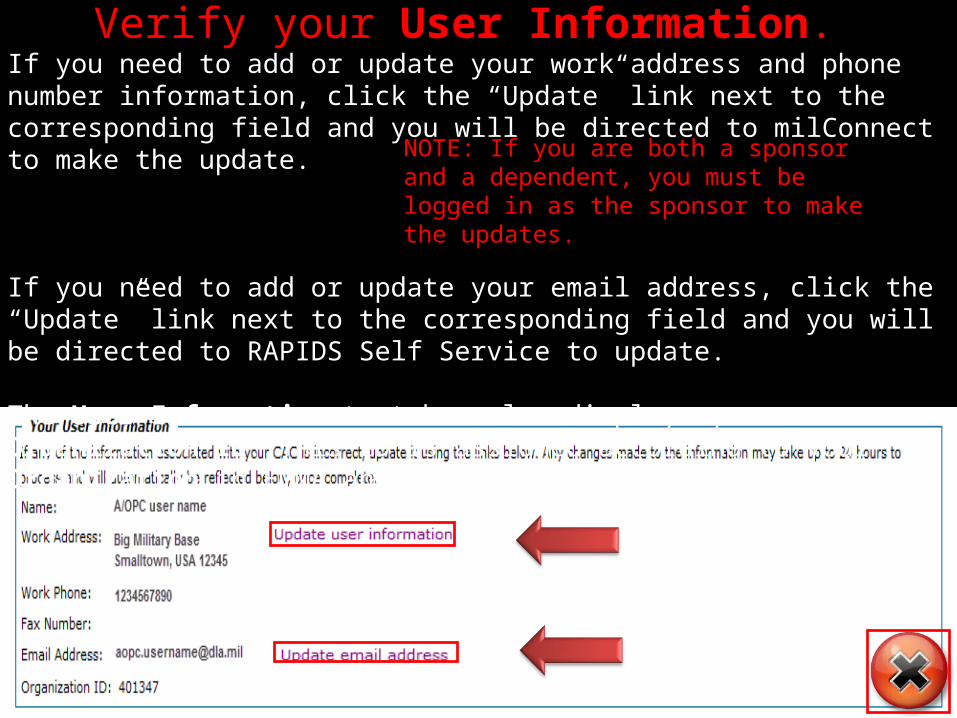
Verify your User Information. If you need to add or update your work address and phone number information, click the “Update” link next to the corresponding field and you will be directed to milConnect to make the update.
If you need to add or update your email address, click the “Update” link next to the corresponding field and you will be directed to RAPIDS Self Service to update.
The User Information text box also displays your Organization ID. This ID is assigned according to your Organization in EMMA and cannot be changed.
NOTE: If you are both a sponsor and a dependent, you must be logged in as the sponsor to make the updates.

milConnect
http://www.dmdc.osd.mil/milconnect

RAPIDS Self Service
http://www.dmdc.osd.mil/self_service/

The Display Preference option is available to set a default number of records for future AIM sessions. Click “All” from
the drop-down list.
You have the option to set a default number of rows that will display on the Task Inbox, Managing Accounts, Cardholder Accounts, Accounts in Progress, Account Migration, and Training Dates tabs.
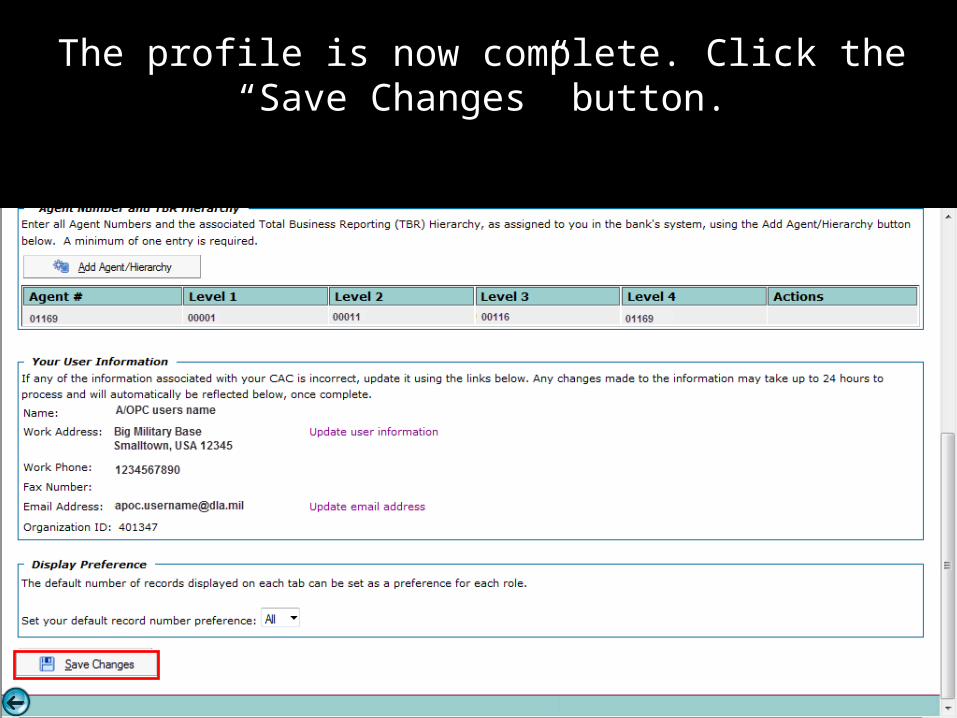
The profile is now complete. Click the “Save Changes” button.
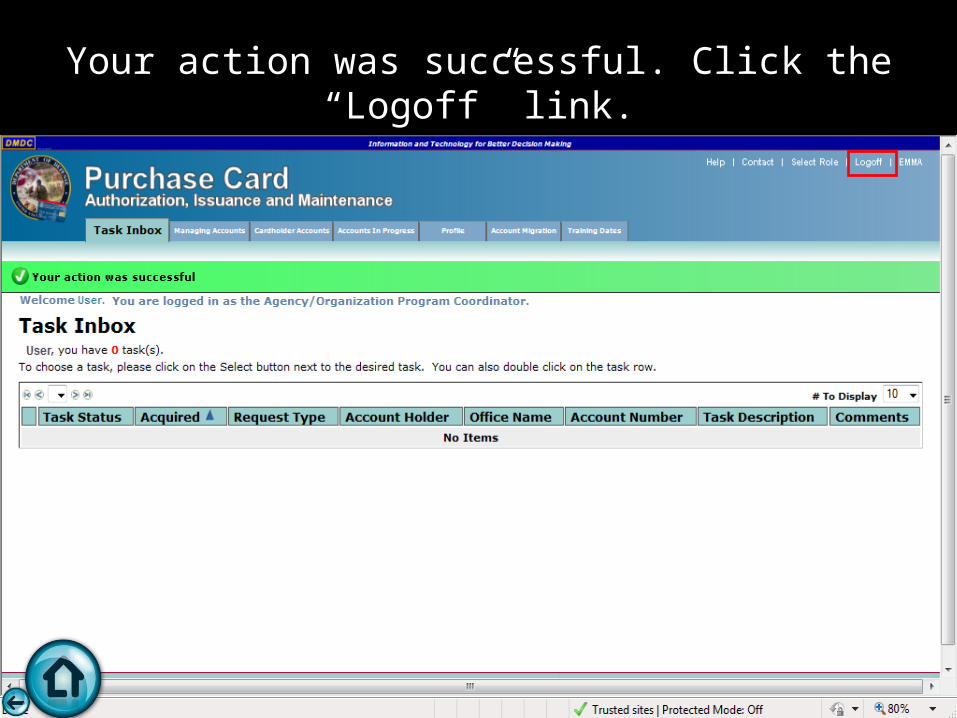
Your action was successful. Click the “Logoff” link.
101This concludes the PCOLS 101 Interactive Tutorial:
How to Complete an A/OPC Profile in AIM
To learn
To exit tutorial press ESC on your keyboard
P C O L SI N T E R A C T I V E T U T O R I A L