1 Live Sound Reinforcement Live sound system wiring.
36
1 Live Sound Reinforcement Live sound system wiring
Transcript of 1 Live Sound Reinforcement Live sound system wiring.
1
Live Sound Reinforcement
Live sound system wiring
2
Live Sound Reinforcement
We’re going to discuss the most commonly used cables and connector types used in the live sound reinforcement industry.
As mentioned in a previous lesson live sound utilizes both coax and twisted pair type cables and we looked at how signals are transmitted over these cable types.
Coax = unbalanced transmissionTwisted pair = balanced transmission
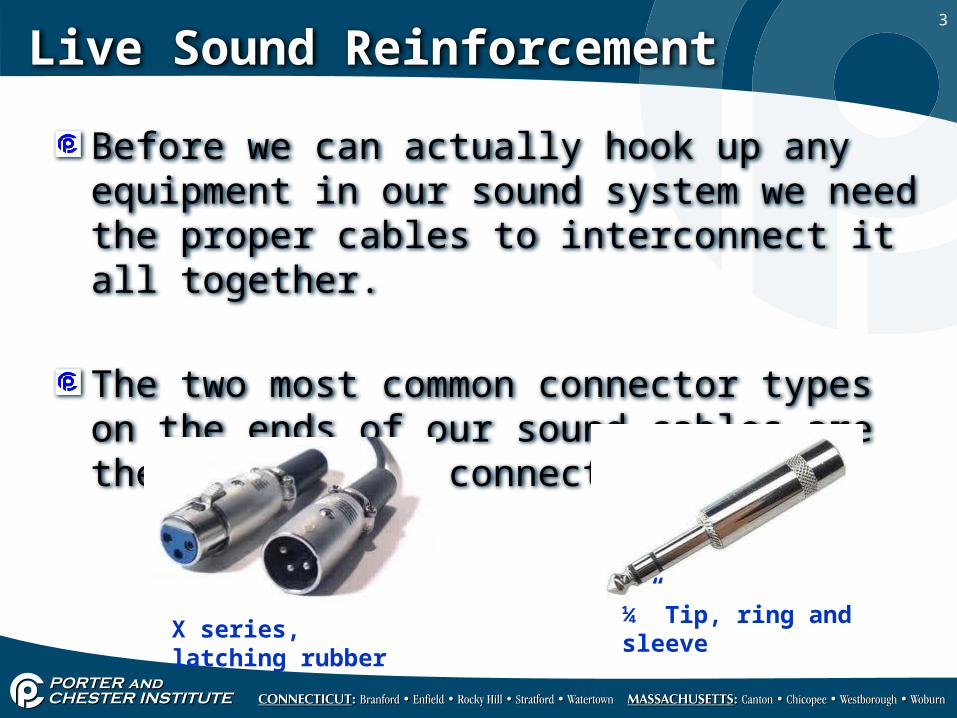
3
Live Sound Reinforcement
Before we can actually hook up any equipment in our sound system we need the proper cables to interconnect it all together.
The two most common connector types on the ends of our sound cables are the XLR and TRS connectors.
X series, latching rubber ¼” Tip, ring and sleeve
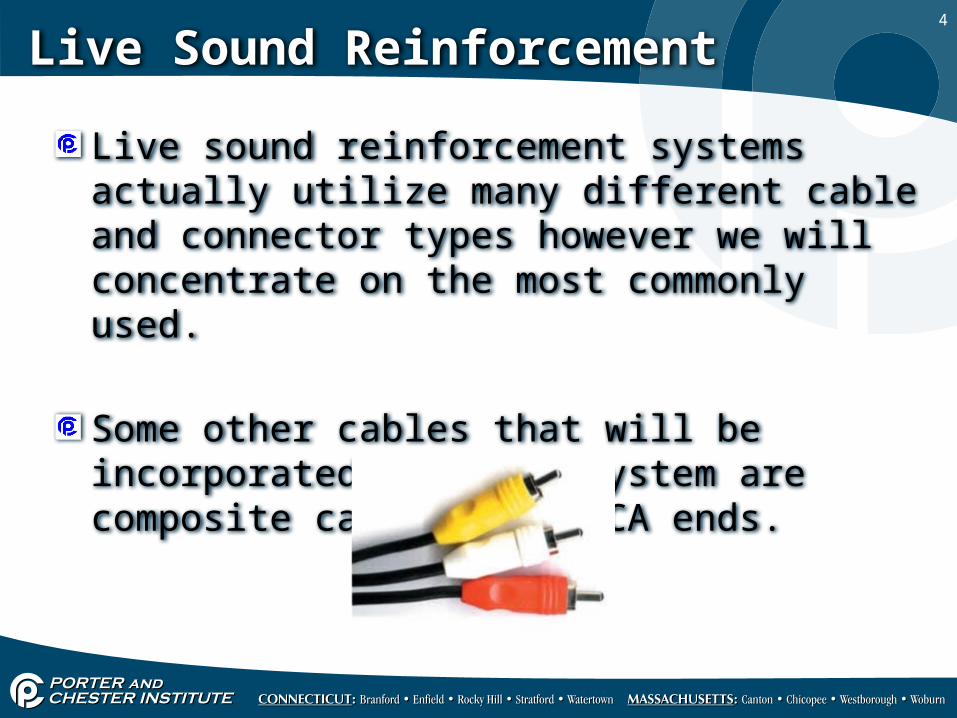
4
Live Sound Reinforcement
Live sound reinforcement systems actually utilize many different cable and connector types however we will concentrate on the most commonly used.
Some other cables that will be incorporated into the system are composite cables with RCA ends.
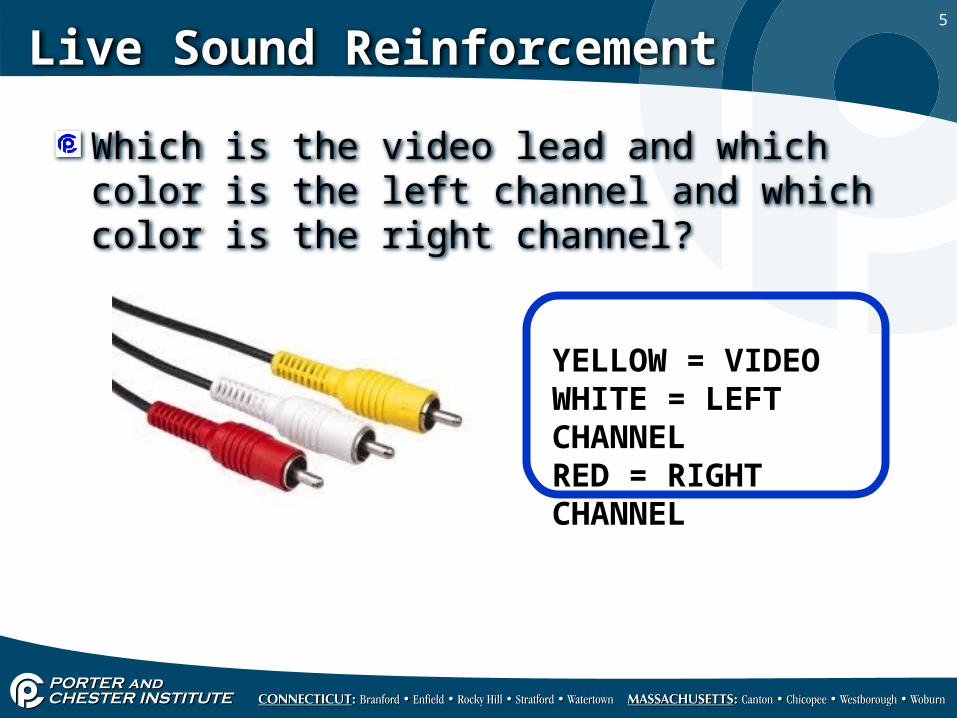
5
Live Sound Reinforcement
Which is the video lead and which color is the left channel and which color is the right channel?
YELLOW = VIDEOWHITE = LEFT CHANNELRED = RIGHT CHANNEL
6
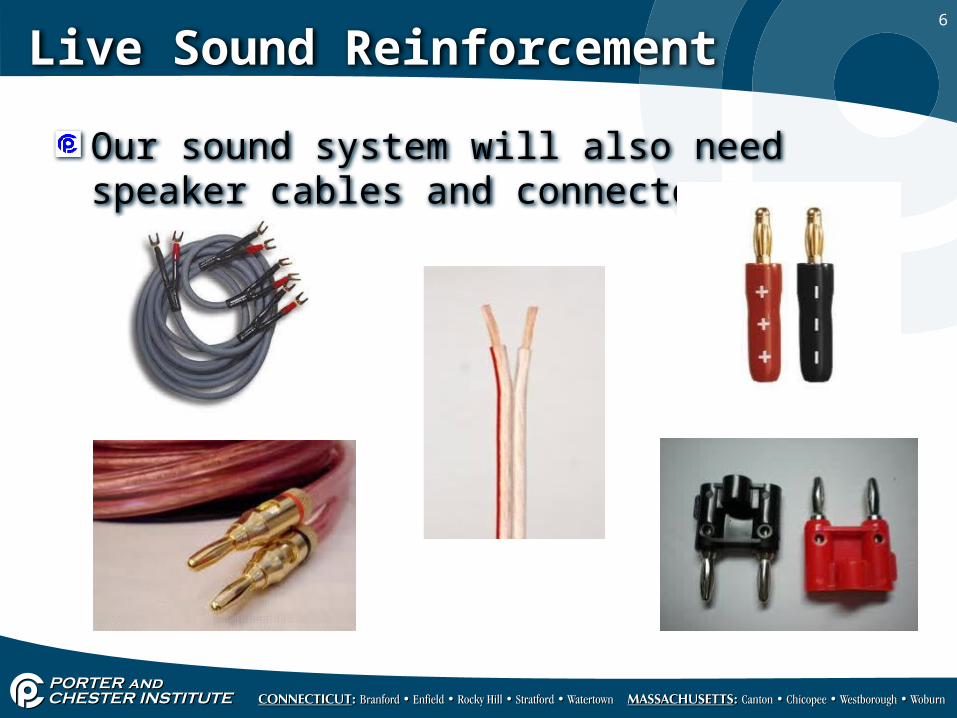
Live Sound Reinforcement
Our sound system will also need speaker cables and connectors.
7
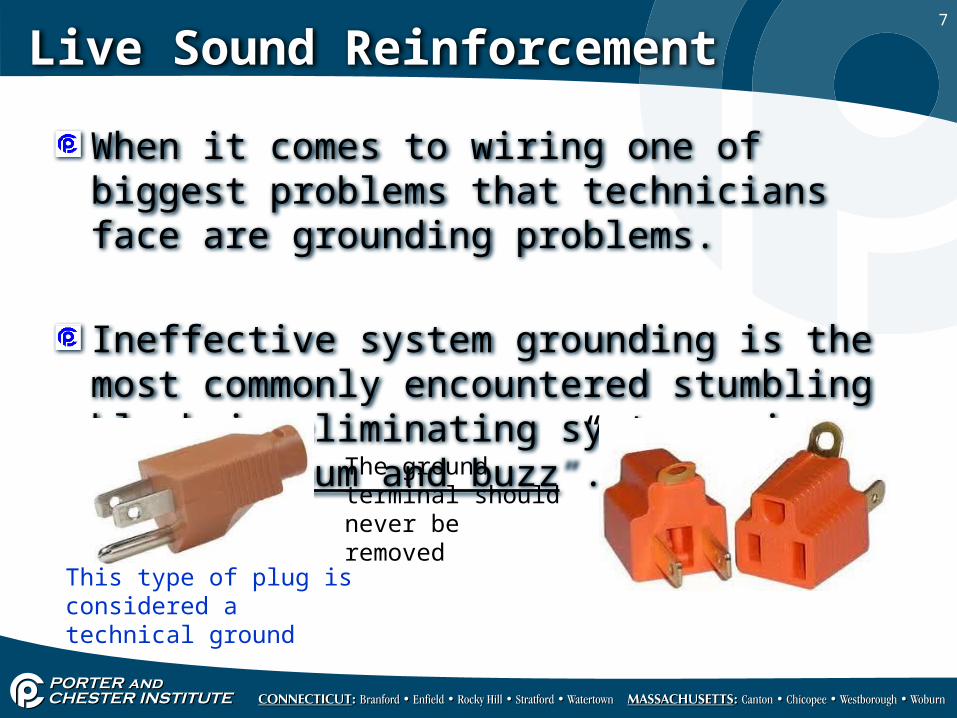
Live Sound Reinforcement
When it comes to wiring one of biggest problems that technicians face are grounding problems.
Ineffective system grounding is the most commonly encountered stumbling block in eliminating system noise, notably “hum and buzz”. The ground terminal
should never be removed
This type of plug is considered a technical ground
8
Live Sound Reinforcement
Utilizing too many paths to ground will result in noise because it creates a ground loop within the building or space and acts like an antenna that will create more EMI (electro magnetic interference).
This EMI will be super imposed back into the sound system.
For this reason a dedicated electrical circuit is required for any permanently installed sound system.
9
Live Sound Reinforcement
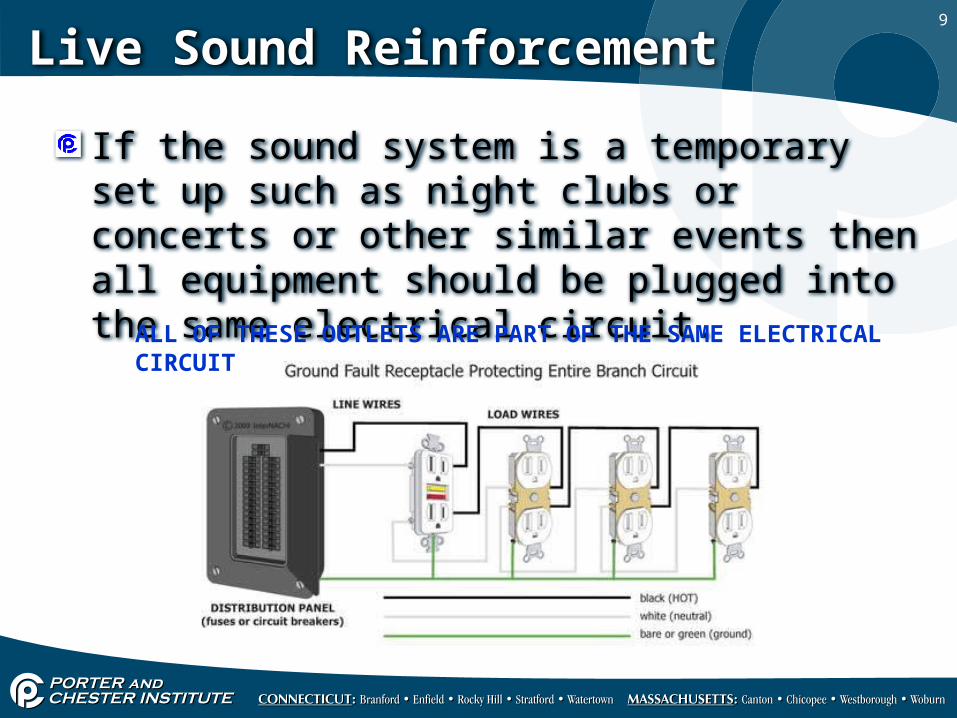
If the sound system is a temporary set up such as night clubs or concerts or other similar events then all equipment should be plugged into the same electrical circuit.
ALL OF THESE OUTLETS ARE PART OF THE SAME ELECTRICAL CIRCUIT
10
Live Sound Reinforcement
Even outlets on the same electrical circuit can cause ground loops so if at all possible the equipment should be plugged into a power strip.
Amplifiers will amplify the noise making matters worse so it’s important to keep all amps on the same electrical outlet too.
11
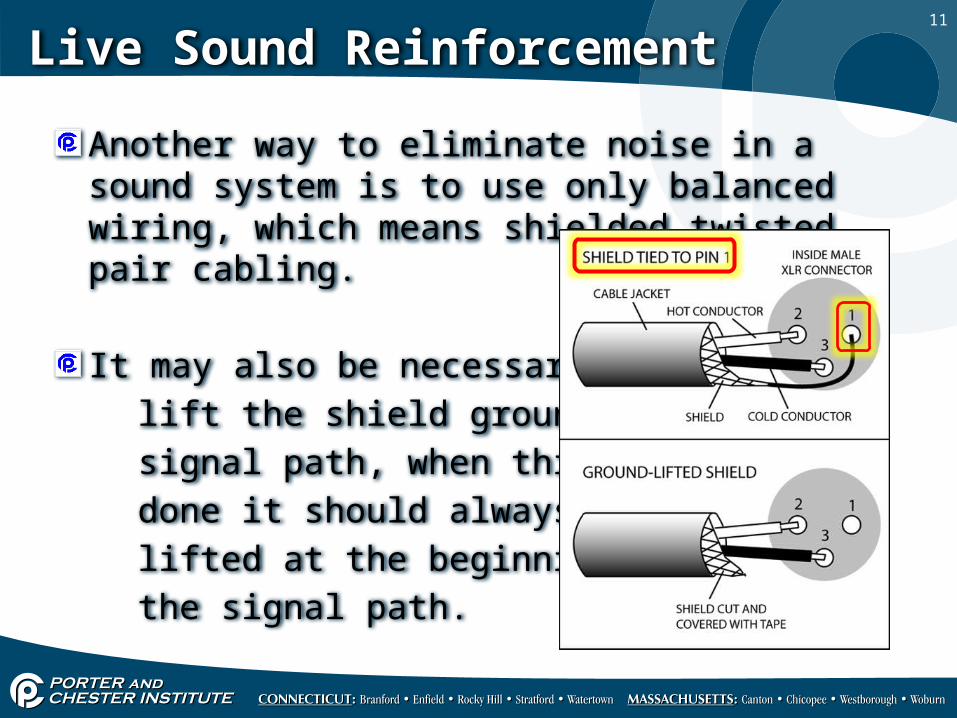
Live Sound Reinforcement
Another way to eliminate noise in a sound system is to use only balanced wiring, which means shielded twisted pair cabling.
It may also be necessary to lift the shield ground of the signal path, when this is done it should always be lifted at the beginning of the signal path.
12
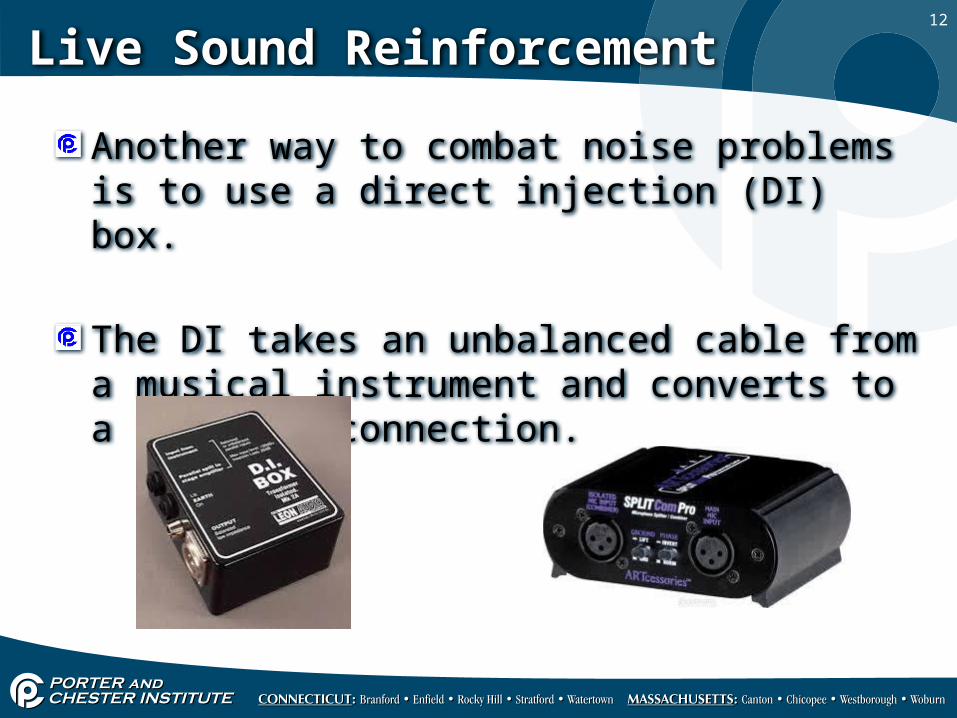
Live Sound Reinforcement
Another way to combat noise problems is to use a direct injection (DI) box.
The DI takes an unbalanced cable from a musical instrument and converts to a balanced connection.
13
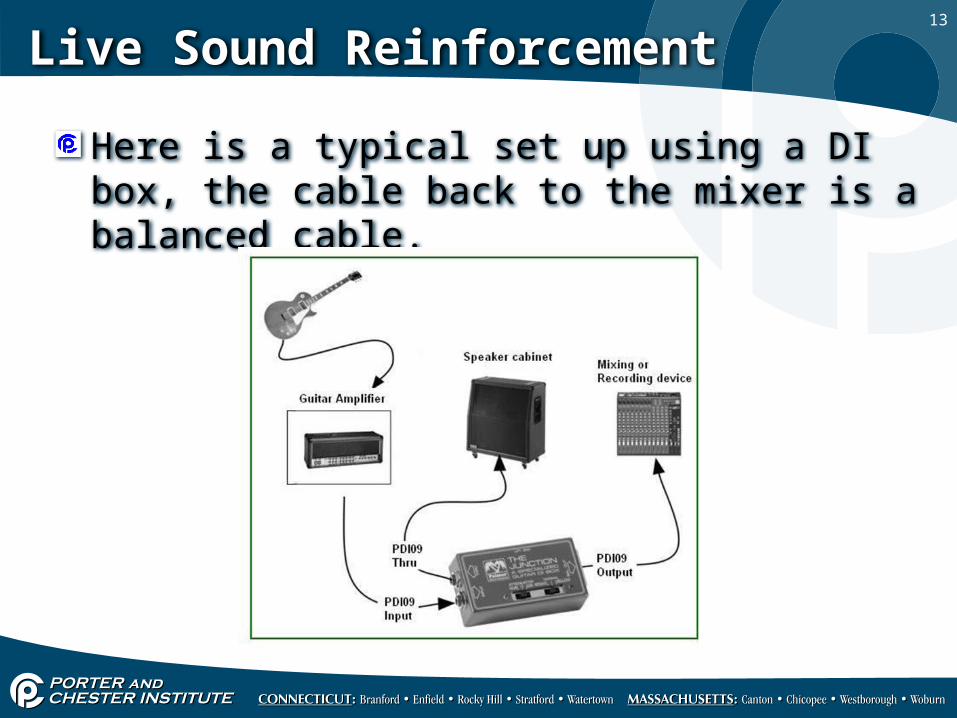
Live Sound Reinforcement
Here is a typical set up using a DI box, the cable back to the mixer is a balanced cable.
14
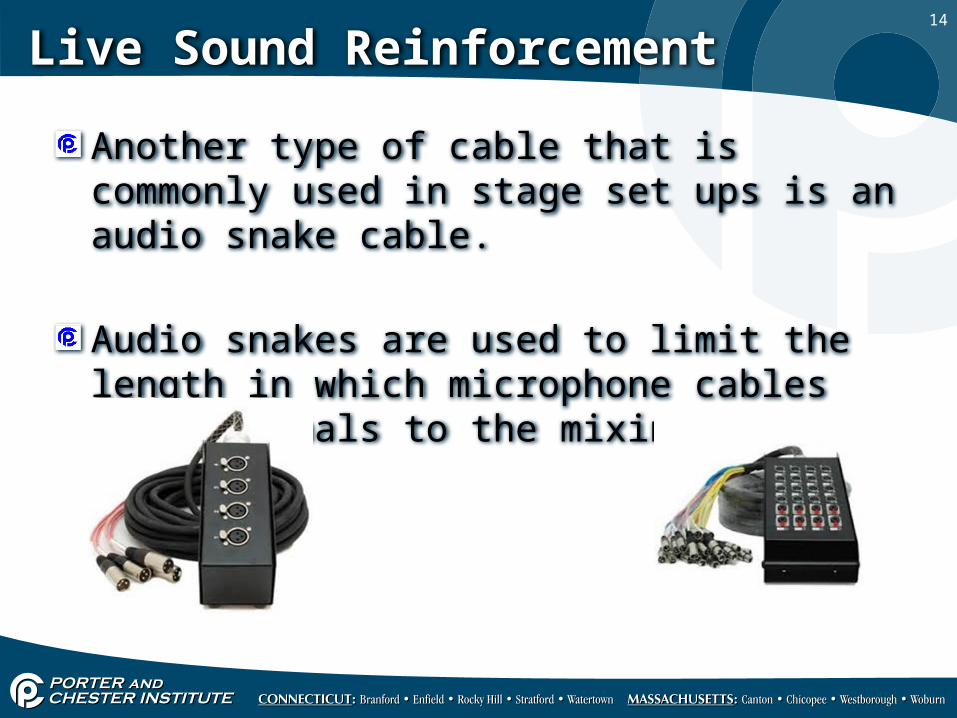
Live Sound Reinforcement
Another type of cable that is commonly used in stage set ups is an audio snake cable.
Audio snakes are used to limit the length in which microphone cables carry signals to the mixing board.
15
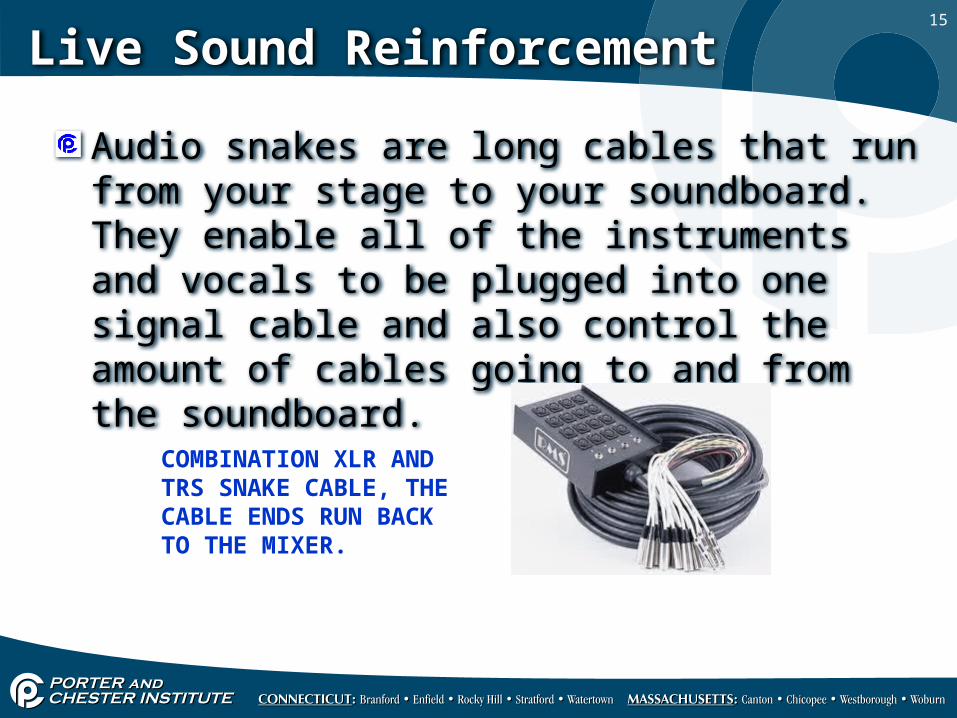
Live Sound Reinforcement
Audio snakes are long cables that run from your stage to your soundboard. They enable all of the instruments and vocals to be plugged into one signal cable and also control the amount of cables going to and from the soundboard.
COMBINATION XLR AND TRS SNAKE CABLE, THE CABLE ENDS RUN BACK TO THE MIXER.
16
Live Sound Reinforcement
On a sound stage almost everything gets a microphone, for example a set of drums may have 5 different microphones.
For this reason audio snake cables provide a very efficient solution in handling all the mic inputs back to the mixer, it also eliminates the safety hazard of too many cables on stage and the additional noise produced by cable coils.
17
Live Sound Reinforcement
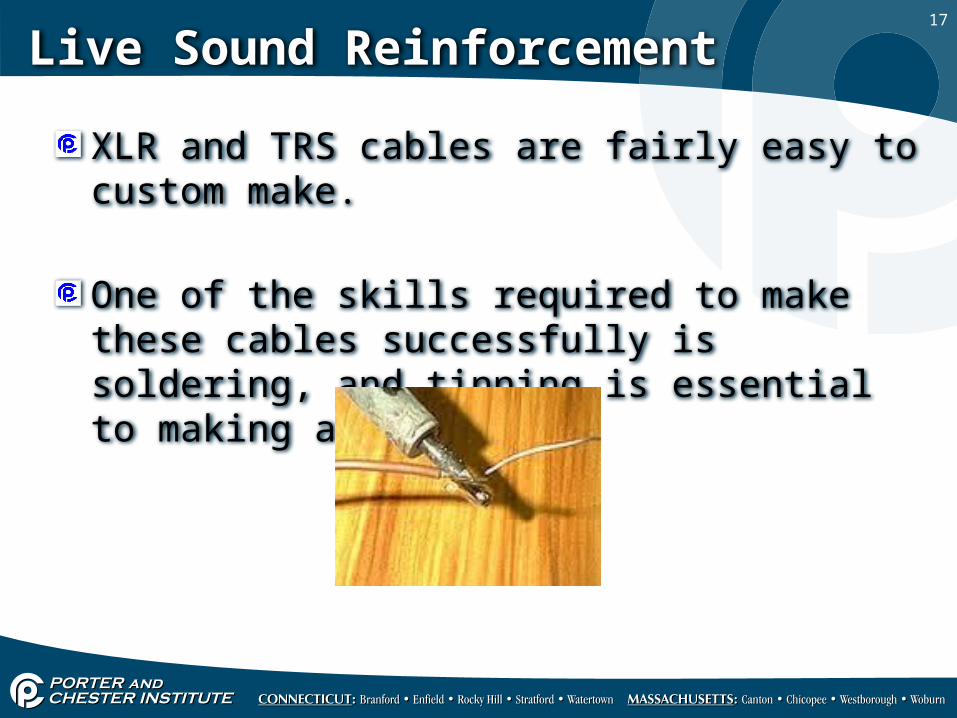
XLR and TRS cables are fairly easy to custom make.
One of the skills required to make these cables successfully is soldering, and tinning is essential to making a good cable.
18
Live Sound Reinforcement
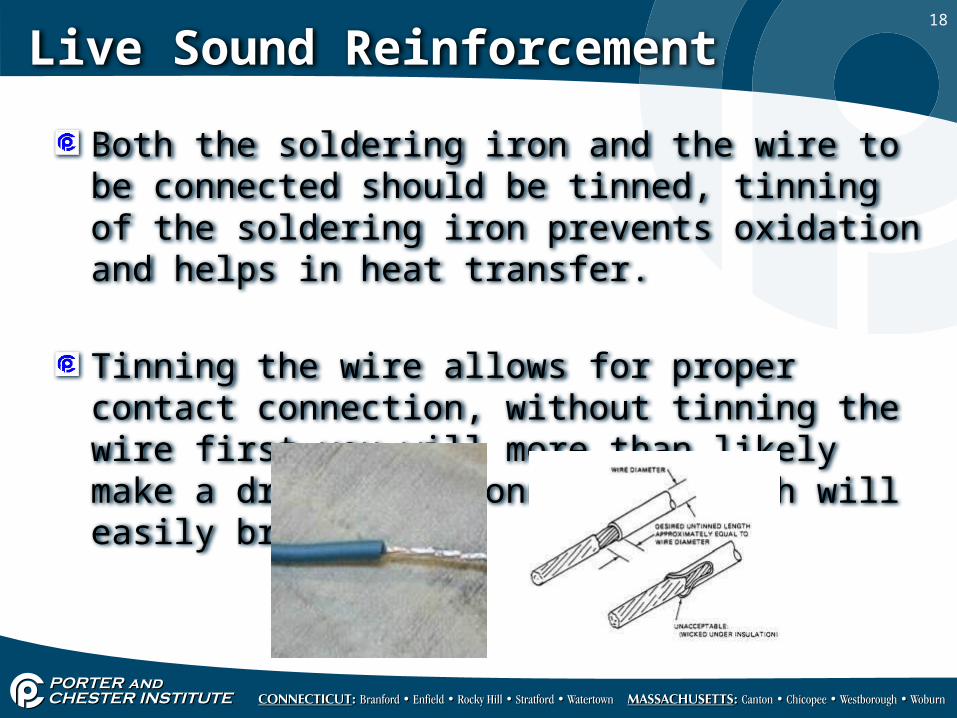
Both the soldering iron and the wire to be connected should be tinned, tinning of the soldering iron prevents oxidation and helps in heat transfer.
Tinning the wire allows for proper contact connection, without tinning the wire first you will more than likely make a dry solder connection which will easily break off.
19
Live Sound Reinforcement
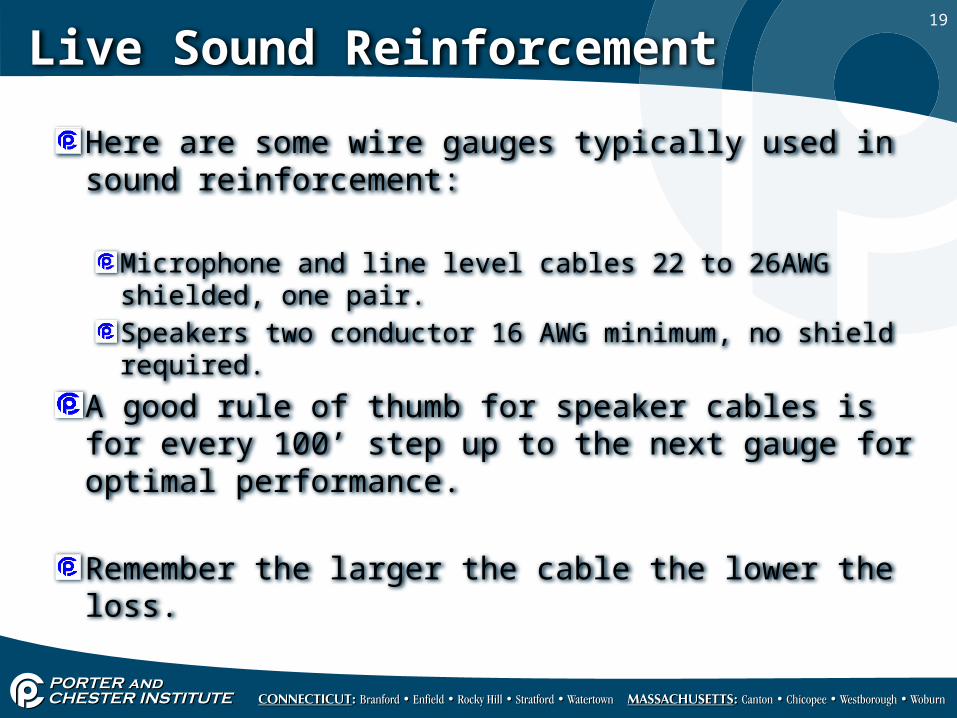
Here are some wire gauges typically used in sound reinforcement:
Microphone and line level cables 22 to 26AWG shielded, one pair.Speakers two conductor 16 AWG minimum, no shield required.
A good rule of thumb for speaker cables is for every 100’ step up to the next gauge for optimal performance.
Remember the larger the cable the lower the loss.
20
Live Sound Reinforcement
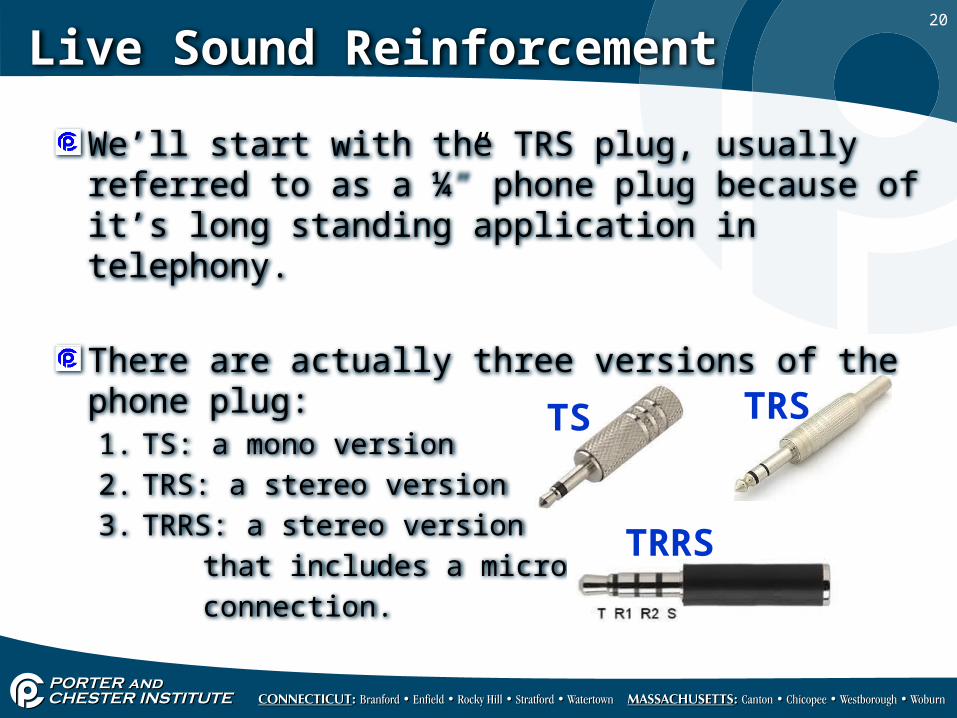
We’ll start with the TRS plug, usually referred to as a ¼” phone plug because of it’s long standing application in telephony.
There are actually three versions of the phone plug:1. TS: a mono version2. TRS: a stereo version3. TRRS: a stereo version that includes a microphone connection.
TS TRS
TRRS
21
Live Sound Reinforcement
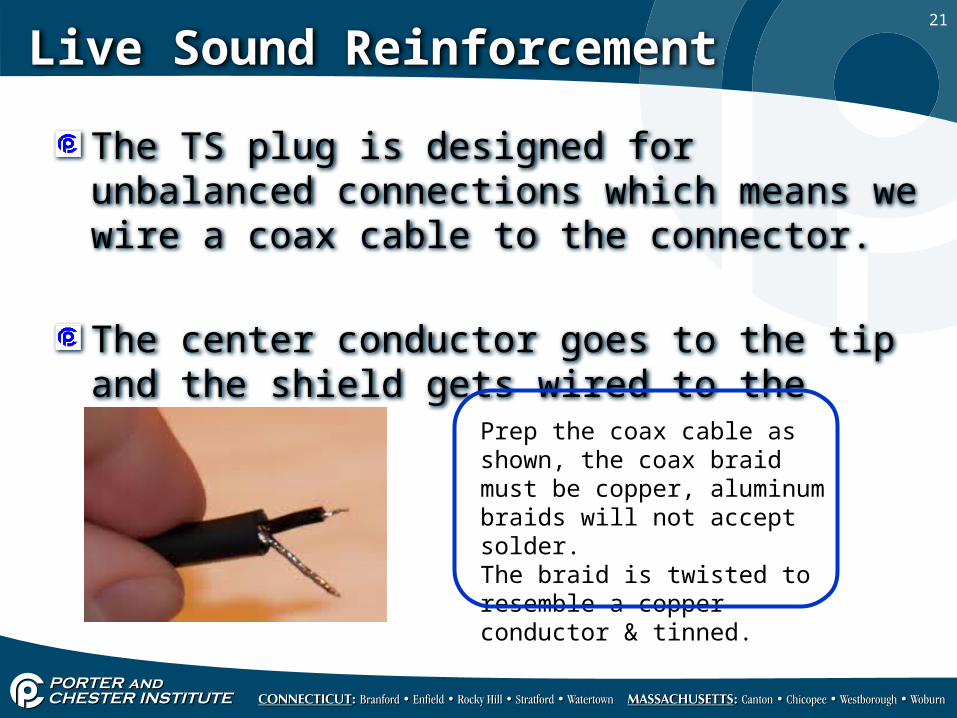
The TS plug is designed for unbalanced connections which means we wire a coax cable to the connector.
The center conductor goes to the tip and the shield gets wired to the ring.
Prep the coax cable as shown, the coax braid must be copper, aluminum braids will not accept solder.The braid is twisted to resemble a copper conductor & tinned.

22
Live Sound Reinforcement
A very important reminder here, always make sure to slide the connector boot and strain relief onto the cable before soldering the connector on.
Solder your cable leads onto the connector.
The connector leads should also be tinned.
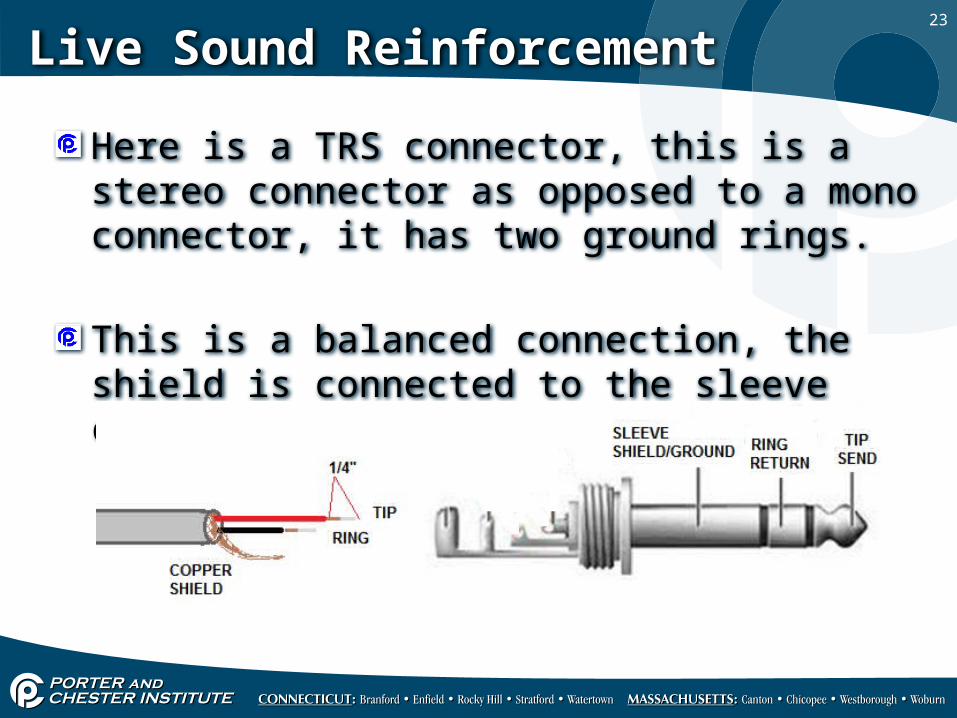
23
Live Sound Reinforcement
Here is a TRS connector, this is a stereo connector as opposed to a mono connector, it has two ground rings.
This is a balanced connection, the shield is connected to the sleeve contact.
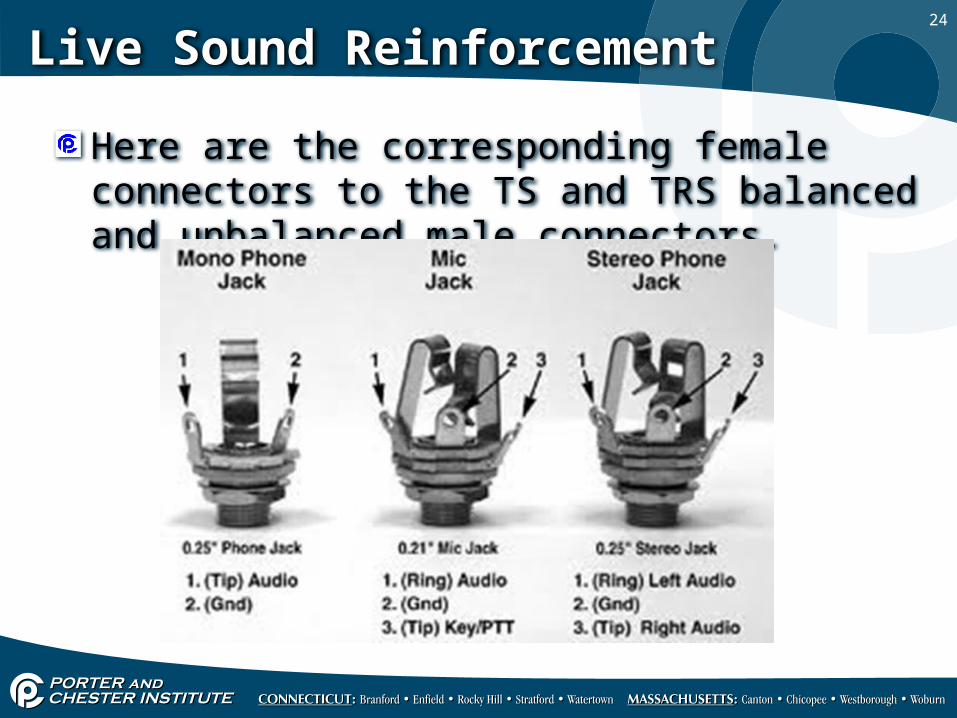
24
Live Sound Reinforcement
Here are the corresponding female connectors to the TS and TRS balanced and unbalanced male connectors.
25
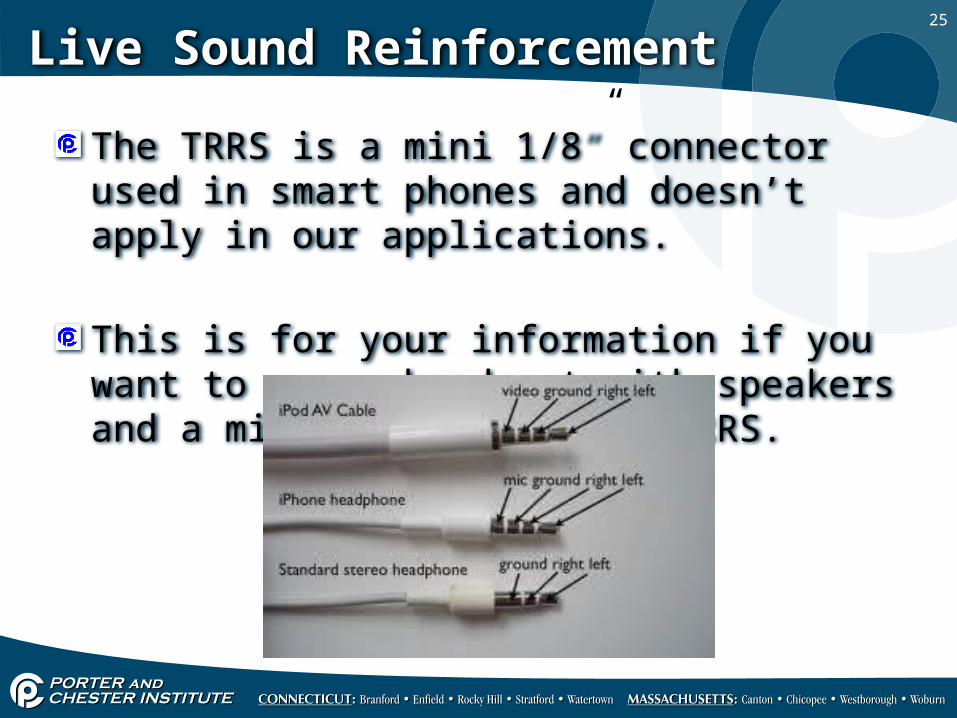
Live Sound Reinforcement
The TRRS is a mini 1/8” connector used in smart phones and doesn’t apply in our applications.
This is for your information if you want to use a head set with speakers and a mic you must have a TRRS.
26
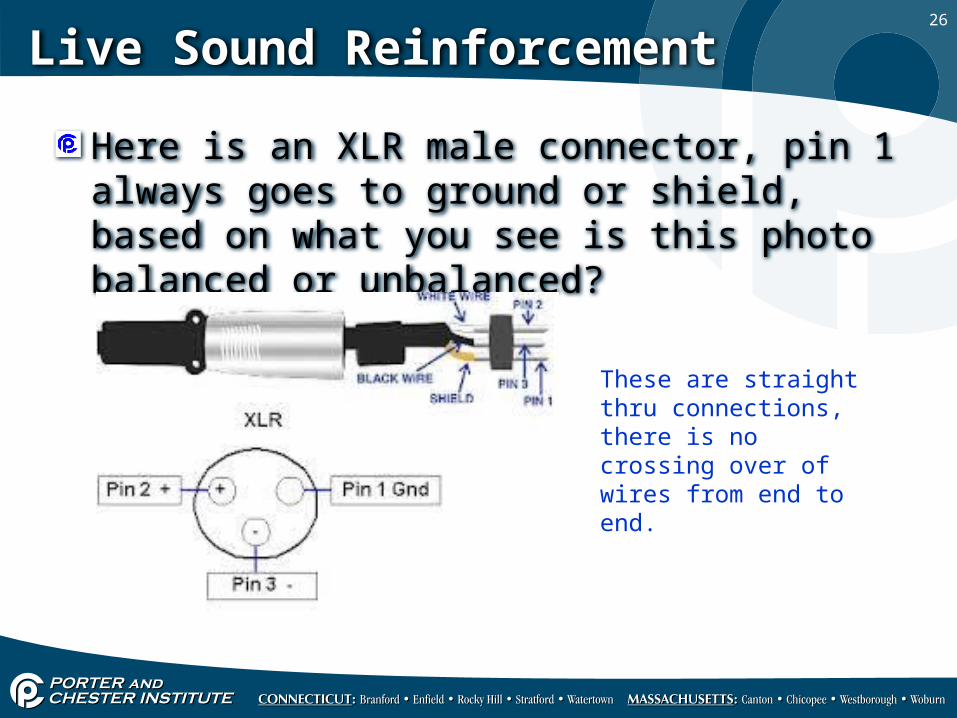
Live Sound Reinforcement
Here is an XLR male connector, pin 1 always goes to ground or shield, based on what you see is this photo balanced or unbalanced?
These are straight thru connections, there is no crossing over of wires from end to end.
27
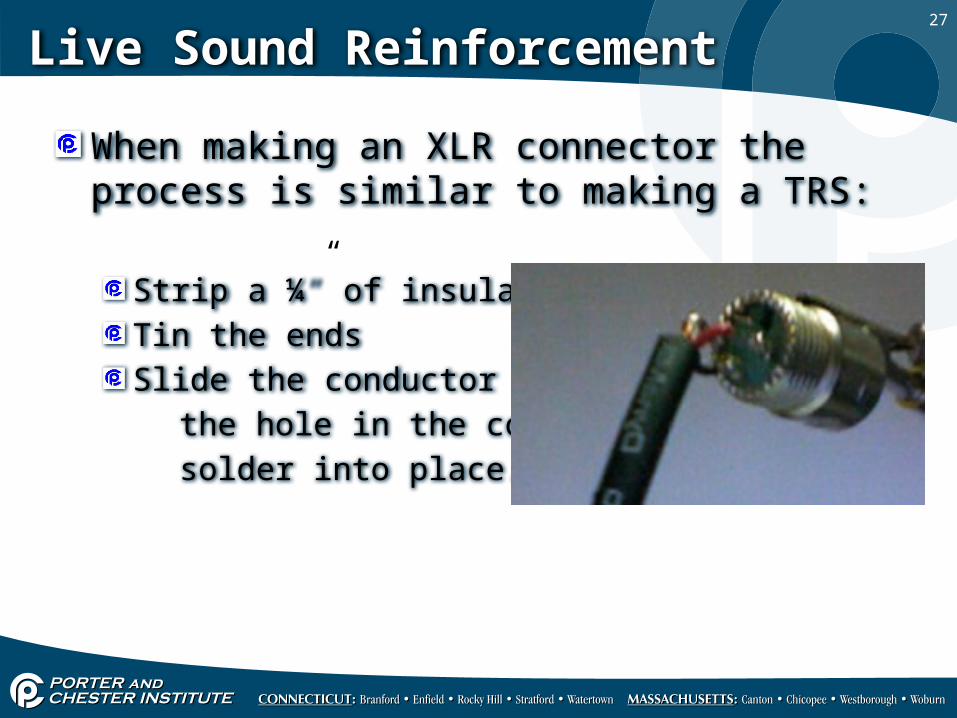
Live Sound Reinforcement
When making an XLR connector the process is similar to making a TRS:
Strip a ¼” of insulationTin the ends Slide the conductor through
the hole in the contact and solder into place.
28
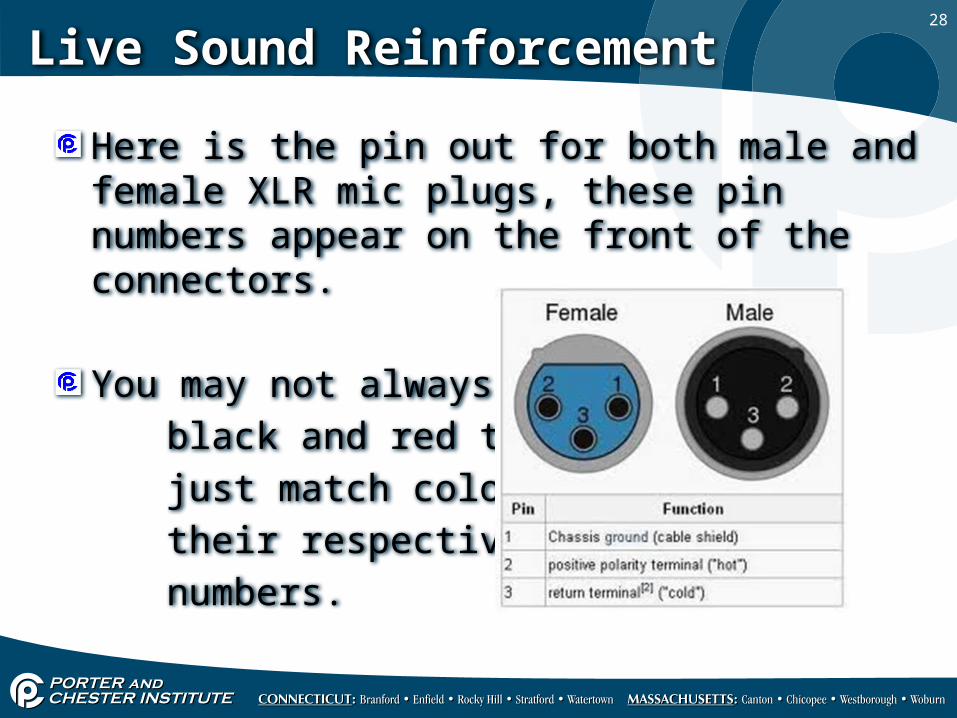
Live Sound Reinforcement
Here is the pin out for both male and female XLR mic plugs, these pin numbers appear on the front of the connectors.
You may not always have black and red twisted pair just match colors to their respective pin numbers.
29
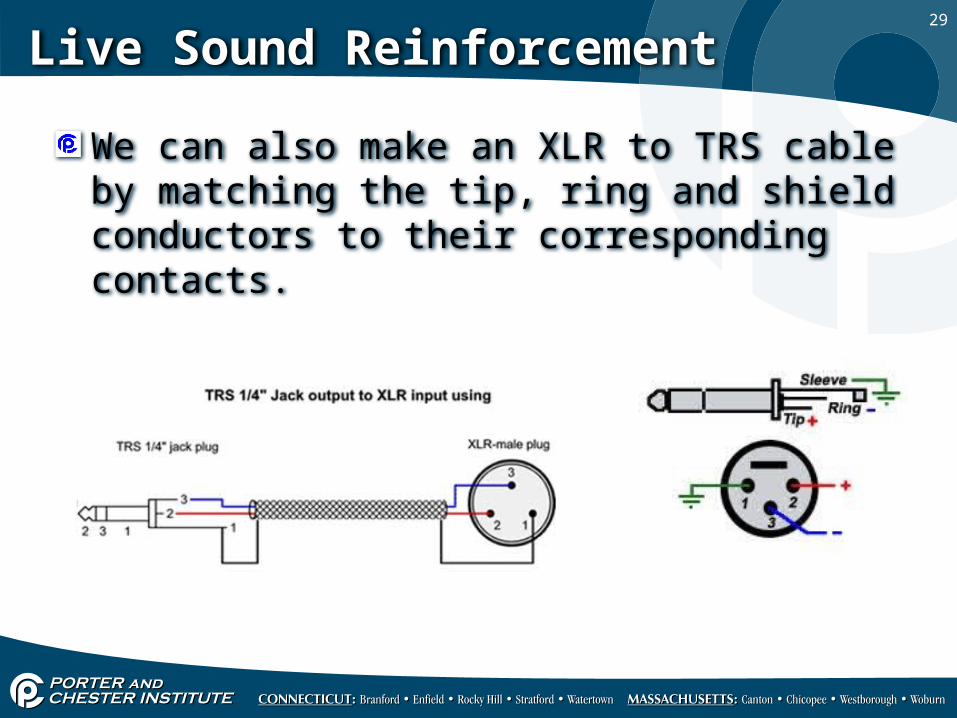
Live Sound Reinforcement
We can also make an XLR to TRS cable by matching the tip, ring and shield conductors to their corresponding contacts.
30
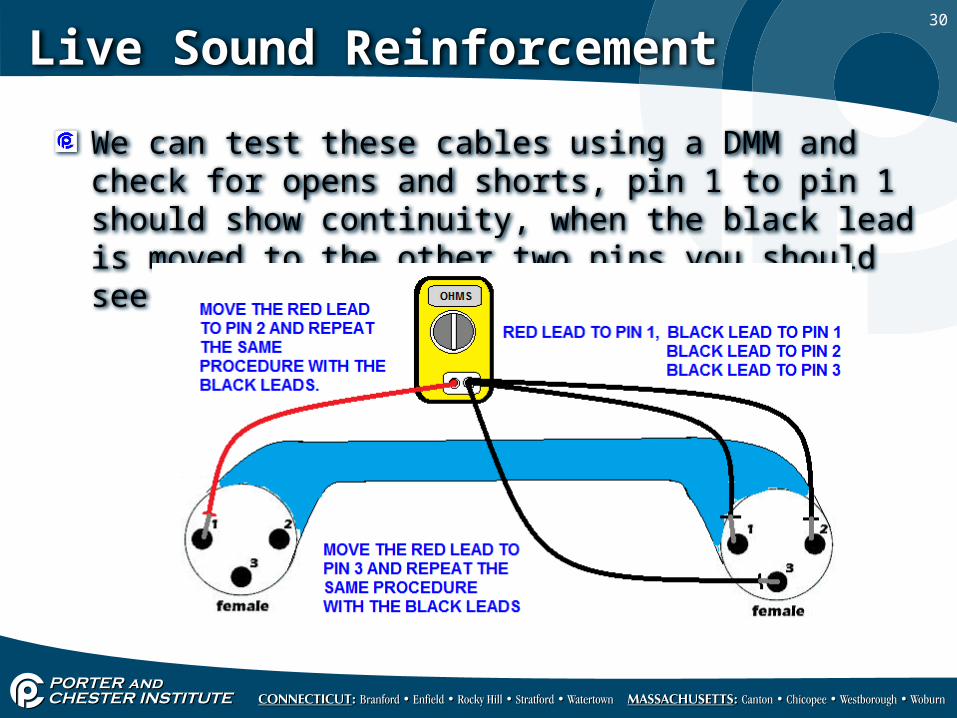
Live Sound Reinforcement
We can test these cables using a DMM and check for opens and shorts, pin 1 to pin 1 should show continuity, when the black lead is moved to the other two pins you should see an open.
31
Live Sound Reinforcement
The same test procedure can be done with TRS cables as well.
The biggest challenge when making these cables is keeping the conductors separated from each other so they don’t short.
32
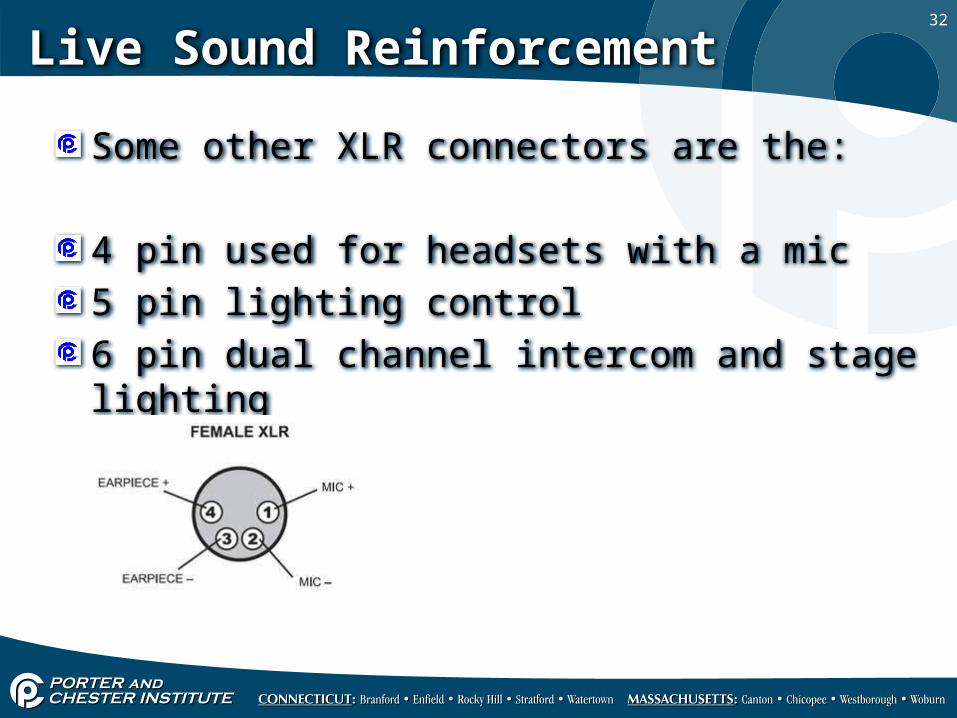
Live Sound Reinforcement
Some other XLR connectors are the:
4 pin used for headsets with a mic5 pin lighting control6 pin dual channel intercom and stage lighting
33
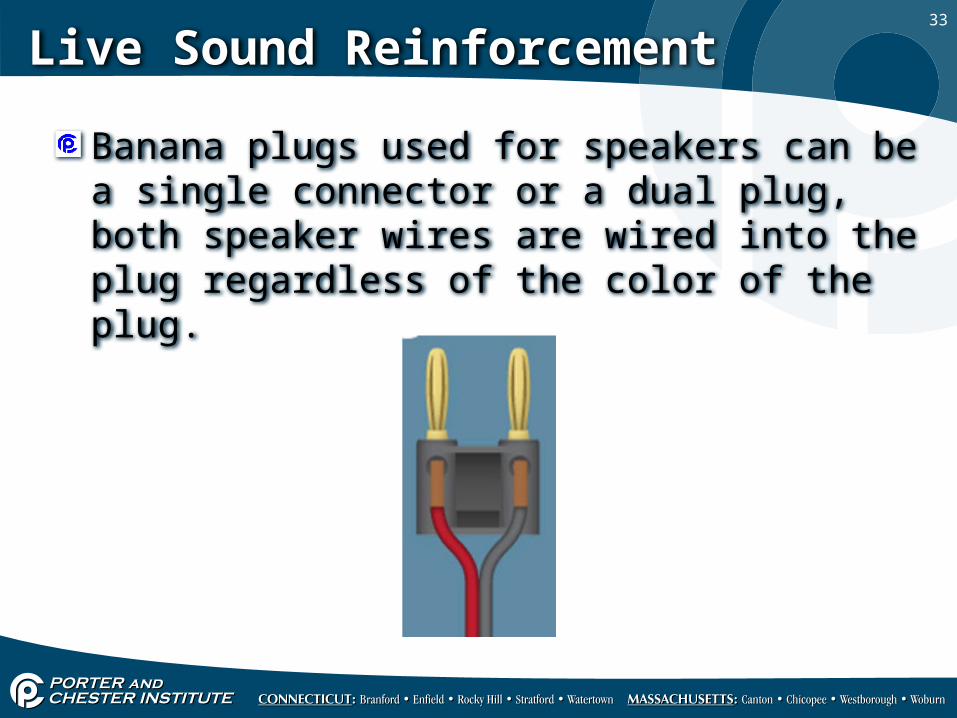
Live Sound Reinforcement
Banana plugs used for speakers can be a single connector or a dual plug, both speaker wires are wired into the plug regardless of the color of the plug.
34
Live Sound Reinforcement
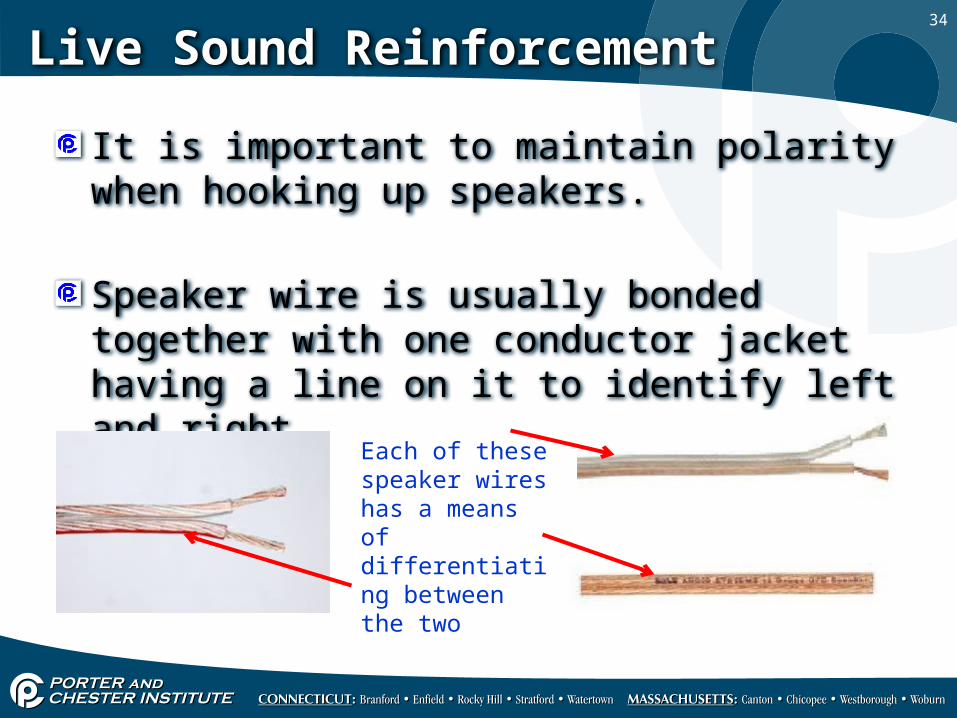
It is important to maintain polarity when hooking up speakers.
Speaker wire is usually bonded together with one conductor jacket having a line on it to identify left and right.
Each of these speaker wires has a means of differentiating between the two
35
Live Sound Reinforcement
Keep the speaker wires consistent from end to end, if you decide for example that the white line on one speaker wire will be designated as the negative (black) lead then it is important that all speakers are wired the same way.
Not maintaining proper polarity will result in phase distortion through the speakers, not all speakers will have the same phase design.
36
Live Sound Reinforcement
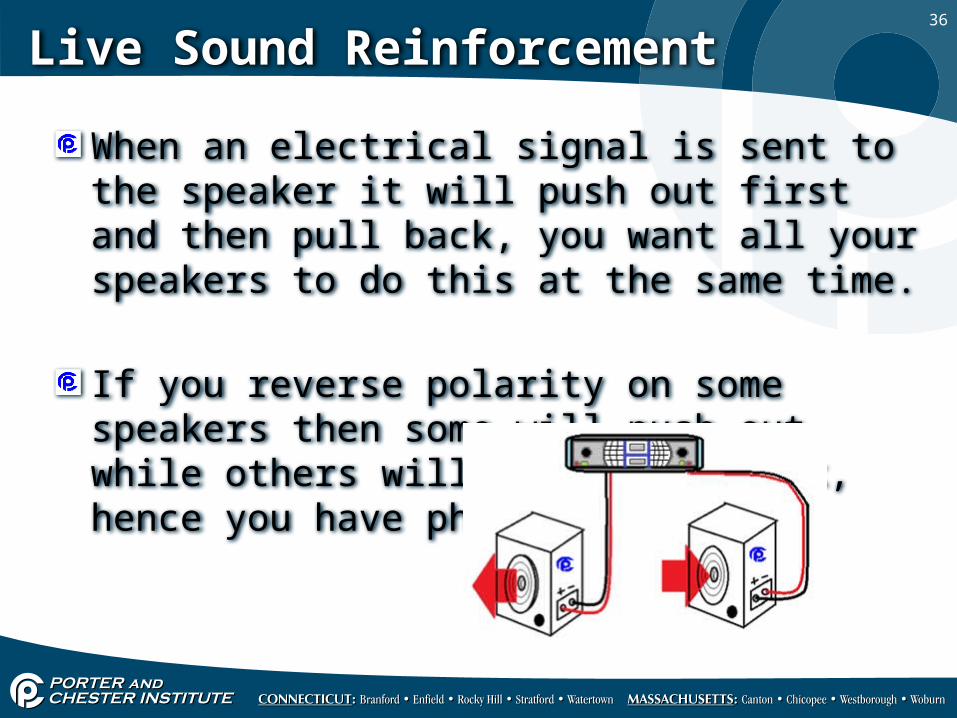
When an electrical signal is sent to the speaker it will push out first and then pull back, you want all your speakers to do this at the same time.
If you reverse polarity on some speakers then some will push out while others will be pulling back, hence you have phase distortion.