1 CP586 © Peter Lo 2003 Multimedia Communication Introduction to PowerPoint & Effective Oral...
55
CP586 © Peter Lo 2003 1 Multimedia Communication Introduction to PowerPoint & Effective Oral Communication
-
Upload
dominick-phillips -
Category
Documents
-
view
217 -
download
4
Transcript of 1 CP586 © Peter Lo 2003 Multimedia Communication Introduction to PowerPoint & Effective Oral...

CP586 © Peter Lo 2003 1
Multimedia Communication
Introduction to PowerPoint & Effective Oral Communication

CP586 © Peter Lo 2003 2
Objective Presentation planning Presentation establishment Organization chart “Draw” toolbar and its commands Animation and sound effect

CP586 © Peter Lo 2003 3
Introduction to PowerPoint & Effective Oral Communication
Presentation planning

CP586 © Peter Lo 2003 4
Presentation planning Assume that you are going to make a
formal presentation to a group of audience. Normally, it takes several steps Step 1: Think about what are to be included
in the presentation Step 2: Collect all relevant information about
all included point Step 3: Organize ideas to be presented in a
proper manner

CP586 © Peter Lo 2003 5
Presentation planning Step 4: Prepare colorful and attractive slides Step 5: Write down notes containing all the
detail to be presented Step 6: Prepare audience handouts Step 7: Take rehearsal

CP586 © Peter Lo 2003 6
Before You Begin You should always rehearse your material. Be well prepared and know your topic. Know your target audience well. Target your presentation to the specific
needs of your audience. Select a subject that you are comfortable
with.

CP586 © Peter Lo 2003 7
General Principles Be responsible to the audience: try to be
interesting, challenging, articulate and entertaining.
Make conscious decisions: be mindful of every aspect of your talk. E.G. Clothes, number of slides and equipment.
Be aware of your strengths and weaknesses. Practice makes perfect: be prepared to practice the
material before your presentation.

CP586 © Peter Lo 2003 8
Nerves Preparation is the best cure for nerves. Take the focus off yourself. Do not draw attention to your hands. Have notes as a guide and reminder. Think happy thoughts. Be positive. Be conscious of a hostile audience.

CP586 © Peter Lo 2003 9
Nerves Breathe deeply. Take a walk. Analyze your fears. A presentation, even a bad one is not the
end of the world. Remember, you talk everyday. Talking in front of a large group of people
is really no different.

CP586 © Peter Lo 2003 10
Voice and Speech Patterns Pacing: Try not to rush your presentation. Pausing: Silence allows your audience to to
reflect and absorb on the material being presented.
Accents: Be aware of your accent. Pitch and Volume: Vary the pitch of your
voice and adjust the volume accordingly. Clarity, emphasis and word structure.

CP586 © Peter Lo 2003 11
Common Problems Poor preparation and/or lack of practice. Poor time management. Nervous utterances. People that read rather than present. Rushing through a presentation.

CP586 © Peter Lo 2003 12
Structure All presentations must have a beginning, middle
and end. The beginning should be motivational and force
the audience to focus on you rather than their preoccupations.
The middle should have a logical sequence Repeat key words, ideas or phrases to maintain the
attention of the audience. Restate your objective and sum up.

CP586 © Peter Lo 2003 13
Visual Aids Allow the audience time to read the visual aid. You must be able to read the aid from the back of
the lecture theatre. Try to maintain eye contact with the audience
rather than the aid itself. Know your equipment and anticipate problems. Use bold letters and numbers. Use sans serif fonts.

CP586 © Peter Lo 2003 14
Visual Aids Keep them simple. Use clear colors. Explain what the audience is looking at. Use color whenever possible. Font selection should promote easy
reading. Illustrate numerical information

CP586 © Peter Lo 2003 15
PowerPoint Slide Convey one major idea per slide. Only list your key points. You should then elaborate on each key point. You should have no more than seven points on an
individual slide. Use reveals to build up a story, caption by caption. Use white space and avoid overcrowding.

CP586 © Peter Lo 2003 16
Questions Questions can allow you to clarify
statements and respond to audience needs. Anticipate the questions and practice some
responses. Watch the amount of time that is devoted to
questions. Pause before taking questions. Do not look uncomfortable or defensive.

CP586 © Peter Lo 2003 17
Questions Listen carefully and respond to the entire
audience. Keep your answers brief. Maintain your dignity. Be honest. Use your teaching skills.

CP586 © Peter Lo 2003 18
Show Time Listen to other speakers. Incorporate current events. Be open about mistakes, you’re only human. Handle disruptions with charm. Gauge the audience reaction. Respond to your audience appropriately. Ask for feedback and learn from others.

CP586 © Peter Lo 2003 19
Show Time Listen to other speakers. Incorporate current events. Be open about mistakes, you’re only human. Handle disruptions with charm. Gauge the audience reaction. Respond to your audience appropriately. Ask for feedback and learn from others.

CP586 © Peter Lo 2003 20
Introduction to PowerPoint & Effective Oral Communication
Presentation establishment

CP586 © Peter Lo 2003 21
Microsoft PowerPoint Microsoft PowerPoint is a presentation
graphics program designed to prepare slide shows.
It is a tool you can use to communicate your ideas through visual aids that appear professionally designed yet are easy to produce.

CP586 © Peter Lo 2003 22
Interface and Demonstration

CP586 © Peter Lo 2003 23
Presentation establishment Creating a new file
Choose “New” Command from “File” menu Choose option from “New Presentation”
dialog box Choose an auto layout for a new slide from
“New Slide” dialog box

CP586 © Peter Lo 2003 24
Adding Text to Slide Placeholders
Select the placeholder. Type without selecting. Press [Ctrl] + [Enter] to access next
placeholder. Text can be added directly to several
different views.

CP586 © Peter Lo 2003 25
Adding Slides to Presentations
Click the New Slide button on the Standard toolbar.
Choose Insert, New Slide. Press [Ctrl] + [M]. Press [Ctrl] + [Enter] from last placeholder. When you add a new slide, PowerPoint
allows you to select from a list of templates.

CP586 © Peter Lo 2003 26
New Slide Dialog Box

CP586 © Peter Lo 2003 27
Navigating Presentations
Use the Slide Navigator
Scroll bar Next Slide, Previous Slide buttons
Keyboard [PgUp] or [PgDn]
Other basic navigation techniques work
CP586 © Peter Lo 2003 28
Applying Templates
Templates dress up your presentation quickly.
Templates are stored in the templates presentation designs folder.
Templates are created by professional designers.
Double-click default design on status bar.
Choose format, apply design template.

CP586 © Peter Lo 2003 29
Modifying Background Colour

CP586 © Peter Lo 2003 30
Adding Slide Objects Some placeholders are for specific objects
such as clip art, graphs, tables, organizational charts or media clips.
Use the insert menu to insert clip art, sound or an external image.
You can also use the insert dialog box to list all the objects that can be embedded into a PowerPoint slide.

CP586 © Peter Lo 2003 31
Insert Object Dialog Box

CP586 © Peter Lo 2003 32
WordArt Object You can add text with special effects in
your slides using Microsoft WordArt.

CP586 © Peter Lo 2003 33
Different Views You can switch between five views of your
presentation, each view giving you a different way of looking at and working with your presentation.
See your lab sheet for details.

CP586 © Peter Lo 2003 34
Different Views Slide view. Outline view. Slide sorter view. Notes page view. Slide show view.

CP586 © Peter Lo 2003 35
Moving and Resizing To move or resize an object, first click on
the object to select it. Eight handles appear around the object.
Click and drag a handle to change the size and/or shape of the object.
Click and drag anywhere else on the object to move it.

CP586 © Peter Lo 2003 36
Deleting and Re-ordering Slides To delete a slide in slide view, select delete
slide from the edit menu. In slide sorter view, select a slide and hit the
delete key from your keyboard. You can also change the order of your
slides in slide sorter view by clicking on a slide and dragging it to the position where you want it to appear.

CP586 © Peter Lo 2003 37
Action Buttons Action Buttons are
objects you can add in your presentation to act as hyperlinks.
Next, choose Action Buttons from the Slide Show menu.
A list of pre-made buttons will appear.

CP586 © Peter Lo 2003 38
Creating Summary Slides First, in Slide Sorter View select the slides
whose titles you want to use as bulleted points on your Summary Slide. To select several slides that are not next to each other, hold down the Control Key as you make your selections. Once you have selected all the slides you need, click on the Summary Slide button on the Slide Sorter Toolbar

CP586 © Peter Lo 2003 39
Introduction to PowerPoint & Effective Oral Communication
Organization chart

CP586 © Peter Lo 2003 40
Organization chart Adding organization chart using
“Microsoft Organization Chart” Choose “Organization chart” from “Insert-
Picture” A sample chart will be displayed Functions can be accessed by the options in
the menus and the tools on the toolbar
CP586 © Peter Lo 2003 41
Organization chart Operating organization chart
To add text into a box Click on the box Start typing
To add a box to the chart Select the box type (Subordinate, Co-worker, etc.) Click on the chart to place the new box

CP586 © Peter Lo 2003 42
Organization chart Operating organization chart
To delete a box Click on it to select Press the “Delete” key
To update the organization chart Choose “Update” from the “File” menu
To return to PowerPoint Choose “Exit and Return” from the “File” menu
CP586 © Peter Lo 2003 43
Introduction to PowerPoint & Effective Oral Communication
“Draw” toolbar and its commands

CP586 © Peter Lo 2003 44
Drawing object Everything drawn in PowerPoint is known
as “drawing object” Drawing object in PowerPoint is divided
into two categories Line objects
Line, arc, freeform
Shape object Rectangle, oval, other shapes drawn with shape
tools, text tool

CP586 © Peter Lo 2003 45
Line objects To draw a straight line with the “Line” tool
or drawing arc with the “Arc” tool Select the Line tool by clicking on it Note that the mouse cursor become a ‘cross’ Move the cursor to where one end of the line
is desired, hold the button and drag Drag mouse cursor to where the other end of
the line is desired, release the button
CP586 © Peter Lo 2003 46
Line objects With combination of <Shift> key
Line can be forced to be Horizontal Vertical Inclining at 450
The <Shift> will give no effect to “Freeform” tools

CP586 © Peter Lo 2003 47
Shape objects The process of drawing shape objects is
very similar to the drawing of line object Select the desired shape tool Position the mouse cursor (a ‘cross’) to where
the shape to begin Click and drag the mouse to draw the shape Release the mouse button when the shape is
about the right size

CP586 © Peter Lo 2003 48
Shape objects Moving drawing objects
The simplest way to move drawing objects is by drag-and-drop Select the shape object by clicking on it Drag the shape object to a new position Release the mouse button to place the shape object

CP586 © Peter Lo 2003 49
Shape objects Resizing drawing objects
Select a drawing object by clicking on it. Note that the square are known as resize handles
Dragging any one of the resize handle Release the mouse button when the object is
resized to a right size

CP586 © Peter Lo 2003 50
Adjusting objects Some drawing objects are adjustable
Parallelogram Rectangle Rounded rectangle ...

CP586 © Peter Lo 2003 51
Adjusting objects Adjusting the shape of an adjustable object
Select the object Drag the adjustment handle to change its
shape Release the mouse button
CP586 © Peter Lo 2003 52
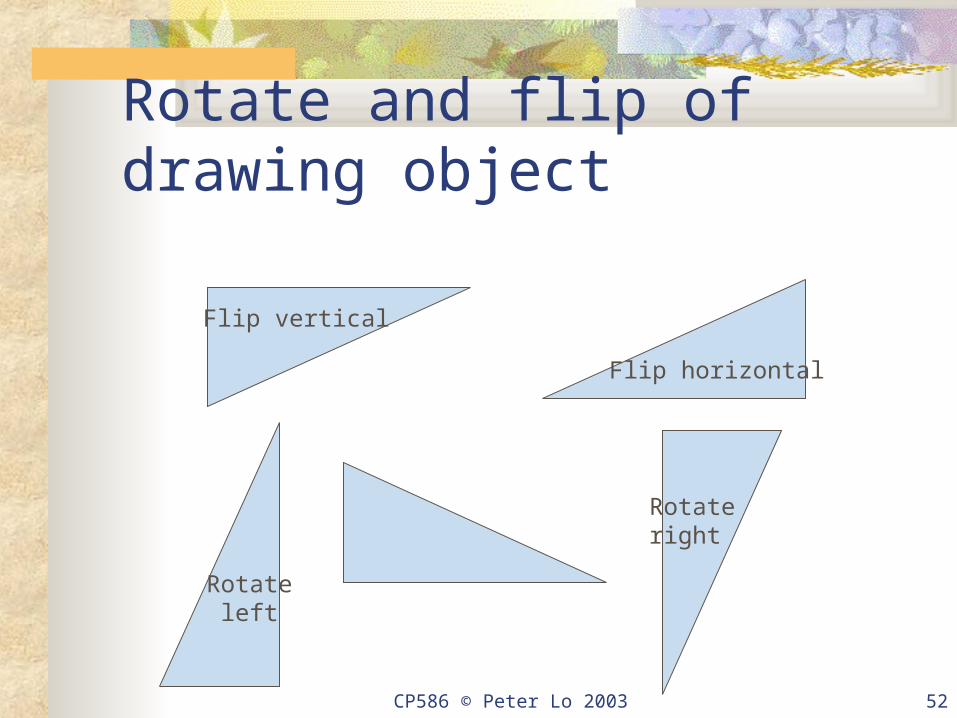
Rotate and flip of drawing object
Flip vertical
Flip horizontal
Rotateright
Rotateleft

CP586 © Peter Lo 2003 53
Introduction to PowerPoint & Effective Oral Communication
Animation and sound effect

CP586 © Peter Lo 2003 54
Animation and sound effect Preset animation
Select a drawing object by clicking on it Choose “Preset Animation” from “Slide
Show” menu Select desired animation effect

CP586 © Peter Lo 2003 55
Animation and sound effect Custom animation
Select desired slide for animation Choose “Custom Animation” from “Slide
Show” menu Select desired animation effect