
1 Base/Default Material 8 Color Changes 11 Temperature...
8
Welcome to the first installment of Ultra Genesis Studio – Box Lights! So what is this all about? It's about LIGHT. With Daz Studio's Iray rendering we now have the ability to render in physically based environments. Ok, but what does that mean? Well it means that we can take lighting into the real world – with the correct tools and set ups we can replicate real world lighting. In this volume of the Studio we will be exploring studio style lighting with box lighting, light panels, reflectors/bounces, and more! Whats Included Morphing Box Light Base (With 18 Morph Targets – Larger Emitter, Move Emitter Down Tube, Move Emitter Y, Scale Emitter, Smaller Emitter, Close Top, Light Panel, Light Trap, Octagonal, Pinhole, Reflector, Reflector Only, Shallow Flat, Shallow Low, Shallow Mid, Straight Base, Straight Sides, & Straight Top) 9 Mesh Light Presets (Light Blocker, Eye Light, Fill Light, Light Panel, Reflector, Rim Light, Soft Fill Light, Soft Light, and Spot Light) 12 Light “Rigs” Ready to use lighting setups designed to replicate real world studio type lighting sets! (4 Floor Level, 4 Standing, 4 Portrait) 12 HDR Studio Maps 36 Iray Environment Presets (12 Bright, 12 Medium, 12 Dark) 3 Cameras Ready to use cameras to go along with the light rigs – Low, Standing, Close 3 Render Setting Presets for Iray (High, Medium, Low) These are the settings I use when rendering. Included for a little extra convenience. Emitter Materials 1 Base/Default Material 8 Color Changes 11 Temperature Changes 8 Intensity Changes Reflector Materials 5 Bounce Materials 3 Matte Materials 4 Metallic Materials
Transcript of 1 Base/Default Material 8 Color Changes 11 Temperature...
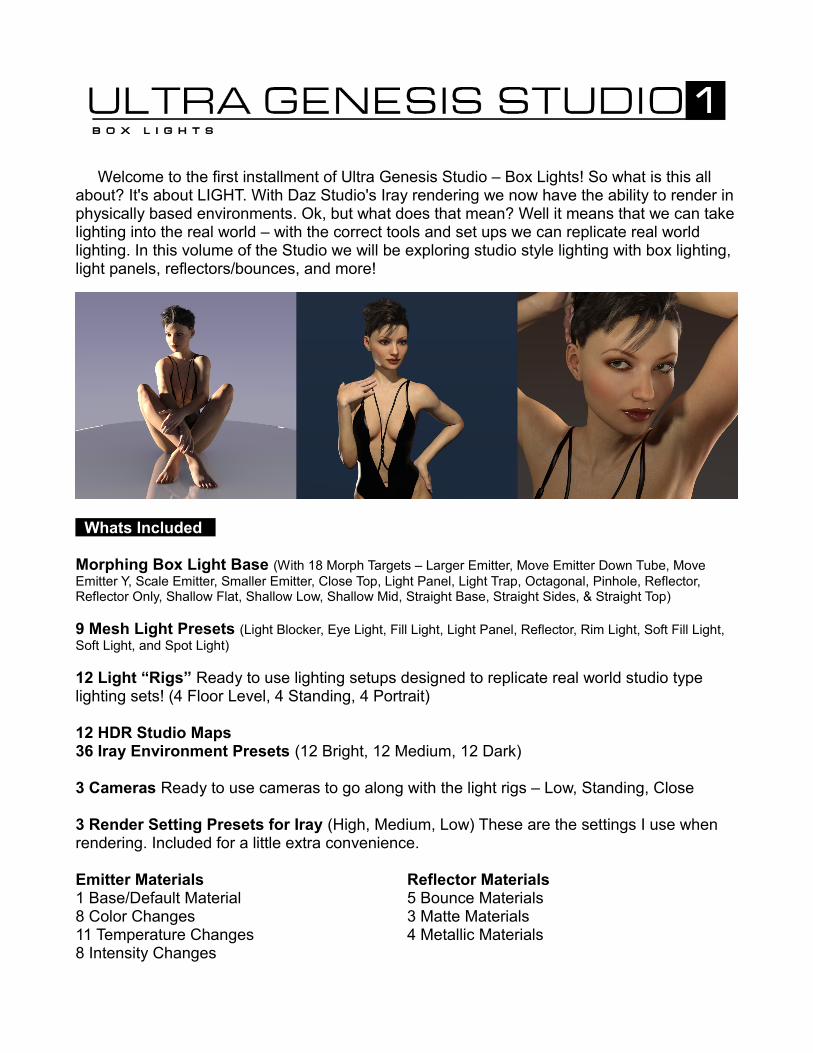
Welcome to the first installment of Ultra Genesis Studio – Box Lights! So what is this all about? It's about LIGHT. With Daz Studio's Iray rendering we now have the ability to render in physically based environments. Ok, but what does that mean? Well it means that we can take lighting into the real world – with the correct tools and set ups we can replicate real world lighting. In this volume of the Studio we will be exploring studio style lighting with box lighting, light panels, reflectors/bounces, and more!
Whats Included
Morphing Box Light Base (With 18 Morph Targets – Larger Emitter, Move Emitter Down Tube, Move Emitter Y, Scale Emitter, Smaller Emitter, Close Top, Light Panel, Light Trap, Octagonal, Pinhole, Reflector, Reflector Only, Shallow Flat, Shallow Low, Shallow Mid, Straight Base, Straight Sides, & Straight Top)
9 Mesh Light Presets (Light Blocker, Eye Light, Fill Light, Light Panel, Reflector, Rim Light, Soft Fill Light, Soft Light, and Spot Light)
12 Light “Rigs” Ready to use lighting setups designed to replicate real world studio type lighting sets! (4 Floor Level, 4 Standing, 4 Portrait)
12 HDR Studio Maps36 Iray Environment Presets (12 Bright, 12 Medium, 12 Dark)
3 Cameras Ready to use cameras to go along with the light rigs – Low, Standing, Close
3 Render Setting Presets for Iray (High, Medium, Low) These are the settings I use when rendering. Included for a little extra convenience.
Emitter Materials1 Base/Default Material8 Color Changes11 Temperature Changes8 Intensity Changes
Reflector Materials5 Bounce Materials3 Matte Materials4 Metallic Materials
Mesh Lights
The basis of this package is the mesh light - Mesh lights are different from normal 3D based lights in that they have a physical presence in the scene and any light emitting from them follows the rules of the Physically Based Render (PBR) Engine. Not to go into a long speech about the physics of light, but this allows us to use mesh lights to recreate types and styles of lighting found in the real world. For instance, consider a lit clear light bulb – light is cast by the light so it travels virtually in all directions. Now if you were to put a shade on the bulb then a good portion of the bulbs light would be blocked and softened. It is those types of interactions that make mesh based lighting such an exciting tool to have access to.
The mesh lights in the package are based around the box light design – A box like shape with a light source (or emitter) in the base. The Ultra Genesis Box Light has a collection of morphs to change it's shape, control the amount of light being allowed to escape the box, and basically change the entire style of the light.
How to Use
The I WANT TO RENDER NOW Approach
If the mesh light piece above bored you to tears or you stopped reading one sentence in, then you will want to start out like this:
1. Create a new scene2. Load your Figure and do what work you want to do with clothing, materials, poses, etc 3. Apply one of the Environments 4. Load one of the Cameras from the set that would fit the type of image you want to
make5. Load one of the preset light rigs6. Load the low render setting7. Switch to the Camera (Headlamps are off, so the scene will be black and grey)8. Test Render!9. Adjust the lighting as you like, change the environment, and/or adjust the camera10.Render again!
The MAKE IT YOUR OWN Approach
This style is basically like the IWTRN approach but I am going to show you some cool things that you can do with this set to move past the default light rigs and come up with your own awesome lighting! Time to get in and muck about...
The Mesh Light Presets & What They Do
Light Blocker – This is a large panel with a matte black loaded onto the reflector materials. The Emitter has been hidden, so it is not a light source. This is for blocking light. Either part of one of the mesh lights or light coming from the HDR environment. Think of this as an “Anti-Reflector”
Eye Light – Small sharp light for putting highlights in the eyes. Useful tool for having a great lighting setup but also getting that little sparkle in the eye that really sells an image.
Fill Light – A moderately bright light that has soft edges. Use this to “fill in” light into areas where you need it. Dimming this light can have some great soft effects.
Light Panel – A large, dim, very very soft light. My personal favorite. Use this to cast soft light into the scene or to provide a boost to the environment effects.
Reflector – Similar to the light blocker, but this one has a collection of materials that help “bounce” light off it and reflect it back into the scene. Please be aware that these will add to your render time, however the effects can be amazing. There is a whole line of materials in the Reflectors folder to use on this prop.
Rim Light – A VERY bright light meant to light the edges of a figure. This light is traditionally to the back of the figure, and either right or left.
Soft Fill Light - A softer version of the fill light. Notice that this also has harder edged shadows, and gives a more noir feel to a lighting environment.
Soft Light – A dim light with a soft falloff.
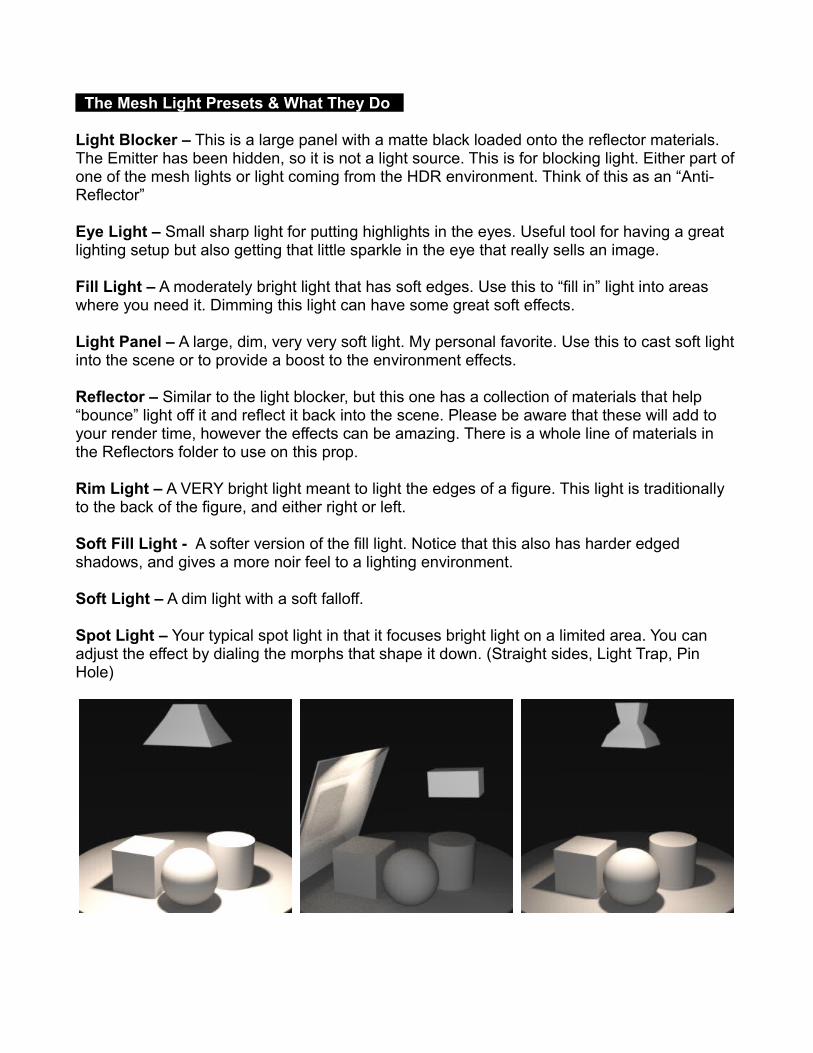
Spot Light – Your typical spot light in that it focuses bright light on a limited area. You can adjust the effect by dialing the morphs that shape it down. (Straight sides, Light Trap, Pin Hole)
Getting Under The Hood
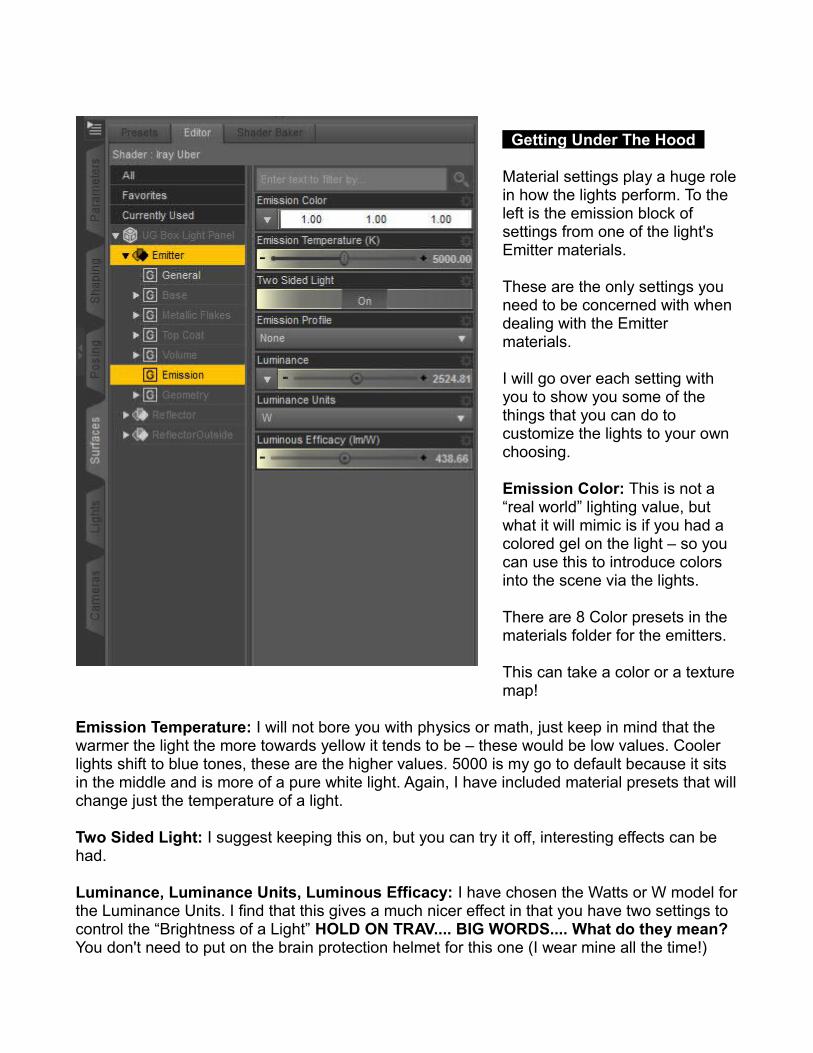
Material settings play a huge role in how the lights perform. To the left is the emission block of settings from one of the light's Emitter materials.
These are the only settings you need to be concerned with when dealing with the Emitter materials.
I will go over each setting with you to show you some of the things that you can do to customize the lights to your own choosing.
Emission Color: This is not a “real world” lighting value, but what it will mimic is if you had a colored gel on the light – so you can use this to introduce colors into the scene via the lights.
There are 8 Color presets in the materials folder for the emitters.
This can take a color or a texture map!
Emission Temperature: I will not bore you with physics or math, just keep in mind that the warmer the light the more towards yellow it tends to be – these would be low values. Cooler lights shift to blue tones, these are the higher values. 5000 is my go to default because it sits in the middle and is more of a pure white light. Again, I have included material presets that will change just the temperature of a light.
Two Sided Light: I suggest keeping this on, but you can try it off, interesting effects can be had.
Luminance, Luminance Units, Luminous Efficacy: I have chosen the Watts or W model for the Luminance Units. I find that this gives a much nicer effect in that you have two settings to control the “Brightness of a Light” HOLD ON TRAV.... BIG WORDS.... What do they mean? You don't need to put on the brain protection helmet for this one (I wear mine all the time!)
Luminance is simply the “Brightness” of the light Luminous Efficacy is how well the light transmits the brightness. So with the Watts Units model, we get the ability to not only adjust the overall brightness but also how well the light source transmits the light. Whenever we can get more options, it's my thinking to take them!
So long words short, if you want to make the light brighter, you can simply change the Luminance value. If you want to tweak it a little you can change the Efficacy as well. Using this type of units you could have a very bright light that has a low efficacy – meaning a softer light. Or a low luminance and a high efficacy – a very sharp light. Again, I have included a set of +/- settings to make the lights Brighter (+) or Dimmer (-)
Mighty Morphs
Larger Emitter, Move Emitter Down Tube, Move Emitter Y, Scale Emitter, Smaller Emitter, Close Top, Light Panel, Light Trap, Octagonal, Pinhole, Reflector, Reflector Only, Shallow Flat, Shallow Low, Shallow Mid, Straight Base, Straight Sides, & Straight Top
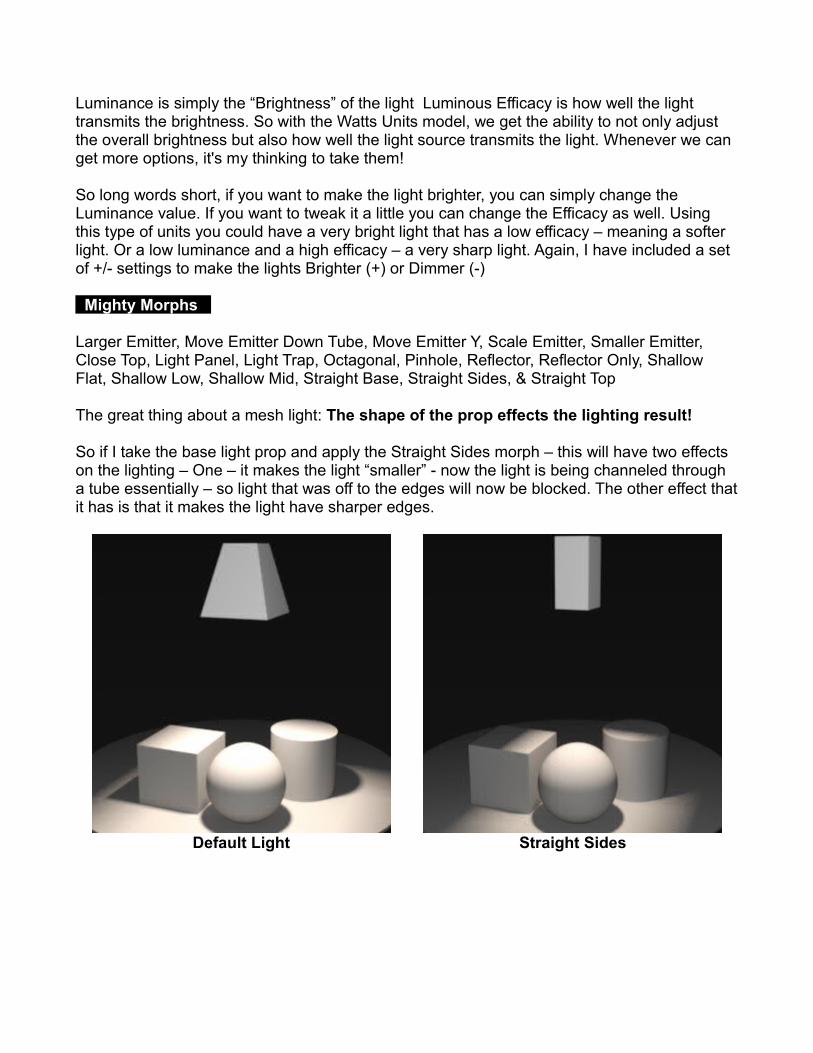
The great thing about a mesh light: The shape of the prop effects the lighting result!
So if I take the base light prop and apply the Straight Sides morph – this will have two effects on the lighting – One – it makes the light “smaller” - now the light is being channeled through a tube essentially – so light that was off to the edges will now be blocked. The other effect that it has is that it makes the light have sharper edges.
Default Light Straight Sides

EXPERIMENT! You can become a Mad Light Scientist and have a ball with these things. Find out what happens when you use say the pinhole or the light trap morph to restrict the light that comes down the tube. Try altering the shape of the reflector shroud. Use scale dials to make rectangles or longer tubes! Because this is physically based, any change to the mesh will make the lights change – some changes will be subtle, some will be harsh, but everything is useful in it's own way.
QUICK TIPS
• If your scene is too bright turn the camera headlamp off• Use your perspective view to get an eye on where your lights are pointing, and adjust
them as needed.• Like something you have set up – save it as a scene subset!• Try other settings in the iray render settings – what is the worse that could happen?• Try to keep your lights under 3 – over lighting a scene is never a good thing.• Get ideas from the Web! There are thousands of sites dedicated to photographic
lighting... well guess what.... everything they have to say applies to a PBR!
Content Cheat Sheets
Environments:
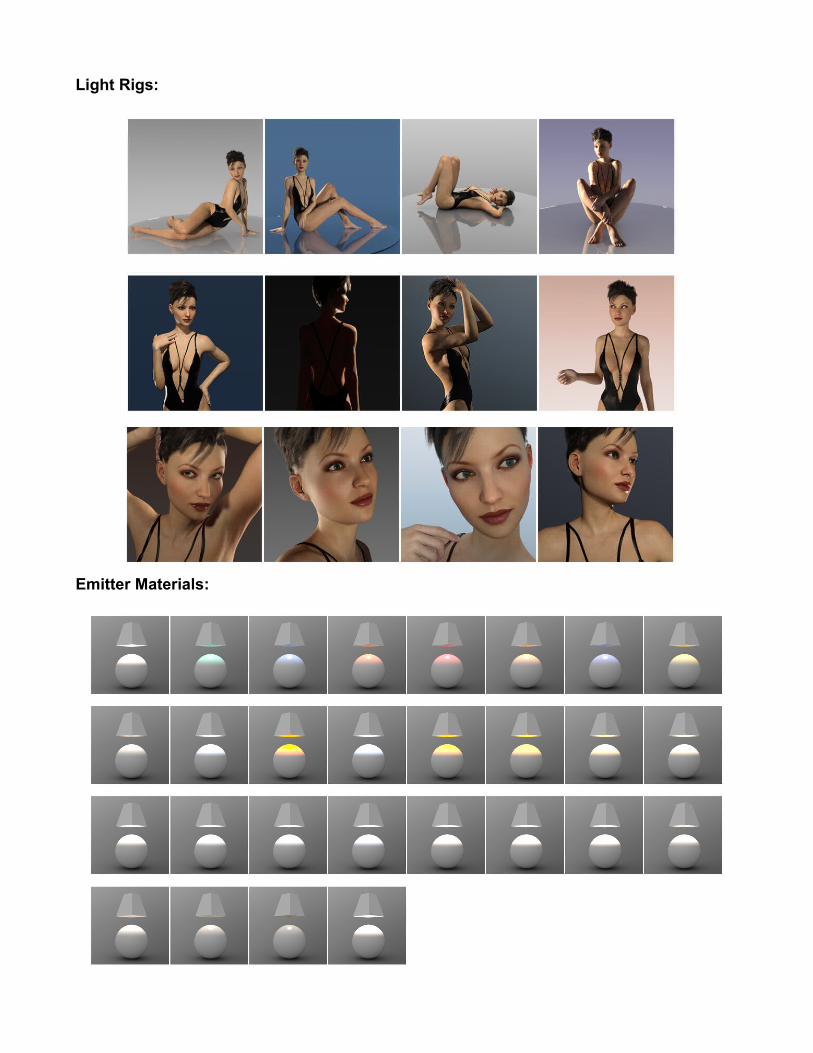
Light Rigs:
Emitter Materials:
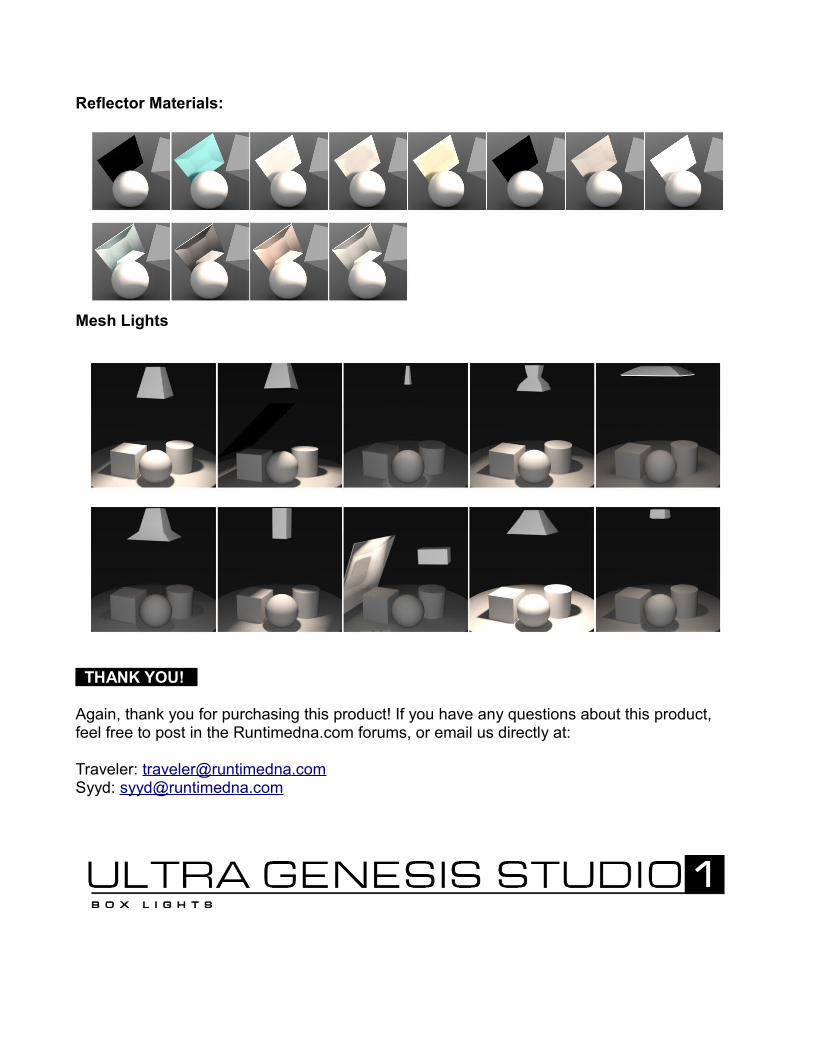
Reflector Materials:
Mesh Lights
THANK YOU!
Again, thank you for purchasing this product! If you have any questions about this product, feel free to post in the Runtimedna.com forums, or email us directly at:
Traveler: [email protected]: [email protected]


![Home [Documentation Center]docs.daz3d.com/lib/exe/fetch.php/public/read_me/...3 Eye Brows 4 Eyes 5 Eye Lashes 7 GenHair Materials Skin Builder People Presets Preps Skin Builder Apply](https://static.fdocuments.in/doc/165x107/6011cf076e44b934ba1b377e/home-documentation-centerdocsdaz3dcomlibexefetchphppublicreadme-3.jpg)
![Home [Documentation Center]docs.daz3d.com › lib › exe › fetch.php › public › read_me › index › ...Water drop style poses load single drops on the front of your character](https://static.fdocuments.in/doc/165x107/5f19f9b5b70345531231d71c/home-documentation-centerdocsdaz3dcom-a-lib-a-exe-a-fetchphp-a-public.jpg)