09-How to Add Lighting to Your Gallery
3
09-How to Add Lighting to Your Gallery This tutorial covers LightUp for Google SketchUp. Once you set it up, it should be easy to enhance your gallery and artworks with full lighting. 1. First, find the lighting preferences that Fiona has prepared (Lightup.prefs in the course folder) and save a copy of it to your group folder. Then save the IES file (90PAR38_HAL_FL_120V.ies in the course folder) to your group folder. Though these files probably won't change, it's a good idea to save them to your team folders just in case. 2. Next, remove the ceiling layer of your gallery and zoom out. Look at where the lighting tracks are in relation to your art objects. It will be helpful to make a general plan for your lighting. (For inspiration, take a tour of a major museum gallery via googleartproject.com) 3. Next, using your Layers Menu, hide everything but the lightbulbs. 4. Select all of the lights by hitting Ctrl + A. Then go to Tools > LightUp > Import Preferences. Select the Lightup.prefs document that you copied into your team folder. 5. Next, while the lights are selected, click the Inquiry Tool (the yellow question bubble second from the right). A box will show up asking for an IES file. Click on it and navigate to the IES file in your team folder. Hit "Okay."
Transcript of 09-How to Add Lighting to Your Gallery
09-How to Add Lighting to Your GalleryThis tutorial covers LightUp for Google SketchUp. Once you set it up, it should be easy to enhance your gallery and artworks with full lighting.
1. First, find the lighting preferences that Fiona has prepared (Lightup.prefs in the course folder) and save a copy of it to your group folder. Then save the IES file (90PAR38_HAL_FL_120V.ies in the course folder) to your group folder. Though these files probably won't change, it's a good idea to save them to your team folders just in case.
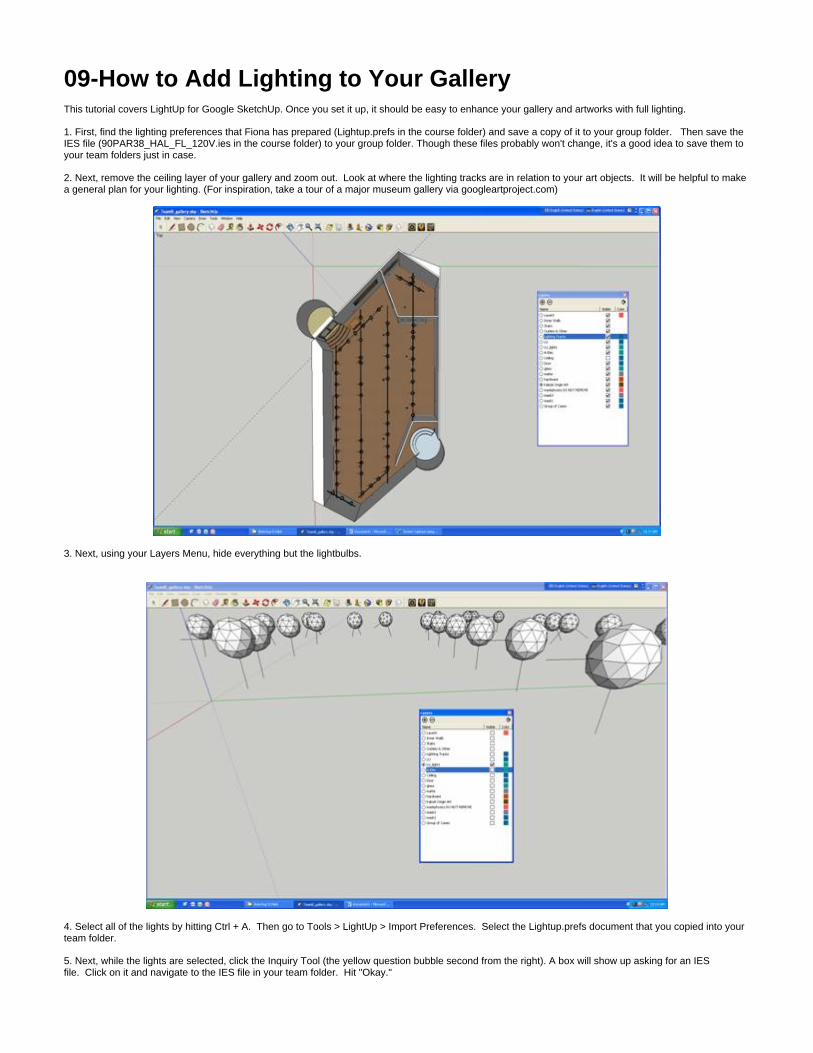
2. Next, remove the ceiling layer of your gallery and zoom out. Look at where the lighting tracks are in relation to your art objects. It will be helpful to make a general plan for your lighting. (For inspiration, take a tour of a major museum gallery via googleartproject.com)
3. Next, using your Layers Menu, hide everything but the lightbulbs.
4. Select all of the lights by hitting Ctrl + A. Then go to Tools > LightUp > Import Preferences. Select the Lightup.prefs document that you copied into your team folder.
5. Next, while the lights are selected, click the Inquiry Tool (the yellow question bubble second from the right). A box will show up asking for an IES file. Click on it and navigate to the IES file in your team folder. Hit "Okay."
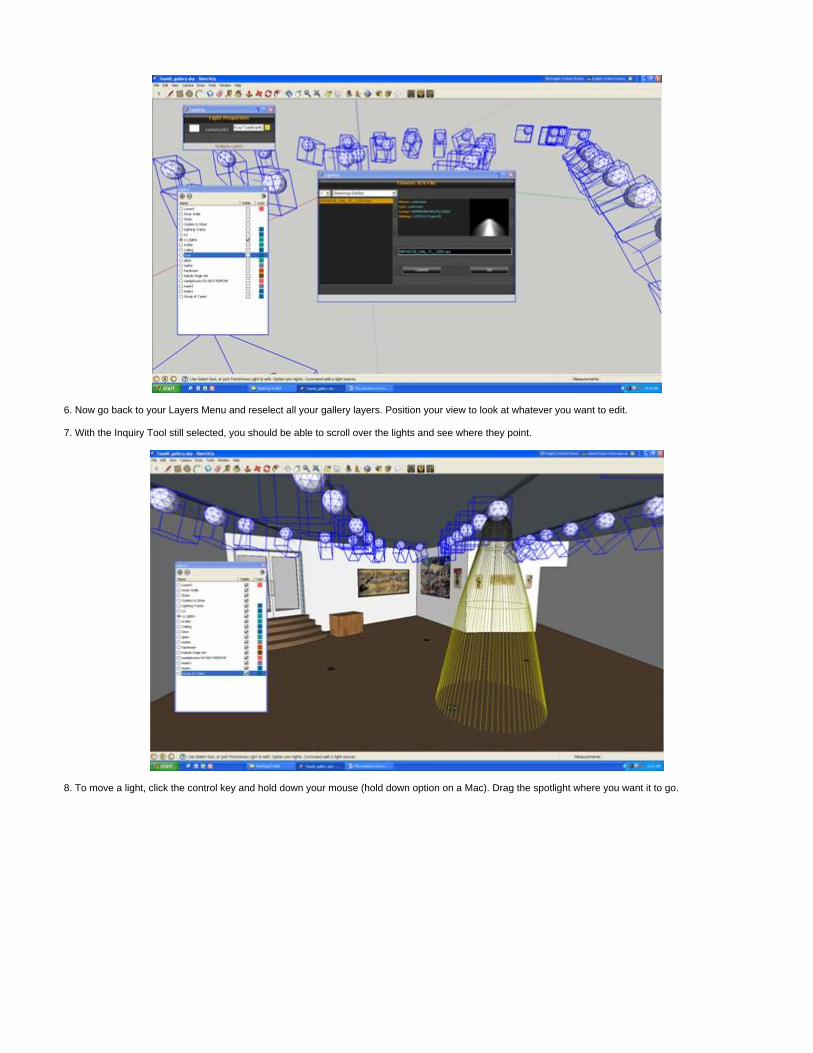
6. Now go back to your Layers Menu and reselect all your gallery layers. Position your view to look at whatever you want to edit.
7. With the Inquiry Tool still selected, you should be able to scroll over the lights and see where they point.
8. To move a light, click the control key and hold down your mouse (hold down option on a Mac). Drag the spotlight where you want it to go.
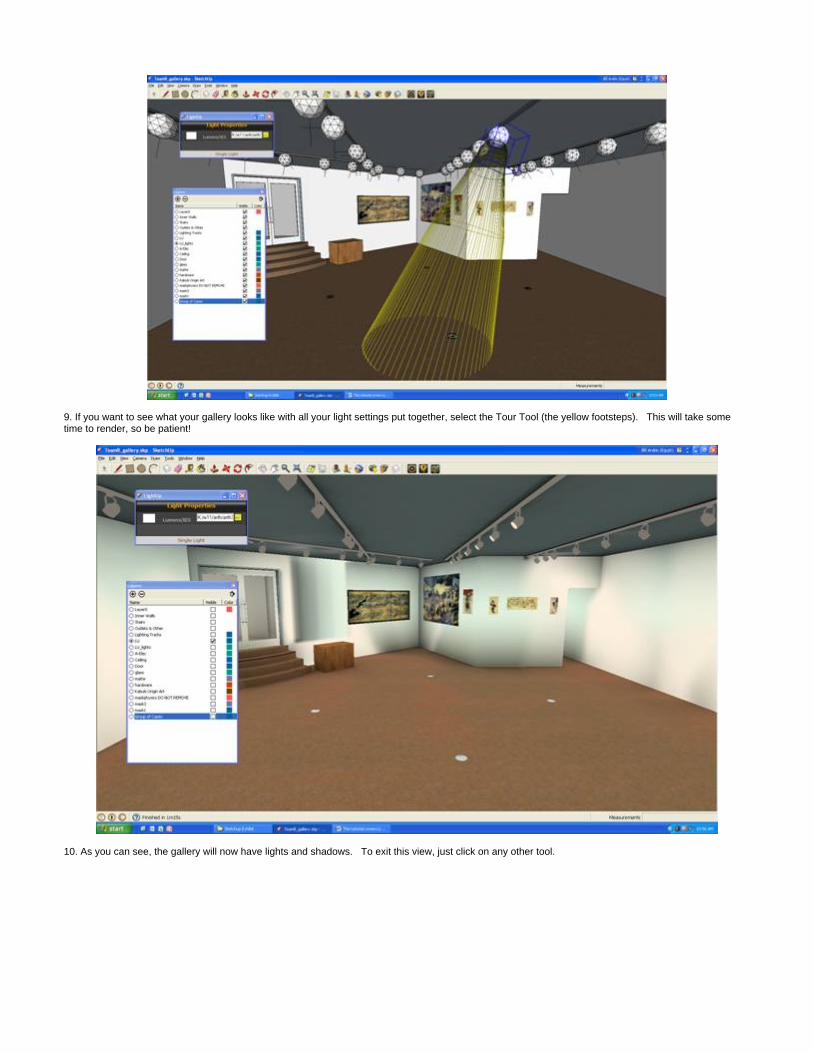
9. If you want to see what your gallery looks like with all your light settings put together, select the Tour Tool (the yellow footsteps). This will take some time to render, so be patient!
10. As you can see, the gallery will now have lights and shadows. To exit this view, just click on any other tool.