tremoughacornproject.files.wordpress.com · Web viewThe use of technology to monitor wildlife...
14
Transcript of tremoughacornproject.files.wordpress.com · Web viewThe use of technology to monitor wildlife...

The use of technology to monitor wildlife goes back a long way. In the early 1900’s scientists began to use cameras to monitor wildlife, and spy

FEZ Spider Mainboard
Infra redMotion sensor
behind enemy lines. Homing pigeons were the animal of choice, as they reliably returned home with the camera and precious film held within. What is perhaps most impressive about this use of technology is that cameras were produced to weigh just 70g, about as much as an apple. Since then, with technological advances making many computing devices increasingly smaller, the scope for using technology in environmental monitoring has massively increased. Scientists now make regular use of technology, with tracking movements, monitoring behaviour, and recording abiotic factors just a few of many areas which have particularly benefitted. There are however aspects of the culture of technology use in science which present problems.
A scientist interested in tracking animal migration for example can purchase a variety of devices that may be useful, such as GPS loggers, accelerometers, and cameras. These devices are typically expensive and inflexible, performing only a few preordained tasks. There are also many factors that scientists may wish to investigate, but no commercially devices are available.
The technology now available from Microsoft called ‘Gadgeteer’ provides a platform for creating diverse and flexible devices for wildlife monitoring. With a large number of different sensors now being available for this technology, devices can be built to meet specific needs, and an understanding of this technology will enable you to adapt the technology for those needs! The BioAcorn that you will soon create is one such device that enables wildlife and environmental monitoring to enable a range of different scientific questions to be answered. Long term studies could for example be set up with the BioAcorn recording changes in air quality in a developing area via the gas sense module, climate change via the temperature logger or the effects of artificial street lighting via the light sense module. These environmental variables can be measured in conjuction with presence of different species via the camera trap function whereby photos are taken when triggered by the infra red.

USB Connector Module
SD Card Module
Gas Sensor
Temperature & Humidity
Sensor
Light Sensor Module
Barometer Module
Battery Module
Camera Module
cs
To begin the programming you’ll first need to make sure you have downloaded all the programmes required. Follow the link below
https://www.ghielectronics.com/support/.net-micro-framework
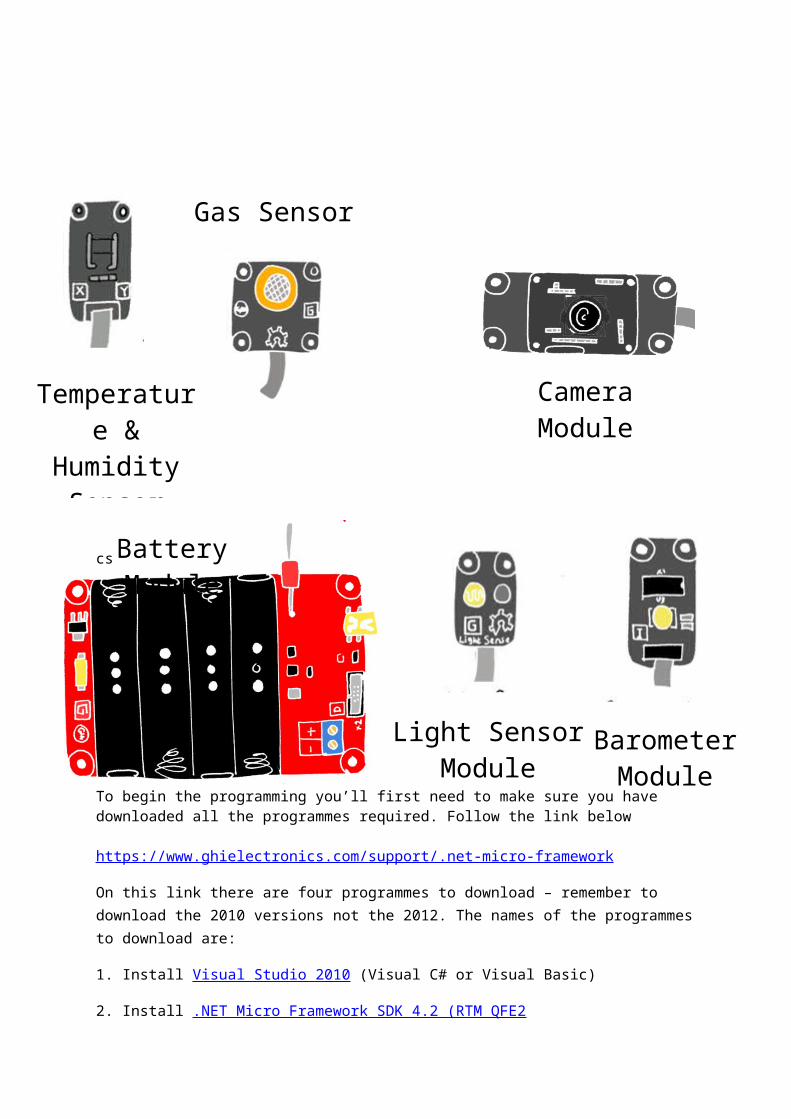
On this link there are four programmes to download – remember to download the 2010 versions not the 2012. The names of the programmes to download are:
1. Install Visual Studio 2010 (Visual C# or Visual Basic)
2. Install .NET Micro Framework SDK 4.2 (RTM QFE2
3. Install the latest NETMF and Gadgeteer Package 2013 R2 or browse all packages
4. Download FEZ Config (Beta) Utility program used to update or configure your devices.
Once these are downloaded you are now ready to build the device and get programming!
1. First you need to get the gadgeteer modules from the box and connect them together. The modules you should have include a spider main board, a USB connector board, temperature and humidity sensor, SD card ,camera, infra red PIR sensor, light sensor, barometer, gas sensor and a battery holder.
2. The spider main board is where all of the other modules are connected. On each module there are letters, these letters mean that this piece can be connected to the main board in the socket that also has that letter. Some modules have multiple letters meaning they can be plugged into a socket with any of those letters on. Don’t connect this to the computer just yet!
Warning: Make sure you don’t connect or disconnect any pieces from your acorn whilst it is plugged in as this will damage it! It must be disconnected first!
3. Next you need to open up the computer programme called Microsoft VS Express for Desktop by pressing the icon on the desktop.
4. Press ‘New Project’ which is written in blue text on the left black bar on the screen.
The temperature/humidity module to the left can be connected to either X or Y.

5. Press ‘Installed’, ‘Templates’, ‘Visual C#’ and select ‘Gadgeteer’ from the left hand side panel.
6. Select the Gadgeteer board that you are using – the FEZ spider and press ‘Create’.
7. There is a tab under ‘File’ called ‘ Toolbox’. Select ‘Toolbox’ and a long list of different sensors will pop up. Now you can drag the different pieces you need to make the camera. Find and drag over Button, Camera (Premium), Display_T35 and SD card and Temperature/Humidity.

8. Right click on the page and select ‘Connect all modules’. If you need to delete a connection, right click on the connection and select delete. The screen should look something like the image above once everything has been connected together. You can use that page to check you have connected all the parts to the right sections on the FEZ Spider mainboard.
9. Now you can start programming the pieces you have selected to tell it how to take all the abiotic readings at set intervals. Select the Program.cs tab at the top of the page to begin the programming.
10. You’ll need to save your project by pressing ‘File’, ‘Save All’ first. Don’t forget to save your project because the programme won’t work properly otherwise!
11. Next we need to type ‘using Gadgeteer.Modules.GHIElectronics;’ This tells the computer what we are trying to do, so it will guess what we are typing and make it quicker to programme.

The following code is everything you now need to programme the BioAcorn with boxes explaining what each bit means.
The Full Codeusing System;using System.Collections;using System.Threading;using Microsoft.SPOT;using Microsoft.SPOT.Presentation;using Microsoft.SPOT.Presentation.Controls;using Microsoft.SPOT.Presentation.Media;using Microsoft.SPOT.Touch;
using Gadgeteer.Networking;using GT = Gadgeteer;using GTM = Gadgeteer.Modules;using Gadgeteer.Modules.GHIElectronics;using Gadgeteer.Modules.Seeed;using System.IO;using System.Text;using Gadgeteer;using Gadgeteer.Interfaces;
namespace GadgeteerApp3{ public partial class Program
These ‘using’ bits of code tell the program that you are using gadgeteer components, and allow the auto-complete to work, making typing in the code easier
These sections tell the program to create variables such as _t1 , _h which will be used later to contain the data from the environmental sensors

{ private GT.Timer _getReading = new GT.Timer(20000); private double _t1; private double _h; private double _lx; private double _p;
int pictureIndex = 1;
FileStream myFile; StreamWriter stream; TextWriter writer; GT.StorageDevice storage; GT.Timer timer;
void TheLoop() { while (true) { Thread.Sleep(10); } } void ProgramStarted() { Debug.Print("Programme Started"); sdCard.MountSDCard(); System.Threading.Thread.Sleep(500);
if (sdCard.IsCardMounted) { storage = sdCard.GetStorageDevice(); display_T35.SimpleGraphics.Clear(); display_T35.SimpleGraphics.DisplayText("SD CARD SUCCESSFULLY MOUNTED", Resources.GetFont(Resources.FontResources.small), GT.Color.Red, 10, 50); } else { Debug.Print("SD CARD NOT MOUNTED"); }
if (sdCard.IsCardMounted && storage != null) {
This tells the first picture to be saved at the start of the SD card
These introduce the bits of code that write the data to SD card
This tells the program to wait before starting, so it doesn’t crash
This mounts the SD card, so it is ready to receive data
This checks that the SD card is mounted, and if it is displays a message on the screen
This code is used if the SD card is successfully mounted, and creates a new file for the data to be added to.

myFile = storage.Open("data" + ".csv", FileMode.Create, FileAccess.Write); writer = new StreamWriter(myFile); writer.Write("Temp");
temperatureHumidity.MeasurementComplete += new GT.Modules.Seeed.TemperatureHumidity.MeasurementCompleteEventHandler(temperatureHumidity_MeasurementComplete); temperatureHumidity.StartContinuousMeasurements();
barometer.MeasurementComplete += new
GT.Modules.Seeed.Barometer.MeasurementCompleteEventHandler(barometer_MeasurementComplete); barometer.ContinuousMeasurementInterval = new TimeSpan(0, 0, 0, 20); barometer.StartContinuousMeasurements();
_getReading.Tick += new GT.Timer.TickEventHandler(_getReading_Tick); _getReading.Start(); } else { temperatureHumidity.MeasurementComplete += new GT.Modules.Seeed.TemperatureHumidity.MeasurementCompleteEventHandler(temperatureHumidity_MeasurementComplete); temperatureHumidity.StartContinuousMeasurements();
barometer.MeasurementComplete += new
These bits of code tell the barometer and temperature/humidity sensor to start taking measurements, every 20 seconds
The following bits of code are used when the file has already been created, and tells the device to skip that step whilst still telling the sensors to start recording data
The ‘void’ sections tell the program what to do each time the sensor takes a measurement, in this case they put the data in a variable called _p for pressure

GT.Modules.Seeed.Barometer.MeasurementCompleteEventHandler(barometer_MeasurementComplete); barometer.ContinuousMeasurementInterval = new TimeSpan(0, 0, 0, 20); barometer.StartContinuousMeasurements();
_getReading.Tick += new GT.Timer.TickEventHandler(_getReading_Tick); _getReading.Start(); } } void temperatureHumidity_MeasurementComplete(GT.Modules.Seeed.TemperatureHumidity sender, double temperature, double relativeHumidity) { _t1 = temperature; _h = relativeHumidity; } void barometer_MeasurementComplete(GT.Modules.Seeed.Barometer sender, GT.Modules.Seeed.Barometer.SensorData sensorData) { _p = sensorData.Pressure; }void _getReading_Tick(GT.Timer timer) { _lx = lightSensor.ReadLightSensorPercentage(); display_T35.SimpleGraphics.Clear(); Debug.Print("Temperature : " + _t1 + " degrees "); Debug.Print("Humidity : " + _h); Debug.Print("Light : " + _lx); Debug.Print("Pressure : " + _p); display_T35.SimpleGraphics.Clear(); display_T35.SimpleGraphics.DisplayText("Temperature : " + _t1 + " degrees :) ", Resources.GetFont(Resources.FontResources.small), GT.Color.Red, 10, 50);
using (FileStream myFile = File.Open("\\SD\\_data.csv", FileMode.Append)) { byte[] logMsg = UTF8Encoding.UTF8.GetBytes("temperature " + _t1 + " degrees" + "," + _h + "," + _lx + "," + _p + "," + "\n");
myFile.Write(logMsg, 0, logMsg.Length); myFile.Flush(); } } }
}
The ‘void’ sections tell the program what to do each time the sensor takes a measurement, in this case they put the data in a variable called _p for pressure
This section displays all the variables from each recording on the screen, and writes the temperature to the screen
This final section writes the data to a file on the SD card, with a column for each variable. The file is a .csv file that can be opened in Microsoft Excel

A Massive Thank you to…JISC for funding our project and advice from Greenwich!
Project Support & Guidance throughoutLucy Hawkes, Matthew Witt, M.D Sharma, Andy McGowan and all others at the University of Exeter, College of life and Environmental Science Cornwall campus. A massive thank you for all of their support throughout the project!
3D CAD Design & ProductionDaniel Metcalfe for designing and producing the BioAcorn housing.Makernow Lab – Falmouth University Workshop
Conceptualisation TeamLaurence BelcherMelissa ShawAli NorthOli MaskreySamantha CoplandGeorgia CassRoz EvansHayley SimmsAndy Jackson