
© 2011 Delmar, Cengage Learning Chapter 6 Placing and Linking Graphics.
46
© 2011 Delmar, Cengage Learning Chapter 6 Placing and Linking Graphics
-
Upload
jeremy-harrell -
Category
Documents
-
view
215 -
download
2
Transcript of © 2011 Delmar, Cengage Learning Chapter 6 Placing and Linking Graphics.

© 2011 Delmar, Cengage Learning
Chapter 6
Placing and Linking Graphics

Chapter Objectives
• Place multiple graphics• Use the Links panel• Explore image resolution issues• Place vector graphics• Interface InDesign with Photoshop• Use libraries
© 2011 Delmar Cengage Learning
Place Multiple Graphics
• Use the Place command on the File menu to place single or multiple graphics into a layout.
© 2011 Delmar Cengage Learning

Place Multiple Graphics
• Use [Ctrl] + click to select as many graphic files as you want to place, and then click Place.
• The place gun icon appears, featuring a thumbnail of the “current” loaded image and a number indicating how many graphics are loaded.
© 2011 Delmar Cengage Learning

Place Multiple Graphics
© 2011 Delmar Cengage Learning
Thumbnail of “current” loaded image
Number indicates the number of images loaded in the place gun

Place Multiple Graphics
© 2011 Delmar Cengage Learning
The Frame Fitting commands you will use most often are:
•Fill Frame Proportionally
•Fit Content Proportionally

Place Multiple Graphics
• Fill Frame Proportionally scales the graphic so that it fills the entire frame without distorting the graphic.
© 2011 Delmar Cengage Learning

Place Multiple Graphics
• Fit Content Proportionally scales a graphic so that the entire graphic is visible when placed into any size frame.
© 2011 Delmar Cengage Learning

You can set up default fitting settings for all graphics in the Frame Fitting Options dialog box.
© 2011 Delmar Cengage Learning
Place Multiple Graphics
© 2011 Delmar Cengage Learning
• Adobe Bridge is a free-standing content management application designed to help you manage files you will use in CS5.
• Adobe Mini Bridge, new to CS5, allows you to use the organizational power of Adobe Bridge without leaving InDesign, via the Mini Bridge panel.

Place Multiple Graphics
© 2011 Delmar Cengage Learning
Thumbnail previews
Mini Bridge panel
Folder directory

Use the Links Panel
• Understanding preview files – Low resolution versions of graphics– Act as a proxy for actual content– Stores a link to content
© 2011 Delmar Cengage Learning

Use the Links Panel
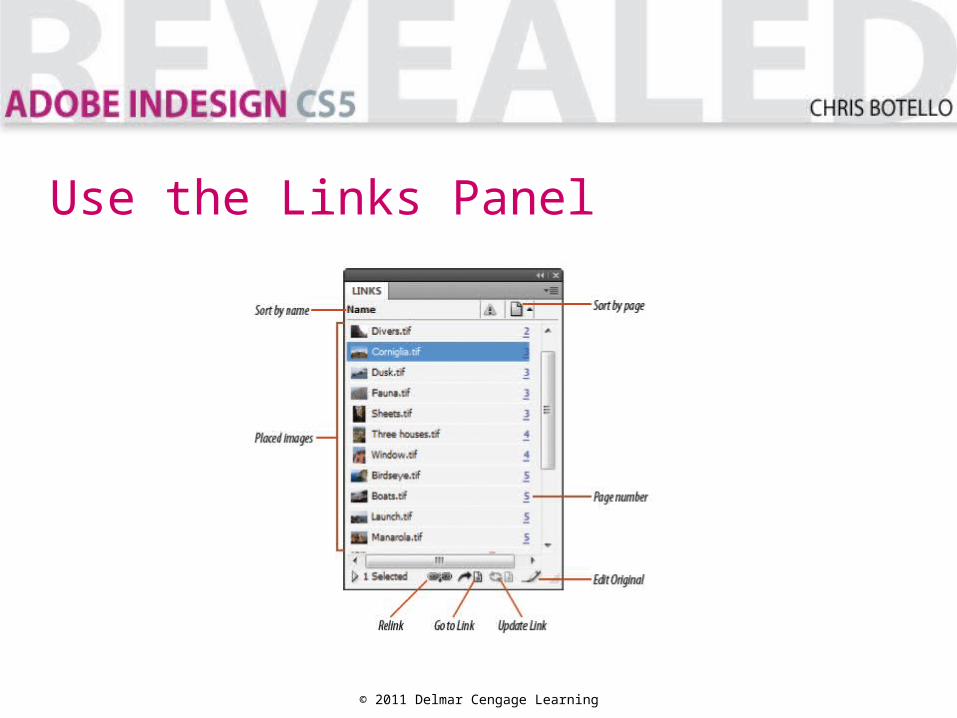
• Using the Links panel– The Links panel is command center for
managing links to placed graphics.• Lists all text and graphic files• Lists location page number• Gives options for sorting list
© 2011 Delmar Cengage Learning

Use the Links Panel
• To view information about a link, click the Links panel options button, then click Panel Options.
• Check the boxes of the categories that you'd like to display.
• Click Show Column or Show in Link Info check box.
© 2011 Delmar Cengage Learning
Use the Links Panel
© 2011 Delmar Cengage Learning
Use the Links Panel
• When you place graphics or text, InDesign remembers the path on your computer.
• The Links panel alerts you to status of placed file.• Missing icon appears when established link no longer
points to file• Modified icon appears when file is modified after being
placed in InDesign
© 2011 Delmar Cengage Learning
Use the Links Panel
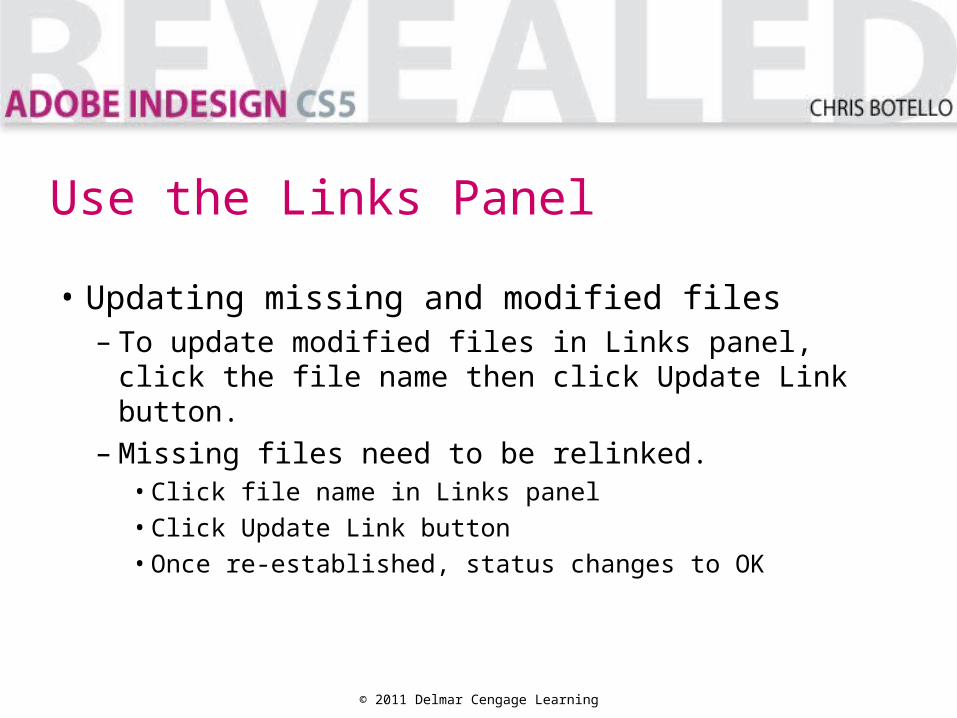
• Updating missing and modified files– To update modified files in Links panel, click the file
name then click Update Link button.– Missing files need to be relinked.
• Click file name in Links panel
• Click Update Link button
• Once re-established, status changes to OK
© 2011 Delmar Cengage Learning
Use the Links Panel
• To expand the Links panel and show the Link Info section, click the Show/Hide Link Information button.
© 2011 Delmar Cengage Learning

© 2011 Delmar Cengage Learning
Missing icon
Modified icon
No status icon indicates link OK
Show/Hide Link Information button
Use the Links Panel
Use the Links Panel
© 2011 Delmar Cengage Learning
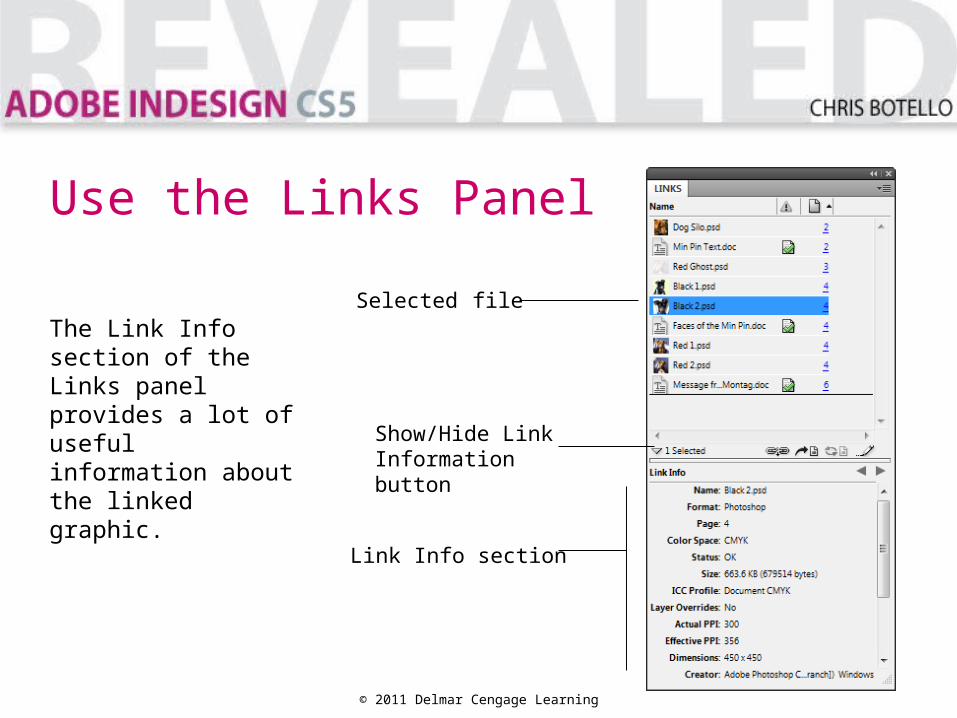
Link Info section
Selected file
Show/Hide Link Information button
The Link Info section of the Links panel provides a lot of useful information about the linked graphic.

Use the Links Panel
QUICKTIP
InDesign lets you choose whether or not text is linked. If you want all your placed text to be linked to the original document, click Edit/Preferences/File Handling in the Links section, make sure the Create Links When Placing Text and Spreadsheet Files check box is checked.
© 2011 Delmar Cengage Learning

Explore Image Resolution Issues
• Photographic images are created on computers using a rectangular grid of colored squares called pixels.
• Graphics created from pixels are called bitmap graphics.
© 2011 Delmar Cengage Learning

Explore Image Resolution Issues
• The number of pixels in a given inch is referred to as resolution.
• Effective resolution refers to the resolution of a placed image based on its size in the layout.
© 2011 Delmar Cengage Learning
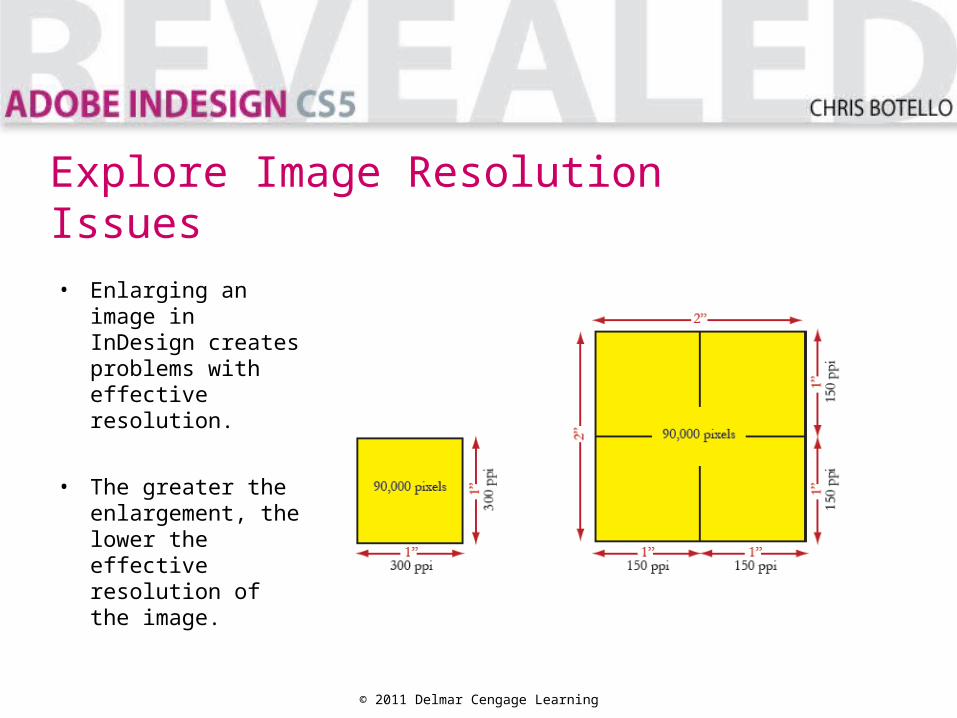
• Enlarging an image in InDesign creates problems with effective resolution.
• The greater the enlargement, the lower the effective resolution of the image.
© 2011 Delmar Cengage Learning
Explore Image Resolution Issues

• Images should be created at the correct output size for optimum resolution.
• Images can be resized if necessary in Photoshop, but there is still a loss of quality.
© 2011 Delmar Cengage Learning
Explore Image Resolution Issues

• When Photoshop creates new pixels in the process of interpolation, it bases the color of the new pixels on the color information of the original pictures.
• You can reduce the size of graphics without worry.
© 2011 Delmar Cengage Learning
Explore Image Resolution Issues

Place Vector Graphics
• Graphics created in drawing programs, such as Adobe Illustrator, are called vector graphics.
• They consist of anchor points and line segments called paths.
• Best choice for typographical illustrations.
© 2011 Delmar Cengage Learning

Place Vector Graphics
© 2011 Delmar Cengage Learning
Vector graphic placed in InDesign

Place Vector Graphics
• When placing vector graphics in InDesign you can resize them without losing image quality.
• When vector graphics are placed from Illustrator, only the vector is placed, not the entire document.
© 2011 Delmar Cengage Learning
Place Vector Graphics
Choosing the default display performance:– When a graphic file is placed in InDesign, a low-
resolution preview file appears.– Quality displayed is determined in the Display
Performance section of the Preferences dialog box.– Choose between Fast, Typical, or High Quality
Display views.
© 2011 Delmar Cengage Learning
Place Vector Graphics
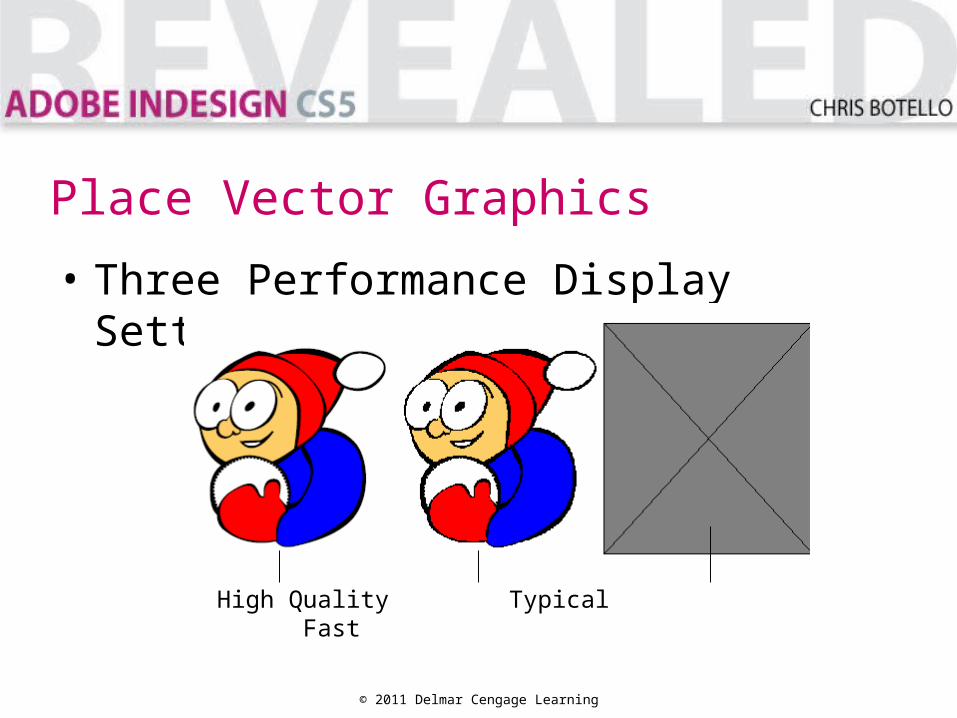
• Three Performance Display Settings
© 2011 Delmar Cengage Learning
High Quality Typical Fast

Place Vector Graphics
There are two ways to put Illustrator graphics into an InDesign document:
– Place it using the Place command if you don’t need to edit it.
– Copy and paste it so that it becomes a fully-editable InDesign object.
© 2011 Delmar Cengage Learning

Interface InDesign with Photoshop
• You can remove a white background from placed graphics using the Detect Edges function in the Clipping Path dialog box.
© 2011 Delmar Cengage Learning

Interface InDesign with Photoshop
© 2011 Delmar Cengage Learning
Interface InDesign with Photoshop
• The Threshold setting determines pixel values that will be made transparent.
• Tolerance setting determines how smooth the edge of the image will be once pixels are transparent.
© 2011 Delmar Cengage Learning

© 2011 Delmar Cengage Learning
Threshold
Tolerance
Interface InDesign with Photoshop

• A silhouette is a selection made in Photoshop.
• Alpha channels are silhouettes saved with names.
© 2011 Delmar Cengage Learning
Interface InDesign with Photoshop

© 2011 Delmar Cengage Learning
Black areas can be made transparent in InDesign
White represents selected areas of image
Interface InDesign with Photoshop

• Loading clipping paths in InDesign:– Paths are another type of selection you can
create in Photoshop.– Created with Pen tool, one or more paths can
be saved in file.
© 2011 Delmar Cengage Learning
Interface InDesign with Photoshop

• Save or export a path with Photoshop file.
• Saved files don’t automatically load in InDesign but can be loaded using a clipping path.
• Exported clipping paths are loaded automatically.
© 2011 Delmar Cengage Learning
Interface InDesign with Photoshop
Placing a graphic with a feathered edge against a colored background in InDesign
– A soft edge around a graphic is a feathered edge.
– They are created in Photoshop.– Standard design is to place a feathered edge
against white background.
© 2011 Delmar Cengage Learning
Interface InDesign with Photoshop

• When placing a feathered edge against colored background, save against a transparent background in Photoshop.– Make selection with feathered edge– Copy selection to new layer– Make original layer visible
© 2011 Delmar Cengage Learning
Interface InDesign with Photoshop
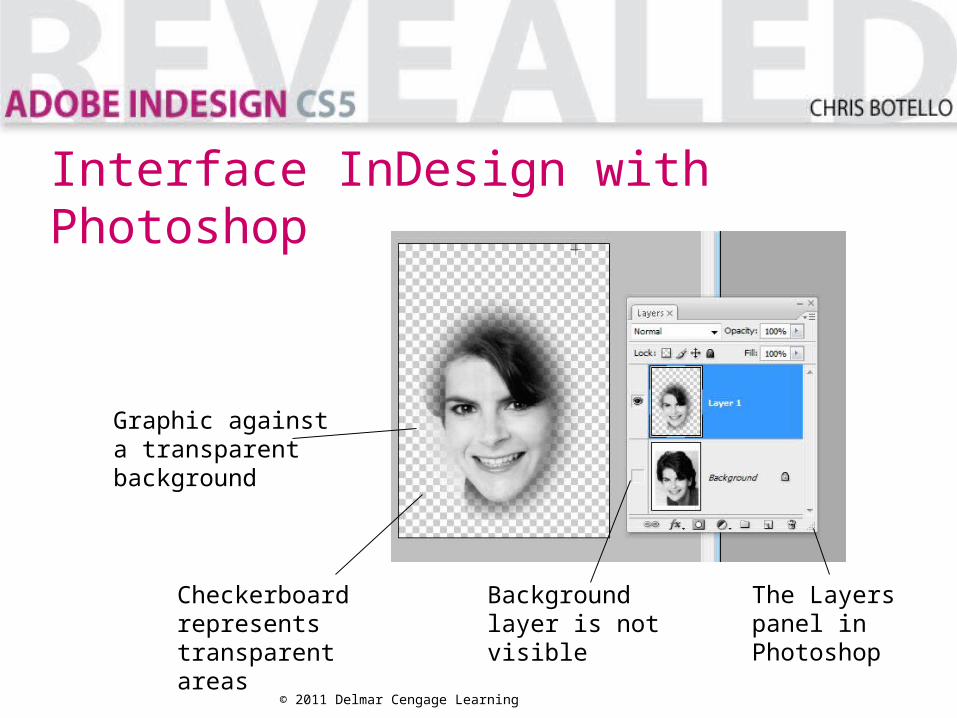
The Layers panel in Photoshop
© 2011 Delmar Cengage Learning
Checkerboard represents transparent areas
Background layer is not visible
Graphic against a transparent background
Interface InDesign with Photoshop

Use Libraries
• Libraries are InDesign files.• Look like panels
• Saved with .indl extension
• Also called Object libraries
• Libraries are used to store graphics.• Drag items from page into library.• Drag library items from library to page.
© 2011 Delmar Cengage Learning

Use Libraries
• Libraries can store text, vectors, bitmaps, and InDesign objects, such as frames.
• Commands for adding items to library on Library panel menu:– Add Items on Page– Add Items on Page as Separate Objects
© 2011 Delmar Cengage Learning
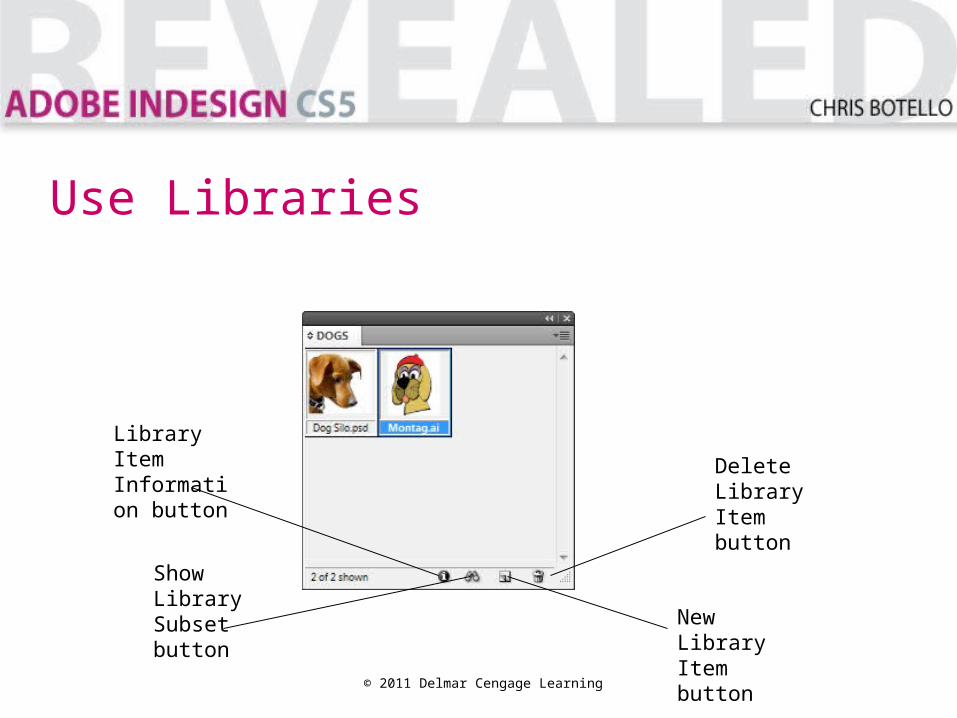
© 2011 Delmar Cengage Learning
Show LibrarySubset button
Library ItemInformation button
New LibraryItem button
Delete LibraryItem button
Use Libraries


